

Page 1
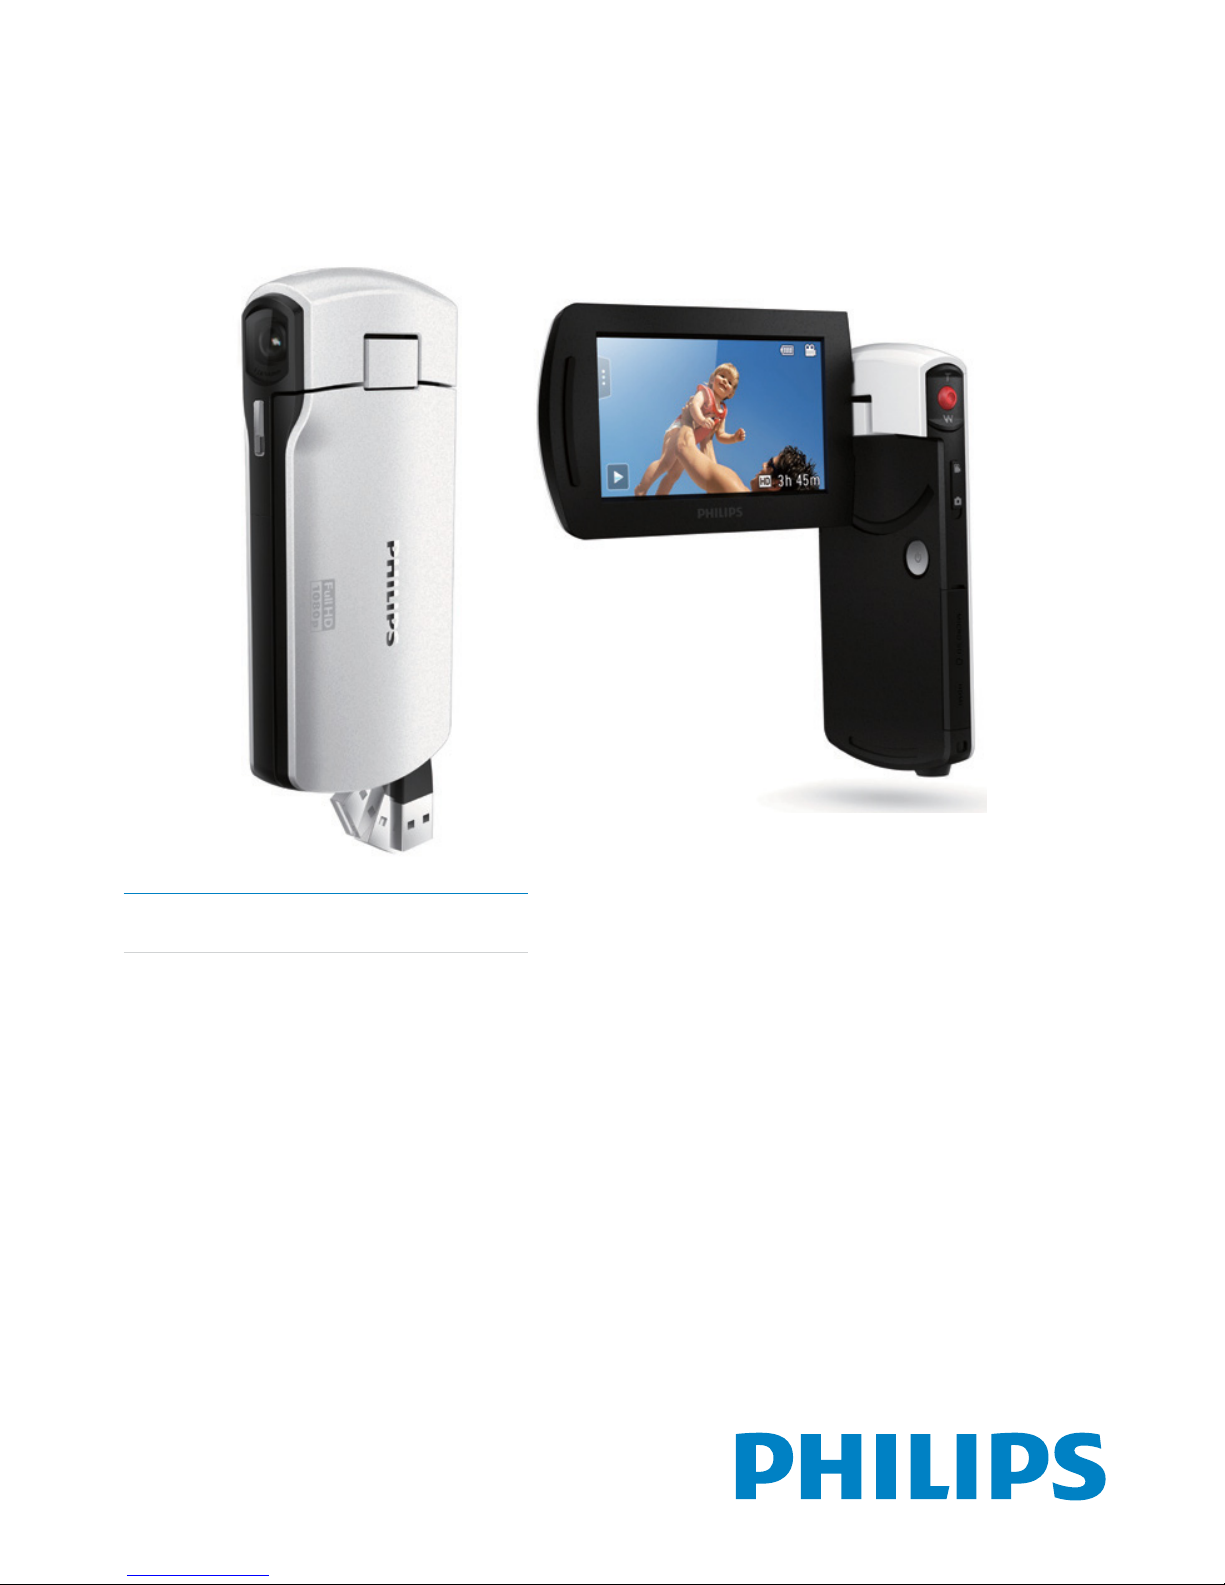
CAM295
Register your product and get support at
www.philips.com/welcome
EN User manual
Page 2

3EN
Contents
1 Important 4
Safety 4
Notice 4
2 Your camcorder 5
Introduction 5
What’s in the box 5
Functional overview 6
3 Get started 8
Load the Micro SD card 8
Turn on 8
First-time setup 8
Charge the built-in battery 9
4 Use your camcorder 10
Record video 10
Take pictures 10
Play 10
Adjust settings 12
5 Use more of your camcorder 13
View video or pictures on TV 13
Install and use the camcorder software 13
6 Technicalspecications 15
7 Frequently asked questions (FAQ) 16
Page 3

4
Notice
This product complies with the radio
interference requirements of the European
Community.
Your product is designed and manufactured
with high quality materials and components,
which can be recycled and reused.
When this crossed-out wheeled bin symbol is
attached to a product it means that the product
is covered by the European Directive 2002/96/
EC.
Please inform yourself about the local separate
collection system for electrical and electronic
products.
Please act according to your local rules and
do not dispose of your old products with your
normal household waste. Correct disposal of
your old product helps to prevent potential
negative consequences for the environment and
human health.
Your product contains batteries covered by
the European Directive 2006/66/EC, which
cannot be disposed with normal household
waste.Please inform yourself about the local
rules on separate collection of batteries
because correct disposal helps to prevent
negative consequences for the environmental
and human health.
1 Important
Safety
a Read these instructions.
b Keep these instructions.
c Heed all warnings.
d Follow all instructions.
e Do not use this apparatus near water.
f Clean only with dry cloth.
g Do not block any ventilation openings.
Install in accordance with the
manufacturer’s instructions.
h Do not install near any heat sources such
as radiators, heat registers, stoves, or
otherapparatus(includingampliers)that
produce heat.
i Only use attachments/accessories
speciedbythemanufacturer.
j Referallservicingtoqualiedservice
personnel. Servicing is required when
the apparatus has been damaged in any
way, such as power-supply cord or plug
is damaged, liquid has been spilled or
objects have fallen into the apparatus, the
apparatus has been exposed to rain or
moisture, does not operate normally, or
has been dropped.
k Apparatus shall not be exposed to
dripping or splashing.
l Do not place any sources of danger on
theapparatus(e.g.liquidlledobjects,
lighted candles).
Any changes or modications made to this
device that are not expressly approved by
Philips Consumer Lifestyle may void the user’s
authority to operate the equipment.
EN
Page 4
5
2 Your camcorder
Introduction
With this portable camcorder, you can:
• take full HD (1080P) or VGA movies
• take pictures
• play recorded movies or pictures either
directly or on the large screen of a
connected TV
• upload the recorded movies or pictures to
the Internet directly via your PC/Mac
What’s in the box
Make sure that the following items are packed
in the box:
• Camcorder
• Quick start guide
Note
•
The safety logo and power rating information are
located at the USB arm of the camcorder.
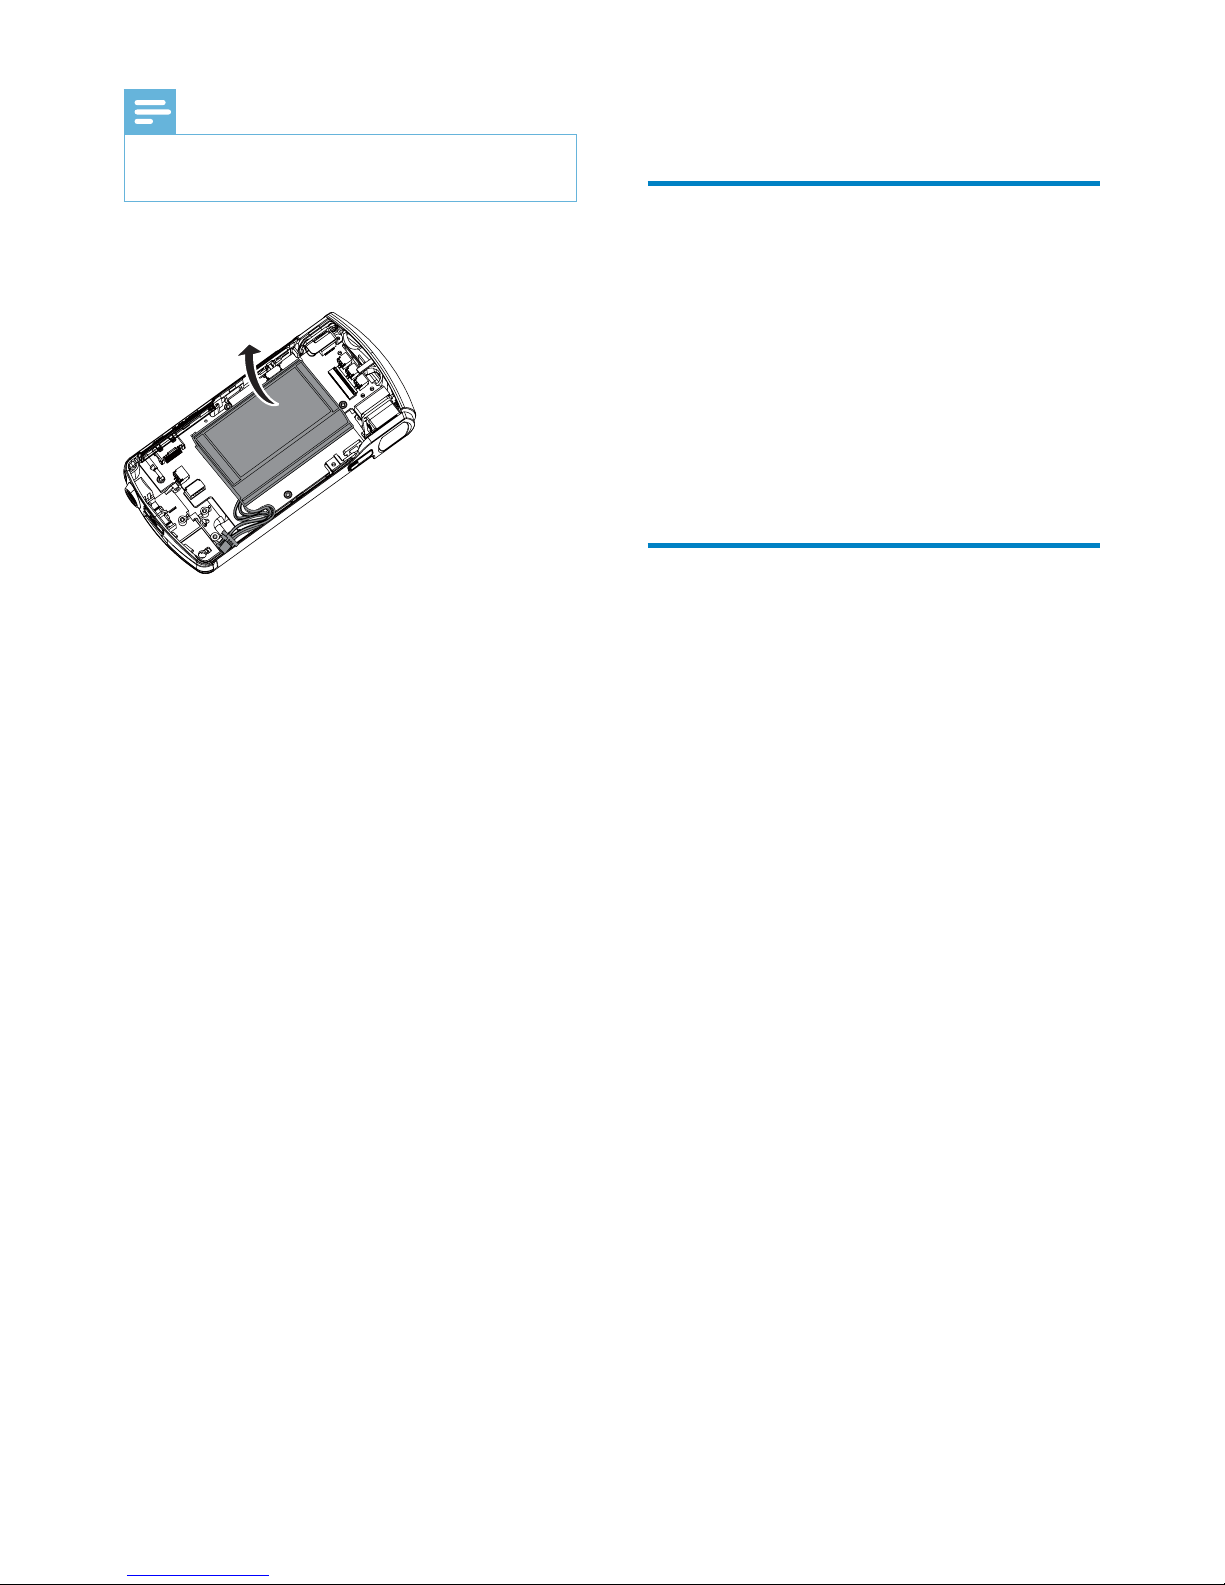
Always bring your product to a professional to
remove the built-in battery.
EN
Page 5
6
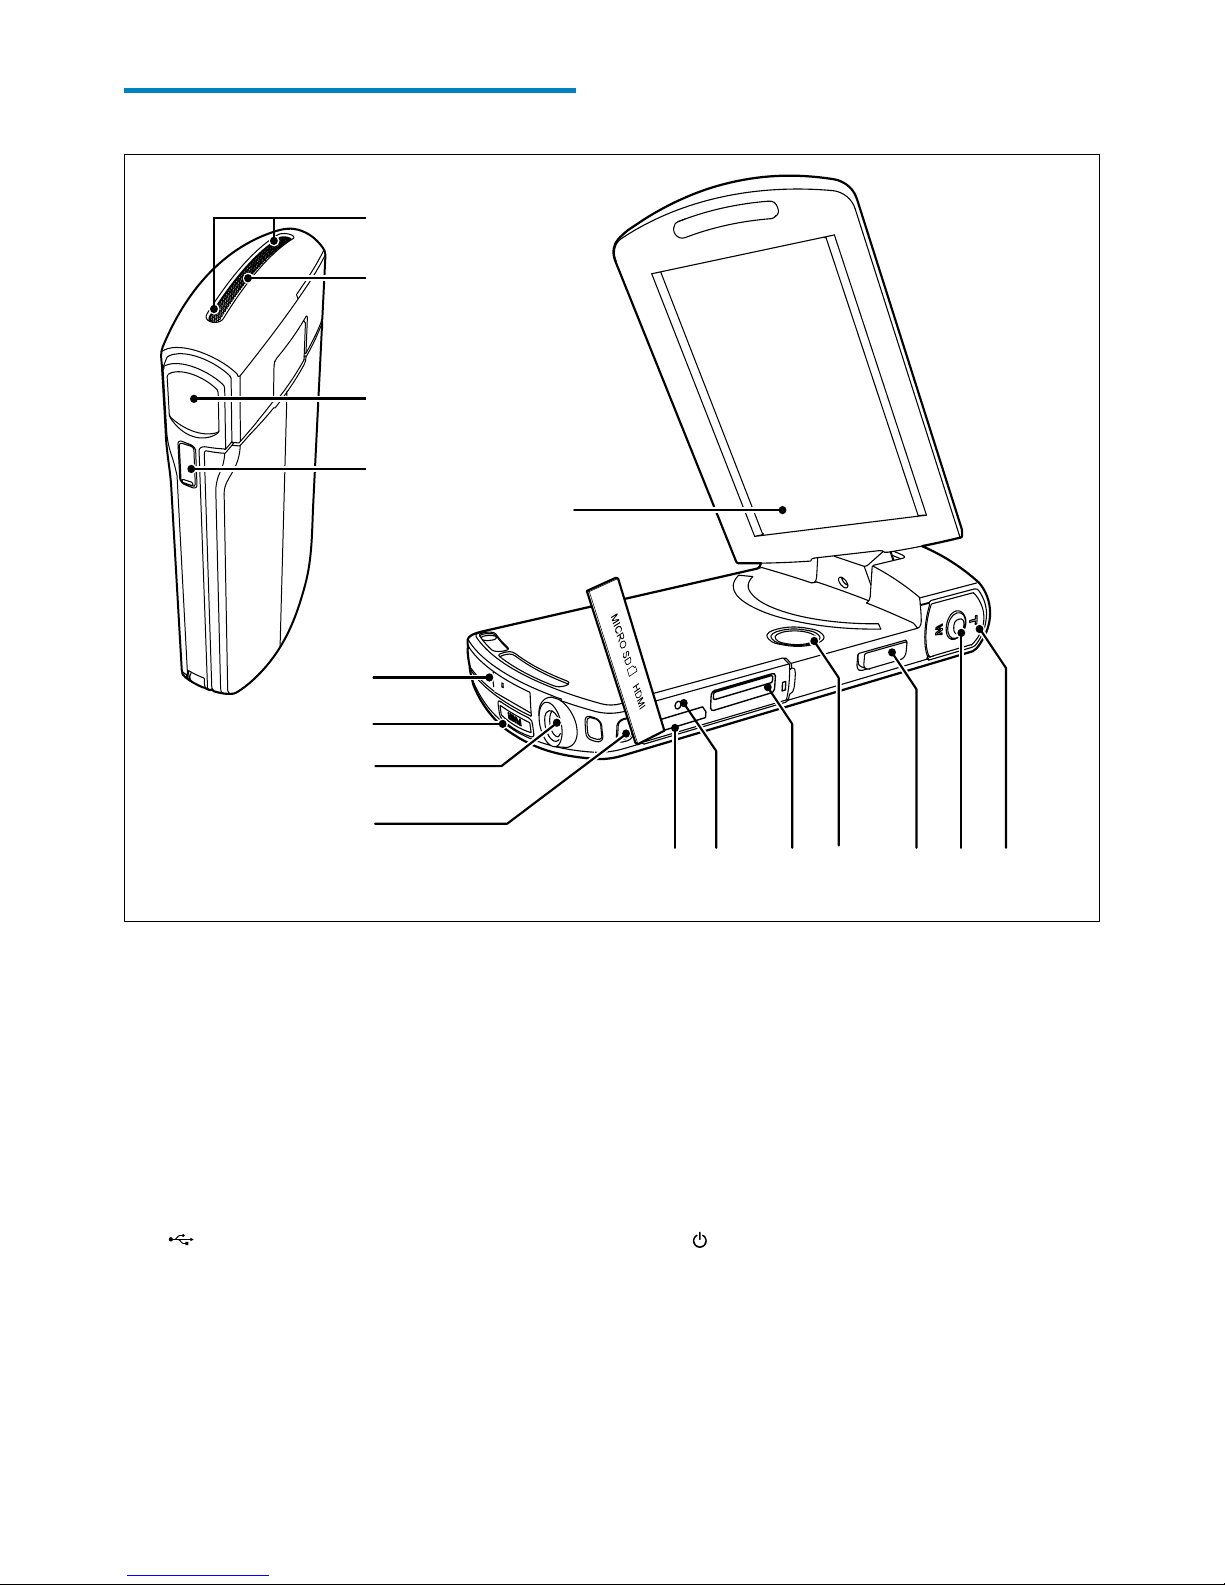
j HDMI
• Connect to a TV through an HDMI
cable with a mini HDMI connector
(type C).
k RESET
• Restore default settings.
l MICRO SD
• Load a Micro SD card.
m
• Turn on/off the camcorder.
n Mode switch button
• Switch between picture and video
recording modes.
Functional overview
a Built-in microphones
b Built-in speaker
c Lens
d Flashlight
e Swivel touch screen
f USB connector
g
• Eject the USB connector.
h Tripod socket
i Hand strap hole
b
c
d
a
e
jk lm nop
h
g
f
i
EN
Page 6

7
o Shutter button
• In viewnder mode, take a picture or
start/stop video recording.
• In play mode, switch to viewnder
mode.
p T/W
• In viewnder mode, zoom in/out.
• During video play, change the volume.
EN
Page 7
8
First-time setup
When you turn on the camcorder for the rst
time, a menu for OSD language selection is
displayed.
1 On the swivel touch screen, tap / to
select a language.
2 Tap [OK] to conrm.
» A welcome message is displayed briey.
» An inquiry box for date and time
setting is displayed.
3 Tap [Yes] to conrm.
» A date setting menu is displayed.
4 Tap / to set the day, month and year
successively.
5 Tap [OK] to conrm the date setting.
» A time setting menu is displayed.
6 Tap / to set the hour and minute
successively.
7 Tap [OK] to conrm the time setting.
» The rst-time setup is complete.
» The camcorder enters viewnder
mode.
Tip
•
See ‘Use your camcorder - Adjust settings’ for more
settings.
Select a scene
1 In viewnder mode, tap to show the
system setting menu.
2 Tap [Scene] to enter scene setting.
3 Tap / to select a scene you like.
4 Tap [OK] to conrm the setting.
3 Get started
Load the Micro SD card
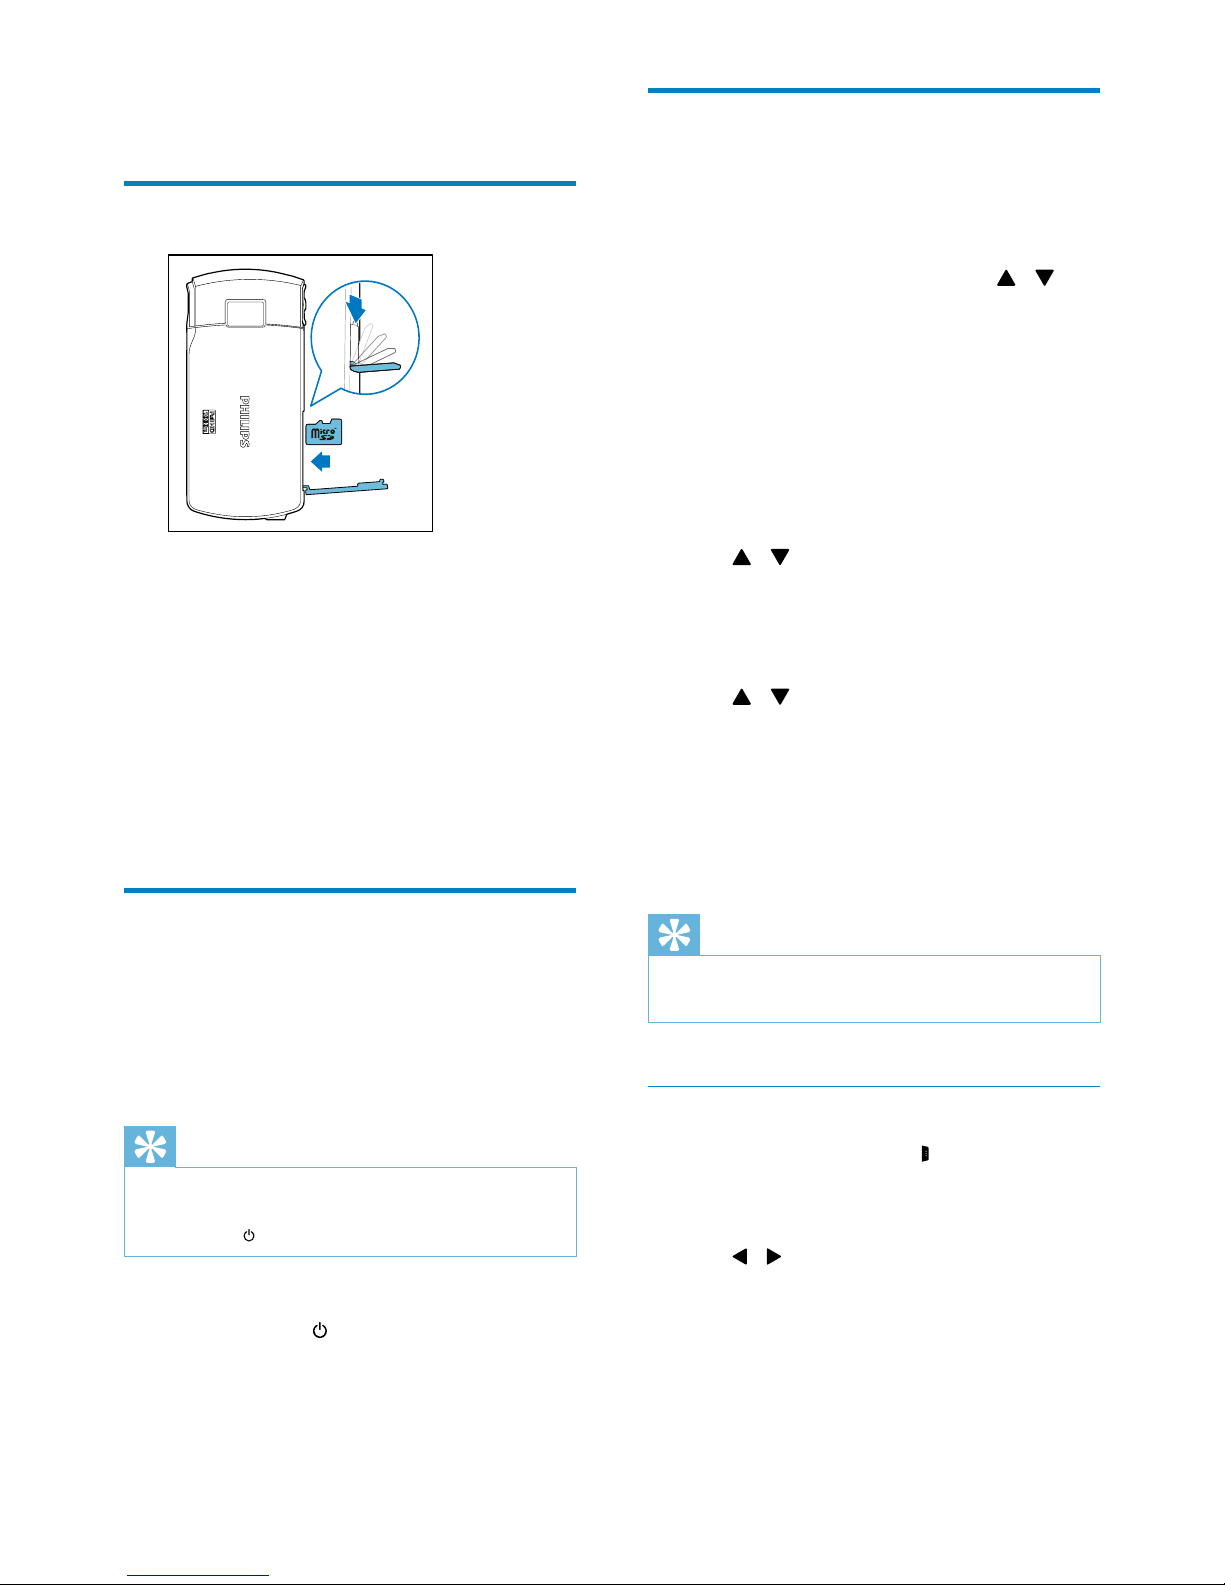
1 Flap open the protective cover on the
Micro SD card socket.
2 Insert a Micro SD card (not supplied) into
the socket.
• Make sure that the the Micro SD card
is not write-protected.
• Make sure that the metal contact of
the card faces down.
3 Close the protective cover securely.
Turn on
• Flip open the swivel touch screen.
» For rst-time users, a menu for OSD
language selection is displayed (See
‘’Get started - First-time setup).
Tip
•
To save energy, the camcorder turns off automatically
after being idle for 3 minutes. To turn on the camcorder
again, press
.
To turn off the camcorder:
• Press and hold
.
• Or close the swivel touch screen.
• The backlight on the swivel touch
screen turns off.
EN
Page 8
9
3 Wait until the status indicator stops
ashing and turns to green steadily.
» The built-in battery is fully charged.
Tip
•
The camcorder is fully charged for rst-time use.
• It takes about 3.5 hours to fully charge the built-in
battery via the PC .
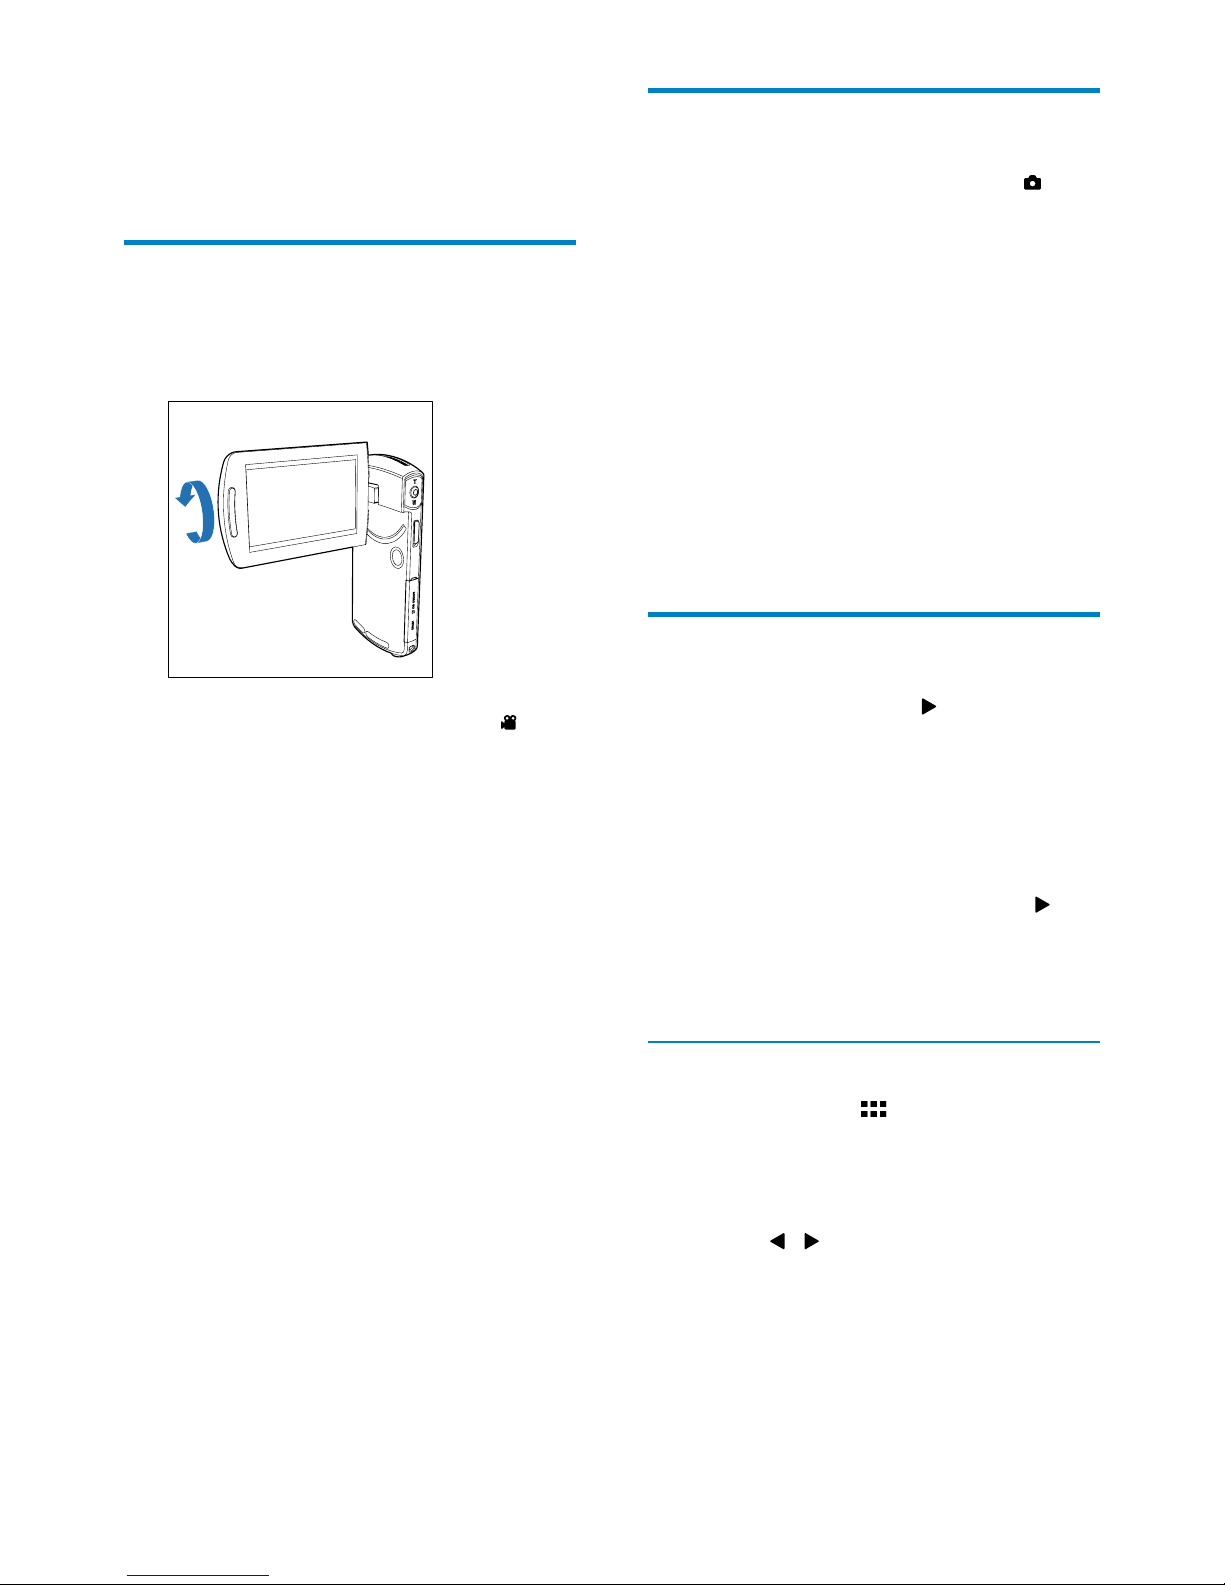
You can also charge the camcorder via a USB
adaptor (not supplied) connected to mains
power. The charge time is about 2 hours.
UK
EURUKEUR
Select a special effect
1 In viewnder mode, tap to show the
system setting menu.
2 Tap [Effects] to enter scene setting.
3 Tap / to select a special effect you like.
4 Tap [OK] to conrm the setting.
Charge the built-in battery
Note
•
The USB connector of the camcorder is primarily
intended for charging and mass storage purposes.
• You can also connect the USB connector of the
camcorder to another device (for example, a TV,
DVD/Blu-ray player or Home cinema set) for media
play. In this case, make sure that the device suppor ts the
H.264 le format.
• Not all devices that support H.264 le format can
play media les in the camcorder through direct USB
connection.
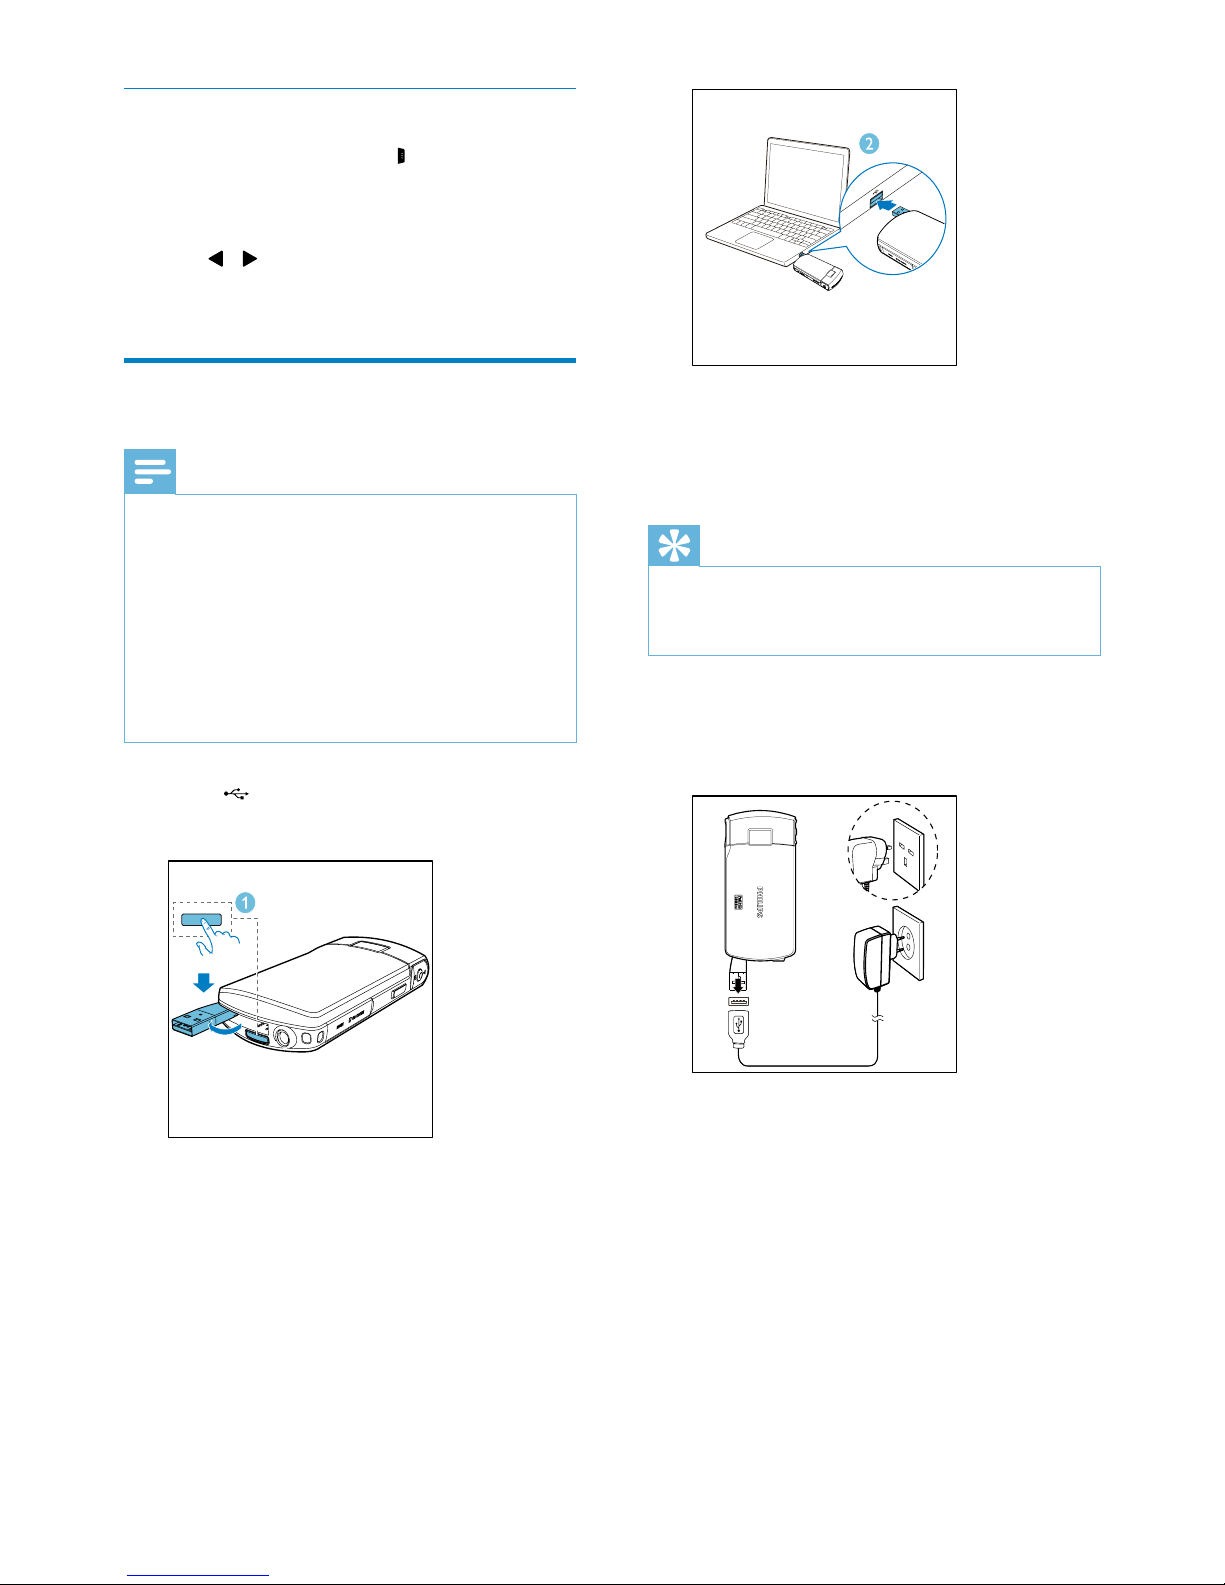
1 Press at the bottom of the camcorder
to eject the USB connector.
2 Connect the USB connector to a USB
socket on a PC.
» The status indicator on the shutter
button starts ashing in orange.
PRESS
EN
Page 9
10
Take pictures
1
Switch the mode switch button to .
» The le size and remaining number
of pictures that can be taken are
displayed on the swivel touch screen.
2 Hold the camcorder steadily and aim the
lens as needed.
3 Press T/W to zoom in/out if necessary.
4 Press the shutter button down halfway to
adjust the focus.
5 Press the shutter button down completely
to take a picture.
» [Picture saved!] is displayed briey.
Play
1
In viewnder mode, tap on the swivel
touch screen to enter play mode.
» The last recorded media is played
automatically.
2 Swipe to the left/rights to select a picture
or video clip for play.
3 If the selected le is a video clip, tap in
the middle of the screen to start play.
• To pause play, tap any place of the
swivel touch screen.
Preview
• In play mode, tap .
» The thumbnails of 9 les are displayed
on each page.
» To select a le, tap the le directly.
» Tap
/ to view the previous/next
page.
4 Use your
camcorder
Record video
1
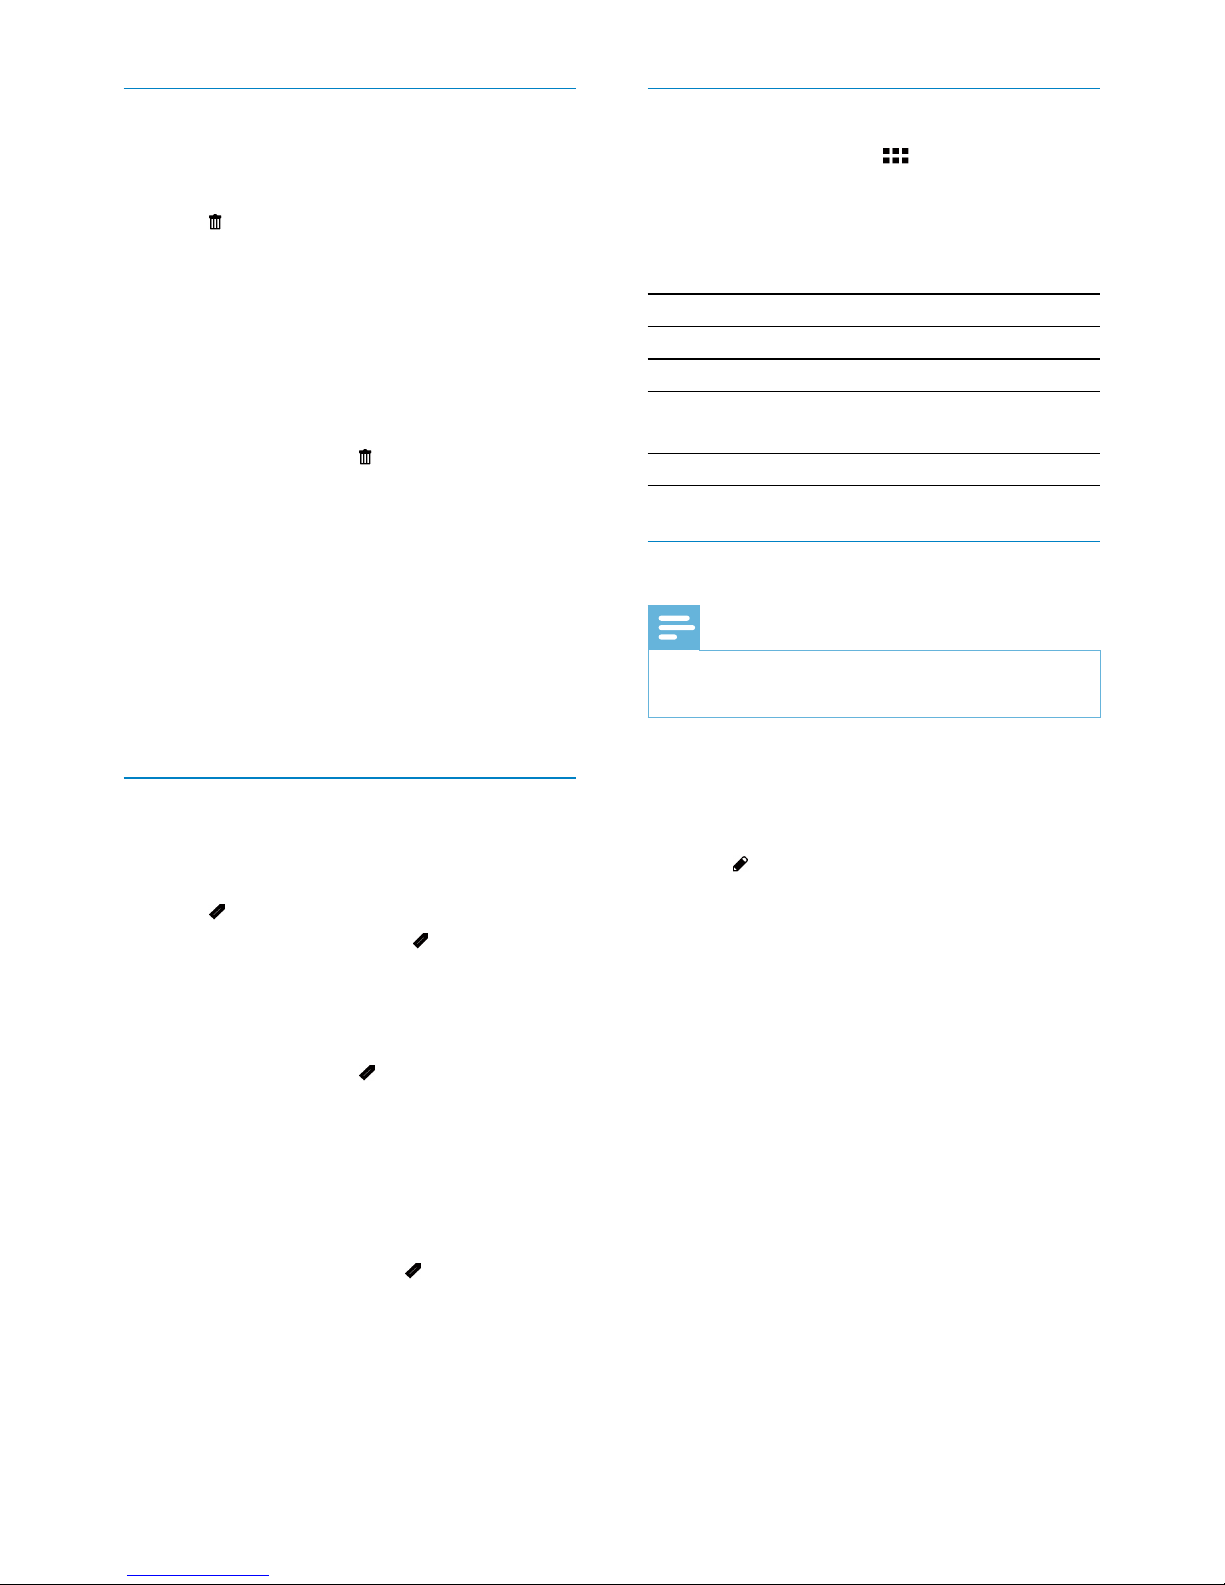
Adjust the swivel touch screen to an
appropriate position.
2 Switch the mode switch button to .
» The selected resolution and remaining
recording time are displayed on the
swivel touch screen.
3 Hold the camcorder steadily and aim the
lens as needed.
4 Press the shutter button to start recording.
» A red time indicator is displayed on
the display panel.
» The status indicator on the shutter
button starts ashing in red.
5 Press T/W to zoom in/out if necessary.
6 Press the shutter button again to end
recording.
» [Recording saved!] is displayed briey.
EN
Page 10
11
Playtaggedles
1 During preview, tap again.
» A tag operation menu is displayed.
2 Tap an option to highlight it, then tap [Yes]
for conrmation.
Menu option Description
[Play all] Play all les.
[Play tagged] Play tagged les only.
[Quick impression] Play excerpts of tagged
les.
[Clear all tags] Untag all les.
Trim a video clip
Note
•
Only video les not recorded with ‘Dual recording’ can
be edited (trimmed) on the camcorder.
1 In play mode, swipe to the left/right on the
swivel touch screen to select a recorded
video clip.
2 Tap to enter the trim window.
» A bar for video trimming is displayed
at the top of the window.
3 Tap the left ruler and move to the right to
set the starting point you want.
4 Tap the right ruler and move to the left to
set the starting point you want.
5 Tap [Preview] to preview the edited video
clip.
6 After conrmation, tap[Save] to save the
edited video clip as a new le.
Deleteale
1 In play mode, swipe to the left/right on the
swivel touch screen to to select a le.
2 Tap to enter the window for deletion
conrmation.
3 Tap [Yes] to conrm the deletion
operation.
» [Deleted!] is displayed briey.
» To exit the operation, tap [No].
You can also delete les in batches.
1 During preview, tap .
» A small square box is displayed at the
bottom right corner of each le.
2 Tap a square box to select the le.
» A check mark is displayed in the
square box.
3 Repeat step 2 to select more les.
4 Tap [Conrm] to conrm deletion of all
the selected les.
Tagale
1 Tap the left ruler and move to the right to
set the starting point you want.
2 Tap to tag the le.
• To untag the le, tap
again.
3 Repeat steps 1 to 2 to tag more les.
You can also tag les during preview.
1 During preview, tap .
» A small square box is displayed at the
bottom right corner of each le.
2 Tap a square box to tag the le.
» A check mark is displayed in the
square box.
» To untag the le, tap
again.
3 Repeat steps 1 to 2 to tag more les.
EN
Page 11

12
Settings menu
option
Description
[Flash] Select a ashlight mode: [On],
[Off] or [Auto].
[Resolution] Select a video resolution: [Full
HD] (for best video quality),
[Sports HD] (for lming of fast
moving objects), or [Standard]
(for reduced video le size).
[Photo Size] Select the size of the photos to
be saved (the higher the photo
size, the higher the resolution).
[Scene] Select an automatic exposure
mode that matches your shot
for easy shooting.
[Dual
recording]
Record full HD and
compressed QVGA videos at
the same time.
[Date] Set the date.
[Time] Set the time.
[Autoplay] Start automatic play when the
camcorder is connected to a
PC.
[Capture
sound]
Turn on/off the capture sound.
[Language] Select your desired menu
language.
[Pre-record] Enable/disable 3-second pre-
record mode.
[Format SD
card]
Clear contents from the micro
SD card.
[TV system] Change this setting if the
output video does not appear
correctly on your TV.
[F/S Detect] Enable/disable face smile
detection.
Zoom in a picture
1 In play mode, swipe to the left/right on the
swivel touch screen to select a picture.
2 Press T to zoom in the picture.
3 Tap the screen to pan through the
enlarged picture.
• To return to normal view, press W.
Adjust volume level during video play
• During video play, press T/W.
Adjust settings
1
In viewnder mode, tap to show the
system setting menu.
2 Tap [Settings] to enter the settings sub-
menu.
3 Tap / to nd an item.
4 Tap the item to show the options available.
5 Tap the option you prefer.
6 Tap [OK] to conrm the selection.
7 Tap x to hide the system setting menu.
EN
Page 12
13
Note
•
The software supplied only works on PCs that operate
Microsoft® Windows® XP, Vista and Windows 7.
• When you connect the camcorder to a Mac, use the
iMovie software to import and edit your pictures/
videos directly.
Install the camcorder software
1 Connect the camcorder to a PC (see ‘Get
started’ > ‘Charge the built-in battery’).
2 If the software does not install
automatically, nd and click the Setup icon
at My Computer\CAM295.
3 Follow the on-screen instructions to nish
installation of the software.
Install and use the camcorder
software
1 On your PC, click Start\(All) Programs\
ArcSoft MediaImpression HD Edition.
» The main screen of the software is
displayed.
2 Click an option to select the corresponding
operation.
3 Follow the on-screen instructions to
complete the operation.
5 Use more of
your camcorder
View video or pictures on TV
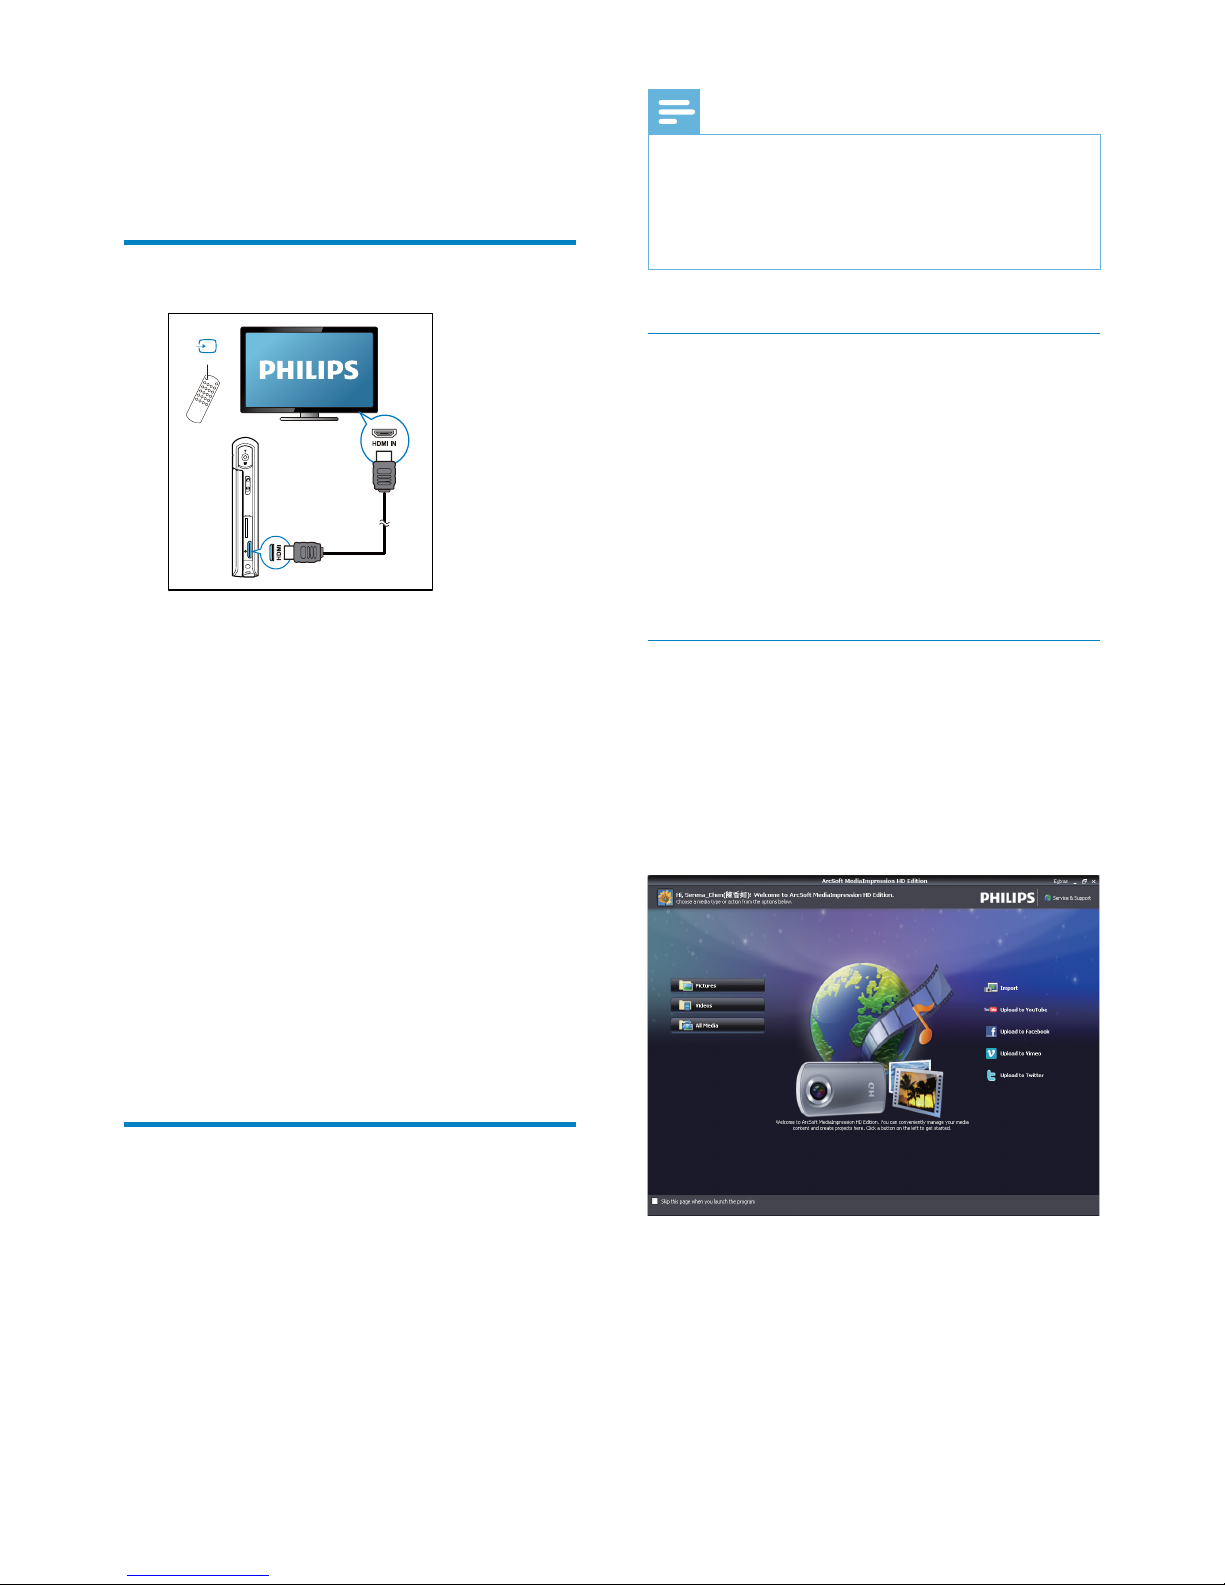
1 Connect an HDMI cable (not supplied) to:
• the HDMI socket on the camcorder
(requiring a mini HDMI connector)
• the HDMI input socket on an HDTV
• An inquiry box for output mode
selection is displayed.
2 To output the exact camcorder display
with menu options to the TV screen, tap
[TV] on the swivel touch screen.
• To output the camcorder display
without menu options to the TV
screen, tap [Live CAM] on the swivel
touch screen.
3 On the camcorder, select a le and start
play.
Install and use the camcorder
software
With the software (ArcSoft MediaImpression
HD Edition) available in the internal memory
of the camcorder, you can impor t, edit, archive
or upload your pictures/videos to the Internet
easily.
SOURCE
TV
EN
Page 13

14
Transfer video/pictures to a PC/Mac
1 Connect the camcorder to a PC/Mac
(see ‘Get started’ > ‘Charge the built-in
battery’).
» It may take some time for the PC/Mac
to recognize the camcorder.
2 Find your video/pictures at My
Computer\CAM295\DCIM\100MEDIA
or My Computer\CAM295 SD\
DCIM\100MEDIA.
3 Copy any video/pictures you want to your
designated folder in the PC/Mac.
Tip
•
You can also import the video/picture les with the
camcorder software (for PC) or iMovie (for Mac).
EN
Page 14

15
System support Windows XP/Vista/
Windows 7, Mac (mass
storage only )
TV out NTSC/PAL selectable, Mini
HDMI (type C)
Power rating DC 5V, 500mA
Weight 0.06kg
Dimensions
(W x H x D)
54 x 110 x 21.5 mm
6 Technical
specifications
Product information is subject to change
without prior notice.
Image sensor 1/3.2” 8MP CMOS sensor
Operation modes Movie record, picture
record
Lens (focusing) Auto focus f=4.76mm
Focus mode Auto focus
Focus range 0.1m to Innity
Aperture F2.8
Digital zoom 5X
Exposure control Auto
Exposure
compensation
-2.0~2.0EV
White balance Auto
Auto power off 3 minutes
Memory 64MB (512Mbit) DDR2 +
128MB SLC (96MB for AP)
+ Micro-SD card Slot
Shutter type Electronic
Shutter speed 1/2~1/4000 second
Picture le format JPEG
Video
compression
format
*.MP4 (H.264 )
Video resolution Full HD (1080p 30) 1920
X1080 (30fps)
Sports HD (720p 60)
1280X720 (60fps)
VGA (4:3) 640X480
(30fps)
Audio le format AAC
Battery 1100mAh Li-ion (built-
in); 120-minute battery
life time based on 720P
recording
PC interface Mini USB 2.0 port
EN
Page 15

16
Why do my video/pictures look blurry?
• Hold the camcorder steady in your hands
during shooting.
• During video capture, do not move the
camcorder too fast.
• Use a tripod (not supplied) if necessary.
Why do my video/pictures look distorted on a
TV screen?
• Select the correct TV system.
How do I charge the camcorder?
• You can charge the camcorder via the USB
pop-out connector. When you connect
it to your PC/laptop it will automatically
charge. You can also plug the camcorder via
the pop-out USB into a USB charger.
How long do I have to charge the camcorder?
• The camcorder is fully charged for rst
usage. The camcorder charge time when
connected to your PC/laptop is 3.5 hours.
When you charge it via USB adaptor, the
charge time is 2 hours.
WherecanIndanadaptorforCAM295to
charge the battery?
• CAM295 can be charged via regular
USB adaptors, which are readily available
in electronic stores. The CAM295 is
compliant to the iPhone 4 adapter.
Camcorder stopped responding?
• In the unlikely event that your camcorder
stops responding, you can manually reset
it. The reset button is located under the
HDMI cover. There you see a small opening
above the HDMI connection. Please use
a small prying object (like a pen) to insert
and press gently for resetting. After you
have reset the camcorder, please turn on
the camcorder again, and set-up will start
again.
Why does the camcorder sometimes not
record the right color?
• To record both indoors and outdoors,
and not having to change any settings,
the camcorder has an automatic whitebalance correction. This enables you to
7 Frequently
asked questions
(FAQ)
Why is there no response when I use the
camcorder?
• The camcorder is in power-off mode. Turn
on the camcorder (see ‘Get started’ >
‘Turn on’).
• The built-in battery may be drained.
Charge the battery (see ‘Get started’ >
‘Charge the built-in battery’).
Why is [Memory full!] displayed when I try to
record?
• Ensure that the Micro SD card has been
inserted correctly (see ‘Get started’ >
‘Load the Micro SD card’).
• The memory is used up. Save your video/
pictures to a computer (see ‘Use more of
your camcorder’ > ‘Transfer video/pictures
to a PC/Mac’). Then delete les from your
camcorder or clear the memory.
How much memory is needed for 1 hour of
Full HD recording?
• The CAM295 uses 4GB on average for
1 hour of Full HD video. For a more
complex video recording (e.g. with lots of
motions in the video, or a lot of panning),
the CAM295 will use more memory. This is
done to maintain the video quality, but will
increase the usage of memory.
Why do I have no access to folders on the
camcorder from my computer?
• Ensure that the USB connection is correct.
• The camcorder turns off automatically
15 minutes after it is connected to a
computer. You can press
to turn it on
again.
EN
Page 16

17
How do I play my videos on TV?
• To play back on TV, please use an HDMI
connector (mini HDMI to standard HDMI)
if your TV accepts HDMI input, or use the
video-out cable provided.
Why is there no lens cover?
• The camcorder comes without a lens
cover, keeping it simple to use and fussfree. It is made of robust material that
doesn’t scratch under normal usage. A
travel pouch and a lens cloth are provided,
allowing you to keep the camcorder clean.
What format does the camcorder record in?
• The camcorder uses the same video
format as Blu-ray players and discs – H.264.
This highly sophisticated format delivers
superb HD picture quality.
What does pre-record mean that is in the
setting?
• The pre-record button is designed to
let you never miss a moment. When
you enable the pre-record function, the
camcorder will record video 3 seconds
before you have pressed the record
button. So when you play-back the
recorded lm, you will automatically
see the rst 3 seconds before you have
pressed the record button. This can be
useful when lming unexpected moments.
The pre-record function will not drain
battery life, it will operate as normal.
Somevideolescannotbeedited.Whyis
that?
• Video les recorded with dual recording
cannot be edited. To edit video les on the
camcorder, set [Dual recording] to [Off]
before you record video (see ‘Use your
camcorder’ > ‘Adjust settings’).
record both indoors and outdoors where
the amount of light in the environment
changes. If you move fast from outdoors to
indoors, the camcorder might need some
time to correct that, and in extreme cases
the colors might seem a bit unnatural.
However, after a few seconds this will be
corrected automatically by the camcorder.
How do I connect it to a Windows PC/laptop?
• Connect the camcorder to your PC/laptop
via USB. The USB pop-out connector is
strong enough to support the camcorder
when it is plugged into the PC’s USB port.
For easy sharing and editing, install the
software program (Media Impression HD)
that comes with the camcorder.
How do I connect it to a Mac?
• The camcorder works with the Mac
via USB. The USB pop-out connector is
strong enough to support the camcorder
when it is plugged into the USB port. The
camcorder works great with the iMovie
software, which is part of the iLife package
that comes with your Mac. To transfer
videos using iMovie, simply connect the
camcorder to your Mac via USB, launch
iMovie and start importing by clicking the
camcorder icon. Select ‘Use original quality’
to ensure the best quality, and to maintain
le sizes at an optimum.
Can I connect the camcorder directly to TV,
DVD/Blu-ray player or Home Cinema set via
their USB-port?
• The USB plug is designed to share your
videos/pictures to your PC or Laptop. You
can plug the CAM295 directly into your
TV, DVD/Blu-ray player or Home cinema
set (called the host from this point on), and
it will play the pictures that are stored on
the CAM295. To play the videos from the
CAM295, it depends if your host supports
the le format H.264 of the CAM295.
Most Blu-ray enabled players are able to
play this format.
EN
Page 17

18
Tips on video making
• You can easily look back on fun moments
and relive them with the camcorder. To
enjoy these memories to the fullest, here
are some simple video tips:
• When capturing videos, hold your
camcorder steady in your hand
• Don’t move too fast when panning
(i.e. moving the camera horizontally)
as it will be hard to follow what is
captured when you review the video
• Try shooting from different angles
– for example, from the side, from
the front, or even from below. You
can easily join the different video
segments together with the PC
software included
EN
Page 18

© 2011 Koninklijke Philips Electronics N.V.
All rights reserved.
CAM295_00_UM_V1.1
 Loading...