

Page 1
Philips Remote User Guide
Head Hall C13
Overview
The following document intends to familiarize one with the use of features
in our
allows for full control of all devices installed in the room.
Smart Classrooms
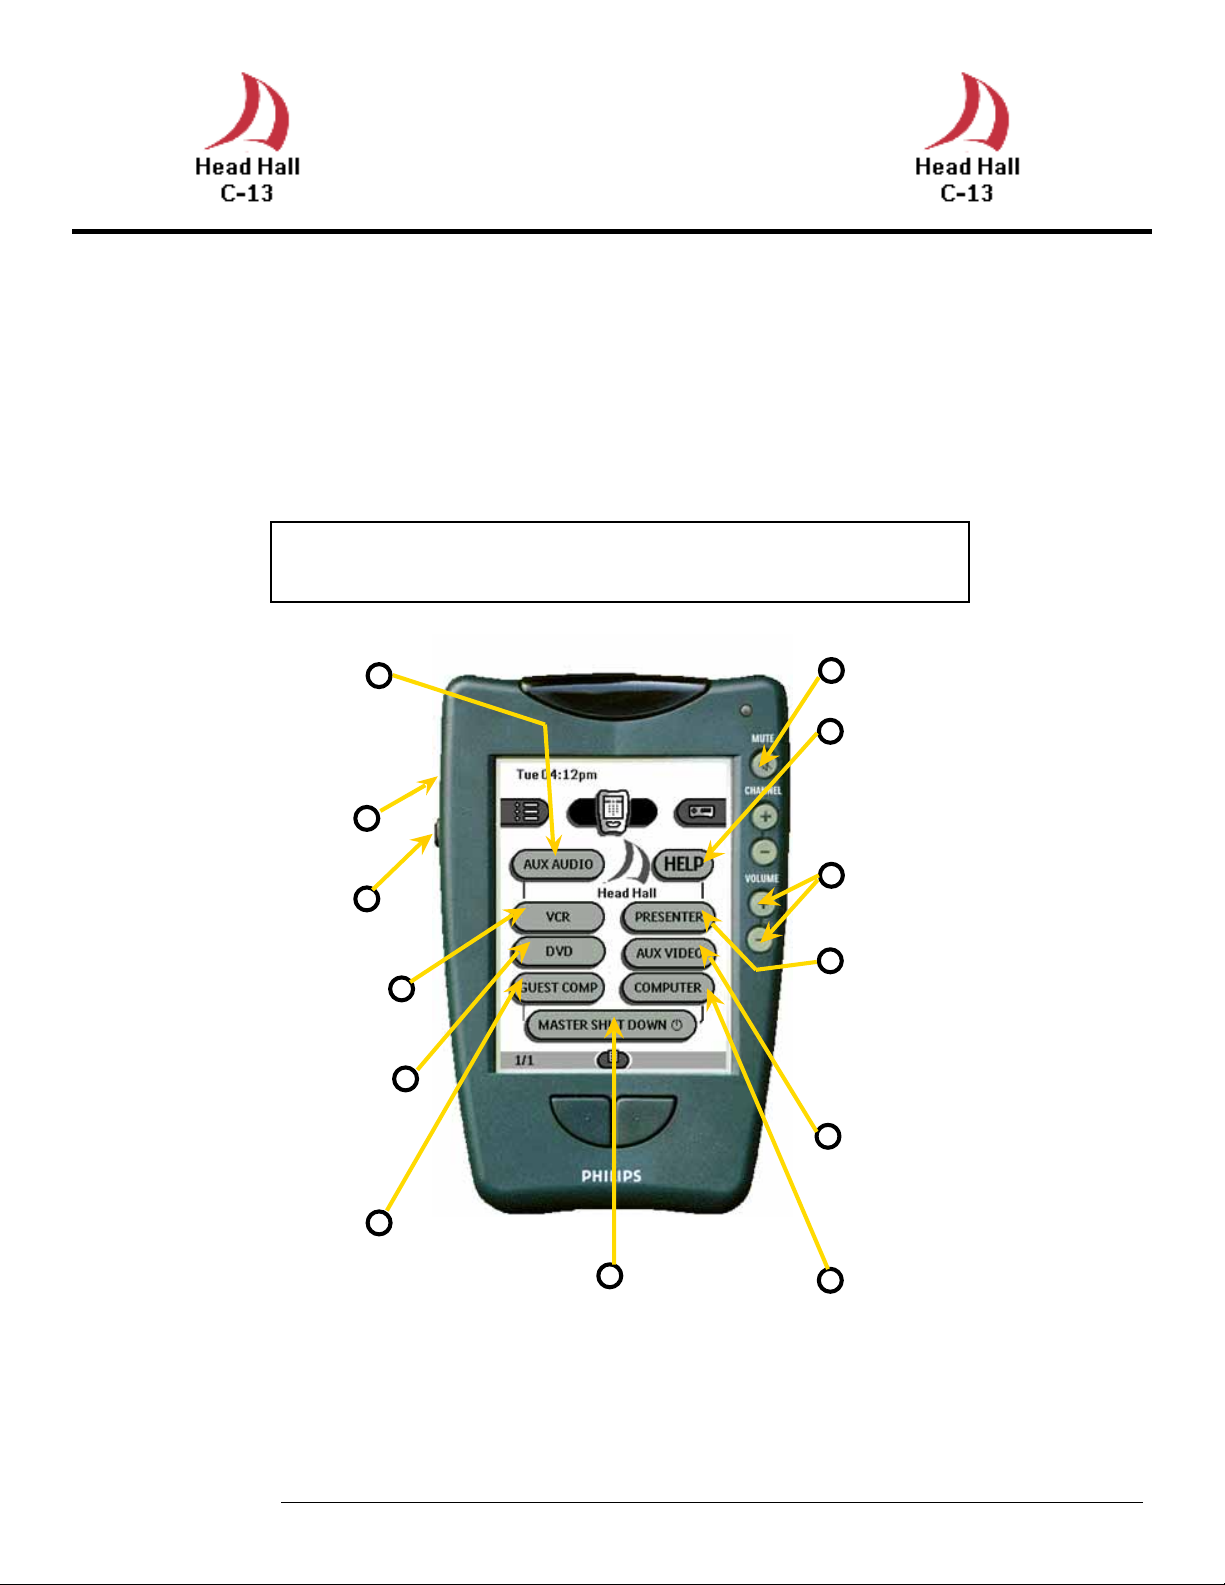
General Operations Using the Pronto Remote
via the Philips Remote Control. The remote itself
AUX AUDIO to send
auxiliary sound to the
amplifier.
Contrast controls for the
touch screen display.
Backlight initiate button.
Press on the VCR icon to
get to the VCR controls.
Press on the DVD icon to
get to the DVD controls.
Press on the Guest
Comp icon to send the
guest computer desktop
to the projector.
Master MUTE button.
Press on the HELP
icon for support information.
Master VOLUME
contorls.
Press on the PRE-
SENTER icon to display documents from
the document camera
on the projector
Press on the AUX icon
to display auxiliary AV
inputs on the projector.
Press on the COMPU-
Press on the MASTER SHUT
DOWN icon and hold it for at
least 6 seconds to turn every
equipment off.
ANY TROUBLE USING THE PRONTO PLEASE REFER TO THE NEXT PAGE
TER icon to display
the console computer
on the projector.
Page 2
Starting up Troubleshooting
Blank Screen !
The Pronto screen will be blank when picked up from
the charger base.
To initiate the Pronto just Touch anywhere on the
touch screen as indicated.
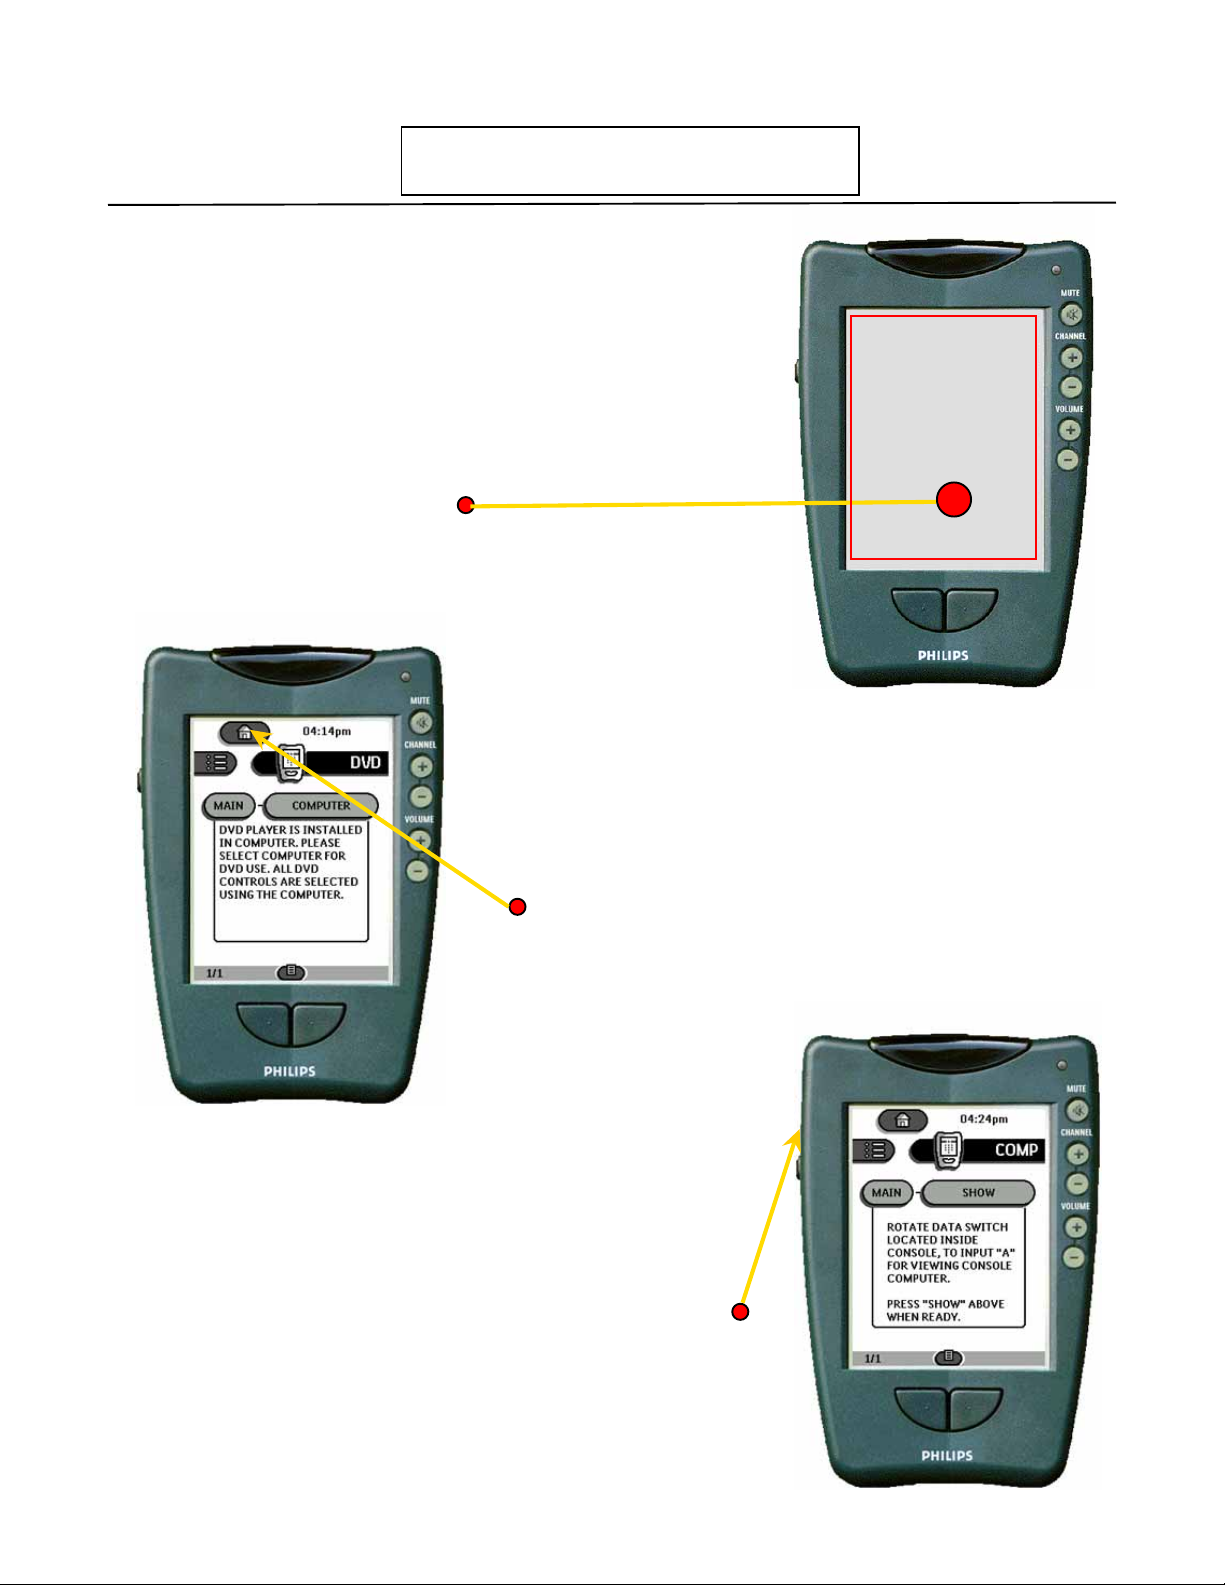
Where is the main page!
Just press on the icon that resembles a house at
the top left hand corner of any equipment menu
page. Should a display other than the main page
appear.
No Display!
If display is dark or do not appear check contrast
dial before calling for. There is a contrast dial on
the right side of the Pronto receiver that is similar
to a volume control dial on a walkman.
Page 3

STEP 2
Playing a DVD
Step 1
DVD player in this auditorium is on the computer.
Therefore start the DVD
program and place a DVD
in the DVD-ROM.
The DVD controls page as
shown in the left will be
displayed.
Step 2
Press the DVD icon in the
main menu.
Step 3
Press the COMPUTER icon
to send the DVD video
signal to the projector.
STEP 3
STEP 1
Playing the VCR
Step 1
Press the VCR icon in the
main menu.
The VCR controls page as
shown in the left will be
displayed.
Step 2
Press the PLAY icon.
Step 3
Press the SHOW icon to
send the VCR video signal
to the projector.
STEP 3
STEP 2
Page 4

Displaying an Auxiliary Video Source
Step 1
Connect the AUX video
source to the terminals
labeled AUX VIDEO on the
backsplash of the console.
Step 2
Press the AUX VIDEO icon
on the main page.
Step 3
STEP 2
Press the Show icon to
display the video source
through the projector.
STEP 3
STEP 2
Displaying a Laptop Computer
Step 1
Connect the VGA, Mouse
and Audio cables onto the
GUEST COMPUTER plate
on the console backsplash
STEP 3
Step 2
Press the GUEST COMP
icon on the main page.
Step 3
Press the SHOW icon to
display the output throgh
the computer.
Page 5

STEP 2
Visual Presenter
Step 1
Press the PRESENTER icon
in the main page.
Step 2
Place Document on the
Visual Presenter and press
SHOW. Lighting controls
are on the Visual Presenter.
Step 3
Use the icons AUTO FOCUS, ZOOM IN and ZOOM
OUT. To customize the
output
STEP 3
STEP 4
Displaying the Console Computer
Step 1
Turn on the computer.
Step 2
Press the COMPUTER icon
on the main page.
Step 3
Press the SHOW icon to
display the output throgh
the computer.
STEP 2
STEP 3
 Loading...