

Philips BDP5200K/93 Operation Manual

Register your product and get support at
www.philips.com/welcome
BDP5200K/93
EN User manual 9
ZH-CN Ⴌ߀൱Ҭ 33

1 Hookup and play
EN
ZH-CN
Before you connect this Blu-ray disc/ DVD player, read and understand all accompanying instructions.
ঙඵְޝޝ௯/DVD ӎۄࡱሏಏĩೊྗᅩ٢Ӌ๐ᄗܚם؇ฌd

O
OA
U
1
Register your product and get support at
www.philips.com/welcome
EN User manual
BDP5200
VIDE
C
I
COAXIAL AUDIO LINE OUT
DIO LINE O
HDMIVIDEO
( )
T
3
2
O
T
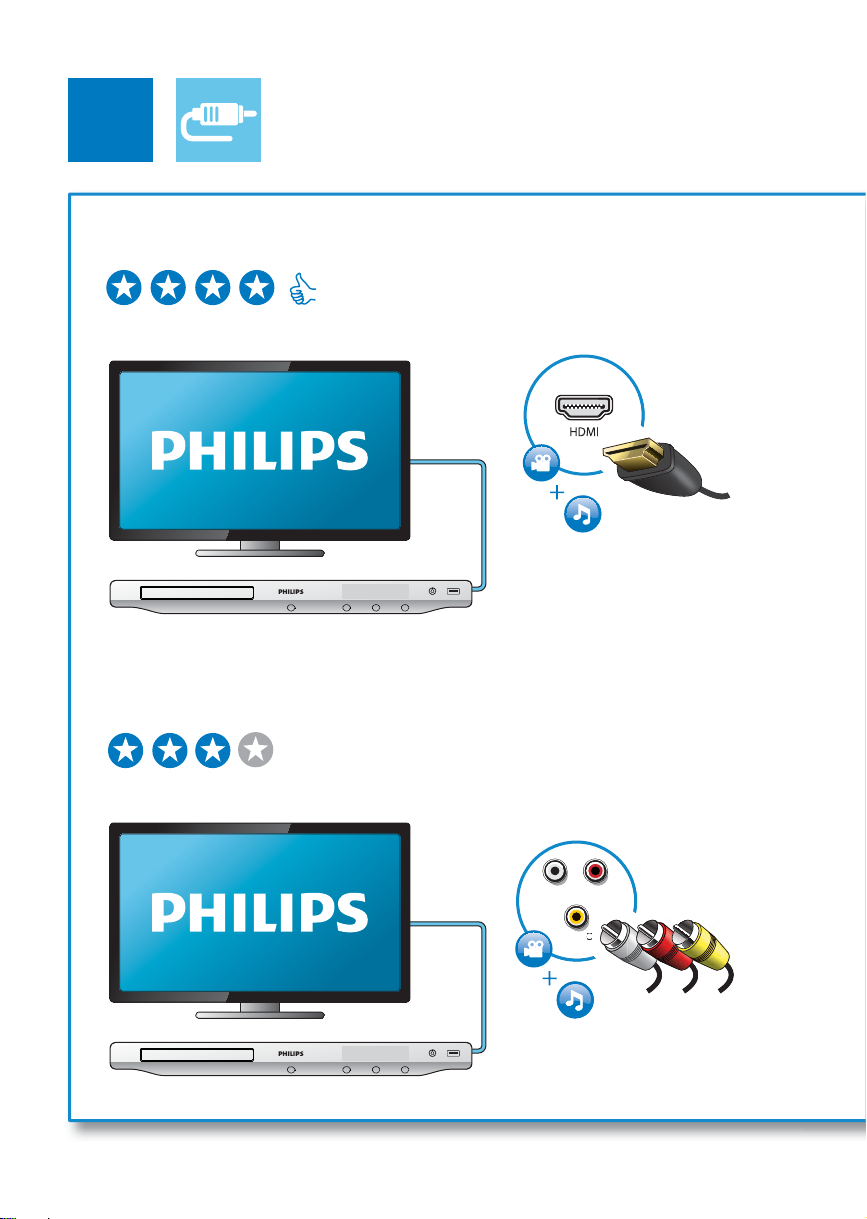
1 HDMI
HDMI VIDEO COAXIAL AUDIO LINE OUT
2 VIDEO+AUDIO LINE OUT
HDMI VIDEO COAXIAL AUDIO LINE OUT
LINE
VIDEO
VIDE
OU
AUDIO LINE OUT
4

3 COAXIAL
4 AUDIO LINE OUT
HDMI VIDEO COAXIAL AUDIO LINE OUT
COAXIAL
HDMI VIDEO COAXIAL AUDIO LINE OUT
AUDIO LINE OUT
5
3
4
6
5
1
2
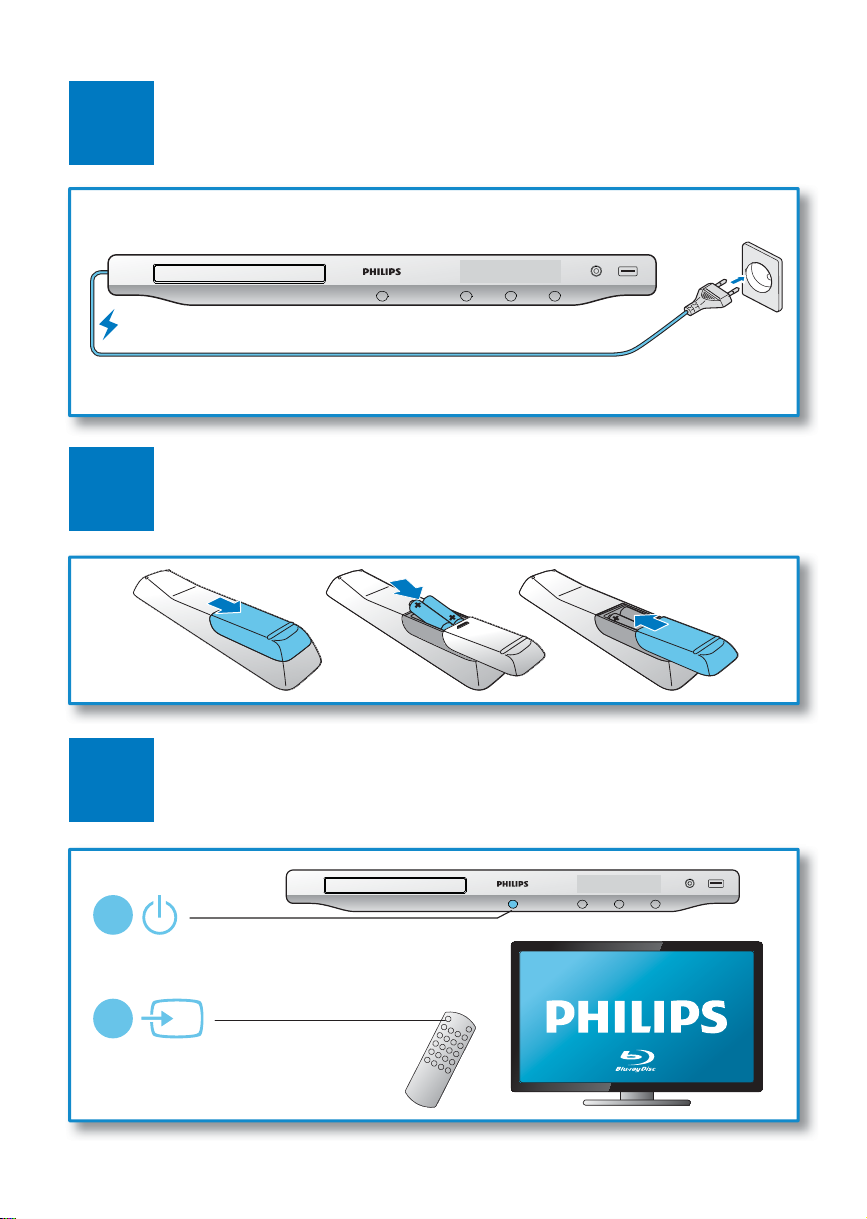
SOURCE
TV
6
2
BD/BD 3D
DVD/VCD/CD
DivX Plus HD/MKV
MP3 / JPEG
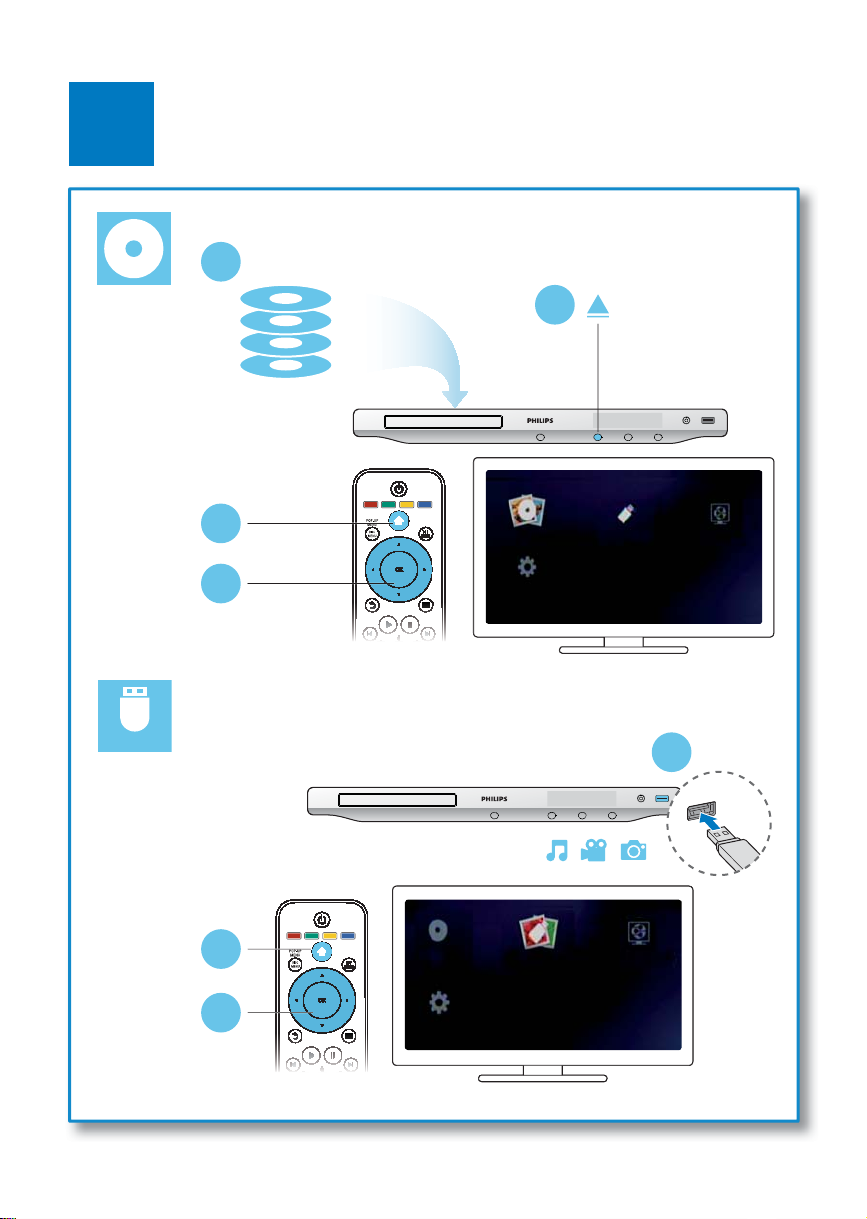
1
USB
3
4
Setup
browse USBplay Disc
browse PC
1
2
3
Setup
browse USBplay Disc
browse PC
7

Contents
1 Hookup and play 2-7
2 Use your Blu-ray disc/ DVD player 10
Basic play control 10
Video, audio and picture options 11
DivX videos 13
RMVB or RM files 13
Play a musical slideshow 14
BonusView on Blu-ray 14
BD-Live on Blu-ray 14
Play a Blu-ray 3D video 15
Set up a network 15
iPhone 16
Browse PC (DLNA) 16
Karaoke 17
Use Philips EasyLink 17
3 Change settings 19
Picture 19
Sound 20
Network (installation, status) 20
Preference (languages, parental control...) 20
Advanced options (clear memory...) 21
4 Update software 22
Update software via the Internet 22
Update software via USB 22
English
5 Specifications 23
6 Troubleshooting 25
7 Safety and important notice 28
9EN
2 Use your Blu-ray disc/ DVD player
Congratulations on your purchase, and welcome to Philips! To fully benefit from the support that Philips
offers (e.g. product software upgrade), register your product at www.philips.com/welcome.
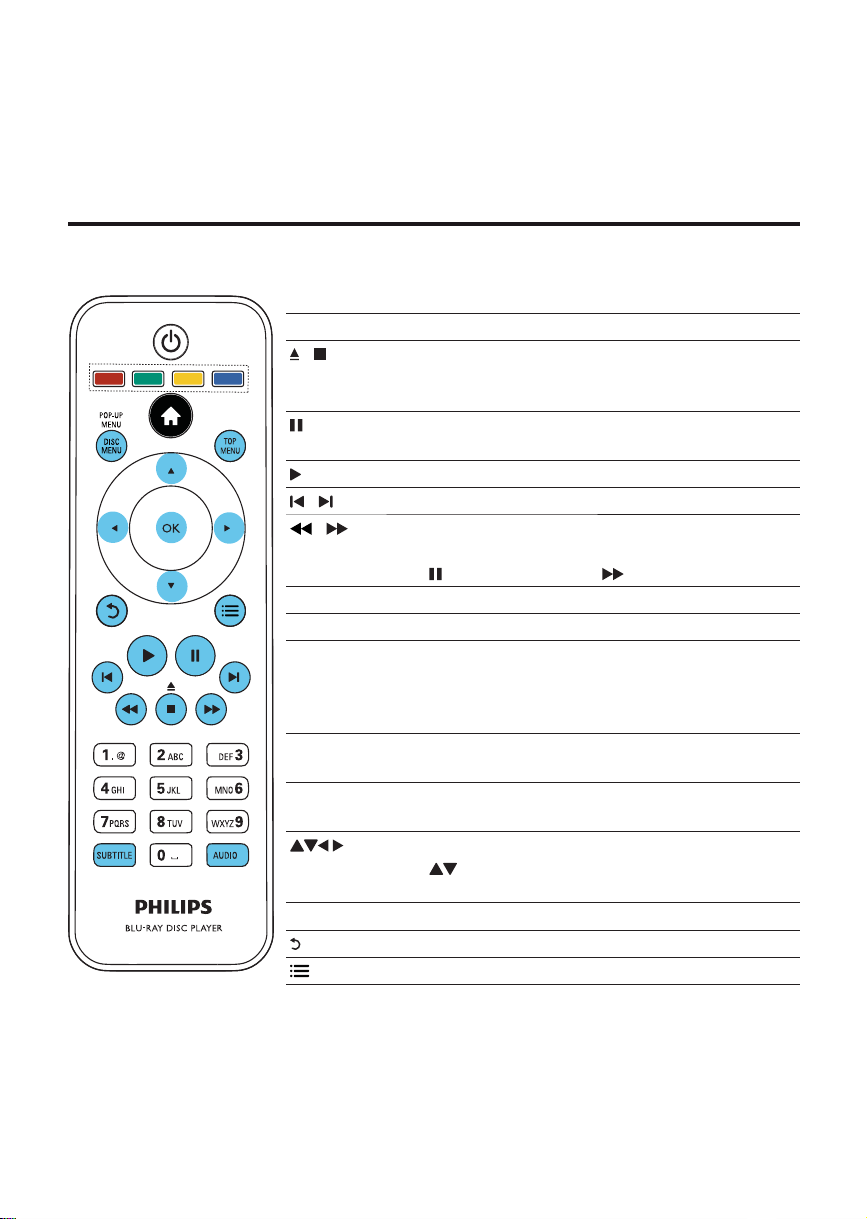
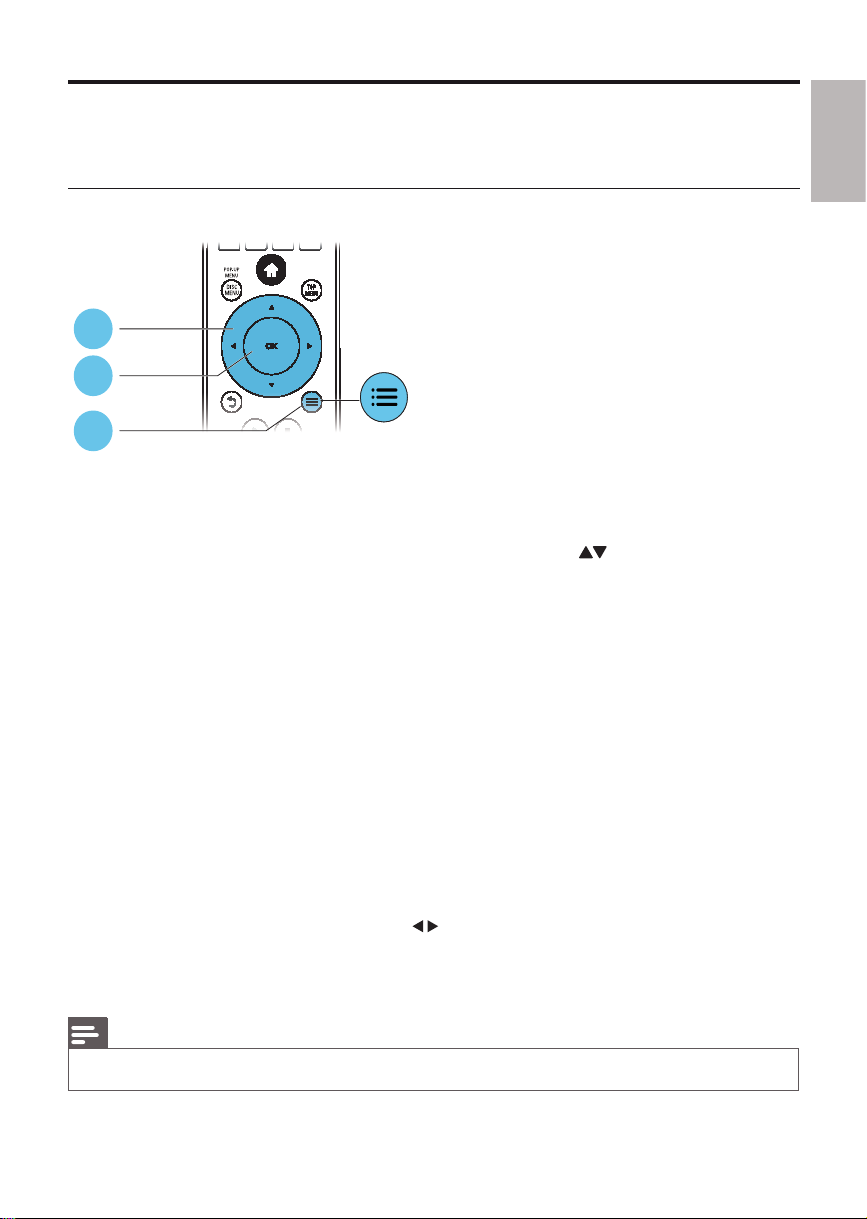
Basic play control
During play, press the following buttons to control.
Button Action
/
/
/
AUDIO Select an audio language or channel.
SUBTITLE Select a subtitle language.
DISC
MENU /
POP-UP
MENU
TOP
MENU
Color
buttons
OK Confirm a selection or entry.
Stop play.
Press and hold (more than 4 seconds) to open or close
the disc compartment.
Pause play.
Press repeatedly to slow forward frame by frame.
Star t or resume play.
Skip to the previous or next track, chapter or file.
Fast backward or forward.
Press repeatedly to change the search speed.
Press
once, and then press to slow forward.
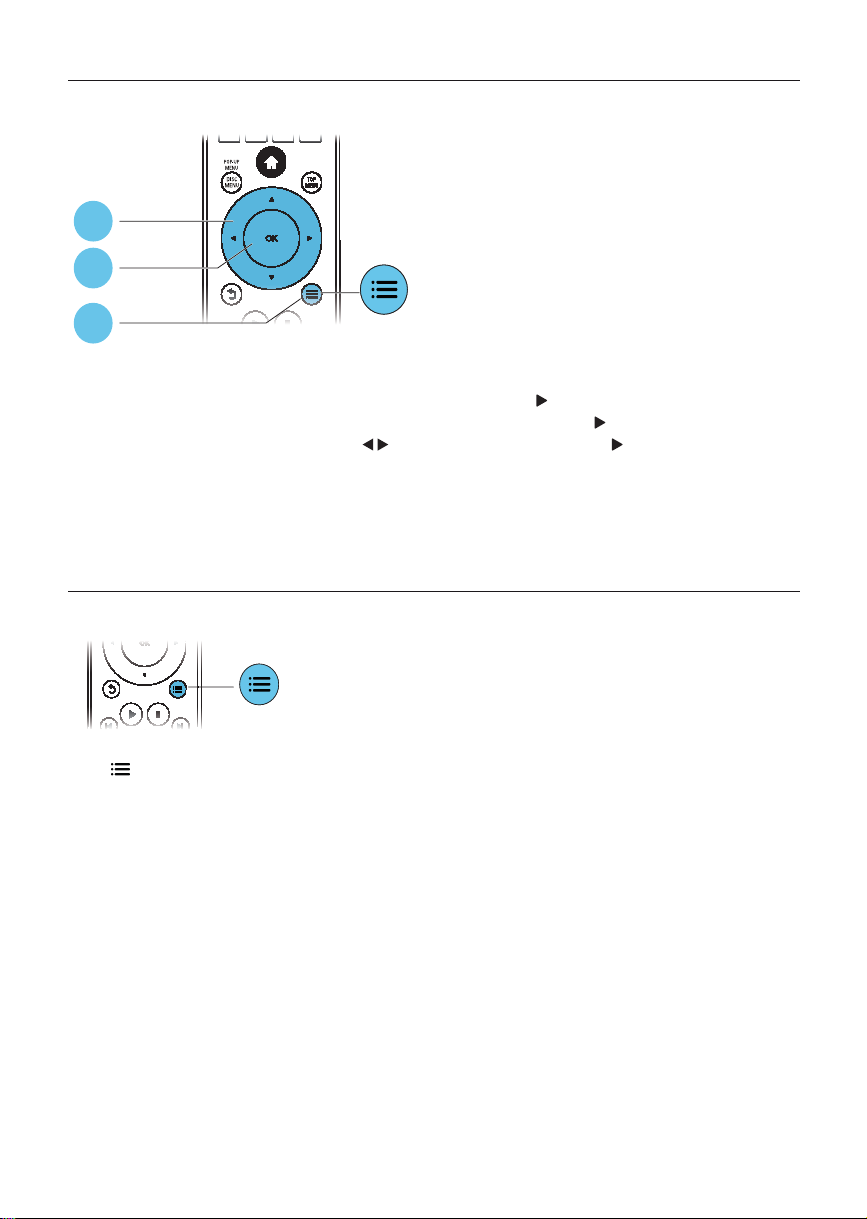
Access or exit the disc menu.
Access the main menu of a video disc.
Select tasks or options for Blu-ray discs.
Navigate the menus.
Press
clockwise during slideshow.
Return to a previous display menu.
Access more options during play.
to rotate a picture clockwise or counter-
EN
10
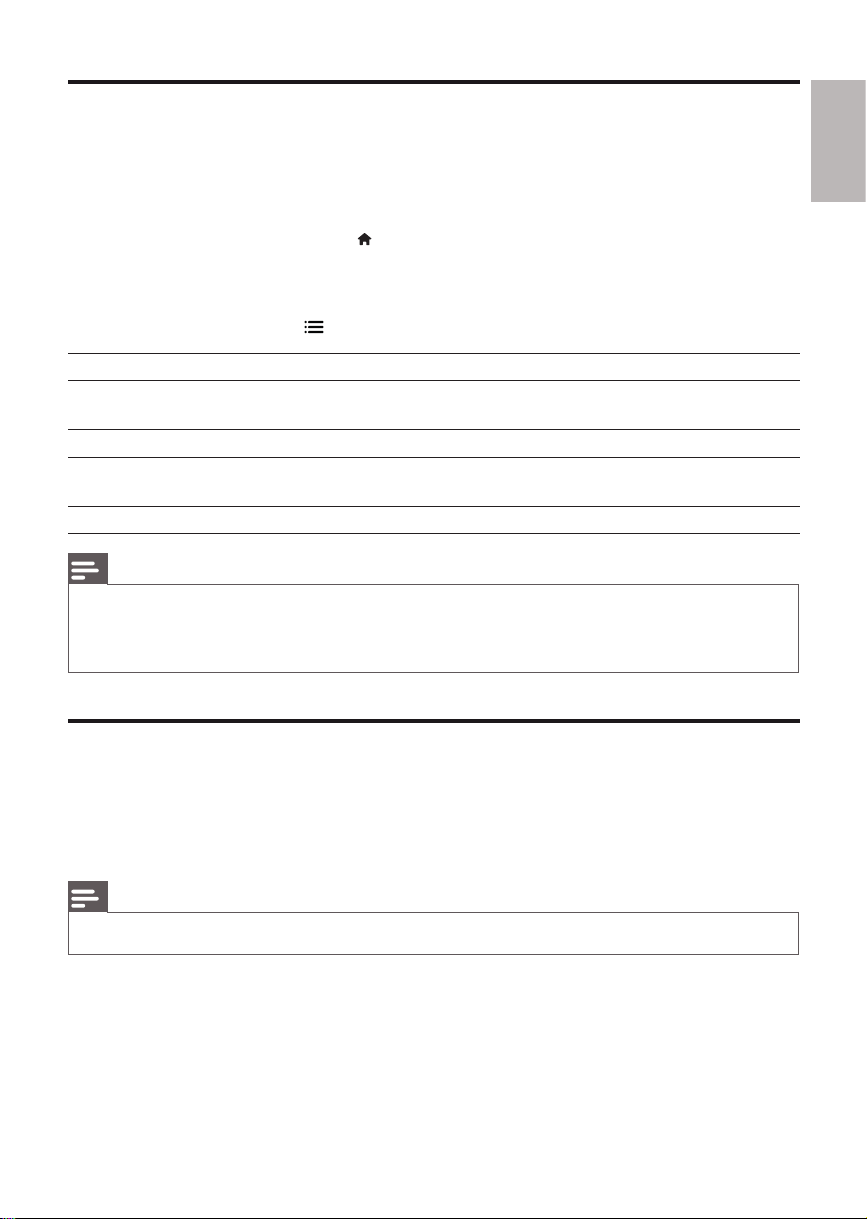
Video, audio and picture options
More options are available for video or picture play from a disc or USB storage device.
Video options
2
3
1
Access more options during video play.
• [Audio Language]: Select an audio language.
• [Subtitle Language]: Select a subtitle language.
• [Subtitle Shift]: Change the subtitle position on the screen. Press
position.
• [Info]: Display play information.
• [Character Set]: Select a character set that supports the DivX video subtitle (only for DivX
videos).
• [Time Search]: Skip to a specific time via the numeric buttons on the remote control.
• [2nd Audio Language]: Select the second audio language (only for Blu-ray discs that support
BonusView).
• [2nd Subtitle Language]: Select the second subtitle language (only for Blu-ray discs that support
BonusView).
• [Titles]: Select a title.
• [Chapters]: Select a chapter.
• [Karaoke]: Set up Karaoke function.
• [Angle List]: Select a camera angle.
• [Menus]: Display a disc menu.
• [PIP Selection]: Display a picture-in-picture window (only for Blu-ray discs that suppor t
BonusView).
• [Zoom]: Zoom into a video picture. Press
• [Repeat]: Repeat a chapter or title.
• [Repeat A-B]: Mark two points within a chapter for repeat play, or turn off repeat mode.
• [Picture Settings]: Select a predefined color setting.
to select a zoom factor.
to change the subtitle
English
Note
Available video options depend on the video source. •
11EN
Picture options
2
3
1
Access more options during slideshow.
• [Rotate +90]: Rotate a picture 90 degrees clock wise. Press
• [Rotate -90]: Rotate a picture 90 degrees counter-clockwise. Press
• [Zoom]: Zoom into a picture. Press
• [Info]: Display picture information.
• [Duration per slide]: Set a display interval for a slideshow.
• [Slide Animation]: Select a transition effect for a slideshow.
• [Picture Settings]: Select a predefined color setting.
• [Repeat]: Repeat a selected folder.
Audio options
to select a zoom factor. Press to continue slideshow.
to continue slideshow.
to continue slideshow.
Press repeatedly to cycle through the following options.
Repeat the current track.•
Repeat all the tracks on the disc or folder.•
Play audio tracks in a random loop.•
Turn off a repeat mode.•
EN
12
DivX videos
You can play DivX videos from a disc, or a USB storage device.
VOD code for DivX
Before you purchase DivX videos and play them on this player, register this player on •
www.divx.com using the DivX VOD code.
Display the DivX VOD code: press •
DivX subtitles
Press • SUBTITLE to select a language.
If the subtitle does not appear correctly, change the character set that suppor ts the DivX subtitle. •
Select a character set: press
Character set Languages
[Standard] English, Albanian, Danish, Dutch, Finnish, French, Gaelic, German, Italian, Kurdish
(Latin), Norwegian, Portuguese, Spanish, Swedish and Turkish
[Chinese] Simplified Chinese
[Chinese-
Trad itiona l]
[Korean] English and Korean
Note
To play DivX DRM protected files from a USB storage device, connect this player to a TV through HDMI. •
To use the subtitles, make sure that the subtitle file has the same name as the DivX video file name. For •
example, if the DivX video file is named “movie.avi”, save the subtitle file as “movie.srt”, or “movie.sub”.
This player can play subtitle files in the following formats: .srt, .sub, .txt, .ssa, and .smi.
•
Traditional Chinese
, and select [Setup] > [Advanced] > [DivX® VOD Code].
, and select [Character Set].
English
RMVB or RM files
You can play RMVB or RM files from a disc or a USB storage device.
An Real Media Variable Bitrate (RMVB) and RealMedia (RM) file contains both audio and video. You can
copy an RMVB or RM file from your computer onto a recordable disc or USB storage device. And play
them from this player.
Note
Make sure that the file extension must be “.RMVB”, “.RMV”, or “.RM”. •
13EN
Play a musical slideshow
Play music and pictures simultaneously to create a musical slideshow.
1 From a disc or connected USB storage device, play a music file.
2 Press , and go to the picture folder.
3 Select a picture from the same disc or USB, and press OK to start slideshow.
4 Press to stop slideshow.
5 Press again to stop music play.
BonusView on Blu-ray
View special content (such as commentaries) in a small screen window.
This feature is only applicable to Blu-ray discs compatible with BonusView (also known as picture in
picture).
1 During play, press .
The options menu is displayed. »
2 Select [PIP Selection] > [PIP], and press OK.
PIP options [1]/[2] depend on the video contents. »
The secondary video window is displayed. »
3 Select [2nd Audio Language] or [2nd Subtitle Language], and press OK.
BD-Live on Blu-ray
Access exclusive online services, such as movie trailers, games, ringtones and other bonus contents.
This feature is only applicable to Blu-ray discs that are BD-Live enabled.
1 Prepare the Internet connection and set up a network (see “Set up a network ”).
2 Connect a USB storage device to this player.
A USB storage device is used to store the downloaded BD-Live content.•
To delete the BD-Live previously downloaded on the USB storage device for memory •
release, press
and select [Setup] > [Advanced] > [Clear memory].
3 Play a disc that is BD-Live enabled.
4 On the disc menu, select the BD-Live icon, and press OK.
BD-Live starts to load. The loading time depends on the disc and the Internet connection. »
5 On the BD-Live interface, select an item to access.
Note
BD- Live services vary from discs and countries. •
When you use BD-Live, data on the disc and this player are accessed by the content provider •
Use a USB storage device with at least 1GB of free space to store the download. •
EN
14

Play a Blu-ray 3D video
Before you start, make sure that:
the TV is 3D compliant, and is connected to this player through HDMI•
the disc is a Blu-ray 3D disc•
you have 3D glasses compatible with the TV.•
1 Make sure that 3D output is turned on: press , and select [Setup] > [Video] > [Watch 3D
video] > [Auto].
2 Play a Blu-ray 3D video.
3 Put on the 3D glasses for 3D effects.
To play 3D video in 2D, turn off Blu-ray 3D output (press •
3D video] > [Off]).
Set up a network
Connect this player to a computer network and the Internet to access the services:
• Browse PC (DLNA): play photos, music and video files streamed from your computer.
• Update software: update the software of this player via the Internet.
• BD-Live: access online bonus features (applicable to Blu-ray discs that are BD-Live enabled).
1 Connect this player to a computer network and the Internet, through wired (Ethernet) or
wireless connection.
This player has a built-in Wi-Fi for a wireless connection.•
PC (DLNA)
, and select [Video] > [Watch
PC (DLNA)
English
2 Perform the network installation.
1), Press .
2), Select [Setup], and press OK.
3), Select [Network] > [Network Installation], and press OK.
4), Follow the instructions on the TV screen to complete the installation.
15EN

Caution
Before you connect to a network, familiarize yourself with the network router, media server software for •
DLNA , and networking principles. If necessary, read documentation accompanying network components.
Philips is not responsible for lost, damaged or corrupt data.
iPhone
With an iPhone screen as a remote control, you can browse and play media files of a disc or USB
storage device in this player.
What you need
Download the Philips’ smar tphone control application from the iTunes store to your iPhone.•
Connect this player to a home network (see “Set up a network ”).•
Connect your iPhone to the same home network (see the user manual of the iPhone for •
details).
iPhone control
1 Inser t a disc or USB storage device into this player.
2 On the iPhone screen, tap the smartphone control icon.
If the control icon does not appear, download the Philips’ smartphone control application •
to the iPhone.
After a search, the name of this player is displayed.•
3 Select this player from the iPhone screen.
The iPhone used as a remote control for this player is enabled. »
The control buttons are displayed on the iPhone screen, and control functions can vary from »
play modes.
4 From the iPhone screen, touch the source tab, and then select the DISC or USB option.
The folders in the disc or USB storage device are displayed. »
5 Open a folder, and select a file to play.
6 Tap the control buttons on the iPhone screen to control the play.
To exit the application, press the home button on the iPhone.•
EN
16
Browse PC (DLNA)
With this DLNA-certified player connected to a computer network, you can play video, music and
photo from a computer.
Note
To browse a PC, make sure that a DLNA media server software (such as Windows Media Player 11 or •
higher) is installed on the PC .
1 Connect this player to a computer network (see “Set up a network”).
2 On the PC, in the DLNA media ser ver software (such as Windows Media Player 11 or higher),
you need to set:
a
Share my media to this player (see “Help” document in the media server software).
b
Share files or add files to the library (see “Help” document in the media server software).
3 Press .
4 Select [browse PC], and press OK.
A content browser is displayed. »
5 Select a file, and press OK to play.
You may control play with the disc play features.•
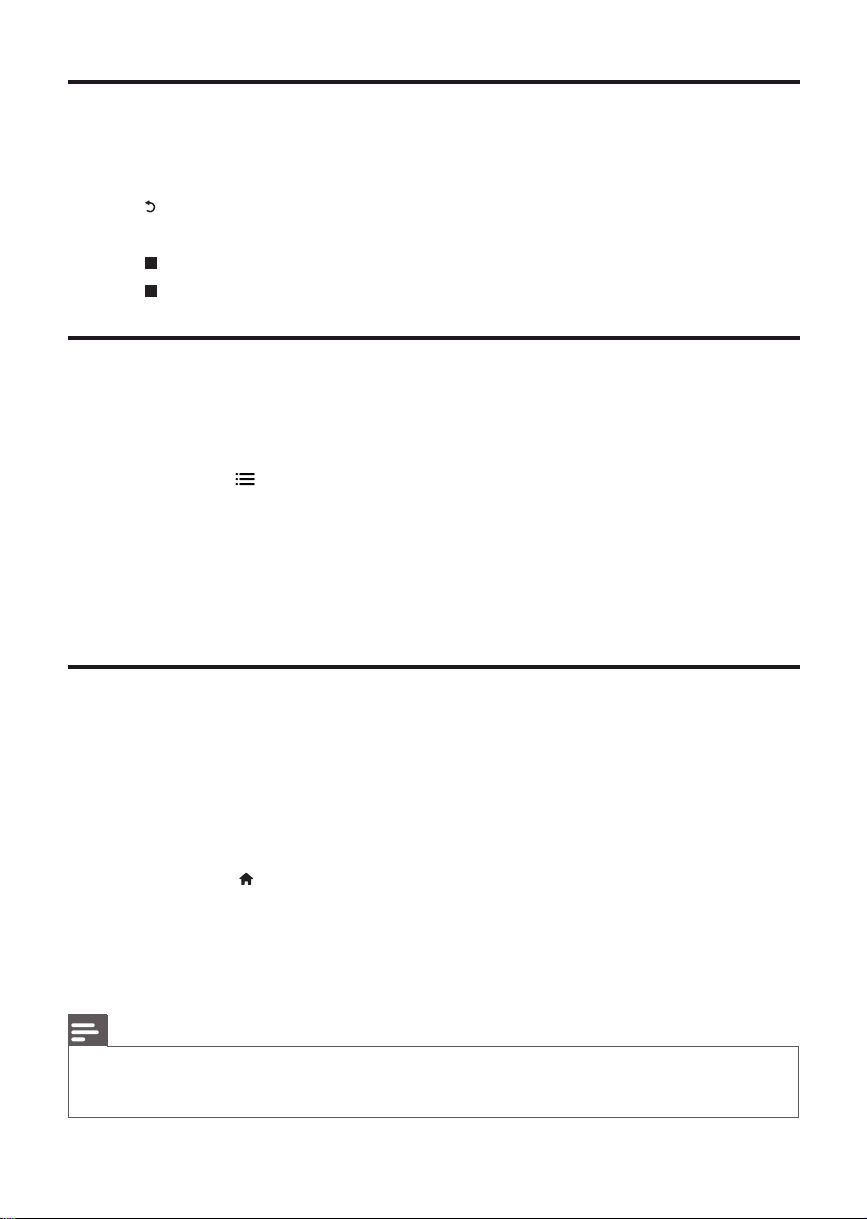
Karaoke
Connect a microphone (not supplied) to the MIC connector on this player.
1
2 Press to display the home menu.
3 Select [Setup] > [Audio] > [Karaoke], and press OK.
The Karaoke menu is displayed. »
4 Select [Microphone] > [On], and press OK to turn on the microphone sound output.
5 Play a Karaoke video disc, and then sing through the microphone.
Change the Karaoke settings from the Karaoke menu
• [Microphone]: Turn on or off microphone sound output.
• [Microphone volume]: Change the microphone volume.
• [Echo]: Change the echo level.
• [Key]: Change the pitch level that matches your voice.
• [Vocal support]: Reduce the original sound.
English
17EN

Use Philips EasyLink
This player supports Philips EasyLink which uses the HDMI CEC (Consumer Electronics Control)
protocol. You can use a single remote control to control EasyLink compliant devices that are connected
through HDMI. Philips does not guarantee 100% interoperability with all HDMI CEC devices.
1 Connect the HDMI CEC compliant devices through HDMI, and turn on the HDMI CEC
operations on the TV and other connected devices (see the user manual of the TV or other
devices for details).
2 Press .
3 Select [Setup] > [EasyLink].
4 Select [On] under the options: [EasyLink], [One Touch Play] and [One Touch Standby].
EasyLink function is turned on. »
One Touch Play
When you play a disc on this player, the TV automatically switches to the correct video input source.
One Touch Standby
When a connected device (for example TV) is put to standby with its own remote control, this player
is put to standby automatically.
EN
18
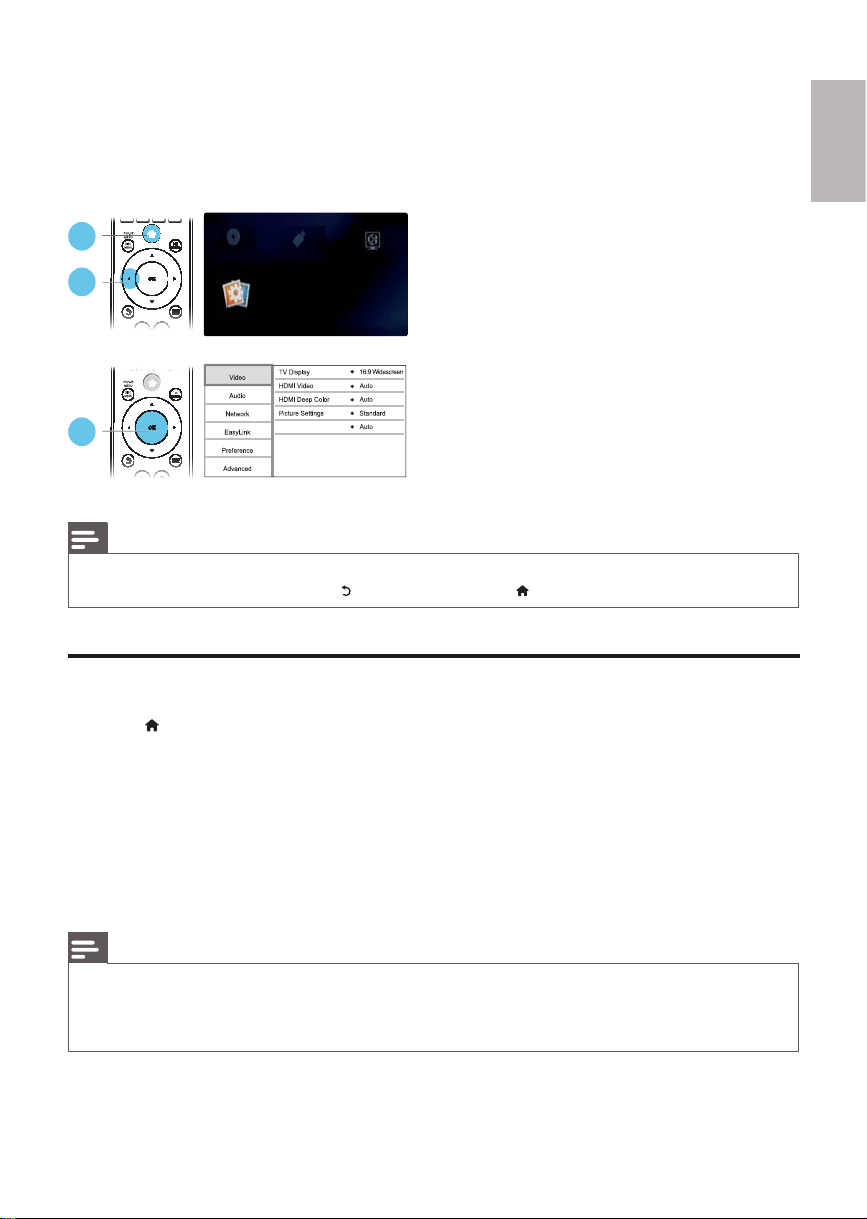
3 Change settings
This section helps you to change the settings of this player.
1
browse USBplay Disc
browse PC
2
Setup
3
Note
You cannot change a menu option that is grayed out. •
To return to the previous menu, press • . To exit the menu, press .
Watch 3D video
Picture
Press .
1
2 Select [Setup] > [Video] to access the video setup options.
• [TV Display]: Select a picture display format to fit the T V screen.
• [HDMI Video]: Select an HDMI video resolution.
• [HDMI Deep Color]: Display colors with more shades and hues when the video content is
recorded in Deep Color and the TV supports this feature.
• [Picture Settings]: Select a predefined color setting.
• [Watch 3D video]: Set to 3D or 2D output when playing a Blu-ray 3D disc. The player must be
connected to a 3D TV through HDMI.
English
Note
If you change a setting, make sure that the TV suppor ts the new setting. •
For set tings related to HDMI, the TV must be connected through HDMI. •
For the composite connection (via the • VIDEO connector), select a video resolution of 480i/576i or 480p/576p
under [HDMI Video] to enable video output.
19EN
 Loading...