

Page 1
ClearLine
BBP200 BBP210
Mounting instruction 安装说明书
IEC
EN60598
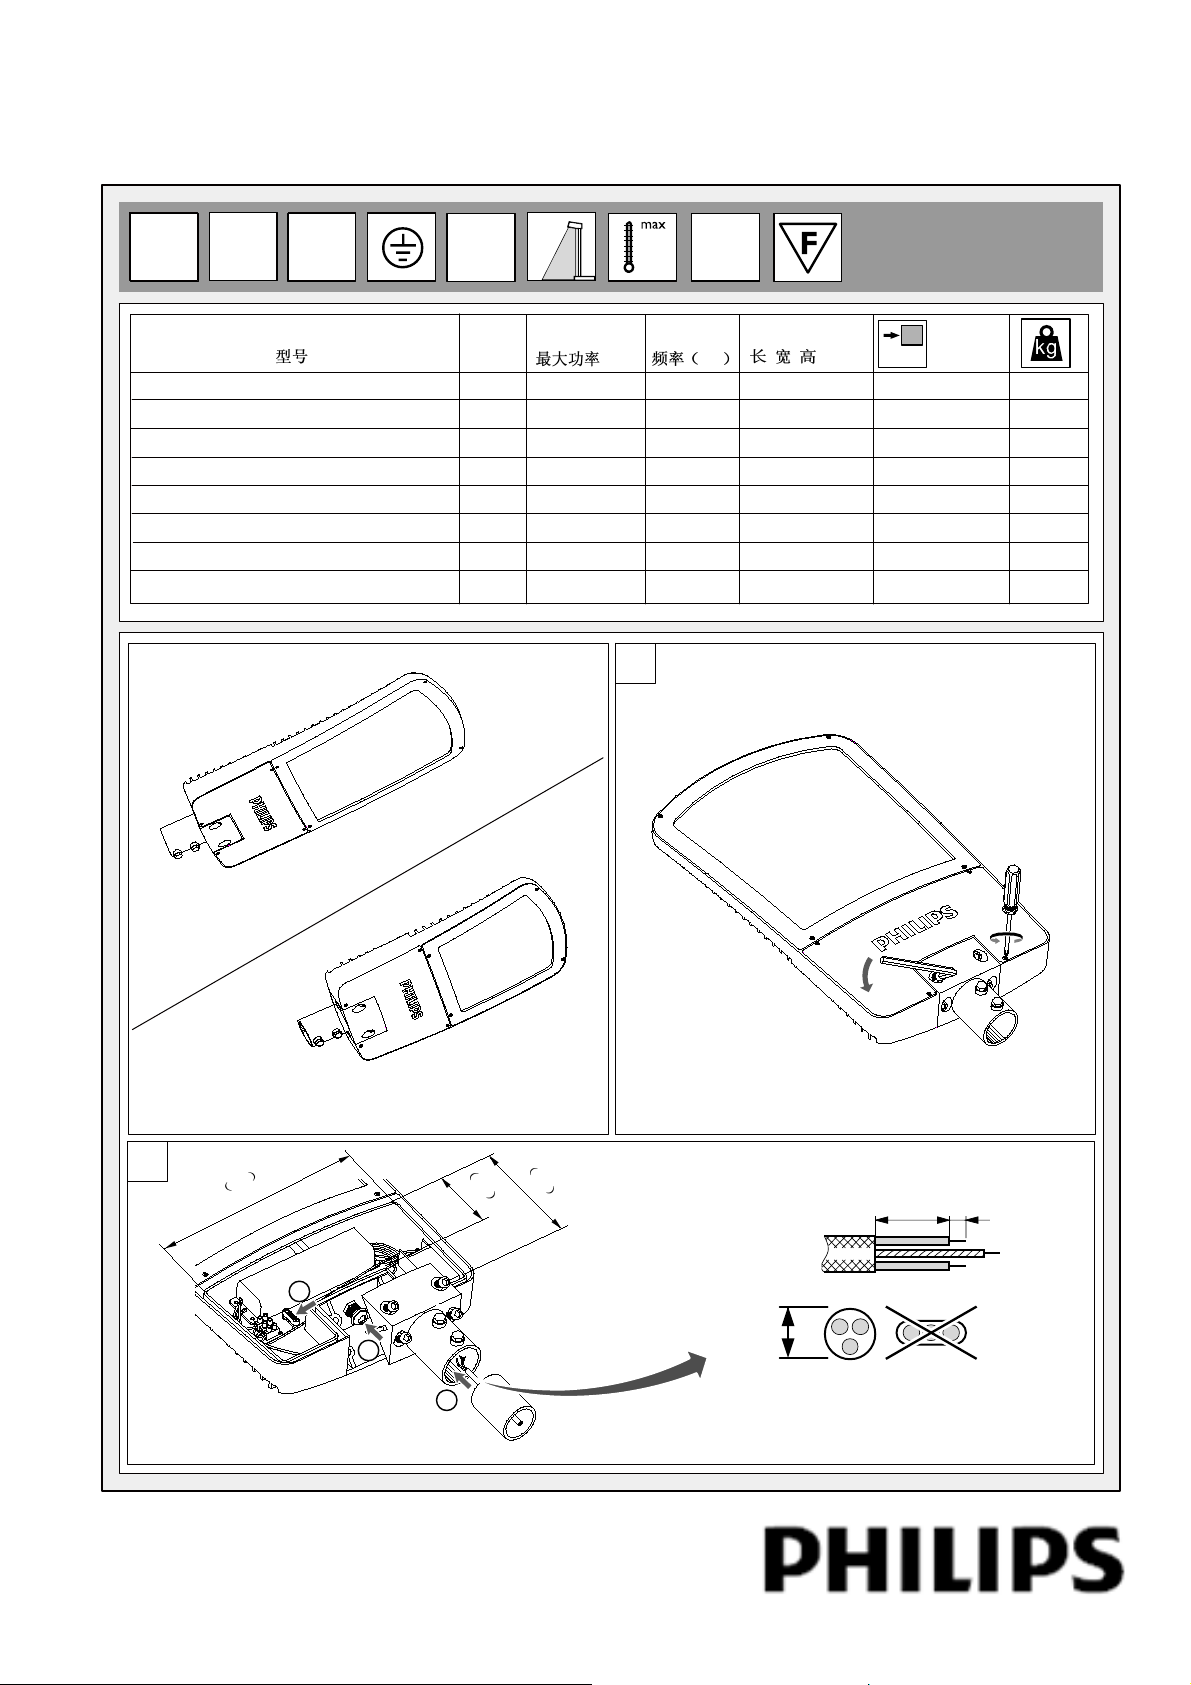
BBP210 120xLED-HP/NW 220-240 60Hz SI
BBP200 60xLED-HP/NW 220-240 60Hz SI
BBP210 120xLED-HP/NW 220-240 50Hz SI
BBP200 60xLED-HP/NW 220-240 50Hz SI
BBP210 120xLED-HP/NW 220-240 60Hz GR
BBP200 60xLED-HP/NW 220-240 60Hz GR
BBP210 120xLED-HP/NW 220-240 50Hz GR
BBP200 60xLED-HP/NW 220-240 50Hz GR
GB
7000
220V~-
240V~
Type
IP66
LEDs
120
60
120
60
120
60
120
60
Pmax(W)
(W)
135
73
135
73
135
73
135
73
IK 04
35°C
F(Hz)
Hz
60
60
50
50
60
60
50
50
LxWxH(mm)
x x (mm)
768x420x105
635x336x92
768x420x105
635x336x92
768x420x105
635x336x92
768x420x105
635x336x92
m
Wind Area
2
迎风面积
0.27
0.17
0.27
0.17
0.27
0.17
0.27
0.17
13.5
9.5
13.5
9.5
13.5
9.5
13.5
9.5
1
BBP210
BBP200
2
Philips Lighting Luminaires (Shanghai) Co., Ltd.
Address: No. 2688, Huyi Road, Jiading, Shanghai, China
Postalcode: 201801
7
3
3
7
4
2
3
1
1
1
0
3
2
1
飞利浦灯具(上海)有限公司
地址:中国,上海市嘉定区马陆镇沪宜公路2688号
邮编:201801
8
1
1
3
6
8
0
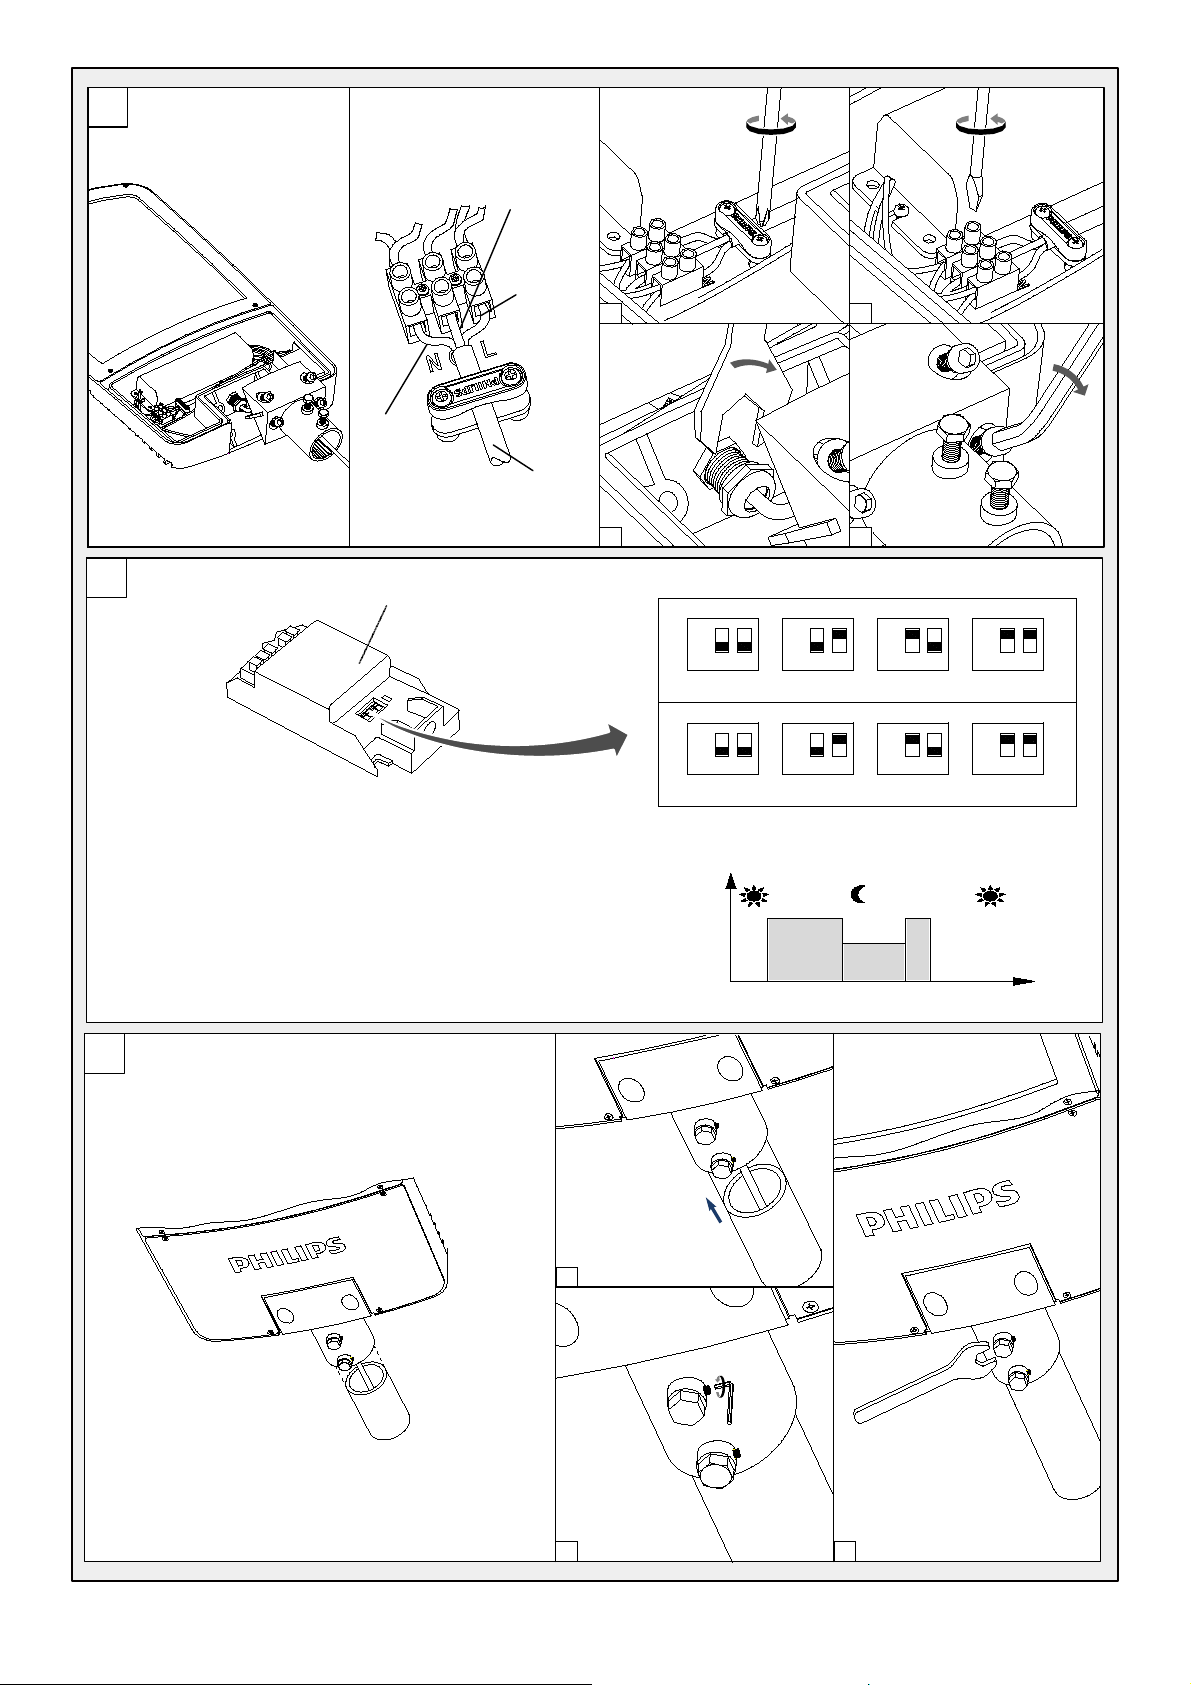
Ф6~12
Power Cable 3x1.5mm
35 7
2
H07RN-F
电源线
Page 2
3
Yellow-green
黄绿色 接地
2
1.5mm
Blue Neutral
兰色 接零线
Dimmer Setting
4
调光器设置
The ESC02 Has a 4-position dip switch. Position 1 and position 2 control the timer t1, from
power on to begin dimming. Position 3 and position 4 control the timer t2, from begin
dimming to the moment back to full power. There are 4 options for t1 and t2 respectively,
totally 16 options for this controller. The indication of how to set t1 and t2 is shown in
Figure A :
ESC02有四个控制位。第一和第二控制位控制时段t1,从通电开始到开始渐变。第三和
第四控制位控制时段t2.从开始渐变到满负荷运行。控制器在t1和t2 分别有四种情形,
总共有16种情况。怎样设置他t1和t2见下图所示:
For instance, if t1 is 6 hour and t2 is 5 hour, the lamp wattage output Is shown in Figure B.
t1 and t2 are preset at 4 hour when delivery from factory. Please adjust them to the time
you want before Installation。
举例,如果t1是6小时,t2是5小时,光源输出功率如图。产品在出厂时,把t1和t2都设
置成了4小时。请在安装使用前,将时间设置成你所需要的设置。
ESC02
2
1.5mm
Earth
2
1.5mm
Brown Live
蓝色 接火线
a
3x1.5mm
2
Power Cable
H07RN-F
电源线
c d
10N· m
Figure A
4H
ON
OFF
12
Dip switch 1,2:Timer t1
4H
ON
OFF
1
Dip switch 3,4:Timer t2
Figure B
Lamp
Power
100%
60%
0.5N· m
b
5H
ON
OFF
12
5H
ON
OFF
2
18:00 24:00 5:00 7:00
1
t1 t2
6H
ON
OFF
12
6H
ON
OFF
2
1
0.5N· m
17N· m
7H
ON
OFF
12
7H
ON
OFF
2
1
2
5
a
0.7Nm
17Nm
c
b
Page 3

If you want to replace the power supply, first operate Step 1, second
operate as shown on right, finally act as Step3.
如果要更换电源,先按照操作步骤1,然后按照图示操作,最后按
第三步操作。
If you want to replace MCPCB module,
operate as shown on right.
如果要更换MCPCB模组,请按下述步
骤。换上新模组,装回原状。
a 2b
a
c
b
d
c
Luminaire installation position 1
灯具安装方式 1
Luminaire installation position 2
灯具安装方式 2
1. The luminaire shall be installed by a qualified electrician and wired in accordance
with the latest IEE electrical regulations or the national requirements.
灯具应由有资格的电工安装,接线要符合IEE 电气标准或国家标准。
2. Turn off the main power when change the power supply or LED module.
更换电源驱动或LED模组时,必须先断电。
d
 Loading...