

Philips Azur GC4310, Azur GC4330, Azur GC4340, Azur GC4320 User Manual

Azur
GC4340, GC4330, GC4320, GC4310

2

ENGLISH 4
DEUTSCH 12
NORSK 21
SVENSKA 29
SUOMI 37
DANSK 45
GC4340, GC4330, GC4320, GC4310
Important
Read these instructions for use carefully before using the appliance and
save them for future reference.
◗ Check if the voltage indicated on the type plate corresponds to
the local mains voltage before you connect the appliance.
◗ Check the cord regularly for possible damage.
◗ Do not use the appliance if the plug, the cord or the appliance
itself is damaged.
◗ If the mains cord is damaged, it must be replaced by Philips, a
service centre authorised by Philips or similarly qualified persons
in order to avoid a hazard.
◗ Never leave the iron unattended when it is connected to the
mains.
◗ Never immerse the iron in water.
◗ Keep the appliance out of the reach of children.
◗ The soleplate of the iron can become extremely hot and may
cause burns if touched. Do not allow the cord to come into
contact with the soleplate when it is hot.
◗ When you have finished ironing,when you clean the appliance,
when you fill or empty the water tank and also when you leave
the iron even for a short while: set the steam control to position
O, put the iron on its heel and remove the mains plug from the
wall socket.
◗ This appliance is intended for household use only.
Before first use
C
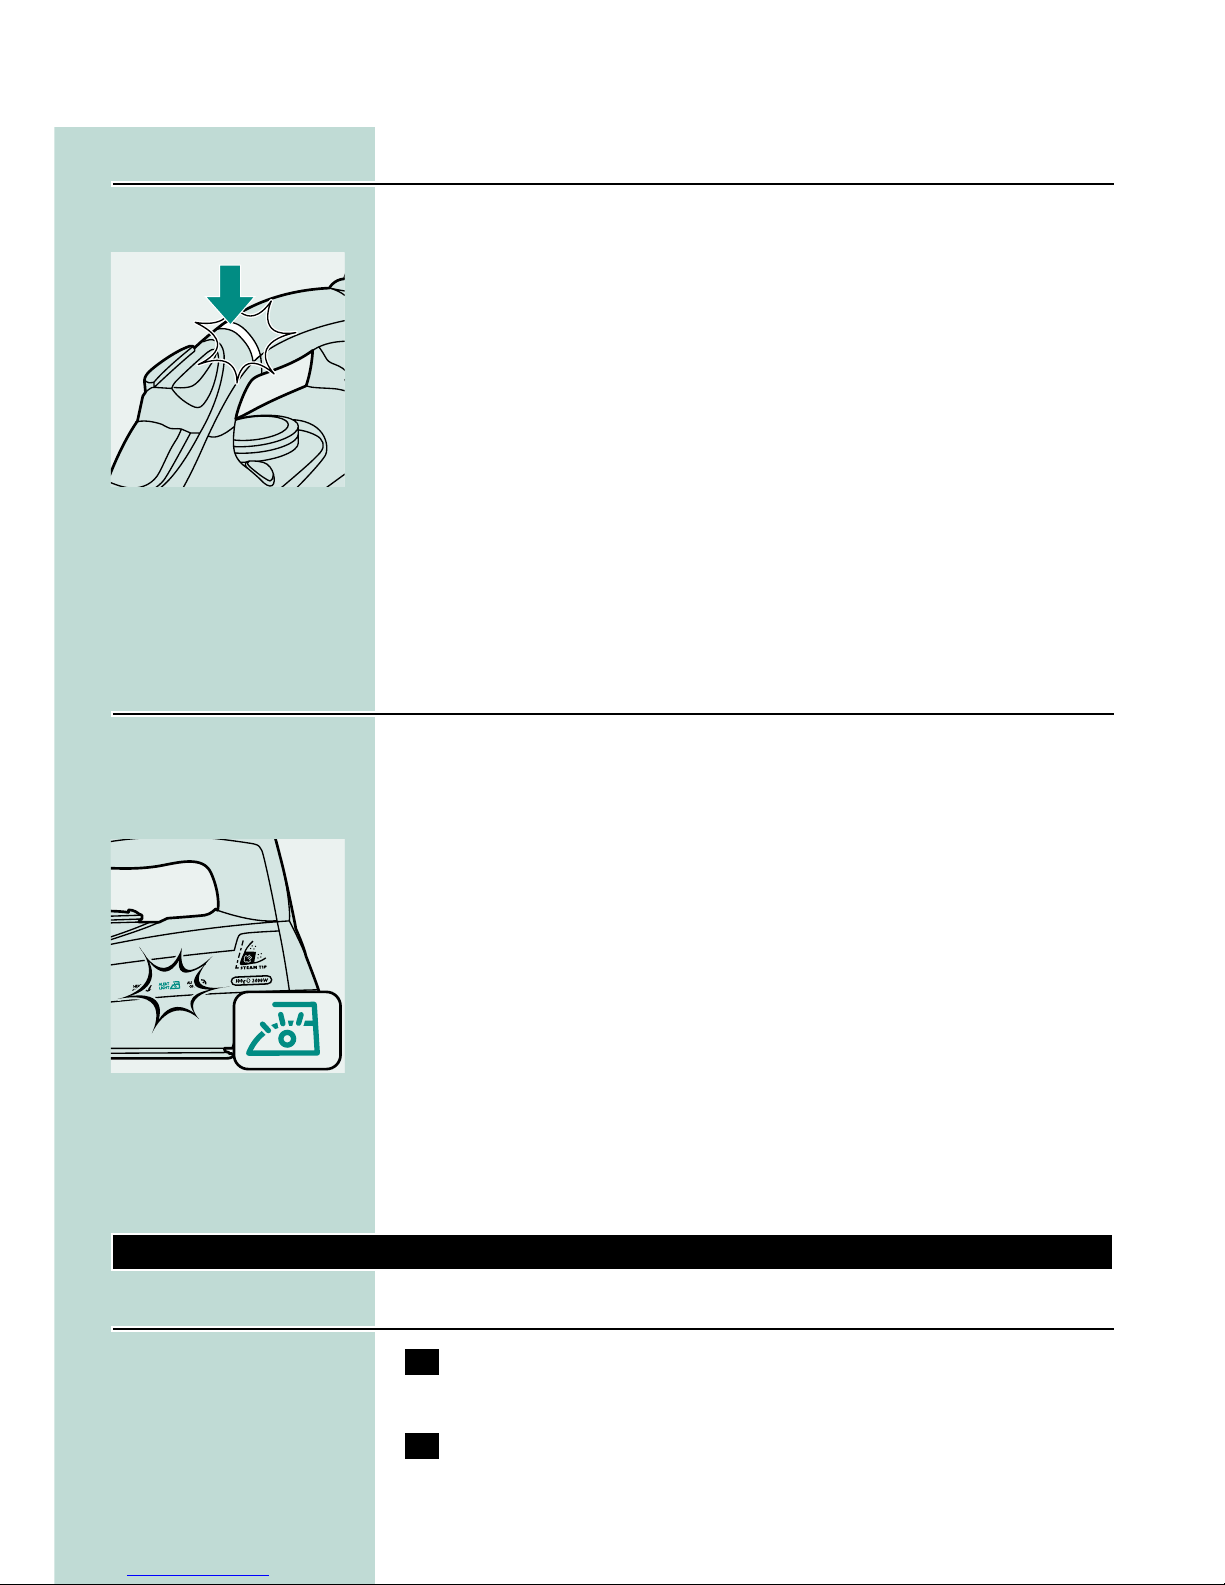
1 Remove the heat-resistant protective cover from the soleplate
(type GC4340 only). Remove any sticker or protective foil
from the soleplate.
B
The iron may give off some smoke when you use it for the first time.This
will cease after a short while.
Preparing for use
Filling the water tank
Never immerse the iron in water.
1 Make sure the appliance is unplugged.
ENGLISH4
C
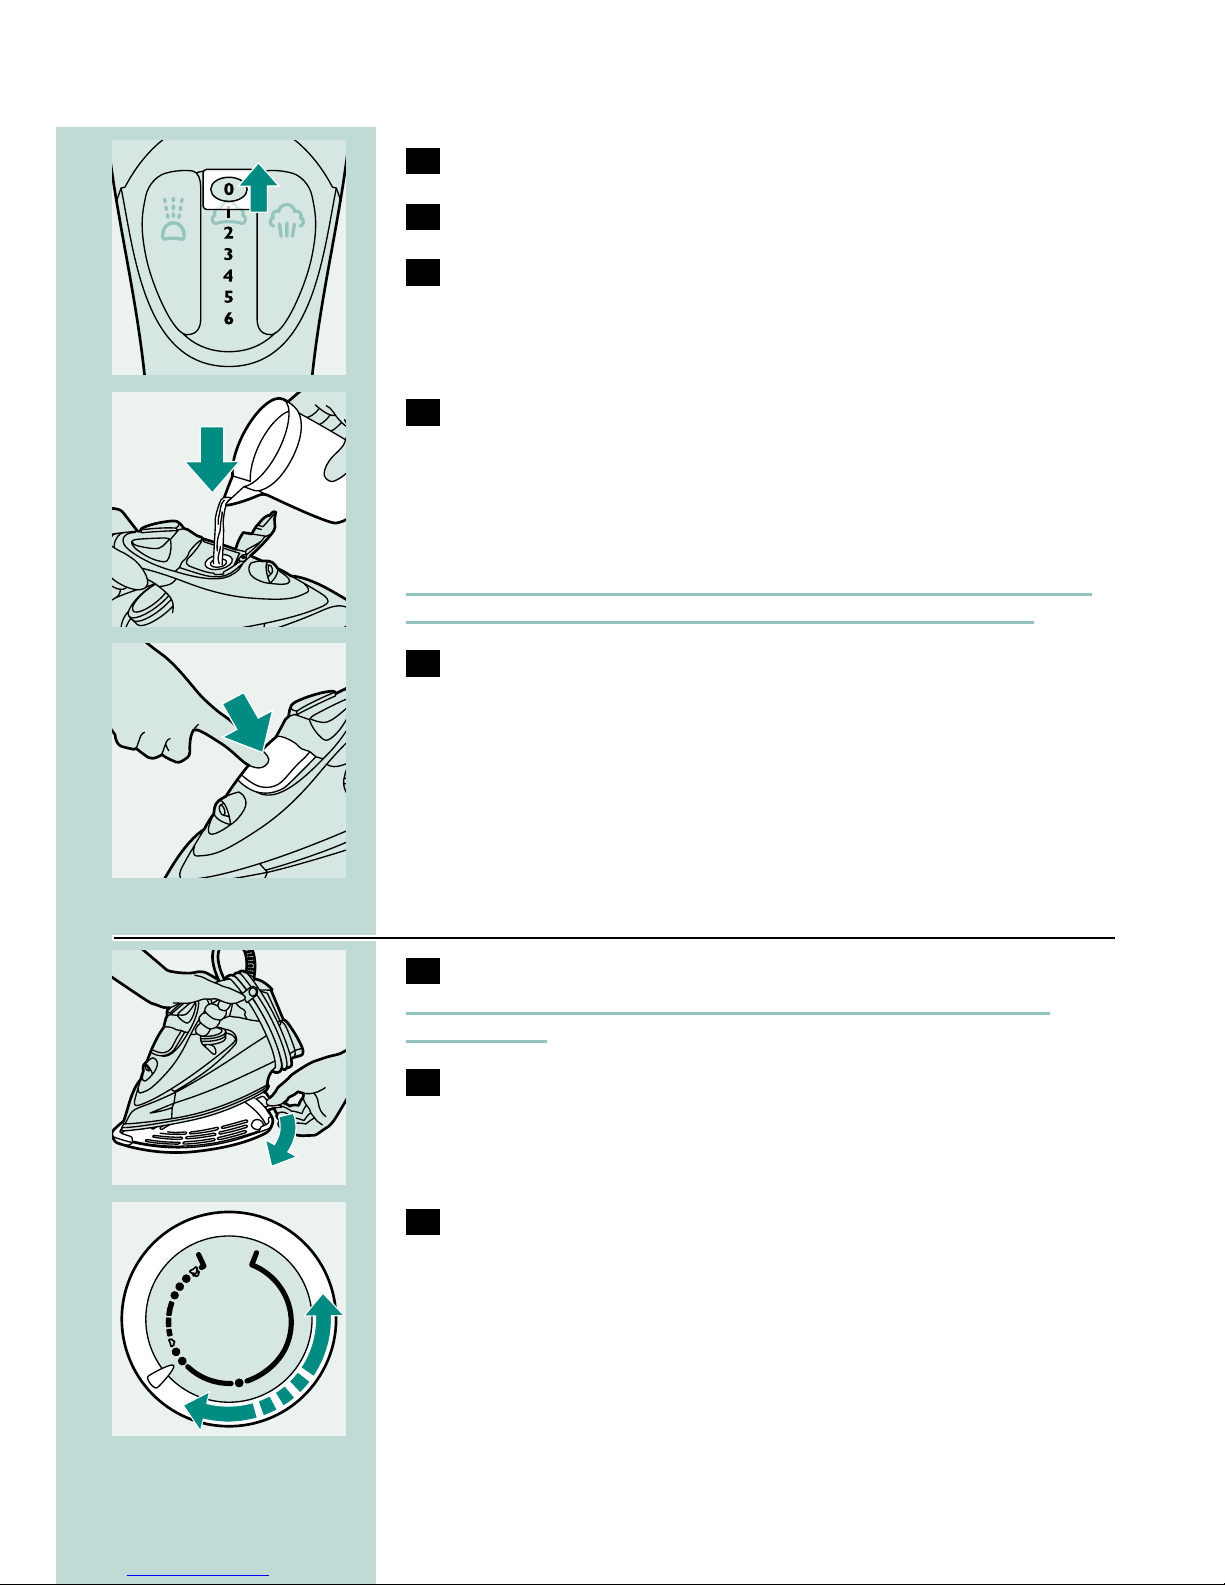
2 Set the steam control to position O (= no steam).
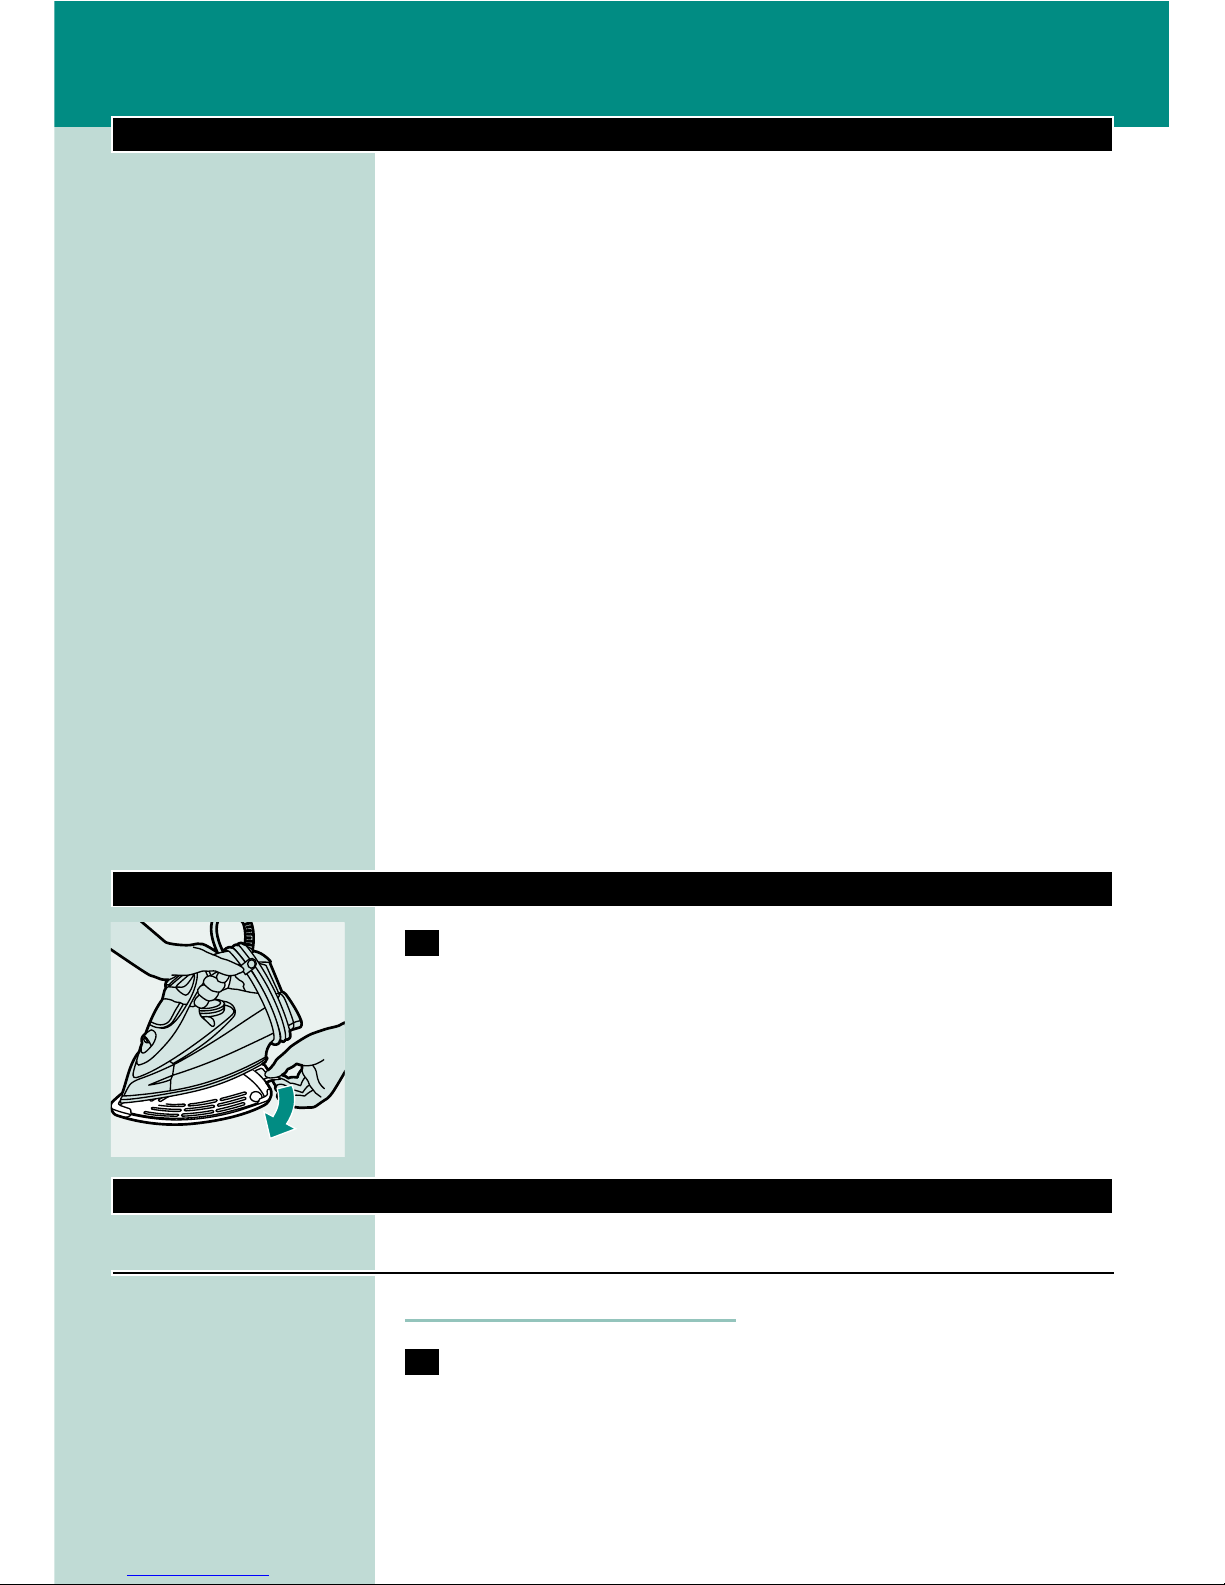
3 Open the cap of the filling opening.
4 Tilt the iron backwards.
C
5 Fill the water tank with tap water up to the maximum level by
means of the filling cup.
Do not fill the tank beyond the MAX indication.
◗ If the tap water in your area is very hard, we advise you to use
distilled water.
Do not put perfume, vinegar, starch, descaling agents, ironing additives
chemically descaled water or other chemicals in the water tank.
C
6 Close the filling cap (Click!).
Setting the temperature
C
1 Type GC4340 only: remove the heat-resistant protective cover.
Do not leave the heat-resistant protective cover on the soleplate
during ironing.
2 Put the iron on its heel.
C
3 Set the required ironing temperature by turning the
temperature dial to the appropriate position.
Check the laundry care label for the required ironing temperature:
- 1 Synthetic fabrics (e.g. acrylic, nylon, polyamide, polyester)
- 1 Silk
- 2 Wool
- 3 Cotton, linen
If you do not know what kind(s) of fabric(s) an article is made of,
determine the right ironing temperature by ironing a part that will not
be visible when you wear or use the article.
ENGLISH 5
LINEN
SILK
NYLON
WOOL
COTTON
MIN
MAX
Silk, woollen and synthetic materials: iron the reverse side of the fabric
to prevent shiny patches.Avoid using the spray function to prevent
stains.
Start ironing the articles that require the lowest ironing temperature,
such as those made of synthetic fibres.
4 Put the mains plug in an earthed wall socket.
C
5 When the amber temperature pilot light has gone out, wait a
while before you start ironing.
The amber pilot light will go on from time to time during ironing.
Using the appliance
Steam ironing
1 Make sure that there is enough water in the water tank.
2 Select the recommended ironing temperature (see chapter
'Preparing for use', section 'Setting the temperature').
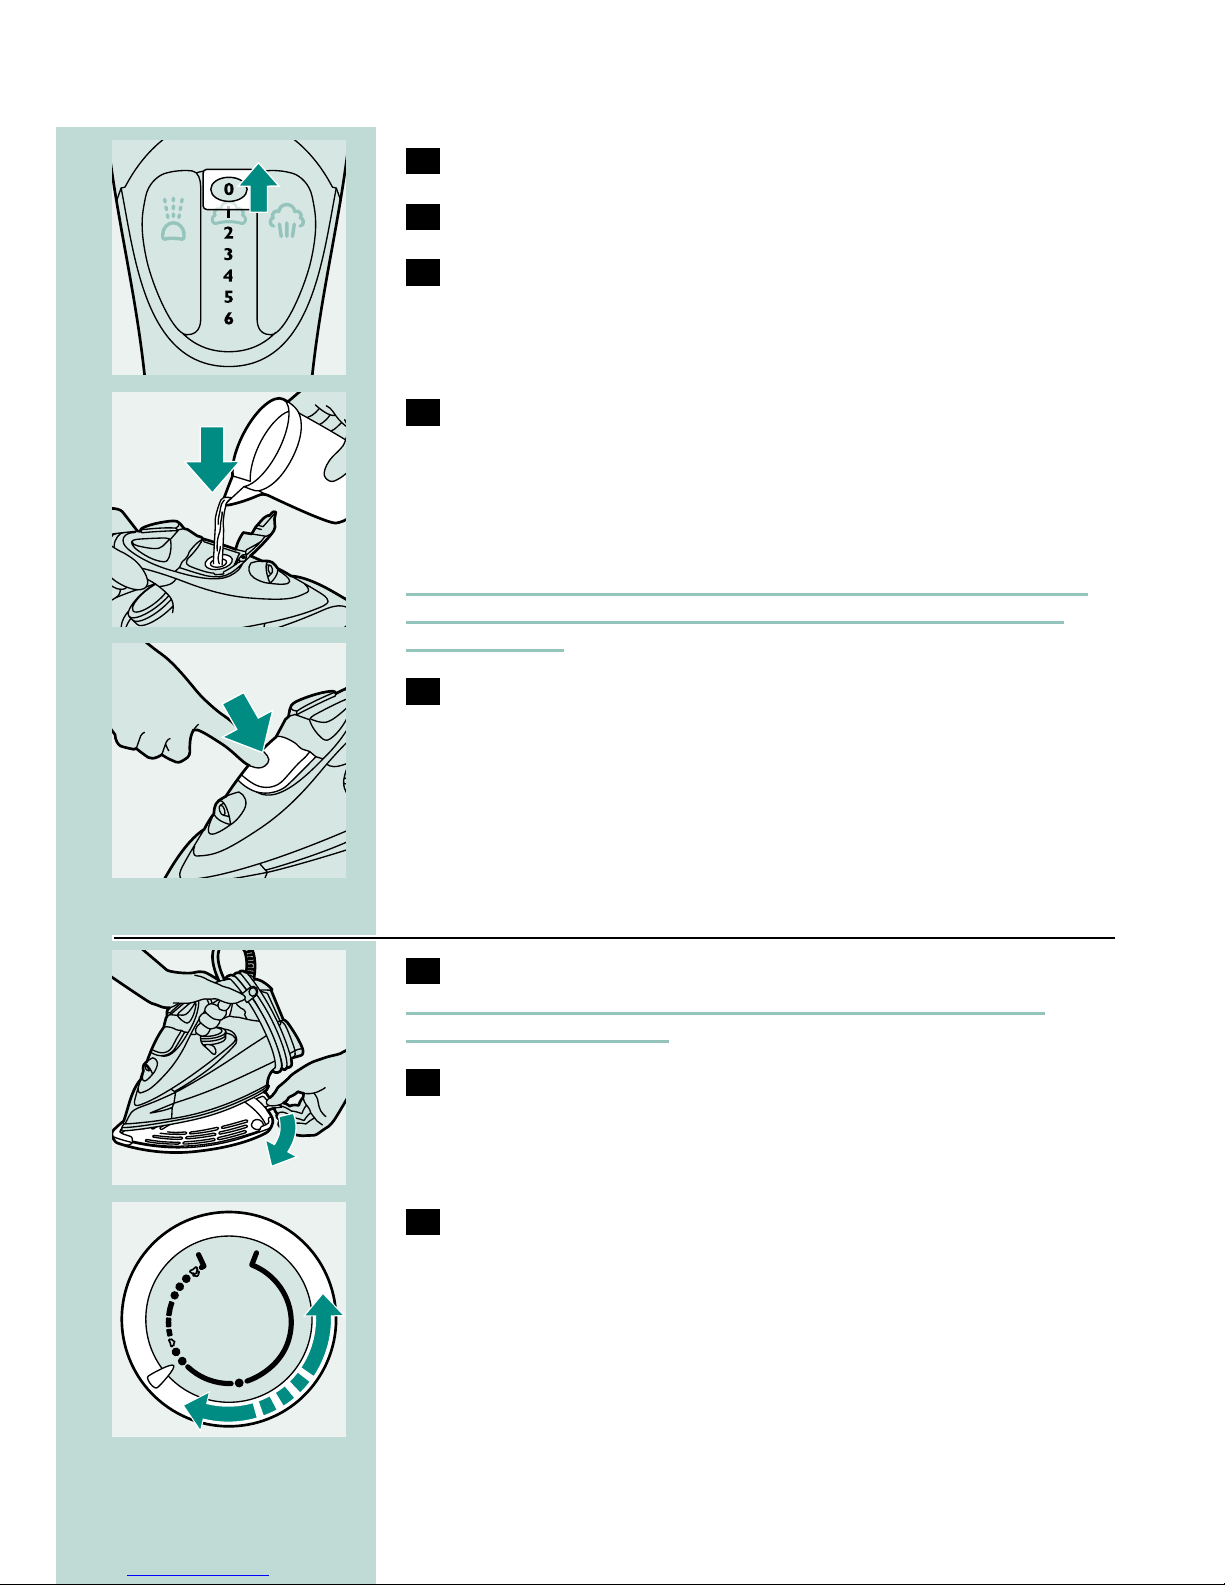
C
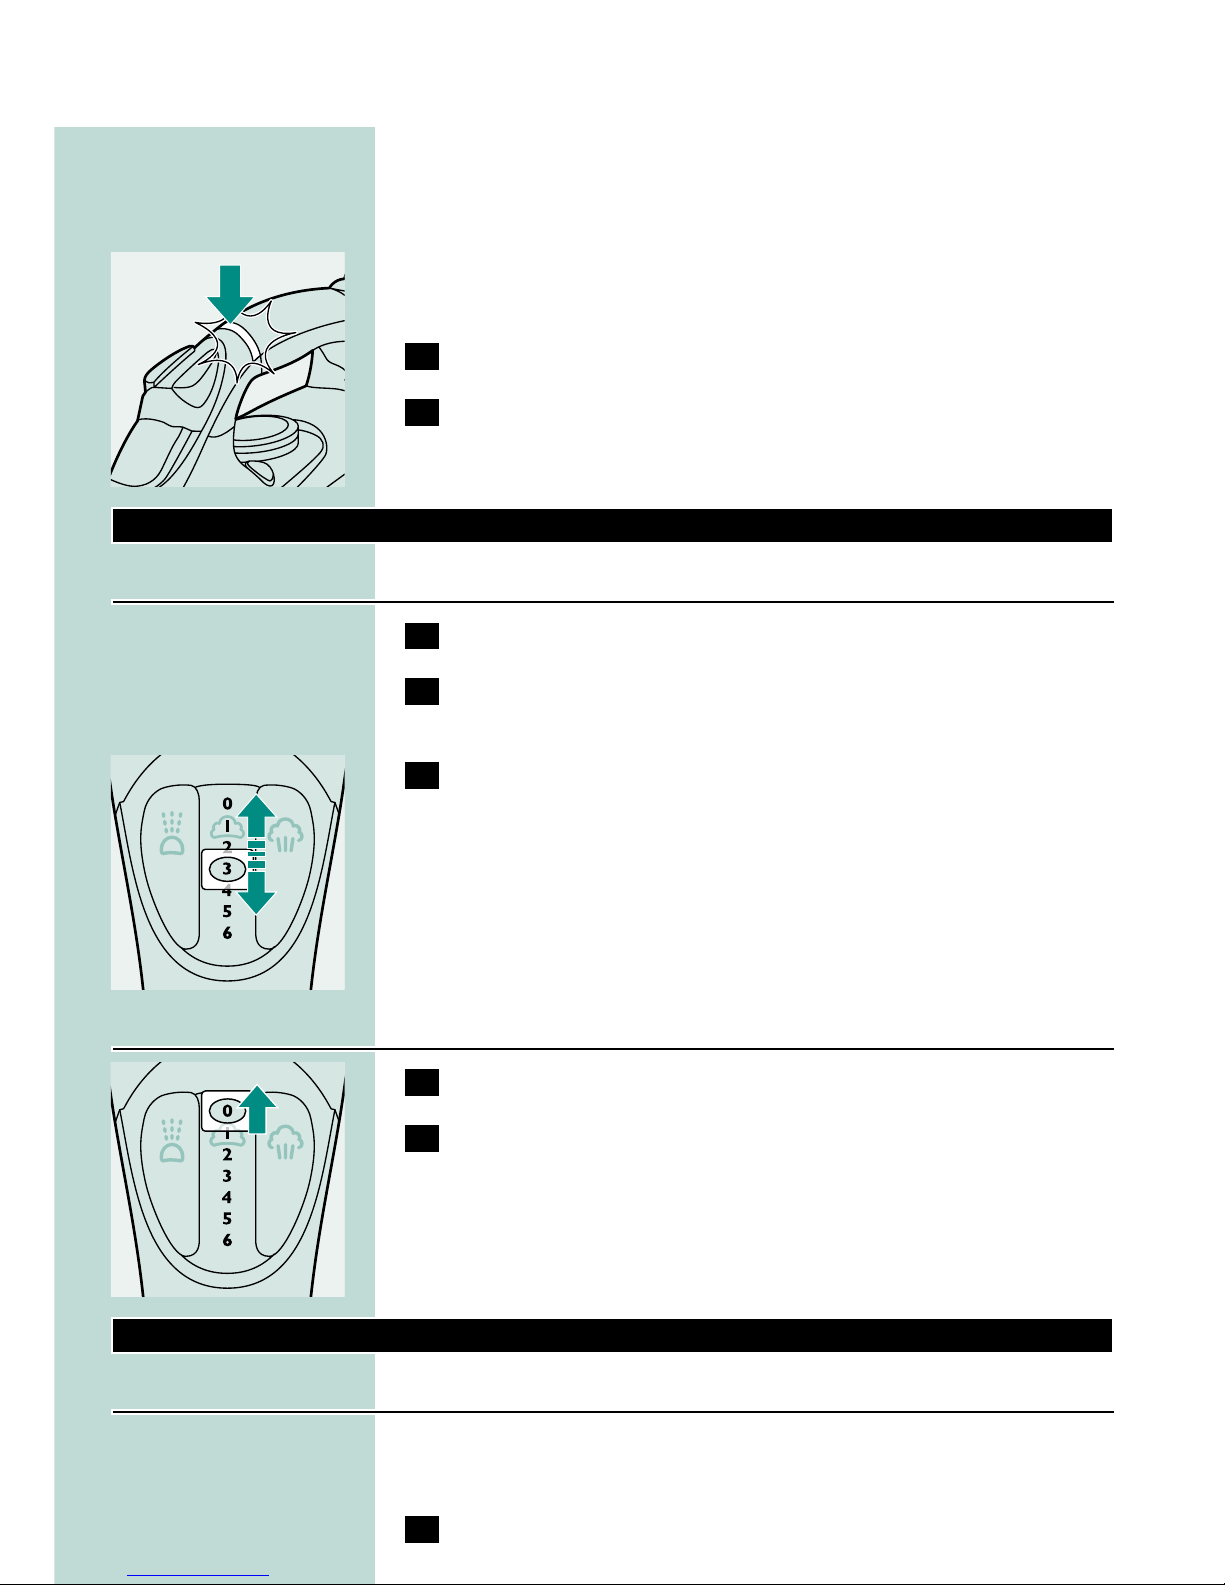
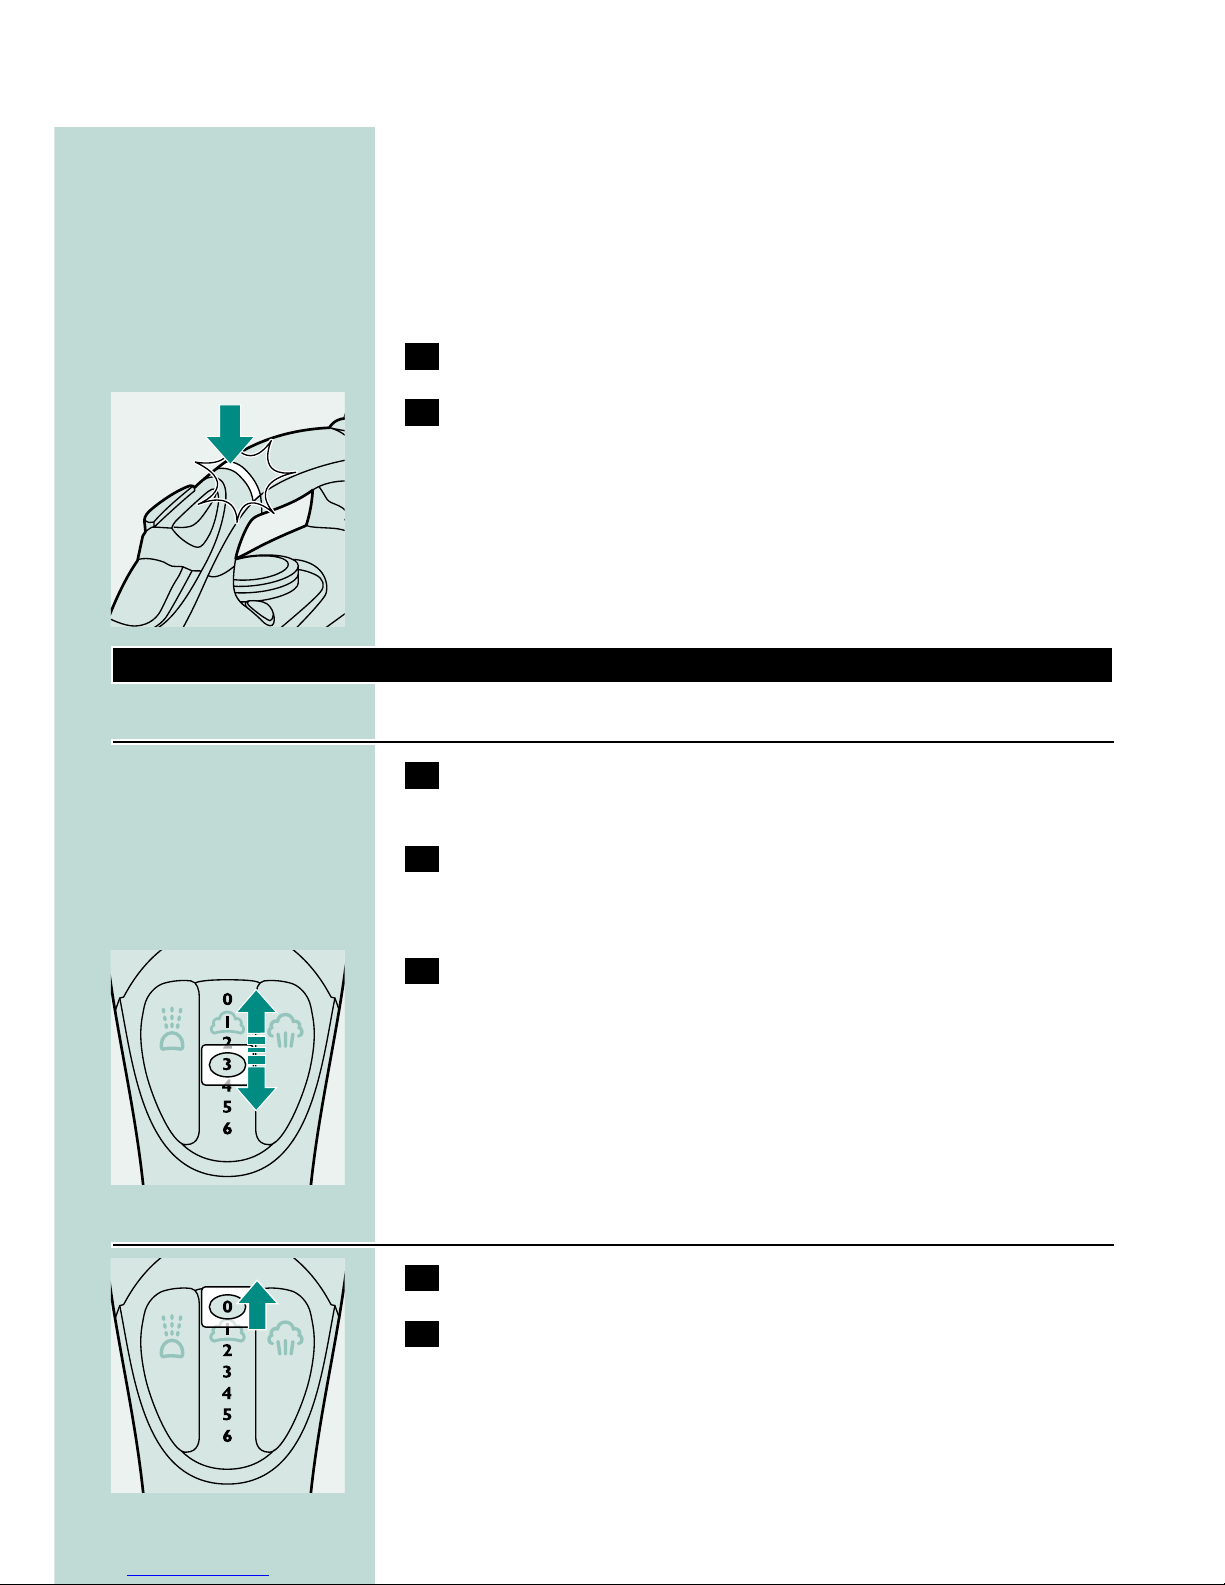
3 Select the appropriate steam setting. Make sure that the steam
setting you select is suitable for the ironing temperature
selected:
- 1 - 3 for moderate steam (temperature settings 2 to 3)
- 4 - 6 for maximum steam (temperature settings 3 to MAX)
B
The iron will start steaming as soon as the set temperature has been
reached.
Ironing without steam
C
1 Set the steam control to position O (= no steam).
2 Select the recommended ironing temperature (see chapter
'Preparing for use', section 'Setting the temperature').
Features
Spray function
You can use the spray function to remove stubborn creases at any
temperature.
1 Make sure that there is enough water in the water tank.
ENGLISH6
C
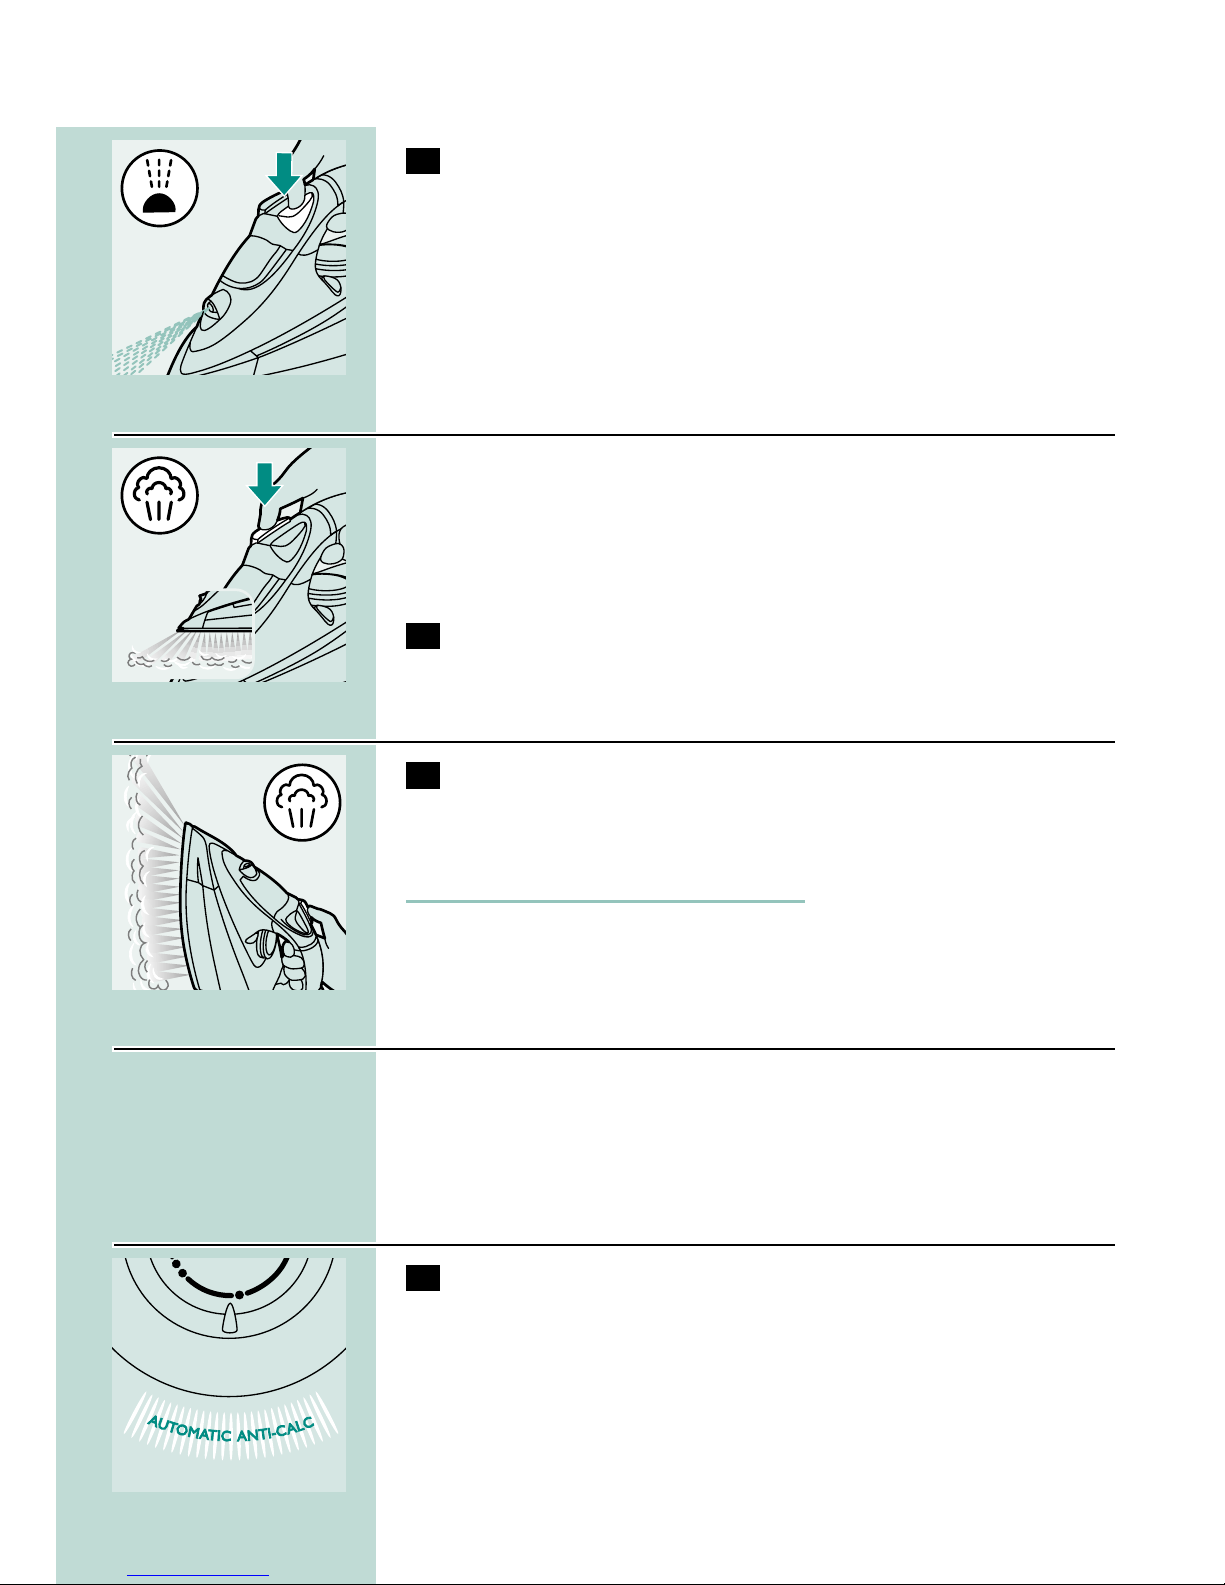
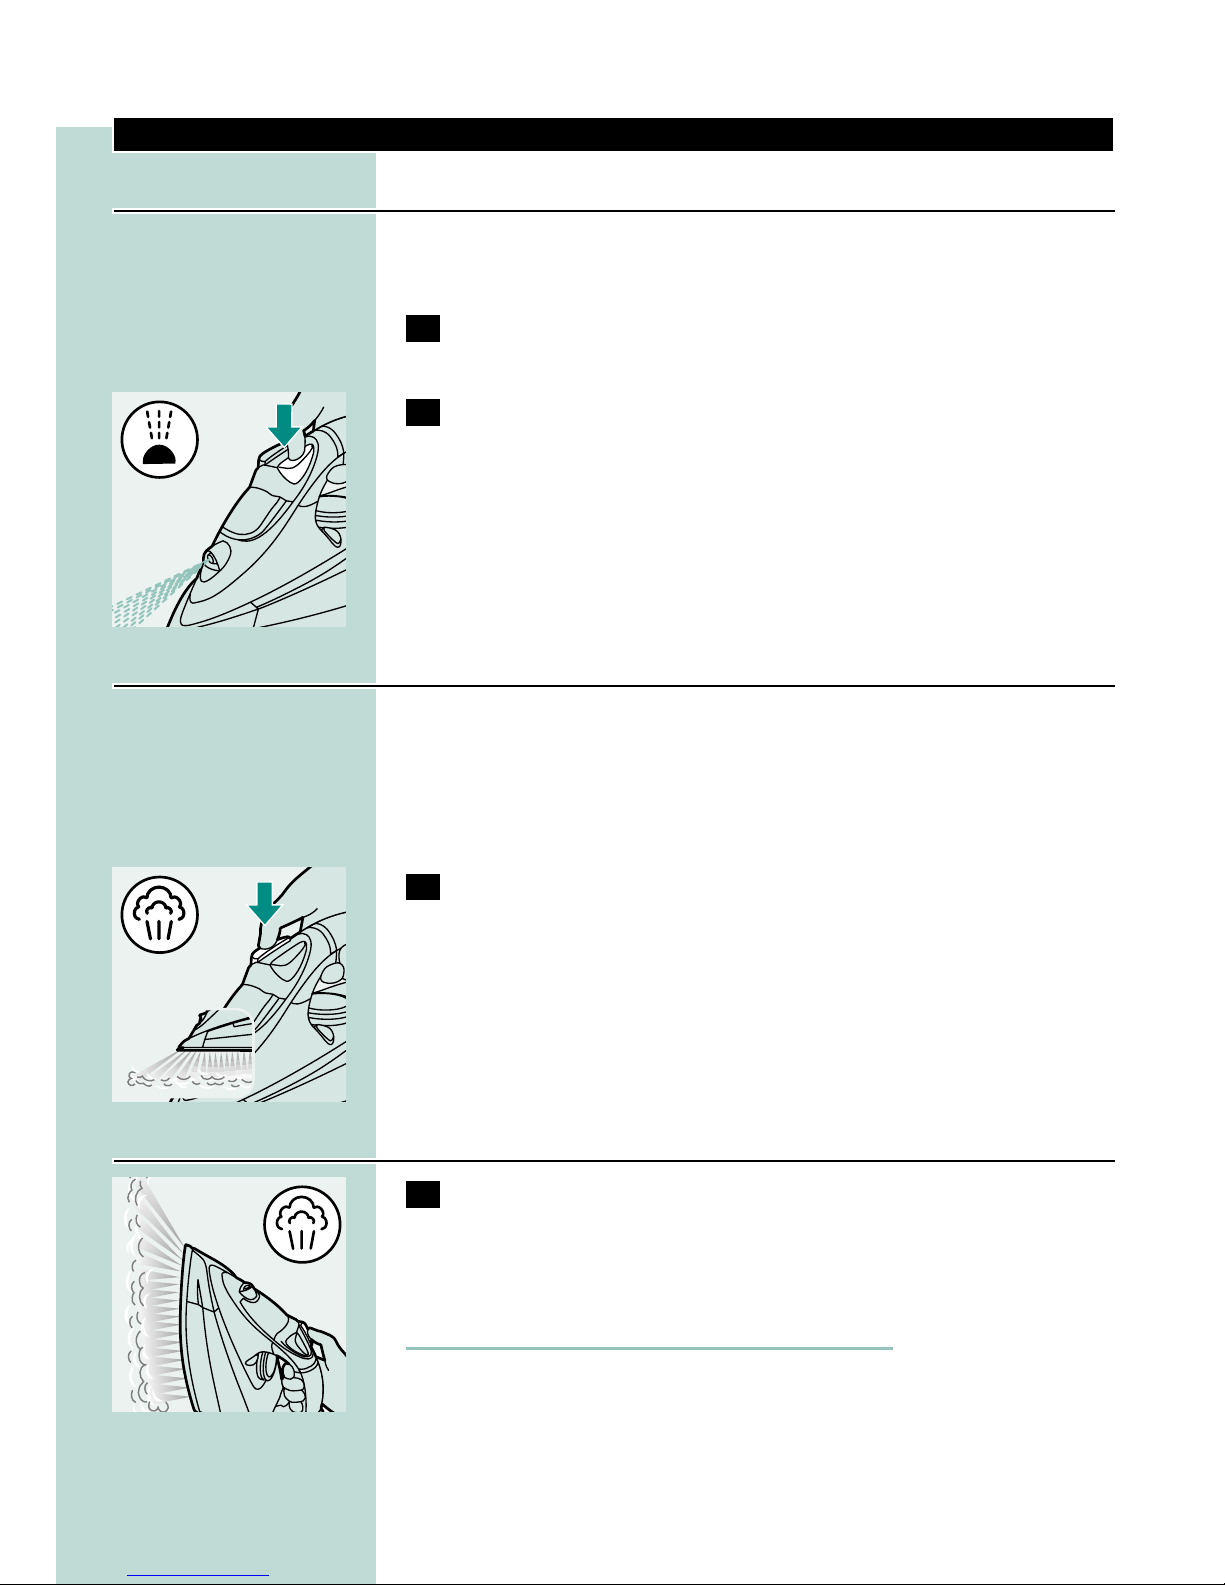
2 Press the spray button several times to moisten the article to
be ironed.
Concentrated shot of steam from the special Steam Tip`
A powerful shot of concentrated steam helps remove stubborn
creases.The forward-directed concentrated shot of steam enhances
the distribution of steam into every part of your garment.
The shot-of-steam function can only be used at temperature settings
between 2 and MAX.
C
1 Press and release the shot-of-steam button.
Vertical shot of steam
C
1 The shot-of-steam function can also be used when you hold
the iron in vertical position.
This is useful for removing creases from hanging clothes, curtains etc.
Never direct the steam towards people.
Drip stop
This iron is equipped with a drip-stop function: the iron automatically
stops producing steam when the temperature is too low to prevent
water from dripping out of the soleplate.When this happens you may
hear a sound.
Automatic anti-calc system
C
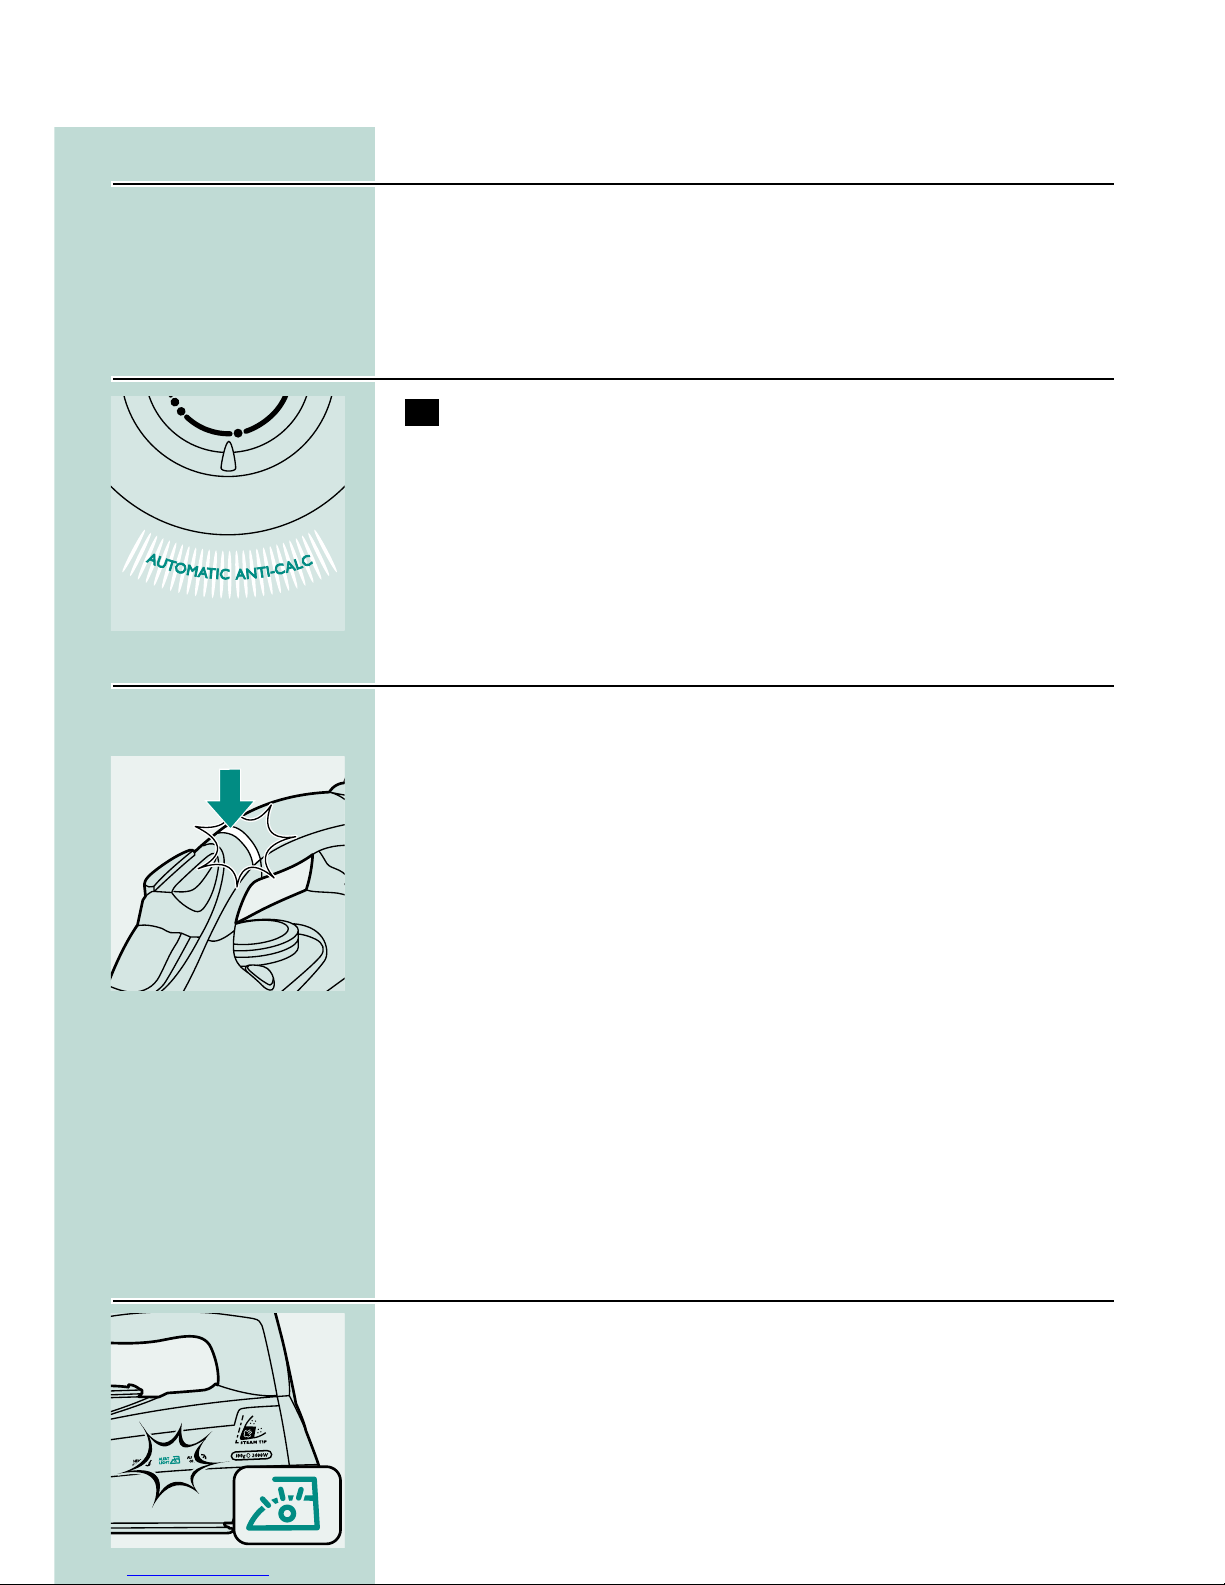
1 The built-in anti-calc system reduces the build-up of scale and
guarantees a longer life for the iron.
ENGLISH 7
Electronic safety shut-off function
B
Type GC4320 only.
C
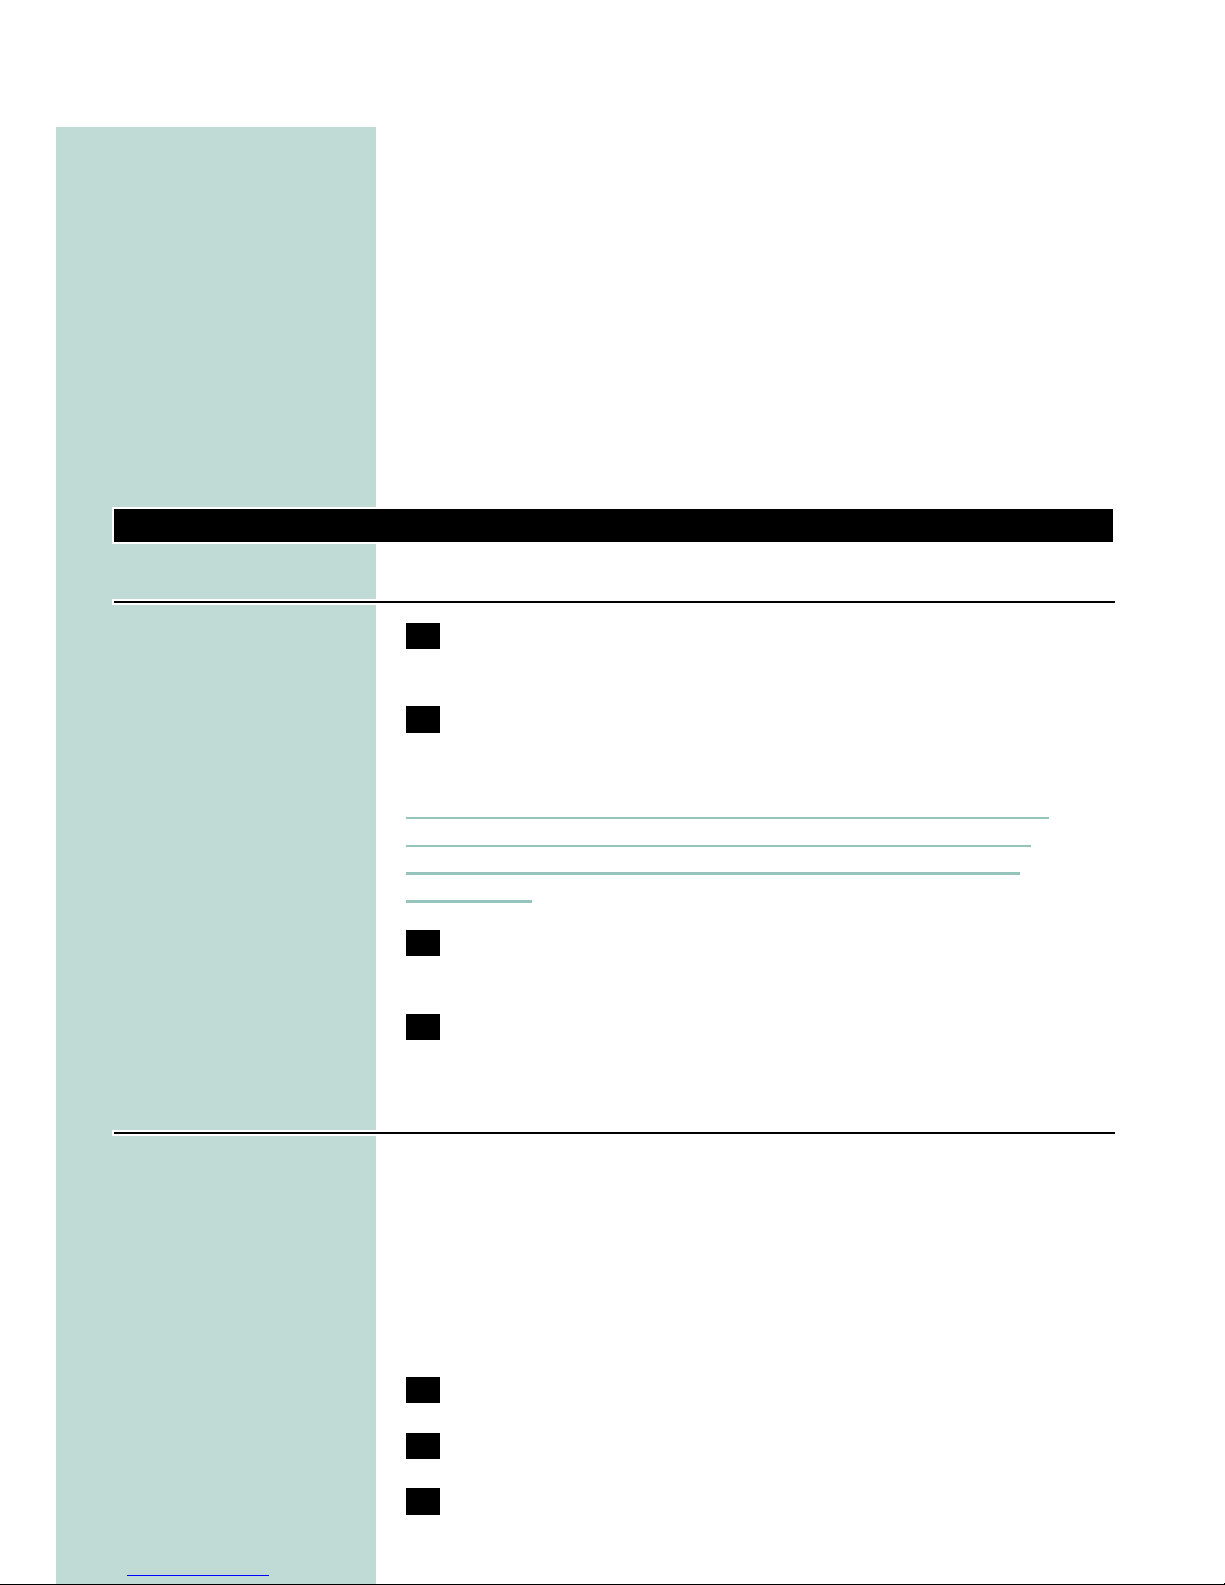
◗ The electronic safety shut-off function automatically switches off
the iron if it has not been moved for a while.
◗ The red auto-off pilot light starts blinking to indicate that the iron
has been switched off by the safety shut-off function.
To let the iron heat up again:
- Pick up the iron or move it slightly.
- The red auto-off pilot light goes out. If the temperature of the
soleplate has dropped below the set ironing temperature, the amber
temperature pilot light goes on.
- If the amber pilot light goes on after you have moved the iron, wait
for it to go out before you start ironing.
- If the amber pilot light does not go on after you move the iron, the
soleplate still has the right temperature and the iron is ready for use.
Alert light and electronic safety shut-off function
B
Types GC4340 and GC4330.
The iron is equipped with a blue alert light.
C
◗ The blue alert light burns as long as the iron is plugged in.
◗ The blue alert light starts blinking to indicate that the iron has
been switched off by the safety shut-off function.
To let the iron heat up again:
- Pick up the iron or move it slightly.
- The blue alert light stops blinking. If the temperature of the soleplate
has dropped below the set ironing temperature, the amber
temperature pilot light goes on.
- If the amber pilot light goes on after you have moved the iron, wait
for it to go out before you start ironing.
- If the amber pilot light does not go on after you move the iron, the
soleplate still has the right temperature and the iron is ready for use.
Cleaning and maintenance
After ironing
1 Remove the mains plug from the wall socket and let the iron
cool down.
2 Wipe flakes and any other deposits off the soleplate with a
damp cloth and a non-abrasive (liquid) cleaning agent.
ENGLISH8
To keep the soleplate smooth, you should avoid hard contact with
metal objects. Never use a scouring pad, vinegar or other chemicals to
clean the soleplate.
3 Clean the upper part of the iron with a damp cloth.
4 Regularly rinse the water tank with water. Empty the water
tank after cleaning.
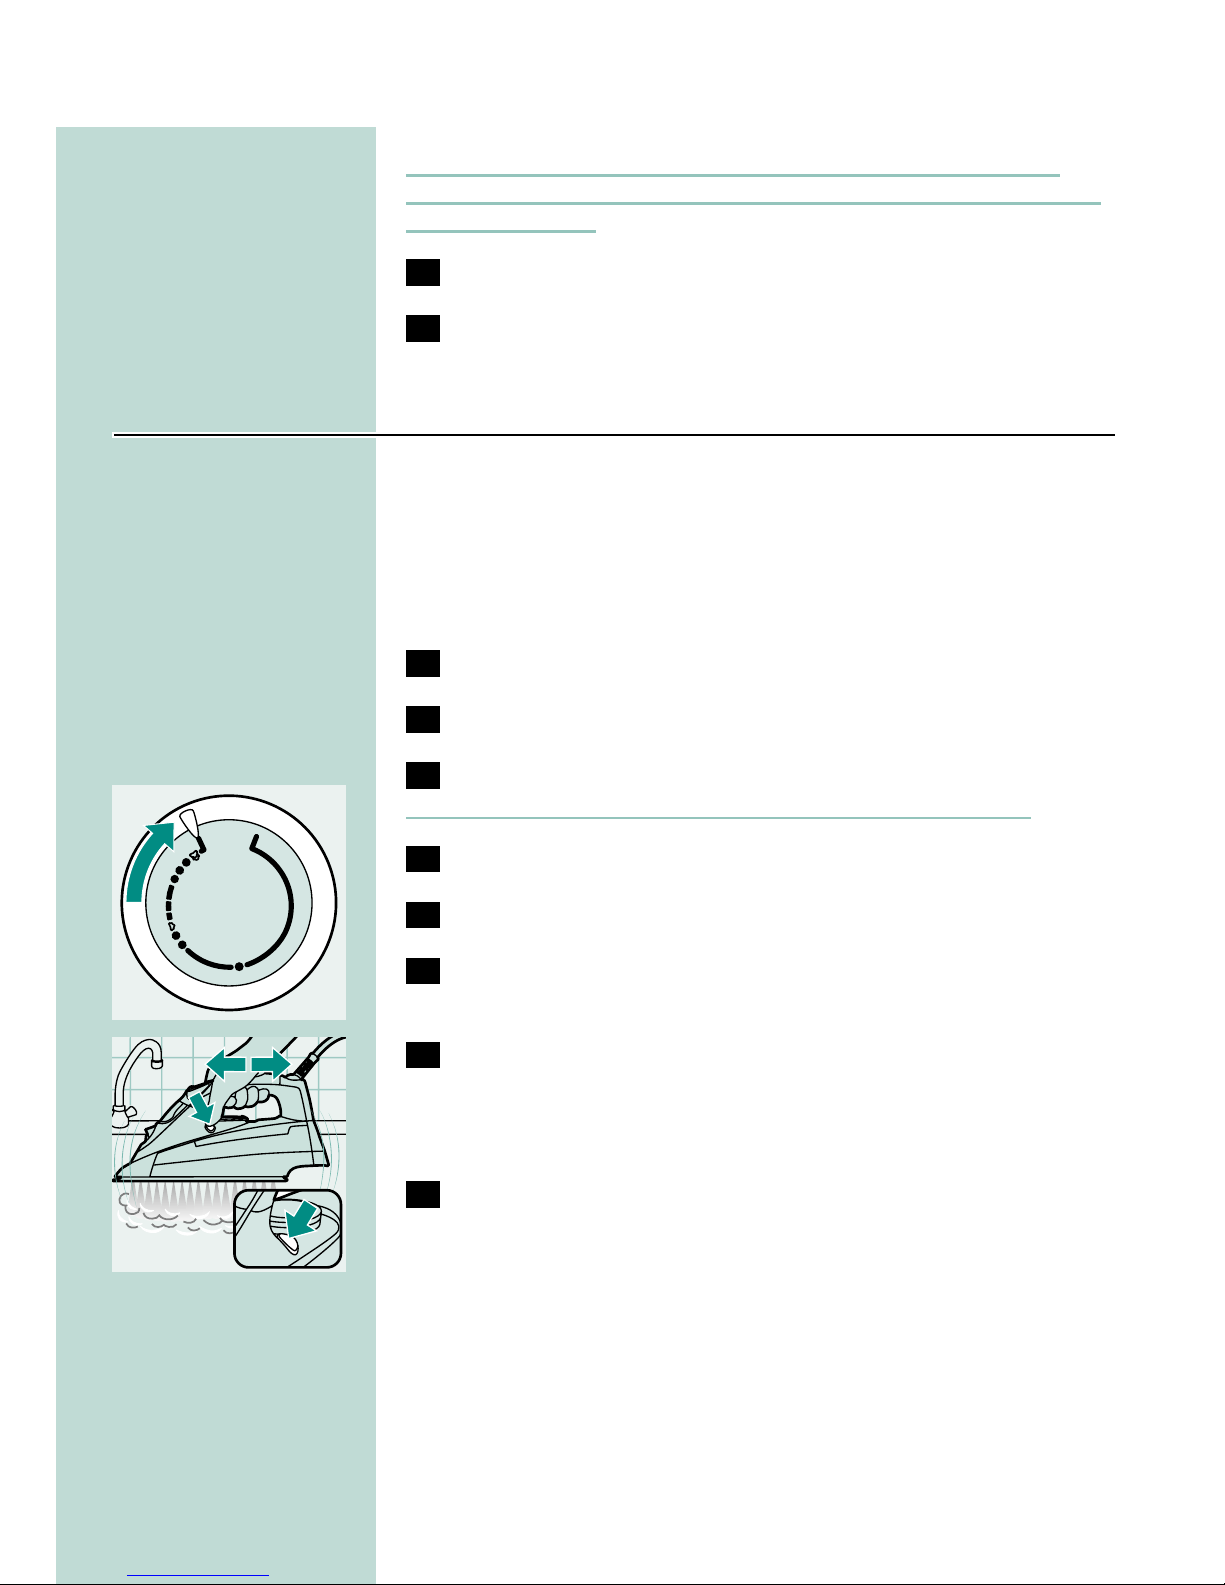
Calc-clean function
You can use the calc-clean function to remove scale and impurities.
◗ Use the calc-clean function once every two weeks.If the water in
your area is very hard (i.e. when flakes come out of the soleplate
during ironing), the calc-clean function should be used more
frequently.
1 Make sure the appliance is unplugged.
2 Set the steam control to position O.
3 Fill the water tank to the maximum level.
Do not put vinegar or other descaling agents in the water tank.
C
4 Select the maximum ironing temperature.
5 Put the plug in the wall socket.
6 Unplug the iron when the amber temperature pilot light has
gone out.
C
7 Hold the iron over the sink, press and hold the calc-clean
button and gently shake the iron to and fro.
Steam and boiling water will come out of the soleplate. Impurities and
flakes (if any) will be flushed out.
8 Release the calc-clean button as soon as all the water in the
tank has been used up.
Repeat the calc-clean process if the iron still contains a lot of impurities.
After the calc-clean process
- Put the plug in the wall socket and let the iron heat up to allow the
soleplate to dry.
- Unplug the iron when it has reached the set ironing temperature.
- Move the hot iron gently over a piece of used cloth to remove any
water stains that may have formed on the soleplate.
- Let the iron cool down before you store it.
ENGLISH 9
LINEN
SILK
NYLON
WOOL
COTTON
MIN
MAX

Storage
1 Make sure the appliance is unplugged and set the steam control
to position O.
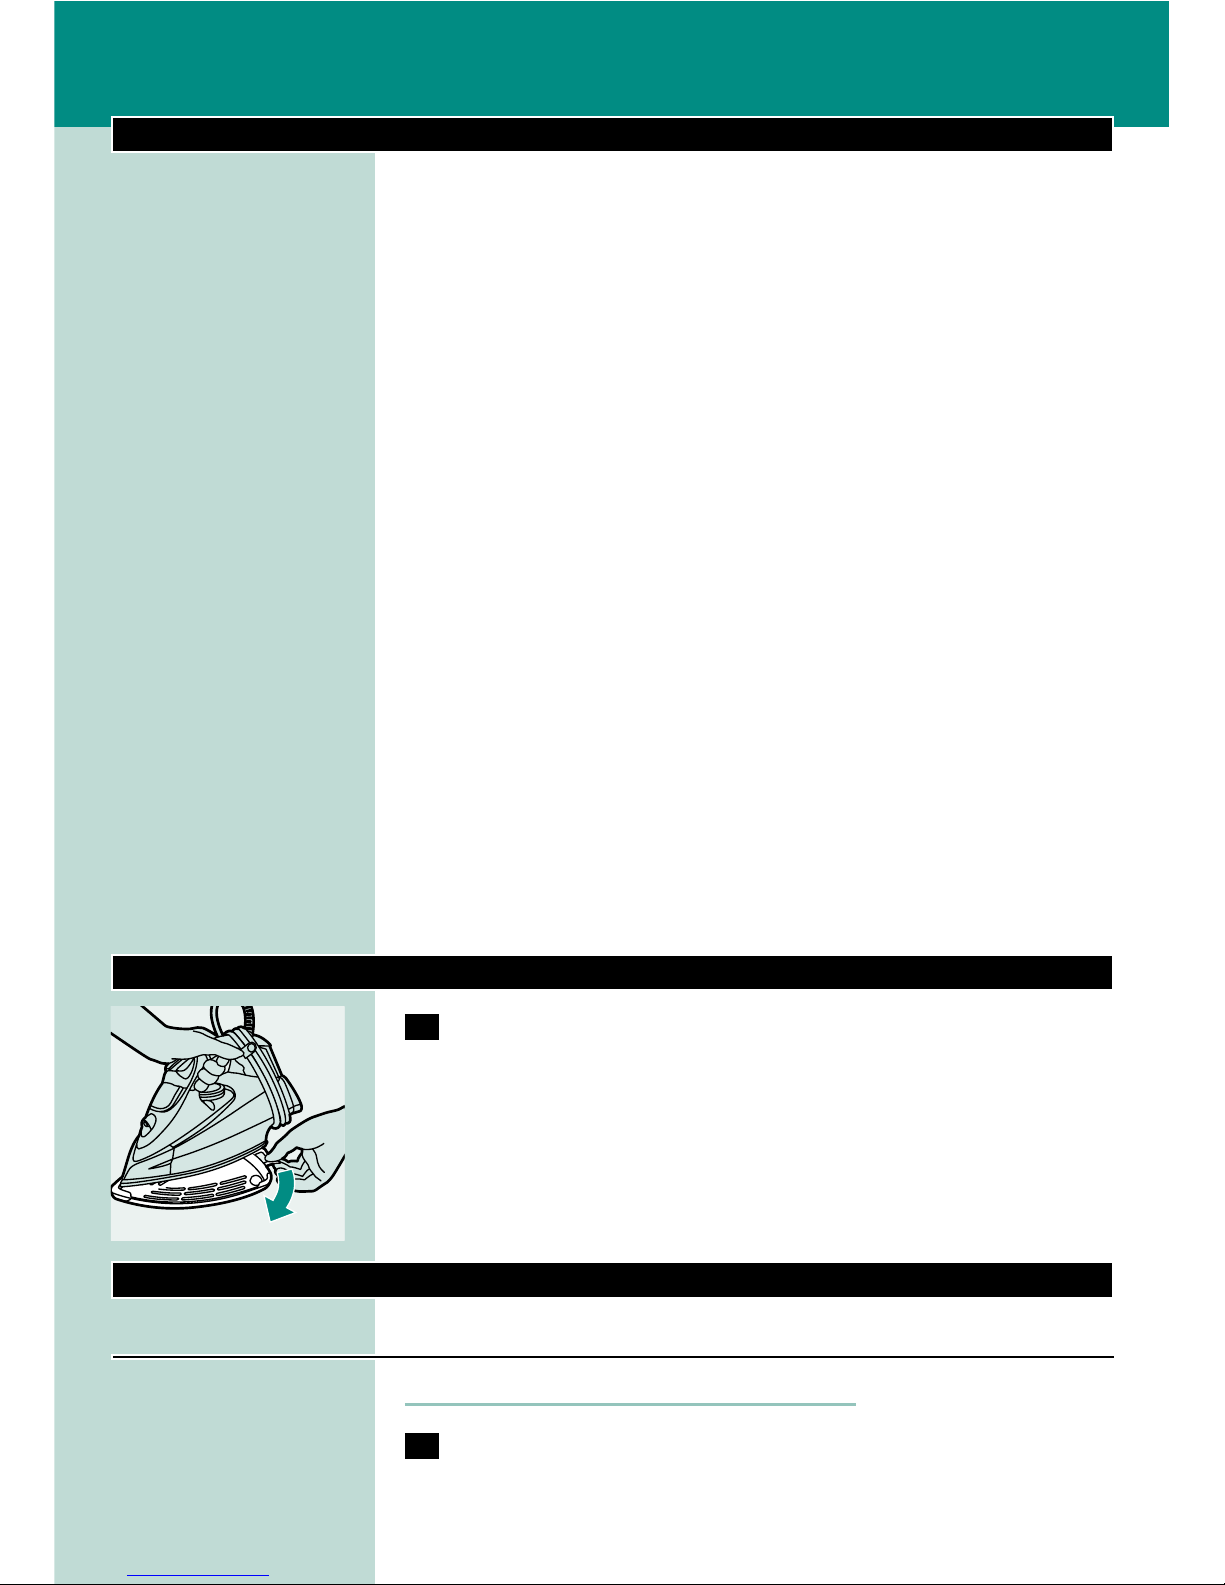
C
2 Empty the water tank.
C
3 Let the iron cool down.Wind the mains cord around the cord
storage facility and fix it with the cord clip.
4 Always store the emptied iron horizontally on a stable surface
and use a cloth to protect the soleplate.
Heat-resistant protective cover
B
Type GC4340 only.
Do not use the heat-resistant protective cover during ironing.
C
1 Put the iron on the heat-resistant protective cover.
2 Wind the mains cord around the cord storage facility.
3 Store the iron with the heat-resistant protective cover
horizontally on a stable surface.
Guarantee & service
If you need information or if you have a problem, please visit the Philips
website at www.philips.com or contact the Philips Customer Care
Centre in your country (you will find its phone number in the
worldwide guarantee leaflet). If there is no Customer Care Centre in
your country, turn to your local Philips dealer or contact the Service
Department of Philips Domestic Appliances and Personal Care BV.
Troubleshooting
This chapter summarises the most common problems you could
encounter with your iron. Please read the different sections for more
details. If you are unable to solve the problem, contact the Customer
Care Centre in your country.
ENGLISH10
1
2

Solution
Check the mains cord, the plug and
the wall socket.
Set the temperature dial to the
required position.
Fill the water tank (see chapter
'Preparing for use').
Set the steam control to a position
between 1 and 6 (see chapter 'Using
the appliance').
Select an ironing temperature that is
suitable for steam ironing (2 to
MAX). Put the iron on its heel and
wait until the amber pilot light has
gone out before you start ironing.
Continue ironing in horizontal position
and wait a while before using the
(vertical) shot-of-steam function again.
Select an ironing temperature that is
suitable for steam ironing (2 to
MAX). Put the iron on its heel and
wait until the amber pilot light has
gone out before you start ironing.
Press the filling cap until you hear a
click.
Rinse the water tank and do not put
any additive in the water tank.
Use the calc-clean function a few
times (see chapter 'Cleaning and
maintenance').
Move the iron slightly to deactivate
the safety shut-off function.The pilot
light goes out.
Move the iron slightly to deactivate
the safety shut-off function.The blue
alert light stops blinking.
Check the mains cord, the plug and
the wall socket.
Possible cause(s)
There is a connection problem.
The temperature dial has been set to
MIN.
There is not enough water in the
water tank.
The steam control has been set to
position O.
The iron is not hot enough and/or the
drip-stop function has been activated.
The (vertical) shot-of-steam function
has been used too often within a very
short period.
The iron is not hot enough.
The cap of the filling opening has not
been closed properly.
An additive has been poured into the
water tank.
Hard water forms flakes inside the
soleplate.
The safety shut-off function has
switched the iron off (see chapter
'Features').
The safety shut-off function has
switched the iron off (see chapter
'Features').
There is a connection problem.
Problem
The iron is plugged in but the soleplate
is cold.
No steam.
No shot of steam or no vertical shot of
steam.
Water droplets drip onto the fabric.
Flakes and impurities come out of the
soleplate during ironing.
The red pilot light blinks (type GC4320
only).
The blue alert light blinks (types
GC4340 and GC4330 only).
The iron is plugged in but the blue alert
light is out (types GC4340 and
GC4330 only).
ENGLISH 11
Wichtig
Lesen Sie diese Bedienungsanleitung vor dem ersten Gebrauch des
Geräts sorgfältig durch und bewahren Sie sie zur späteren
Einsichtnahme auf.
◗ Überprüfen Sie, ob die auf dem Typenschild angegebene
Betriebsspannung mit der örtlichen Netzspannung übereinstimmt,
bevor Sie das Gerät anschließen.
◗ Überprüfen Sie das Netzkabel regelmäßig auf Unversehrtheit.
◗ Benutzen Sie das Gerät nicht, wenn der Netzstecker, das
Netzkabel oder das Gerät selbst defekt ist.
◗ Ist das Netzkabel defekt, darf es nur von einem Philips Service-
Center oder einer von Philips autorisierten Werkstatt durch ein
Original-Ersatzkabel ausgetauscht werden, um ein
Sicherheitsrisiko zu vermeiden.
◗ Lassen Sie das eingeschaltete Gerät niemals unbeaufsichtigt.
◗ Tauchen Sie das Bügeleisen niemals in Wasser.
◗ Halten Sie das Gerät außer Reichweite von Kindern.
◗ Achten Sie beim eingeschalteten Gerät darauf, dass Sie die
Bügelsohle nicht berühren; sie wird sehr heiß. Geben Sie auch
darauf Acht, dass das Netzkabel nicht mit der heißen Bügelsohle in
Berührung kommt.
◗ Wenn Sie das Bügeln beenden, das Gerät reinigen, den
Wasserbehälter füllen oder leeren oder den Raum nur kurz
verlassen, stellen Sie stets den Dampfregler auf Position 0, stellen
Sie das Bügeleisen aufrecht und ziehen Sie den Netzstecker aus
der Steckdose.
◗ Dieses Gerät ist nur für den Gebrauch im Haushalt bestimmt.
Vor dem ersten Gebrauch
C
1 Entfernen Sie die hitzebeständige Unterlage von der Bügelsohle
(nur Gerätetyp GC4340). Entfernen Sie Aufkleber bzw.
Schutzfolie von der Bügelsohle.
B
Einige Teile des Bügeleisens sind leicht eingefettet und können beim
ersten Gebrauch etwas Rauch abgeben. Dies geht nach kurzer Zeit
vorüber.
Vorbereitung zum Gebrauch
Den Wasserbehälter füllen
Tauchen Sie das Bügeleisen niemals in Wasser
1 Das Gerät darf nicht am Stromnetz angeschlossen sein.
DEUTSCH12
C
2 Stellen Sie den Dampfregler auf Position 0 (= kein Dampf).
3 Öffnen Sie die Kappe der Einfüllöffnung.
4 Neigen Sie das Bügeleisen nach hinten.
C
5 Füllen Sie mit dem Becher Leitungswasser in den
Wasserbehälter, bis die Markierung MAX erreicht ist.
Füllen Sie den Wasserbehälter nicht über die Markierung MAX hinaus.
◗ Wenn das Leitungswasser in Ihrer Gegend sehr hart ist,
empfehlen wir Ihnen die Verwendung von destilliertem Wasser.
Geben Sie weder Parfum, Essig,Wäschestärke, Entkalter, Bügelzusätze
noch chemisch entkalktes Wasser oder andere Chemikalien in den
Wasserbehälter.
C
6 Schließen Sie die Kappe der Einfüllöffnung (Sie hören ein
Klicken).
Einstellen der Bügeltemperatur
C
1 Nur GC4340: Nehmen Sie die hitzebeständige Unterlage ab.
Lassen Sie die hitzebeständige Unterlage keinesfalls während des
Bügelns an der Bügelsohle.
2 Stellen Sie das Bügeleisen aufrecht.
C
3 Drehen Sie den Temperaturregler auf die gewünschte
Bügeltemperatur.
Prüfen Sie das Etikett im Wäsche-/Kleidungsstück auf die erforderliche
Bügeltemperatur:
- 1 Kunstfasern (z. B. Polyacryl, Nylon, Polyamid, Polyester)
- 1 Seide
- 2 Wolle
- 3 Baumwolle, Leinen
Wenn Ihnen die Art des Gewebes nicht bekannt ist, ermitteln Sie die
geeignete Bügeltemperatur an einer Stelle, die bei normalem Gebrauch
nicht sichtbar ist.
DEUTSCH 13
LINEN
SILK
NYLON
WOOL
COTTON
MIN
MAX
Seide,Wolle und Kunstfasern: Bügeln Sie das Gewebe von links, um
glänzende Stellen zu vermeiden.Verwenden Sie die Sprühfunktion nicht,
es könnten Wasserflecken zurückbleiben.
Beginnen Sie stets mit den Textilien, die eine niedrige
Temperatureinstellung erfordern, etwa mit synthetischen Stoffen.
4 Stecken Sie den Netzstecker in eine Steckdose.
C
5 Wenn die gelbe Kontrolllampe erloschen ist, warten Sie noch
einen Moment, bevor Sie zu bügeln beginnen.
Die gelbe Kontrolllampe leuchtet während des Bügelns in regelmäßigen
Abständen auf.
Der Gebrauch des Geräts
Dampfbügeln
1 Achten Sie darauf, dass genügend Wasser im Wasserbehälter
ist.
2 Wählen Sie die empfohlene Bügeltemperatur (siehe
"Vorbereitung zum Gebrauch",Abschnitt "Einstellen der
Bügeltemperatur").
C
3 Wählen Sie die gewünschte Dampfeinstellung.Vergewissern Sie
sich, dass diese Einstellung zur gewählten Temperatur passt:
- 1 bis 3: mäßiger Dampf - Temperatur 2 bis 3.
- 4 bis 6: starker Dampf - Temperatur 3 bis MAX.
B
Das Bügeleisen produziert Dampf, sobald die eingestellte Temperatur
erreicht ist.
Trockenbügeln
C
1 Stellen Sie den Dampfregler auf Position 0 (= kein Dampf).
2 Wählen Sie die empfohlene Bügeltemperatur (siehe
"Vorbereitung zum Gebrauch",Abschnitt "Einstellen der
Bügeltemperatur").
DEUTSCH14
Funktionen
Die Sprühfunktion
Die Sprühfunktion steht bei jeder Temperatur zur Verfügung und eignet
sich zur Beseitigung hartnäckiger Falten.
1 Achten Sie darauf, dass genügend Wasser im Wasserbehälter
ist.
C
2 Feuchten Sie das Bügelgut an, indem Sie mehrmals die
Sprühtaste drücken.
Gezielter Dampfstoß mit der Steam Tip`-Funktion
Ein kräftiger Dampfstoß hilft, hartnäckige Falten zu beseitigen. Der
gezielt nach vorn gerichtete Dampfstoß verbessert die Verteilung des
Dampfes auf das gesamte Gewebe.
Die Dampfstoßfunktion kann nur bei Temperaturen zwischen 2 und
MAX verwendet werden.
C
1 Drücken Sie kurz die Dampfstoßtaste.
Vertikaler Dampfstoß
C
1 Die Dampfstoßfunktion kann auch bei senkrecht gehaltenem
Bügeleisen benutzt werden.
Diese Funktion eignet sich besonders zum Glätten hängender Textilien,
z. B. Gardinen,Vorhänge usw.
Richten Sie den Dampstoß niemals auf Personen!
DEUTSCH 15
Tropfschutz
Dieses Bügeleisen ist mit einer Tropfschutzfunktion versehen: Bei zu
niedrigen Temperaturen wird die Dampfproduktion gestoppt, damit
kein Wasser aus der Bügelsohle tropft. Eventuell ist dabei ein Geräusch
zu hören.
Automatische Antikalk-Funktion
C
1 Das integrierte Antikalk-System verringert Kalkablagerungen
und sorgt dadurch für eine längere Lebensdauer des
Bügeleisens.
Sichere automatische Abschaltung
B
Nur Typ GC4320.
C
◗ Das Bügeleisen wird automatisch ausgeschaltet, wenn es eine Zeit
lang nicht bewegt wurde.
◗ Wenn sich das Bügeleisen automatisch ausgeschaltet hat, blinkt die
rote Kontrolllampe.
Erneutes Aufheizen des Bügeleisens:
- Heben Sie das Bügeleisen an und bewegen Sie es ein wenig hin und
her.
- Die rote Kontrolllampe erlischt.Wenn die Temperatur der Bügelsohle
unter die eingestellte Bügeltemperatur abgesunken ist, leuchtet die
gelbe Temperatur-Kontrolllampe auf.
- Wenn die gelbe Kontrolllampe nach dem Bewegen des Bügeleisens
aufleuchtet, warten Sie, bis sie wieder erlischt, bevor Sie zu bügeln
beginnen.
- Wenn die gelbe Kontrolllampe nach dem Bewegen des Bügeleisens
nicht aufleuchtet, hat die Bügelsohle noch die erforderliche
Temperatur, und das Bügeleisen ist einsatzbereit.
Kontrolllampe und sichere automatische Abschaltung
B
Nur Gerätetypen GC4340 und GC4330.
Das Bügeleisen ist mit einer blauen Kontrolllampe ausgestattet.
C
◗ Die blaue Kontrolllampe leuchtet, solange das Bügeleisen am
Stromnetz angeschlossen ist.
◗ Wenn die automatische Abschaltung das Bügeleisen ausgeschaltet
hat, blinkt die blaue Kontrolllampe.
DEUTSCH16
Erneutes Aufheizen des Bügeleisens:
- Heben Sie das Bügeleisen an und bewegen Sie es ein wenig hin und
her.
- Die blaue Kontrolllampe erlischt.Wenn die Temperatur der
Bügelsohle unter die eingestellte Bügeltemperatur abgesunken ist,
leuchtet die gelbe Temperatur-Kontrolllampe auf.
- Wenn die gelbe Kontrolllampe nach dem Bewegen des Bügeleisens
aufleuchtet, warten Sie, bis sie wieder erlischt, bevor Sie zu bügeln
beginnen.
- Wenn die gelbe Kontrolllampe nach dem Bewegen des Bügeleisens
nicht aufleuchtet, hat die Bügelsohle noch die erforderliche
Temperatur, und das Bügeleisen ist einsatzbereit.
Reinigung und Wartung
Nach dem Bügeln
1 Ziehen Sie den Netzstecker aus der Steckdose und lassen Sie
das Bügeleisen abkühlen.
2 Wischen Sie Kalkpartikel und andere Ablagerungen mit einem
feuchten Tuch und etwas Spülmittel von der Bügelsohle.
Damit die Bügelsohle glatt bleibt, sollte sie nicht in Berührung mit
Metallgegenständen kommen.Verwenden Sie zum Reinigen der
Bügelsohle weder Scheuerschwämme noch Essig oder andere
Chemikalien.
3 Reinigen Sie den oberen Teil des Bügeleisens mit einem
feuchten Tuch.
4 Spülen Sie den Wasserbehälter von Zeit zu Zeit mit klarem
Wasser aus. Leeren Sie den Wasserbehälter anschließend.
Calc-Clean-Funktion
Mit der Entkalkungsfunktion Calc-Clean lassen sich Kalkablagerungen
und Verunreinigungen beseitigen.
◗ Entkalken Sie das Bügeleisen alle zwei Wochen.Wenn das Wasser
in Ihrer Gegend sehr hart ist (d. h. es treten beim Bügeln Flocken
aus der Bügelsohle), sollten Sie die Calc-Clean-Funktion häufiger
anwenden.
1 Das Gerät darf nicht am Stromnetz angeschlossen sein.
2 Stellen Sie den Dampfregler auf Position O (= kein Dampf).
3 Füllen Sie den Wasserbehälter bis zur Markierung MAX.
DEUTSCH 17
 Loading...