

Page 1
^ ■ ■ ' ' ^ ^
M ^ #■*%* ,* 4.,^
w
^ ^
English: This digital apparartus does not
exceed the Class B limits for
noise emissions from digital
apparatus as set out in the Radio
interference Regulations of the
Canadian Department of
Communications.
FrançaisiCet appareil numé(iq№ n'émet
pas de bruits radioélectriques
dépassant les limitesaipplicables aux appareils nunx^ques
de Classe B prescrite le
Régelement sur le Brôui^age
Radioélectrique édicté par le
Ministère des Comfnumcations
du Canada.
Know these
symbok
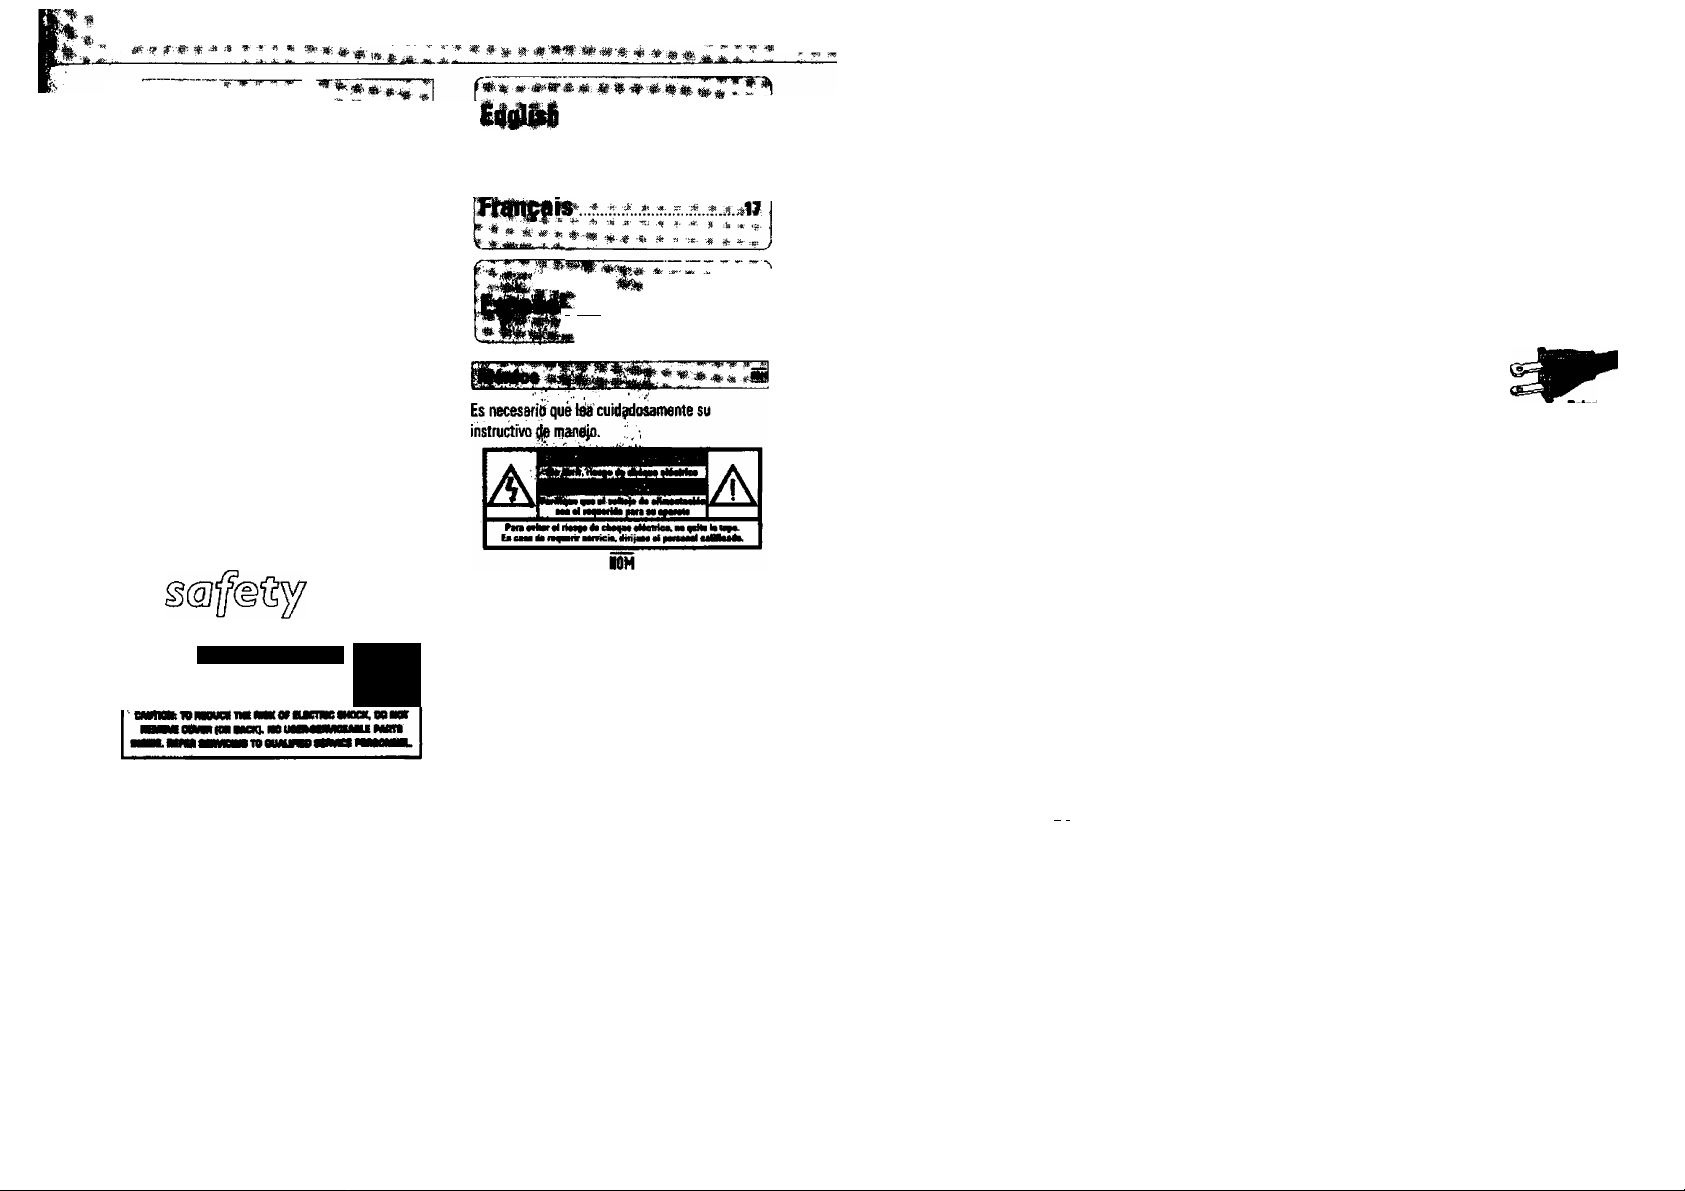
CAUTIOIM
ra
This *Tx)lt of lightning**
Indicates uninsulated
A
may cause an electrical shock. For the
safety of everyone In your h<Hisehold,
please do not remove product
covering.
A
enclosed literature closely to prevent
operating and maintenance problems.
material within your unit
The “exclamation point'* calls
attention to features for
which you should read the
‘* ***»*'•*•*»*.
•»> -.1*: -1^ ^ ii ^ ^
^ ’.m
w ^ ,Æ.
é m -0- ^ ^ m 4 <4
^ m »ÿ # „
^ ^ ^ m- ^ ^ ^ ^
rr in- niiMiiMi ^ 16=^'
WARNING: to prevent
FIRE OR SHOCK HAZARD. DO
NOT EXPOSE THIS EQUIPMENT TO
RAIN OR MOISTURE.
CAUTION: To prevent
electric shock, match wide blade of
plug to wide slot, and fully insert.
WARNING
To reduce the risk of fire or electric
shock, do not expose this appliance to
rain or ffloisture.
CAUTION
Use of controls or adjustments or
performance of procedures other than
herein may result in hazardous
radiation exposure.
This product was designed and manufactured to meet strict
quality and safety standards. There are, however, some
installation and operation precautions which you should be
panicularty aware of.
1. RawlieMnKtNMt'Allthesafetyandoperatjnginsmjctions should be read before the appliance is operated.
2. RMsielMaiGli«»'The safety and operating
instructions should be retained for future reference.
3. Hud Witiio|t - AH warnings on the appliance and in
the operating instructioris should be adhered to.
4. Follow iMtnMSiim* All opbratmgarKi use instructions
should be followed.
5. WHer and MoistorO’The appliance should not be used
near water - for example, near a bathttki/Wtehibowl.
kitchen sink, laundry tub, in a wet baiim^or near a
swimming pool, etc. •' %
6. Carts Mid Stemts- The appliance should be used only
with a cart or stand that is recommended by the
manufacturer.
6A. An appliance and cart combination should be
moved with care. Quick stops, excessive
force, and uneven surfaces may cause the
appliance and cart combination to overturn.
7. Writ or Ceiling Moontiiig - The fiance should be
mounted to a wall or ceiling only as reconxrtended by the
manufacturer.
S. Ventilahm - The appliance should be situated so that its
location or position does not interfere with its proper
ventilation. For example, the appliance should not be
situated on a bed, sofa, rug, or similar surface that may
bixk the ventilation openings; or. placed in a built-in
installation, such as a bookcase or cabinet that may
impede the flow of air through the ventilation openings.
9. Heat' The aix)liance should be situated away from heat
sources such as radiators, heat registers, stoves, or other
appliances (including amplifiers) that produce heat.
10. Power Sources - The appliance should be connected to a
power sup;^ only of the type described in the operating
instructions or as marked on the appliance.
• T.
7?je sei complies with the FCC-Bules, Part 15 and
with 21CFR1040.10. Operation is subject to the
following two conditions:
1. This device may not cause harmful interference,
and
2. Ihis device must accept any interfereride received,
including interference that may cause un^ired
operation
The type-plate is located on the bottom of the clock
radio.
11. GnNHiding Of Polorizatioo -
The precautions that should be
taken so that the grounding or
polarization means of an appliance
is not defeated.
m
CAUTION I To prevent electric shock, match tfie
wide blade of this plug to the wide slot fully insert. Do
not use this (polarized) plug with an extension cord,
receptacle or other outlet unless the Wades can be fully
inserted to prevent blade exposure.
12. Powor-Corri Protection - Power supply cords should be
muted so that they are not likely to be walked on or pin
ched by items placed upon or against them, paying par
ticular attention to cords and plugs, convenience recep
tacles, and the point where they exit from the appliance.
IlCloHiing - The appliance should be cleaned orriy as
recommended by the manufacturer.
llPowor Unos - An outdoor antenna should be located
away from power lines.
15.Nooute Period» - The power cord of the appliance
should be unplugged horn the outlet when left unused for
a long period of time.
IfiiObiect Mid liqHid Entry - Care should be tdten so that
objects do not fall and liquids are not spilled into the
enclosure through openings.
17.Damage Requiring Saivice - The appliance should be
serviced by qualified service personnel when:
A The power-supply cord or the plug has been damaged: or
B. Objects have fallen, or liquid has spilled into the
appliance, or
G. Tfie appliance has been exposed to rain; or
D. The appliance does not appear to operate normally or
exhibits a marked change in performance; or
E. The appliance has been dropped, or the enclosure
l&Smvicing - The user should not attempt to service the
appliance beyond that described in the operating
irrstructions. All other servicing should be referred to
qualified service personnel.
91/8
EL4S62-1
iy.
AC
5
Page 2
Roturr^ your Wr«»'r<inty Registration card today to
ensure you receive all the biuiefits /ouVe erjtiiied to-
Once your Philips Magnavox purchase is
registered, you're eligible to receive all
the privileges of owning a Philips
Magnavox product
Know these
So compteie and return the Warranty
Registration Cord enclosed with your
purchase at once. And take advantage
of these important benefits.
For Ci^tomer Use
EntM^M^w the Serial No. vdticH is.
kkated on die rear of the cabihec. Retaht
this information for future reference. ’'
Model No. ________________________
This “bolt of lightning"
A
electrical shock. For the safety of
everyone in your household, please do
not remove product covering.
A
literature closely to prevent operating
and maintenance problems.
indicates uninsulated material
within your unit may cause an
The “exclamation point” calls
attention to features for which
you should read the enclosed
Serial No.
________________________
WARNING: to prevent
FIRE OR SHOCK HAZARD, DO
NOT EXPOSE THIS EQUIPMENT TO
RAIN OR MOISTURE.
CAUTION: To prevent
electric shock, match wide blade of
plug to wide slot, and fully insert
Page 3
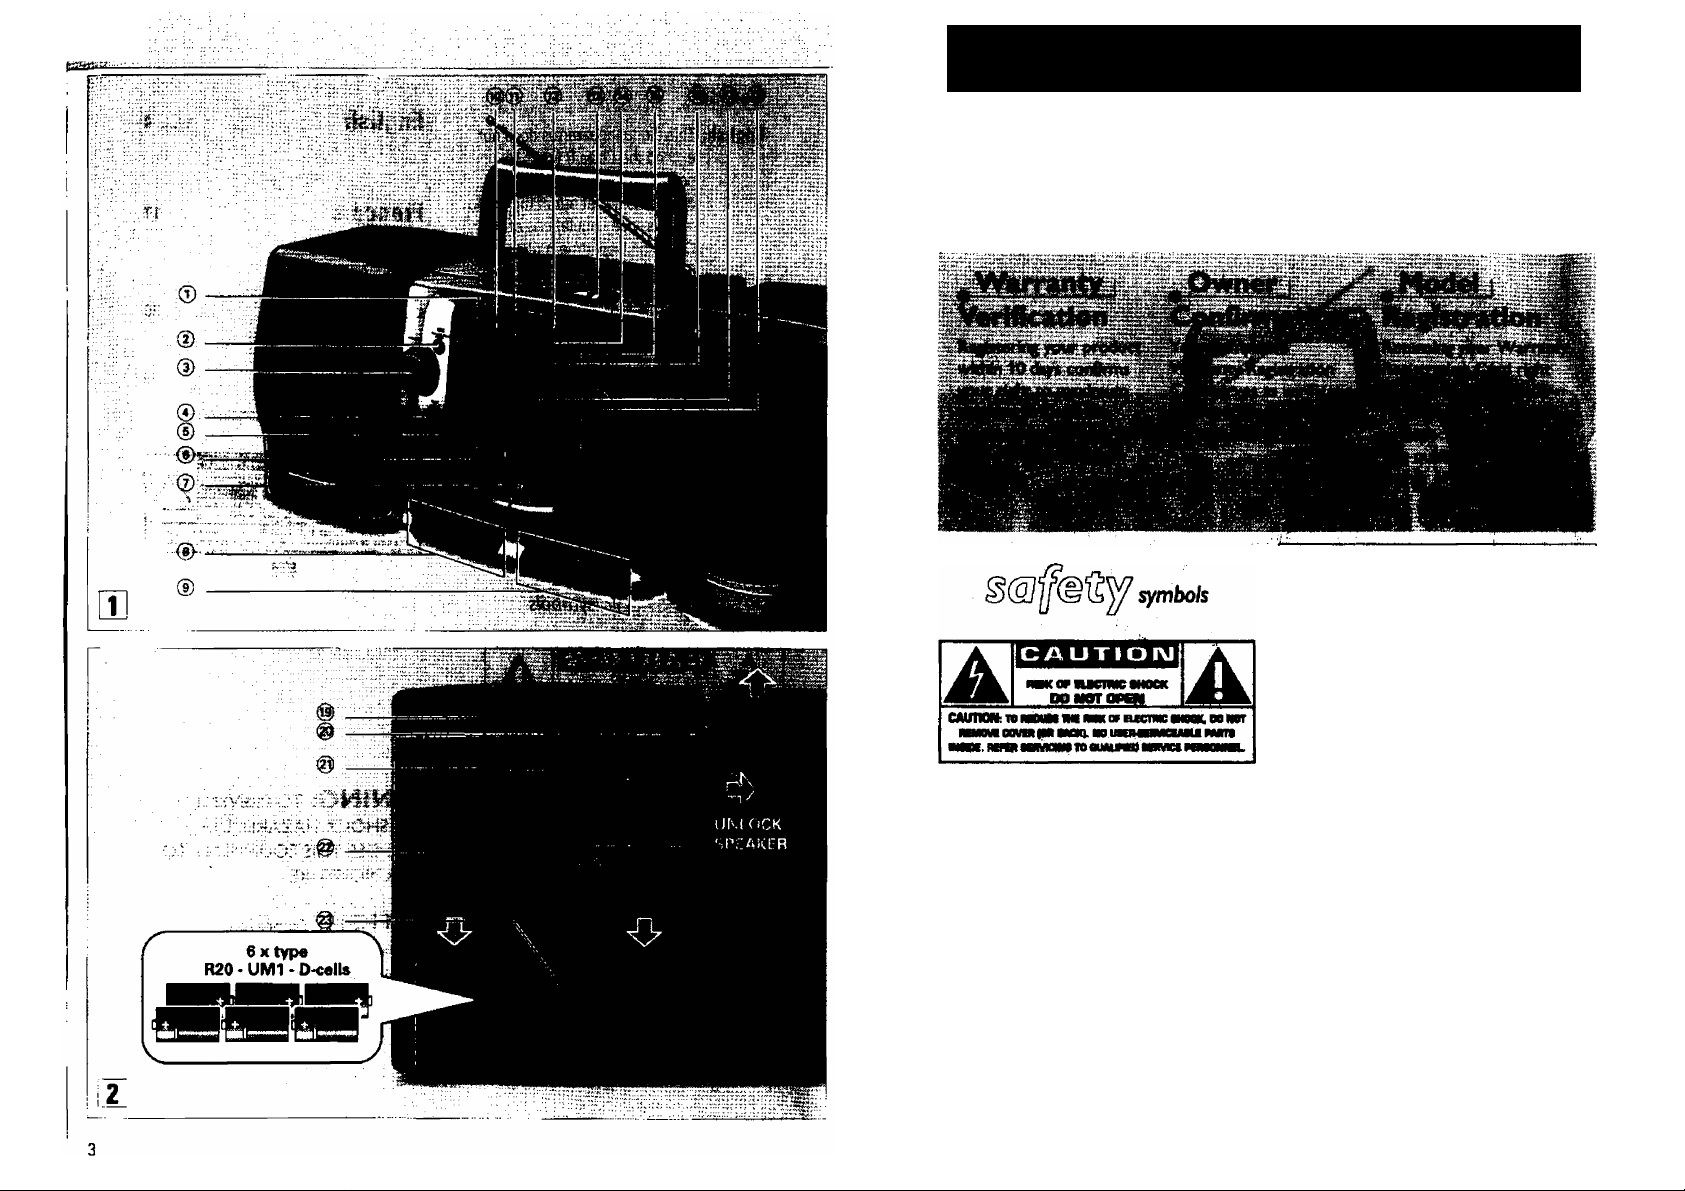
CONHiOLS
mymsmm
0 IR SENSOR • Infrared remate sensor for remote
control reception.
(D DBB Dynamic Bass Boost To increase the bass
level.
C?) VOLUME A ▼ - To adjust the volume level.
C4; TONE CONTROL - To adjust the emphasis on high
or low tones.
(5) ii - 3.5 mm headphone socket.
SOURCE SELECTOR - To select the source of
sound: CD-TUNER-TAPE/OF and to switch the
POWER ON/OFF.
(DDISnAY
CASSETTE RECORDBl
C^OECKI
RECORD •-To start recording,
PLAY ► - To start playback.
4M - To fast rewind the tape.
- To fast forward the tape.
8TOP*OPEN ■ 4 - To stop playback and open
the cassette compartment.
PAUSE II - To interrupt recording or playback.
®DECK2
PLAY ► - To start playback.
^ - To fast rewind the tape.
- To.fast forward the tape.
STOP^PEN ■ A • To stop playback and open
the cassette compartment.
PAUSE II' To interrupt recording or playback. CD PLAYER
@ MODE - e.g. to SHUFFLE or RD’EAT playback.
® PROGRAM - To program track numbers and to
review the program.
@ STOP ■ - To stop playback or erase a program.
@ OPEN - To open the CD door.
@ PLAY*PAUSE Mil - To start or interrupt CO play
back.
@ SEARCH »w • To skip or search forwards to a pas
sage or a track.
@ SEAUCH HM - To skip or search backwards to a
passage or a track.
RADIO
@BAND - To select the wave band ¡FM/AM).
TUNING - To tune to radio stations.
@ SPEAKER LEVERS - To unlock
boxes. ’ '
@ TELESCOPIC AERIAL - To imptwe lW recep
tion. ' ^ ^ ■ •
SPEAKERS - Speaker terminals.
@ AC MAINS • Outlet for power cord.
^ BATTERY DOOR - To open the battery compart
ment.
0 VOLUME A ▼ - To adjust the volume level.
(?) SHUFFLE - To select playback of tracks in random
order.
@ REPEAT - To repeat a track, a CD programme or
an entire CD.
® ► II - To start or interrupt CD playback
(D ■ - to stop playback or erase a CO programme
@ M or N - To skip to the beginning of a
current/previous or subsequent track
C?) SEARCH MM Of MH - To skip or search backwards
and forwards within a track
77» TUNER CONTWl fte/wiwfe
ow/ro/ hm m function with thb set.
Whenever convenient, use the power supply if you want to conserve
battery life. Make sure you remove the power plug from the set and wall
outlet before ih^ftîrtg batteries.
Batteries {optional)
f. Open the battery compartment and insert as shown six batteries,
type R20, UM1 or 0-cells.
RsnioM control batteries (included)
#. Open the battery compartment and insert as shown two batteries,
type AAA. R03 or UM4.
Z Replace the compartment door, making sure die batteries are firmly
andcorrectly in place.
J, Remove the batteries if exhausted or if they will not be used again for
a long period.
- The incorrect use of batteries can cause electrolyte leakage and will
corrode the compartment or cause the batteries to burst. Therefore:
- Do not mix battery types, e.g. alkaline with zinc carbonate.
-*• When inserting new batteries, replace all at batteries the same time.
Nit«».'The battery supply is switched off when the set is connected to
the mains.
Bsffsfiss coÊrtaia dtemha! substances, sa they sbouM ifc
cfpiopBrIy
1. Check if the power voltage as shown on the type plate (on the base of
the set! corresponds to your local power voltage. If it does not, consult
your dealer or service organisation.
2. Connect the power cord to the MAINS ~ outlet and the wall outlet.
- The set is now ready to use.
^ To switchaff the power completely, pull the power plug out of
r the wall outlet. u'\:
- Disconnect the pqyverl^ when you change over to battery supply, or
to protect the set duririg heavy dtunderstorms.
- To avoid overheating oi the^et a safety circuit has been built in.
Therefore your set may disconnect under extreme conditions, if this
■ happens, switch the set of and let it cool down before reusing it.
We have done our utmost to make the packaging easily
separable into tftfee nwio materials: cardboa«! (box), er^ndabte polystyrene (buffer) and polyedïylene (bags,
protective foam sheet).
Your set cMwisiti of nnterial» wkioli c«ii be recycled if diMwaseaibted by a i^eciatiatd com!»«»■
^aiisted batleriei eifdcldt^ttipwnt
Page 4

Í№UÍRS
Attaching the speakers
• Slide the speakers down into the sleeves on the sides of the set
cabinet. The speakers will click into position.
Taking off the speakers
• Keep the lever (found on the back corner of the speaker) pressed and
slide the speaker upwards.
Connecting the speakers
I. Connect the right speaker to the terminal R, with the red marked wire
to + and the black wire to
Z Clip the exposed portion of wire into the corresponding colour terminal.
3. Repeat the wiring procedure for the left speaker to terminal L making
sure that you connect the red wire to f and die black wire to -.
Positinaing tha spaakars
The ideal position is obtained when the 2 front speakers and the listening
position build an equilateral triangle and the speakers are at ear-height.
Note:
- Speakers with an impedance of 4 ohms or higher other than as
supplied may be used instead. Do not, however, use speakers with a
lower impedance as this will result in damage to your set
- When headphones are connected with the headphone socket O
the speakers are disconnected.
I. Set the source selector ® to TUNER.
■Z Adjust the sound using the VOLUME a ▼ ®, TONE ® and DBB (|)
controls.
JL Select the wave band using the BAND selector#.
4. Tune to a radio station using the TUNING knob
To improve radio reception
- For FM, pull out the telescopic antenna. To improve FM-reception,
incline and turn the antenna. Reduce its length if the FM-signal is too
strong (very close to a transmitter).
- For AM, the set is provided with a built-in antenna, so the telescopic
antenna is not needed. Direct the antenna by turning the whole set.
SL To switch off the set, set the source selector ® to TAPE/OFF.
General operation
1. To switch on the set, set the source by using the source selector Cs).
2. Adjust the sound using the VOLUME AT@, TONE ® and DBB @
controls.
3. To switch off the set, set the source selector® to TAPE/OFF position,
with the cassette keys released.
Page 5

I #
- CO OI*EN: V^en the CD (ioor is open.
- TottI track RunriMr ami plpiyiag time: In stop position.
- fkKNwt track mtaiber aiiii elapsed playing time: During CD play.
- In PAUSE position, the display freezes and the elapsed playing time
and the current track number are shown.
- SHUFFLE/REPEAT: When the respective mode is activated.
- PROGRAM: When program function is active.
- no SEL: PROGRAM button is pressed but no tracks are selected.
- prag: Whan you store a track.
- pfKMMMi FULL Maximum track number stored.
- nopnif: When PROGRAM is stopped/erased.
- no di$C: Error in CD operation or with the CD (see
'TROUBLESHOOTING').
t Set the squffie selector ® to CD.
Z Press OPEN ^ to open the CD door
3. Insert the AUDIO CD. printed side facing up. To close the CD door,
push the door down.
4. Start playback by pressing PLAY*PAUSE Nl(i$.
5. Adjust the sound using the VOLUME ▲ ▼ C?), TONE 0 and DBB (D
controls.
6. To interrupt playback, press PLAY*PAUSE HI Press
PLAY*PAUSE Mlig) again to continue playback.
7. Press STOP*Cj| to stop CO playback.
8. Set the source selector (è) to TAPE/OFF position to switch off the set.
/Vote: CD playback will also stop when:
- The CD has reached the end;
- The CD door is opened;
- The source selector 0 is in the TAPE/OFF position.
SEARCH KM or MK
iìj/"ì; %■;' ;гчг: cì fii ;:
^ Swirching for a passaga witkia a track
You can search for a passage within a track. The CD is played at low
1j|5le№^ and at high $p$Iid.ihdw8ver, the sound is still recognizable.
I. Keep the SEARCH M4.^i3r m button pressed during playback, and
r leleara the button as soon^ you recognize the required passage:
‘ ~ Normal CD playback will resume at this point.
The MODE button allows you to select four different modes. The modes
^ be selected or longed before or during playback.
filPress MODE anti) the desired function appears on the display.
SHUFUE- Tracks are played'in random order.
*■' SHUFFIE REPEAT ALL - To repeat the CD continuously in random order.
REPEAT ALL - F^ats the entire CD.
ftIMEPEAT 1 - Continuous playback of the current track.
- Except for REi^T 1. during playback you can use SEARCH w* or
to skip tracks.
- The SHUFFLE/REPEAT modes can also be further combined with
PROGRAM.
Z To leave the SHUFFLE mode, press the MODE button @ repeatedly
until the various SHUFFLE/REPEAT modes are no longer shown on the
display. You can also press STOP ■ @ to quit playback.
You may store up to 20 tracks in the memory in the desired sequence.
You may store any track more than once.
Programfiiing track numbers
f. Select the desired track using SEARCH m
shows the required track number.
Z Store the desired track by pressing PROGRAM (y) once
3. Select and store all desired tracks of a CD in this way.
огмм @ until the display
Selecting a different track during playback
- You can jump to the next track by pressing SEARCH qs) once. If you
want to skip more than one track, press SEARCH more than
once until the display shows the desired track number.
- If you want to repeat the running track from the beginning, press SEARCH
MMi once. If you want to repeat one of the previous tracks, press SEARCH
m ife) more than once until the display shows the required track number.
Starting with a particular track
1. In the STOP position you can select a desired track using the SEARCH
or HH
Z Press PLAY»PAUSE HI @ to start playback.
10
Checking e program
I. To review the set program, press PROGRAM @ more than 2 seconds.
- The display will show the track numbers you have selected in
sequence.
Z Start playback of the program by pressing PIAY*PAUS£ HI
Erasing a progrmi
You can erase a prt^m by:
- pressing STOP* @ during programming;
~ pressing STOP*@ again in stop position;
- pressing STOP * @ twice in play mode;
- opening the CO door.
11
Page 6

ilWSETIlAECOROER
1. Set the source selector (b) to TAPE/OFF.
Z Press SfOP*OPEN ■ 4 Oa)/® to open the cassette holder.
1 Insert a recorded cassette.
4. Press PLAY^ and playback will start.
5. Adjust the sound using the VOLUME AT (s), TONE (¿) and DBB (2)
controls,
6. For brief interruptions, press PAUSE ll(§)/(9?. Press PAUSE II Ci)/(i)
again to resume playback.
7. By pressing -44 orw^ (s)/®, fast winding of the tape is possible in
both directions.
A To stop playback, press STOP* OPEN ■ 4 @/@.
- The keys are automatically released at the end of the tape.
9. Set the source selector ® to TAPE/OFF position (with the cassette
keys released) to switch off the set.
Continuous playback
1. Set the source selector to TAPE/OFF.
2. Press both STOP*OPEN ■ 4 ®/® keys to open the cassette holders.
3. Insert a recorded cassette in both cassette holders.
4. Press PLAY ► Cs|) on deck 2 and playback will start on deck 2.
5. Press PAUSE 11® on deck 1 and then PLAY ► (s). As soon as playback
on deck 2 stops (when the tape has reached its end or STOP “OPEN ■
4® is pressed) PAUSE ll(§) on deck 1 is released and playback will
start on deck 1.
CAS%mREC0RDIN6
Tj;.5snr— 1 j
i -laiMBitaii ptgraTo i
(For best results, use the power supply or fresh batteries.
% Set the source selector ® to TAPE and do not move this switch during
I recording.
Z Press both STOP*OPEN ■ 4 ®/(?) keys to open the cassette holders.
Z Insert the recorded tape into deck 2 and a blank tape for recording in
, deck 1.
4. Press PAUSE II® and then RECORD • (e) on deck 1.
£ To start dubbing, press PLAY ► ® on deck 2.
- PAUSE II® will be released.
- By pressing PAUSE II® on deck 1 again, you can omit undesired
passages while deck 2 continues.
Press PAUSE ■ ® on deck 1 to resume dubbing.
I - Pressing PAUSE II® on deck 2 will create pauses,
it To stop, press both STOP*OPEN ■ 4 ®/® keys.
1. Set the source selector® to TUNER.
2. Tune to the desired radio station using the TUNING knob.
J. Press STOP »OPEN ■ 4 ® on deck 1 to open the cassettte holder.
4. Insert a recordable cassette.
& Press RECORD • ® to start recording.
£ For brief interruptions, press PAUSE II®. To resume recording, press
PAUSE II® again.
7. To stop, press STOP*OPEN ■ 4 ®.
General information on cassette recording
- Recording is permissible insofar as copyright or other rights of third
parties are not infringed.
- Recording is only possible on deck 1. During recording it is advisable
not to wind or rewind a tape in deck 2.
- This deck is not suited for recording on CHROME (lEC II) or METAL (lEC
IV) type cassettes. For recording you should use NORMAL type
cassettes (lEC I) on which the tabs have not been broken.
- The recording level is set automatically. Altering the VOLUME, DBB or
TONE controls will not affect the recording in progress.
- No recording will take place during the first 7 seconds, when the leader
tape passes the recorder heads.
- To prevent the accidental erasure of a recording, keep the cassette side
to be safeguarded in front of you and break out the left tab. Recording
on this side is no longer possible. To render this safeguard ineffective,
cover the tabs with a piece of adhesive tape.
12
1. Set the source selector ® to CD.
Z Insert a CD and if desired, program track numbers.
Z Press STOP*OPEN ■ 4 ® on deck 1 to open the cassettte holder.
4. Insert a recordable cassette.
5. Press RECORD • ® to start recording.
- Playing of the CD program starts automatically from the beginning
of the program. It is not necessary to start the CD player separately.
£ For brief interruptions, press PAUSE II®. To resume recording, press
PAUSEll® again,
7. To stop recording press STOP*OPEN ■ 4 ®.
To select and record a particular passage within a track
1. Press SEARCH @ or (jis) to select a passage.
2. Put the CD player in PAUSE II @ position at the selected passage.
- Recording will start from this exact point when you press
RECORD«®.
13
Page 7

- Place the set on a hard, flat surface so that it does not tilt.
- Do not ejippse the set CDs, batteries or cassettes to humidity, rain,
sand, direct sunlight or other places where high temperatures can
occur, such 8$ in the vicinity of heating apparatus or in motor cars
parked in the sun.
- Do not cover the set. The amplifier produces heat which must dis
sipate freely, so make sure that there is sufficient ventilation around
the set. A minimum gap of 15 cm is necessary.
- The mechanical parts of the CD player and the cassette deck contain
self-lubricating bearings and must not be oiled or lubricated.
- A chamois leather slightly moistened with water is sufficient for
cleaning.the housing. Oo not use cleaning agents containing alcohol,
spirits, amnwhia or abrasives as these may harm the housing.
The lens of the CD player should never be touched.
The lens may cloud over if the CD player is moved from cold to warm
surroundings. The CD player will not start. Give the player some time
to^climatise.
To take a CD out of its box, press the center spindle while lifting the
CD. Always pick up the CO ^ the edge and replace the CD back in Its
box after use to avoid scratching and dust.
To clean the CO, wipe in a straight line from the centre towards the
edge using a soft, lint-free cloth. Do not use cleaning agents as they
may damage the disc.
Never write on a CD or attach stickers to it.
mmmimnmmn
To ensure a good recording and playback quality, clean the indicated
parts after every 50 hours of operation or, on average,
once a month. Use a cotton bud slightly moistened with alcohol or a
special head cleaning fluid.
• Press PLAY ► and clean die rubber pressure rollers ©.
• Then press PAUSE M and clean the capstans (b) and the heads ®.
• After cleaning, press ST0P«0PEN ■ 4.
Cleaning of the heads can also be done by playing a cleaning
cassette through once.
The type plate is located on the base of the set.
■ Í - ■ .
la fault occurs, first check the points listed below before taking the set for repair.
!7tf you are unable to remedy a problem by following these hints, consult your dealer or service center.
IWARNING ; Under no circumstances should you try to repair the set yourself, as this would invalidate the
iwarranty.
^PROBLEM
- - POSSIBLE CAUSE
REMEDY
Set does not react to operation of
anyofthecontroit
- Electrostatic discharge.
♦ Switch off the set. disconnect the power plug,
reconnect after a few seconds.
¡Otsplay does act function property
!•- Electrostatic discharge.
Switch off the set, disconnect the mains plug and
reconnect after a few seconds.
> - Set runs on batteries.
• Switch to mains supply.
___________________
___________
No sound
- VOLUME Is not adjusted.
• Adjust the VOLUME.
“ Headphones are connected.
• Disconnect headphones.
I - Batteries are exhausted.
• Insert fresh batteries.
- Batteries are incorrectly inserted.
• Insert the batteries correctly.
- Power cord is not securely connected.
• Connect the power ocrd properly.
Bad sound
- Unsuitable speakers are used.
• Use supplied speakers.
- Batteries are exhausted.
• Replace batteries.
___________________
Poor bass sound
- Speakers not in phase.
• Connect speakers poles correctly,'+' to V;to
No sound on left or right side
- Speaker wrongly connected
• Connect speaker properly.
Beversed left and riflht sound
- Speakers are wrongly connected.
• Connect speakers properly, L to left, R to right.
____________
___ __
Severe radio hum or noise
- Set too close to TV. VCR or computer.
• Increase the distance.
Poor radio reception
- Weak radio signal.
• FM; aim and extend the telescopic aerial for best
reception;
• AM: rotate the entire set.
Poor caisatta sound quality________________
- Oust and dirt on the heads, capstan or pressure
roller.
• Clean the heads etc., see Maintenance.
~ Use of incompatible cassette types (METAL or
CHROME).
• Only use NORMAL (lEC 1) for recording.
Becording does not work
- Cassette tab(s} may be broken out.
• Apply a piece of adhesive tape over the missing
tab space.
CP playback does not work
- CD is badly scratched or dirty.
• Replace or dean the CD, see Maintenance,
- No CD inserted.
• Insert CD.
- CD inserted upside down.
• Insert CO with printed side facing up.
The CD skips Iracipt
- Laser lens is steamed up.
• Wait until tens has acclimatized.
- CD is damaged or dirty.
• Replace or clean the CD.
- PR06RAM/SHUFFLE is active.
• Switch off the PROGRAM/SHUFFLE function.
Bemotc cowtrot does not function properly
- Batteries are exhausted.
• Insert new batteries.
- Batteries are incorrectly inserted.
• Insert batteries correctly.
- Distance between the set is too large.
• Reduce the distance.
____________
_________________
* •
_____
14
15
 Loading...