

Page 1
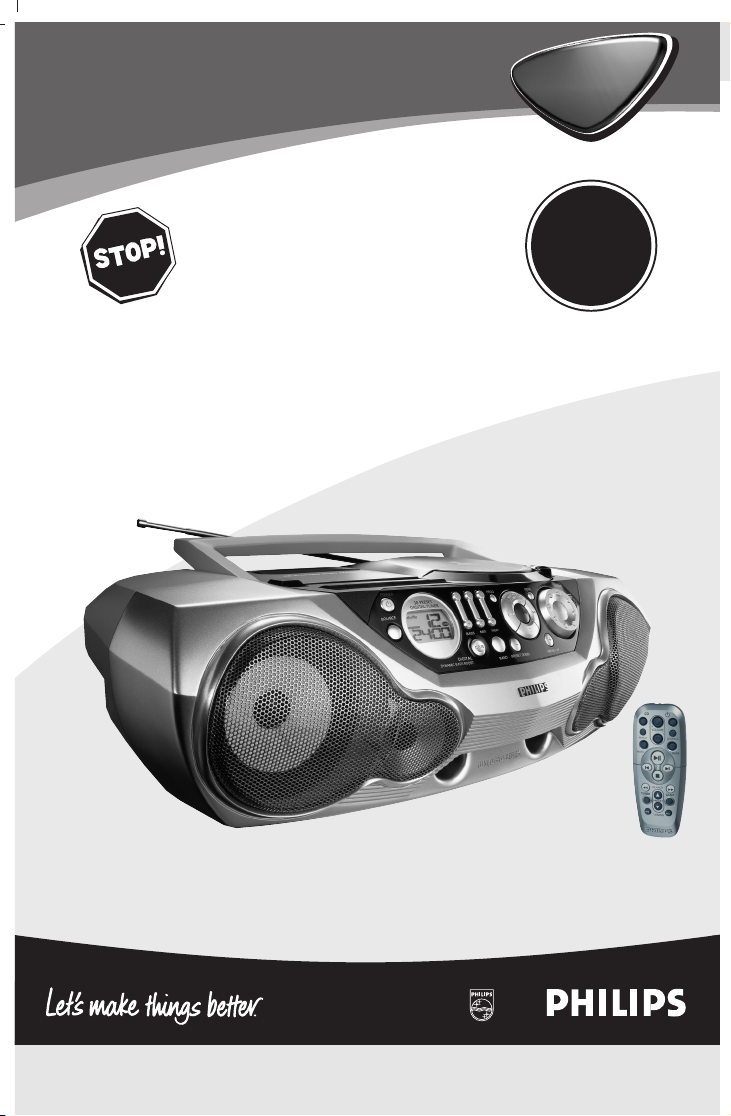
AZ 2040, AZ 2045 CD Soundmachine
Audio
Audio
CD Soundmachine
AZ 2040 • AZ 2045
Read this manual first!
Congratulations on purchasing this Philips product.
We’ve included everything you need to get started.
If you have any problems, Philips Representatives can
help you get the most from your new product by explaining:
• Hookups,
• First Time Setup, and
• Feature Operation.
Do not attempt to return this product to the store.
For fast help, call us first!
1-800-531-0039
Thank you for making Philips a part of your home!
S
E
E
W
H
Y
I
N
S
I
D
E
I
M
P
O
R
T
A
N
T
!
Return
your Warr anty
Registration Card
within 10 days
Remote control
for AZ2045 model only
Page 2
3150.115.2886.2 Printed in Hong Kong CMM/RB/0152
CLASS 1
LASER PRODUCT
Read this manual first!
Congratulations on purchasing this Philips product.
We’ve included everything you need to get started.
If you have any problems, Philips Representatives can
help you get the most from your new product by explaining:
• Hookups,
• First Time Setup, and
• Feature Operation.
Do not attempt to return this product to the store.
For fast help, call us first!
1-800-531-0039
Thank you for making Philips a part of your home!
S
E
E
W
H
Y
I
N
S
I
D
E
I
M
P
O
R
T
A
N
T
!
Return
your Warr anty
Registration Card
within 10 days
English
Français
Español
Meet Philips at the Internet
http://www.philipsusa.com
http://www.audio.philips.com
PHILIPS CONSUMER ELECTRONICS COMPANY
A Division of Philips Electronics North America Corporation
Knoxville, Tennessee 37914-1810, U.S.A.
Page 3
CLASS 1
LASER PRODUCT
Audio
Audio
CD Soundmachine
AZ 2040 • AZ 2045
Read this manual first!
Congratulations on purchasing this Philips product.
We’ve included everything you need to get started.
If you have any problems, Philips Representatives can
help you get the most from your new product by explaining:
• Hookups,
• First Time Setup, and
• Feature Operation.
Do not attempt to return this product to the store.
For fast help, call us first!
1-800-531-0039
Thank you for making Philips a part of your home!
S
E
E
W
H
Y
I
N
S
I
D
E
I
M
P
O
R
T
A
N
T
!
Return
your Warr anty
Registration Card
within 10 days
S
E
A
R
C
H
C
D
R
E
W
R
I
T
A
B
L
E
C
O
M
P
A
T
I
B
L
E
A
Z
2
0
4
0
C
D
S
O
U
N
D
M
A
C
H
I
N
E
C
D
S
Y
N
C
H
R
O
S
T
A
R
T
R
E
C
O
R
D
I
N
G
R
E
C
O
R
D
PO
W
E
R
B
ASS
PROG
M
O
D
E
RE
M
O
T
E
SE
NS
O
R
VO
L
UM
E
HIG
H
MID
S
O
U
R
C
E
30 PRESET
DIGITAL TUNER
B
A
N
D
D
IG
IT
AL
D
Y
N
A
M
I
C
B
A
S
S B
O
O
S
T
P
R
E
S
E
T
D
O
W
N
P
R
E
S
E
T
U
P
P
L
A
Y
SE
A
R
C
H
S
T
O
P
P
A
U
SE
S
E
A
R
C
H
S
T
O
P
6 x R20 • UM-1 • D-CELLS
See A
&
* ( ) ¡
8 07 9
!!@#65
$
%^
321 4
2
3
B
CD
V
O
L
U
M
E
S
E
A
R
C
H
P
R
E
S
E
T
T
U
N
I
N
G
D
I
G
I
T
A
L
R
E
M
O
T
E
C
O
N
T
R
O
L
B
A
N
D
T
U
N
E
R
R
E
P
E
A
T
M
U
T
E
B
A
S
S
S
H
U
F
F
L
E
3
4
0
4
5
7
6
8
9
1
%
$
#
!
@
1
Remote control
for AZ2045 model only
Page 4
CLASS 1
LASER PRODUCT
Audio
Audio
CD Soundmachine
AZ 2040 • AZ 2045
Read this manual first!
Congratulations on purchasing this Philips product.
We’ve included everything you need to get started.
If you have any problems, Philips Representatives can
help you get the most from your new product by explaining:
• Hookups,
• First Time Setup, and
• Feature Operation.
Do not attempt to return this product to the store.
For fast help, call us first!
1-800-531-0039
Thank you for making Philips a part of your home!
S
E
E
W
H
Y
I
N
S
I
D
E
I
M
P
O
R
T
A
N
T
!
Return
your Warr anty
Registration Card
within 10 days
S
E
A
R
C
H
C
D
R
E
W
R
I
T
A
B
L
E
C
O
M
P
A
T
I
B
L
E
A
Z
2
0
4
0
C
D
S
O
U
N
D
M
A
C
H
I
N
E
C
D
S
Y
N
C
H
R
O
S
T
A
R
T
R
E
C
O
R
D
I
N
G
R
E
C
O
R
D
PO
W
E
R
B
ASS
PROG
M
O
D
E
RE
M
O
T
E
SE
NS
O
R
VO
L
UM
E
HIG
H
MID
S
O
U
R
C
E
30 PRESET
DIGITAL TUNER
B
A
N
D
D
IG
IT
AL
D
Y
N
A
M
I
C
B
A
S
S B
O
O
S
T
P
R
E
S
E
T
D
O
W
N
P
R
E
S
E
T
U
P
P
L
A
Y
SE
A
R
C
H
S
T
O
P
P
A
U
SE
S
E
A
R
C
H
S
T
O
P
6 x R20 • UM-1 • D-CELLS
See A
&
* ( ) ¡
8 07 9
!!@#65
$
%^
321 4
2
3
B
CD
V
O
L
U
M
E
S
E
A
R
C
H
P
R
E
S
E
T
T
U
N
I
N
G
D
I
G
I
T
A
L
R
E
M
O
T
E
C
O
N
T
R
O
L
B
A
N
D
T
U
N
E
R
R
E
P
E
A
T
M
U
T
E
B
A
S
S
S
H
U
F
F
L
E
3
4
0
4
5
7
6
8
9
1
%
$
#
!
@
2
3
4
5
6
A AB
C
7
X
A
Page 5
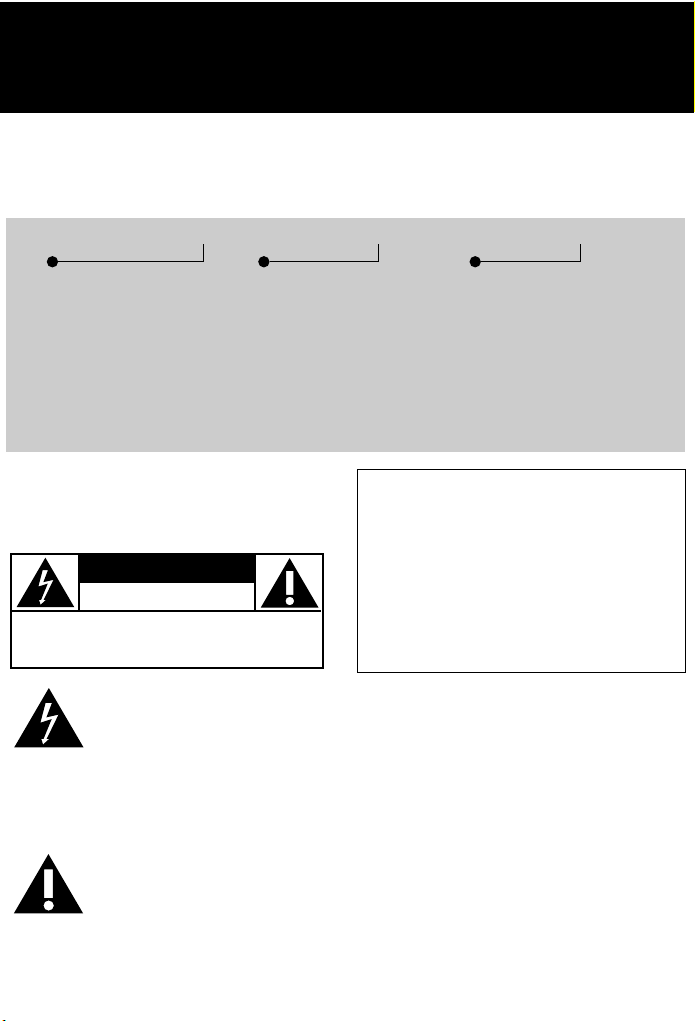
Return your Warranty Registration card today to
ensure you receive all the benefits you’re entitled to.
• Once your Philips purchase is
registered,you’re eligible to receive all
the privileges of owning a Philips
product.
Warranty
Verification
Registering your product
within 10 days confirms
your right to maximum
protection under the
terms and conditions of
your Philips warranty.
Owner
Confirmation
Your completed Warranty
Registration Card serves
as verification of
ownership in the event of
product theft or loss.
• So complete and return the Warranty
Registration Card enclosed with your
purchase at once.And take advantage
of these important benefits.
Know these
ssaaffeettyysymbols
CAUTION
RISK OF ELECTRIC SHOCK
DO NOT OPEN
CAUTION: TO REDUCE THE RISK OF ELECTRIC SHOCK, DO NOT
REMOVE COVER (OR BACK). NO USER-SERVICEABLE PARTS
INSIDE. REFER SERVICING TO QUALIFIED SERVICE PERSONNEL.
This “bolt of lightning”
indicates uninsulated material
within your unit which may
cause an electrical shock.For the safety
of everyone in your household,please
do not remove product covering.
The “exclamation point” calls
attention to features for
which you should read the
enclosed literature closely to prevent
operating and maintenance problems.
For Customer Use
Enter below the Serial No.which is located
on the bottom of the cabinet.Retain this
information for future reference.
Model No._________________________
Serial No. _________________________
WARNING: TO PREVENT FIRE
OR SHOCK HAZARD, DO NOT
EXPOSE THIS EQUIPMENT TO RAIN
OR MOISTURE.
CAUTION:To prevent electric
shock,match wide blade of plug to
wide slot,and fully insert.
Model
Registration
Returning your Warranty
Registration Card right
away guarantees you’ll
receive all the information
and special offers which
you qualify for as the
owner of your model.
Page 6
IMPORTANT SAFETY INSTRUCTIONS
1. Read these instructions.
2. Keep these instructions.
3. Heed all warnings.
4. Follow all instructions.
5. Do not use this apparatus near water.
6. Clean only with a damp cloth.
7. Do not block any ventilation openings.
Install in accordance with the
manufacturer´s instructions.
8. Do not install near any heat sources such as
radiators, heat registers, stoves, or other
apparatus (including amplifiers) that produce
heat.
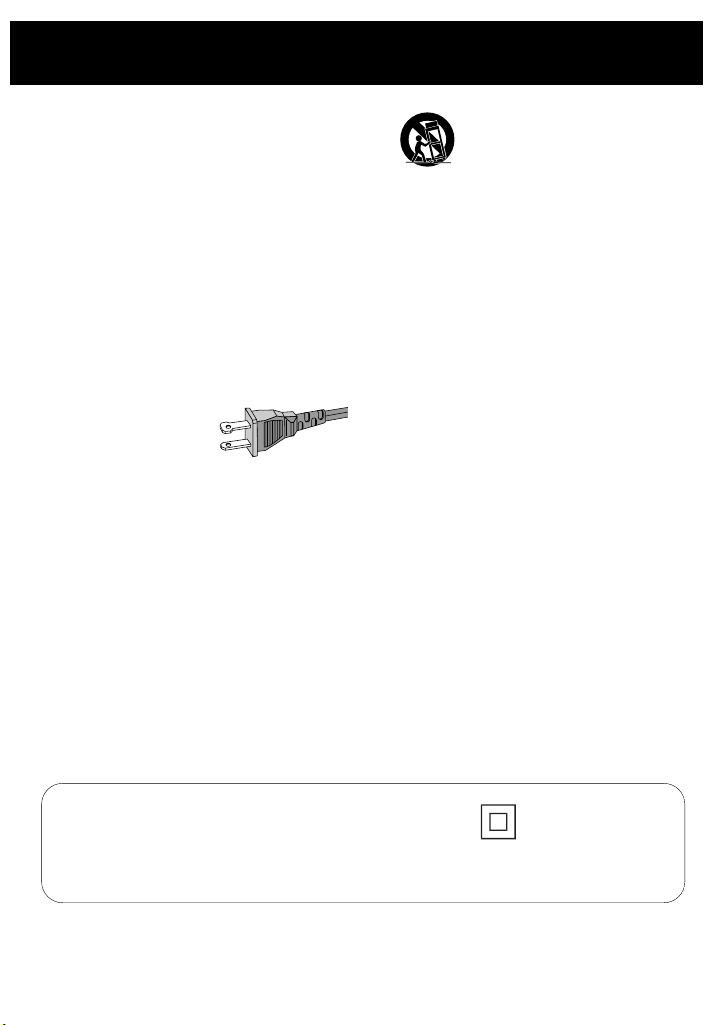
9. Do not defeat the
safety purpose of the
polarized or groundingtype plug. A polarized
plug has two blades with one wider than the
other. A grounding type plug has two blades and
a third grounding prong. The wide blade or the
third prong are provided for your safety. If the
provided plug does not fit into your outlet,
consult an electrician for replacement of the
obsolete outlet.
10. Protect the power cord from being walked on
or pinched, particularly at plugs, convenience
receptacles, and the point where they exit from
the apparatus.
11. Only use attachments/accessories specified
by the manufacturer.
AC
Polarized Plug
12. Use only with a cart, stand, tripod,
bracket, or table specified by the
manufacturer or sold with the
apparatus. When a cart is used, use
caution when moving the
cart/apparatus combination to avoid
injury from tip-over.
13. Unplug this apparatus during lightning storms
or when unused for long periods of time.
14. Refer all servicing to qualified service
personnel. Servicing is required when the
apparatus has been damaged in any way, such
as power-supply cord or plug is damaged, liquid
has been spilled or objects have fallen into the
apparatus, the apparatus has been exposed to
rain or moisture, does not operate normally, or
has been dropped.
15. Battery usage CAUTION. To prevent battery
leakage which may result in bodily injury or
damage to the unit:
• Install all batteries correctly, + and - as marked
on the unit.
• Do not mix batteries (old and new or carbon
and alkaline, etc.).
• Remove batteries when the unit is not used for a
long time.
6475-E003-01/6
Class II equipment symbol
This symbol indicates that the unit has a double insulation system.
Page 7

LIMITED WARRANTY
PORTABLE AUDIO
One Year Free Exchange
This product must be carried in for an exchange.
WHO IS COVERED?
You must have proof of purchase to exchange the product.A
sales receipt or other document showing that you purchased the
product is considered proof of purchase.Attach it to this
owner’s manual and keep both nearby.
WHAT IS COVERED?
Warranty coverage begins the day you buy your product.For
one year thereafter, a defective or inoperative product will be
replaced with a new,renewed or comparable product at no
charge to you.A replacement product is covered only for the
original warranty period.When the warranty on the original
product expires,the warranty on the replacement product also
expires.
WHAT IS EXCLUDED?
Your warranty does not cover:
• labor charges for installation or setup of the product,
adjustment of customer controls on the product,and
installation or repair of antenna systems outside of the
product.
• product repair and/or part replacement because of misuse,
accident,unauthorized repair or other cause not within the
control of Philips Consumer Electronics Company.
• reception problems caused by signal conditions or cable or
antenna systems outside the unit.
• a product that requires modification or adaptation to enable
it to operate in any country other than the country for which
it was designed,manufactured, approved and/or authorized, or
repair of products damaged by these modifications.
• incidental or consequential damages resulting from the
product.(Some states do not allow the exclusion of incidental
or consequential damages,so the above exclusion may not
apply to you.This includes, but is not limited to, prerecorded
material,whether copyrighted or not copyrighted.)
• a product that is used for commercial or institutional
purposes.
WHERE IS EXCHANGE AVAILABLE?
You may exchange the product in all countries where the
product is officially distributed by Philips Consumer Electronics
Company.In countries where Philips Consumer Electronics
Company does not distribute the product,the local Philips
service organization will attempt to provide a replacement
product (although there may be a delay if the appropriate
product is not readily available).
BEFORE REQUESTING EXCHANGE...
Please check your owner’s manual before requesting an
exchange. Adjustments of the controls discussed there may save
you a trip.
This warranty gives you specific legal rights.You may have other rights which vary from state/province to state/province.
Philips Service Solutions Group,P.O.Box 2976, Longview, Texas 75606, (903) 242-4800
EL4967E003 / MAC 4108 / 10-00
EXCHANGING A PRODUCT IN U.S.A.,
PUERTO RICO OR U.S.VIRGIN ISLANDS...
Contact your dealer to arrange an exchange.Or,ship the
product,insured and freight prepaid,and with proof of purchase
enclosed,to the address listed below.
(In U.S.A.,Puerto Rico and U.S.Virgin Islands, all implied
warranties,including implied warranties of merchantability and
fitness for a particular purpose, are limited in duration to the
duration of this express warranty.But, because some states do
not allow limitations on how long an implied warranty may last,
this limitation may not apply to you.)
EXCHANGING A PRODUCT IN CANADA...
Please contact Philips at:
(In Canada,this warranty is given in lieu of all other warranties.
No other warranties are expressed or implied,including any
implied warranties of merchantability or fitness for a particular
purpose. Philips is not liable under any circumstances for any
direct,indirect, special, incidental or consequential damages,
howsoever incurred, even if notified of the possibility of such
damages.)
TO GET OUT-OF-WARRANTY EXCHANGE...
In U.S.A.,Puerto Rico or U.S.Virgin Islands, contact Philips
Service Company at (800) 531-0039 to obtain the cost of outof-warranty exchange.Then carefully pack the product and ship
it to the Small Product Service Center (address listed above).In
Canada,call the phone number listed above under “Exchanging a
Product a Canada” to obtain the cost of out-of-warranty
exchange.
REMEMBER...
Please record the model and serial numbers found on the
product below.Also,please fill out and mail your warranty
registration card promptly. It will be easier for us to notify you if
necessary.
MODEL # _______________________________________
SERIAL # _______________________________________
Small Product Service Center
Philips Service Company
907 Snapps Ferry Road,Plant 2, Building 6
Greeneville,TN 37743
1-800-661-6162 (French Speaking)
1-800-363-7278 (English Speaking)
Page 8

This product complies with the FCC-Rules, Part 15 and with 21 CFR 1040.10. Operation is subject to the
following two conditions:
1 This device may not cause harmful interference, and
2 This device must accept any interference received, including interference that may cause undesired
operation.
CAUTION
Use of controls or adjustments or performance of procedures other than herein may result in hazardous
radiation exposure or other unsafe operation.
L’appareil répond aux normes FCC, Part 15 et 21 CFR 1040.10. Fonctionnement soumis aux deux conditions
suivantes:
1 Cet appareil ne doit pas provoquer d’interférences nuisibles, et
2 Cet appareil doit accepter toute interférence reçue, y compris les interférences susceptibles de provoquer
un fonctionement peu satisfaisant.
CAUTION
L’emploi de commandes, de réglages ou l’application de procédures autres que ceux mentionnés dans ce
manuel peuvent occasionner des radiations d’exposition ou un fonctionnement dangereux.
El aparato cumple las normas FCC, Parte 15 y 21 CFR 1040.10. Funcionamiento dependiente de dos
condiciones siguientes:
1 Este aparato no puede provocar interferencia dañina, y
2 Este aparato debe aceptar cualquier interferencia recibida, incluyendo las interferencias que pueden provocar
un funcionamiento insuficiente.
ATENCIÓN
El uso de mandos o ajustes o la ejecucción de métodos que no sean los aquí descritos puede ocasionar
peligro de exposición a radiación.
NOTES
Page 9

English CONTROLS
TOP AND FRONT PANELS
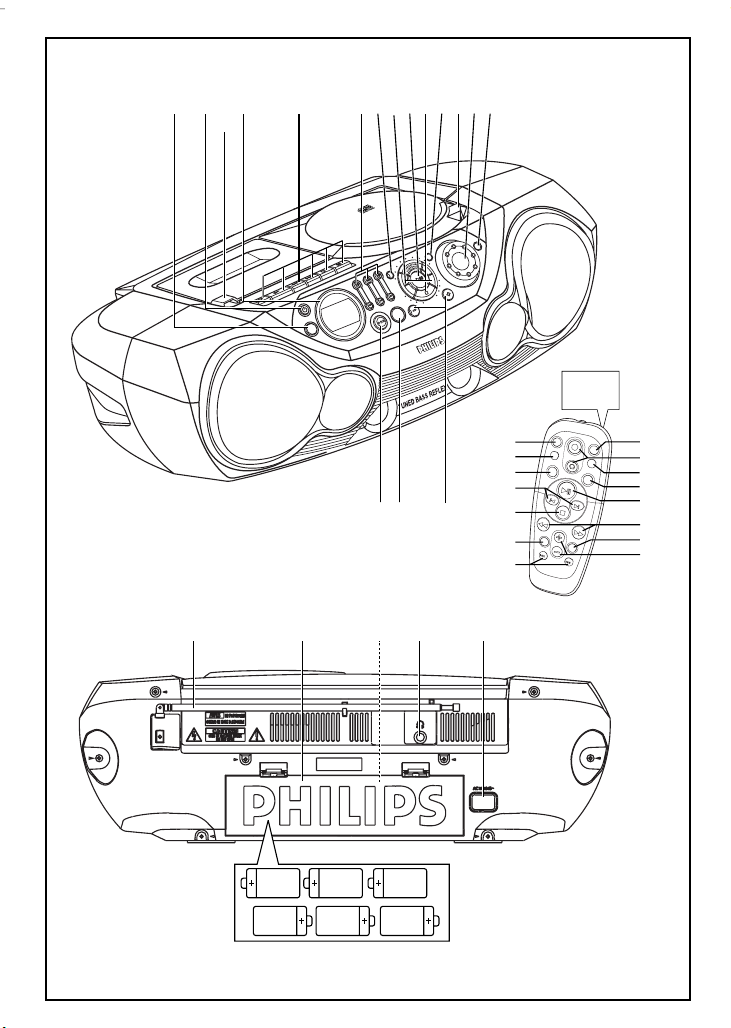
(See 1)
1SOURCE – selects CD/ TUNER / TAPE function
2y – power on/ off switch
3Display – shows the status of the set
4Cassette recorder keys
RECORD 0 – starts recording
PLAY 2 – starts playback
SEARCH 5/6 – fast winds/rewinds tape
STOP 9 – stops tape
PAUSE ; – pauses playback or recording
5BASS, MID, HIGH – EQ keys to adjust the bass,
mid & treble frequencies
6PROG
CD: programs tracks and reviews the program;
Tuner: programs preset radio stations
Navigation controls
7∞, §
CD: – searches back and forward within a
track;
– skips to the beginning of a current
track/ previous/ later track
Tuner: – tunes to radio stations (down, up).
82; – starts or pauses CD playback
99 – stops CD playback;
– erases a CD program
0MODE – selects different play modes:
e.g.
REPEAT or SHUFFLE (random) order
!Door – lift at the respective door to open cassette/
tape or cd compartment
@VOLUME – to adjust volume level
#REMOTE SENSOR (for AZ2045 model only) –
infrared sensor for remote control
$PRESET DOWN/ UP (–, +) – selects a preset
tuner station (down, up)
%BAND – selects waveband
^DBB – (Dynamic Bass Boost) activates a more
vivid bass response
BACK PANEL
&Telescopic antenna – improves FM reception
*Battery compartment – for 6 batteries,
type R-20, UM1 or D-cells
(Voltage selector (inside battery compartment,
some versions only) – adjust to match the local
voltage 110/220V before plugging in the set
)p – 3.5 mm stereo headphone jack
Note: The speakers will be muted when
headphones are connected to the set.
¡AC MAINS – inlet for power cord
REMOTE CONTROL (for AZ2045 only)
1CD – selects CD sound source
2y – switches the set off
Note: When the set is switched off, the remote
control cannot operate any commands. The set
needs to be switched on first via the set's y
button.
3VOLUME 3,4 – adjusts volume level (up, down)
4SHUFFLE – plays all CD tracks in random order
5BASS – selects DBB on/off
62; – starts/ pauses CD playback
7SEARCH 5, 6 – searches backwards/ forwards
within a track
8BAND – selects FM/ AM waveband
9PRESET +, – – selects a preset radio station
(up, down)
0TUNING ∞, § – tunes to tuner stations
(down, up)
!TUNER – selects tuner sound source
@9 – stops CD playback;
– erases a CD program
#¡, ™ – skips to the beginning of a current track
previous/ subsequent track
$MUTE – interrupts/ resumes sound
%REPEAT – repeats a track /program/ entire CD
CAUTION
Use of controls or adjustments or performance of
procedures other than herein may result in hazardous
radiation exposure or other unsafe operation.
POWER SUPPLY
Whenever convenient, use the power supply to
conserve battery life. Make sure you remove the
power plug from the set and wall outlet before
inserting batteries.
Page 10
Batteries (not included)
• Insert 6 batteries, type R-20, UM-1 or D-cells,
(preferably alkaline) with the correct polarity.
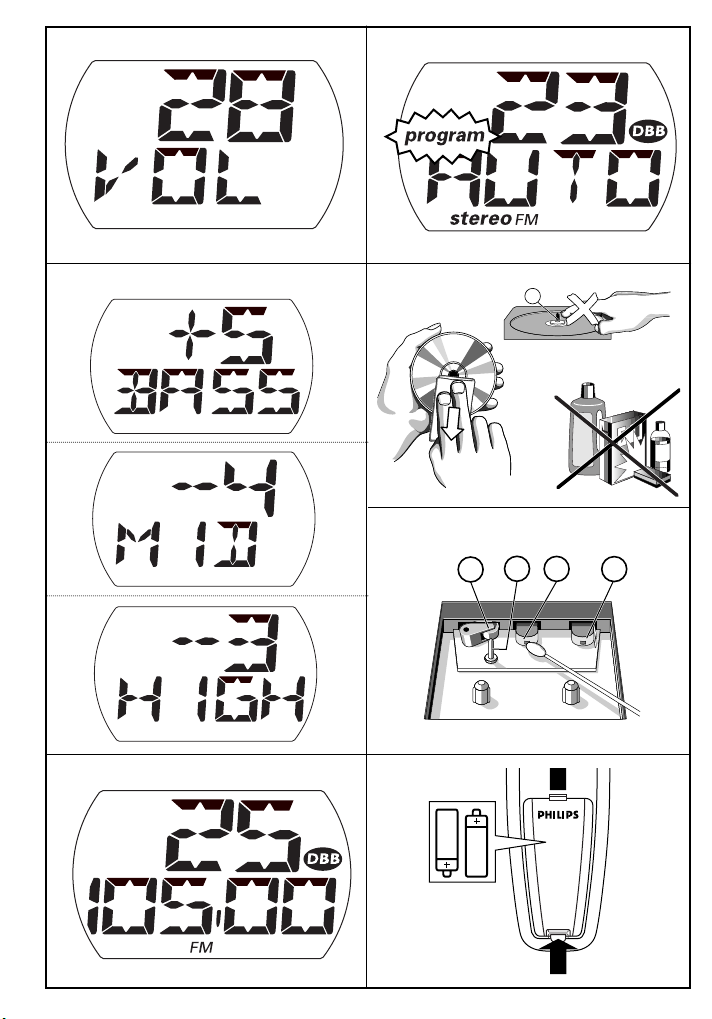
Remote control (for AZ2045 only /See A)
• Insert 2 batteries, type AAA, R03 or UM4
(preferably alkaline).
Incorrect use of batteries can cause electrolyte
leakage and will corrode the compartment or cause
the batteries to burst.
• Do not mix battery types: e.g. alkaline with carbon
zinc. Only use batteries of the same type for the
set.
• When inserting new batteries, do not try to mix old
batteries with the new ones.
• Batteries contain chemical substances, so
they should be disposed of properly.
Using AC Power
1 Check if the power supply, as shown on the type
plate located on the bottom of the set,
corresponds to your local power supply. If it does
not, consult your dealer or service center.
2 If your set is equipped with a voltage selector,
adjust the selector so that it matches with the
local power .
3 Connect the power cord to the wall outlet.
4 To disconnect the power supply, unplug the set
from the wall outlet.
Auto-Standby mode
When a CD or tape has reached the end of playback
and remains in the stop position for more than
15 minutes, the set will switch off automatically to
save energy.
The type plate is located on the bottom of the
set.
BASIC FUNCTIONS
Switching on and off and selecting function
1 Press y on the set to switch on.
2 Press SOURCE once or more to select:
CD, TUNER
or TAPE function.
3 Press y to switch off the set.
Notes:
– To change from
TAPE to TUNER or CD function, or
when you are switching off the set: first, make
sure you press the tape STOP 9 key to end
playback and all the cassette keys are released.
– The tone, sound settings, tuner presets and the
volume level (up to a maximum volume level of 20)
will be retained in the set’s memory.
Adjusting volume and sound
1 Adjust the volume with the VOLUME control.
™ Display shows the volume level and a number
from 0-32. (See 2)
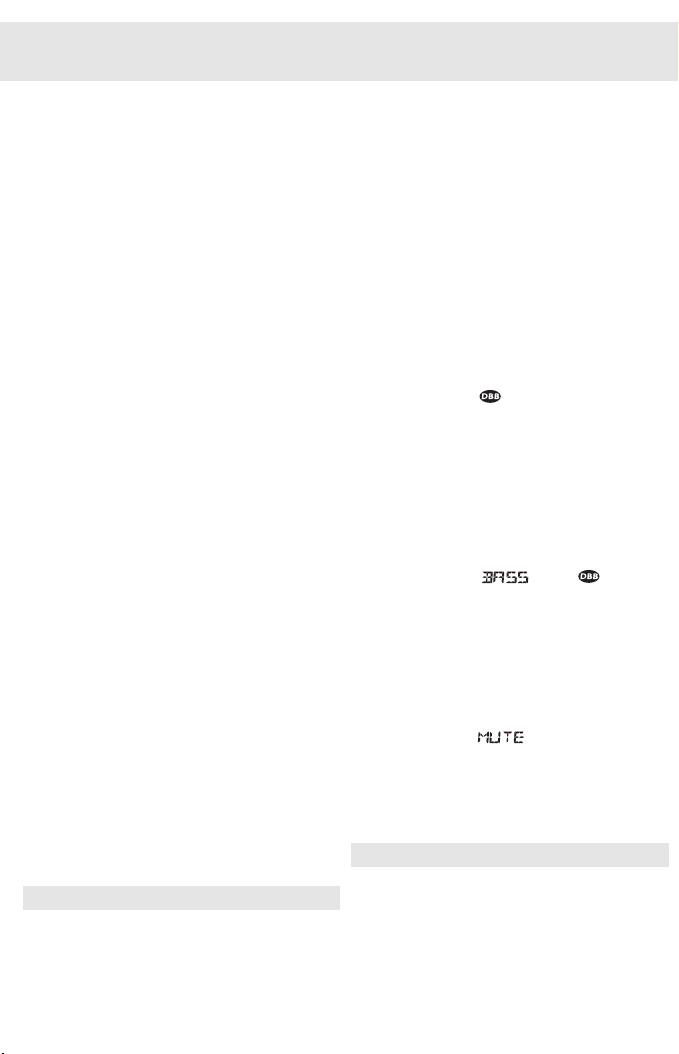
2 Press DBB once or more to select dynamic bass
boost on or off.
™ Display: shows when activated.
3 To adjust the bass, mid and treble tones, press and
hold + or – on the BASS, MID, HIGH keys until
you reach the desired level, –5 to +5
™ Display briefly shows BASS, MID, or HIGH and the
level. (See 3)
Note: To prevent sound interference the bass control
options operate exclusively. You cannot combine the
bass from BASS with DBB
™ The display shows or the indicator is
automatically switched off to remind you if you
attempt to use both bass settings
Mute (for AZ2045 only)
1 Press MUTE on the remote control to interrupt
sound reproduction instantly.
™ Playback continues without sound and the
display flashes .
2 To reactivate sound reproduction you can:
– press MUTE again;
– adjust the volume controls;
– change source.
DIGITAL TUNER
Tuning to radio stations
1 Press y to on, then press SOURCE to select
TUNER.
– TU is displayed briefly and then the radio station
frequency, waveband and, if programmed, a
preset number are shown. (See 4)
2 Press BAND once or more to select your
waveband.
BASIC FUNCTIONS DIGITAL TUNER
Page 11
DIGITAL TUNER CD CD CASSETTE RECORDER
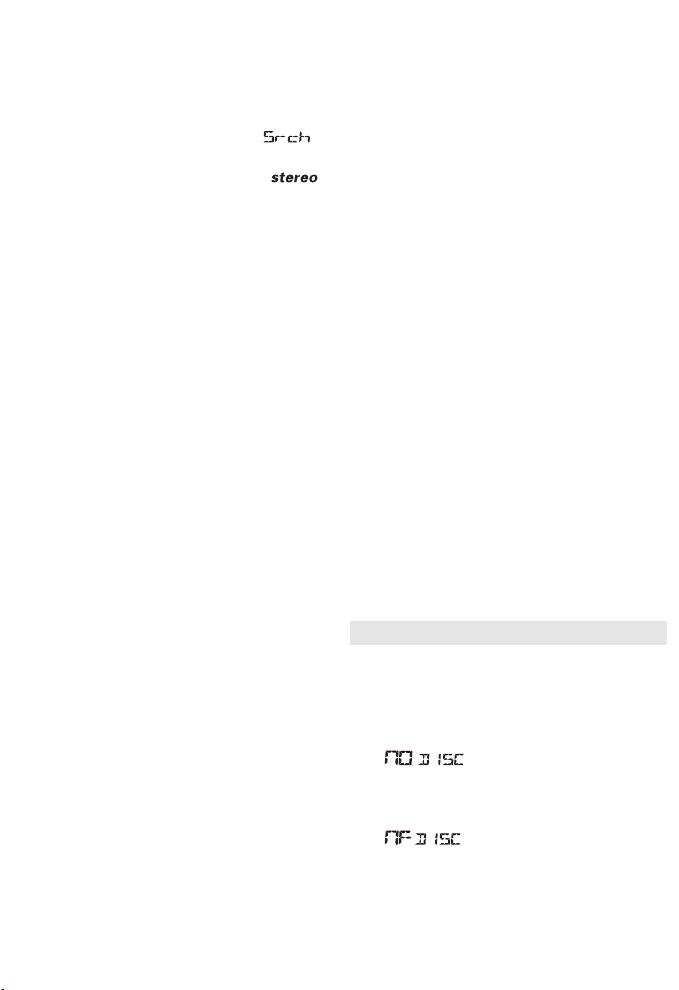
3 Press and hold ∞ or § until the frequency in the
display starts running.
™ The radio automatically tunes to a station of
sufficient reception. Display shows
during automatic tuning.
™ If a FM station is received in stereo, is
shown.
4 Repeat steps 2-3 if necessary until you find the
desired station.
• To tune to a weak station, press∞ or § briefly
and repeatedly until you have found optimal
reception.
To improve radio reception:
• For FM, extend, incline and turn the telescopic
antenna. Reduce its length if the signal is too
strong.
• For AM, the set uses a built-in antenna. Direct this
antenna by turning the whole set.
Programming radio stations
You can store up to a total of 30 radio stations in the
memory, manually or automatically (Autostore).
Manual programming
1 Tune to your desired station (see Tuning to radio
stations).
2 Press PROG to activate programming.
3 Press PRESET DOWN/ UP once or more to select
a preset number.
4 Press PROG to confirm.
5 Repeat steps 1-4 to store other stations.
Note: You can erase a preset station by storing
another frequency in its place.
Autostore
Autostore automatically starts programming radio
stations from preset 1. Available stations are
programmed in order of waveband reception strength:
FM, followed by AM. Any previous presets e.g.
manually programmed will be erased.
• Press PROG for 4 seconds or more to activate
autostore programming.
™ The display shows AUTO, program blinks,
followed by the radio station details when
stored. (See 5)
After all stations are stored, the first autostore preset
station will then automatically play.
To listen to a preset or autostore station
Press the PRESET (up or down) buttons once or more
until the desired preset station is displayed.
Changing tuning grid (some versions only)
In North and South America the frequency step
between adjacent channels in the AM and FM band
are 10 KHz and 100 KHz respectively. In the rest of the
world this step is 9 KHz and 50 KHz. Usually the
frequency step has been preset in the factory for your
area.
1 Check that the set is completely switched off.
2 To select 9KHz: Simultaneously, press MODE and
PRESET DOWN on the set.
3 Switch the set on to TUNER and then release the
controls.
• To select 10KHz: Repeat steps 1-3 but in step 2,
simultaneously, press MODE and PRESET UP on
the set.
™ When you tune to radio stations, the display
shows tuning in either steps of 9 kHz or 10 kHz.
™ All preset and autostore stations will be
affected and you may need to reprogram
stations.
CD PLAYER
Playing a CD
This CD player plays Audio Discs including
CD-Recordables and CD-Rewritables.
1 Press y to on, then SOURCE to select
™ if no CD is inserted.
2 Insert a CD with the printed side facing up and
close the CD door.
™ Display: total number of tracks and playing time.
™ is shown if you have inserted a
non-finalized CD-R(W).
CD.
Page 12
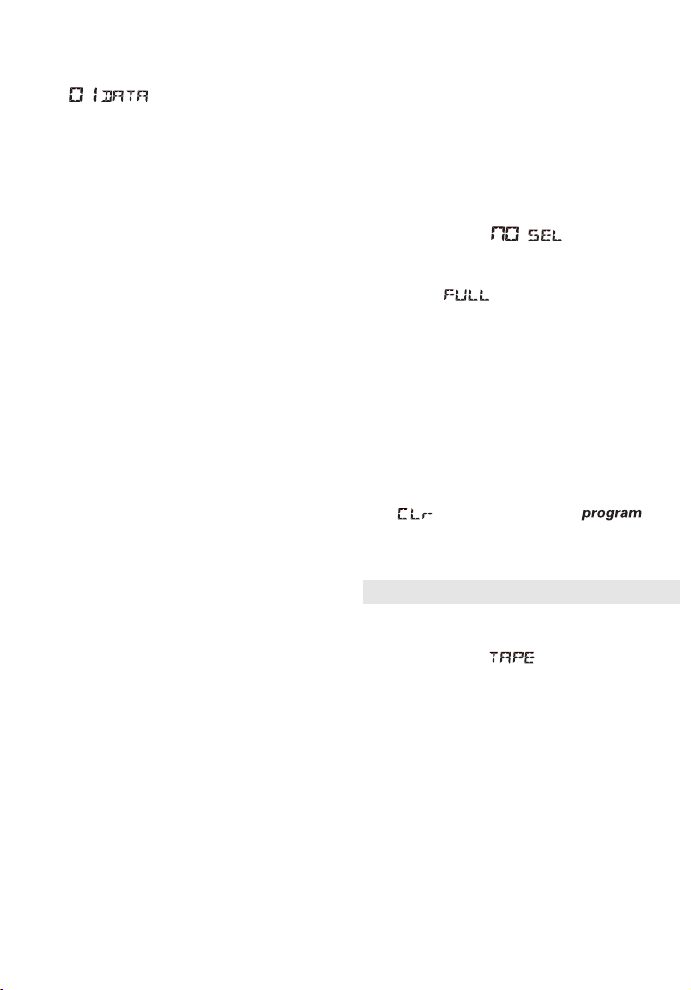
3 Press 2; to start playback.
™ if your CD contains non-audio
files
4 To pause playback press 2;. Press 2; again to
resume play.
5 To stop CD playback, press 9.
Note: CD play will also stop when:
– the CD door is opened
– the CD has reached the end
– you select tape or tuner source.
Selecting a different track
• Press ∞ or § on the set, once or repeatedly to
select.
• In the pause/stop position, press 2; to start
playback.
Finding a passage within a track
1 Press and hold ∞ or §.
™ The CD is played at high speed and low volume.
2 When you recognize the passage you want, release
∞ or § to resume normal playback.
Note: During a CD program or if shuffle/ repeat
active, searching is only possible within a track.
Programming track numbers
In the stop position, select and store your CD tracks in
the desired sequence. Up to 20 tracks can be stored in
the memory.
1 Press ∞ or § on the set to select your desired
track number.
2 Press PROG.
™ If you attempt to program without first selecting
a track number, is shown.
3 Repeat steps 1-2 to select and store all desired
tracks.
™ Display: if you try to program more than
20 tracks.
Reviewing the program
In the stop position, press and hold PROG until the
display shows all your stored track numbers in
sequence.
Erasing a program
You can erase the program by:
• pressing 9 twice
™ is displayed briefly and
disappears.
• selecting TAPE or TUNER source.
Different play modes: SHUFFLE and REPEAT
You can select and change the various play modes
before or during playback, and combine the modes
with PROGRAM.
shuffle – tracks of the entire CD/ program are
played in random order
shuffle and repeat all – to repeat the entire CD/
program continuously in random order
repeat all – repeats the entire CD/ program
repeat (and shuffle repeat) – plays the current
(random) track continuously
1 To select play mode, press MODE once or more.
2 Press 2; to start playback if in the stop position.
3 To select normal playback, press MODE repeatedly
until the various modes are no longer displayed.
– You can also press 9 to cancel your play mode.
CASSETTE RECORDER
Cassette playback
1 Press y to on, then SOURCE to select
TAPE.
™ Display: shows throughout tape
operation.
2 Insert a cassette and close the door.
3 Press PLAY 2 to start playback.
4 To pause, press PAUSE ;. Press again to resume.
5 Press SEARCH 5 or 6 to fast wind the tape.
6 To stop the tape, press STOP 9.
• The keys are automatically released at the end of a
tape, except if PAUSE ; has been activated.
Page 13

CASSETTE RECORDER MAINTENANCE & SAFETY
GENERAL INFORMATION ON RECORDING
• Recording is permissible insofar as copyright or.
other rights of third parties are not infringed.
• For recording, use only NORMAL type cassettes
(IEC type I) on which the tabs have not yet been
broken. This deck is not suited for recording on
CHROME (IEC II) or METAL (IEC IV) type cassettes.
• The best recording level is set automatically.
Altering the VOLUME, DBB or BASS, MID &
HIGH controls will not affect the recording.
• To protect a tape from accidental erasure, break
out the tabs. If you wish to record again, cover the
tabs with a piece of adhesive tape.
CD Synchro Start recording
1 Select CD function.
2 Insert a CD and if desired, program track numbers.
3 Open the cassette door.
4 Insert a suitable tape into the cassette deck and
close the door.
5 Press RECORD 0 to start recording.
– Playing of the CD program starts automatically
from the beginning of the program. You don’t
need to start the CD player separately.
™ To select and record a particular passage within
a CD track:
• Press ∞ or §. Release the control when you
recognize the passage you want.
• To pause CD playback, press 2;.
• Recording starts from this exact point in the
track when you press RECORD 0.
6 To pause recording, press PAUSE ;.
Press PAUSE ; again to resume recording.
7 To stop recording, press STOP 9.
Recording from the Radio
1 Tune to the desired radio station (see Tuning to
radio stations).
2 Follow steps 3-7, under Synchro Start CD
recording.
Maintenance & Safety
CD player and CD handling (See 6)
• If the CD player cannot read CDs correctly, use a
cleaning CD to clean the lens before taking the set
to repair.
• The lens of the CD player should never be touched!
• Sudden changes in the surrounding temperature
can cause condensation on the lens of your CD
player. Playing a CD is then not possible. Do not
attempt to clean the lens but leave the set in a
warm environment until the moisture evaporates.
• Always close the CD door to avoid dust on the
lens.
• To clean the CD, wipe in a straight line from the
center towards the edge using a soft, lint-free
cloth. Do not use cleaning agents as they may
damage the disc.
• Never write on a CD or attach any stickers to it.
Safety Information
• Don’t expose the set, batteries, CDs or cassettes to
humidity, rain, sand or excessive heat.
• Clean the set with a dry cloth. Don’t use any
cleaning agents containing alcohol, ammonia,
benzene or abrasives as these may harm the set.
• Place the set on a hard and flat surface so that the
system does not tilt. Make sure there is good
ventilation to prevent the set overheating.
• The mechanical parts of the set contain selflubricating bearings and must not be oiled or
lubricated.
Tape deck maintenance (See 7)
To ensure quality recording and playback of the tape
deck, clean parts A, B and C as shown, once a
month. Use a cotton bud slightly moistened with
alcohol or a special head cleaning fluid to clean the
deck.
1 Open the cassette door.
2 Press PLAY 2 and clean the roller C.
3 Press PAUSE ; and clean the heads A, and the
capstan B.
4 After cleaning, press STOP 9.
Page 14
TROUBLESHOOTING
WARNING
Do not open the set as there is a risk of electric shock! Under no circumstances should you try to
repair the set yourself, as this will invalidate the warranty.
If a fault occurs, first check the points listed below before taking the set for repair.
If you are unable to remedy a problem by following these hints, consult your dealer or service center.
Remote control does not function properly/
cannot turn on the set
– Set is switched off
• Press y button on the set to switch on (See note:
remote control)
– Batteries dead/ incorrectly inserted
• Insert (fresh) batteries correctly
– Distance/ angle between the set too large
• Reduce the distance/ angle
No sound /power
– Volume not adjusted
• Adjust the VOLUME
– Power cord not securely connected
• Connect the AC power cord properly
– Batteries dead/ incorrectly inserted
• Insert (fresh) batteries correctly
– Headphones connected to the set
• Disconnect headphones
Severe radio hum or noise
– Electrical interference: set too close to TV, VCR or
computer
• Increase the distance
Poor radio reception
– Weak radio signal
• FM: Adjust the FM telescopic antenna
Poor cassette sound quality
– Dust and dirt on the heads, etc.
• Clean deck parts, see Maintenance
– Use of incompatible cassette types
(METAL or CHROME)
• Only use NORMAL (IEC I) for recording
Recording does not work
– Cassette tab(s) may be broken
• Apply adhesive tape over the missing tab space
indication
– CD badly scratched or dirty
• Replace/ clean CD, see Maintenance
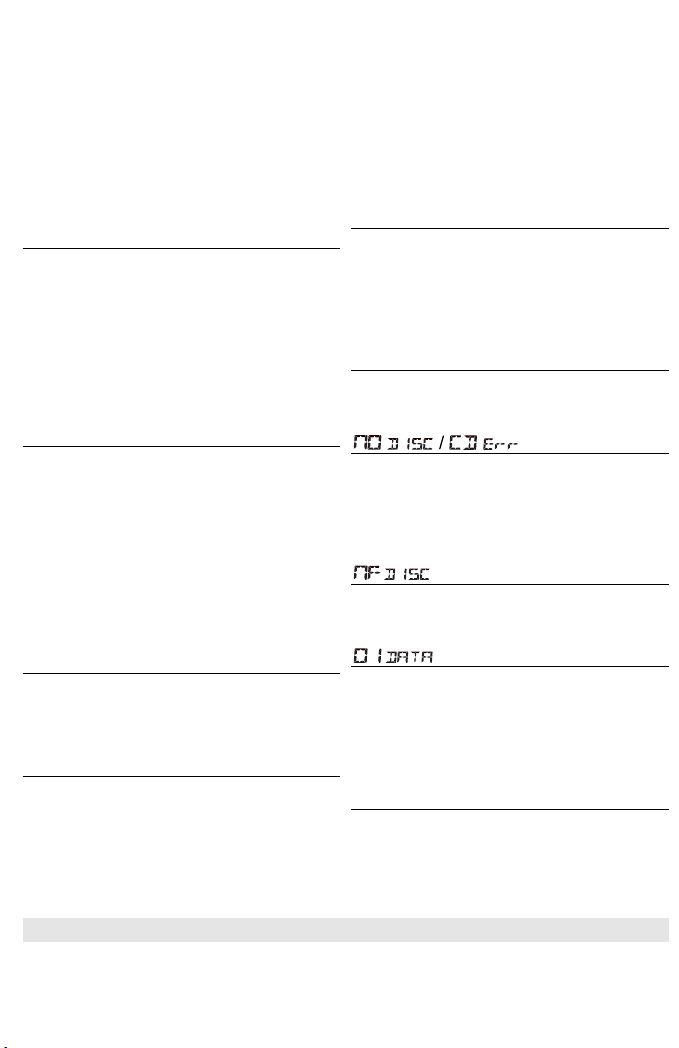
– Laser lens steamed up
• Wait until lens has cleared
indication
– CD-R(W) is blank/ not finalized
• Use a finalized CD-R(W)
indication
– CD-ROM disc inserted/
CD contains non-audio files
• Use CD Audio discs only/
press ∞ or § once or more to skip to a CD audio
track instead of the data files
The CD skips tracks
– CD damaged or dirty
• Replace or clean CD
– SHUFFLE or PROGRAM is active
• Switch off SHUFFLE / PROGRAM
Environmental information
We have done our best to reduce the packaging and make it easy to separate into 3 materials: cardboard,
expandable polystyrene, polyethylene.
Your set consists of materials which can be recycled if disassembled by a specialized company. Please observe
the local regulations regarding the disposal of packaging, dead batteries and old equipment.
 Loading...