

Philips AZ1816/55, AZ1816 User Manual
AZ1816MP3-CD Soundmachine
User Manual
1
2
9
)
¡
0
^
&
(
*
!
%
$
@
3
4
7
5
6
8
6xR14•UM-2•C-CELLS
#
110V127V
220V240V
1
USB
DIRECT
ALBUM
2
8
3
6
7
4
5
9

Connecting USB
0
USB mass
storage device
USB cable

English Controls / Power Suppy
Supplied accessories
– AC power cord
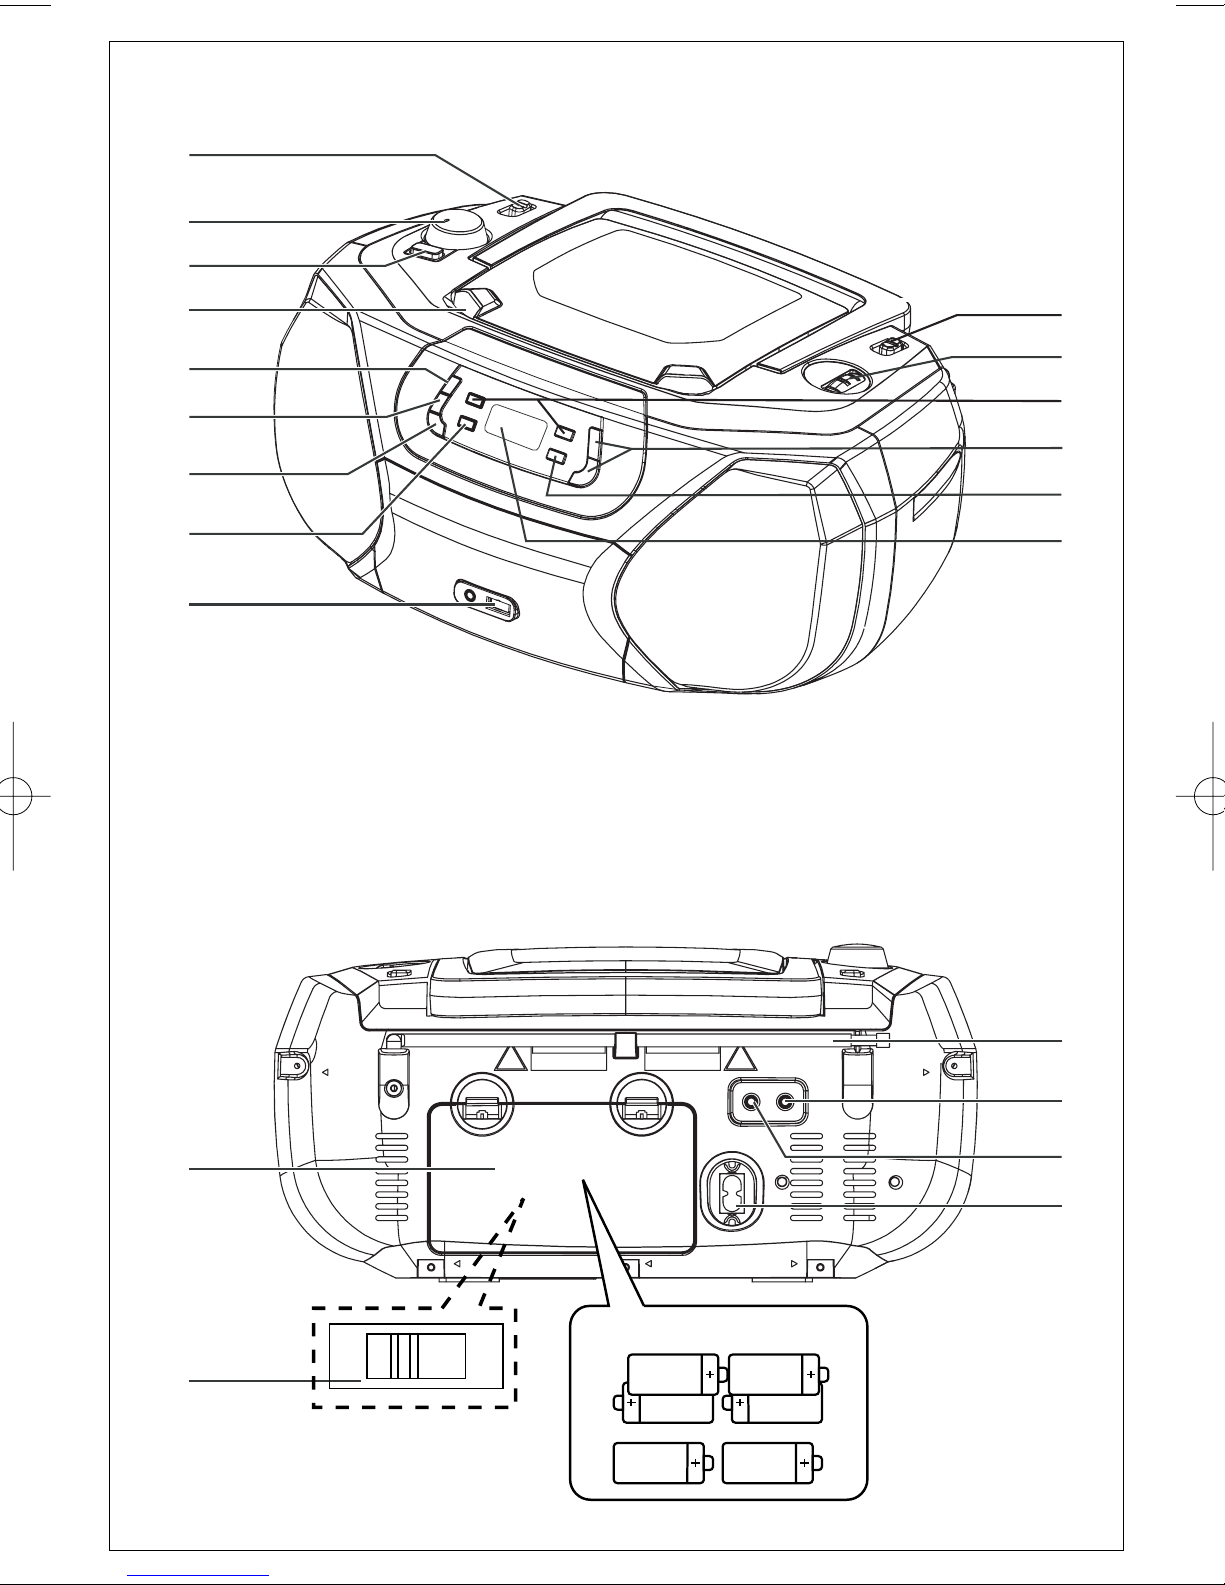
Top and front panels (See 1)
1
Source selector: CD/USB,TUNER,
AUX, OFF
–
selects CD/MP3-CD (or USB mode), radio
or AUX
–
switches off the set
2
VOLUME– adjusts volume level
3
DBB– turns the bass enhancement on/off.
4 LIFT- O PEN
– lifts here to open the disc
door
5
PROG – programs tracks and reviews the
program
6 MODE – selects diffrent play modes:
e.g. REPEAT or SHUFFLE (random order)
7 CD/USB – enters disc or USB mode
8
2;–starts or pauses disc/USB playback
9 USB port – connects an external USB mass
storage device
0
BAND–selects wavebands, MW or FM
!
TUNING
– tunes to radio stations
@ ∞§
–
For disc
/ USB play:
– skips to the beginning of a current/
previous/ later track
– fast searches backwards and forwards with-
in a track
#
ALBUM+/-
– For MP3-CD/ USB play: select albums
$
9 –stops disc/USB playback;
–
erases a program
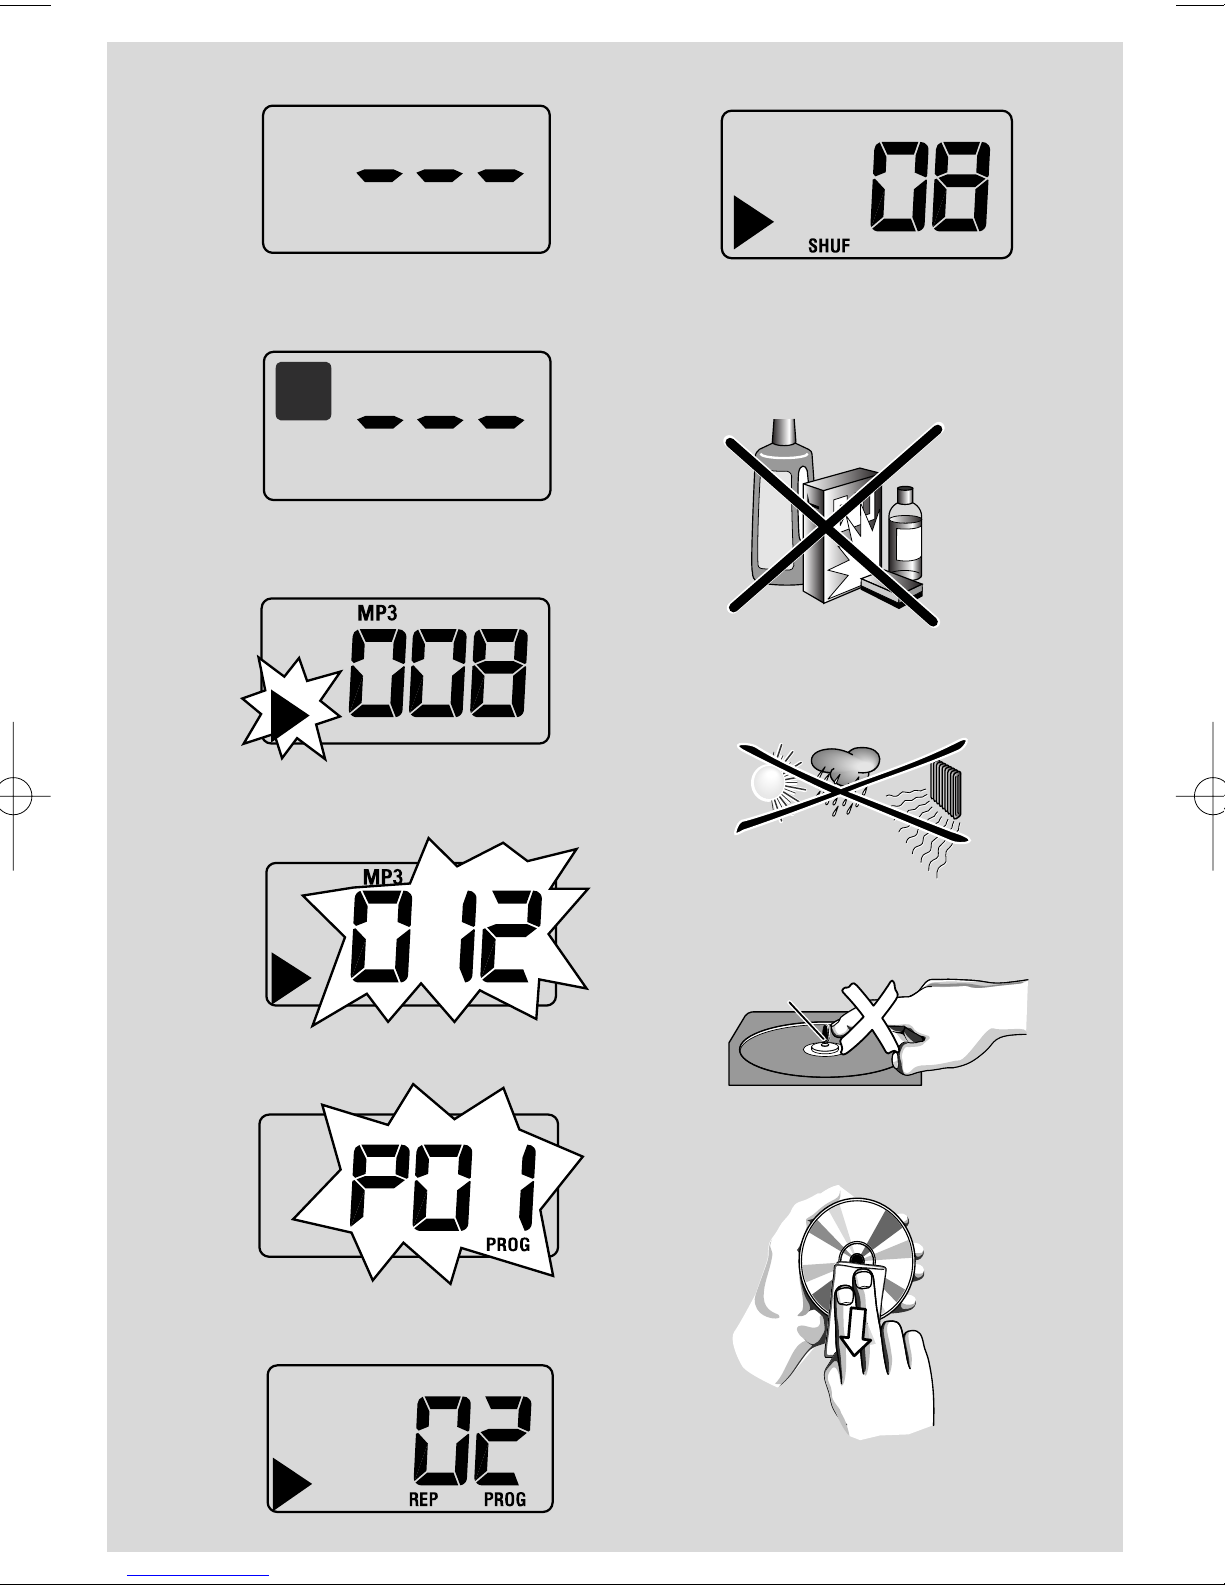
% Display
–
shows disc/USB play functions
Back panel (See 1)
^ Telescopic antenna – improves FM
reception
& p – 3.5 mm stereo headphone socket
Helpful hints: The speakers will be muted
when headphones are connected to the set.
* AUX –
3.5 mm
audio input jack
( AC~ MAINS – inlet for power cord
) Battery door – open to insert 6 x 1.5V
R-14/ UM2/ C-cells
¡ Voltage selector – adjust to match the
local voltage 110/220V.
CAUTION
- Visible and invisible laser radiation.
If the cover is open, do not look at
the beam.
- High voltage! Do not open.You run
the risk of getting an electric shock.
The machine does not contain any
user-serviceable parts.
- Modification of the product could
result in hazardous radiation of
EMC or other unsafe operation.
Power Supply
Whenever convenient, use the power supply
cord if you want to conserve battery life.
Make sure you remove the plug from the set
and wall outlet before inserting batteries.
Batteries (not included)
1 Open the battery door and insert 6 batteries,
type R-14, UM-2 or C-cells, (preferably
alkaline) with the correct polarity as indicated
by the "+" and "–" symbols inside the compartment (See 1).
 Loading...