

Page 1
DYNAMIC
•CD
•RADIO
•TAPE
POWER OFF
DBB
BOOST
POWER ON
SHUFFLE
SEARCH
MODE
STOP
PLAY•PAUSE
FM
FM -
AM -
88
92
96
100
104
108
MHz
AM
530
650
830
1000
1200
1600
KHz
OPEN
PAUSE
SEARCH
PLAY
RECORD
STOP • OPEN
PAUSE
SEARCH
PLAY
RECORD
STOP • OPEN
@
4
3
2
1
!
0
7
9
5
6
8
#%
$
3
Page 2

CONTROLS
English
TOP and FRONT PANEL
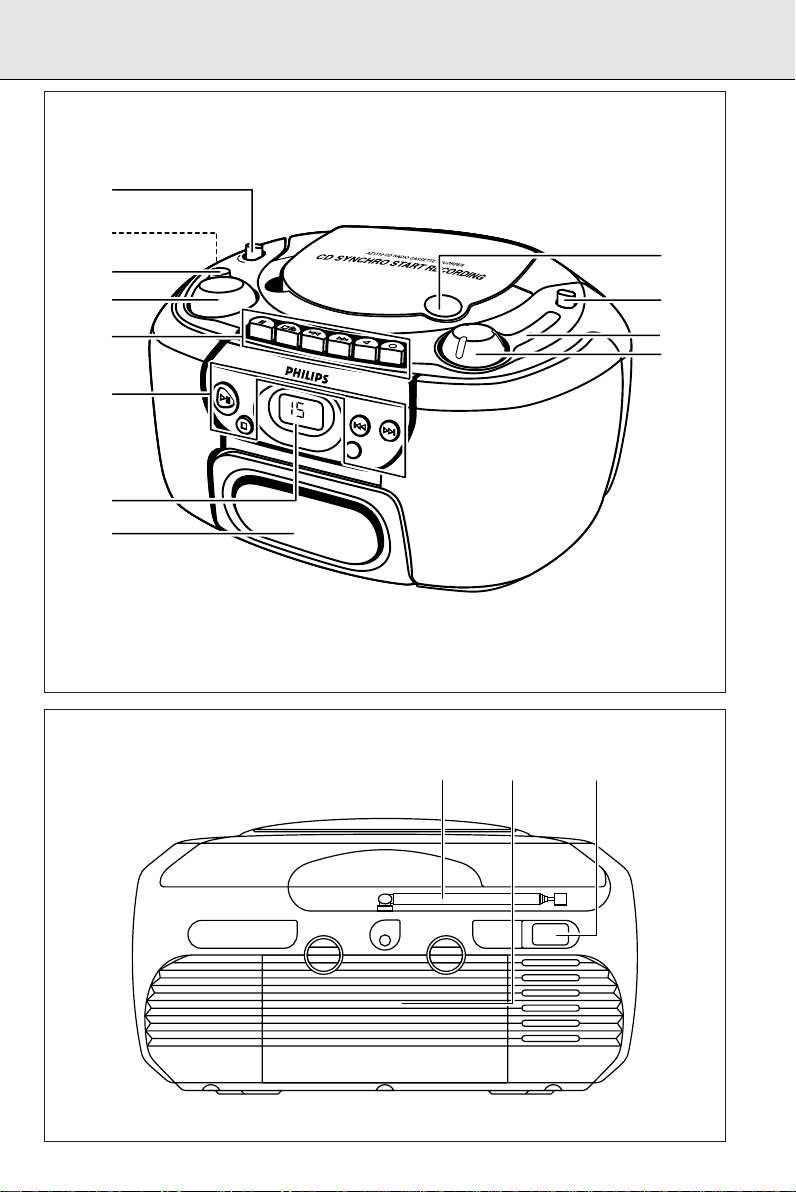
1 DBB (Dynamic Bass Boost) – to increase the bass level
2 VOLUME – to adjust the volume level
3 Cassette keys
PAUSE ; – to interrupt playback
STOP•OPEN 9/– to stop playback and open the cassette compartment
SEARCH 5 – to fast forward the tape
SEARCH 6 – to fast rewind the tape
PLAY 1 – to start playback
RECORD 0 – to start recording
4 CD buttons
PLAY•PAUSE 2; – to start or interrupt CD playback
STOP 9 – to stop playback
SEARCH ∞§– to skip or search a passage or a track
MODE – to select a different playback mode e.g. to SHUFFLE or REPEAT and to program track
numbers
5 CD display – to indicate CD functions
6 Cassette compartment
7 TUNING – to tune to radio stations
8 Tuning dial pointer
9 Band selector – to select the wave band (FM-LW-MW)
0 OPEN – to open the CD door
! Source selector – POWER ON/OFF switch and to select the sound source: CD - RADIO - TAPE
@ p – 3.5 mm headphone socket
Note:
Connecting headphones will automatically disconnect the speakers
BACK PANEL
# Telescopic aerial – To improve FM reception
$ MAINS – for mains lead
% Battery door – to open the battery compartment
Both the model and production numbers can be found on the bottom of the set.
4
Page 3
BATTERIES
POWER SUPPLY
Whenever convenient, use the mains supply if you want to conserve
battery life. Make sure you remove the mains plug from the set and
wall socket before inserting batteries.
Batteries (optional)
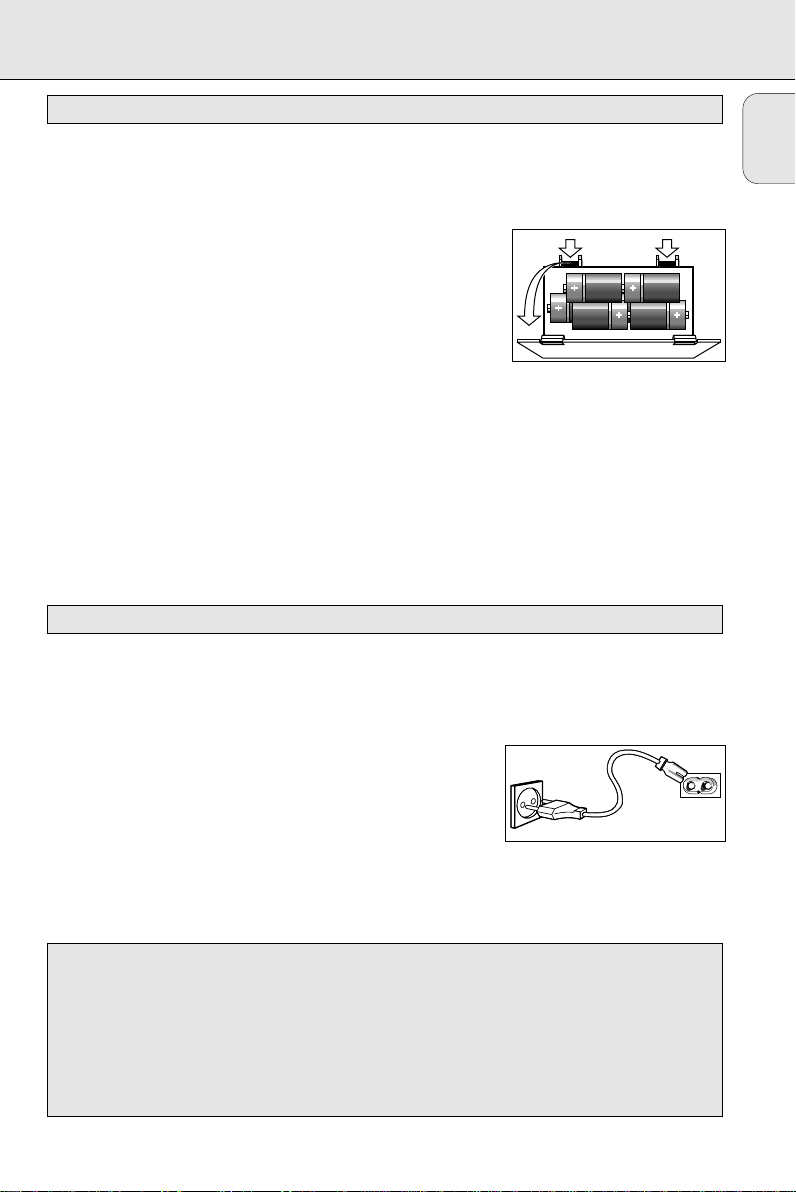
1.
Open the battery compartment and insert as shown six batteries,
type R20, or D-cells.
2.
Replace the compartment door, making sure the batteries are
firmly and correctly in place.
3.
Remove the batteries if exhausted or if they will not be used
again for a long period.
Batteries contain chemical substances, so they should
be disposed of properly.
– The incorrect use of batteries can cause electrolyte leakage and
will corrode the compartment or cause the batteries to burst.
Therefore:
– Do not mix battery types, e.g. alkaline with zinc carbonate.
– When inserting new batteries, replace all batteries at the same
time.
Note:
The battery supply is switched off when the set is connected
to the mains.
MAINS
1.
Check if the mains voltage as shown on the type plate (on the
bottom of the set) corresponds to your local mains voltage. If it
does not, consult your dealer or service organisation.
2.
If your set is equipped with a voltage selector, set it to the local
mains voltage.
3.
Connect the mains lead to the MAINS socket and the wall
socket.
– The set is now ready to use.
4.
To switch off the mains supply completely, pull the mains plug
out of the wall socket.
– Disconnect the mains lead when you change over to battery
supply, or to protect the set during heavy thunderstorms.
English
6 x D-cells - R20
MAINS
Environmental information
All redundant packaging material has been omitted. We have done our utmost to make the packaging
easily separable into three mono materials: cardboard (box), expandable polystyrene (buffer) and
polyethylene (bags, protective foam sheet).
Your set consists of materials which can be recycled if dissassembled by a specialized
company. Please observe the local regulations regarding the disposal of packaging
materials, exhausted batteries and old equipment.
5
Page 4
OPERATION RADIO
English
GENERAL OPERATION
1.
To switch on the set, use the source selector
2.
Adjust the sound using the VOLUME control and DBB switch.
3.
To switch off the set, set the source selector to TAPE/OFF
position, with the cassette keys released.
RADIO
1.
Set the source selector to RADIO.
2.
Adjust the sound using the VOLUME control and the DBB
switch.
3.
Select the wave band using the FM-LW-MW band selector.
4.
Tune to a radio station using the TUNING knob.
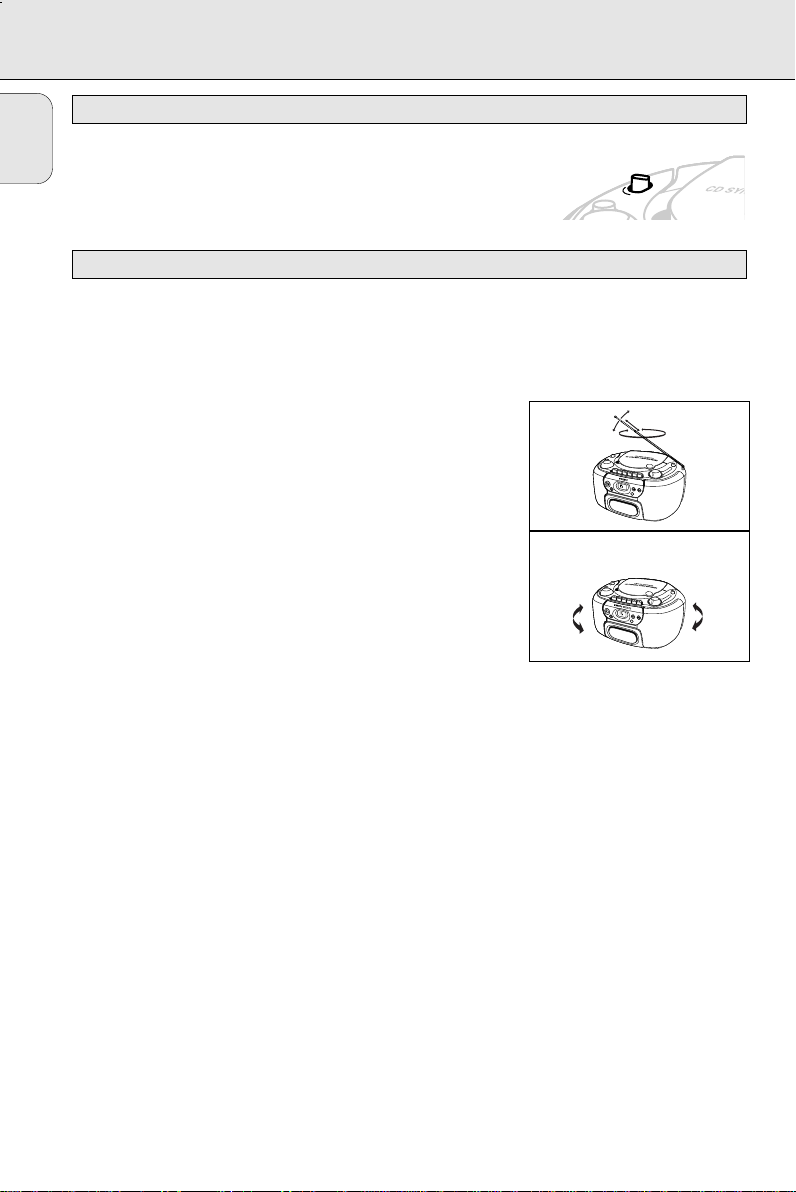
– For FM, pull out the telescopic aerial. To improve FM-
reception, incline and turn the aerial. Reduce its length if the
FM-signal is too strong (very close to a transmitter).
– For AM, (MW and LW) the set is provided with a built-in
aerial, so the telescopic aerial is not needed. Direct the aerial
by turning the whole set.
5.
To switch off the set, set the source selector to TAPE/POWER
OFF position, with the cassette keys released.
FM
AM
(MW-LW)
•TAPE
POWER OFF
DBB
DYNAMIC
BOOST
P
O
W
E
R
O
N
•C
D
•R
A
D
IO
•T
A
P
E
P
O
W
E
R
O
F
F
DBB
D
Y
N
A
M
IC
B
O
O
S
T
P
P
A
A
U
U
S
S
E
E
STOP • OPEN
STOP • OPEN
SEARCH
SEARCH
PLAY
PLAY
RECORD
RECORD
P
L
A
Y
•P
A
U
S
E
S
H
U
F
F
L
E
STOP
S
E
A
R
C
H
M
O
D
E
P
O
W
E
R
O
N
•C
D
•R
A
D
IO
•T
A
P
E
P
O
W
E
R
O
F
F
DBB
D
Y
N
A
M
IC
B
O
O
S
T
P
P
A
A
U
U
S
S
E
E
STOP • OPEN
STOP • OPEN
SEARCH
SEARCH
PLAY
PLAY
RECORD
RECORD
P
L
A
Y
•P
A
U
S
E
S
H
U
F
F
L
E
STOP
S
E
A
R
C
H
M
O
D
E
POWER ON
•RADIO
O
P
E
O
P
E
N
•CD
N
FM AM -
F
M
8
8
A
M
9
2
5
3
0
9
6
6
5
0
1
0
0
8
3
0
1
0
1
4
0
1
0
0
0
8
1
2
M
0
H
0
z
1
6
0
0
K
H
z
FM AM -
F
M
8
8
A
M
9
2
5
3
0
9
6
6
5
0
1
0
0
8
3
0
1
0
1
4
0
1
0
0
0
8
1
2
M
0
H
0
z
1
6
0
0
K
H
z
6
Page 5
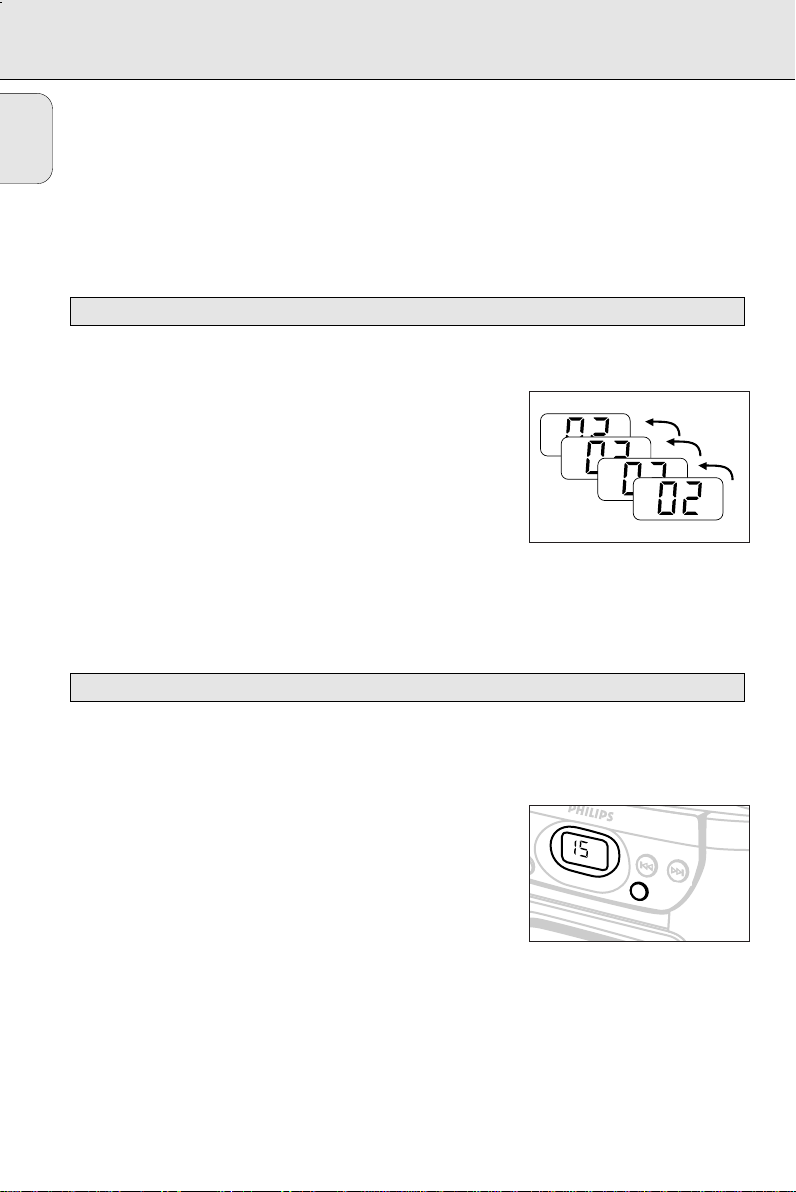
CD DISPLAY INDICATION
SHUFFLE
REPEAT
ALL
PROGRAM
H
OPEN
H
OPEN
CD PLAYER
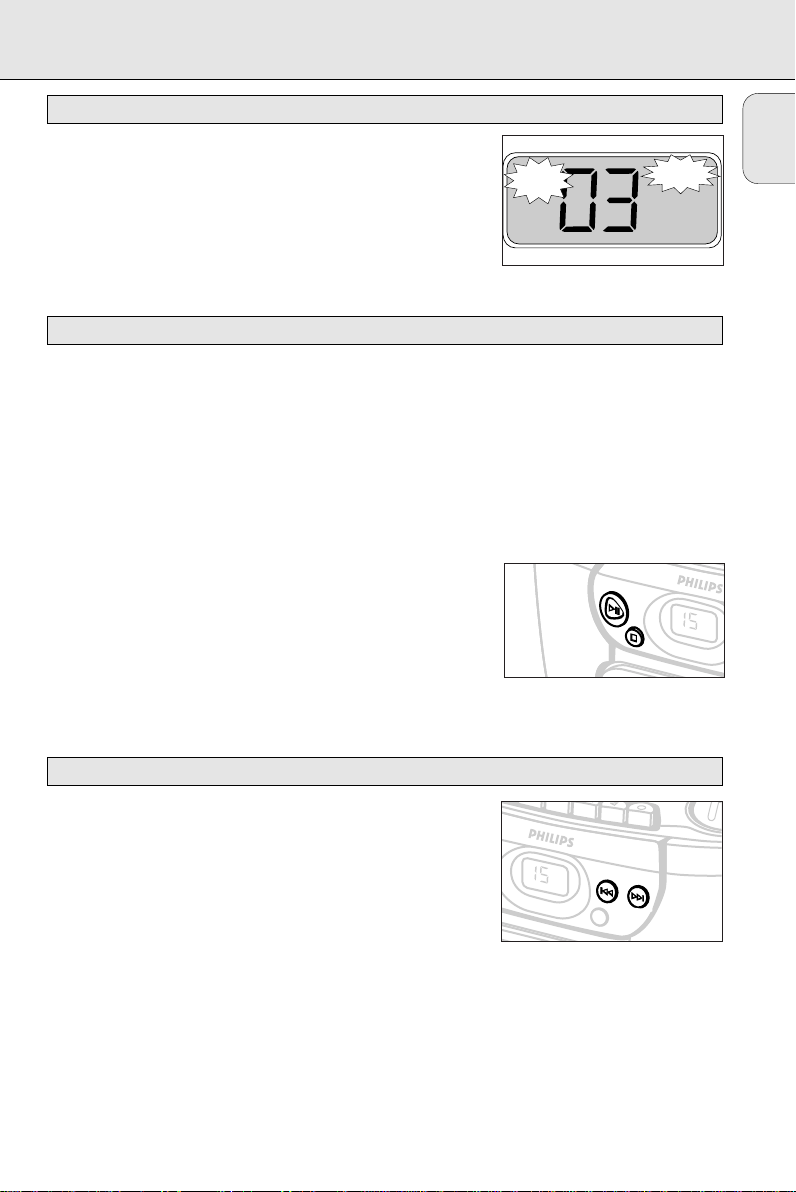
– Total track number: in stop position.
– Current track number: during CD play.
– Current track number flashes: in PAUSE mode.
– SHUFFLE/REPEAT mode: the respective mode is activated.
– PROGRAM: program function is active. P also appears briefly
when you store a track.
– No display: error in CD operation or with the CD
(see Troubleshooting).
PLAYING A CD
1.
Set the source selector to CD.
2.
To open the CD compartment, press OPEN on the CD door.
3.
Insert the audio CD, printed side facing up.
4.
To close the CD compartment, push the door down.
– The CD player scans the contents of the CD and the total
number of tracks is displayed
5.
Press PLAY•PAUSE 2; to start playback.
6.
Adjust the sound using the VOLUME control and the DBB switch.
7.
To interrupt playback, press PLAY•PAUSE 2;.
Press PLAY•PAUSE 2; again to continue playback.
8.
Press STOP 9 to stop CD playback.
9.
Set the source selector to TAPE/OFF position to switch off the
set.
Note:
CD playback will also stop when:
– the CD has reached the end;
– the CD door is opened;
– the source selector is in the RADIO or TAPE/OFF position.
PLAY•PAUSE
English
SEARC
SEARC
STOP
SHUFFLE
SEARCH ∞ or §
Selecting a different track during playback
– You can jump to the next track by pressing SEARCH § once. If
you want to skip more than one track, press SEARCH § more
than once until the display shows the desired track number.
– If you want to repeat the running track from the beginning,
press
∞ SEARCH once. If you want to repeat one of the previous
tracks, press ∞ SEARCH more than once until the display
shows the required track number.
Starting with a particular track
1.
In the STOP position you can select a desired track using the
∞ SEARCH or SEARCH § button.
2.
Press PLAY•PAUSE 2; to start playback.
STOP • OPEN
STOP • OPEN
SEARCH
SEARCH
PLAY
PLAY
RECORD
RECORD
SHUFFLE
SEARCH
MODE
7
Page 6
CD PLAYER
REPEAT
ALL
REPEAT
x 1
x 2
x 3
x 4
REPEAT
ALL
SHUFFLE
SHUFFLE
PLA
PLAY
Searching for a passage within a track
English
You can search for a passage within a track. The CD is played at
low volume and at high speed, however, the sound is still
recognizable.
1.
Keep the ∞ SEARCH or SEARCH § button pressed during
playback, and release the button as soon as you recognize the
required passage:
– Normal CD playback will resume from this point.
SHUFFLE/REPEAT
The MODE button allows you to select four different modes. The
modes can be selected or changed during playback.
1.
During playback only, press MODE until the desired function
appears on the display.
REPEAT - Continuous playback of the current track.
SHUFFLE - Tracks are played in random order.
REPEAT ALL, SHUFFLE - Continiuous playback of tracks in
random order.
REPEAT ALL - Repeats the entire CD.
– During playback you can use ∞ SEARCH or SEARCH § to
skip tracks.
2.
To leave the SHUFFLE mode, press the MODE button repeatedly
until the various SHUFFLE/REPEAT modes are no longer shown
on the display. You can also press STOP 9 to quit playback.
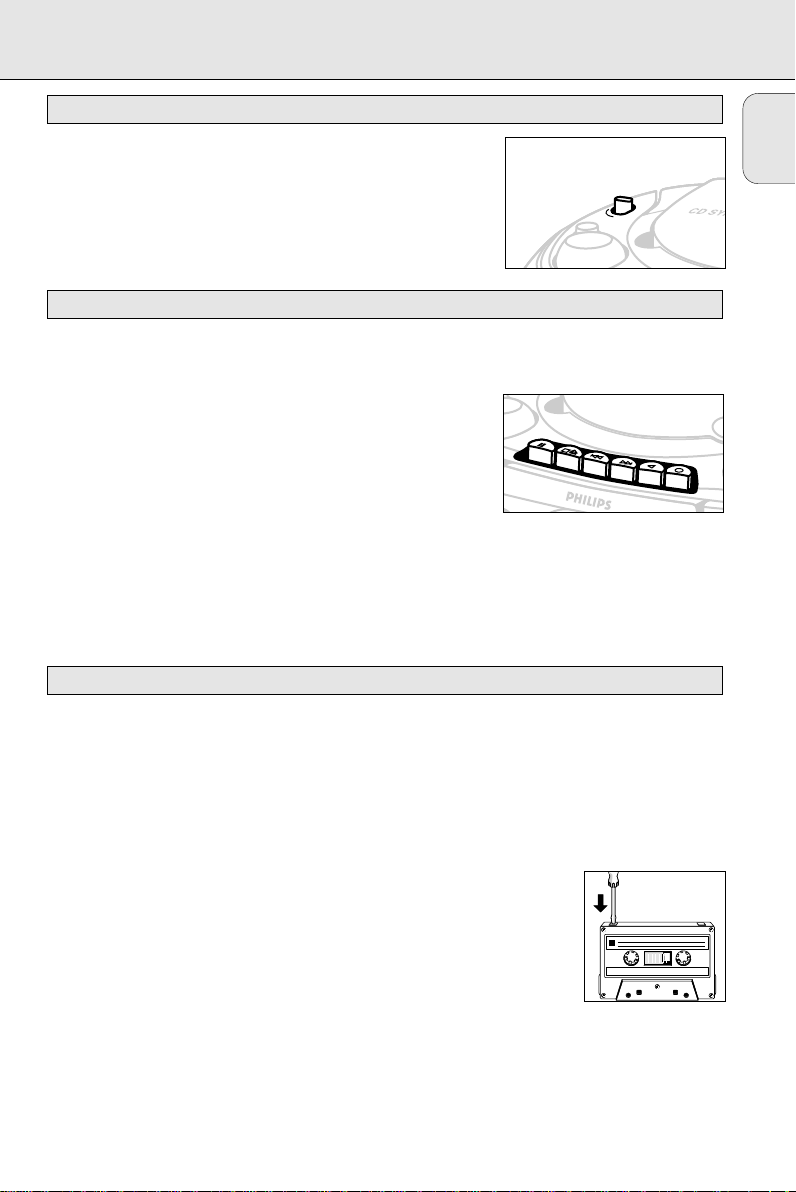
PROGRAMMING TRACK NUMBERS
You may store at most 20 tracks in the memory in the desired sequence. You may store any track more
than once.
Programming track numbers
1.
In the stop position select the desired track using ∞ SEARCH
or SEARCH § until the display shows the desired track number.
2.
Store the desired track by pressing MODE once.
– The display shows P and PROGRAM followed by your
3
Select and store all desired tracks of a CD in this way.
Checking a program
1.
To review the set program, in the stop position press and hold
MODE for more than 2 seconds.
– The display will show the track numbers you have selected in
2.
To start playback of the program, press PLAY•PAUSE 2;.
– Playback starts with the first track of the program. After the
8
selected track number.
sequence.
last track, playback stops and the display shows the CD’s
total number of tracks.
SHUFFLE
Y
RECORD
RECORD
SEARCH
MODE
Page 7
CD PLAYER CASSETTE RECORDER
BOO
PROGRAMMING TRACK NUMBERS
Erasing a program
You can erase a program by:
– opening the CD door.
– setting the source selector to the TAPE or RADIO position.
– pressing STOP twice during playback/in the stop position.
CASSETTE PLAYBACK
1.
Set the source selector to TAPE.
2.
Press STOP•OPEN 9/to open the cassette holder.
3.
Insert a recorded cassette.
4.
Press PLAY 1 and playback will start.
5.
Adjust the sound using the VOLUME, and DBB controls.
6.
For brief interruptions, press PAUSE ;. Press PAUSE ; again to
resume playback.
7.
By pressing 5 or 6, fast winding of the tape is possible in
both directions.
8.
To stop playback, press STOP•OPEN 9/.
– The keys are automatically released at the end of the tape.
9.
Set the source selector to TAPE/POWER OFF position (with the
cassette keys released) to switch off the set.
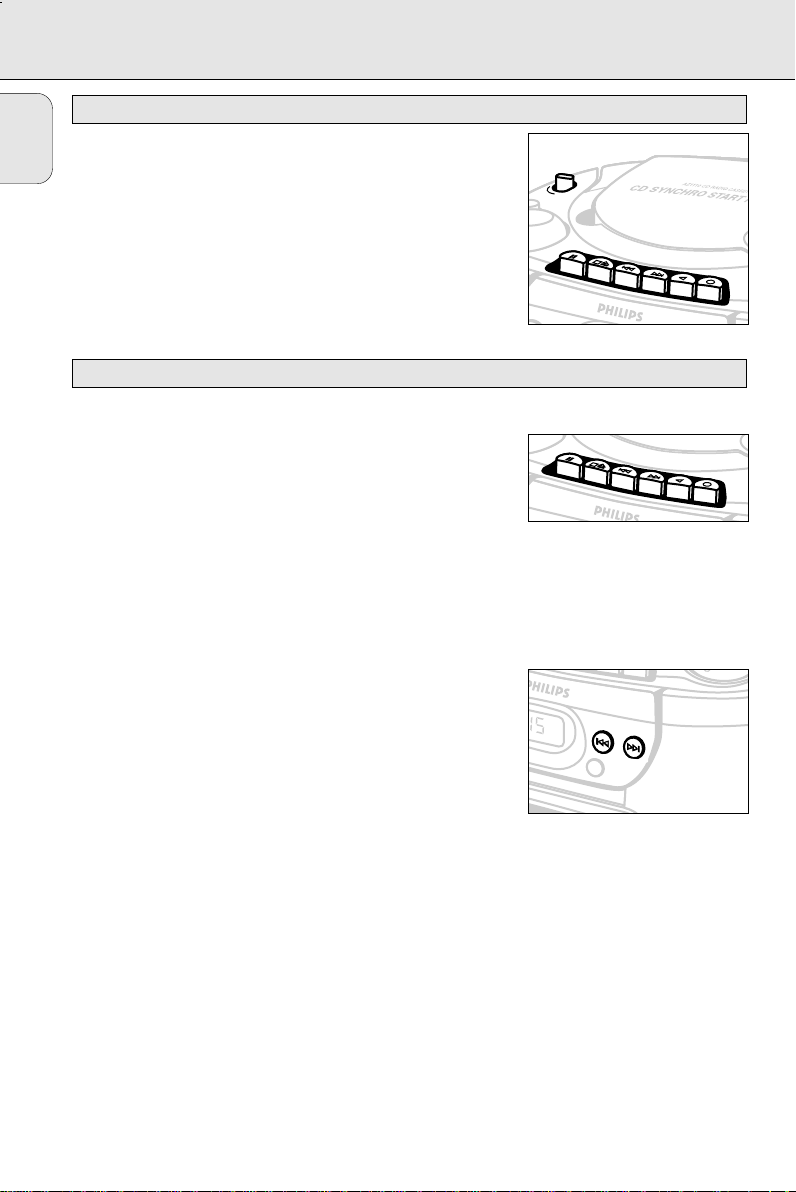
CASSETTE RECORDING
General information on cassette recording
– Recording is permissible insofar as copyright or other rights of
third parties are not infringed.
– This deck is not suited for recording on CHROME (IEC II) or
METAL (IEC IV) type cassettes. For recording you should use
NORMAL type cassettes (IEC I) on which the tabs have not
been broken.
– The recording level is set automatically. Altering the VOLUME
control or, DBB switch will not affect the recording in progress.
– No recording will take place during the first 7 seconds, when
the leader tape passes the recorder heads.
– To prevent the accidental erasure of a recording, keep the
cassette side to be safeguarded in front of you and break out
the left tab. Recording on this side is no longer possible.
English
POWER ON
•CD
•RADIO
•TAPE
POWER OFF
DBB
DYNAMIC
BOOST
ST
PAUSE
PAUSE
STOP • OPEN
STOP • OPEN
SEARCH
SEARCH
PLAY
PLAY
RECORD
PAUSE
RECORD
1
9
Page 8
CASSETTE RECORDER
N
N
English
RECORDING FROM THE RADIO
1.
Set the source selector to RADIO.
2.
Tune to the desired radio station using the TUNING knob.
3.
Press STOP•OPEN 9/to open the cassette holder.
4.
Insert a blank cassette.
5.
Press RECORD 0 to start recording.
6.
For brief interruptions, press PAUSE ;. To resume recording,
press PAUSE ; again.
7.
To stop, press STOP•OPEN 9/.
CD SYNCHRO START RECORDING
1.
Set the source selector to CD.
2.
Insert a CD and if desired, program track numbers.
3.
Press STOP•OPEN 9/to open the cassette holder.
4.
Insert a blank cassette.
5.
Press RECORD 0 to start recording.
– Playing of the CD program starts automatically from the
beginning of the program. It is not necessary to start the CD
player separately.
6.
For brief interruptions, press PAUSE ;. To resume recording,
press PAUSE ; again.
7.
To stop recording press STOP•OPEN 9/.
To select and record a particular passage within a track
1.
Press ∞ SEARCH or SEARCH § to select a passage.
2.
Put the CD player in PAUSE ; position at the selected passage.
– Recording will start from this exact point when you press
RECORD 0.
LAY•PAUSE
Y•PA
POWER ON
•CD
•RADIO
•TAPE
POWER OFF
DBB
DYNAMIC
BOOST
PAUSE
PAUSE
STOP • OPEN
STOP • OPEN
SEARCH
SEARCH
PLAY
PLAY
RECORD
RECORD
PAUSE
PAUSE
STOP • OPEN
STOP • OPEN
SEARCH
SEARCH
PLAY
PLAY
RECORD
RECORD
SEARCH
SEARCH
PLAY
PLAY
RECORD
RECORD
SHUFFLE
SEARCH
MODE
10
Page 9
PRECAUTIONS & GENERAL MAINTENANCE
MAINTENANCE
– Place the set on a hard, flat surface so that it does not tilt.
– Do not expose the set, CDs, batteries or cassettes to humidity,
rain, sand, direct sunlight or other places where high temperatures can occur, such as in the vicinity of heating apparatus or
in motor cars parked in the sun.
– Do not cover the set. The amplifier produces heat which must
dissipate freely, so make sure that there is sufficient ventilation
around the set. A minimum gap of 15 cm is necessary.
– The mechanical parts of the CD player and the cassette deck
contain self-lubricating bearings and must not be oiled or
lubricated.
– A chamois leather slightly moistened with water is sufficient
for cleaning the housing. Do not use cleaning agents containing
alcohol, spirits, ammonia or abrasives as these may harm the
housing.
CD MAINTENANCE
– The lens of the CD player should never be touched.
– The lens may cloud over if the set is moved from cold to warm
surroundings. The CD player will not start. Give the player some
time to acclimatise.
– To take a CD out of its box, press the centre spindle while
lifting the CD. Always pick up the CD by the edge and replace
the CD back in its box after use to avoid scratching and dust.
– To clean the CD, wipe in a straight line from the centre towards
the edge using a soft, lint-free cloth. Do not use cleaning
agents as they may damage the disc.
– Never write on a CD or attach stickers to it.
English
POWER ON
•CD
•RADIO
•TAPE
POW
ER OFF
DBB
DYNAMIC
BOOST
O
P
E
N
F
M
-
A
M
-
FM
88
A
M
92
5
3
0
96
6
5
0
100
8
3
0
104
1
0
108
0
0
1
2
M
0
H
0
z
1
6
0
0
PAUSE
K
PAUSE
H
z
STOP • OPEN
STOP • OPEN
SEAR
SEARCH
CH
P
LA
P
LA
Y
Y
RECORD
RECORD
PLAY•PAUSE
S
H
U
F
F
L
E
S
TO
P
SEARCH
MODE
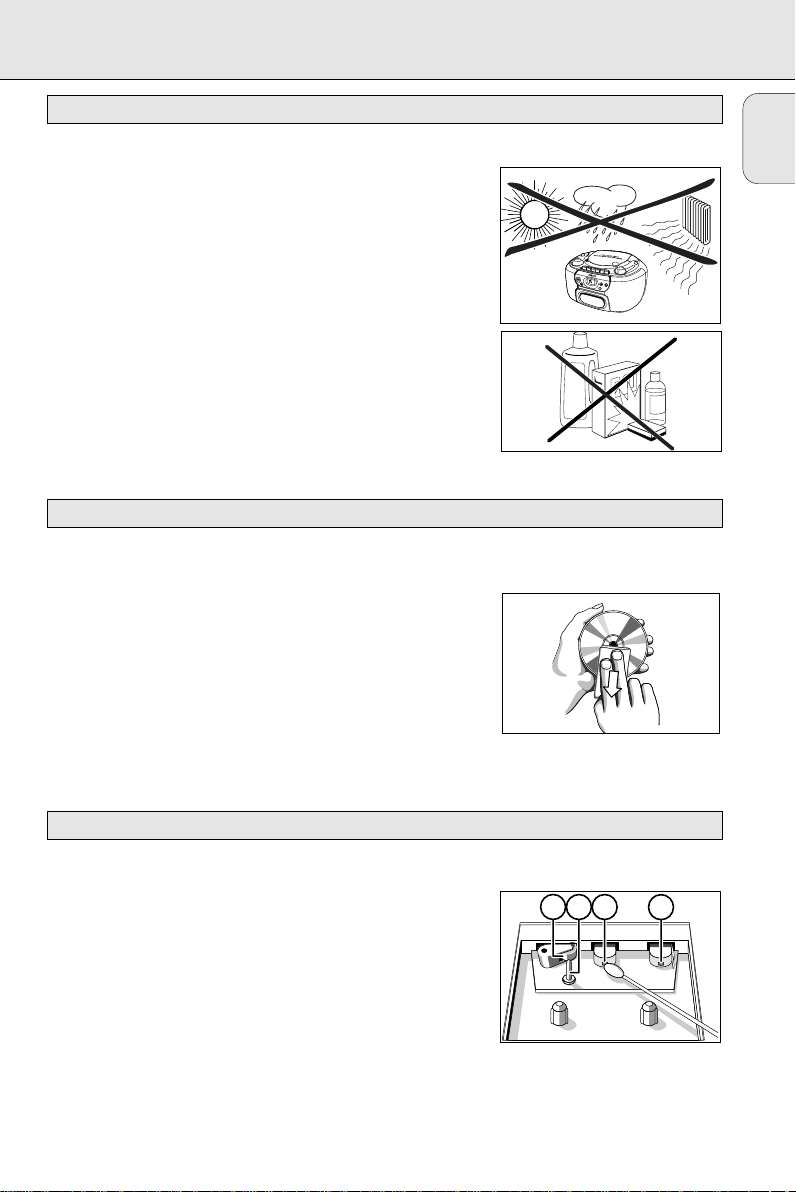
RECORDER MAINTENANCE
To ensure a good recording and playback quality, clean the
indicated parts A,B and C after every 50 hours of operation or,
on average, once a month. Use a cotton bud slightly moistened
with alcohol or a
special head cleaning fluid.
• Press PLAY 1 and clean the rubber pressure roller C.
• Then press PAUSE ; and clean the capstan B and the heads A.
• After cleaning, press STOP•OPEN 9/.
Cleaning of the heads A can also be done by playing a cleaning
cassette through once.
AABC
11
Page 10

TROUBLESHOOTING
If a fault occurs, first check the points listed below before taking the set for repair.
English
If you are unable to remedy a problem by following these hints, consult your dealer or service centre.
WARNING: Under no circumstances should you try to repair the set yourself, as this would
invalidate the guarantee.
PROBLEM
Set does not react to
operation of any control.
Display does not function
properly.
No sound.
Bad sound.
Severe radio hum or noise.
Poor radio reception.
Poor cassette sound quality.
Recording does not work.
CD playback does not work.
The CD skips tracks.
12
POSSIBLE CAUSE
– Electrostatic discharge.
– Electrostatic discharge.
– VOLUME is not adjusted.
– Headphones are connected.
– Batteries are exhausted.
– Batteries are incorrectly
inserted.
– Mains lead is not securely
connected.
– Batteries are exhausted.
– Set too close to TV, VCR or
computer.
– Weak radio signal.
– Dust and dirt on the heads,
capstan or pressure roller.
– Use of incompatible cassette
types (METAL or CHROME).
– Cassette tab(s) may be broken
out.
– CD is badly scratched or dirty.
– No CD inserted.
– CD inserted upside down.
– Laser lens is steamed up.
– MODE pressed but no tracks
selected during programming.
– CD is damaged or dirty.
– PROGRAM/SHUFFLE is active.
REMEDY
• Switch off the set, disconnect
the mains plug and reconnect
after a few seconds.
• Switch off the set, disconnect
the mains plug and reconnect
after a few seconds.
• Adjust the VOLUME.
• Disconnect headphones.
• Insert fresh batteries.
• Insert the batteries correctly.
• Connect the mains lead
properly.
• Replace batteries.
• Increase the distance.
• FM: aim and extend the
telescopic aerial for best
reception;
• AM (MW-LW): rotate the
entire set.
• Clean the heads etc., see
Maintenance.
– Only use NORMAL (IEC I) for
recording.
• Apply a piece of adhesive tape
over the missing tab space.
• Replace or clean the CD, see
Maintenance.
• Insert CD.
• Insert CD with printed side
facing up.
• Wait until lens has
acclimatized.
• Select tracks or erase
program.
• Replace or clean the CD.
• Switch off the PROGRAM/-
SHUFFLE function.
 Loading...