

Page 1
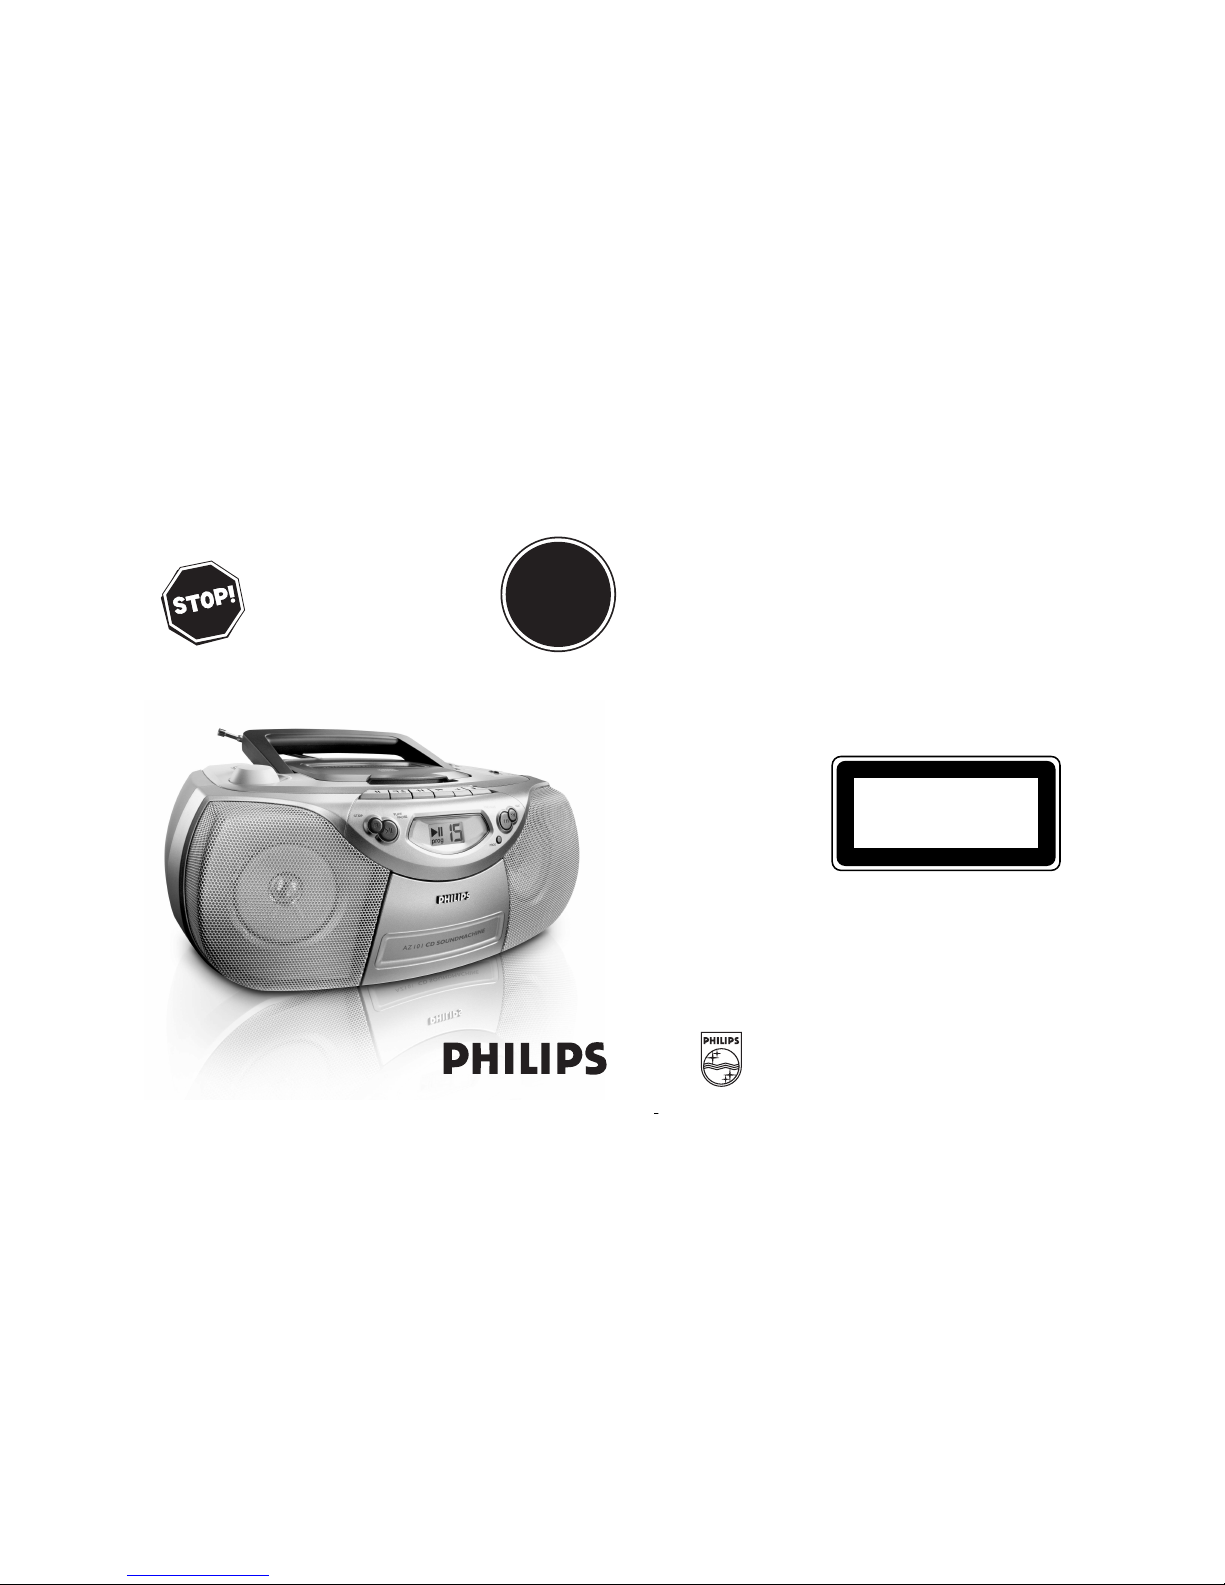
AZ101
AZ102
CD Soundmachine
Need help? Call us!
Philips representatives are ready to help you
with any questions about your new product.
CALL US BEFORE YOU CONSIDER
RETURNING THE PRODUCT!
1-800-531-0039
or visit us on the web at www.philips.com
S
E
E
W
H
Y
I
N
S
I
D
E
I
M
P
O
R
T
A
N
T
!
Return
your Warranty
Registration Card
within 10 days
User Manual
PHILIPS CONSUMER ELECTRONICS NORTH AMERICA
Knoxville, Tennessee 37914-1810, U.S.A.
W
CLASS 1
LASER PRODUCT
AZ 101
Printed in China ALJW-0445
Meet Philips at the Internet
http://www.philips.com
Page 2
6 x R14 • UM-2 • C-CELLS
%
#
$
0 9! 8 7
4
321
5
6@
1
A AB
C
X
7
4
5
3
2
6
Page 3

Return your Product Registration Card today
to get the very most from your purchase.
Registering your model with PHILIPS makes you eligible for all of the valuable benefits listed below, so
don't miss out. Complete and return your Product Registration Card at once to ensure:
*Proof of
Purchase
Returning the enclosed card
guarantees that your date of
purchase will be on file, so no
additional paperwork will be
required from you to obtain
warranty service.
*Product Safety
Notification
By registering your product, you'll
receive notification - directly from
the manufacturer - in the rare
case of a product recall or safety
defect.
*Additional
Benefits of
Product
Ownership
Registering your product
guarantees that you'll receive
all of the privileges to which
you're entitled, including special
money-saving offers.
Know these
safetysymbols
This “bolt of lightning” indicates
uninsulated material within your
unit may cause an electrical
shock. For the safety of everyone in your
household, please do not remove
product covering.
The “exclamation point” calls
attention to features for which
you should read the enclosed
literature closely to prevent operating
and maintenance problems.
CAUTION
RISK OF ELECTRIC SHOCK
DO NOT OPEN
CAUTION: TO REDUCE THE RISK OF ELECTRIC SHOCK, DO NOT
REMOVE COVER (OR BACK). NO USER-SERVICEABLE PARTS
INSIDE. REFER SERVICING TO QUALIFIED SERVICE PERSONNEL.
For Customer Use
Enter below the Serial No. which is
located on the rear of the cabinet.
Retain this information for future
reference.
Model No. ______________________
Serial No.
______________________
WARNING: To reduce the risk of fire
or electric shock, this apparatus should
not be exposed to rain or moisture, and
objects filled with liquids, such as vases,
should not be placed on this apparatus.
ATTENTION: Pour éviter les choc
électriques, introduire la lame la plus
large de la fiche dans la borne
correspondante de la prise et pousser
jusqu’au fond.
CAUTION: To prevent electric shock,
match wide blade of plug to wide slot,
fully insert.
Class II equipment symbol
This symbol indicates that the unit has a double insulation system.
1. Read these instructions.
2. Keep these instructions.
3. Heed all warnings.
4. Follow all instructions.
5. Do not use this apparatus near
water.
6. Clean only with dry cloth.
7. Do not block any ventilation
openings. Install in accordance with
the manufacturer´s instructions.
8. Do not install near any heat sources
such as radiators, heat registers, stoves,or
other apparatus (including amplifiers) that
produce heat.
9. Do not defeat the
safety purpose of the
polarized or
grounding-type plug.
A polarized plug has two blades with one
wider than the other.A grounding type plug
has two blades and a third grounding prong.
The wide blade or the third prong are
provided for your safety. If the provided plug
does not fit into your outlet, consult an
electrician for replacement of the obsolete
outlet.
10.
Protect the power cord from being
walked on or pinched, particularly at plugs,
convenience receptacles, and the point
where they exit from the apparatus.
11.
Only use attachments/accessories
specified by the manufacturer.
12.
Use only with the cart, stand,
tripod, bracket, or table specified
by the manufacturer or sold with
the apparatus.When a car t is
used, use caution when moving
the cart/apparatus combination
to avoid injury from tip-over.
13 .
Unplug this apparatus during lightning
storms or when unused for long periods of
time.
14 .
Refer all servicing to qualified service
personnel. Servicing is required when the
apparatus has been damaged in any way,
such as power-supply cord or plug is
damaged, liquid has been spilled or objects
have fallen into the apparatus, the apparatus
has been exposed to rain or moisture, does
not operate normally, or has been dropped.
15.
Battery usage CAUTION – To
prevent battery leakage which may result in
bodily injury, property damage, or damage
to the unit:
● Install all batteries correctly, + and - as
marked on the unit.
● Do not mix batteries (old and new or
carbon and alkaline, etc.).
● Remove batteries when the unit is not used
for a long time.
IMPORTANT SAFETY INSTRUCTIONS
AC Polarized
Plug
16. Apparatus shall not be exposed to
dripping or splashing.
17. Do not place any sources of danger
on the apparatus (e.g. liquid filled
objects, lighted candles).
18. This product may contain lead and mercury.
Disposal of these materials may be regulated
due to environmental considerations.
For disposal or recycling information,
please contact your local authorities
or the Electronic Industries Alliance :
www.eiae.org.
EL 6475-E005: 04/01
Page 4

English Controls/Power Supply
Supplied accessories
AC mains lead
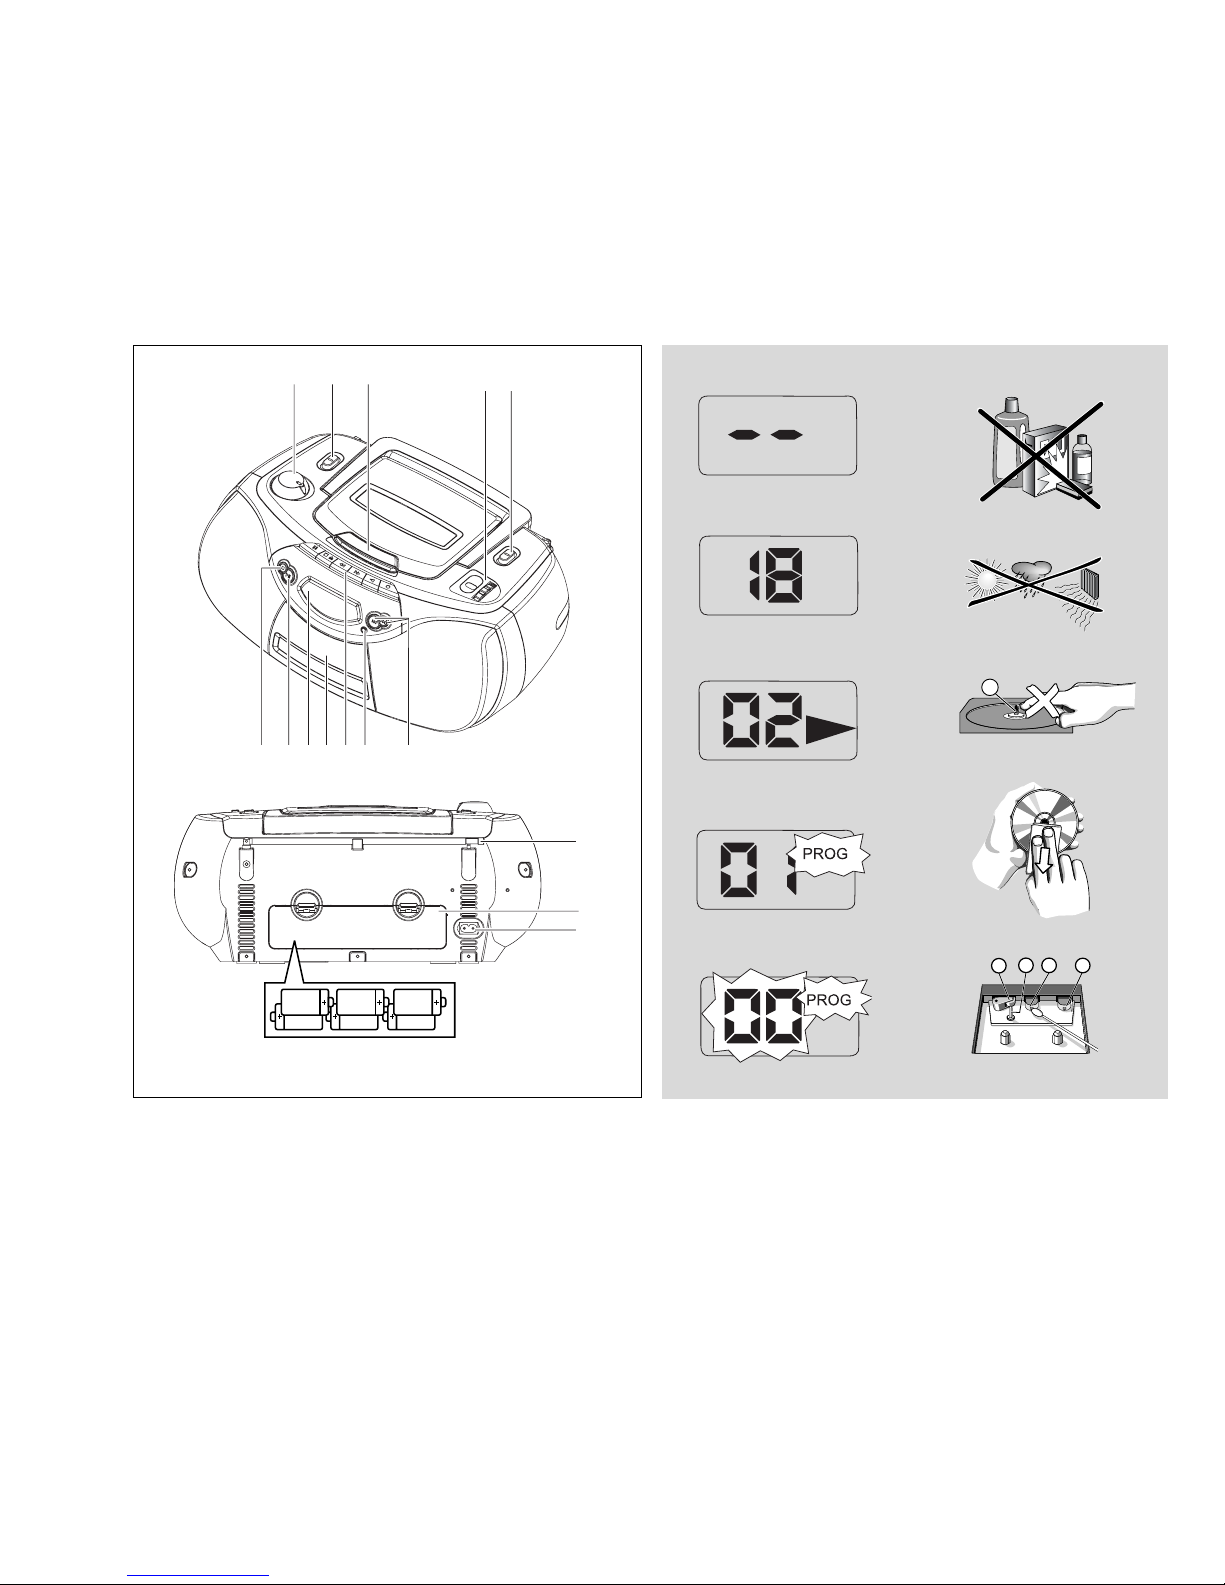
Top and front panels (See 1)
1
VOLUME– adjusts volume level
2
Source selector : CD, TUNER,
TAPE/POWER OFF
–
selects CD, tuner or tape source of sound
–
power off switch
3
CD door
4 TUNING
– tunes to radio stations
5 BAND –
selects waveband
6
PREVIOUS, NEXT ∞ , §
–
skips or searches a passage/track
backwards or forward
7 PROG – progr ams and reviews
programmed track numbers
8
Cassette recorder keys:
;–pauses playback or recording
9
/ –
stops the tape;
–
opens the cassette holder
5 or 6–fast winds/ rewinds tape
1–starts playback
0–starts recording
9 Cassette door
0
CD Display–shows the CD functions
!
PLAY/PAUSE 2; - star ts or pauses CD
playback.
@
STOP 9–stop playback;
–
erases a CD program.
Back panel
#
Telescopic antenna - improves FM
reception.
$ Batter y door - open to insert 6 x 1.5V
R-14/ UM2/ C-cells.
% AC MAINS - inlet for power cord
CAUTION
Use of controls or adjustments or
performance of procedures other
than herein may result in hazardous
radiation exposure or other unsafe
operation.
Power Supply
Whenever convenient, use the mains supply
cord if you want to conserve battery life .
Make sure you remove the plug from the set
and wall outlet before inserting batteries.
Batteries (not included)
1 Open the batter y compartment and insert
six batteries, type R-14, UM-2 or C-cells,
(preferably alkaline) with the correct polarity
as indicated by the "+" and "–" symbols inside
the compartment. (See 1)
2 Replace the compar tment door,making sure
the batteries are firmly and correctly in place.
The set is now ready to operate.
Batteries contain chemical substances, so
they should be disposed of properly.
Power Supply
General operation/Radio
• Incorrect use of batteries can cause
electrolyte leakage and will corrode the
compartment or cause the batteries to bur st:
• Do not mix batter y types: e.g. alkaline with
carbon zinc. Only use batteries of the same
type for the set.
• When inser ting new batteries, do not try to
mix old batteries with the new ones.
• Remove the batteries if the set is not to be
used for a long time.
Using AC Mains
1 Check if the power/mains voltage, as shown
on the type plate located on the
bottom of the set, corresponds to your
local power supply. If it does not, consult your
dealer or service center.
2 Connect the power cord to the AC
POWER/MAINS inlet and the wall socket.
The mains lead is now connected and ready
for use.
3 To switch the set off completely, withdraw the
power cord from the wall socket.
• Disconnect the mains lead from the wall
socket to protect your set during heavy
thunderstorms.
Helpful hints : To avoid unnecessary ener gy
consumption, always adjust the source
selector to
TAPE/POWER OFF
after using
the set. Also check that the tape deck keys
are released
The type plate is located on the bottom
of the set.
General operation
1 To select your sound source adjust the
source selector to : CD,
TUNER
or
TAPE/POWER OFF
.
2 Adjust the sound with the VOLUME
control.
3 To switch off the set, adjust the source selec-
tor to
TAPE/POWER OFF
position and check
the cassette keys are released.
Radio reception
1 Adjust the source selector to
TUNER
.
2 Adjust BAND to select your desired
waveband, FM or AM.
3 Tur n TUNING to tune to a station.
• For FM, extend and turn the telescopic
antenna for best reception. Reduce its length
if the signal is too strong.
• For AM, the set uses a built-in antenna.
Direct this antenna for best reception by
turning the whole set.
4 To switch off the r adio, adjust the source
selector to
TAPE/POWER OFF
position and
check the cassette keys are released.
Page 5

CD Player
CD Player Cassette Recorder
Playing a CD
This CD player plays Audio Discs including
CD-Recordables and CD-Rewritable.
• MP3 CD-ROMs, CD-I, CDV,VCD, DVD or
computer CDs are not possible for playback
on this set.
Important: CDs encoded with copyright
protection technologies by some record
companies may be unplayable by this product.
1 Adjust the source selector to CD.
2 Insert a CD/ CD-R(W) with the printed side
facing up and press the CD door gently
close.
➜ Display shows -- and later, the total
number of tracks. (See 2, 3)
3 Press
PLAY/PAUSE 2;
on the set to start
playback.
➜Display:
2
and the current track number.
(See 4)
4 To pause playback press
PLAY/PAUSE 2;
.
Press
PLAY/PAUSE 2;
again to resume
play.
5 To stop CD play, press
STOP 9
.
6 To switch off the set, adjust the source
selector to
TAPE/POWER OFF
position and
check the cassette keys are released.
Helpful hints : CD play will also stop when:
- you open the CD compartment;
- you select
TUNER
or
TAPE/POWER OFF
sound source;
- the CD has reached the end of playback.
Selecting a different track
• Press
PREVIOUS, NEXT
∞ or § once or
repeatedly until the desired track number
appears in the display.
• In the pause/stop position, press 2; to start
playback.
Finding a passage within a
track
1 During playback, press and hold down
∞ / §
.
➜ The CD is played at high speed and low
volume.
2 When you recognize the passage you want
release
∞ / §
.
➜ Normal playback resumes.
Helpful hints : When searching within a final
track and you reach the end of the last track,
the CD goes to stop mode.
Programming track
numbers
You may store up to 20 tracks in the desired
sequence. If you like, store any track more
than once.
1 In the stop position, press PROG to activate
programming.
➜ Display: PROG and 00 flash.
2 Press ∞or §to select your desired track
number.
➜ Display: PROG and your desired track
number flash. (see 5)
3 Press PROG to store the desired track
number.
➜ Display: PROG and 00 flash for you to
program the next track. (see 6)
4 Repeat steps 2 to 3 to select and store all
desired tracks in this way.
➜ Display shows --after 20 tracks are
stored
5 To play your program, press
PLAY/PAUSE
2;
.
➜ Display: PROG flashes during program
playback
To review a program
• In the stop position, press PROG repeatedly
to see your stored track numbers.
Erasing a program
You can erase the contents of the memory
by:
– Pressing
STOP 9
(twice during playback or
once in the stop position)
– Selecting
TUNER
or
TAPE/POWER OFF
sound source;
– opening the CD door;
Cassette playback
1 Adjust the source selector to
TAPE/POWER OFF
.
2 Press 9/ to open the cassette holder and
insert a cassette and close the deck.
3 Press 1to start playback.
4 To pause playback press ;.
5 To resume , press ;again.
6 To stop the tape , press 9/.
Fast forwarding/rewinding
1 Press
5 or 6
until you reach your desired
passage.
2 Press 9/ to stop rewinding/fast forwarding.
Helpful hints :
- During playback, the keys are automatically
released at the end of a tape and the set is
switched off (unless PAUSE mode
;
has been
activated.)
- During fast forwarding/rewinding, the keys will
not be released at the end of a tape.To switch
off the set, make sure the cassette keys are
also released.
General information on recording
• Recording is permissible insofar as copyright
or. other rights of third parties are not
infringed.
• For recording, use only NORMAL type cassettes (IEC type I) on which the tabs have
not yet been broken.This deck is not suited
for recording on CHROME (IEC II) or
METAL (IEC IV) type cassettes.
• The best recording level is set automatically.
Altering the VOLUME will not affect the
recording.
•To protect a tape from accidental erasure,
break out the tabs. If you wish to record
again, cover the tabs with a piece of adhesive
tape.
CD synchro start recording
1 Select CD source.
2 Insert a CD and if desired, program track
numbers.
3 Press
9
/ to open the cassette holder. Insert
a blank tape and close the deck.
4 Press0to start recording.
➜ Playing of the CD/ program starts
automatically from the beginning. It is not
necessary to star t the CD player separately.
5 For brief interruptions, press ;.To resume
recording, press ;again.
6 To stop recording, press 9/.
Page 6

Recording from the Radio
1 Adjust the Source selector to
TUNER
.
2 Adjust BAND to select your desired
waveband, FM or MW.
3 Tune to the desired radio station (see Radio
reception).
4 Follow steps 3-6 under CD sychro start
recording.
Precautions & General
Maintenance (See 7)
• Place the set on a hard, flat and stable surface
so that the system does not tilt.
• Do not expose the set, batteries, CDs to
humidity, rain, sand or excessive heat caused
by heating equipment or direct sunlight.
• The apparatus shall not be exposed to
dripping or splashing.
• Adequate ventilation with a minimum gap of
15cm between the ventilation holes and surrounding surfaces is necessary to prevent
heat build-up.
• The ventilation should not be impeded by
covering the ventilation openings with items,
such as newspapers, table-cloths, curtains, etc..
• No objects filled with liquids, such as vases,
shall be placed on the apparatus.
• No naked flame sources, such as lighted candles, should be placed on the apparatus.
• The mechanical parts of the set contain
self-lubricating bearings and must not be oiled
or lubricated.
•To clean the set, use a dry cloth. Do not use
any cleaning agents containing alcohol,
ammonia, benzene or abrasives as these may
harm the housing.
Ta pe deck maintenance (See 7)
To ensure quality recording and playback of
the tape deck, clean parts A, B and C as
shown, once a month. Use a cotton bud
slightly moistened with alcohol or a special
head cleaning fluid to clean the deck.
1 Open the cassette holder by pressing
9
/.
2 Press1and clean the roller C.
3 Press ;and clean the heads A, and the
capstan B.
4 After cleaning, press 9.
➜ Cleaning of the heads can also be done by
playing a cleaning cassette through once.
CD player and CD handling (See 7)
• If the CD player cannot read CDs correctly,
use a cleaning CD to clean the lens before
taking the set to repair.
• The lens of the CD player should never be
touched!
• Sudden changes in the surrounding
temperature can cause condensation on the
lens of your CD player. Playing a CD is then
not possible. Do not attempt to clean the
lens but leave the set in a warm environment
until the moisture evaporates.
•Always close the CD-tape door to avoid dust
on the lens.
•To clean the CD, wipe in a straight line from
the center towards the edge using a soft,
lint-free cloth. Do not use cleaning agents as
they may damage the disc.
• Never write on a CD or attach any stickers
to it.
Cassette Recorder Maintenance
Problem
– Possible cause
• Remedy
No sound /power
– Volume not adjusted
• Adjust the VOLUME
– Power cord not securely connected
• Connect the AC power cord properly
– Batteries dead/ incorrectly inserted
• Insert (fresh) batteries correctly
– CD contains non-audio files
• Press
PREVIOUS, NEXT ∞ , §
once or
more to skip to a CD audio track, instead of the
data file.
Display does not function properly/ No
reaction to operation of any of the controls
– Electrostatic discharge
• Switch off and unplug the set. Reconnect after a
few seconds
The CD skips tracks
– CD damaged or dirty
• Replace or clean CD
– Program is active
• Quit program mode
- - indication
– No CD inserted
•
Insert a CD
– CD badly scratched or dirty
•
Replace/ clean CD, see Maintenance
– Laser lens steamed up
•Wait until lens has cleared
– CD-R(W) is blank or not finalized
•
Use a finalized CD-R(W) or suitable CD Audio
disc only.
Poor cassette sound quality
– Dust and dirt on the heads, etc.
• Clean deck parts, see Maintenance
– Use of incompatible cassette types (METAL or
CHROME)
• Only use NORMAL (IEC I) for recording
Recording does not work
– Cassette tab(s) may be broken
• Apply adhesive tape over the missing tab space
Tr oubleshooting
Environmental information
All unnecessary packaging material has been omitted. The packaging can be easily separated
into three materials: cardboard, polystyrene and plastic.
Yo ur set consists of materials which can be recycled if disassembled by a
specialized company. Please observe the local regulations regarding the
disposal of packaging, dead batteries and old equipment.
If a fault occurs, first check the points listed below before taking the set for repair.
If you are unable to remedy a problem by following these hints, consult your dealer or service centre.
WARNING: Do not open the set as there is a risk of electric shock. Under no cir-
cumstances should you try to repair the set yourself, as this will invalidate the guarantee.
Page 7

Philips, P.O. Box 671539,Marietta, GA. 30006-0026
One (1) Year Free Product Exchange
PHILIPS LIMITED WARRANTY
PHILIPS CONSUMER ELECTRONICS warrants this
product against defect in material or workmanship,subject to
any conditions set forth as follows:
PROOF OF PURCHASE:
You must have proof of the date of purchase to exchange the
product.A sales receipt or other document showing the product, the date that you purchased the product, as well as the
authorized retailer included, is considered such proof.
COVERAGE:
Warranty coverage begins the day you buy your product. For a
period of one (1) year from the date of purchase, if the product
is determined to be defective, Philips will exchange the defective
product with a new or renewed product,at its option, at no
charge.The replacement product is covered only for the warranty period of the original product.When the warranty on the
original product expires, the warranty on all replaced products
also expires.When it is necessary for you to ship the product
to Philips for exchange, you will pay the shipping cost for shipment to Philips. Philips will pay the shipping costs when returning a product to you.
Note:The exchange model supplied will be the most comparable one in Philips current inventory.Shipping of your product to
Philips implies intent to follow the specified requirements of the
warranty and exchange program. Product received by Philips
cannot be returned. Replacement product can only be sent if all
warranty requirements are met.Failure to follow all requirements can result in delay of exchange process.
EXCLUDED FROM WARRANTY COVERAGE
Your warranty does not cover:
• Shipping charges to return defective product.
• Labor charges for installation or setup of the product, adjustment of customer controls on the product, and installation
or repair of antenna systems outside of the product.
•Product repair and/or part replacement because of improper
installation, connections to improper voltage supply,abuse,
neglect, misuse,accident, unauthorized repair or other cause
not within the control of Philips.
• Damage occurring to product during shipping when improperly packaged or cost associated with packaging.
•A product that requires modification or adaptation to enable
it to operate in any country other than the country for
which it was designed, manufactured,approved and/or authorized, or repair of products damaged by these modifications.
•A product used for commercial or institutional purposes
(including but not limited to rental purposes).
•Products lost in shipment and no signature verification of
receipt can be provided.
•Products sold AS IS or RENEWED.
WHERE WARRANTY EXCHANGE IS AVAILABLE:
Exchange is available in all countries where Philips officially distributes the product. In countries where Philips does not distribute the product, the local Philips organization will attempt to
exchange the product, although there may be a delay if the
appropriate product is not readily available,or special customs
processes are implied.
FOR EXCHANGE IN THE U.S.A., PUERTO RICO, OR
U.S.VIRGIN ISLANDS…
Contact Philips Customer Care Center at:
1-888-PHILIPS (1-888-744-5477)
FOR EXCHANGE IN CANADA…
1-800-661-6162 (French Speaking)
1-888-PHILIPS (1-888-744-5477) - (English or Spanish
Speaking)
REPLACEMENT AS PROVIDED UNDER THIS WARRANTY IS
THE EXCLUSIVE REMEDY OF THE CONSUMER. PHILIPS
SHALL NOT BE LIABLE FOR ANY INCIDENTAL OR CONSEQUENTIAL DAMAGES FOR BREACH OF ANY EXPRESS OR
IMPLIED WARRANTY ON THIS PRODUCT. EXCEPT TO THE
EXTENT PROHIBITED BY APPLIC ABLE LAW,ANY IMPLIED
WARRANTY OF MERCHANTABILITY OR FITNESS FOR A
PARTICULAR PURPOSE ON THIS PRODUCT IS LIMITED IN
DURATION TO THE DURATION OF THIS WARRANTY.
Some states do not allow the exclusions or limitation of incidental or consequential damages, or allow limitations on how
long an implied warranty lasts, so the above limitations or exclusions may not apply to you.In addition, if you enter into a service contract agreement with the PHILIPS partnership within
ninety (90) days of the date of sale, the limitation on how long
an implied warranty lasts does not apply.
This warranty gives you specific legal rights. You may have other rights which vary from state/province to state/province.
(Warranty:4835 710 27325)
English:This digital apparatus does not exceed the Class B limits for radio noise emissions from digital apparatus as set out in the Radio Interference Regulations of the Canadian Department of Communications.
Français: Cet appareil numérique n'émet pas de bruits radioélectriques dépassant les
limites applicables aux appareils numériques de Classe B prescrites dans le Règlement sur
le Brouillage Radioélectrique édicté par le Ministère des Communications du Canada.
Canada
The set complies with the FCC-Rules, Par t 15 and with 21 CFR
1040.10. Operation is subject to the following two conditions:
1.This device may not cause harmful interference, and
2.This device must accept any interference received, including interference that may cause undesired operation.
 Loading...