

Page 1
Technical specification ......................................................1-1
Features ............................................................................1-1
Accessories .......................................................................1-1
Instruction For Use .....................................................1-2..1-8
Safety & Warnings.............................................................1-9
Service hints
Repair positions ............................................................2-1
Dismantling CD-door.....................................................2-1
Handling chip components............................................2-2
Service tools..................................................................2-2
Blockdiagram.....................................................................3-1
COMBI BOARD
Circuit diagrams
Part 1 ........................................................................4-1
Part 2........................................................................4-2
Part 3 ........................................................................4-3
Layout diagrams
Component side view ................................................4-4
Copper side view .......................................................4-5
Exploded view ...................................................................5-1
Mechanical partslist ...........................................................5-1
Electrical partslist...............................................................6-1
© 3140 785 32870
Published by LX 0348 Service Audio Printed in The Netherlands Subject to modification
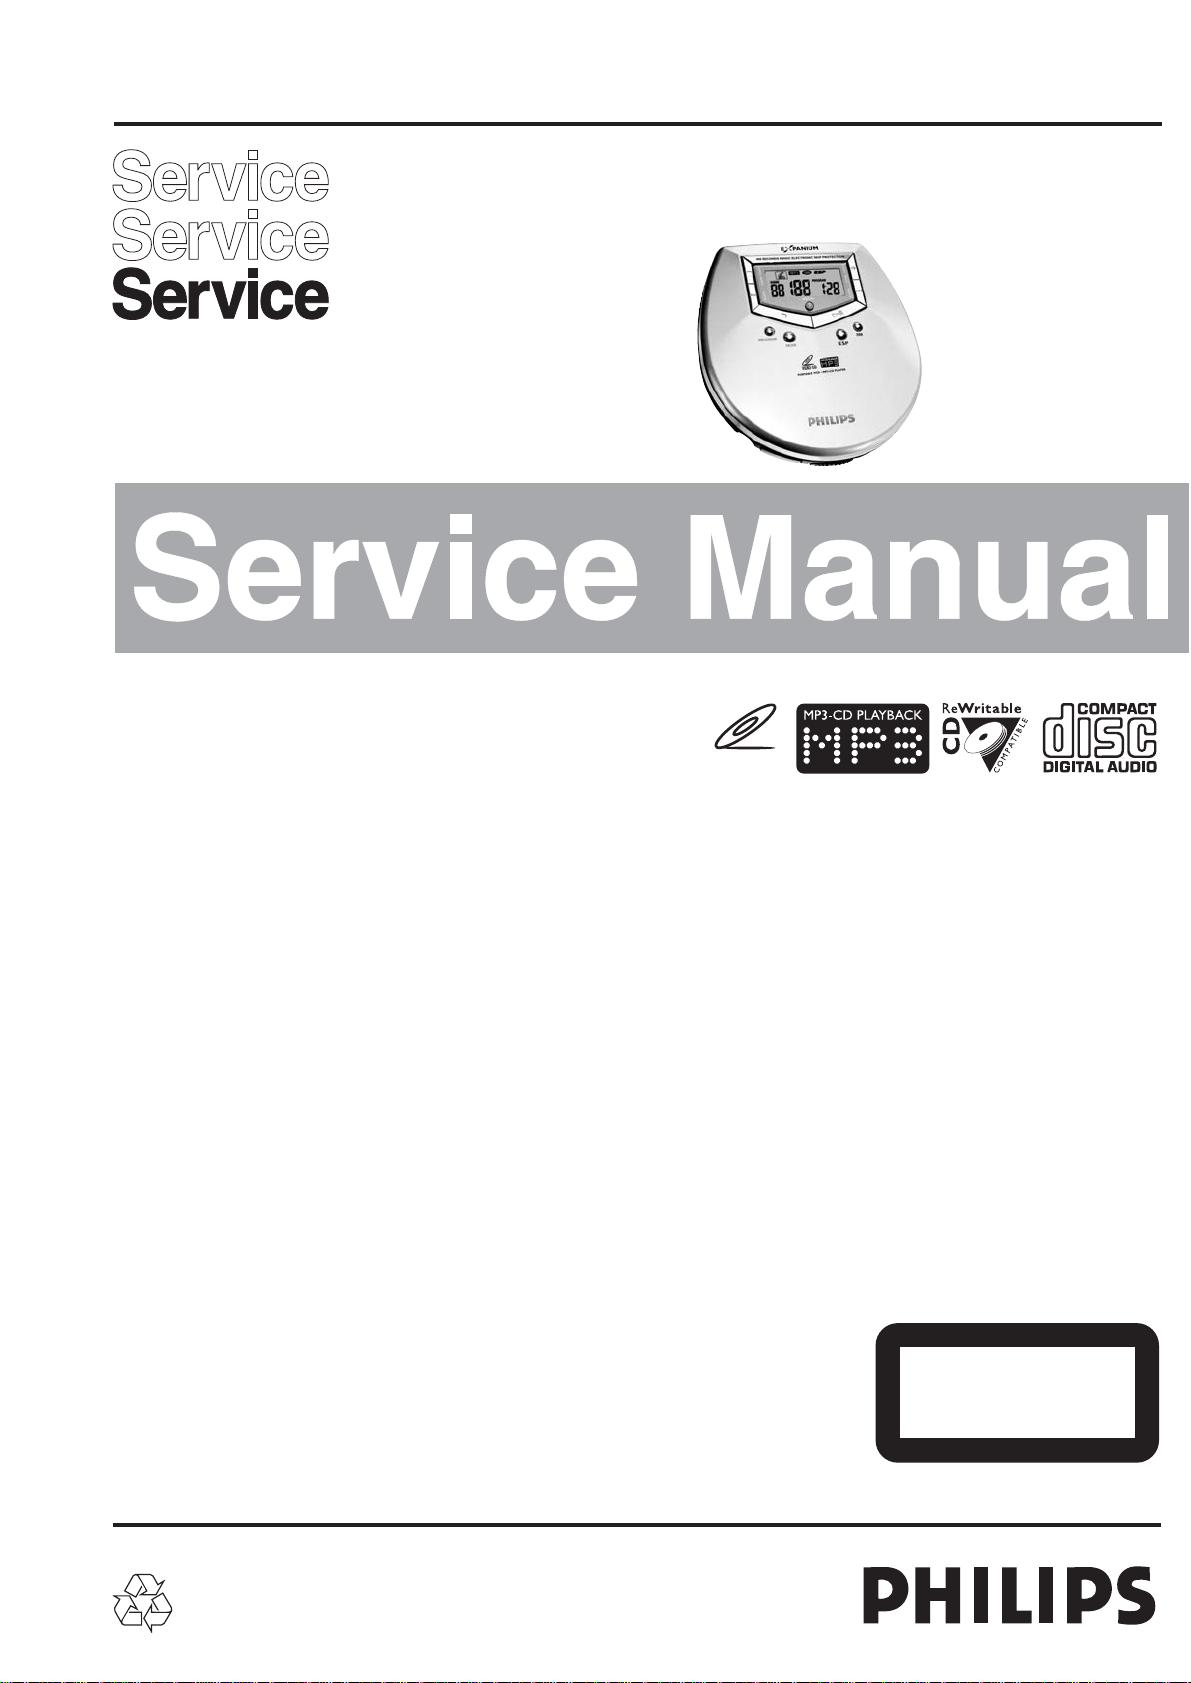
Portable CD/VCD Player
TABLE OF CONTENTS
©
Copyright 2001 Philips Consumer Electronics B.V. Eindhoven, The Netherlands
All rights reserved. No part of this publication may be reproduced, stored in a retrieval
system or transmitted, in any form or by any means, electronic, mechanical, photocopying,
or otherwise without the prior permission of Philips.
all versions
AX6301
VIDEO CD
CLASS 1
LASER PRODUCT
Page 2
1-1
TECHNICAL SPECIFICATION
General
Dimensions (Wx H x D) : 128 x 30x 137.5mm
Weight without batteries : 220g
Shock resistance
+X/-X direction : ≥5g
+Y/-Y direction : ≥5g
+Z/-Z direction : ≥5g
Power supply modes
Battery lifetime
Battery level detection
Current consumption
Headphone out
Output power (THD=10%) :7mW (-1dB)
Frequency response (1mW) : 100Hz-20kHz within 6dB
S/N ratio CD (unwght) : 78dB (81dB typ.)
S/N ratio CD (unw.),incl.muting : 85dB
S/N ratio CD (A-wght) : ≥82dB (84dB typ.)
S/N ratio CD (A-wght),incl.muting : 85dB
THD+N (1kHz, 1mW) : 1.0% (0.2% typ.)
Crosstalk (1kHz) : ≤-24dB (-44dB typ.)
Channel unbalance (-40dB) : 4dB
Volume attenuation (1kHz) : >60dB
Dynamic Bass Boost DBB
Measurement setup CD
Use Audio Signal disc SBC429 4822 397 30184
Battery empty
Difference btw.level 1 and battey empty
Difference btw.level 2 and battey empty
Difference btw.level 3 and battey empty
2.2V
+100/-50mV
0.3V
± 100mV
0.6V ± 100mV
0.9V ± 100mV
ELBATROP D/VCDCROF
SEIROSSECCA
AX6301
10/
20/9313YA rotpadACD/CA
X
7s7/
SBC HE035
e
nohpdaeHoeretS
AY3788
Remote Control
X
X
X
9965 000 22594
9965 000 11492
9965 000 22593
AV Cinch Cable
9965 000 22595
ACCESSORIES
+6dB +6dB
± 2dB 2dB
+0dB dB
± 2dB 2dB
+0dB dB
± 2dB 2dB
DBB 1
FEATURES
V0.3-2.2
egnaregatloV
ESP=on
DVC
7 h
≥
(8h typ.)
MP3
≥
(9h typ.)
ESP=on
8 h
EDOMYLPPUS
tekcosNI-CD.0V6-3.5
seirettabyramirP
EPYTYRETTAB
seirettabAlkaline
AA)x(2
DC
≥
(3h typ.)
D/MP3/VCDC
ESP=on
2.8 h
EGATSBBD
zH100 zH1k zHk01
esnopserycneuqerF
L
R
Low pass filterDUT S/N and distortion meter
22kHz
13th order
i.e. Sound Technology ST1700Bi.e. 4822 395 30204
Level meter
i.e. Sennheiser UPM550
with FF-filter
SERUTAEF
ELBATROP-DCFO
/MP3
WM/MFRENUT
YTILIBITAPMOCELBATIRWER-DC
AX6301
-/-
●
)snoisrevlla(
LEVELNOITCETED seirettabyramirP
offP=SE
on=PSE
)V5.4(YLPPUSNI-CD )V52.2(YLPPUS.TTAB
VCD
on=PSE
VCD
CD
onP=SE
off=PPSE
CD MP3
offP=SE
VCD
on=PSE
VCD
on=PSE
off=SE
440mA
n/an/a n/a
NOITAREPO
CD
EDOM
Play
Jump
CD MP3
onP=SE
210mA 200mA 200mA 400mA 370mA 270mA 240mA 260mA 450mA
n/a n/a n/a
<500mA <650mA <500mA <650mA
EZISMARDPSE
SEGATSBBD
KCABDEEFCITSUOCA
YROMEMMARGORP
N CDDA / MP3/VCDOITCETORPPIKSCINORTCELE
NOITCNUFEMUSER/DLOH
HMiN/dCiNNOITCNUFEGRAHCER
DERAPERPLORTNOCETOMERDROC
s / 400s / 30s120
● / ●
1
-
/-
●
tibM16
02
●
Page 3

1-2
INSTRUCTION FOR USE
English CONTROLS
C
ontrols
1 OPEN 2 ..............to open the VCD MP3 CD lid
2 VOL E .............to adjust the volume
3 2; ........................to switch the player on, start playback and interrupt playback
4 ESP ......................to switch on /off ESP function
5 DBB.................. ...to select bass enhancement
6 §
........................to skip forward and search forward for CD and MP3-CD
..............................to skip forward for VCD
7+..........................to select the desired album up for MP3-CD playback
..............................to fast forward during VCD playback
8 DISPLAY..............(for CD and VCD) to display the current track number and
9 Display
-
0 ...........................to select the desired album down for MP3-CD playback
..............................to fast rewind during VCD playback
! .........................to skip backward and search backward for CD and MP3-CD
§
..............................to skip backward for VCD
@ OFF·RESUME·HOLD·
– OFF ...................switches RESUME and HOLD off
– RESUME..........stores and starts at the last position played
– HOLD................locks all buttons on the set except the volume control slider
# 9 (STOP)...............
$ PROGRAM ..........to program tracks
% MODE .............. ...to select playback options - REPEAT 1, REPEAT ALL,
^ LINE OUT/p..........to connect
..............................- headphones
& infrared sensor for the remote control
* 4.5V DC ...............to connect the mains adapter
remaining / elapsed playing time. (for MP3-CD) to display
the current album number, track number, remaining/elapsed
playing time.
to stop playback, clear a program and switch the set off
SCAN and SHUFFLE
- the set to the audio/video input of your stereo equipment
*
&
^
%
Front view
$
PUSH
1 2 3
4 5 6
7 8 9
RESUME
VIEW ZOOM P/N
RELEASE
PULL
OSD
MODE
PROG
R/L
10 / 0
PBCGO TOSLOW RETURN
90!@
1xCR2025
3V lithium battery
Back view
1
(
2
3
4
5
6
7
8#
( Battery compartment
) Type plate
Remote C
1 OSD .....................(for CD and VCD) to display the current track number and
2 MODE .................to select the playback options: REPEAT 1, REPEAT ALL,
3 § ........................to skip forward for CD, VCD and MP3-CD
4 PROG ...................for CD/VCD/MP3-CD, to program disc tracks
5 R/L........................to toggle between left/right channels and stereo
6 Number buttons to select your desired tracks
7 P/N.......................to toggle between PAL and NTSC
8 ZOOM .................to view pictures in an enlarged mode
9 PBC .....................to toggle between MENU Play and SEQUENCE PLAY
0 GO TO .................to set the time from which playback starts
! RETURN .............to return to MENU PLAY from SEQUENCE PLAY
@ SLOW .................to view VCDs at a slower speed
# VIEW ..................to scan VCD segments
$ RESUME ............to resume playback in stop mode
% ........................to skip backward for CD, VCD and MP3-CD
^ 9 (STOP) ...............to stop playback or clear a program
& ..........................to select the desired album down for MP3-CD playback
..............................to fast rewind during VCD playback
* 2; ........................to start /pause playback / return to normal playback
(+...........................to select the desired album up for MP3-CD playback
..............................to fast forward during VCD playback
ontrol
remaining / elapsed playing time. (for MP3-CD) to display
the current album number, track number, remaining/elapsed
playing time.
SCAN and SHUFFLE
§
-
Page 4
1-3
POWER SUPPLY/GENERAL INFORMATION
Batteries (not included)
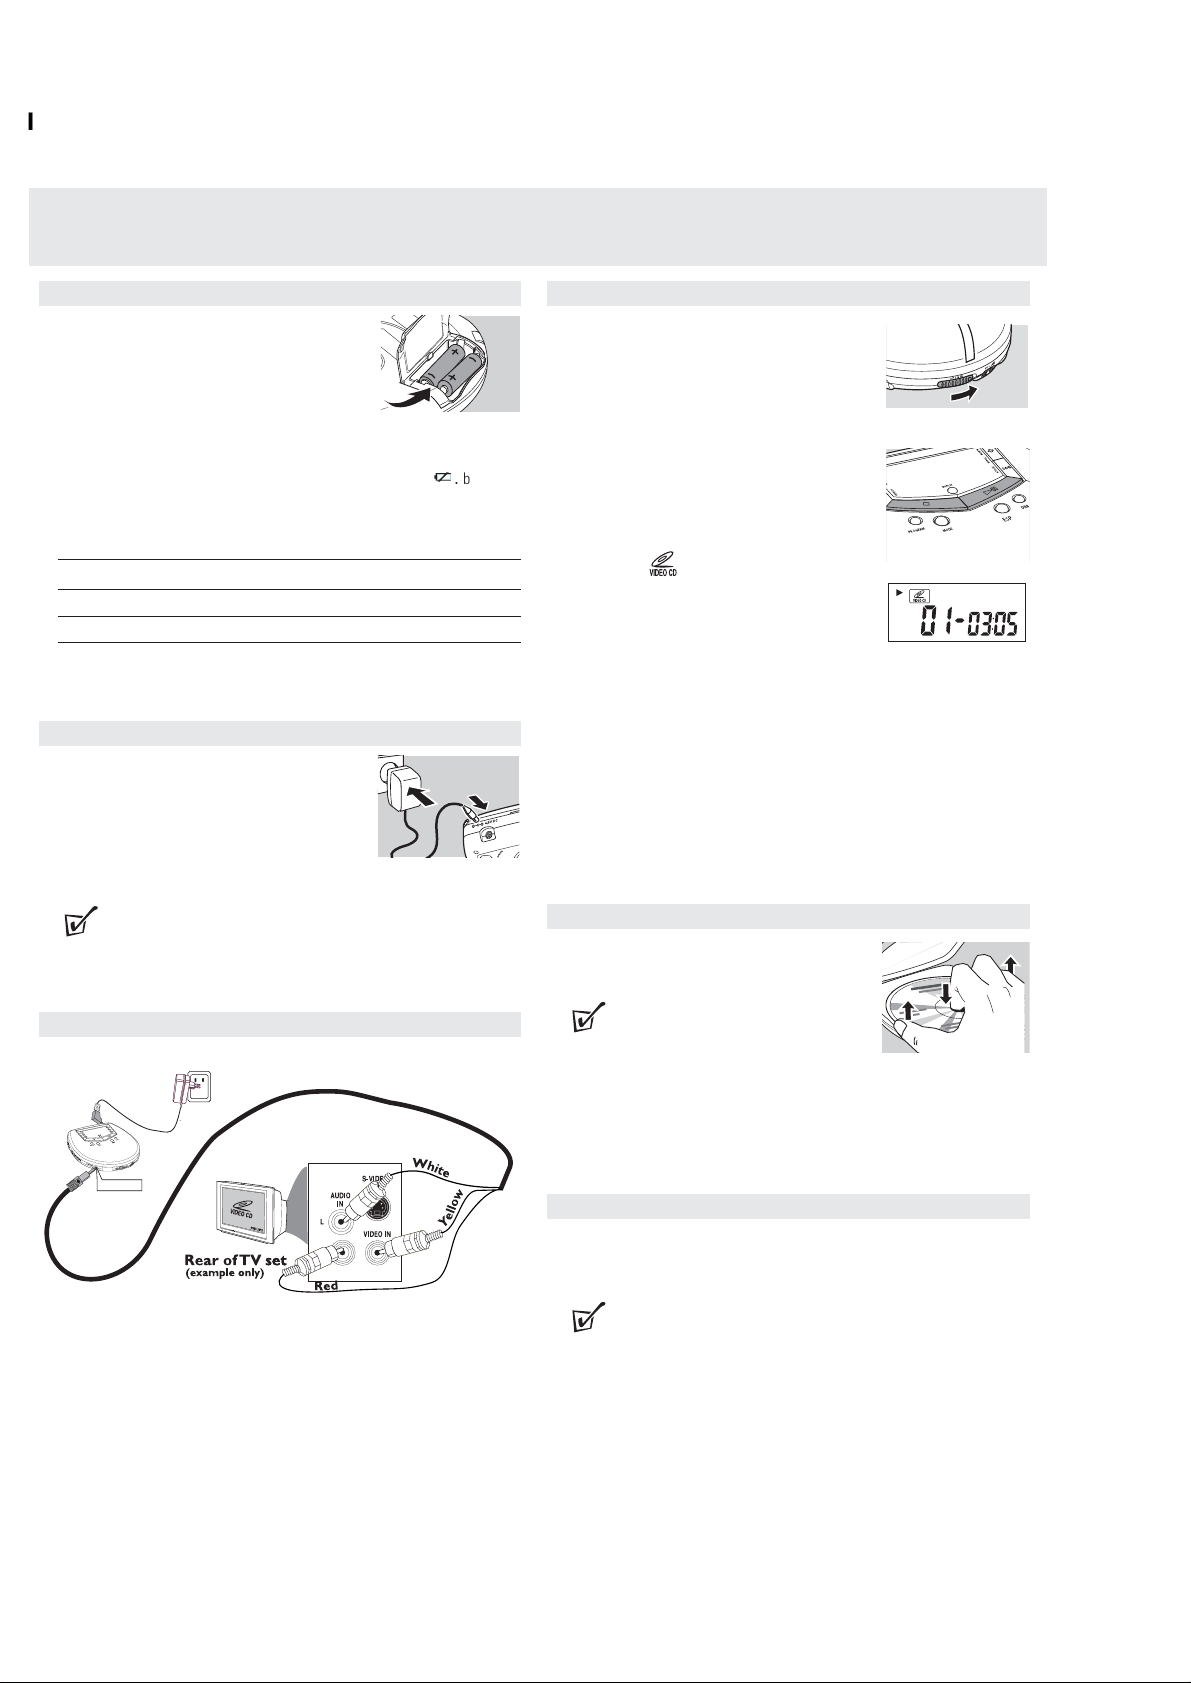
Inserting batteries
• Open the battery compartment and insert 2 alka-
line batteries of type AA (LR6, UM3).
•When using the remote control for the first time,
please remove the clear protective tab from the
battery.
• Do not mix old and new or different types of batteries.
Indication of empty batteries
• Replace the batteries or connect the mains adapter as soon as
.
blinks.
• Remove batteries if they are empty or the set will not be used for a long time.
Average playing time of batteries under normal conditions
Alkaline battery ESP on ESP off
VCD 3 hours 3.5 hours
CD 7 hours 7.5 hours
MP3-CD 9.5 hours
Batteries contain chemical substances, so they should be disposed of
properly.
Mains adapter (supplied AY3193)
Use only the AY3193 adapter (DC: 4.5V/800mA; AC:
110V/220V and 50/60Hz). Any other product may
damage the player.
1 Make sure the mains voltage matches the voltage
requirement of the mains adapter.
2 Connect the mains adapter to the 4.5V DC socket of
the player and to the wall socket.
PLAYBACK
Playing a disc
With this set, you can play
- Video discs
- audio discs (pre-recorded audio CDs, finalized audio
CDs and CD-RWs)
- MP3-CDs (CD-ROMs with MP3 files)
For VCD playback, you need to connect the player to
your TV (see Connecting to your TV system)
1 Push the OPEN 2 slider to open the disc lid.
2 Insert a disc, printed side up, by pressing the CD onto
the hub. Close the lid by pressing the lid down.
3 Press 2; on the set to start playback.
Playback starts.
Video disc: appears. The current track number
and the elapsed time are displayed.
Audio disc: The current track number and the elapsed
playing time are displayed.
MP3-CD: MP3 appears. The current album number, track number and the
elapsed playing time are displayed.
4 To stop playback, press 9.
Video disc: The number of tracks and the total playing time of the disc are
displayed.
Audio disc: The number of tracks and the total playing time of the disc are
displayed.
MP3-CD: The number of albums and the number of tracks are displayed.
.
TIP:
- Always disconnect the adapter when you are not using it.
- Once the mains adapter is connected, the power supply from batteries will
be switched off automatically.
TV connection
Connecting to your TV System
Use the supplied AV cable to connect the player to your TV system. To ensure
uninterrupted viewing, we recommend you use AC mains power for your player during VCD operation.
1 Insert the yellow video cable pin into the VIDEO IN jack on the rear of your TV.
Insert the white and red audio cable pins respectively into the left and right
AUDIO IN jacks of your TV.
2 Insert the pin on the other end of the AV cable into the LINE OUT jack on
your player.
3 Connect the mains adapter to the 4.5V DC socket of the player and to the wall
socket.
LINE OUT p
Playing a disc
5 Press 9 again to switch off the player.
•To remove the disc, hold it by its edge and press the hub
gently while lifting the disc.
TIP:
- You can only press 2; on the set to start
playback.
- if there is no activity, the player will automatically switch off in 30 seconds to
save energy.
- After pressing 2; , you may need to wait for 10 seconds or more until the
first MP3 track is played.
Pause
1
Press 2; to interrupt playback.
The track number and the elapsed playing time are displayed.
2 Press 2; again to resume playback
TIP:
- If the set stays in the PAUSE mode for more than 90 seconds, it will enter the
STOP mode automatically. After 30 seconds or more in the STOP mode, your
set automatically powers down.
0
INSTRUCTION FOR USE
Page 5
1-4
DISPLAY features for VCD, CD and MP3-CD
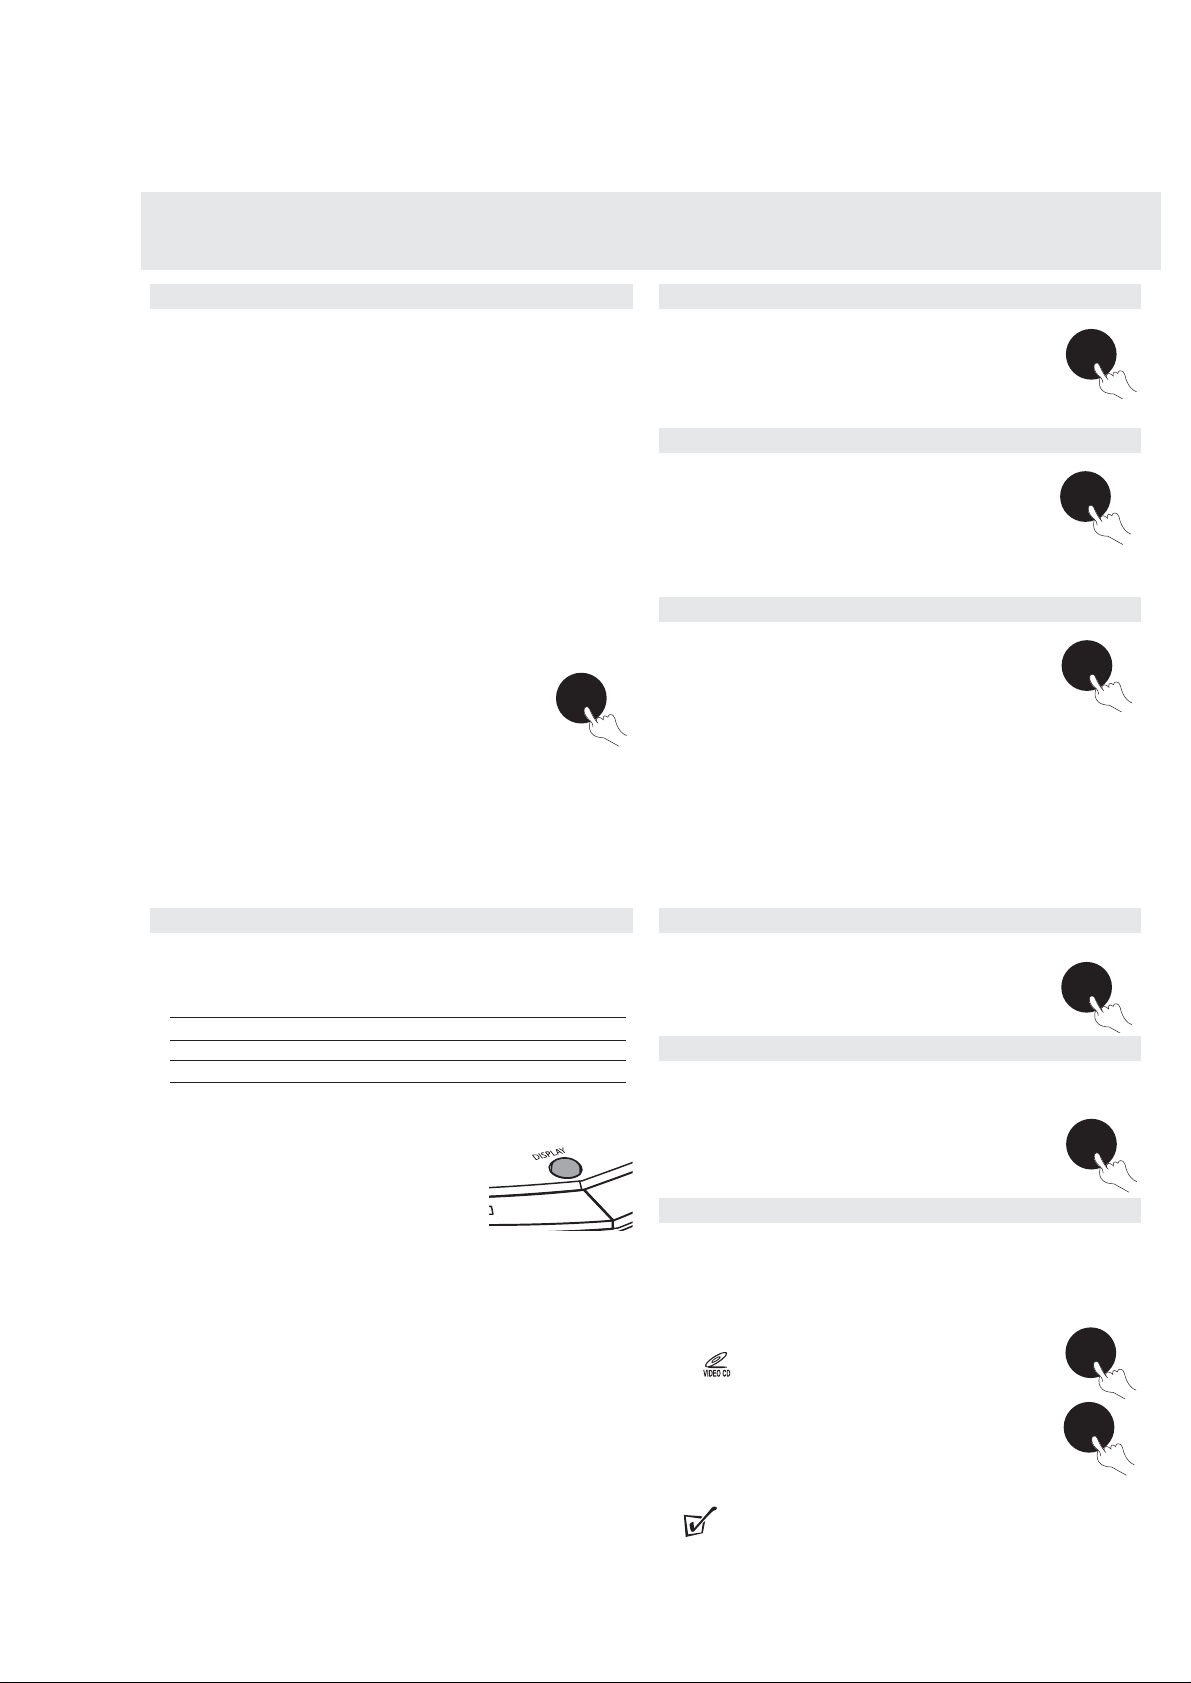
•During normal playback, you can press OSD on the remote control or
DISPLAY on the set repeatedly to select your desired display.
Press OSD or DISPLAY Display
1x Track number + track’s remaining playing time
2x Normal display
FEATURES
Return
If you want to return to MENU PLAY (the main menu at the
beginning of your VCD) during SEQUENCE PLAY, press
RETURN.
Go to
1 Press GO TO on the remote control.
GO TO--:-- appears on the TV screen.
Enter the desired time from which you want to start playback.
2 Press GO TO again to deactivate GO TO.
GO TO CANCEL appears.
View
This feature allows you to scan through your VCD in 9
segments.
1 Press VIEW to divide the whole movie of the video into 9
segments.
The 7-second of each segment is played. After the last
segment, playback starts from the first segment.
2 Select your desired segment using the number buttons on the remote control.
Playback continues from the selected segment.
3 Press VIEW again or 2; to resume normal playback.
Zoom
1 Press ZOOM on the remote control once to enlarge the picture by 2 times.
ZOOM 2" appears.
2 Press ZOOM again to quit the zoom feature.
RESTORE appears and normal playback resumes.
Slow
Select from 4 speeds to capture action in slow motion: 1/2, 1/4, 1/8, and 1/16.
1 Press SLOW on the remote control once or more for playback at slow speed.
Sound is muted and SLOW1/2, SLOW1/4, SLOW1/8 or
SLOW1/16 is displayed.
2 To resume normal playback, press 2;.
Playing a VCD V2.0 with PBC
PBC is a predefined play sequence stored in the CD.
SEQUENCE PLAY is by default on when VCD playback starts.
Before viewing your VCD, make sure the set is switched to the corresponding
PAL or NTSC system of your TV set (except multi-system TVs).
1 Press P/N repeatedly to select PAL or NTSC.
is displayed when you load a VCD with PBC
(Playback Control) into your player.
2 You can press PBC to toggle between MENU PLAY and
SEQUENCE PLAY.
If SEQUENCE PLAY is selected, the playback starts from
the beginning of the first track.
If MENU PLAY is selected, a list of tracks is displayed on the TV screen.
TIP:
This function is not available for discs without Table Of Contents.
ZOOM
SLOW
GO TO
VIEW
RETURN
P/N
PBC
FEATURES
Special features for VCD playback only
Adjusting your TV System
Before viewing the Video CD, ensure that the set is switched to the corresponding PAL or NTSC system of your TV set (except multi-system TV).
1 Connect the audio/video output cable to the corresponding ports of the TV set.
2 Turn on your TV system and adjust the input mode to AV
3 On the remote control, press P/N to toggle between PAL and NTSC TV systems.
OSD - On Screen Display
If you insert a VCD, your TV screen will serve as an additional display for
messages (e.g. PLAY, STOP) and information stored in the VCD.
•Press OSD on the remote control or DISPLAY on the set repeatedly to switch
OSD on or off.
When OSD is switched on, your TV screen may for example display the following
XX-MM:SS - where:
– “XX" is the current track
– "MM" is for minute.
– "SS" is for second.
OSD
INSTRUCTION FOR USE
Page 6
1-5
General MP3 information
How to make a CD-ROM with MP3 files
Use your computer's CD burner to record ('burn") music files from your hard
disc on a CD-ROM. Use ISO9660 disc format.
Make sure that the file names of the MP3 files end with .mp3
Note: Data compression in UDF is not supported.
Supported formats
This set supports:
-Video CD V1.0, V
ideo CD V2.0
- DVCD
- ISO-9660, ISO-9660+Joliet, Joliet, Packet
writing
- MP3 bit rate: 32-320 kbps and variable bit rate (VBR)
-Maximum number of tracks per disc: 400
-Maximum number of albums per disc: 99
TIP:
-
When the system reads a mixed mode MP3-CD, only the number of
total CDDA tracks is displayed.
GENERAL INFORMATION
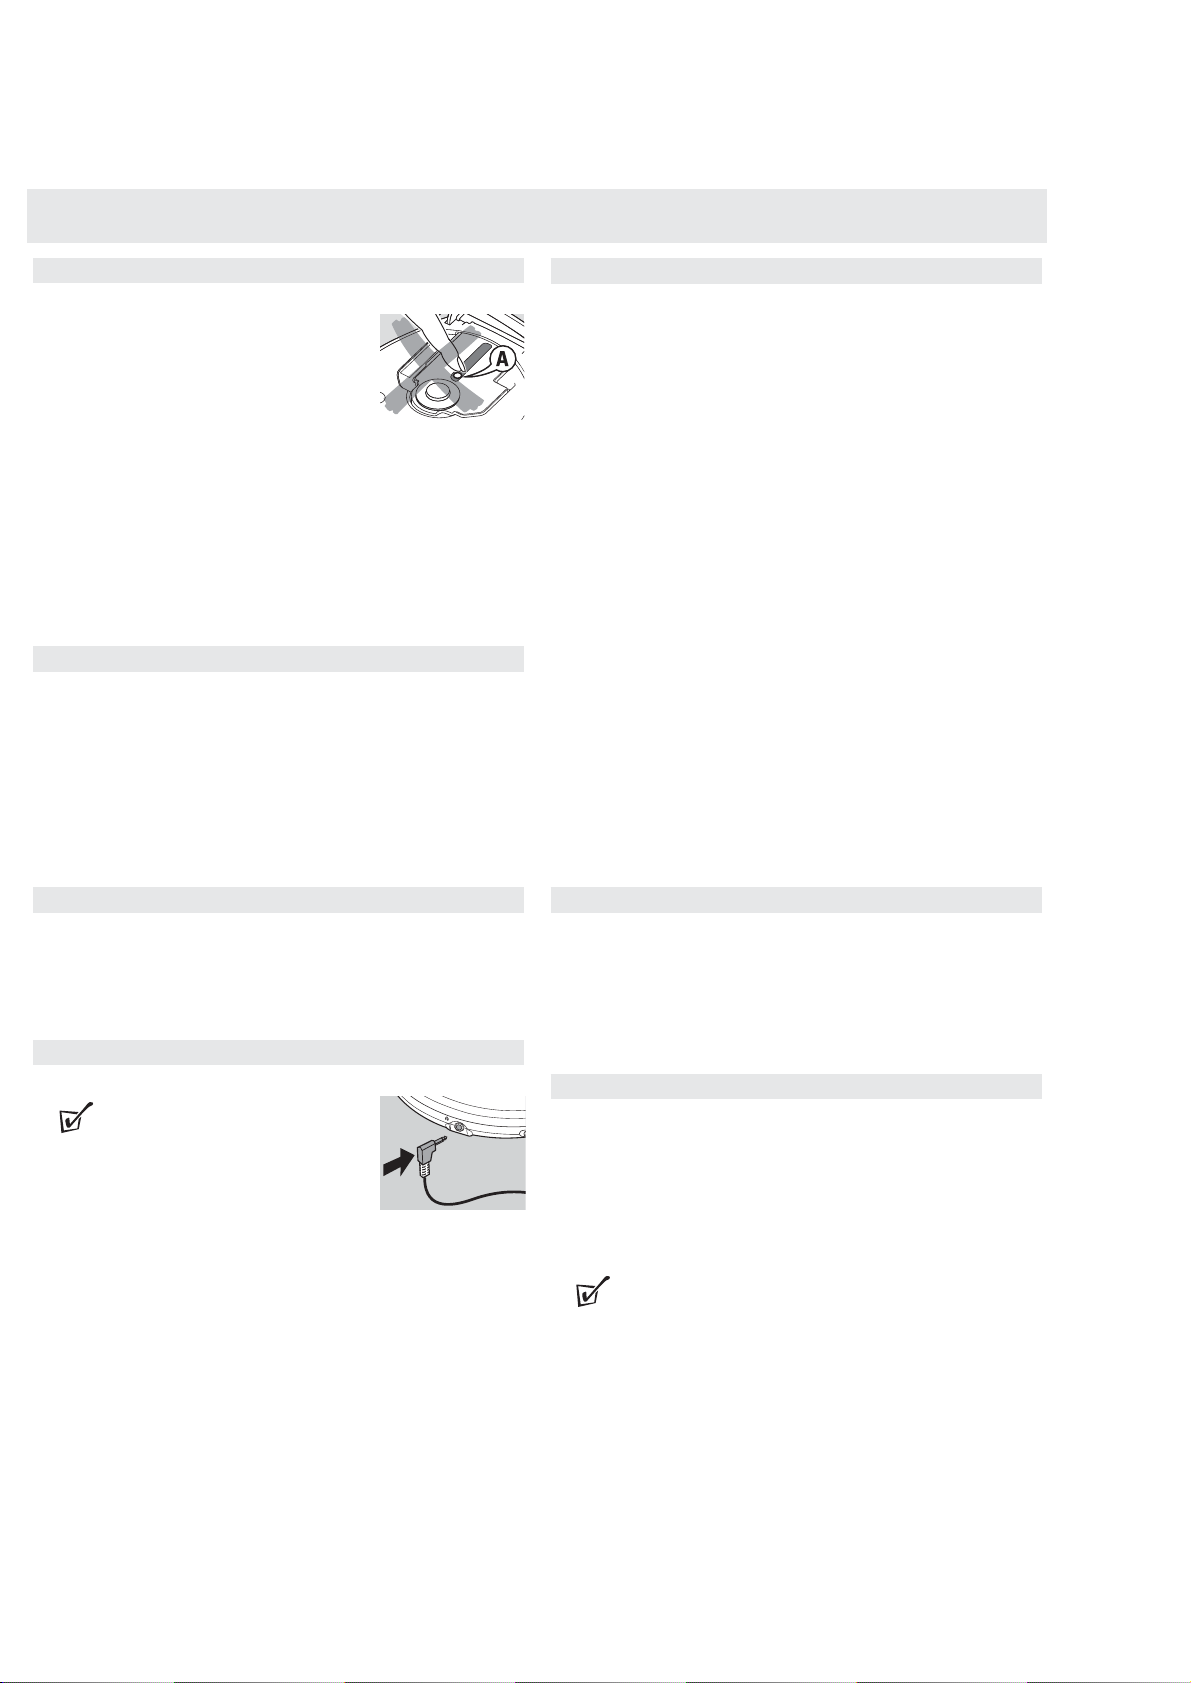
Maintenance
• Do not touch the lens A of the player.
• Do not expose the unit, batteries or discs to humidity,
rain, sand or excessive heat (caused by heating
equipment, or direct sunshine).
•You can clean the player with soft, slightly dampened
and lint-free cloth. Do not use any cleaning agents, as
they may be corrosive.
•To clean the CD, wipe it in a straight line from the center toward the edge
using soft, lint-free cloth.
• Never write on a disc or attach a sticker to it.
• Discs and lens may cloud over when the unit is moved suddenly from cold to
warm surroundings. Leave the player in a warm environment until the moisture
has evaporated.
• Active mobile phones in the vicinity may cause malfunctions.
•Avoid dropping the unit as this may cause damage.
Enviromental information
•We have done our best to make the packaging easily separable into mono
materials. Cardboard (box) and polyethylene (bags, protective foam sheet).
•Your set consists of materials which can be recycled if disassembled by a specialized company. Please observe the local regulations regarding the disposal
of packing material, exhausted batteries and old equipment.
GENERAL INFORMATION
General MP3 information
How to get music files
The music compression technology MP3 (MPEG Audio Layer 3) reduces the
digital data of an audio CD significantly while maintaining CD-like sound quality.
With MP3 you can record up to 10 hours of CD-like music on a single CD-RW.
How to organize music files
Either download legal music files from the Internet to your computer hard disc
or create them from your own audio CDs. For this, insert an audio CD into your
computer's CD-ROM drive and convert the music using appropriate encoder
software. To achieve good sound quality, a bit rate of 128 kbps or higher is
recommended for MP3 music files.
How to make a CD-ROM with MP3 files
In order to easily handle the large number of music files on a CD-ROM, you
can organize them in folders ("albums").
The tracks of an album will be played in alphabetical order. If you want to
arrange them in a certain order, let the file names start with numbers.
For example:
001-EWORLD.MP3
002-FIRESTARTER.MP3
003-DEEP.MP3
Albums will be arranged in alphabetical order, but subfolders (albums within
another album) will be played immediately after the album in which they are
located. Albums without MP3 files will be skipped.
If there are MP3 files which you did not put into an album, you will find them
in the album VARIOUS with album number 0. VARIOUS is the first album that
will be played.
Accessories
Headphones, HE035
Mains adapter, AY3193
Wireless remote control, AY3788
AV cable, AY3484
Headphones (HE035)
• Connect the supplied headphones
to LINE OUT/
p.
TIP:
LINE OUT/ p. can also be used to connect this set to
your HiFi or TV system.
Take care when using headphones
Hearing safety
Do not play your headphones at a high volume. Hearing experts advise that
continuous use at high volume can permanently damage your hearing.
Traffic safety
Do not use your headphones while driving a vehicle. It may create a hazard
and it is illegal in many countries.
E
•
H
O
L
D
L
I
N
E
O
U
T
/
INSTRUCTION FOR USE
Page 7

1-6
Selecting tracks using the number digits
• Press number buttons 0-9 on the remote control to select your desired track.
If more than 10 tracks are stored in a disc, you can use 10+:
• Press 10+ first, and then the last number.
• Press 10+ once for 10+, twice for 20+, and three times for 30+, and so on.
Searching VCDs at different fast / slow speeds during
playblack
• Press + once or several times to
select your desired forwarding speed:
Press Times of normal
speed
1x FORWARD x1
2x FORWARD x2
3x FORWARD x3
4x FORWARD x4
5x Normal Play
• Press – once or several times to select your desired rewinding speed:
Press Times of normal speed
1x BACKWARD x1
2x BACKWARD x2
3x BACKWARD x3
4x BACKWARD x4
5x Normal Play
Playing tracks repeatedly or in a random order - MODE
Press MODE once or several times to select the
desired playback possibility.
– REPEAT 1:
The current track is played repeatedly.
– REPEAT ALL:
The entire disc is played repeatedly. But forMP3CDs, only all the tracks in the current album are
played repeatedly.
– SHUFFLE:
All tracks are played in a random order.
– SCAN :
The first 10 seconds of each track is played in
sequence.
REPEAT 1 ALL
SHUFFLE
SCAN
GENERAL INFORMATION/FEATURE
Volume and sound
Volume adjustment
• Adjust the volume by using the volume control
VOL E.
Sound adjustment
1 Press DBB for a moderate bass enhancement.
appears.
Press DBB again to switch off the bass enhancement.
disappears.
R/L : Channel and stereo sound selection
It is possible to select the right channel or left channel or stereo from a multichannel disc when you connect your player
to your TV or Hi-Fi system.
1
For VCDs, make sure you connect the player
correctly to your TV system first.
•
For music discs, make sure you connect the player to your
Hi-Fi system first.
2
On the remote, press R/L once or more to select your sound output option.
DBB
DBB
FEATURES
Selecting and searching on all discs
Selecting a track during playback
• Briefly press or §
§
§
§
once or several times to skip to the beginning of the
previous or subsequent track.
Playback continues with the selected track .
Search for a passage during CD playback
1 Keep or § pressed to find a particular passage in
a backward or forward direction.
Searching is started.
2 Release the button at the desired passage.
Normal playback continues.
Selecting albums and tracks on MP3-CDs
Selecting an album during playback
• Briefly press - or + once or several times to skip to the first track of the current, previous or subsequent album.
Playback starts from the first track of the
selected album.
Selecting a track during playback
1 Briefly press or § once or several times to
select previous or subsequent tracks within the current album.
2 Release the button at the desired track.
Playback continues with the selected track.
R/L
INSTRUTION FOR USE
Page 8

1- 7
ESP - Electronic Skip Protection
The ESP duration is 120 seconds for CD playback,
400 seconds for MP3 disc playback and
30 seconds for VCD playback.
The ELECTRONIC SKIP PROTECTION system prevents sound loss or unstable
playback caused by light vibrations and shocks. Continuous playback is thus
ensured. ESP does not prevent playback interruptions during vigorous
running. It does not protect the unit against any damage caused by
dropping!
Press ESP repeatedly during playback to toggle between ESP ON and ESP OFF.
•When appears, ESP is activated.
•When disappears, ESP is deactivated
MP3
ALBUM
FEATURES
RESUME and HOLD
You can interrupt playback and continue (after a short
while at the stop position only) from the position
where playback has stopped (RESUME). You can also
lock all buttons of the set so that no action will be
executed (HOLD). Use the OFF – RESUME – HOLD
slider for these functions.
RESUME – continuing from where you have stopped
1 Switch the slider to RESUME during playback to activate RESUME.
y RESUME is shown.
2 Press 9.
3 Press 2; on the set or press 2; or RESUME on the
remote control to resume playback.
y RESUME is shown and playback continues from where
you have stopped.
•To deactivate RESUME, switch the slider to OFF.
y RESUME goes off.
TIP:
– Resume is also cancelled if you have opened the disc lid or disconnected
your player from the power supply.
HOLD - locking all buttons
•Switch the slider to HOLD to activate HOLD.
HOLD appears and all buttons are locked.
When any key is pressed, HOLd is displayed.
•To deactivate HOLD, switch the slider to OFF.
HOLD disappears.
RESUME
RESUME
FEATURES
Programming track numbers
You can select up to 20 tracks and store them in the
memory in a desired sequence. You can store any
track more than once.
1 In the stop mode, press PROGRAM on the set or PROG
on the remote control.
PROGRAM appears and P with the number of
stored tracks is displayed.
2 Select a track with or §
§
.
3 Press PROGRAM on the set or PROG on the remote
control to store the track.
4 Select and store all desired tracks in this way.
5 Press 2; to start playback of the program
Playback starts.
TIP:
– P-FULL appears when the program memory is full.
PROGRAM
Clearing the program
You can clear the program by
•pressing 9 again in th stop mode;
•powering off the player;
• opening the disc lid;
•pressing and holding
PROGRAM during playback
•pressing PROG on the remote control during playback.
TIP:
– P-CLEAr appears on the display of the player for VCD, CD and
MP3-CD.
– PROGRAM CANCEL appears on the TV
screen for VCD.
HOLD
INSTRUTION FOR USE
Page 9

1 - 8
TROUBLESHOOTING
WARNING: Under no circumstances should you try to repair the set yourself
as this will invalidate the guarantee.
If a fault occurs, first check the points listed below before taking the set for
repair. If you are unable to solve a problem by following these hints, consult
your dealer or service centre.
Problems
No sound/power
• Check if the player is connected securely.
• Check volume on the player.
• Disconnect headphones when not using headphones.
•Make sure you operate the TV or amplifier correctly.
•Make sure you have selected VCD player position on the amplifier.
• The power circuit in your player is designed with a power shutdown mode.
This is activated only during battery power operation of the player when the
battery becomes completely drained. When this happens:
1 Connect your player to AC power with the supplied mains adapter.
2 Let the player stand idle for 30 seconds before switching on again to resume
disc operation on AC power supply.
Loud noise when operating the player
• This is normal and due to mechanical parts. Playback is not affected.
The player feels very warm
• When the player is in use for a long period of time, the surface will be heated.
This is normal.
No picture / No color on TV screen
• Connect the cable between the systems and the TV.
• Change the system to the respective PAL or NTSC setting.
My disc cannot play
• Check you have loaded a disc in the player if empty.
• Check you have loaded a disc properly with the label side up.
• Disc dirty/damaged. Clean the disc properly.
• Moisture has condensed in the player.
Remove the disc and leave the player to adjust to the surrounding temperature.
Some audio CDs available on the market are copy protected. These discs will not
play on this set. See your retailer for options regarding non-protected audio CDs.
• Make sure the MP3-CD was recorded within 32-320kbps (128kbps
preferably) with sampling frequencies at 8-48KHz (44.1KHz preferably).
Remote
control does not work
• Remove obstacle between the remote control and the player, and point directly
instead of at a wide angle at the infrared sensor on the player.
• The battery may be exhausted. Replace the battery with a new one.
• Try
using the remote control with a maximum distance of 3 meters from the
sensor on the player.
• Try using the remote control within a maximum angle of 30
0
Picture CD cannot be played
•Make sure that the picture CD is JPEG VGA format (640x480 pixels)
CAUTION
Use of controls or adjustments or performance of procedures
other than herein may result in hazardous radiation exposure
or other unsafe
operation.
INSTRUTION FOR USE
Page 10

1 - 9
SAFETY & WARNINGS
© WARNING
All ICs and many other semiconductors are susceptible to
electrostatic discharges (ESD). Careless handling during
repair can reduce life drastically.
When repairing, make sure that you are connected with the
same potential as the mass of the set via a wristband with
resistance. Keep components and tools at this potential.
ESD
ñ WAARSCHUWING
Alle IC´s en vele andere halfgeleiders zijn gevoelig voor
electrostatische ontladingen (ESD).
Onzorgvuldig behandelen tijdens reparatie kan de levensduur
drastisch doen vermindern. Zorg ervoor dat u tijdens reparatie
via een polsband met weerstand verbonden bent met hetzelfde
potentiaal als de massa van het apparaat.
Houd componenten en hulpmiddelen ook op ditzelfde potentiaal.
f ATTENTION
Tous les IC et beaucoup d´autres semi-conducteurs sont
sensibles aux décharges statiques (ESD). Leur longévite
pourrait être considérablement écourtée par le fait qu´aucune
précaution nést prise à leur manipulation.
Lors de réparations, s´assurer de bien être relié au même
potentiel que la masse de l´appareil et enfileer le bracelet
serti d´une résistance de sécurité.
Veiller à ce que les composants ainsi que les outils que l´on
utilise soient également à ce potentiel.
©
AVAILABLE ESD PROTECTION EQUIPMENT :
anti-static table mat large 1200x650x1.25mm 4822 466 10953
small 600x650x1.25mm 4822 466 10958
anti-static wristband 4822 395 10223
connection box (3 press stud connections, 1MΩ) 4822 320 11307
extendible cable (2m, 2MΩ, to connect wristband to connection box) 4822 320 11305
connecting cable (3m, 2MΩ, to connect table mat to connection box) 4822 320 11306
earth cable (1MΩ, to connect any product to mat or to connection box) 4822 320 11308
KIT ESD3 (combining all 6 prior products - small table mat) 4822 310 10671
wristband tester 4822 344 13999
d WARNUNG
Alle ICs und viele andere Halbleiter sind empfindlich
gegenüber elektrostatischen Entladungen (ESD).
Unsorgfältige Behandlung im Reparaturfall kann die
Lebensdauer drastisch reduzieren.
Sorgen Sie dafür, daß Sie im Reparaturfall über ein Pulsarmband mit Widerstand mit dem Massepotential des
Gerätes verbunden sind.
Halten Sie Bauteile und Hilfsmittel ebenfalls auf diesem
Potential.
©
Safety regulations require that the set be restored to its
original condition and that parts which are identical with
those specified be used.
Safety components are marked by the symbol
f
Les normes de sécurité exigent que l`appareil soit remis
à l`état d`origine et que soient utilisées les pièces de
rechange identiques à celles spécifiées.
Les composants de sécurité sont marqués
d
Bei jeder Reparatur sind die geltenden Sicherheitsvorschriften zu beachten. Der Originalzustand des Gerätes
darf nicht verändert werden. Für Reparaturen sind Originalersatzteile zu verwenden.
Sicherheitsbauteile sind durch das Symbol markiert.
SAFETY
i AVVERTIMENTO
Tutti IC e parecchi semi-conduttori sono sensibili alle scariche
statiche (ESD).
La loro longevità potrebbe essere fortemente ridatta in caso di
non osservazione della più grande cauzione alla loro
manipolazione. Durante le riparationi occorre quindi essere
collegato allo stesso potenziale che quello della massa
delápparecchio tramite un braccialetto a resistenza.
Assicurarsi che i componenti e anche gli utensili con quali si
lavora siano anche a questo potenziale.
ñ
Veiligheidsbepalingen vereisen, dat het apparaat in zijn
oorspronkeliijke toestand wordt teruggebracht en dat
onderdelen, identiek aan de gespecificeerde, worden toegepast.
De Veiligheidsonderdelen zijn aangeduid met het symbool
i
Le norme di sicurezza estigono che l´apparecchio venga
rimesso nelle condizioni originali e che siano utilizzati i
pezzi di ricambiago identici a quelli specificati.
Componenty di sicurezza sono marcati con
©
DANGER: Invisible laser radiation when open.
AVOID DIRECT EXPOSURE TO BEAM.
s Varning !
Osynlig laserstrålning när apparaten är öppnad och
spärren är urkopplad. Betrakta ej strålen.
©
After servicing and before returning the set to customer
perform a leakage current measurement test from all
exposed metal parts to earth ground, to assure no
shock hazard exists.
The leakage current must not exceed 0.5mA.
CLASS 1
LASER PRODUCT
∂ Advarsel !
Usynlig laserstråling ved åbning når sikkerhedsafbrydere
er ude af funktion. Undgå udsaettelse for stråling.
f
"Pour votre sécurite, ces documents doivent être utilisés par
des spécialistes agréés, seuls habilités à réparer votre
appareil en panne".
ß Varoitus !
Avatussa laitteessa ja suojalukituksen ohitettaessa olet alttiina
näkymättömälle laserisäteilylle. Älä katso säteeseen !
Page 11

2 -1
SERVICE HINTS
REPAIR POSITION COPPERSIDE
To get access to the copperside of the
printed board assembly proceed as follows:
1.Remove bottom screws (3x)
2.Lift the bottom-assy-1
3.Supply the unit via external DC-socket
4.Take care that the door switch is closed during
measurements
REPAIR POSITION COMPONENTSIDE
To get access to the compomentside of the
printed board assembly proceed as follows:
1.Remove the bottom screws(3x)
2.Open the CD-door
3.Lift the cabinet-assy-2 and put it backwards on the table
4.Supply the unit via the external DC-socket
5.Take care that the door switch is closed during
measurements
DISMANTLING THE CD-DOOR
To dismantle the CD-door proceed as follows:
1.Dismantle bottom and printed board/drive assembly
2.Disconnect the sticker
(flex-foil connector on the membrance keyboard)
3.Disconnect membrance keyboard
(flex-foil connector on copperside of printed board)
4.Bend the CD-door rightwards downwards as indicated in
the picture above
Remark:Do not use screwdrivers or tools.
Sharp edges could damage hinge or cabinet part.
Page 12

2 - 2
SERVICE TOOLS
Audio signal disc SBC429 4822 397 30184
Playability test disc SBC444 4822 397 30245
Test disc 5 (disc without errors ) + Test disc 5A(disc with dropout errors
black spots and fingerprints) SBC426/ SBC426A 4822 397 30096
ESD PROTECTION EQUIPMENT
Anti-static table mat large 1200x650x1.25mm 4822 466 10953
small 600x650x1.25mm 4822 466 10958
Anti-static wristband 4822 395 10223
Connection box (3press stud connections,1MΩ) 4822 320 11307
Extendible cable (2m,2MΩ ,to connect wristband to connection box) 4822 320 11305
Connecting cable (3m,2MΩ ,to connect table mat to connection box) 4822 320 11306
Earth cable (1MΩ , to connect any product to mat or to connection box) 4822 320 11308
KIT ESD3(combining all 6 prior products - small table mat) 4822 310 10671
Wristband tester 4822 344 13999
HANDLING CHIP COMPONENTS
Page 13

3 - 1
BLOCK DIAGRAM
Page 14

4 - 14 - 1
COMBI BOARD - CIRCUIT DIAGRAM PART 1
Page 15

4 - 2 4 - 2
COMBI BOARD - CIRCUIT DIAGRAM PART 2
Page 16

4 -34 -3
COMBI BOARD - CIRCUIT DIAGRAM PART 3
Page 17

4 - 4 4 - 4
COMBI BOARD - LAYOUT DIAGRAM COMPONENT SIDE VIEW
Page 18

4 - 54 - 5
COMBI BOARD - LAYOUT DIAGRAM COPPER SIDE VIEW
Page 19

5 - 1 5 - 1
MECHANICAL PARTSLIST
EXPLODED VIEW DIAGRAM
401 9965 000 22605 CD DOOR ASSY
402 9965 000 22612 LCD DISPLAY
406
407
408
403 9965 000 22610
404 MEMBRANCE PCB
406 9965 000 22600 CD DOOR SPRING LEFT
407 9965 000 22601 CD DOOR SPRING RIGHT
408 9965 000 22606 MIDDLE CAB
409 9965 000 22599 OPEN KNOB SPRING
411 9965 000 22604 SLIDE KNOB-OPEN
412 9965 000 22609 CD DAMPER
JOINT RUBBER
9940 000 00035
401
402
403
419
421
411
416
409
412
417
413
414
413 9965 000 22598 BATTERY SPRING(+-)
414 3103 309 05480 CD DA23ZPH
416 9965 000 22603 SLIDE KNOB-HOLD
417 9965 000 22597 BATTERY SPRING PLATE(-)
418 9965 000 22596 BATTERY SPRING PLATE(+)
419 9965 000 22608 REMOTE LENS
421 9965 000 22607 BOTTOM CAB
422 9965 000 22611 RUBBER FOOT
423 9965 000 22602 BATTERY DOOR
Note: Only these parts mentioned in the list are
normal service parts.
418
404
422
6 x SCREW
P-1.7x9-CR
423
10 x SCREW
P-1.4x3-NI
Page 20

6 - 1
ELECTRICAL PARTSLIST - COMBI BOARD
- MISCELLANEOUS - - IC & TRANSISTORS -
U10 9965 000 22613 IR RECEIVER GR-M902 Q6 5322 130 42755 BC847B
SW1 9965 000 16227 SLIDE SWITCH 1P3T Q7 5322 130 42755 BC847B
SW6 9965 000 16226 CD DOOR SWITCH DTS-03 Q8 5322 130 42755 BC847B
JK1 9965 000 11404 DC JACK TC18-099-03
CN1 9965 000 22614 STEREO PHONE JACK
Note: Only these parts mentioned in the list are
VR1AB 9965 000 22615 ROTARY VOLUME normal service parts.
- COILS & FILTERS -
X1 9965 000 22616 CRYSTAL 16,9344MHZ 20PF
X2 9965 000 22617 CRYSTAL 27MHZ 20PF
L1 9965 000 22618 MICRO INDUCTOR 330µH-K
L2 9965 000 16232 FXD INDUCTOR 33µH
L4 9965 000 22618 MICRO INDUCTOR 330µH-K
L5 9965 000 22618 MICRO INDUCTOR 330µH-K
L6 9965 000 22618 MICRO INDUCTOR 330µH-K
L7 9965 000 22619 DC-CD OSC COIL
L11 9965 000 22618 MICRO INDUCTOR 330µH-K
L21 9965 000 22618 MICRO INDUCTOR 330µH-K
- DIODES -
D2 9965 000 22620 ZENER DIODE3V9 1/2W
D3 4822 130 83918 PRLL5817
D4 4822 130 30621 1N4148
D5 4822 130 30621 1N4148
D6 4822 130 83918 PRLL5817
D7 4822 130 30621 1N4148
D8 4822 130 30621 1N4148
D9 4822 130 30621 1N4148
- IC & TRANSISTORS -
U1 9965 000 22627 IC BU9536KS2
U2 9965 000 21011 IC BH6575FV-E2
U3 9965 000 22622 IC SPCA716A
U4 9965 000 22623 IC W27L02P-90
U5 9965 000 22628 IC SPCA717A
U6 9965 000 22624 IC TM54S416T-6
U7 9965 000 22625 IC BD4721G
U8 9965 000 22630 IC WM8714ED
U9 9965 000 22626 IC BH4453F
U11 9965 000 22629 IC WV2621
Q1 9965 000 22631 2SD2150
Q2 9965 000 22631 2SD2150
Q3 9965 000 22631 2SD2150
Q4 9965 000 22631 2SD2150
Q5 9965 000 22632 2SA1774TLQ
 Loading...