

Page 1
Register your product and get support at
Enregistrez votre produit et bénéficiez d’une assistance à l’adresse suivante
www.philips.com/welcome
AT940, AT921, AT893, AT890, AT753,
AT752, AT750
Page 2
Page 3
1
Page 4

Page 5

ENGLISH 6
FRANÇAIS (CANADA) 23
AT940,AT921,AT893,AT890,AT753,AT752,AT750
Page 6

6
ENGLISH
Introduction
Congratulations on your purchase and welcome
to Philips! To fully benefit from the support that
Philips offers, register your product at
www.philips.com/welcome.
Please read this user manual, as it contains
information about the wonderful features of this
shaver as well as some tips to make shaving easier
and more enjoyable.
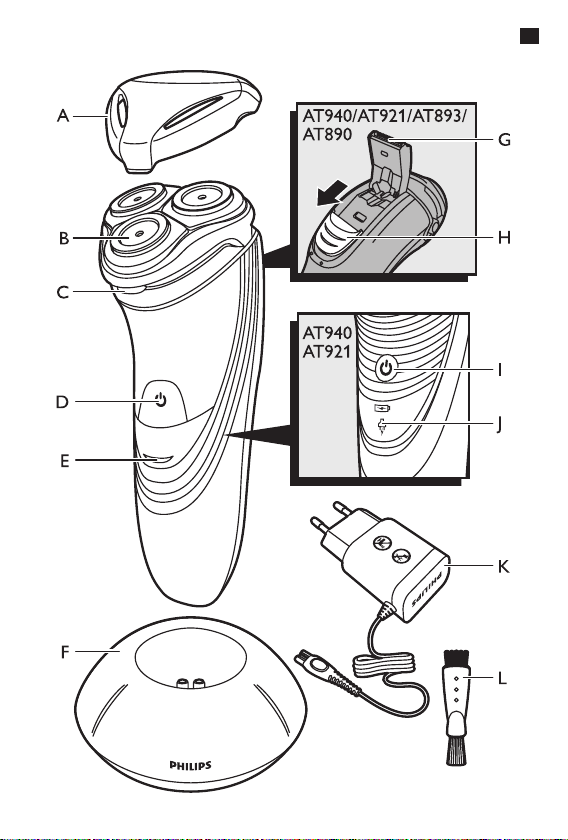
General description (Fig. 1)
A Protection cap
B Shaving unit
C Shaving unit release button
D Shaver on/off button (AT893/AT890/AT753/
AT752/AT750)
E Charging light (AT893/AT890/AT753/AT752/
AT750)
F Charging stand (AT940/AT921 only)
G Trimmer (AT940/AT921/AT893/AT890 only)
H Trimmer release slide (AT940/AT921/AT893/
AT890 only)
I Shaver on/off button (AT940/AT921 only)
J Battery symbol and plug symbol (AT940/AT921
only)
K Adapter
L Cleaning brush
Not shown: Storage pouch (AT940/AT921/AT893/
AT890 only)
Note: You can nd the type number on the back of the
shaver.
Page 7
ENGLISH 7
Important
Read this user manual carefully before you use the
appliance and the charging stand (AT940/AT921
only). Save it for future reference.
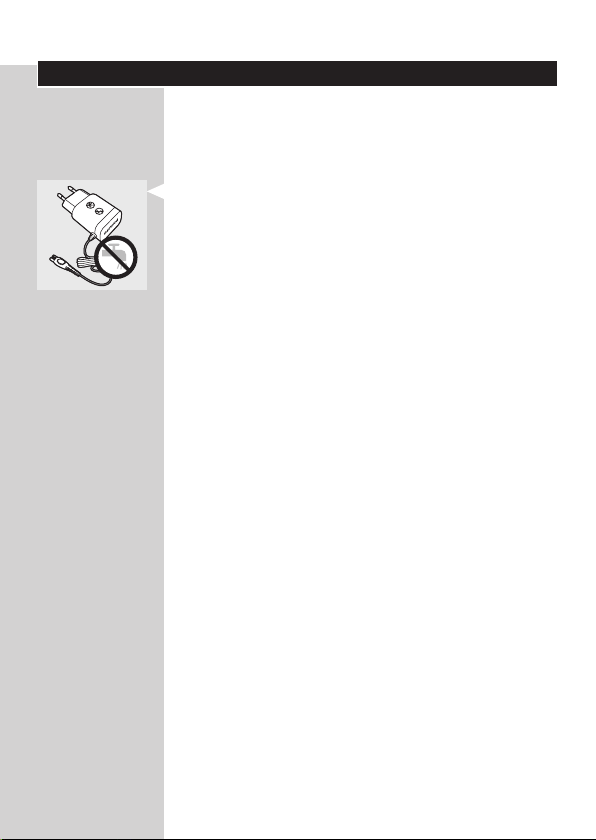
Danger
- Make sure the adapter does not get wet.
Warning
- The adapter contains a transformer. Do not cut
off the adapter to replace it with another plug, as
this causes a hazardous situation.
- This appliance is not intended for use by persons
(including children) with reduced physical, sensor y
or mental capabilities, or lack of experience
and knowledge, unless they have been given
supervision or instruction concerning use of the
appliance by a person responsible for their safety.
- Children should be supervised to ensure that they
do not play with the appliance.
- Always unplug the shaver before you clean it
under the tap.
Caution
- Never use water hotter than 80°C to rinse the
shaver.
- Be careful with hot water. Always check if the
water is not too hot, to prevent your hands from
getting burnt.
- Do not immerse the charging stand (AT940/
AT921 only) in water or any other liquid, nor rinse
it under the tap.
- The shaver and the charging stand (AT940/AT921
only) are not dishwasher-proof.
- Water may leak from the socket at the bottom
of the shaver when you rinse it. This is normal
and not dangerous because all electronics are
enclosed in a sealed power unit inside the shaver.
Page 8
ENGLISH8
- Do not use the shaver, adapter or charging
stand (AT940/AT921 only) if it is damaged, as
this may cause injury. Always replace a damaged
adapter or charging stand with one of the original
type.
- Charge and store the appliance at a temperature
between 10°C and 35°C.
- Always place and use the shaver and the charging
stand (AT940/AT921 only) on a surface that is
fluid-resistant.
- Only use the adapter and the charging
stand (AT940/AT921 only) supplied.
- Always put the protection cap on the shaver
to protect the shaving heads when you are
travelling.
- If the shaver is subjected to a major change
in temperature, pressure or humidity, let
it acclimatise for 30 minutes before you use it.
Compliance with standards
- This shaver complies with the internationally
approved safety regulations and can be safely used
in the bath or shower and cleaned under the tap.
- This Philips appliance complies with all standards
regarding electromagnetic fields (EMF). If handled
properly and according to the instructions in this
user manual, the appliances are safe to use based
on scientific evidence available today.
General
- The appliance is equipped with an automatic
voltage selector and is suitable for mains voltages
ranging from 100 to 240 volts.
- The adapter transforms 100-240 volts to a safe
low voltage of less than 24 volts.
Page 9
ENGLISH 9
Charging
Note: The shaver cannot be used directly from the
mains.
AT940/AT921/AT893/AT890 only: It takes approx. 1
hour to fully charge the shaver.
AT753/AT752/AT750: It takes approx. 8 hours to
fully charge the shaver.
When you charge the shaver for the first time
or after a long period of disuse, let it charge until
the white battery symbol lights up continuously
(AT940/AT921) or the charging light lights up green
continuously (AT893/AT890/AT753/AT752/AT750.
A fully charged shaver provides up to 21 (AT940/
AT921), 17 (AT893/AT890) or 14 (AT753/AT752/
AT750) cordless shaves.
The shaving time may be less than expected as
a result of your shaving behaviour, your cleaning
habits or your beard type.
Charge indications
Battery low
- AT940/AT921: When the battery is almost empty
(when there are only 5 or fewer shaving minutes
left), the orange plug symbol starts to flash. When
you switch off the shaver, the orange plug symbol
continues to flash for a few seconds.
- AT893/AT890/AT753/AT752/AT750: When the
battery is almost empty (when there are only
5 or fewer shaving minutes left), the charging
light starts to flash orange. When you switch off
the shaver, the charging light continues to flash
orange for a few seconds.
Page 10

ENGLISH10
Quick charging (AT940/AT921/AT893/AT890
only)
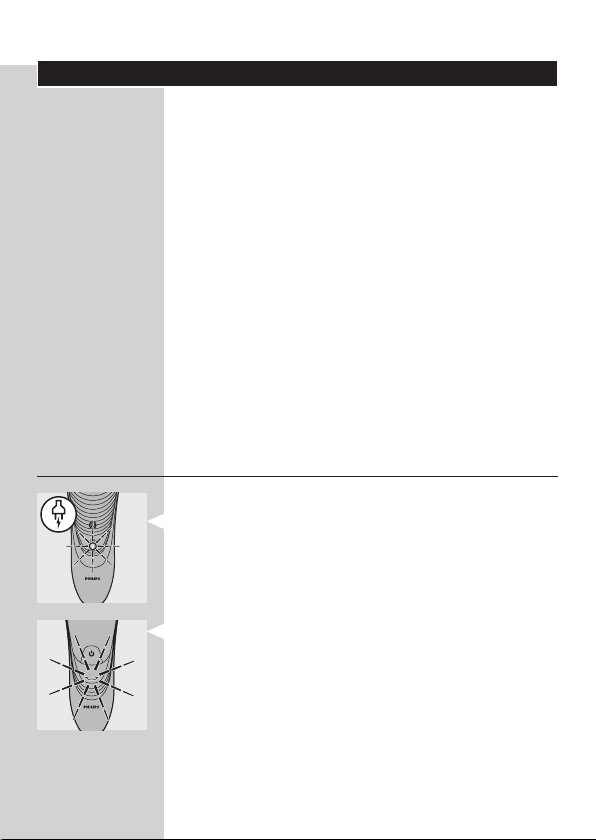
- AT940/AT921: When you start charging the
empty battery, both the white battery symbol and
the plug symbol flash. After approx. 3 minutes,
the orange plug symbol goes out, while the
battery symbol continues to flash. The shaver now
contains enough energy for a 5-minute shave.
- AT893/AT890: When you start charging the
empty battery, the charging light alternately flashes
orange and green. After approx. 3 minutes the
charging light continues to flash green. The shaver
now contains enough energy for a 5-minute shave.
Charging
- AT940/AT921: When the shaver is charging, the
white battery symbol flashes.
- AT893/AT890/AT753/AT752/AT750: When the
shaver is charging, the charging light flashes green.
Battery fully charged
- AT940/AT921: When the battery is fully charged,
the white battery symbol lights up continuously.
Note: After approx. 30 minutes, the battery symbol
goes out to save energy.
Page 11
ENGLISH 11
- AT893/AT890/AT753/AT752/AT750: When the
battery is fully charged, the charging light lights up
green continuously.
Note: After approx. 30 minutes, the charging light goes
out to save energy.
Charging with the adapter
1 Put the small plug in the shaver.
2 Put the adapter in the wall socket.
, The charging light shows the charging status of
the shaver (see section ‘Charge indications’ in
this chapter).
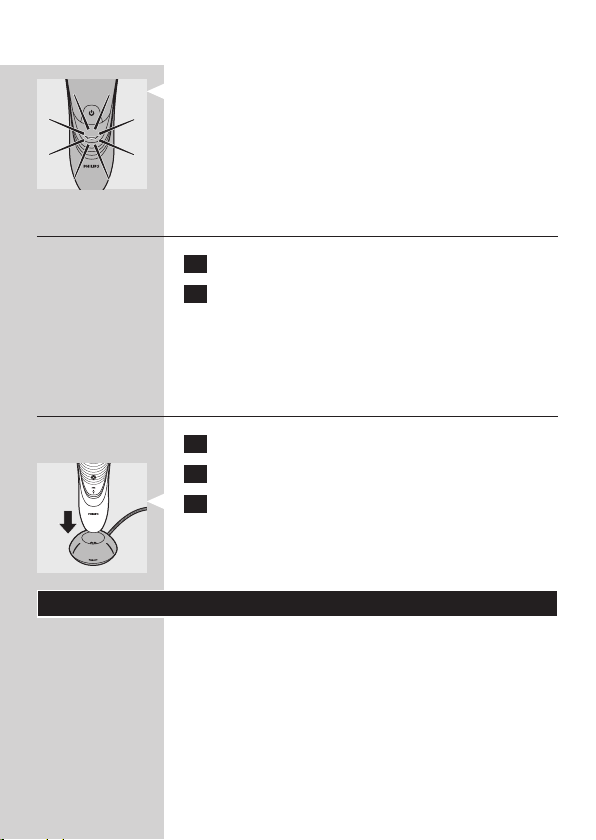
Charging in the charging stand (AT940/
AT921 only)
1 Put the small plug in the charging stand.
2 Put the adapter in the wall socket.
3 Place the shaver in the charging stand.
, The charging light shows the charging status of
the shaver (see section ‘Charge indications’ in
this chapter).
Using the shaver
Note: This shaver can be used in the bath or shower. It
can therefore not be used directly from the mains for
safety reasons.
Page 12
ENGLISH12
Shaving tips and tricks
- This shaver is suitable for both wet and dr y use.
Use the shaver with shaving gel or foam for extra
skin comfort, or use the shaver dry for extra
convenience.
Note: We advise you to use the shaver with shaving gel
or foam when you use it for a wet shave. Do not use
thick shaving cream or shaving oil with this shaver.
- For optimal shaving results, make circular
movements during use.
- The shaver is waterproof and can be used in the
bath or shower.
- Your skin may need 2 or 3 weeks to get
accustomed to the Philips shaving system.
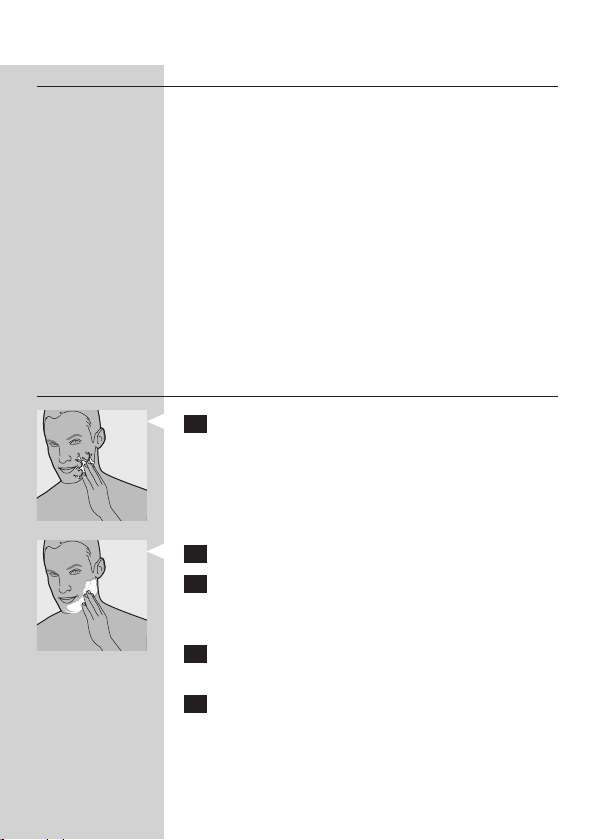
Wet shaving
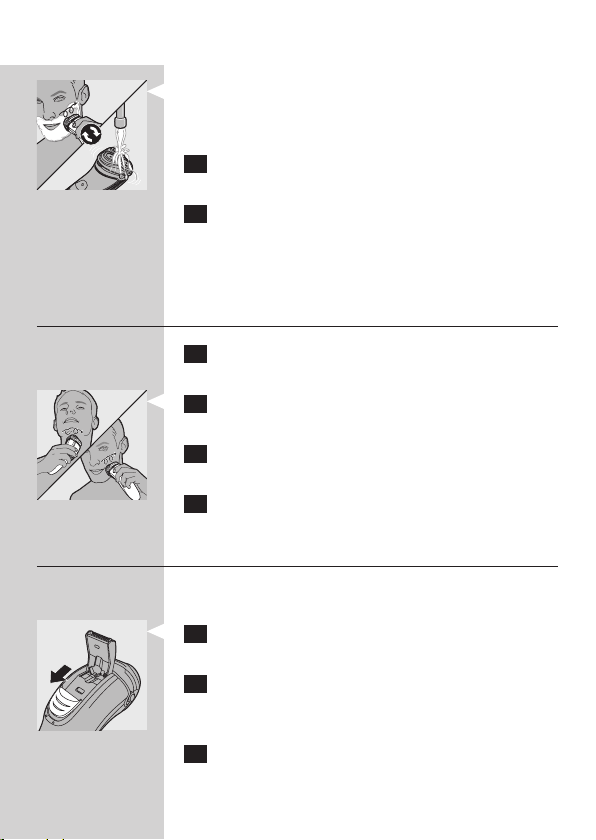
1 Apply some water to your skin.
2 Apply shaving foam or shaving gel to your skin.
3 Rinse the shaving unit under the tap to ensure
that the shaving unit glides smoothly over your
skin.
4 Press the on/off button once to switch on the
shaver.
5 Move the shaving heads in circular movements
over your skin.
Page 13
ENGLISH 13
Note: Rinse the shaver under the tap regularly to
ensure that it continues to glide smoothly over your
skin.
6 After shaving, press the on/off button once to
switch off the shaver and dry your face.
7 Clean the shaver (see chapter ‘Cleaning and
maintenance’).
Note: Make sure you rinse all foam or shaving gel off
the shaver.
Dry shaving
1 Press the on/off button once to switch on the
shaver.
2 Move the shaving heads in circular movements
over your skin.
3 After shaving, press the on/off button once to
switch off the shaver.
4 Clean the shaver (see chapter ‘Cleaning and
maintenance’).
Trimming (AT940/AT921/AT893/AT890 only)
You can use the trimmer to groom your sideburns
and moustache.
1 Push the trimmer slide downwards to open
the trimmer.
2 Press the on/off button once to switch on the
shaver.
, You can now start trimming.
3 After trimming, press the on/off button once to
switch off the shaver.
Page 14
ENGLISH14
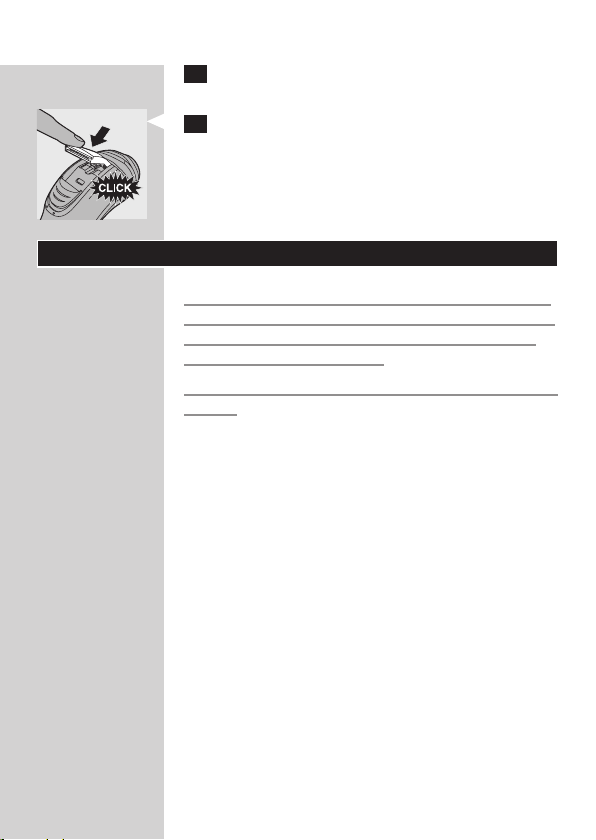
4 Clean the trimmer (see chapter ‘Cleaning and
maintenance’).
5 Close the trimmer (‘click’).
Cleaning and maintenance
Never use compressed air, scouring pads, abrasive
cleaning agents or aggressive liquids such as petrol
or acetone to clean the shaver and the charging
stand (AT940/AT921 only).
Always unplug the shaver before you clean it under
the tap.
- Clean the shaver after every shave for optimal
shaving performance.
- Regular cleaning guarantees better shaving
performance.
- For the best cleaning results, we advise you to use
the Philips Cleaning spray (HQ110).
- Be careful with hot water. Always check if the
water is not too hot, to prevent your hands from
getting burnt.
Note: Water may leak from the socket at the bottom
of the shaver when you rinse it. This is normal and not
dangerous because all electronics are enclosed in a
sealed power unit inside the shaver.
Page 15

ENGLISH 15
Cleaning the shaving unit under the tap
1 Switch off the shaver.
2 Press the release button to open the shaving
unit.
3 Rinse the shaving unit and hair chamber under
a hot tap for 30 seconds.
Be careful with hot water. Always check if the
water is not too hot, to prevent your hands from
getting burnt.
- Rinse the hair chamber and the inside of the
shaving unit.
- Rinse the outside of the shaving unit.
4 Close the shaving unit and shake off excess
water.
Be careful not to hit the shaving unit against
anything while shaking off excess water.
Never dry the shaving unit and the hair chamber
with a towel or tissue, as this may damage the
shaving unit.
5 Open the shaving unit again and leave it open
to let the shaver dry completely.
Page 16

ENGLISH16
Cleaning the shaving unit with the cleaning
brush
1 Switch off the shaver.
2 Press the release button to open the shaving
unit.
3 Pull the shaving unit off the shaver.
4 Turn the lock anticlockwise (1) and remove the
retaining frame (2).
5 Remove and clean one shaving head at a time.
Each shaving head consists of a cutter and a
guard.
Note: Do not clean more than one cutter and guard
at a time, since they are all matching sets. If you
accidentally mix up the cutters and guards, it may take
several weeks before optimal shaving performance is
restored.
- Remove the cutter from the shaving guard and
clean it with the brush.
Page 17

ENGLISH 17
- Clean the inside and outside of the shaving guard
with the brush.
6 Put the shaving heads back into the shaving
unit.
Make sure that the projections of the shaving
heads fit exactly into the recesses.
7 Put the retaining frame back into the shaving
unit and turn the lock clockwise.
8 Insert the lug of the shaving unit into the slot
in the top of the shaver (1). Then close the
shaving unit (2).
Note: If the shaving unit does not close smoothly, check
if you have inserted the shaving heads properly and if
the retaining frame is locked.
Cleaning the trimmer with the cleaning
brush (AT940/AT921/AT893/AT890 only)
Clean the trimmer every time you have used it.
1 Switch off the shaver.
2 Push the trimmer slide downwards to open
the trimmer.
3 Clean the trimmer with the short-bristled side
of the cleaning brush. Brush up and down along
the trimmer teeth.
4 Close the trimmer (‘ click’).
Page 18

ENGLISH18
Tip: For optimal trimming performance, lubricate the
trimmer teeth with a drop of sewing machine oil every
six months.
Storage
There are several ways to store the shaver or to
take it with you when you travel:
- Always put the protection cap on the shaver to
prevent damage.
- AT940/AT921/AT893/AT890 only: Store the
shaver in the pouch supplied.
- AT940/AT921 only: Store the shaver in the
charging stand.
Replacement
For maximum shaving performance, we advise
you to replace the shaving heads every year.
Replace damaged shaving heads right away.
Only replace the shaving heads with original HQ9
Philips Shaving Heads (for AT940/AT921) or HQ8
Philips Shaving Heads (for AT893/AT890/AT753/
AT752/AT750).
1 Switch off the shaver. Disconnect the shaver
from the mains or remove it from the charging
stand (AT940/AT921 only).
2 Press the release button to open the shaving
unit.
3 Pull the shaving unit off the shaver.
Page 19

ENGLISH 19
4 Turn the lock anticlockwise (1) and remove the
retaining frame (2).
5 Remove the shaving heads and place new ones
in the shaving unit.
Make sure that the projections of the shaving
heads fit exactly into the recesses.
6 Put the retaining frame back into the shaving
unit and turn the lock clockwise.
7 Insert the lug of the shaving unit into the slot
in the top of the shaver (1). Then close the
shaving unit (2).
Note: If the shaving unit does not close smoothly, check
if you have inserted the shaving heads properly and if
the retaining frame is locked.
Accessories
To retain the top performance of your shaver, make
sure you clean it regularly and replace its shaving
heads at the recommended time.
Shaving heads
- We advise you to replace your shaving heads
every year. Always replace with HQ9 Philips
Shaving Heads (for AT940/AT921) or HQ8 Philips
Shaving Heads (for AT893/AT890/AT753/AT752/
AT750).
Cleaning
- Use Cleaning spray (HQ110) to clean the shaving
heads thoroughly.
Page 20

ENGLISH20
Environment
- Do not throw away the appliance with the normal
household waste at the end of their life, but
hand them in at an official collection point for
recycling. By doing this, you help to preserve the
environment.
- The built-in rechargeable shaver battery contains
substances that may pollute the environment.
Always remove the battery before you discard or
hand in the shaver at an official collection point.
Dispose of the battery at an official collection
point for batteries. If you have trouble removing
the battery, you can also take the appliance to a
Philips service centre. The staff of this centre will
remove the battery for you and will dispose of it
in an environmentally safe way.
Removing the rechargeable shaver battery
Only remove the rechargeable battery when you
discard the shaver. Make sure the rechargeable
battery is completely empty when you remove it.
1 Disconnect the shaver from the mains or
remove it from the charging stand (AT940/
AT921 only).
2 Let the shaver run until it stops.
3 Undo the screws in the back of the shaver and
in the hair chamber.
4 Remove the front panel and the back panel.
5 Bend the 6 hooks aside and take out the
power unit.
Page 21

ENGLISH 21
Be careful, the hooks are sharp.
6 Remove the battery.
Be careful, the battery strips are sharp.
Do not connect the shaver to the mains again
or put it back into the plugged-in charging stand
(AT940/AT921 only) after you have removed the
rechargeable battery.
Guarantee and service
If you need service or information or if you have
a problem, please visit the Philips website at www.
philips.com/support or contact the Philips Consumer
Care Centre toll free at 1-866-800-9311.
Guarantee restrictions
The shaving heads (cutters and guards) are not
covered by the terms of the international guarantee
because they are subject to wear.
Troubleshooting
This chapter summarises the most common
problems you could encounter with the appliance. If
you are unable to solve the problem with the
information below, contact the Consumer Care
Centre in your country.
Problem Possible cause Solution
The shaver does
not shave as well
as it used to.
The shaving
heads are
damaged or
worn.
Replace the shaving heads (see
chapter ‘Replacement’).
Page 22

ENGLISH22
Problem Possible cause Solution
The shaver does
not work when I
press the on/off
button.
The shaver
does not work,
although it is
connected to the
mains.
Foam or gel
residues clog
up the shaving
heads.
Long hairs
obstruct the
shaving heads.
You have not
inserted the
shaving heads
properly.
The
rechargeable
battery is
empty.
The
temperature
of the shaver is
too high. In this
case, the shaver
does not work.
This shaver is
not designed to
be used directly
from the mains.
Rinse the shaving unit under a
hot tap (see section ‘Cleaning
the shaving unit under the
tap’ in chapter ‘Cleaning and
maintenance’).
Clean the shaving heads one by
one (see section ‘Cleaning the
shaving unit with the cleaning
brush’ in chapter ‘Cleaning and
maintenance’).
Make sure that the projections
of the shaving heads fit exactly
into the recesses (see section
‘Cleaning the shaving unit with
the cleaning brush’).
Recharge the battery (see
chapter ‘Charging’).
As soon as the temperature
of the shaver has dropped
sufficiently, you can switch on the
shaver again.
Recharge the battery (see
chapter ‘Charging’) and
disconnect it from the mains.
Page 23

FRANÇAIS (CANADA)
Introduction
Félicitations pour votre achat et bienvenue dans
l’univers Philips! Pour profiter pleinement du soutien
de Philips, enregistrez votre produit à l’adresse :
www.philips.com/welcome.
Veuillez lire ce manuel contenant des
renseignements sur les caractéristiques fantastiques
de ce rasoir ainsi que des conseils pour simplifier le
rasage et le rendre plus agréable.
Description générale (g. 1)
A Capuchon de protection
B Unité de rasage
C Bouton de libération de l’unité de rasage
D Bouton marche/arrêt du rasoir (modèles AT893,
AT890, AT753, AT752 et AT750)
E Témoin de charge (modèles AT893, AT890,
AT753, AT752 et AT750)
F Socle de recharge (modèles AT940 et AT921
seulement)
G Tondeuse (modèles AT940, AT921 AT893 et
AT890 seulement)
H Glissière de libération de la tondeuse (modèles
AT940, AT921, AT893 et AT890 seulement)
I Bouton marche/arrêt du rasoir (modèles AT940
et AT921 seulement)
J Symboles de pile et de prise (modèles AT940 et
AT921 seulement)
K Adaptateur
L Brosse de nettoyage
Non affiché : étui de rangement (modèles AT940,
AT921, AT893 et AT890 seulement)
Remarque : Le numéro de modèle est indiqué à
l’arrière de votre rasoir.
23
Page 24

FRANÇAIS (CANADA)24
Important
Lisez attentivement ce mode d’emploi avant d’utiliser
l’appareil et le socle de recharge (modèles AT940 et
AT921 seulement) et conservez-le pour un usage
ultérieur.
Danger
- Gardez l’adaptateur au sec.
Mise en garde
- L’adaptateur contient un transformateur. Pour
éviter tout accident, n’essayez pas de remplacer la
fiche de l’adaptateur en la coupant.
- Cet appareil ne doit pas être utilisé par des
personnes (incluant des enfants) avec des
capacités physiques, sensorielles ou mentales
réduites, ou qui n’ont pas l’expérience et les
connaissances nécessaires, à moins qu’elles
ne soient sous la surveillance d’une personne
responsable de leur sécurité ou qu’elles aient
reçu de cette personne des directives concernant
l’utilisation de l’appareil.
- Les enfants doivent être surveillés pour s’assurer
qu’ils ne s’amusent pas avec l’appareil.
- Toujours débrancher le rasoir avant de le nettoyer
sous le robinet.
Avertissement
- N’utilisez jamais d’eau dont la température est
supérieure à 80 °C pour rincer le rasoir.
- Attention avec l’eau chaude. Il est impor tant de
toujours vérifier que l’eau n’est pas trop chaude
pour ne pas vous brûler les mains.
- Ne plongez jamais le socle de recharge
(modèles AT940 et AT921 seulement) dans de
l’eau, ni dans d’autres liquides et ne le rincez pas
sous le robinet.
Page 25

FRANÇAIS (CANADA) 25
- Le rasoir et le socle de recharge (modèles AT940
et AT921 seulement) ne sont pas lavables au lavevaisselle.
- Il est possible que de l’eau s’écoule de la prise au
bas du rasoir au cours du rinçage. C’est normal et
sans danger car tous les composants électroniques
sont regroupés dans un boîtier hermétique à
l’intérieur du rasoir.
- Pour éviter tout accident, n’utilisez pas le
rasoir, l’adaptateur ou le socle de recharge
(modèles AT940 et AT921 seulement) s’il est
endommagé. Remplacez toujours un adaptateur
ou un socle de recharge endommagé par un autre
du type d’origine.
- Rechargez et rangez l’appareil à une température
comprise entre 10 °C et 35 °C.
- Posez toujours le rasoir et le socle de recharge
(modèles AT940 et AT921 seulement) sur une
surface imperméable.
- Utilisez exclusivement l’adaptateur et le socle de
recharge (modèles AT940 et AT921 seulement)
fournis.
- Placez toujours le capuchon de protection sur le
rasoir afin d’en protéger les têtes lorsque vous
êtes en voyage.
- Si le rasoir est soumis à un changement important
de température, de pression ou d’humidité,
laissez-le à la température ambiante pendant
30 minutes avant de l’utiliser.
Conformité aux normes
- Ce rasoir est conforme aux normes
internationales de sécurité. Il peut être utilisé
dans le bain ou sous la douche et nettoyé à l’eau
courante en toute sécurité.
Page 26

FRANÇAIS (CANADA)26
- Cet appareil Philips est conforme à toutes les
normes relatives aux champs électromagnétiques
(CEM). Il répond aux règles de sécurité établies
sur la base des connaissances scientifiques
actuelles s’il est manipulé correctement et
conformément au présent mode d’emploi.
Généralités
- L’appareil est équipé d’un sélecteur de tension
automatique. Il accepte les tensions secteur variant
de 100 à 240 volts.
- L’adaptateur transforme la tension de 100-240 V
en une tension de sécurité de moins de 24 V.
Recharge
Remarque : Le rasoir ne peut en aucun cas être
branché directement sur une prise murale.
Modèles AT940, AT921, AT893 et AT890 seulement :
une charge complète dure environ 1 heure.
Modèles AT753, AT752 et AT750 : une charge
complète dure environ 8 heures.
Lorsque vous rechargez le rasoir pour la première
fois ou après une longue période d’inutilisation,
attendez que le symbole de pile soit allumé en blanc
de façon continue (modèles AT940 et AT921) ou
que le symbole de charge soit allumé en vert de
façon continue (modèles AT893, AT890, AT753,
AT752 et AT750) avant de le débrancher.
Un rasoir entièrement chargé peut assurer jusqu’à
21 (modèles AT940 et AT921), 17 (modèles AT893
et AT890) ou 14 (modèles AT753, AT752 et AT750)
rasages sans fil.
L’autonomie de rasage peut être inférieure à celle
prévue selon la durée de vos rasages, vos habitudes
de nettoyage du rasoir ou le type de votre barbe.
Page 27

FRANÇAIS (CANADA) 27
Informations relatives à la charge
Pile faible
- Modèles AT940 et AT921 : lorsque la pile est
presque vide, c’est-à-dire lorsqu’il ne vous reste
que 5 minutes de rasage ou moins, le symbole de
prise clignote en orange et continue de le faire
pendant quelques secondes après l’extinction du
rasoir.
- Modèles AT893, AT890, AT753, AT752 et AT750 :
lorsque la pile est presque vide, c’est-à-dire
lorsqu’il ne vous reste que 5 minutes de rasage ou
moins, le témoin de charge clignote en orange et
continue de le faire pendant quelques secondes
après l’extinction du rasoir.
Recharge rapide (modèles AT940, AT921,
AT893 et AT890 seulement)
- Modèles AT940 et AT921 : au début de la charge
d’une pile vide, le symbole de pile blanc et le
symbole de prise orange clignotent tous les deux.
Au bout d’environ 3 minutes, le symbole de prise
s’éteint, mais celui de pile continue à clignoter. Le
rasoir est alors suffisamment rechargé pour offrir
5 minutes d’autonomie.
- Modèles AT893 et AT890 : au début de la charge
d’une pile vide, le témoin de charge clignote de
façon alternative en orange et vert. Après environ
3 minutes, le témoin de charge continue de
clignoter en vert. Le rasoir est alors suffisamment
rechargé pour offrir 5 minutes d’autonomie.
Page 28

FRANÇAIS (CANADA)28
Recharge
- Modèles AT940 et AT921 : pendant la charge, le
symbole de pile clignote en blanc.
- Modèles AT893, AT890, AT753, AT752 et AT750 :
pendant la charge, le témoin de charge clignote
en vert.
Pile complètement chargée
- Modèles AT940 et AT921 : lorsque la pile est
complètement chargée, le symbole de pile reste
allumé en blanc de façon continue.
Remarque : Le symbole de pile s’éteint au bout d’une
trentaine de minutes pour économiser de l’énergie.
- Modèles AT893, AT890, AT753, AT752 et AT750 :
lorsque la pile est complètement chargée, le
témoin de charge reste allumé en vert de façon
continue.
Remarque : Le témoin de charge s’éteint pour
économiser de l’énergie après environ 30 minutes.
Chargement à l’aide de l’adaptateur
1 Insérez la petite fiche dans le rasoir.
2 Branchez l’adaptateur dans une prise murale.
, Le témoin de charge indique l’état de
chargement du rasoir (voir la section
«Informations relatives à la charge» de ce
chapitre).
Page 29

FRANÇAIS (CANADA) 29
Recharge sur le socle de recharge
(modèles AT940 et AT921 seulement)
1 Insérez la petite fiche dans le socle de
recharge.
2 Branchez l’adaptateur dans une prise murale.
3 Posez le rasoir sur le socle de recharge.
, Le témoin de charge indique l’état de
chargement du rasoir (voir la section
«Informations relatives à la charge» de ce
chapitre).
Utilisation du rasoir
Remarque : Ce rasoir est utilisable dans le bain ou sous
la douche et ne peut donc pas être utilisé lorsqu’il est
branché directement sur le secteur.
Trucs et astuces de rasage
- Ce rasoir est utilisable aussi bien à sec que sous
l’eau. Pour plus de confort appliquez du gel ou de
la mousse sur votre peau, même si vous pouvez
parfaitement vous raser sur peau sèche.
Remarque : Lors d’un rasage sur peau humide, nous
vous conseillons d’utiliser du gel ou de la mousse.
Toutefois, n’utilisez pas de produit trop épais.
- Pour un résultat optimal, rasez-vous en suivant des
gestes circulaires.
- Ce rasoir est étanche et utilisable dans le bain ou
sous la douche.
- Votre peau pourrait avoir besoin de 2 ou
3 semaines pour s’habituer au système de rasage
Philips.
Page 30

FRANÇAIS (CANADA)30
Rasage humide
1 Mouillez votre visage avec de l’eau.
2 Appliquez ensuite la mousse ou le gel à raser.
3 Rincez l’unité de rasage sous l’eau du robinet
pour vous assurer qu’il glisse facilement sur
votre visage.
4 Mettez l’appareil en marche en appuyant une
fois sur le bouton marche/arrêt.
5 Faites glisser les têtes de rasage sur votre
visage en effectuant des mouvements
circulaires.
Remarque : Rincez fréquemment l’unité de rasage
sous l’eau du robinet pour vous assurer qu’il glisse
facilement sur votre visage.
6 Après le rasage, appuyez une fois sur le bouton
marche/arrêt pour éteindre le rasoir et vous
essuyer le visage.
7 Nettoyer le rasoir (voir section «Nettoyage et
entretien»).
Remarque : Assurez-vous d’enlever toute trace de
mousse ou de gel à raser du rasoir.
Page 31

FRANÇAIS (CANADA) 31
Rasage à sec
1 Mettez l’appareil en marche en appuyant une
fois sur le bouton marche/arrêt.
2 Faites glisser les têtes de rasage sur votre
visage en effectuant des mouvements
circulaires.
3 Après le rasage, éteignez le rasoir en appuyant
une fois sur le bouton marche/arrêt.
4 Nettoyer le rasoir (voir section «Nettoyage et
entretien»).
Tonte (modèles AT940, AT921 AT893 et
AT890 seulement)
Vous pouvez utiliser la tondeuse pour tailler vos
favoris et votre moustache.
1 Ouvrez la tondeuse en poussant la glissière
vers le bas.
2 Mettez l’appareil en marche en appuyant une
fois sur le bouton marche/arrêt.
, Vous pouvez commencer la tonte.
3 Après la tonte, éteignez le rasoir en appuyant
une fois sur le bouton marche/arrêt.
4 Nettoyez la tondeuse (voir section «Nettoyage
et entretien»).
5 Fermez la tondeuse (vous entendrez un déclic).
Page 32

FRANÇAIS (CANADA)32
Nettoyage et entretien
N’utilisez jamais d’air comprimé, de tampons à
récurer, de nettoyants abrasifs ou de produits
puissants tels que de l’essence ou de l’acétone
pour nettoyer le rasoir et le socle de recharge
(modèles AT940 et AT921 seulement).
Toujours débrancher le rasoir avant de le nettoyer
sous le robinet.
- Nettoyez votre rasoir après chaque rasage pour
un rasage optimal.
- Nettoyer le rasoir régulièrement assure un rasage
optimal.
- Pour un résultat optimal, nous vous
recommandons d’utiliser le spray nettoyant Philips
(HQ110).
- Attention avec l’eau chaude. Il est impor tant de
toujours vérifier que l’eau n’est pas trop chaude
pour ne pas vous brûler les mains.
Remarque : Il est possible que de l’eau s’écoule de
la prise au bas du rasoir au cours du rinçage. C’est
normal et sans danger car tous les composants
électroniques sont regroupés dans un boîtier
hermétique à l’intérieur du rasoir.
Nettoyage de l’unité de rasage sous le
robinet
1 Éteignez le rasoir.
2 Appuyez sur le bouton de libération pour
ouvrir l’unité de rasage.
3 Rincez l’unité de rasage et le compartiment de
récupération des poils pendant 30 secondes
sous l’eau chaude du robinet.
Page 33

FRANÇAIS (CANADA) 33
Attention avec l’eau chaude. Il est important de
toujours vérifier que l’eau n’est pas trop chaude
pour ne pas vous brûler les mains.
- Rincez le compartiment de récupération des poils
et l’intérieur de l’unité de rasage.
- Rincez l’extérieur de l’unité de rasage.
4 Fermez l’unité de rasage et secouez-la pour en
retirer l’eau qui reste.
Veillez à ne pas heurter l’unité de rasage et
secouez-la pour en retirer l’eau qui reste.
Ne séchez jamais l’unité de rasage, ni le
compartiment à poils avec une serviette ou un
mouchoir, car cela pourrait endommager les têtes
du rasoir.
5 Ouvrez de nouveau l’unité de rasage et
laissez-la ouverte jusqu’à ce qu’elle sèche
complètement.
Nettoyage de l’unité de rasage avec la
brosse
1 Éteignez le rasoir.
2 Appuyez sur le bouton de libération pour
ouvrir l’unité de rasage.
Page 34

FRANÇAIS (CANADA)34
3 Détachez l’unité de rasage du rasoir.
4 Tournez le verrou dans le sens anti-horaire (1)
et retirez le système de fixation (2).
5 Ne retirez et ne nettoyez qu’une seule tête
de rasoir à la fois. Chaque tête est composée
d’une lame et d’un dresse-poils.
Remarque : Ne nettoyez pas plusieurs lames et
dresse-poils à la fois, car chaque lame est associée à
un dresse-poils. Si vous mélangez accidentellement les
lames et les dresse-poils, il pourra vous falloir plusieurs
semaines avant d’obtenir de nouveau un rasage
optimal.
- Retirez la lame du dresse-poils et nettoyez-la à
l’aide de la brosse.
- Nettoyez l’intérieur et l’extérieur du dresse-poils à
l’aide de la brosse.
Page 35

FRANÇAIS (CANADA) 35
6 Remettez les têtes du rasoir dans l’unité de
rasage.
Veillez à ce que les saillies de la tête du rasoir
s’imbriquent parfaitement dans les creux.
7 Remettez le système de fixation dans l’unité
de rasage et tournez le verrou dans le sens
horaire.
8 Insérez la patte de l’unité de rasage dans la
fente située sur la partie supérieure du rasoir
(1). Fermez ensuite l’unité de rasage (2).
Remarque : Si l’unité de rasage se ferme mal, assurezvous que vous avez bien inséré les têtes du rasoir et
que le système de xation est verrouillé.
Nettoyage de la tondeuse à l’aide de la
brosse (modèles AT940, AT921, AT893 et
AT890 seulement)
Nettoyez la tondeuse après chaque utilisation.
1 Éteignez le rasoir.
2 Ouvrez la tondeuse en poussant la glissière
vers le bas.
3 Nettoyez la tondeuse avec l’extrémité à poils
courts de la brosse de nettoyage. Brossez les
lames de la tondeuse dans un mouvement de
haut en bas.
4 Fermez la tondeuse (vous entendrez un déclic).
Page 36

FRANÇAIS (CANADA)36
Conseil : Pour des performances optimales, lubriez
les lames de la tondeuse avec une goutte d’huile pour
machine à coudre tous les six mois.
Rangement
Plusieurs options s’offrent à vous pour ranger le
rasoir ou pour l’emporter en voyage :
- Toujours transpor ter le rasoir avec son capuchon
de protection en place pour éviter les dégâts
- Modèles AT940, AT921, AT893 et AT890
seulement : rangez le rasoir dans l’étui fourni.
- Modèles AT940 et AT921 seulement : rangez le
rasoir en le plaçant sur le socle de recharge.
Remplacement
Pour profiter de performances de rasage optimales,
nous vous recommandons de remplacer les
têtes de votre rasoir chaque année. Et si vous
constatez qu’elles sont endommagées, changez-les
immédiatement.
En remplacement d’une tête de rasoir, optez
seulement pour une tête Philips HQ9 (modèles
AT940 et AT921) ou Philips HQ8 (modèles AT893,
AT890, AT753, AT752 et AT750).
1 Éteignez le rasoir et débranchez-le de la prise
secteur ou retirez-le du socle de recharge
(modèles AT940 et AT921 seulement).
Page 37

FRANÇAIS (CANADA) 37
2 Appuyez sur le bouton de libération pour
ouvrir l’unité de rasage.
3 Détachez l’unité de rasage du rasoir.
4 Tournez le verrou dans le sens anti-horaire (1)
et retirez le système de fixation (2).
5 Retirez les têtes du rasoir et insérez les
nouvelles têtes dans l’unité de rasage.
Veillez à ce que les saillies de la tête du rasoir
s’imbriquent parfaitement dans les creux.
6 Remettez le système de fixation dans l’unité
de rasage et tournez le verrou dans le sens
horaire.
7 Insérez la patte de l’unité de rasage dans la
fente située sur la partie supérieure du rasoir
(1). Fermez ensuite l’unité de rasage (2).
Remarque : Si l’unité de rasage se ferme mal, assurezvous que vous avez bien inséré les têtes du rasoir et
que le système de xation est verrouillé.
Accessoires
Pour préserver les performances optimales de votre
rasoir, prenez soin de le nettoyer régulièrement et
d’en replacer les têtes dans les délais recommandés.
Page 38

FRANÇAIS (CANADA)38
Têtes de rasage
- Nous vous recommandons de remplacer les têtes
de votre rasoir tous les ans et toujours par des
têtes Philips HQ9 (modèles AT940 et AT921)
ou Philips HQ8 (modèles AT893, AT890, AT753,
AT752 et AT750).
Nettoyage
- Pour bien nettoyer les têtes de votre rasoir,
servez-vous du spray nettoyant (HQ110).
Environnement
- Si vous n’avez plus besoin des appareils et que
vous désirez les mettre au rebut, ne les jetez pas
avec les ordures ménagères. Déposez-les dans un
point de collecte de recyclage. Vous contribuerez
ainsi à la protection de l’environnement.
- La pile rechargeable intégrée contient des
substances qui peuvent nuire à l’environnement.
Veillez à toujours retirer la pile avant de mettre
le rasoir au rebut ou de le déposer à un endroit
assigné à cet effet. Déposez la pile usagée à
un endroit assigné à cet effet. Si vous n’arrivez
pas à retirer la pile, vous pouvez appor ter les
appareils dans un Centre de service agréé Philips,
qui prendra toute l’opération en charge pour
préserver l’environnement.
Pour retirer la pile rechargeable du rasoir
Retirez la pile rechargeable uniquement lorsque
vous mettez le rasoir au rebut. Assurez-vous que
la pile est complètement déchargée lorsque vous
la retirez.
Page 39

FRANÇAIS (CANADA) 39
1 Débranchez le rasoir de la prise secteur ou
retirez-le du socle de recharge (modèles AT940
et AT921 seulement).
2 Laissez le rasoir fonctionner jusqu’à ce qu’il
s’arrête.
3 Retirez les vis au dos du rasoir et du
compartiment de récupération des poils.
4 Retirez le panneau avant et le panneau arrière.
5 Pliez les 6 crochets sur les côtés pour retirer
le bloc d’alimentation.
Attention, les crochets sont pointus.
6 Retirez la pile.
Soyez prudent, car les languettes de la pile sont
coupantes.
Une fois que vous avez retiré la pile rechargeable,
ne branchez plus le rasoir sur le secteur et
ne le déposez plus sur le socle de recharge
(modèles AT940 et AT921 seulement) lorsque ce
dernier est branché.
Garantie et services
Si vous souhaitez obtenir des informations
supplémentaires ou faire réparer l’appareil, ou si
vous rencontrez un problème, visitez le site Web
de Philips à l’adresse www.philips.com/support ou
communiquez sans frais avec le service à la clientèle
de Philips au 1 866 800-9311.
Restrictions de garantie
Sujettes à l’usure, les têtes de rasoir (lames et
dresse-poils) ne sont pas couvertes par la garantie
internationale.
Page 40

FRANÇAIS (CANADA)40
Résolution de problèmes
Ce chapitre présente les problèmes les plus courants
que vous pouvez éprouver avec votre appareil. Si
vous ne parvenez pas à résoudre le problème à
l’aide des informations ci-dessous, communiquez
avec le Service à la clientèle Philips de votre pays.
Problème Cause possible Solution
Les résultats
de rasage
ne sont
pas aussi
satisfaisants
que
d’habitude.
Les têtes du rasoir
sont endommagées
ou usées.
Des résidus de
mousse ou de gel
obstruent les têtes
du rasoir.
Les têtes du rasoir
sont bloquées par
de longs poils.
Vous n’avez pas
correctement
inséré les têtes du
rasoir.
Remplacez les têtes du rasoir (voir
le chapitre «Remplacement»).
Rincez l’unité de rasage sous
l’eau chaude (voir la section
«Nettoyage de l’unité de rasage
sous le robinet» du chapitre
«Nettoyage et entretien»).
Nettoyez les têtes de rasoir
l’une après l’autre (voir la section
«Nettoyage de l’unité de rasage
avec la brosse» du chapitre
«Nettoyage et entretien»).
Veillez à ce que les saillies des
têtes de rasoir s’imbriquent
parfaitement dans les creux (voir
la section «Nettoyage de l’unité
de rasage avec la brosse»).
Page 41

FRANÇAIS (CANADA) 41
Problème Cause possible Solution
Le rasoir ne
fonctionne
pas lorsque
j’appuie sur
le bouton
marche/
arrêt.
Le rasoir ne
fonctionne
pas alors
qu’il est
branché sur
le secteur.
La pile
rechargeable est
vide.
La température
du rasoir est trop
élevée. Dans ce
cas, le rasoir ne
fonctionne pas.
Ce rasoir n’a pas
été conçu pour
être utilisé lorsqu’il
est branché
directement sur le
secteur.
Rechargez la pile (voir le chapitre
«Recharge»).
Lorsque la température du rasoir
a chuté suffisamment, vous pouvez
l’utiliser de nouveau.
Rechargez la pile (voir le chapitre
«Recharge») et débranchez
l’appareil du secteur.
Page 42

Page 43

Page 44

Page 45

Page 46

4222.002.5260.3
 Loading...