

Page 1
www.philips.com/support
AJ4300
User manual
Always there to help you
Register your product and get support at
Question?
Contact
Philips
Page 2

Page 3

1EN
Contents
1 Important 2
Safety 2
2 Your clock radio 3
Introduction 3
What's in the box 3
Overview of the clock radio 4
3 Get started 5
Install battery 5
Connect power 5
Set clock 5
4 Listen to FM radio 6
Tune to FM radio stations 6
Store FM radio stations automatically 6
Store FM radio stations manually 6
Select a preset radio station 6
Adjust volume 6
5 Set alarm timer 7
Set alarm 7
Activate/deactivate alarm timer 7
Snooze the alarm 7
6 Other features 8
Set sleep timer 8
Charge your device 8
Adjust display brightness 8
7 Product information 9
Specications 9
8 Troubleshooting 10
9 Notice 11
Page 4
2 EN
1 Important
Safety
Warning
• Never remove the casing of this clock radio.
• Never lubricate any part of this clock radio.
• Never place this clock radio on other electrical
equipment.
• Keep this clock radio away from direct sunlight, naked
amesorheat.
• Make sure that you always have easy access to the
power cord, plug or adaptor to disconnect the clock
radio from the power.
• Read and follow these instructions.
• Make sure that there is enough free space
around the product for ventilation.
• Protect the power cord from being
walked on or pinched, particularly at plugs,
convenience receptacles, and the point
where they exit from the clock radio.
• Referallservicingtoqualiedser vice
personnel. Servicing is required when
the clock radio has been damaged in any
way, such as power-supply cord or plug
is damaged, liquid has been spilled or
objects have fallen into the clock radio, the
clock radio has been exposed to rain or
moisture, does not operate normally, or
has been dropped.
• Onlyuseattachments/accessoriesspecied
by the manufacturer.
• Unplug this clock radio during lightning
storms or when unused for long periods
of time.
• Battery usage CAUTION – To prevent
battery leakage which may result in bodily
injury, property damage, or damage to the
clock radio:
• Install the batteries correctly, + and - as
marked on the clock radio.
• Do not mix batteries (old and new or
carbon and alkaline, etc.).
• Remove the batteries when the clock
radio is not used for a long time.
• The batteries shall not be exposed to
excessiveheatsuchassunshine,reor
the like.
• The clock radio shall not be exposed to
dripping or splashing.
• Do not place any sources of danger on the
clockradio(e.g.liquidlledobjects,lighted
candles).
• Where the MAINS plug or an appliance
coupler is used as the disconnect device,
the disconnect device shall remain readily
operable.
Note
• The type plate is located on the bottom of the
apparatus.
Page 5

3EN
2 Your clock radio
Congratulations on your purchase, and
welcometoPhilips!Tofullybenetfromthe
support that Philips offers, register your product
at www.philips.com/welcome.
Introduction
With this clock radio, you can:
• listen to FM radio;
• set two alarms, and
• wake up to buzzer or radio.
What's in the box
Check and identify the contents of your
package:
• Clock radio
• Short User Manual
• Safety¬iceleaet
Page 6
4 EN
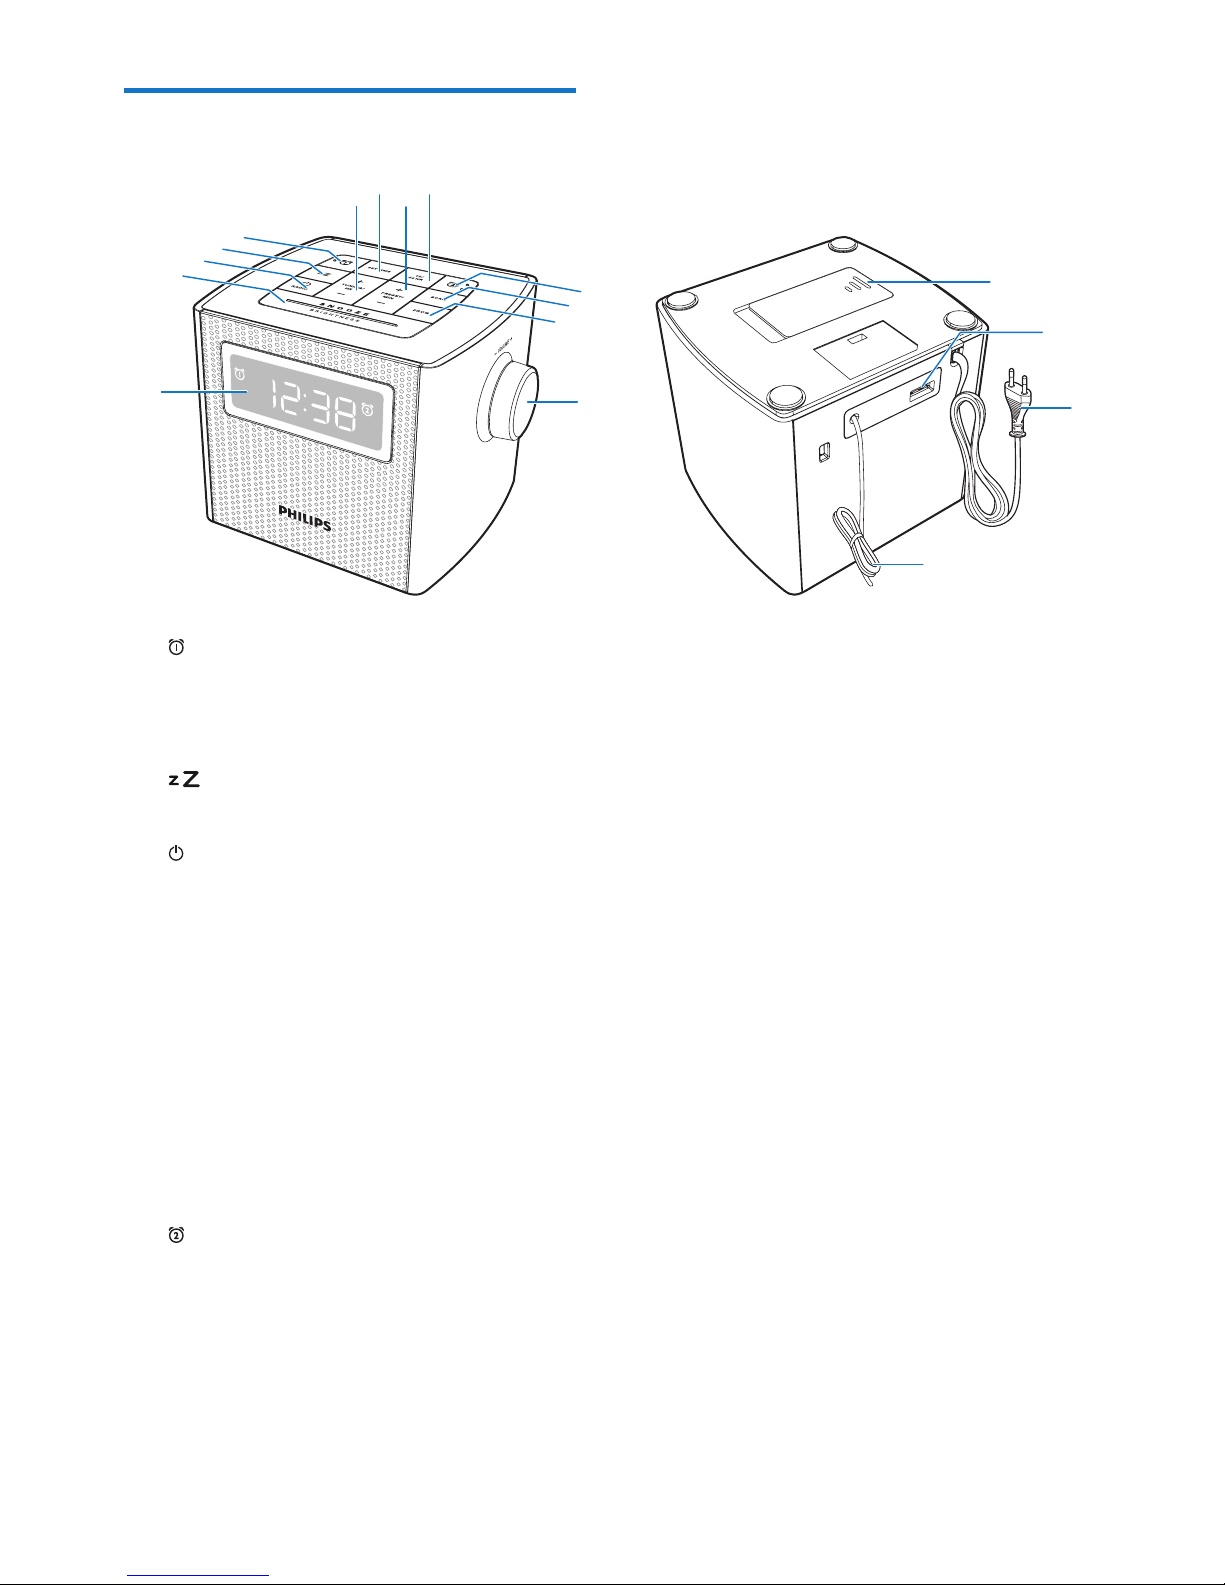
Overview of the clock radio
a
• Set Alarm 1.
• View alarm settings.
• Activate or deactivate alarm timer.
b
• Set sleep timer.
c /RADIO
• Turn the radio on or off.
d SNOOZE/BRIGHTNESS
• Snooze the alarm.
• Adjust display brightness.
e PROG
• Program the sequence of the radio
stations.
f SCAN
• Scan and store FM radio stations
automatically.
g
• Set Alarm 2.
• View alarm settings.
• Activate or deactivate alarm timer.
h 12/24 HR
• Set 12 or 24 time format.
a
b
c
d
e
f
g
h
i
j
k
l
m
n
o
q
p
i + PRESET/ MIN -
• Adjust minute.
• Select preset radio stations.
j SET TIME
• Set time.
k + TUNING/ HR -
• Adjust hour.
• Tune to FM radio stations.
l Display panel
m VOL knob
• Adjust volume.
n FM ANT
• Improve FM reception.
o Power plug
• Connect AC power.
p USB socket
• Charge your mobile devices.
q Battery compartment
Page 7
5EN
3 Get started
Always follow the instructions in this chapter in
sequence.
Install battery
Caution
• Risk of explosion! Keep batteries away from heat,
sunshineorre.Neverdiscardbatteriesinre.
• Danger of explosion if batteries are incorrectly
replaced. Replace only with the same or equivalent
type.
• The batteries contain chemical substances, so they
should be disposed of properly.
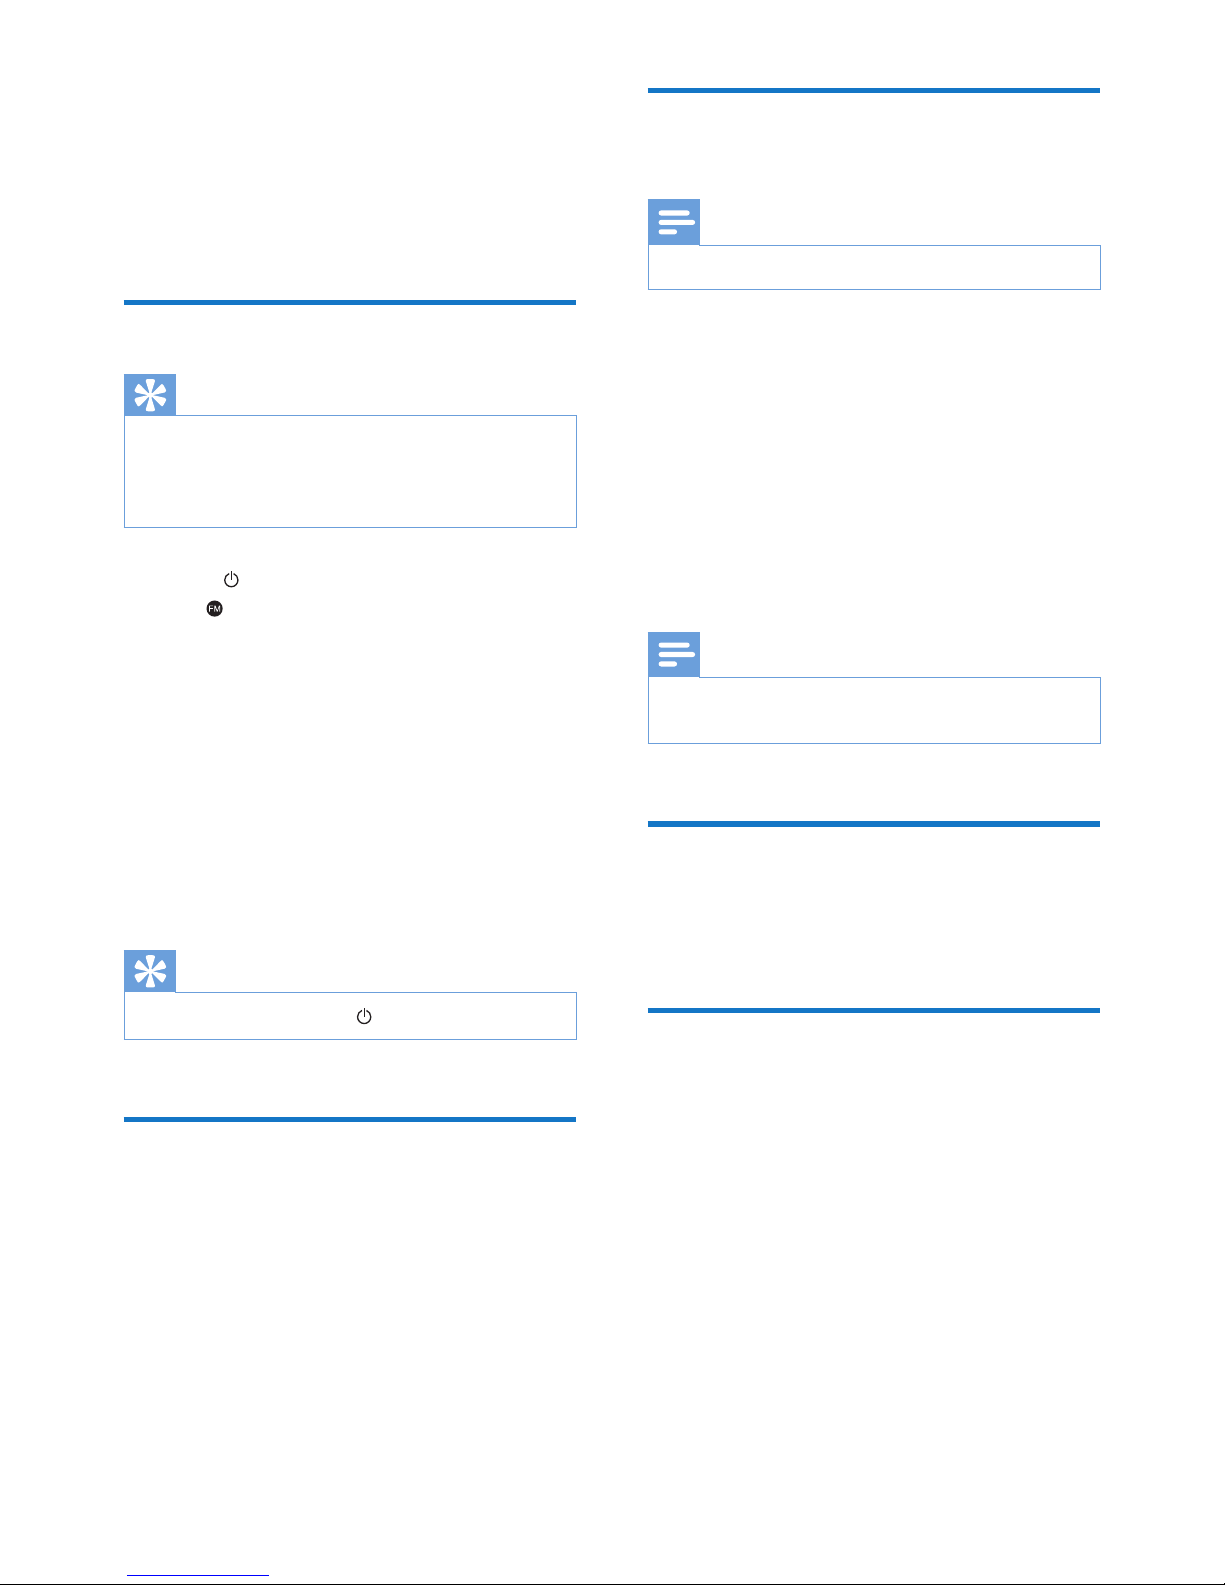
You can only use AC power as power supply.
The battery can only back up clock and alarm
settings.
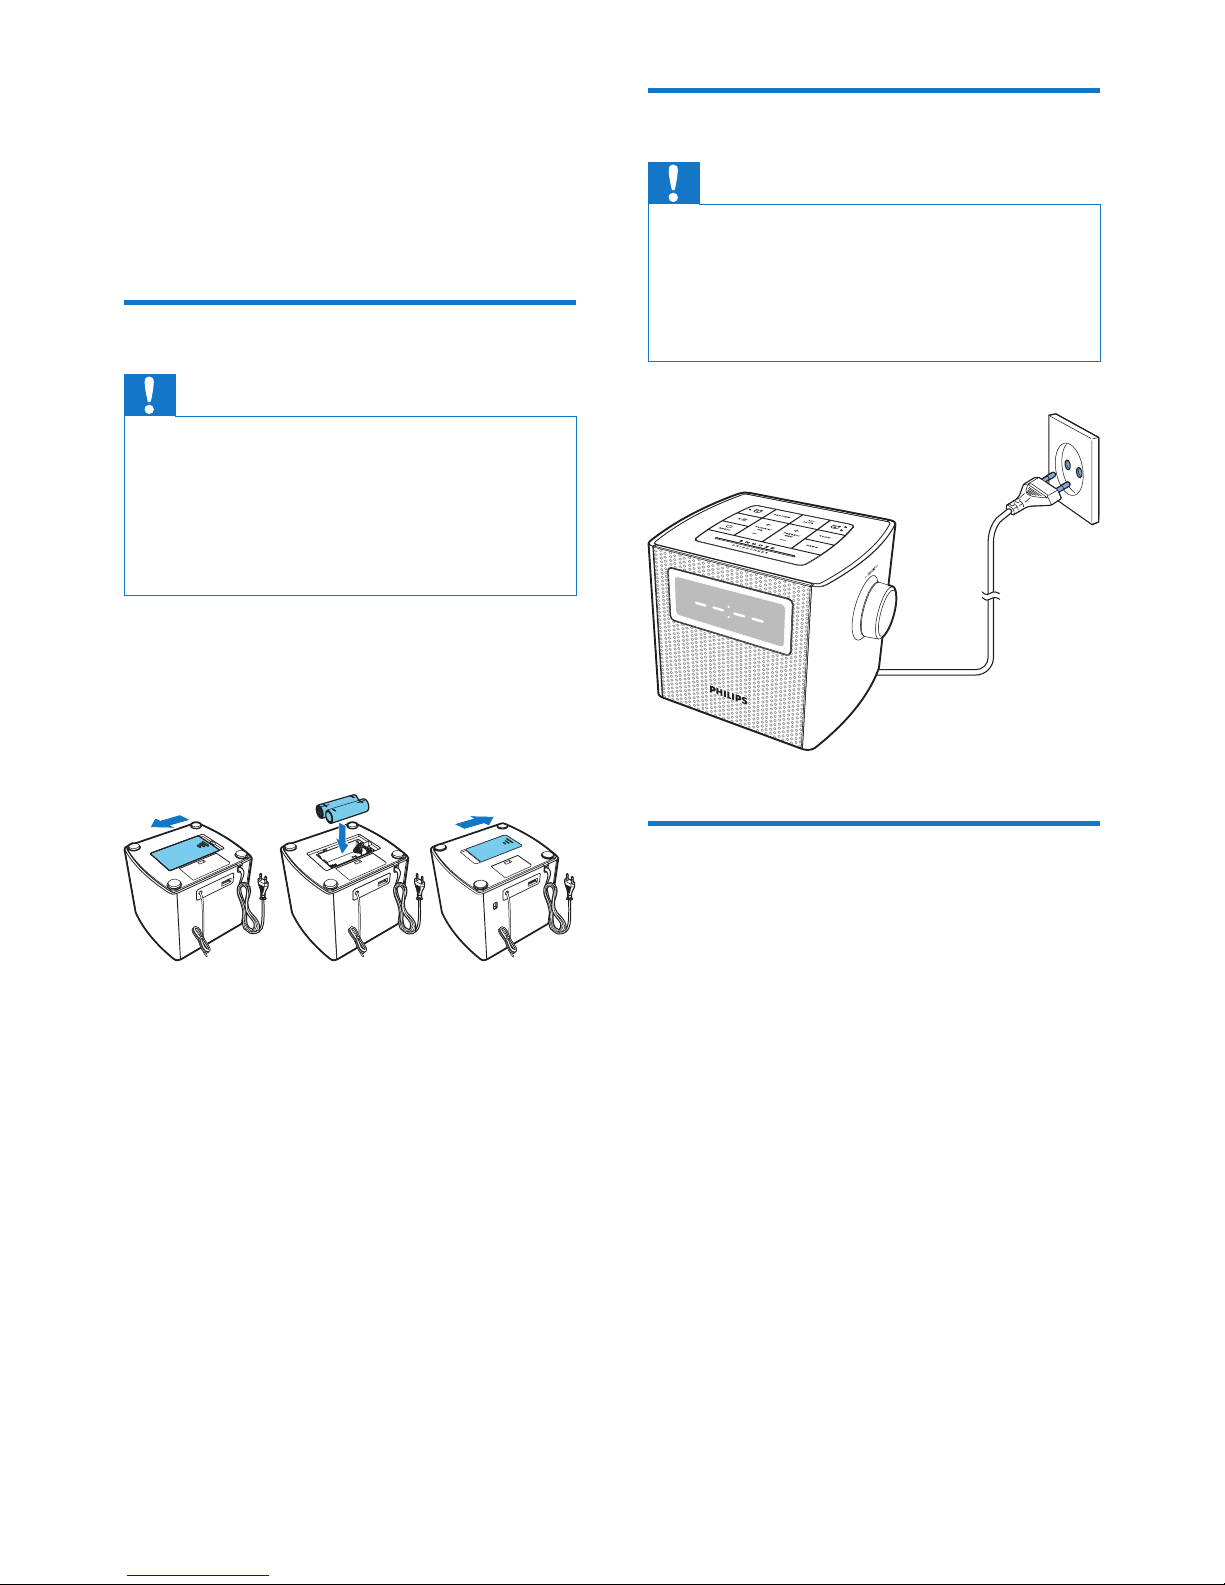
• Install two AA batteries (not supplied) as
illustrated below:
Connect power
Caution
• Risk of product damage! Make sure that the power
voltage corresponds to the voltage printed on the back
or underside of the clock radio.
• Risk of electric shock! When you unplug the AC plug,
always pull the plug from the socket. Never pull the
cord.
Set clock
1 Press SET TIME to activate clock setting
mode.
» The hour and minute digits blink.
2 Press + TUNING/ HR - to set hour.
3 Press + PRESET/ MIN - to set minute.
4 Press SET TIMEtoconrm.
5 Press 12/24 HR to select 12/24 hour
format.
Page 8
6 EN
4 Listen to FM
radio
Tune to FM radio stations
Tip
• Position the antenna as far as possible from any
electrical appliances.
• For better reception, fully extend and adjust the
position of the antenna.
1 Press /RADIO to turn on FM radio.
» is displayed.
2 Press and hold + TUNING/ HR - for two
seconds.
» The clock radio tunes to a station with
strong reception automatically.
3 Repeat step 2 to tune to more radio
stations.
To tune to a station manually:
• In tuner mode, press + TUNING/ HR -
repeatedly to select a frequency.
Tip
• To turn the radio off, press /RADIO again.
Store FM radio stations
automatically
• In FM tuner mode, press SCAN.
» The clock radio stores all the available
FM radio stations, and then broadcasts
therstavailablestationautomatically.
Store FM radio stations
manually
Note
• You can store a maximum of 20 FM radio stations.
1 In FM tuner mode, tune to an FM radio
station.
2 Press PROG.
» The preset number begins to blink.
3 Press + PRESET/ MIN - repeatedly to
select a number.
4 Press PROGagaintoconrm.
5 Repeat steps 1 to 4 to store other stations.
Note
• To remove a pre-stored station, store another station
in its place.
Select a preset radio station
• In FM tuner mode, press + PRESET/ MIN -
repeatedly to select a preset radio station.
Adjust volume
• Rotate the VOL knob to increase or
decrease the volume level.
Page 9
7EN
5 Set alarm timer
Set alarm
You can set two alarms to ring at different time.
Note
• Make sure that the clock is set correctly.
1 Press and hold or for two seconds to
activate alarm setting mode.
» The hour and minute digits and the
alarm icon ( or ) begin to blink.
2 Press + TUNING/ HR - to set hour.
3 Press + PRESET/ MIN - to set minute.
4 Press or toconrm.
» [buz] (buzzer) or your last listened
frequency blinks.
5 Press + TUNING/ HR - or + PRESET/
MIN - to select an alarm source: buzzer or
your last listened channel.
6 Press or toconrm.
Tip
• When alarm sounds, volume increases gradually. You
cannot adjust the alarm volume manually.
Activate/deactivate alarm timer
• Press or repeatedly to activate or
deactivate the alarm timer.
» or appears if the alarm timer is on
and disappears if it is off.
• To stop the alarm, press the
corresponding or .
» The alarm repeats ringing for the next
day.
Snooze the alarm
• When alarm sounds, press SNOOZE.
» The alarm snoozes and repeats ringing
nine minutes later.
Page 10
8 EN
6 Other features
Set sleep timer
This clock radio can switch to standby mode
automatically after a preset period.
• Press repeatedly to select the sleep
timer period (in minutes).
To deactivate the sleep timer:
In sleep timer setting mode, press
repeatedly until [OFF] (off) appears.
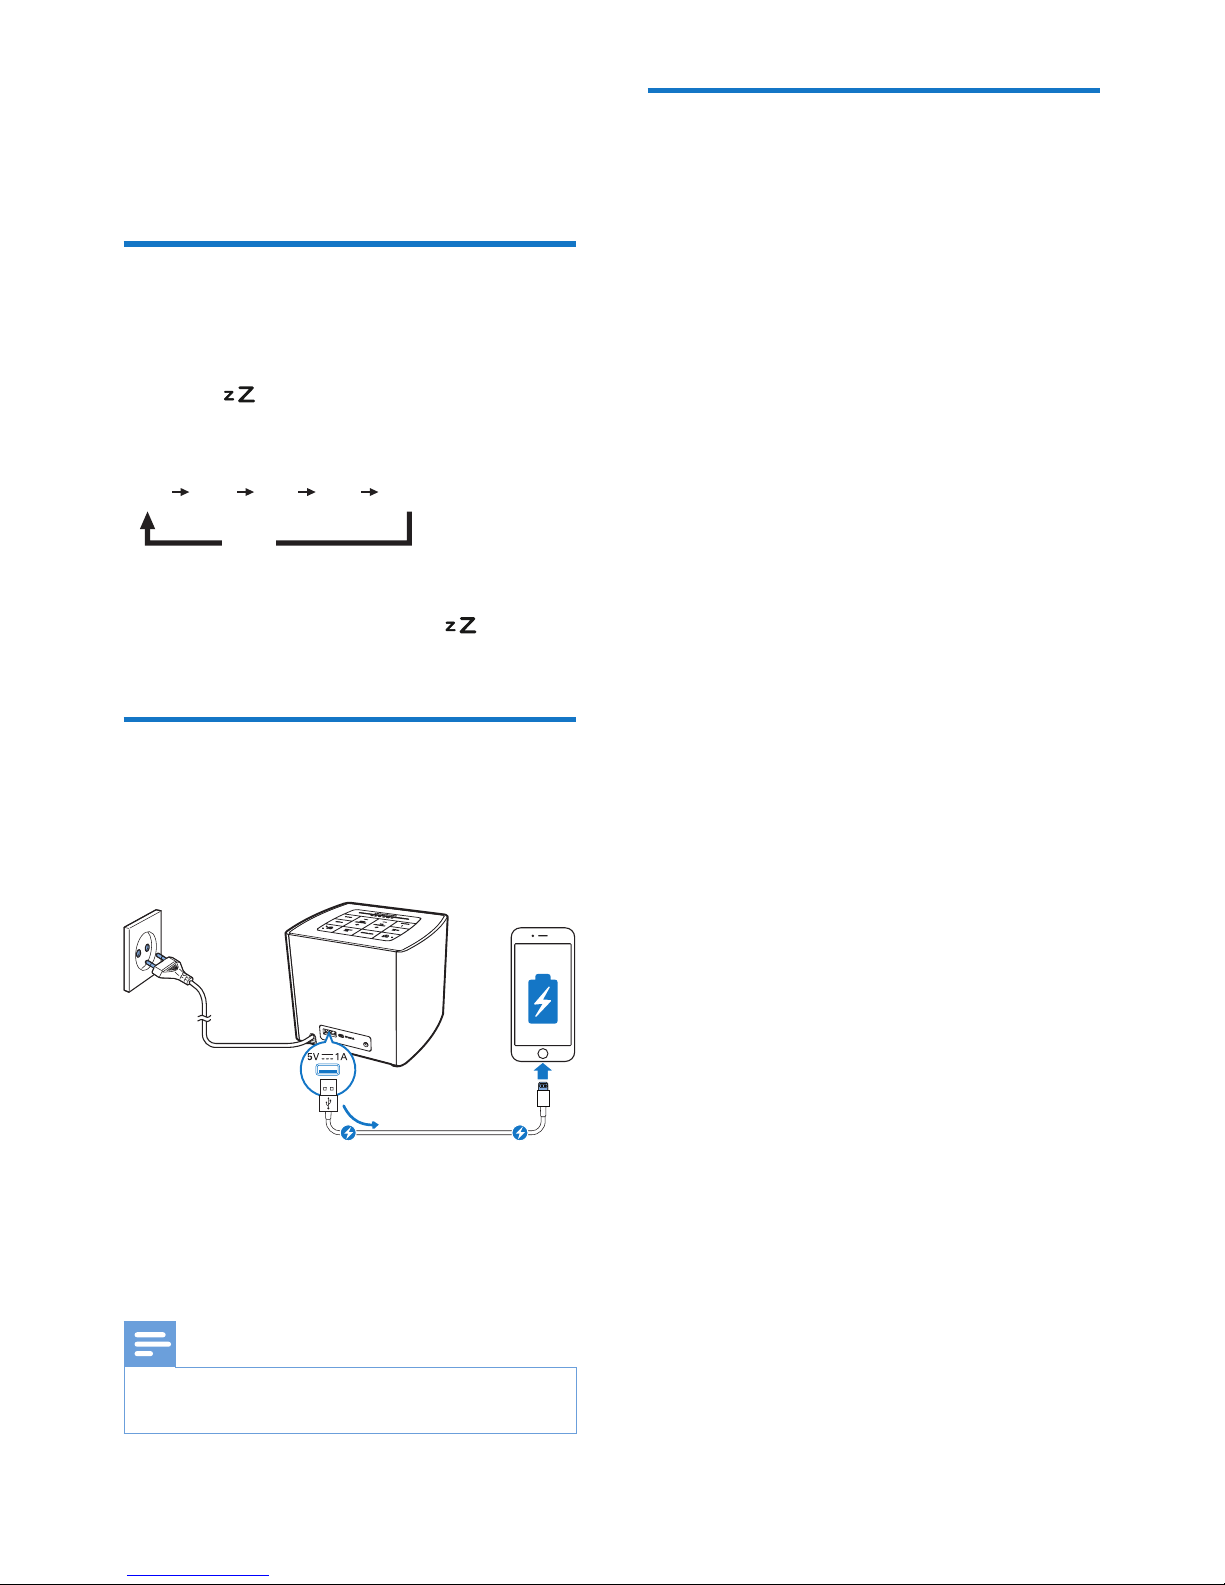
Charge your device
With this clock radio, you can charge your
external devices, such as your cell phone, MP3
player or other mobile devices.
• Use a USB cable (not supplied) to connect
your device with the clock radio.
» Once the device is recognized, the
charging starts.
Note
• The maximum current for USB charging is 1A.
• Charging all devices with this product is not guaranteed.
15 30 60 90 120
OFF
Adjust display brightness
• Press BRIGHTNESS repeatedly to select
different brightness levels.
Page 11

9EN
7 Product
information
Note
• Product information is subject to change without prior
notice.
Specications
Amplier
Rated Output Power 0.5 W RMS
Tuner
Tuning Range (FM) 87.5 - 108 MHz
Tuning Grid 50 KHz
Search Selectivity <28 dBf
Total Harmonic Distortion <3%
Signal to Noise Ratio >55 dB
USB
Charging Support 5 V, 1 A
General information
AC Power 100-240V ~, 50/60 Hz
Battery Two AA batteries
Operation Power
Consumption
<10 W
Standby Power
Consumption
<1 W
Dimensions - Main
Unit (W x H x D)
129 x 104 x 105 mm
Weight - Main Unit 0.5 kg
Page 12

10 EN
8 Troubleshooting
Warning
• Never remove the casing of this device.
To keep the warranty valid, never try to repair
the system yourself.
If you encounter problems when using this
device, check the following points before
requesting service. If the problem remains
unsolved, go to the Philips Web page (www.
philips.com/support). When you contact Philips,
make sure that the device is nearby and the
model number and serial number are available.
No power
• Make sure that the AC power plug of the
clock radio is connected properly.
• Make sure that there is power at the AC
outlet.
No response from the clock radio
• Disconnect and reconnect the AC power
plug, then turn on the clock radio again.
Poor radio reception
• Keep the clock radio away from other
electronic devices to avoid radio
interference.
• Fully extend and adjust the position of the
FM antenna.
Alarm does not work
• Set the clock/alarm correctly.
Page 13

11EN
9 Notice
Anychangesormodicationsmadetothis
device that are not expressly approved by
WOOX Innovations may void the user’s
authority to operate the equipment.
This product complies with the radio interference
requirements of the European Community.
Disposal of your old product
Your product is designed and manufactured
with high quality materials and components,
which can be recycled and reused.
This symbol on a product means that the
product is covered by European Directive
2012/19/EU. Inform yourself about the local
separate collection system for electrical and
electronic products. Follow local rules and never
dispose of the product with normal household
waste. Correct disposal of old products
helps prevent negative consequences for the
environment and human health.
Environmental information
All unnecessary packaging has been omitted.
We have tried to make the packaging easy to
separate into three materials: cardboard (box),
polystyrene foam (buffer) and polyethylene
(bags, protective foam sheet.)
Your system consists of materials which can
be recycled and reused if disassembled by
a specialized company. Please observe the
local regulations regarding the disposal of
packaging materials, exhausted batteries and old
equipment.
Page 14

Specications are subject to change without notice.
2015 © WOOX Innovations Limited. All rights reserved.
Philips and the Philips’ Shield Emblem are registered trademarks of Koninklijke Philips N.V.
and are used by WOOX Innovations Limited under license from Koninklijke Philips N.V.
AJ4300_12_UM_V1.0
 Loading...