

Page 1

CD Clock Radio
F
M
Z
Z
Z
Z
R
A
D
IO
C
D
P
L
A
Y
/P
A
U
S
E
S
E
T
D
A
Y
S
L
E
E
P
W
E
E
K
E
N
D
-
S
L
E
E
P
E
R
A
L
A
R
M
1
M
O
D
E
/
O
F
F
SET
ALARM
1
2
T
I
M
E
CLOCK
C
D
/
R
A
D
I
O
O
F
F
P
R
O
G
R
A
D
I
O
P
R
E
S
E
T
V
O
L
U
M
E
2
1
P
L
A
Y
/P
A
U
S
E
S
E
T
D
A
Y
S
L
E
E
P
W
E
E
K
E
N
D
-
S
L
E
E
P
E
R
A
L
A
R
M
1
M
O
D
E
/
O
F
F
A
L
A
R
M
1
M
O
D
E
/
O
F
F
A
L
A
R
M
1
M
O
D
E
/
O
F
F
SET
ALARM
1
2
T
I
M
E
CLOCK
C
D
/
R
A
D
I
O
O
F
F
C
D
/
T
U
N
I
N
G
S
E
A
R
C
H
C
D
/
T
U
N
I
N
G
S
E
A
R
C
H
P
R
O
G
R
A
D
I
O
P
R
E
S
E
T
V
O
L
U
M
E
2
1
O
P
E
N
•
C
L
O
S
E
O
P
E
N
•
C
L
O
S
E
R
A
D
IO
O
N
R
A
D
IO
O
N
AJ 3965
Page 2

Important notes for users in the U.K.
Mains plug
This apparatus is fitted with an approved moulded
13 Amp plug. To change a fuse in this type of plug
proceed as follows:
• Remove fuse cover and fuse.
• Fix new fuse which should be a BS1362 5 Amp,
A.S.T.A. or BSI approved type.
• Refit the fuse cover.
If the fitted plug is not suitable for your socket
outlets, it should be cut off and an appropriate plug
fitted in its place.
If the mains plug contains a fuse, this should have a
value of 5 Amp. If a plug without a fuse is used, the
fuse at the distribution board should not be greater
than 5 Amp.
Note: The severed plug must be disposed to avoid a
possible shock hazard should it be inserted into a
13 Amp socket elsewhere.
How to connect a plug
The wires in the mains lead are coloured with the
following code: blue = neutral (N), brown = live (L).
As these colours may not correspond with the colour
markings identifying the terminals in your plug,
proceed as follows:
• Connect the blue wire to the terminal marked N or
coloured black.
• Connect the brown wire to the terminal marked L
or coloured red.
• Do not connect either wire to the earth terminal in
the plug, marked E (or e) or coloured green (or
green and yellow).
Before replacing the plug cover, make certain that the
cord grip is clamped over the sheath of the lead - not
simply over the two wires.Copyright in the U.K.:
Recording and playback of material may require
consent. See Copyright Act 1956 and The Performer’s
Protection Acts 1958 to 1972.
n Norge
Advarsel: For å redusere faren for brann eller elektrisk støt;
skal apparatet ikke utsettes for regn eller fuktighet.
Typeskilt finnes på apparatens underside.
Observer: Nettbryteren er sekundert innkoplet. Den
innebygde netdelen er derfor ikke frakoplet nettet så lenge
apparatet er tilsluttet nettkontakten.
English ........................................... 4
Français...................................... 14
Español ....................................... 24
Deutsch ....................................... 34
Nederlands .............................. 44
Italiano ........................................ 54
Português .................................. 64
Dansk
............................................ 74
Svenska ...................................... 84
English
Français
Español
Deutsch
Nederlands
Italiano
Português
Dansk
Svenska
i Italia
DICHIARAZIONE DI CONFORMITA’
Si dichiara che l’apparecchio AJ 3965 Philips risponde
alle prescrizioni dell’art. 2 comma 1 del D. M.
28 Agosto 1995 n. 548.
Philips Consumer Electronics
Philips, Glaslaan 2,
5616 JB Eindhoven, The Netherlands
2
Suomi............................................ 94
Έλληνικά ..................... 104
Suomi
Έλληνικά
2
Page 3

F
M
Z
Z
Z
Z
R
ADIO
CD
PLA
Y/PA
U
SE
SET DAY
SLEEP
W
E
E
K
E
N
D
-
S
L
E
E
P
E
R
ALARM 1
MODE/OFF
SET
A
L
A
R
M
1
2
T
I
M
E
CLOCK
C
D
/RA
D
IO
O
FF
P
R
O
G
R
A
D
I
O
P
R
E
S
E
T
VO
LU
M
E
2
1
DIGITAL RADIO
PLAY
/PAU
SE
SET DAY
SLEEP
W
E
E
K
E
N
D
-
S
L
E
E
P
E
R
ALARM 1
MODE/OFF
SET
A
L
A
R
M
1
2
T
I
M
E
CLOCK
C
D
/RA
D
IO
O
FF
P
R
O
G
R
A
D
I
O
P
R
E
S
E
T
VO
LU
M
E
2
1
O
P
E
N
•
C
L
O
S
E
O
P
E
N
•
C
L
O
S
E
A
L
A
R
M
1
M
O
D
E
/
O
F
F
C
D
/
T
U
N
I
N
G
S
E
A
R
C
H
RADIO ON
2 265431
7
*
09 ! @ #$8 &% ^
(
3
Page 4

CONTROLS
English
TOP AND FRONT PANELS
1
WEEKEND SLEEPER– deactivates
2
ALARM 1 MODE/OFF or ALARM 2
MODE/OFF
3
DISPLAY–shows the clock/alarm times and
4
REPEATALARM/
–
switches off the alarm for a 9 minute period;
–
changes the brightness of the display
illumination
5 24 HR RESET –
stops the active alarm for 24 hours
6 OPEN•CLOSE – opens/closes
7
SLEEP
8 SET DAY
9 SET control
–
sets/ reviews/ switches off
alarm 1 or 2
status of the set
adjusts the sleep time
–
– sets the day for weekend sleeper
activation
– sets the times for
ALARM 1/ 2/ TIME/ CLOCK
alarm 1 or 2 for the
weekend
BRIGHTNESS CONTROL
CD holder
0 7, 8
– adjusts clock/alarm times;
– adjusts the gentle wake minimum and
maximum volume level for alarm 1 or 2;
– selects a CD wake up track for alarm 1or 2
! PLAY•PAUSE 2;– starts/pauses
CD playback
@
RADIO ON/ BAND
– switches on the radio;
– selects FM/ MW/ LW waveband
# CD/TUNING SEARCH ∞, §
–
skips CD tracks/search for a particular
passage;
–
tunes to radio stations
$ CD/RADIO
–
stops
– stops the active alarm for 24 hours
% PROG –
^
RADIO PRESET
&
VOLUME
*
Mains lead - for mains supply
(
Pigtail – aerial to improve FM reception
OFF 9
CD/Radio/Sleep function;
programmes tuner preset stations
selects preset
4, 3 –
station
4, 3 –
adjusts the sound level
CAUTION
Use of controls or adjustments or performance of procedures other than herein
may result in hazardous radiation exposure or other unsafe operation.
Environmental information
All unnecessary packaging material has been omitted. We have done our utmost to make the
packaging easy to separate into three mono-materials: cardboard (box), expandable polystyrene
(buffer), polyethylene (bags, protective foam).
Your set consists of materials which can be recycled if disassembled by a specialized
company. Please observe the local regulations regarding the disposal of packing
materials, exhausted batteries and old equipment.
4
Page 5

MAINS SUPPLY AND DEMO MODE
F
M
Z
Z
Z
Z
RADIO
C
D
P
LA
Y
/P
A
U
S
E
SET DAY
S
L
E
E
P
WEEKEND SLEEPER
A
L
A
R
M
1
M
O
D
E
/
O
F
F
S
E
T
A
L
A
R
M
1
2
T
I
M
E
C
L
O
C
K
CD/RAD
IO
OFF
R
A
D
I
O
P
R
E
S
E
T
VO
LU
M
E
2
1
D
I
G
I
T
A
L
R
A
D
I
O
P
L
A
Y
/PA
U
SE
SET DAY
S
L
E
E
P
WEEKEND SLEEPER
A
L
A
R
M
1
M
O
D
E
/
O
F
F
S
E
T
A
L
A
R
M
1
2
T
I
M
E
C
L
O
C
K
CD
/RADIO
O
FF
R
A
D
I
O
P
R
E
S
E
T
V
O
LU
M
E
2
1
O
P
E
N
•
C
L
O
S
E
O
P
E
N
•
C
L
O
S
E
A
L
A
R
M
1
M
O
D
E
/
O
F
F
C
D
R
A
D
I
O
O
N
1. Check if the mains voltage, shown on the type plate on the
bottom of the set, corresponds to your local mains supply. If it
does not, consult your dealer or service centre.
2. Connect the mains plug into the wall socket.The mains supply
is now switched on and the display will show the
PHILIPS demo mode.
™ PH..IL ..IPS scrolls across the display continuously.
• Press any control (with the exception of
BRIGHTNESS CONTROL
on the set) to exit the demo mode.
REPEAT ALARM/
3. To disconnect the set from the mains completely, remove the
plug from the wall socket.
SELF-POWERED BACK-UP
The self-powered back-up conveniently allows your day, alarm and
clock time settings to be stored for up to 3 minutes when there is a
power interruption e.g. mains failure.
The complete CD clock radio and illumination will be switched off.
As soon as the mains supply returns, the display will indicate the
correct time.
• If mains supply returns after 3 minutes, the display will show
the PHILIPS demo mode and you will need to re-enter the
day and clock time.
INSTALLATION
English
For users in the U.K.: please follow the instructions on page 2.
BASIC FEATURES
Illumination brightness
1. Check if the SET control is turned to CLOCK position.
2. Press REPEAT ALARM/
BRIGHTNESS CONTROL once or more
– The brightness of the display will change in this sequence:
LOW ™ MEDIUM ™ BRIGHT ™ LOW...
Volume
Press VOLUME 4or 3 to adjust the volume level. The volume
level vo: is indicated as a number from 0-32.
5
Page 6
CLOCK CD PLAYBACK
CD
CD
F
M
Z
Z
Z
Z
R
A
D
IO
C
D
P
L
A
Y
/P
A
U
S
E
S
E
T
D
A
Y
SLEEP
W
E
E
K
EN
D
-
SL
E
E
P
ER
S
E
T
A
L
A
R
M
1
2
T
I
M
E
C
L
O
C
K
C
D
/
R
A
D
I
O
O
F
F
P
R
O
G
R
A
D
IO
P
R
E
S
E
T
V
O
L
U
M
E
2
1
D
I
G
I
T
A
L
R
A
D
I
O
P
L
A
Y
/P
A
U
S
E
S
E
T
D
A
Y
SLEEP
W
E
E
K
EN
D
-
SL
E
E
P
E
R
S
E
T
A
L
A
R
M
1
2
T
I
M
E
C
L
O
C
K
C
D
/
R
A
D
I
O
O
F
F
P
R
O
G
R
A
D
IO
P
R
E
S
E
T
V
O
L
U
M
E
2
1
A
L
A
R
M
1
M
O
D
E
/
O
F
F
C
D
/
T
U
N
I
N
G
S
E
A
R
C
H
R
A
D
I
O
O
N
1
D
English
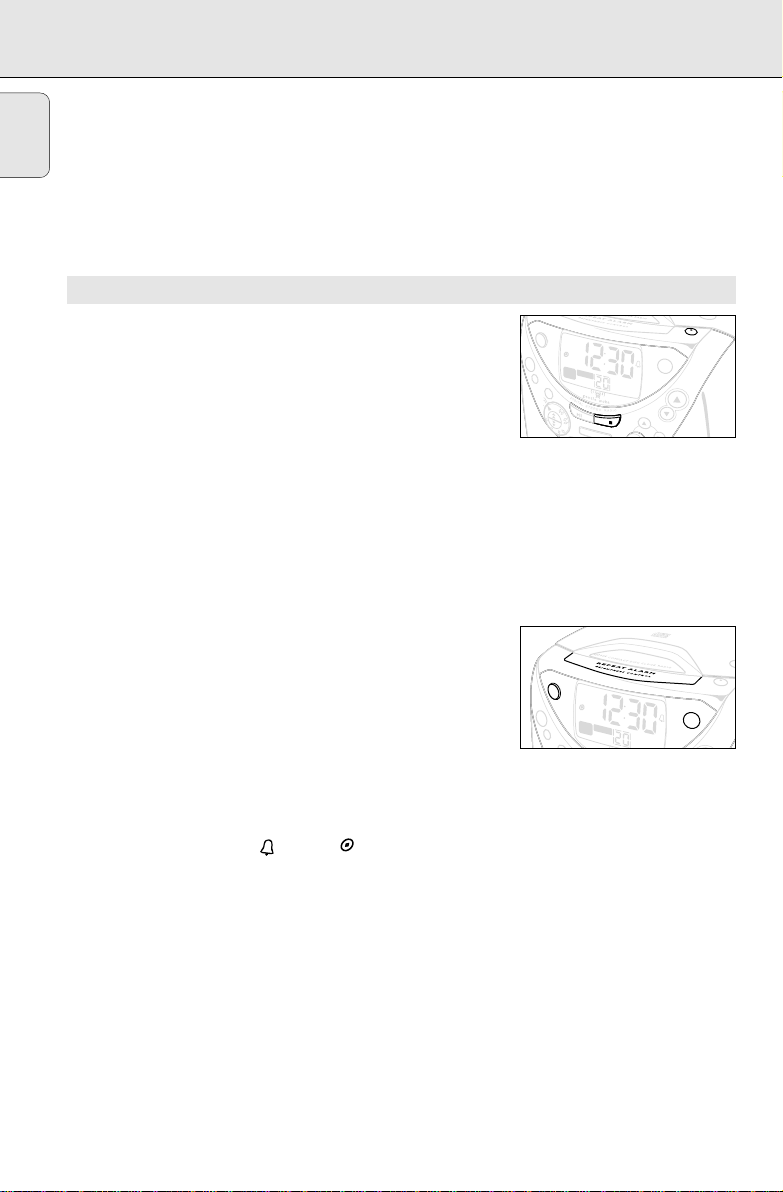
SETTING THE CLOCK
The time is displayed using the 24 hour clock.
1. Turn the SET control to TIME.
2. Press 7, 8 to adjust both the hours and minutes.
™ With your finger held down on 7 or 8 respectively, the time
will increase/ decrease rapidly and continuously from minutes
to hours.
™ Press 7 or 8 briefly and repeatedly to adjust the time slowly,
minute by minute.
3. Turn the SET control to CLOCK when you have reached the
correct setting.
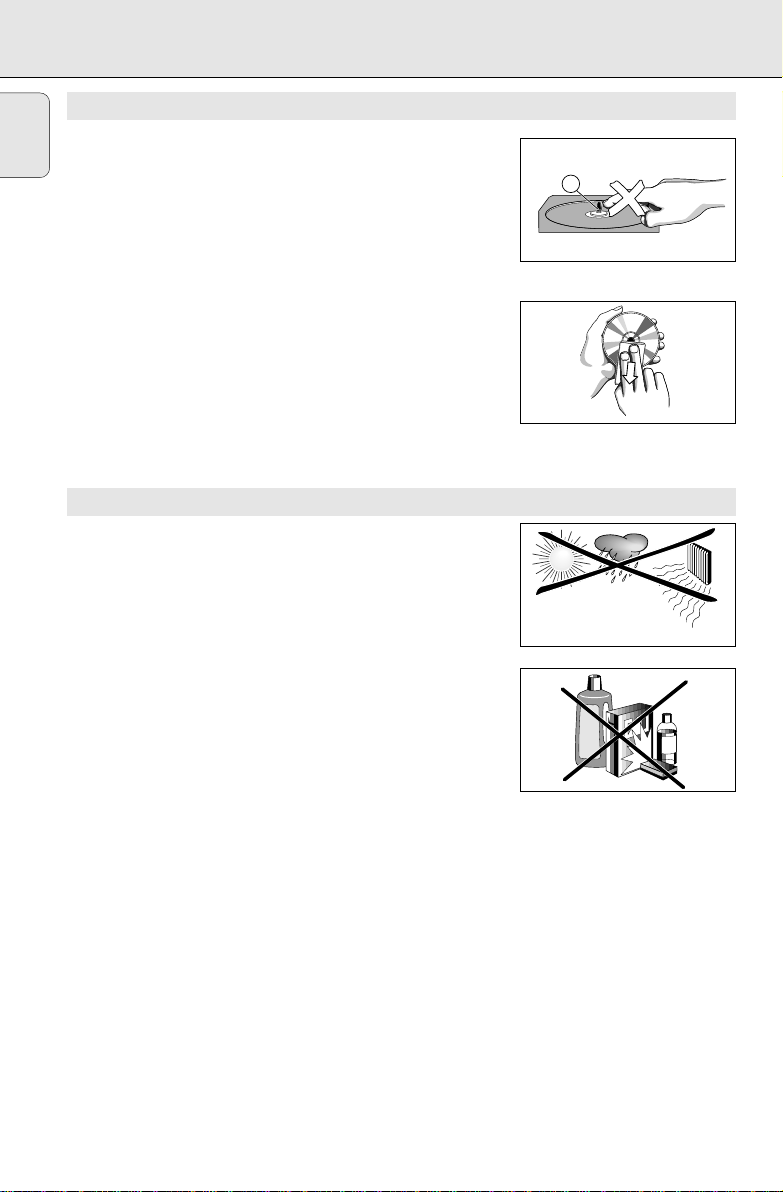
SETTING THE DAY
Setting the day enables you to set the WEEKEND SLEEPER
function. If you attempt to use the WEEKEND SLEEPER prior to
setting the day, ' ' will flash briefly in the display to remind
you to set the day first.
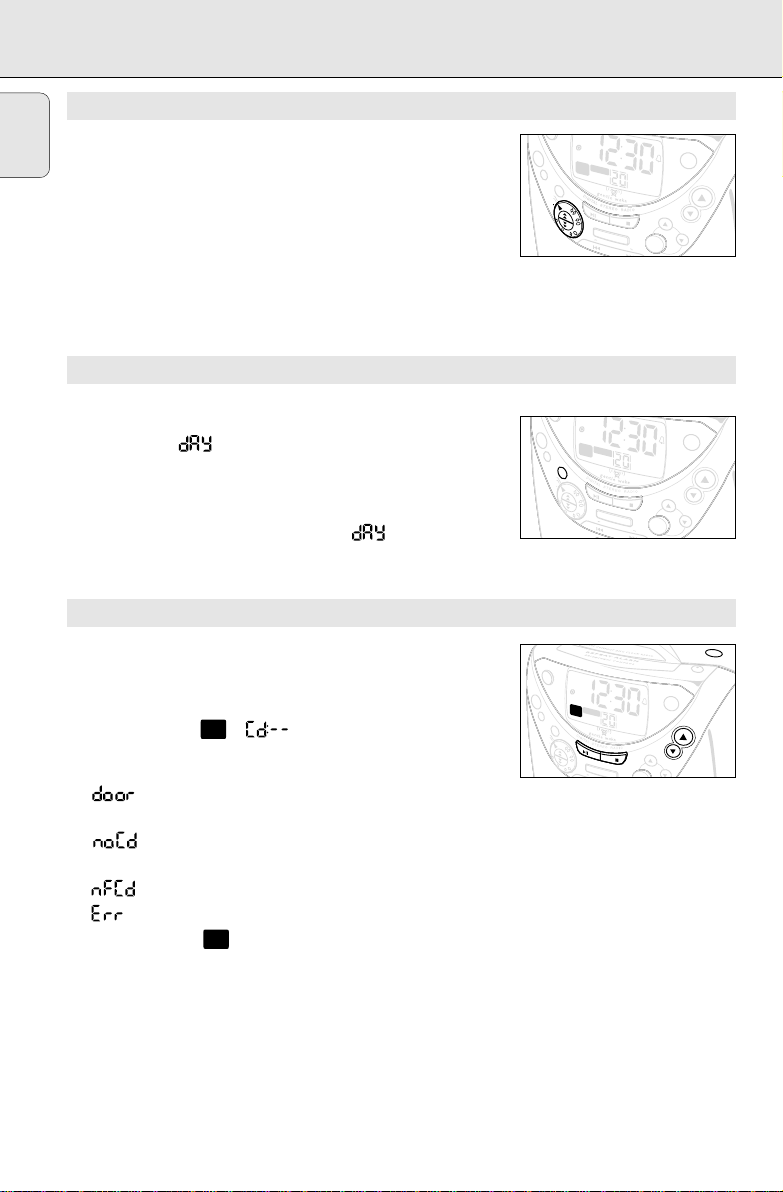
1. Press SET DAY.
2. While the day display is shown, press SET DAY again once or
more to select the day numbered from ' ' 1-7 (Monday-
Sunday).
– The display will revert to show the clock time.
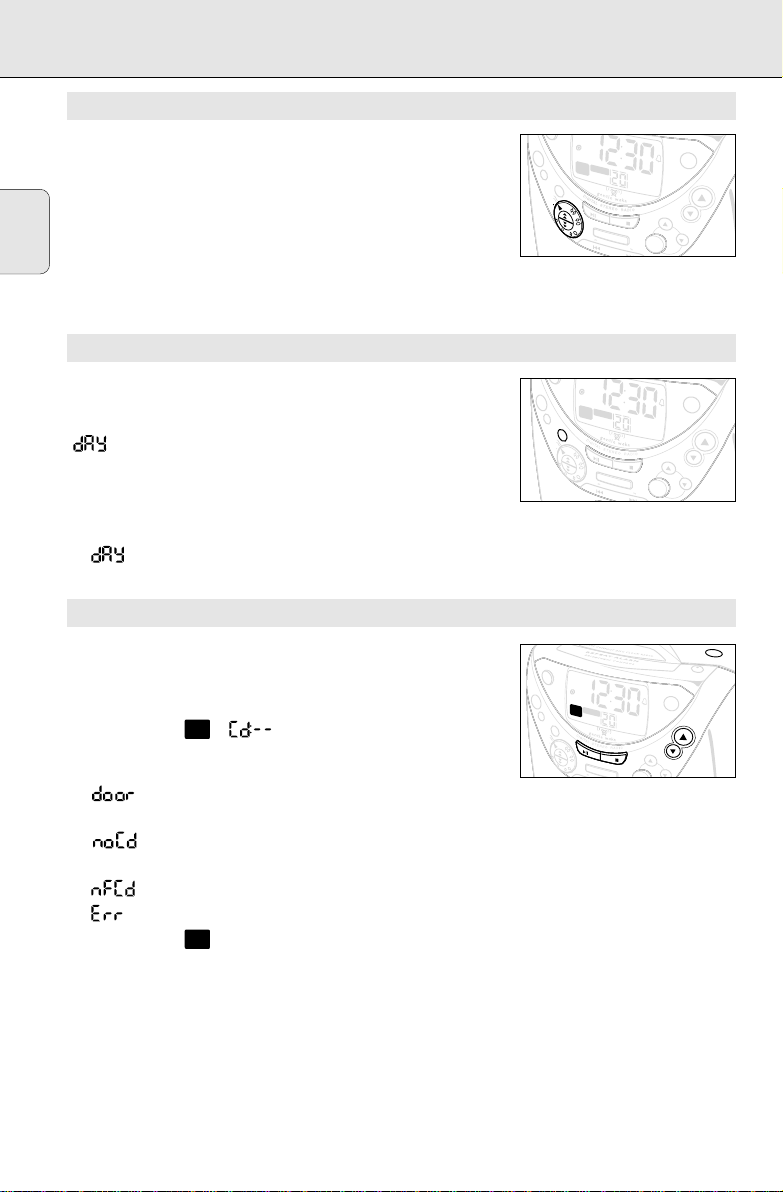
CD PLAYBACK
1. Press OPEN•CLOSE to open the CD door.
2. Insert a CD with the printed side facing up, and press the door
to close.
3. Press PLAY/PAUSE 2; to start playback.
• The CD indicator , ’ ‘ and the total number of tracks
are shown, followed by the current track number briefly before
returning to the clock time.
• ' ' is shown if you have not closed the CD door or when
you open the CD door during playback.
• ' ' is shown if no CD has been inserted or has been
inserted incorrectly.
• ' ' is shown if the CD-R(W) is non-finalized.
• ' 'indicates a general error in operation of the set.
™ The CD indicator is shown during CD playback.
W
W
E
E
E
E
K
K
E
E
N
N
D
S
D
SL
-
L
-
EE
EE
P
P
E
ER
R
Z
Z
R
C
A
SLEEP
D
SLEEP
D
IO
S
S
E
E
T
T
D
D
A
A
Y
Y
S
S
E
E
T
T
A
A
L
L
A
A
R
R
M
M
1
1
2
2
T
T
I
I
M
M
C
C
E
E
L
L
O
O
C
C
K
K
P
P
L
L
A
A
Y
Y
/P
/P
A
A
U
U
S
S
E
E
C
C
D
D
/
R
/
R
A
A
D
D
I
O
I
O
D
I
R
G
A
I
T
D
A
I
O
L
R
O
A
N
D
I
O
C
D
/
T
U
N
I
N
G
S
E
A
R
C
A
A
L
L
A
A
R
R
M
M
M
M
O
1
O
1
D
D
E
E
/
O
/
O
F
F
F
F
1
1
WEEKEND-
WEEKEND-
SLEEPER
SLEEPER
Z
Z
RADIO
C
S
S
L
D
L
E
E
E
E
P
P
SET DAY
SET DAY
S
S
E
E
T
T
A
A
L
L
A
A
R
R
M
M
1
1
2
2
T
T
I
I
M
M
C
C
E
E
L
L
O
O
C
C
K
K
F
M
PLA
PLA
Y/P
Y/PA
A
U
U
SE
S
E
CD/RAD
C
D/R
ADIO
IO
OFF
O
FF
D
I
R
G
A
I
T
D
A
I
O
L
R
O
A
N
D
I
O
C
A
L
A
R
M
1
M
O
D
E
/
O
F
F
2
2
Z
Z
F
M
O
O
F
F
F
F
H
Z
Z
V
V
O
O
L
U
L
U
M
M
E
E
R
R
A
A
D
D
IO
I
O
P
P
R
R
E
E
S
E
S
E
T
T
P
P
R
R
O
O
G
G
O
P
O
E
P
N
E
N
•
C
•
L
C
O
L
S
O
E
S
E
A
L
A
R
M
1
M
O
D
E
/
O
F
F
2
2
V
VOLUM
OLU
M
E
E
R
R
A
A
D
D
I
O
I
O
P
P
R
R
E
E
S
E
S
E
T
T
6
Page 7
CD PLAYBACK RADIO
RADIO
CD
P
L
A
Y
/P
A
U
S
E
D
A
Y
S
E
T
A
L
A
R
M
1
2
T
I
M
E
C
L
O
C
K
C
D
/
R
A
D
I
O
O
F
F
P
R
O
G
R
A
D
I
O
P
R
E
S
E
T
V
O
L
U
M
E
D
I
G
I
T
A
L
R
A
D
I
O
P
L
A
Y
/P
A
U
S
E
D
A
Y
S
E
T
A
L
A
R
M
1
2
T
I
M
E
C
L
O
C
K
C
D
/
R
A
D
I
O
O
F
F
P
R
O
G
R
A
D
IO
P
R
E
S
E
T
V
O
L
U
M
E
C
D
/
T
U
N
I
N
G
S
E
A
R
C
H
R
A
D
I
O
O
N
R
A
C
D
4. Adjust the sound with VOLUME 4 or 3.
5. To interrupt, press PLAY•PAUSE 2;.
• The current track number shows briefly before returning to
clock time with and flashing during pause.
6. Press PLAY•PAUSE 2; again to resume playback.
7. Press CD/RADIO OFF 9 to stop playback.
™ The CD indicator disappears from the display and the CD player
is switched off.
™ The set automatically switched to standby clock time after the
last track.
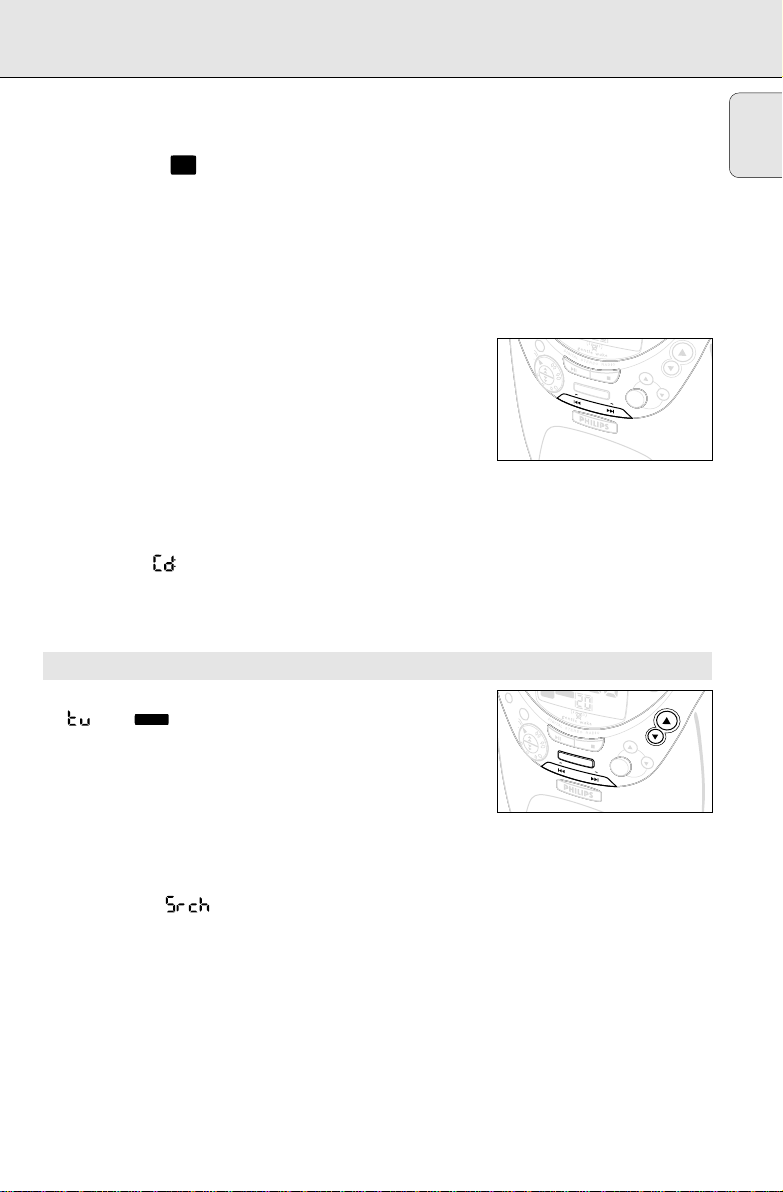
Selecting a different track
Track number appears briefly in the display when you press
∞ or § to skip tracks.
• Press § once or more to skip to the track(s).
• Press ∞ more than once to skip to previous track(s).
• Press ∞ once and playback will return to the beginning of the
current track.
Finding a passage within a track
1. During playback, press and hold down ∞ or §.
™ The CD is played at high speed and low volume; the display
will show ’ ’ and your current track number.
2. Release ∞ or § when you recognize the passage you want.
™ Normal CD playback and clock display will resume.
English
RADIO
RADIO ON/ BAND
1. Press
to switch on the radio mode.
™ ’ ’ and are shown in the display followed by the last
selected waveband and preset station details.
2. Press
RADIO ON/ BAND
again if you wish to change
waveband.
3. Adjust the sound using VOLUME 4 or 3.
Automatic tuning
• Press ∞ or § one second or more to tune to your station.
™ The radio automaticly tunes to a station of sufficient reception.
Display shows ’ ’ during automatic tuning.
Manual tuning
• Press and hold down on ∞ or § to tune to a station.
• Release when the frequency in the display is the approximate
frequency.
• Fine tune by pressing briefly ∞ or § once or more.
SLEEP
D
SLEEP
IO
Z
Z
F
S
S
E
E
T
T
D
D
A
A
Y
Y
S
S
E
E
T
T
A
A
L
L
A
A
R
R
M
M
1
1
2
2
T
T
I
I
M
M
C
C
E
E
L
L
O
O
C
C
K
K
M
P
P
L
L
A
A
Y
Y
/P
/
P
A
A
U
U
S
S
E
E
C
C
D
D
/
R
/
R
A
A
D
D
I
O
I
O
O
O
F
F
F
F
D
I
R
G
A
I
T
D
A
I
O
L
R
O
A
N
D
I
O
C
D
/
T
U
N
I
N
G
S
E
A
R
C
H
V
V
O
O
L
U
L
U
M
M
E
E
R
R
A
A
D
D
I
O
I
O
P
P
R
R
E
E
S
E
S
E
T
T
P
P
R
R
O
O
G
G
7
Page 8
PROG
PROG
RADIO
F
M
Z
Z
Z
Z
R
A
D
IO
C
D
P
L
A
Y
/P
A
U
S
E
S
E
T
D
A
Y
SLEEP
W
EE
K
E
N
D
-
SL
EE
P
E
R
S
E
T
A
L
A
R
M
1
2
T
I
M
E
C
L
O
C
K
C
D
/
R
A
D
I
O
O
F
F
P
R
O
G
R
A
D
I
O
P
R
E
S
E
T
VO
LU
M
E
2
1
D
I
G
I
T
A
L
R
A
D
I
O
P
L
A
Y
/P
A
U
S
E
S
E
T
D
A
Y
SL
EEP
W
E
E
K
E
N
D
-
SL
EE
P
ER
S
E
T
A
L
A
R
M
1
2
T
I
M
E
C
L
O
C
K
C
D
/
R
A
D
I
O
O
F
F
P
R
O
G
R
A
D
I
O
P
R
E
S
E
T
V
O
L
U
M
E
2
1
A
L
A
R
M
1
M
O
D
E
/
O
F
F
C
D
/
T
U
N
IN
G
S
E
A
R
C
H
R
A
D
I
O
O
N
R
C
D
A
V
O
Y
O
O
O
RADIO ALARM
To improve reception
English
FM: Extend the pigtail at the back of the set fully for optimum
reception.
MW/ LW:Uses a built-in aerial. Direct the aerial by adjusting the
position of the set.
4. Press CD/RADIO OFF 9 to switch off the radio.
™ disappears from the display.
Programming radio stations
You can store up to a total of 30 radio stations in the memory
1. Tune to your desired station (see Tuning to radio stations).
2. Press PROG to activate programming.
™ Display: flashes.
3. Press PRESET 4 or 3 once or more to allocate a number from
1 to 30 to this station.
4. Press PROG again to confirm the setting.
™ Display: disappears, the preset number and the
frequency of the preset station are shown.
5. Repeat the above four steps to store other stations.
• You can overwrite a present station by storing another
frequency in its place.
SETTING THE ALARM TIME
General
Two different alarm times ALARM 1 or 2 can be set in the CD,
radio or buzzer modes. This can be useful when for example you
need to be woken up at a different time during the week and at the
weekend.
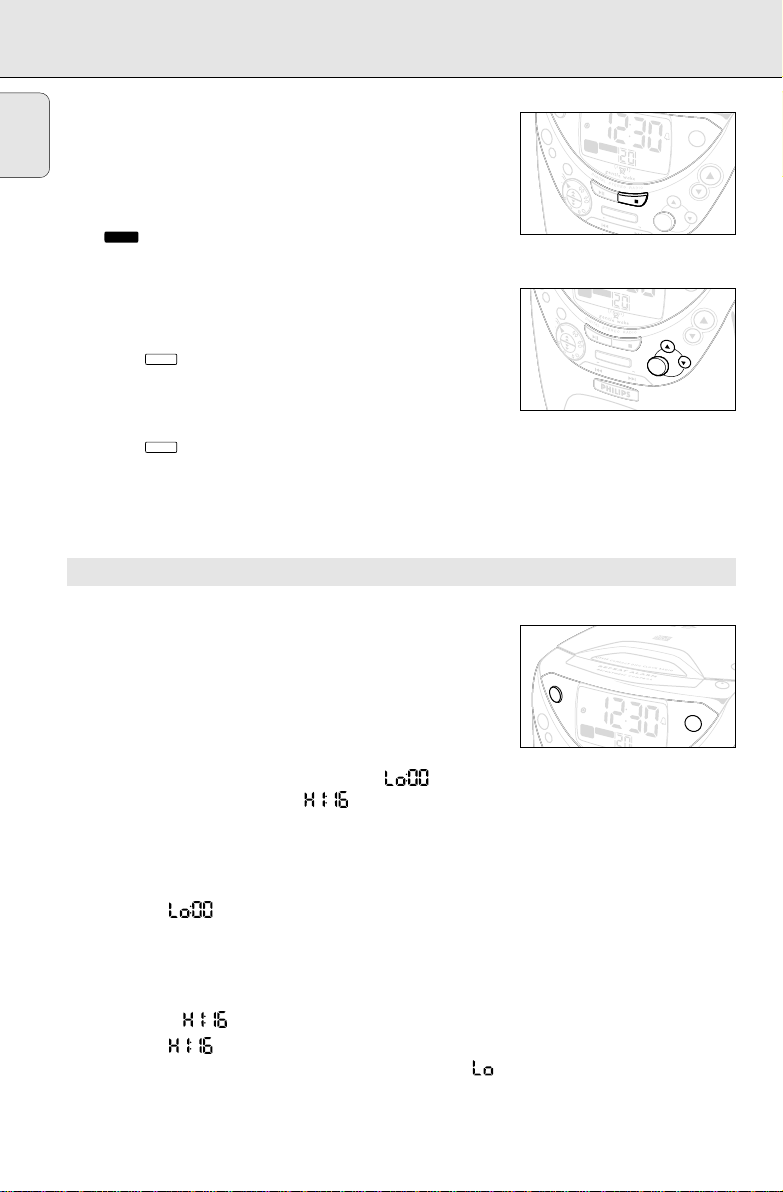
Gentle wake volume
A sure way of getting up in the mornings, the gentle wake
volume for the alarm begins from zero volume ( ) and
gradually increases to a high of 16 ( ). If,
however, you wish to changes the default volume settings for the
buzzer, radio or CD alarm:
1. In the standby mode, press ALARM 1 MODE/OFF or
ALARM 2 MODE/OFF once.
2. As soon as ‘
appears, press 7 or 8 once or more until
’
you reach the desired level (0-32). This sets the starting volume
of your alarm.
3. To set the maximum volume for your alarm, press
ALARM 1 MODE/OFF or ALARM 2 MODE/OFF again to
change to the display.
4. As soon as ‘
desired volume level (a number equal or greater than the ,
low setting).
8
appears, press 7 or 8 until you reach the
’
W
W
E
E
EK
E
SL
SL
E
E
E
A
SLEEP
D
SLEEP
IO
S
S
E
E
T
T
D
D
A
A
Y
Y
S
S
E
E
T
T
A
A
L
L
A
A
R
R
M
M
1
1
2
2
T
T
I
I
M
M
C
C
E
E
L
L
O
O
C
C
K
K
P
P
L
L
A
A
Y
Y
/P
/P
A
A
U
U
S
S
E
E
C
C
D
D
/
R
/
R
A
A
D
D
I
I
D
I
R
G
A
I
T
D
A
I
O
L
R
O
A
N
D
I
O
C
D
/
T
U
N
I
N
G
S
E
A
R
C
A
A
L
L
A
A
R
R
M
M
M
M
O
1
O
1
D
D
E
E
/
O
/
O
F
F
F
F
1
1
K
E
E
N
N
D
D
-
-
E
P
P
E
ER
R
Z
Z
R
C
A
SLEEP
D
SLEEP
D
IO
S
S
E
E
T
T
D
D
A
Z
Z
F
M
O
O
O
O
F
F
F
F
H
F
M
VO
V
O
L
U
LU
M
M
E
E
R
R
A
A
D
D
I
O
I
O
P
P
R
R
E
E
S
E
S
E
T
T
P
P
R
R
O
O
G
G
O
P
O
E
P
N
E
N
•
C
•
L
C
L
A
L
A
R
M
1
M
O
D
E
/
O
F
F
2
2
Z
Z
V
Page 9
Note:
l
l
F
M
Z
Z
Z
Z
RADIO
C
D
PLA
Y
/P
A
U
SE
SET DAY
S
L
E
E
P
WEEKEND SLEEPER
A
L
A
R
M
1
M
O
D
E
/
O
F
F
S
E
T
A
L
A
R
M
1
2
T
I
M
E
C
L
O
C
K
CD
/RADIO O
FF
R
A
D
I
O
P
R
E
S
E
T
VO
LUM
E
2
1
D
I
G
I
T
A
L
R
A
D
I
O
PLA
Y
/P
A
U
SE
SET DAY
S
L
E
E
P
WEEKEND SLEEPER
A
L
A
R
M
1
M
O
D
E
/
O
F
F
S
E
T
A
L
A
R
M
1
2
T
I
M
E
C
L
O
C
K
CD
/RADIO
O
FF
R
A
D
I
O
P
R
E
S
E
T
V
O
LU
ME
2
1
O
P
E
N
•
C
L
O
S
E
O
P
E
N
•
C
L
O
S
E
A
L
A
R
M
1
M
O
D
E
/
O
F
F
C
D
/
T
U
R
A
D
I
O
O
N
• The gentle wake volume settings do not affect normal CD
and radio playback volume level.
• It is not possible to review the gentle wake volume range
during the active alarm call as pressing ALARM 1 MODE/OFF
or ALARM 2 MODE/OFF cancels the alarm completely.
SETTING ALARM1 OR 2
1. Turn the SET control to ALARM 1 or 2.
2. Press 7, 8 to adjust both the hours and minutes:
– With your finger held down on 7 or 8 respectively, the time
will increase or decrease rapidly and continuously from
minutes to hours.
– Press 7 or 8 briefly and repeatedly to adjust the time slowly,
minute by minute.
3. Release 7 or 8 when you have reached the correct alarm time
setting.
4. Turn the SET control back to CLOCK.
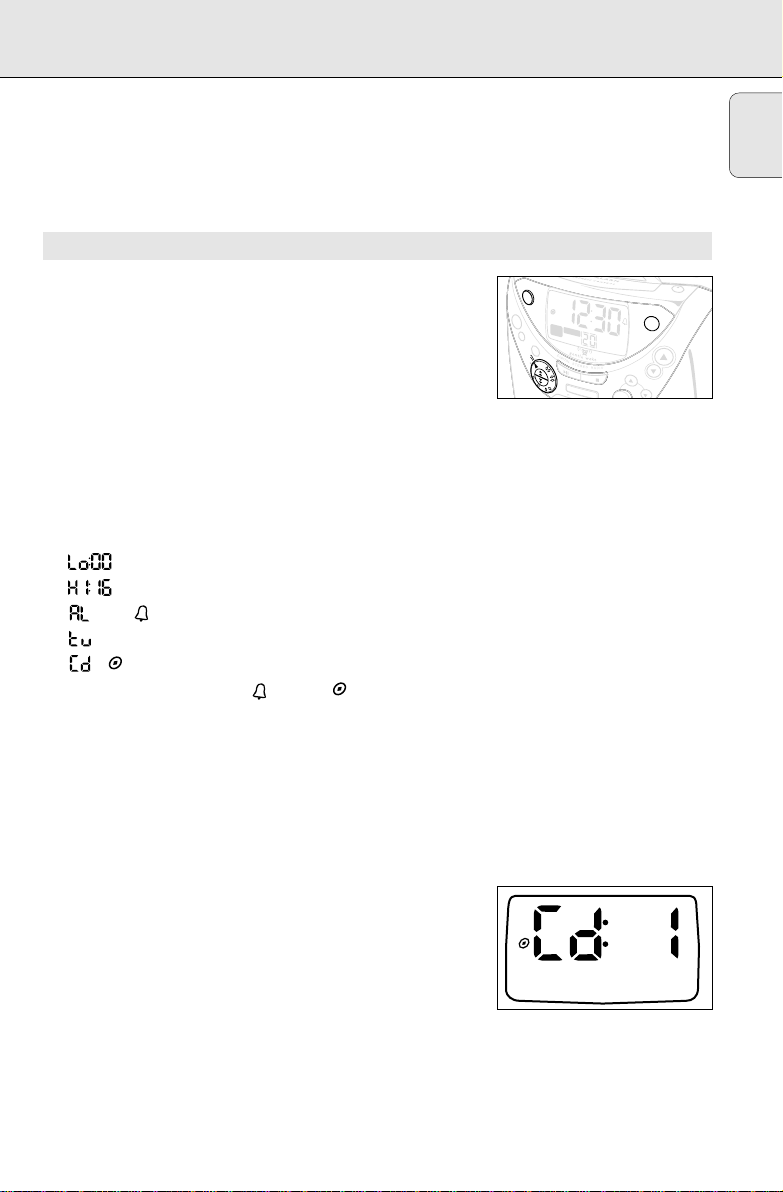
5. Select your choice of alarm mode by pressing ALARM 1
MODE/OFF or ALARM 2 MODE/OFF more than once.
™ The alarm mode display sequence is shown:
• : default volume level for start gentle of wake alarm;
• : default maximum volume level for gentle wake alarm;
• with for buzzer alarm;
• with for radio alarm;
• : and a track number 1-99 is shown.
• Alarm off: display without , or .
6. If you have selected the CD alarm, please read the next chapter
CD alarm mode: Selecting a CD track on further options.
CD alarm mode: Selecting a CD track
You can programme and select a CD track number between 1-99,
when the set is in the standby or radio playback mode.
However, if the track number programmed does not exist on your
CD, the first track of the CD will be played during the alarm call.
1. Insert a CD into the CD holder.
2. Press ALARM 1 MODE/OFF or ALARM 2 MODE/OFF until
the CD and track number display is shown.
3. As soon as the CD alarm display appears, press 7 or 8 until the
desired track number is shown.
™ The display returns to standby clock time.
4. To review your programmed track number, press
ALARM 1 MODE/OFF or ALARM 2 MODE/OFF again
repeatedly until the CD alarm display is shown.
ALARM
English
9
Page 10
ALARM
l
F
M
Z
Z
Z
Z
RADIO
C
D
P
LA
Y
/P
A
U
SE
SET DAY
S
L
E
E
P
WEEKEND SLEEPER
A
L
A
R
M
1
M
O
D
E
/
O
F
F
S
E
T
A
L
A
R
M
1
2
T
I
M
E
C
L
O
C
K
CD
/RAD
IO OFF
R
A
D
I
O
P
R
E
S
E
T
VO
LU
ME
2
1
D
I
G
I
T
A
L
R
A
D
PLA
Y
/P
A
U
SE
SET DAY
S
L
E
E
P
WEEKEND SLEEPER
A
L
A
R
M
1
M
O
D
E
/
O
F
F
S
E
T
A
L
A
R
M
1
2
T
I
M
E
C
L
O
C
K
CD
/RADIO
O
FF
R
A
D
I
O
P
R
E
S
E
T
VO
LUM
E
2
1
O
P
E
N
•
C
L
O
S
E
O
P
E
N
•
C
L
O
S
E
A
L
A
R
M
1
M
O
D
E
/
O
F
F
R
A
D
I
O
O
N
O
O
Note:
English
– The BUZZER alarm option will automatically replace the
CD alarm if you have:
– inserted a CD incorrectly;
– inserted a damaged CD;
– forgotten to insert any CD;
– pressed open the CD door.
SWITCHING OFF THE ALARM
There are three ways to switch off the alarm. Unless you cancel
the alarm completely, the 24 HOUR ALARM RESET will be
automatically selected after 59 minutes, from the time your alarm
goes first off.
24 hour alarm reset
If you want the alarm mode to be stopped immediately but also
wish to retain the same alarm setting for the following day:
• Press 24 HR RESET or CD/RADIO OFF 9.
™ You will hear a beep tone confirming 24 hour reset
activation.
Canceling the alarm completely
To cancel the set alarm time before it goes off, or during the alarm
call:
• Press ALARM 1 MODE/OFF or ALARM 2 MODE/OFF once or
more until the selected alarm indicator disappears from the
display.
Repeat alarm
This will repeat your alarm call at 9 minutes intervals.
• During the alarm call,
press REPEAT ALARM/
• Repeat if desired (up to a maximum of 59 minutes).
Notes:
• The selected alarm mode , or in the display will
flash throughout the repeat alarm duration.
• If you are using the CD alarm mode, CD playback resumes at
the point interrupted by the repeat alarm.
• During the CD alarm, CD playback continues for 59 minutes
unless the alarm is stopped.
BRIGHTNESS CONTROL.
O
P
O
E
P
N
E
N
•
C
•
L
C
A
A
L
L
A
A
R
R
M
M
M
M
O
1
O
1
D
D
E
E
/
O
/
O
F
F
F
F
1
1
W
W
E
E
E
E
K
K
EN
EN
D
SL
D
S
-
-
L
EE
E
EP
P
E
E
R
R
Z
Z
R
C
A
SLEEP
D
SLEEP
D
IO
Z
Z
F
S
S
E
E
T
T
D
D
A
A
Y
Y
M
L
A
L
A
R
M
1
M
O
D
E
/
O
F
F
2
2
V
V
O
O
L
U
L
U
M
M
E
E
10
Page 11

ALARM SLEEP
SLEEP
ZZZZZZZ
Z
Z
Z
Z
Z
A
O
A
L
WEEKEND SLEEPER
This feature deactivates the alarm every Saturday and Sunday and
resumes the alarm function Monday to Friday. Make sure, however,
that you have set the day first (see chapter: SETTING THE DAY).
1. Press WEEKEND SLEEPER once or more until. or
appears for one or both alarms.
2. To cancel the weekend sleeper function, repeat step 1 until
and/ or disappears from the display.
SLEEP
About Sleep
The CD clock radio has a built-in sleep timer which enables the set
to be automatically switched off during radio or CD playback after a
set period of time. There are four sleep times before the set turns
itself off: 10, 30, 60, 90 minutes and off.
Setting Sleep
1. Press the PLAY•PAUSE or RADIO ON/ BAND.
• For the CD mode, make sure you have inserted a disc first.
2. Select your slumber time by pressing SLEEP once or more until
the desired sleep time is shown.
3. To cancel the sleep function, you can either:
• Press SLEEP once or more until disappears.
• Press CD/ RADIO OFF 9.
• Press REPEATALARM/
BRIGHTNESS CONTROL.
L
A
A
R
R
M
M
M
M
O
1
O
1
D
D
E
E
/
O
/
O
F
F
F
F
1
1
W
W
E
EE
E
K
K
E
EN
N
D
SL
D
S
-
-
L
E
EE
E
PE
P
E
R
R
Z
Z
R
C
A
SLEEP
D
SLEEP
D
IO
S
S
E
E
T
T
D
D
A
A
Y
Y
S
S
E
E
T
T
A
A
L
L
A
A
R
R
M
M
1
1
2
2
T
T
I
I
M
M
C
C
E
E
L
L
O
O
C
C
K
K
P
P
L
L
A
A
Y
Y
/P
/P
A
A
U
U
S
S
E
E
D
R
I
G
A
I
D
T
A
I
O
L
A
L
A
R
M
1
M
O
D
E
/
O
F
F
2
2
Z
Z
F
M
C
C
D
D
/
R
/
R
A
A
D
D
I
O
I
O
O
O
F
F
F
F
R
O
A
N
D
I
FMRADIO
SLEEP
V
V
O
O
L
LU
R
R
A
A
D
D
I
O
IO
P
P
R
R
E
E
S
E
S
E
T
T
English
U
M
M
E
E
11
Page 12
MAINTENANCE
English
CD PLAYER AND CD HANDLING
• The lens of the CD player should never be touched!
• Sudden changes in the surrounding temperature can cause
condensation to cloud over on the lens of your CD player.
Playing a CD is then not possible. Do not attempt to clean the
lens but leave the set in a warm environment until the
moisture evaporates.
• Always shut the CD door to keep the CD holder dust-free.To
clean, dust the holder with a soft dry cloth.
• To take a CD out of its box, press the centre spindle while
lifting the CD. Always pick up the CD by the edge and replace
the CD back in its box after use to avoid scratching and dust.
• To clean the CD, wipe in a straight line from the centre
towards the edge using a soft, lint-free cloth. Do not use
cleaning agents as they may damage the disc.
• Never write on a CD or attach any stickers to it.
GENERAL
• If you do not intend to use your CD clock radio for a long time,
withdraw the mains plug from the wall socket.
• Do not expose the set or CDs to humidity, rain, sand, or
excessive heat caused by heating equipment or direct sunlight.
• To clean the set, use a soft, slightly dampened chamois leather.
Do not use any cleaning agents containing alcohol, spirits,
ammonia or abrasives as these may harm the housing.
X
12
Page 13

TROUBLESHOOTING
If a fault occurs, first check the points listed below before taking the set for repair.
If you are unable to remedy a problem by following these hints, consult your dealer or service centre.
WARNING:Do not open the set as there is a risk of electric shock! Under no
circumstances should you try to repair the set yourself, as this would
invalidate the guarantee.
Problem Possible cause Remedy
No sound Volume not adjusted Adjust the VOLUME
No reaction to any operation Electrostatic discharge Disconnect the set from the mains
of the keys supply and reconnect the set after
5 minutes.
CD PLAYER
CD playback does not work CD badly scratched or dirty Replace/ clean CD
Laser lens steamed up Wait until lens has acclimatized
Laser lens dirty Clean lens by playing a CD lens
cleaning disc
CD-R(W) is non-finalized Use a finalized CD-R(W)
RADIO
Occasional crackling sound Weak signal Extend pigtail fully
during FM broadcast
Continuous crackling/ Electrical interference from TV's, Move set away from other
hiss disturbance computers, fluorescent lamps, etc. electrical equipment
during MW/ LW broadcast
ALARM
The alarm does not function Alarm time not set Set alarm time
Alarm mode not selected See chapter on Setting ALARM 1
or ALARM 2 time
Volume too low for radio/ CD/ See chapter on
buzzer alarm mode Gentle wake volume
The Weekend-Sleeper does Day selection not set/ incorrect See chapter on SETTING THE DAY
not function Weekend-Sleeper not set Set Weekend-Sleeper
English
This product complies with the radio interference requirements of the European Union.
The type plate is located on the bottom of the set.
13
Page 14

COMMANDES
PANNEAU SUPERIEUR ET FRONTAL
1 WEEKEND SLEEPER –
pour désactiver le réveil 1 ou 2 pour le week-end
2
Français
ALARM 1 MODE/OFFouALARM
MODE/OFF –
pour régler/revoir/éteindre le réveil 1 ou 2
3 AFFICHEUR –
indique les heures d'horloge/ réveil ainsi que
l'état de l'appareil
4
REPEATALARM/
– pour éteindre le réveil pendant une durée de
9 minutes;
– pour changer la luminosité de l'éclairage de
l’afficheur
5 24 HR RESET –
pour arrêter le réveil actif pendant 24 heures
6
OPEN•CLOSE
pour ouvrir/fermer le compartiment du CD
7 SLEEP –
pour ajuster la durée de sommeil
8 SET DAY –
pour régler le jour pour la fonction sommeil
week-end
9 Sélecteur SET –
pour régler l'heure de
ALARM 1/ 2/ TIME/ CLOCK
BRIGHTNESS CONTROL
–
0 7, 8
– pour ajuster les heures d'horloge/réveil;
– pour régler le niveau de volume minimum et
2
maximum pour se réveiller doucement pour le
réveil 1 ou 2;
– pour sélectionner une plage CD pour le réveil 1
ou 2
! PLAY•PAUSE 2;–
pour commencer/interrompre la lecture du CD
@ RADIO ON/ BAND
– pour allumer la radio;
– pour sélectionner la bande d'onde FM/ MW/ LW
# CD/TUNING SEARCH ∞, §
– pour sauter des plages CD/rechercher un
passage particulier;
– pour rechercher des stations de radio
$ CD/RADIO OFF 9
– pour arrêter la fonction CD/Radio/Sleep;
– pour arrêter le réveil actif pendant 24 heures
% PROG –
pour programmer les stations radio préréglées
^ RADIO PRESET 4, 3 –
pour sélectionner une station de radio
préréglée
& VOLUME 4,3 – pour ajuster le niveau de son
* Cordon d'alimentation –
pour l’alimentation secteur
( Antenne en enroulement –
antenne pour améliorer la réception FM
ATTENTION
L’utilisation des commandes ou réglages ou le non-respect des procédures ciincluses peuvent se traduire par une exposition dangereuse à l’irradiation.
Informations sur l’environnement
Tous les matériaux d'emballage inutiles ont été évités. Nous avons fait le maximum pour autoriser
la séparation des matériaux d’emballage en trois catégories: le carton (boîte), le polystyrène
expansé (tampon) et le polyéthylène (sachets, mousse de protection).
Votre équipement est constitué de matériaux recyclables, à condition d’être démonté par
une firme spécialisée. Veuillez observer les règles locales en vigueur pour le rebut des
matériaux d’emballage, les piles usées et les anciens équipements.
14
Page 15

ALIMENTATION SECTEUR ET MODE DE DEMONSTRATION
F
M
Z
Z
Z
Z
RADIO
C
D
PL
A
Y
/P
A
U
S
E
SET DAY
S
L
E
E
P
WEEKEND SLEEPER
A
L
A
R
M
1
M
O
D
E
/
O
F
F
S
E
T
A
L
A
R
M
1
2
T
I
M
E
C
L
O
C
K
CD/RADIO
OFF
R
A
D
I
O
P
R
E
S
E
T
VO
LUM
E
2
1
D
I
G
I
T
A
L
R
A
D
I
O
P
L
A
Y
/P
A
U
S
E
SET DAY
S
L
E
E
P
WEEKEND SLEEPER
A
L
A
R
M
1
M
O
D
E
/
O
F
F
S
E
T
A
L
A
R
M
1
2
T
I
M
E
C
L
O
C
K
CD/RAD
IO
O
FF
R
A
D
I
O
P
R
E
S
E
T
VO
LUM
E
2
1
O
P
E
N
•
C
L
O
S
E
O
P
E
N
•
C
L
O
S
E
A
L
A
R
M
1
M
O
D
E
/
O
F
F
C
D
R
A
D
I
O
O
N
1. Vérifiez que la tension secteur indiquée sur la plaque
signalétique sous l'appareil correspond à la tension de secteur
local. Si ce n'est pas le cas, consultez votre revendeur ou le service
après-vente.
2. Branchez la fiche d'alimentation dans la prise murale.
L'alimentation est maintenant sous tension et l’afficheur indique le
PHILIPS demo mode.
™ PH..IL ..IPS défile de façon continue à l'afficheur.
• Appuyez sur chaque bouton de fonction (sauf REPEAT ALARM/
BRIGHTNESS CONTROL
sur l’appareil) pour annuler le mode de
démonstration.
3. Pour couper entièrement l'alimentation secteur, retirez la fiche
secteur de la prise murale.
MEMOIRE AUTONOME
La mémoire autonome permet commodément de mémoriser vos
réglages de jour, de réveil et d’horloge pendant 3 minutes au maximum
en cas de panne d’alimentation, par exemple une panne de courant.
Le radio-réveil de CD complet ainsi que le rétro-éclairage sont mis
hors service. Dès que l’alimentation secteur est rétablie, l’afficheur
indiquera l’heure exacte.
• Si l’alimentation revient après 3 minutes,
PHILIPS demo mode
apparaît et il vous faudra réintroduire le jour et l’heure d’horloge.
INSTALLATION
Français
FONCTIONS DE BASE
Luminosité d'éclairage
1. Contrôlez si le sélecteur SET se trouve en position CLOCK.
2. Appuyez une ou plusieurs fois sur REPEAT ALARM/
CONTROL
.
– La luminosité de l’afficheur change dans l’ordre suivant:
LOW ™ MEDIUM ™ BRIGHT ™ LOW...
Volume
Appuyez sur VOLUME 4 ou 3 pour régler le niveau de volume. Le
niveau de volume vo: est indiqué par un chiffre de 0 à 32.
BRIGHTNESS
15
Page 16
HORLOGE LECTURE D’UN CD
CD
CD
F
M
Z
Z
Z
Z
R
A
D
IO
C
D
P
L
A
Y
/P
A
U
S
E
S
E
T
D
A
Y
SLEEP
W
E
E
K
EN
D
-
SL
E
E
P
ER
S
E
T
A
L
A
R
M
1
2
T
I
M
E
C
L
O
C
K
C
D
/
R
A
D
I
O
O
F
F
P
R
O
G
R
A
D
IO
P
R
E
S
E
T
V
O
L
U
M
E
2
1
D
I
G
I
T
A
L
R
A
D
I
O
P
L
A
Y
/P
A
U
S
E
S
E
T
D
A
Y
SLEEP
W
E
E
K
EN
D
-
SL
E
E
P
E
R
S
E
T
A
L
A
R
M
1
2
T
I
M
E
C
L
O
C
K
C
D
/
R
A
D
I
O
O
F
F
P
R
O
G
R
A
D
IO
P
R
E
S
E
T
V
O
L
U
M
E
2
1
A
L
A
R
M
1
M
O
D
E
/
O
F
F
C
D
/
T
U
N
I
N
G
S
E
A
R
C
H
R
A
D
I
O
O
N
1
D
REGLAGE DE L'HORLOGE
L’heure est affichée sur la base de 24 heures.
1. Tournez le sélecteur SET sur TIME.
2. Appuyez sur 7, 8 pour ajuster les heures et les minutes.
Français
™ Lorsque 7 ou 8 est enfoncé, l'afficheur indiquera un défilement
rapide et continu avant/ arrière des minutes et des heures.
™ Appuyez brièvement et plusieurs fois sur 7 ou 8 pour régler
l'heure lentement minute par minute.
3. Tournez le sélecteur SET sur CLOCK lorsque vous aurez obtenu le
réglage correct.
REGLAGE DU JOUR
Le réglage du jour vous permet d’utiliser la fonction WEEKEND
SLEEPER (sommeil week-end). Si vous essayez de régler la fonction
WEEKEND SLEEPER avant de procéder au réglage de jour,
' ' clignotera brièvement sur l’affichage pour vous rappeler de
régler d’abord le jour correct.
1. Appuyez sur SET DAY.
2. Lors de l’affichage du jour, appuyez à nouveau une ou plusieurs fois
sur SET DAY pour sélectionner le jour indiqué par un chiffre
'' 1-7 (lundi-dimanche).
– L'afficheur repassera maintenant à l'heure d'horloge.
LECTURE D’UN CD
1. Appuyez sur OPEN•CLOSE pour ouvrir la porte CD.
2. Introduisez un CD avec la face imprimée orientée vers le haut et
appuyez sur la porte pour fermer.
3. Appuyez sur PLAY/PAUSE 2; pour commencer la lecture.
• L’indicateur CD , ’ ‘ et le nombre total de plages
apparaissent, suivi par le numéro de la plage courante et tout de
suite après par l’heure de l’horloge.
• ' ' sera affiché si vous n'avez pas fermé la porte CD ou si
vous ouvrez la porte CD pendant la lecture.
• ' ' sera affiché si vous n’avez pas introduit de CD ou si vous
l’avez introduit incorrectement.
• ' ' sera affiché si le CD-R(W) n’est pas bien fini.
• ' ' indique une erreur d’utilisation de l’appareil.
™ L’indicateur CD est affiché lors de la lecture CD.
W
W
E
E
E
E
K
K
E
E
N
N
D
S
D
SL
-
L
-
EE
E
E
P
P
E
ER
R
Z
Z
R
C
A
SLEEP
D
SLEEP
D
IO
F
S
S
E
E
T
T
D
D
A
A
Y
Y
S
S
E
E
T
T
A
A
L
L
A
A
R
R
M
M
1
1
2
2
T
T
I
I
M
M
C
C
E
E
L
L
O
O
C
C
K
K
A
A
L
L
A
A
R
R
M
M
M
M
O
1
O
1
D
D
E
E
/
O
/
O
F
F
F
F
1
1
WEEKEND-
WEEKEND-
SLEEPER
SLEEPER
Z
Z
C
S
S
L
L
E
E
E
E
P
P
SET DAY
SET DAY
S
S
E
E
T
T
A
A
L
L
A
A
R
R
M
M
1
1
2
2
T
T
I
I
M
M
C
C
E
E
L
L
O
O
C
C
K
K
M
P
P
L
L
A
A
Y
Y
/P
/P
A
A
U
U
S
S
E
E
C
C
D
D
/
R
/
R
A
A
D
D
I
O
I
O
O
O
F
F
F
F
D
I
R
G
A
I
T
D
A
I
O
L
R
O
A
N
D
I
O
C
D
/
T
U
N
I
N
G
S
E
A
R
C
H
RADIO
D
F
M
PLA
PLA
Y/P
Y/PA
A
U
U
SE
S
E
CD/RAD
C
D/R
ADIO
IO
OFF
O
FF
D
I
R
G
A
I
T
D
A
I
O
L
R
O
A
N
D
I
O
C
A
L
A
R
M
1
M
O
D
E
/
O
F
F
2
2
Z
Z
V
V
O
O
LU
L
U
M
M
E
E
R
R
A
A
D
D
I
O
IO
P
P
R
R
E
E
S
E
S
E
T
T
P
P
R
R
O
O
G
G
O
P
O
E
P
N
E
N
•
C
•
L
C
O
L
S
O
E
S
E
A
L
A
R
M
1
M
O
D
E
/
O
F
F
2
2
Z
Z
V
VOLUM
OLU
M
E
E
R
R
A
A
D
D
I
O
I
O
P
P
R
R
E
E
S
E
S
E
T
T
16
Page 17

LECTURE D’UN CD RADIO
RADIO
CD
P
L
A
Y
/P
A
U
S
E
D
A
Y
S
E
T
A
L
A
R
M
1
2
T
I
M
E
C
L
O
C
K
C
D
/
R
A
D
I
O
O
F
F
P
R
O
G
R
A
D
IO
P
R
E
S
E
T
V
O
L
U
M
E
D
I
G
I
T
A
L
R
A
D
I
O
P
L
A
Y
/P
A
U
S
E
D
A
Y
S
E
T
A
L
A
R
M
1
2
T
I
M
E
C
L
O
C
K
C
D
/
R
A
D
I
O
O
F
F
P
R
O
G
R
A
D
I
O
P
R
E
S
E
T
V
O
L
U
M
E
C
D
/
T
U
N
I
N
G
S
E
A
R
C
H
R
A
D
I
O
O
N
R
A
C
D
4. Réglez le son à laide de VOLUME 4 ou 3.
5. Pour interrompre, appuyez sur PLAY•PAUSE2;.
• Le numéro de la plage courante apparaît brièvement avant de
repasser a l’heure de l’horloge avec qui clignotent pendant
l’interruption.
6. Appuyez à nouveau sur PLAY•PAUSE2; pour reprendre la lecture.
7. Appuyez sur CD/RADIO OFF 9 pour arrêter la lecture.
™ L’indicateur CD disparaît de l'afficheur et le lecteur de CD s'éteint.
™ L’appareil passe automatiquement en mode de veille avec affichage
de l’heure de l’horloge à la fin de la dernière plage.
Sélection d’une autre plage
Le numéro de la plage apparaît brièvement sur l’afficheur lorsque vous
appuyez sur ∞ ou § pour sauter des plages.
• Appuyez une ou plusieurs fois sur § pour passer à une des plages
suivantes.
• Appuyez plusieurs fois sur ∞ pour retourner à une des plages
précédentes.
• Appuyez une fois sur ∞ et la lecture recommence au début de la
plage en cours.
Recherche d’un passage au sein d’une plage
1. Pendant la lecture, maintenez enfoncé ∞ ou §.
™ La lecture du CD se fait à vitesse rapide et à volume réduit;
l'afficheur indiquera ’ ’ ainsi que le numéro de plage courant.
2. Relâchez ∞ ou § lorsque vous reconnaîtrez le passage désiré.
™ La lecture de CD habituelle reprendra et l'affichage de l’heure de
l'horloge réapparaîtra.
Français
RADIO
1. Appuyez sur RADIO ON/ BAND pour passer au mode radio.
™ ’ ’ et apparaissent sur l'afficheur suivi par la bande
d’onde sélectionnée en dernier et les détails de la station préréglée.
2. Appuyez à nouveau sur RADIO ON/ BAND si vous désirez changer
la bande d’onde.
3. Réglez le son à laide de VOLUME 4 ou 3.
Syntonisation automatique
• Appuyez sur ∞ ou § pendant une seconde ou plus pour rechercher
la station désirée.
™ La radio se règle automatiquement sur un émetteur à réception
suffisante. L'afficheur indique ’ ’ pendant la syntonisation
automatique.
SLEEP
D
SLEEP
IO
Z
Z
F
S
S
E
E
T
T
D
D
A
A
Y
Y
S
S
E
E
T
T
A
A
L
L
A
A
R
R
M
M
1
1
2
2
T
T
I
I
M
M
C
C
E
E
L
L
O
O
C
C
K
K
M
P
P
L
L
A
A
Y
Y
/P
/P
A
A
U
U
S
S
E
E
C
C
D
D
/
R
/
R
A
A
D
D
I
O
I
O
O
O
F
F
F
F
D
I
R
G
A
I
T
D
A
I
O
L
R
O
A
N
D
I
O
C
D
/
T
U
N
I
N
G
S
E
A
R
C
H
V
V
O
O
L
U
L
U
M
M
E
E
R
R
A
A
D
D
I
O
I
O
P
P
R
R
E
E
S
E
S
E
T
T
P
P
R
R
O
O
G
G
17
Page 18

RADIO REVEIL
PROG
PROG
RADIO
F
M
Z
Z
Z
Z
R
A
D
IO
C
D
P
L
A
Y
/
P
A
U
S
E
S
E
T
D
A
Y
SLEEP
W
EE
K
EN
D
-
SL
EE
PE
R
S
E
T
A
L
A
R
M
1
2
T
I
M
E
C
L
O
C
K
C
D
/
R
A
D
I
O
O
F
F
P
R
O
G
R
A
D
IO
P
R
E
S
E
T
V
O
LU
M
E
2
1
D
I
G
I
T
A
L
R
A
D
I
O
P
L
A
Y
/P
A
U
S
E
S
E
T
D
A
Y
SLEEP
W
E
E
K
E
N
D
-
SL
E
E
P
ER
S
E
T
A
L
A
R
M
1
2
T
I
M
E
C
L
O
C
K
C
D
/
R
A
D
I
O
O
F
F
P
R
O
G
R
A
D
I
O
P
R
E
S
E
T
VO
L
U
M
E
2
1
A
L
A
R
M
1
M
O
D
E
/
O
F
F
C
D
/
T
U
N
I
N
G
S
E
A
R
C
H
R
A
D
I
O
O
N
R
C
D
A
V
O
Y
O
O
O
Syntonisation manuelle
• Maintenez enfoncé ∞ ou § pour rechercher une station.
• Relâchez lorsque la fréquence sur l’afficheur s’approche de la
fréquence désirée.
• Appuyez une ou plusieurs fois brièvement sur ∞ ou § pour une
Français
syntonisation plus précise.
Pour améliorer la réception
FM: Étendez entièrement le fil en enroulement qui se trouve à l'arrière
de l'appareil pour obtenir une réception optimale.
MW/ LW:Utilise une antenne incorporée. Dirigez l'antenne en réglant
la position de l'appareil.
4. Appuyez sur CD/RADIO OFF 9 pour éteindre la radio.
™ disparaît de l'afficheur.
Programmation des stations radio
Vous pouvez mémoriser jusqu'à 30 stations radio au total.
1. Syntonisez la station désirée (Voir Syntonisation des stations
radio).
2. Appuyez sur PROG pour activer la programmation.
™ Afficheur: clignote.
3. Appuyez une ou plusieurs fois sur PRESET 4 ou 3 pour attribuer
un numéro de 1 à 30 à cette station.
4. Appuyez à nouveau sur PROG pour confirmer le réglage.
™ Afficheur: disparaît, le numéro préréglé et la fréquence de la
station préréglée apparaissent brièvement.
5. Répétez les quatre opérations précédentes pour mémoriser d'autres
stations.
• Vous pouvez "écraser" une station préréglée en mémorisant une
autre fréquence à sa place.
A
SLEEP
D
SLEEP
IO
S
S
E
E
T
T
D
D
A
A
Y
Y
S
S
E
E
T
T
A
A
L
L
A
A
R
R
M
M
1
1
2
2
T
T
I
I
M
M
C
C
E
E
L
L
O
O
C
C
K
K
F
P
P
L
L
A
A
Y
Y
/P
/P
A
A
U
U
S
S
E
E
C
C
D
D
/
R
/
R
A
A
D
D
I
O
I
O
O
O
D
I
R
G
A
I
T
D
A
I
O
L
R
O
A
N
D
I
O
C
D
/
T
U
N
I
N
G
S
E
A
R
C
H
Z
Z
M
F
F
F
F
V
V
O
O
LU
LU
M
M
E
E
R
R
A
A
D
D
I
O
IO
P
P
R
R
E
E
S
E
S
E
T
T
P
P
R
R
O
O
G
G
REGLAGE DE L'HEURE DE REVEIL
Généralités
Il est possible de régler deux heures de réveil différentes (ALARM 1 ou
2) en mode CD, radio ou ronfleur. Ceci peut s'avérer utile, si par exemple,
vous désirez vous réveiller à une heure différente en semaine et le
week-end.
Gentle wake volume (réveil à faible volume)
Pour être sûr d’être réveillé le matin, le niveau de gentle wake volume
commence à zéro ( ) et devient de plus en plus fort jusqu’à
16 ( ). Si vous voulez toutefois modifier les volumes pré-réglés
pour le ronfleur, la radio ou le lecteur CD:
1. En mode de veille, appuyez une fois sur ALARM 1 MODE/OFF ou
ALARM 2 MODE/OFF.
2. Lorsque l’afficheur indique ‘
sur 7 ou 8 jusqu'a ce que vous obteniez le niveau souhaité (0-32).
Cette opération permet de régler le volume minimum du réveil.
18
appuyez une ou plusieurs fois
’
O
P
O
E
P
N
E
N
•
C
•
L
C
A
A
L
L
A
A
R
R
M
M
M
M
O
1
O
1
D
D
E
E
/
O
/
O
F
F
F
F
1
1
W
W
E
E
E
E
K
K
E
E
N
N
D
SL
D
SL
-
-
E
E
E
E
P
P
E
E
R
R
Z
Z
R
C
A
SLEEP
D
SLEEP
D
IO
Z
Z
F
S
S
E
E
T
T
D
D
A
M
L
A
L
A
R
M
1
M
O
D
E
/
O
F
F
2
2
V
Page 19

REVEIL
l
l
F
M
Z
Z
Z
Z
RADIO
C
D
PLA
Y
/PA
U
SE
SET DAY
S
L
E
E
P
WEEKEND SLEEPER
A
L
A
R
M
1
M
O
D
E
/
O
F
F
S
E
T
A
L
A
R
M
1
2
T
I
M
E
C
L
O
C
K
CD/RADIO
O
FF
R
A
D
I
O
P
R
E
S
E
T
VO
LU
M
E
2
1
D
I
G
I
T
A
L
R
A
D
I
O
P
LA
Y/P
A
U
S
E
SET DAY
S
L
E
E
P
WEEKEND SLEEPER
A
L
A
R
M
1
M
O
D
E
/
O
F
F
S
E
T
A
L
A
R
M
1
2
T
I
M
E
C
L
O
C
K
CD/RADIO
O
FF
R
A
D
I
O
P
R
E
S
E
T
VO
LUM
E
2
1
O
P
E
N
•
C
L
O
S
E
O
P
E
N
•
C
L
O
S
E
A
L
A
R
M
1
M
O
D
E
/
O
F
F
C
D
/
T
U
R
A
D
I
O
O
N
3. Pour régler le volume maximum de votre réveil, appuyez à nouveau
sur ALARM 1 MODE/OFF ou ALARM 2 MODE/OFF pour modifier
l'affichage jusqu’à .
4. Dès que ‘
vous obteniez le niveau de volume souhaité (chiffre égal ou inférieur
au réglage minimum .
Remarques:
• Les réglages de
le volume d'écoute de la radio ou du CD.
• Il n'est pas possible de vérifier le réglage de
volume
pendant que le réveil sonne puisque le fait d'appuyer sur
ALARM 1 MODE/OFF ou ALARM 2 MODE/OFF arrête le réveil
complètement.
REGLAGE DU REVEIL 1 OU 2
1. Tournez le sélecteur SETsur ALARM 1 ou 2.
2. Appuyez sur 7, 8 pour ajuster les heures et les minutes.
– Lorsque 7 ou 8 est enfoncé, l'afficheur indiquera un défilement
rapide et continu avant ou arrière des minutes et des heures.
– Appuyez brièvement et plusieurs fois sur 7 ou 8 pour régler
l'heure lentement minute par minute.
3. Relâchez 7 ou 8 dès que vous avez obtenu le réglage correct de
l’heure de réveil.
4. Tournez le sélecteur SETà nouveau sur CLOCK.
5. Sélectionnez le mode de réveil en appuyant plus d’une fois sur
ALARM 1 MODE/OFF ou ALARM 2 MODE/OFF.
™ Les modes de réveil apparaissent sur l’afficheur dans l’ordre
suivant:
• : niveau de volume minimum pré-réglé pour le réveil à
• : niveau de volume maximum pré-réglé pour le réveil à
• avec pour le réveil par le ronfleur;
est affiché, appuyez sur 7 ou 8 jusqu'a ce que
’
gentle wake volume
n'ont aucune incidence sur
faible volume;
faible volume;
gentle wake
Français
• avec pour le réveil par la radio;
• : et un numéro de plage 1-99 est affiché.
• Arrêt de l’alarme: afficheur sans l’indication , ou .
6. Si vous avez sélectionné le réveil par CD, reportez-vous au
chapitre suivant ‘Mode réveil par CD: Sélection d’une plage
CD’ pour plus de détails.
19
Page 20

REVEIL
F
M
Z
Z
Z
Z
RADIO
C
D
PLA
Y
/PA
U
SE
SET DAY
S
L
E
E
P
WEEKEND SLEEPER
A
L
A
R
M
1
M
O
D
E
/
O
F
F
S
E
T
A
L
A
R
M
1
2
T
I
M
E
C
L
O
C
K
CD
/RADIO
O
FF
R
A
D
I
O
P
R
E
S
E
T
VO
LU
M
E
2
1
D
I
G
I
T
A
L
R
A
D
PLA
Y
/P
A
U
SE
SET DA
Y
S
L
E
E
P
WEEKEND SLEEPER
A
L
A
R
M
1
M
O
D
E
/O
F
F
S
E
T
A
L
A
R
M
1
2
T
I
M
E
C
L
O
C
K
CD
/RADIO
O
FF
R
A
D
I
O
P
R
E
S
E
T
VO
LU
M
E
2
1
O
P
E
N
•
C
L
O
S
E
O
P
E
N
•
C
L
O
S
E
A
L
A
R
M
1
M
O
D
E
/
O
F
F
R
A
D
I
O
O
N
O
O
Mode réveil par CD: Sélection d’une plage CD
Lorsque l’appareil se trouve en mode de veille ou pendant que la
radio est allumée, il est possible de programmer et sélectionner un
numéro de plage CD entre 1 et 99. Si vous avez programmé une
plage qui n'existe pas sur le CD, le lecteur lira automatiquement la
Français
première plage du CD à l’heure de réveil.
1. Introduisez un CD dans le compartiment CD.
2. Appuyez sur ALARM 1 MODE/OFF ou ALARM 2 MODE/OFF
jusqu’à ce que l’afficheur de CD indiquant un numéro de plage
apparaisse.
3. Dès que l’afficheur de réveil CD apparaît, appuyez sur 7 ou 8
jusqu’à ce que l’afficheur indique le numéro de la plage désirée.
™ L'afficheur repasse à l'heure d'horloge en mode de veille.
4. Pour vérifier le numéro de plage programmé, appuyez à nouveau
plusieurs fois sur ALARM 1 MODE/OFF ou ALARM 2
MODE/OFF jusqu’à ce que l’afficheur de réveil CD apparaisse.
Remarque:
– Le ronfleur (BUZZER) remplacera automatiquement le réveil par
CD lorsque:
– vous n'avez pas correctement placé le CD;
– vous avez inséré un CD abîmé;
– vous avez oublié d'insérer un CD;
– vous avez ouvert la porte CD.
ARRET DU REVEIL
Vous pouvez arrêter le réveil de trois façons. A moins que vous ne
choisissiez d'arrêter complètement le réveil, L'ARRET PENDANT 24
HEURES sera automatiquement sélectionnée 59 minutes après la
première sonnerie du réveil.
Arrêt pendant 24 heures
Si vous désirez arrêter immédiatement le réveil tout en conservant
le réglage valide pour le lendemain:
• Appuyez sur 24 HR RESET ou CD/RADIO OFF 9.
™ Vous entendrez un bip confirmant l'activation du réveil au bout
de 24 heures.
Arrêt définitif du réveil
Pour arrêter définitivement le réveil avant qu’il ne se mette en
marche ou pendant qu’il est actif:
• Appuyez une ou plusieurs fois sur ALARM 1 MODE/OFF ou
ALARM 2 MODE/OFF jusqu’à ce que l’indicateur de réveil
sélectionné disparaisse de l’afficheur.
O
P
O
E
P
N
E
N
•
C
•
L
C
A
A
L
L
A
A
R
R
M
M
M
M
O
1
O
1
D
D
E
E
/
O
/
O
F
F
F
F
1
1
W
W
E
E
E
E
K
K
E
E
N
N
D
SL
D
SL
-
-
E
E
E
E
P
P
E
E
R
R
Z
Z
R
C
A
SLEEP
D
SLEEP
D
IO
Z
Z
F
S
S
E
E
T
T
D
D
A
A
Y
Y
M
L
A
L
A
R
M
1
M
O
D
E
/
O
F
F
2
2
V
V
O
O
L
U
L
U
M
M
E
E
20
Page 21

REVEIL SLEEP
SLEEP
ZZZZZZZ
Z
l
Z
Z
Z
Z
A
O
A
L
Répétition du réveil
Cette fonction réactive le réveil plusieurs fois à des intervalles de
9 minutes.
• Appuyez sur REPEAT ALARM/
que le réveil se fait entendre.
• Au besoin, répétez (jusqu’à 59 minutes au maximum).
Remarques:
• Le mode de réveil sélectionné , ou clignote sur
l’afficheur pendant tout le temps où la fonction de répétition de
réveil est active.
• Si vous aviez sélectionné le réveil par CD, la lecture de CD
recommence là ou elle a été interrompue au moment que vous
avez appuyé sur REPEAT ALARM.
• Pendant le réveil par CD, la lecture de CD continue pendant
59 minutes sauf si l’alarme est arrêtée.
WEEKEND SLEEPER (SOMMEIL WEEK-END)
Cette fonction désactive le réveil tous les samedis et dimanches et
réactive la fonction de réveil du lundi au vendredi.
Contrôlez d’abord si vous avez réglé le jour (voir le chapitre:
REGLAGE DU JOUR).
1. Appuyez une ou plusieurs fois sur WEEKEND SLEEPER jusqu’à
ce que. ou apparaisse pour un des ou pour les deux
réveils.
2. Pour annuler la fonction sommeil week-end, répétez le pas 1
jusqu’à ce que et/ ou n'apparaisse plus sur l’afficheur.
BRIGHTNESS CONTROL
pendant
Français
SLEEP (FONCTION SOMMEIL)
A propos de la fonction sommeil (SLEEP)
Le radio-réveil CD est doté d’une minuterie incorporée qui permet
d’éteindre automatiquement la radio ou le lecteur de CD au bout
d'une période de temps déterminée. Quatre périodes sont prévues
à cet effet avant que l'appareil s'éteigne automatiquement: 10, 30,
60, 90 minutes et hors service.
Activation de la fonction sommeil (SLEEP)
1. Appuyez sur
PLAY•PAUSE 2;
ou RADIO ON/ BAND.
• En mode CD, contrôlez d’abord si vous avez inséré un CD.
2. Sélectionnez la durée de sommeil en appuyant une ou plusieurs
fois sur SLEEP jusqu’à ce que la durée de sommeil désirée
apparaisse sur l’afficheur.
3. Pour arrêter la fonction sommeil, vous pouvez:
• Appuyer une ou plusieurs fois sur SLEEP jusqu’à ce que
n’apparaisse plus sur l’afficheur;
• Appuyer sur CD/ RADIO OFF 9.
• Appuyez sur REPEAT ALARM/ B
RIGHTNESS CONTROL.
L
A
A
R
R
M
M
M
M
O
1
O
1
D
D
E
E
/
O
/
O
F
F
F
F
1
1
W
W
E
E
E
E
K
K
E
EN
N
D
S
D
SL
-
LE
-
E
E
E
P
PE
E
R
R
Z
Z
R
C
A
SLEEP
D
SLEEP
D
IO
S
S
E
E
T
T
D
D
A
A
Y
Y
S
S
E
E
T
T
A
A
L
L
A
A
R
R
M
M
1
1
2
2
T
T
I
I
M
M
C
C
E
E
L
L
O
O
C
C
K
K
P
P
L
L
A
A
Y
Y
/P
/P
A
A
U
U
S
S
E
E
D
R
I
G
A
I
D
T
A
I
O
L
A
L
A
R
M
1
M
O
D
E
/
O
F
F
2
2
Z
Z
F
M
C
C
D
D
/
R
/
R
A
A
D
D
I
O
I
O
O
O
F
F
F
F
R
O
A
N
D
I
FMRADIO
SLEEP
V
V
O
O
L
U
L
U
M
M
E
E
R
R
A
A
D
D
I
O
I
O
P
P
R
R
E
E
S
E
S
E
T
T
21
Page 22

ENTRETIEN
ENTRETIEN DU LECTEUR DE CD ET DES CDS
• Ne jamais toucher à la lentille du lecteur de CD!
• La lentille risque de s’embuer suite à des changements soudains
Français
de température. A ce moment-là, il n’est pas possible de lire un
CD. N’essayez pas de nettoyer la lentille, mais mettez
l’équipement dans un environnement chaud, de sorte que
l’humidité puisse s’évaporer.
• Fermez toujours la porte CD pour empêcher la poussière de
pénétrer dans le compartiment. Pour nettoyer le compartiment,
utilisez un doux chiffon sec.
• Pour extraire le CD de son coffret, appuyez sur le centre et
soulevez le CD de son logement. Saisissez toujours le CD par le
bord et remettez-le dans son coffret aussitôt après son
utilisation pour éviter de le rayer et pour le protéger contre la
poussière.
• Pour nettoyer le CD, frottez en ligne droite en partant du centre
vers le bord avec un chiffon doux non pelucheux. L’emploi d’un
détergent peut sérieusement endommager le CD.
• Ne faites jamais d’inscription sur le CD et n’y apposez jamais
d’autocollants.
GENERALITES
• Si n'avez pas l'intention d'utiliser le radio-réveil CD pendant
longtemps, débranchez-le de la prise d'alimentation.
• Ne pas exposer l’appareil ni les CDs à l’humidité, à la pluie, au
sable ni à la chaleur excessive causée par un équipement de
chauffage ou les rayons directs du soleil.
• Pour nettoyer l’équipement, utilisez une peau de chamois
humide. Ne pas utiliser de détergents contenant de l’alcool, de
l’ammoniaque, du benzène ou des abrasifs, car ceux-ci peuvent
endommager le boîtier.
X
22
Page 23

DEPANNAGE
Si un défaut apparaît, vérifiez tout d’abord les points listés ci-dessous, avant de porter votre poste
chez un réparateur.S’il ne vous est pas possible de remédier à un problème en suivant ces
instructions, prenez contact avec votre vendeur ou votre service de réparation.
ATTENTION:N’ouvrez pas l’appareil, car il y a risque de chocs électriques!
N’essayez sous aucun prétexte d’effectuer vous-même la réparation, car
ceci annulerait la validité de la garantie.
Problème Cause possible Remède
Pas de son Volume non réglé Réglez le VOLUME
L'appareil ne réagit pas Décharge électrostatique Débranchez la fiche secteur,
aux commandes puis rebranchez-la au bout de
5 minutes
LECTEUR CD
La lecture d’un CD CD sérieusement rayé ou contaminé Remplacez/ nettoyez le CD
ne fonctionne pas Lentille embuée Attendez que la lentille se soit
désembuée
Lentille sale Nettoyez la lentille à l’aide d’un
CD de nettoyage pour la lentille
Le CD-R(W) n’est pas bien fini Utilisez un CD-R(W) bien fini
RADIO
Craquements intermittents Signal faible Allongez entièrement l’antenne
pendant une émission FM
Craquements continus/ Interférences électriques dues à Déplacez l’équipement à distance
sifflements pendant un téléviseur, un ordinateur, des des autres équipements
une émission MW/LW tubes fluorescents, etc. électriques
REVEIL
Le réveil ne fonctionne pas Heure de réveil non réglée Réglez l'heure de réveil
Mode de réveil non sélectionné Voir chapitre
Reglage du réveil 1 ou 2
Volume trop bas pour la radio/ Voir chapitre
le CD/ le ronfleur Gentle wake volume
La fonction Weekend-Sleeper Jour non/ incorrectement réglé Voir chapitre Reglage du jour
ne fonctionne pas Fonction Weekend-Sleeper annulée Activez la fonction
Weekend-Sleeper
Français
Ce produit satisfait aux conditions imposées par l’Union Européenne
en matière d’interférences radio.
La plaquette de type se trouve à la base de l'équipement.
23
Page 24

CONTROLES
PANELES SUPERIOR Y FRONTAL
1
WEEKEND SLEEPER
desactiva las alarmas 1 o 2 durante el fin de
semana
2
ALARM 1 MODE/OFF o ALARM 2
MODE/OFF
ajusta/ cambia/ apaga las alarmas 1 o 2
3
PANTALLA
Español
muestra la hora del reloj/alarma y el estado
del ajuste
4
REPEATALARM/BRIGHTNESS CONTROL
–
detiene la alarma durante un período de
9 minutos;
–
cambia la intensidad de iluminación de la
pantalla
5 24 HR RESET –
detiene la alarma activa durante 24 horas
6 OPEN•CLOSE –
abre/cierra el compartimento para el CD
7
SLEEP
ajusta la hora sleep (dormir)
8 SET DAY
ajusta el día de la semana para la activación
de weekend sleeper (durmiente del fin de
semana)
9 Control SET
ajusta las horas de
ALARM 1/ 2/ TIME/ CLOCK
–
–
–
–
–
0 7, 8
–
– ajusta la hora del reloj/alarma;
– ajusta los niveles máximo y mínimo del
volumen del despertador suave de las
alarmas 1 o 2;
– selecciona una pista del CD para que actúe
como despertador con la alarma 1 o 2
! PLAY•PAUSE 2;–
inicia/ detiene la reproducción del CD
@ RADIO ON/ BAND
– enciende la radio;
– selecciona la banda FM/ MW/ LW
# CD/TUNING SEARCH ∞, §
–
salta las pistas del CD/busca un pasaje en
particular;
sintoniza las emisoras de radio
–
$ CD/RADIO
–
detiene la función CD/Radio/Sleep;
– detiene la alarma activa durante 24 horas
% PROG –
programa las presintonías
^
RADIO PRESET
selecciona una presintonía
&
VOLUME
ajusta el volumen
*
Cable principal –
alimentación del aparato
(
Cable flexible –
antena que mejora la recepción en FM
OFF 9
4, 3 –
4, 3 –
ATENCIÓN
El uso de mandos o ajustes o la ejecucción de métodos que no sean los aquí
descritos puede ocasionar peligro de exposición a radiación.
Información medioambiental
Se ha prescindido de cualquier material de embalaje innecesario. El embalaje esta compuesto de
tres materiales fácilmente separables: cartón (la caja), poliestireno expandible (amortiguación) y
polietileno (bolsas, plancha protectora de espuma).
El aparato está fabricado con materiales que se pueden reciclar si son desmontados por
una empresa especializada. Observe las normas locales concernientes a la eliminación
de estos materiales, pilas usadas y equipos desechables.
24
Page 25

ALIMENTACIÓN Y MODO DE DEMOSTRACIÓN
F
M
Z
Z
Z
Z
RADIO
C
D
PL
A
Y
/P
A
U
S
E
SET DAY
S
L
E
E
P
WEEKEND SLEEPER
A
L
A
R
M
1
M
O
D
E
/
O
F
F
S
E
T
A
L
A
R
M
1
2
T
I
M
E
C
L
O
C
K
CD
/RAD
IO
OFF
R
A
D
I
O
P
R
E
S
E
T
VO
LU
M
E
2
1
D
I
G
I
T
A
L
R
A
D
I
O
P
L
A
Y
/P
A
U
SE
SET DAY
S
L
E
E
P
WEEKEND SLEEPER
A
L
A
R
M
1
M
O
D
E
/
O
F
F
S
E
T
A
L
A
R
M
1
2
T
I
M
E
C
L
O
C
K
CD
/RAD
IO
O
FF
R
A
D
I
O
P
R
E
S
E
T
VO
LU
M
E
2
1
O
P
E
N
•
C
L
O
S
E
O
P
E
N
•
C
L
O
S
E
A
L
A
R
M
1
M
O
D
E
/
O
F
F
C
D
R
A
D
I
O
O
N
1. Compruebe que la tensión de alimentación, que encontrará
indicada en la base del aparato, coincide con la que usted
consume. Si no fuera así, consulte a su vendedor o servicio
técnico.
2. Conecte el cable principal en el enchufe de la pared. De este
modo, alimentará el aparato y la pantalla mostrará el PHILIPS
demo mode.
™ Después, la palabra PH..IL ..IPS recorrerá la pantalla
continuamente.
• Pulse cualquier tecla de control (a excepción de
REPEAT ALARM/
BRIGHTNESS CONTROL) para salir del modo
demostración.
3. Para desconectar el aparato por completo, desenchúfelo.
AUTOALIMENTACIÓN DE SALVAGUARDA
El sistema de autoalimentación de salvaguarda mantiene los
ajustes del día, alarma y hora durante 3 minutos en el caso de que
se produjera una interrupción de la alimentación (por ejemplo, fallo
en la red eléctrica).
Durante este tiempo, la radio reloj CD y la iluminación se
desconectarán. Tan pronto como se restablezca el suministro de
energía eléctrica, la pantalla volverá a indicar la hora correcta.
• Si el suministro eléctrico volviera transcurridos más de
3 minutos, la pantalla mostrará el PHILIPS demo mode y
deberá volver a introducir el día y la hora del reloj.
INSTALACIÓN
Español
CARACTERÍSTICAS BÁSICAS
Intensidad de la iluminación
1. Compruebe si el control SET está en la posición CLOCK.
2. Pulse la tecla REPEAT ALARM/
BRIGHTNESS CONTROL una o más
veces
– La intensidad de la pantalla cambiará según la siguiente
secuencia: LOW ™ MEDIUM ™ BRIGHT ™ LOW...
Volumen
Pulse VOLUME 4 o 3 para ajustar el nivel del volumen. El nivel del
volumen vo: está indicado por un número comprendido entre 0-32.
25
Page 26

RELOJ REPRODUCCIÓN DEL CD
CD
CD
CD
F
M
Z
Z
Z
Z
R
A
D
IO
C
D
P
L
A
Y
/P
A
U
S
E
S
E
T
D
A
Y
SLEEP
W
E
E
K
EN
D
-
SL
E
E
P
ER
S
E
T
A
L
A
R
M
1
2
T
I
M
E
C
L
O
C
K
C
D
/
R
A
D
I
O
O
F
F
P
R
O
G
R
A
D
IO
P
R
E
S
E
T
V
O
L
U
M
E
2
1
D
I
G
I
T
A
L
R
A
D
I
O
P
L
A
Y
/P
A
U
S
E
S
E
T
D
A
Y
SLEEP
W
E
E
K
EN
D
-
SL
E
E
P
E
R
S
E
T
A
L
A
R
M
1
2
T
I
M
E
C
L
O
C
K
C
D
/
R
A
D
I
O
O
F
F
P
R
O
G
R
A
D
IO
P
R
E
S
E
T
V
O
L
U
M
E
2
1
A
L
A
R
M
1
M
O
D
E
/
O
F
F
C
D
/
T
U
N
I
N
G
S
E
A
R
C
H
R
A
D
I
O
O
N
1
D
AJUSTE DEL RELOJ
La hora se visualiza en el sistema de 24 horas.
1. Lleve el control SET hasta la posición TIME.
2. Pulse 7, 8 para ajustar las horas y los minutos.
™ Si mantiene el dedo sobre 7 u 8 respectivamente, la hora
incrementará / disminuirá rápida y continuamente de minutos
a horas.
™ Pulse 7 u 8 breve y repetidamente para ajustar el tiempo
Español
lentamente, minuto a minuto.
3. Lleve el control SET a la posición de
CLOCK (
reloj) cuando
haya finalizado el ajuste.
AJUSTE DEL DÍA
El ajuste del día le permite ajustar la función WEEKEND
SLEEPER. Si intenta utilizar la función WEEKEND SLEEPER
antes de ajustar el día, aparecerá ' ' brevemente en la
pantalla para recordarle que primero debe ajustar el día.
1. Pulse SET DAY.
2. Cuando aparezca el día, pulse SET DAYuna o más veces para
seleccionar el día numerado de ' ' 1-7 (lunes-domingo).
– La pantalla volverá a mostrar la hora del reloj.
REPRODUCCIÓN DEL CD
1. Pulse OPEN•CLOSE para abrir la puerta del CD.
2. Introduzca un CD con la cara impresa hacia arriba y apriete la
puerta para que se cierre.
3. Pulse PLAY/PAUSE 2; para iniciar la reproducción.
• Durante un instante aparecerá el indicador del CD ,
’ ‘ y el número total de pistas, seguido por
el número de la pista en curso; después volverá a mostrar la
hora del reloj.
• ' ' aparece cuando usted no cierra la puerta del CD o
cuando abre la puerta del CD durante la reproducción.
• ' ' aparece si no se ha introducido un CD o ha sido
introducido incorrectamente.
• ' ' aparece si el CD-R(W) no ha finalizado.
• ' ' indica un error general en el funcionamiento del aparato.
™ El indicador del CD aparece durante la reproducción del CD.
4. Ajuste el sonido con VOLUME 4 o 3.
5. Para detener la reproducción, pulse PLAY•PAUSE 2;.
• El número de la pista en curso aparecerá brevemente antes de
volver a la hora del reloj; parpadeará durante la pausa.
W
W
EE
E
E
K
K
E
E
N
N
D
SL
D
SL
-
-
E
E
E
E
P
P
E
ER
R
Z
Z
R
C
A
SLEEP
D
SLEEP
D
IO
S
S
E
E
T
T
D
D
A
A
Y
Y
S
S
E
E
T
T
A
A
L
L
A
A
R
R
M
M
1
1
2
2
T
T
I
I
M
M
C
C
E
E
L
L
O
O
C
C
K
K
P
P
L
L
A
A
Y
Y
/P
/P
A
A
U
U
S
S
E
E
C
C
D
D
/
R
/
R
A
A
D
D
I
O
I
O
D
I
R
G
A
I
T
D
A
I
O
L
R
O
A
N
D
I
O
C
D
/
T
U
N
I
N
G
S
E
A
R
C
A
A
L
L
A
A
R
R
M
M
M
M
1
O
O
1
D
D
E
E
/
O
/
O
F
F
F
F
1
1
WEEKEND-
WEEKEND-
SLEEPER
SLEEPER
Z
Z
RADIO
C
S
S
L
D
L
E
E
E
E
P
P
SET DAY
SET DAY
S
S
E
E
T
T
A
A
L
L
A
A
R
R
M
M
1
1
2
2
T
T
I
I
M
M
C
C
E
E
L
L
O
O
C
C
K
K
F
M
PL
PL
A
A
Y
Y
/PA
/PA
U
U
SE
S
E
CD/RADIO
C
D/RA
DIO O
O
FF
FF
D
I
R
G
A
I
T
D
A
I
O
L
R
O
A
N
D
I
O
C
A
L
A
R
M
1
M
O
D
E
/
O
F
F
2
2
Z
Z
F
M
O
O
F
F
F
F
H
Z
Z
V
V
O
O
L
U
L
U
M
M
E
E
R
R
A
A
D
D
I
O
I
O
P
P
R
R
E
E
S
E
S
E
T
T
P
P
R
R
O
O
G
G
O
P
O
E
P
N
E
N
•
C
•
L
C
O
L
S
O
E
S
E
A
L
A
R
M
1
M
O
D
E
/
O
F
F
2
2
VO
VO
LUM
LU
M
E
E
R
R
A
A
D
D
I
O
I
O
P
P
R
R
E
E
S
E
S
E
T
T
26
Page 27

REPRODUCCIÓN DEL CD RADIO
RADIO
P
L
A
Y
/P
A
U
S
E
D
A
Y
S
E
T
A
L
A
R
M
1
2
T
I
M
E
C
L
O
C
K
C
D
/
R
A
D
I
O
O
F
F
P
R
O
G
R
A
D
I
O
P
R
E
S
E
T
V
O
LU
M
E
D
I
G
I
T
A
L
R
A
D
I
O
P
L
A
Y
/P
A
U
S
E
D
A
Y
S
E
T
A
L
A
R
M
1
2
T
I
M
E
C
L
O
C
K
C
D
/
R
A
D
I
O
O
F
F
P
R
O
G
R
A
D
I
O
P
R
E
S
E
T
V
O
L
U
M
E
C
D
/
T
U
N
I
N
G
S
E
A
R
C
H
R
A
D
I
O
O
N
R
A
C
D
6. Pulse PLAY•PAUSE 2; de nuevo para continuar con la
reproducción.
7. Pulse CD/RADIO OFF 9 para detener la reproducción.
™ El indicador del CD desaparece de la pantalla y el reproductor de
CD se desconecta.
™ El aparato pasa automáticamente a mostrar la hora del reloj tras
la reproducción de la última pista.
Selección de una pista diferente
El número de la pista aparece durante un instante en la pantalla
cuando pulsa ∞ o § para saltar las pistas.
• Pulse § una o más veces para saltar la(s) pista(s).
• Pulse ∞ más de una vez para saltar la(s) pista(s) anterior(es).
• Pulse ∞ una vez y la reproducción volverá al principio de la pista
en curso.
Búsqueda de un pasaje dentro de una pista
1. Durante la reproducción, pulse y mantenga apretadas ∞ o §.
™ El CD se pondrá en marcha a alta velocidad y volumen bajo; la
pantalla mostrará ’ ’ y el número de la pista en curso.
2. Suelte ∞ o § cuando reconozca el paso que desea oír.
™ La reproducción normal del CD volverá a activarse y aparecerá la
hora del reloj.
RADIO
SLEEP
D
SLEEP
IO
Z
1. Pulse RADIO ON/ BAND para pasar al modo radio.
™ ’ ’ y aparecen en la pantalla seguidos de la última
emisora seleccionada y los detalles de las presintonías.
2. Pulse de nuevo RADIO ON/ BAND si desea cambiar de emisora.
3. Ajuste el sonido con VOLUME 4 o 3.
Sintonización automática
• Pulse ∞ o § durante un segundo o más para sintonizar su
emisora.
™ La radio sintonizará automáticamente una emisora que tenga la
recepción suficiente. La pantalla muestra ’ ’ durante la
sintonización automática.
Sintonización manual
• Pulse y mantenga apretadas ∞ o § para sintonizar una
emisora.
• Suéltelas cuando la frecuencia mostrada en la pantalla sea
próxima a la frecuencia que desea sintonizar.
• Sintonice la radio suavemente pulsando ∞ o § brevemente
una o más veces.
S
S
E
E
T
T
D
D
A
A
Y
Y
S
S
E
E
T
T
A
A
L
L
A
A
R
R
M
M
1
1
2
2
T
T
I
I
M
M
C
C
E
E
L
L
O
O
C
C
K
K
P
P
L
L
A
A
Z
F
M
Y
Y
/P
/P
A
A
U
U
S
S
E
E
C
C
D
D
/
R
/
R
A
A
D
D
I
O
I
O
O
O
F
F
F
F
D
I
R
G
A
I
T
D
A
I
O
L
R
O
A
N
D
I
O
C
D
/
T
U
N
I
N
G
S
E
A
R
C
H
V
V
O
O
L
U
L
U
M
M
E
E
R
R
A
A
D
D
I
O
I
O
P
P
R
R
E
E
S
E
S
E
T
T
P
P
R
R
O
O
G
G
Español
27
Page 28

RADIO ALARMA
PROG
PROG
RADIO
F
M
Z
Z
Z
Z
R
A
D
IO
C
D
P
L
A
Y
/P
A
U
S
E
S
E
T
D
A
Y
SLEEP
W
EE
K
E
N
D
-
SL
EE
P
E
R
S
E
T
A
L
A
R
M
1
2
T
I
M
E
C
L
O
C
K
C
D
/
R
A
D
I
O
O
F
F
P
R
O
G
R
A
D
I
O
P
R
E
S
E
T
VO
LU
M
E
2
1
D
I
G
I
T
A
L
R
A
D
I
O
P
L
A
Y
/P
A
U
S
E
S
E
T
D
A
Y
SL
EEP
W
E
E
K
E
N
D
-
SL
EE
P
ER
S
E
T
A
L
A
R
M
1
2
T
I
M
E
C
L
O
C
K
C
D
/
R
A
D
I
O
O
F
F
P
R
O
G
R
A
D
I
O
P
R
E
S
E
T
V
O
L
U
M
E
2
1
A
L
A
R
M
1
M
O
D
E
/
O
F
F
C
D
/
T
U
N
IN
G
S
E
A
R
C
H
R
A
D
I
O
O
N
R
C
D
A
V
O
Y
O
O
O
Para mejorar la recepción
FM: Extienda del todo el cable flexible situado en la parte trasera
del aparato para obtener una recepción óptima.
MW/ LW:
4. Pulse CD/RADIO OFF 9 para apagar la radio.
Programación de las emisoras de radio
Usted puede guardar hasta un total de 30 emisoras en la memoria
Español
1. Sintonice la emisora deseada (véase Sintonización de las
2. Pulse PROG para activar la programación.
™ Pantalla: parpadeará.
3. Pulse PRESET 4 o 3 una o más veces para asignar a esta
4. Pulse PROG de nuevo para confirmar el ajuste.
™ Pantalla: desaparecerá mientras que el número y la
5. Repita los cuatro pasos anteriores para presintonizar otras emisoras.
• Usted puede sobrescribir las presintonías guardando otra
AJUSTE DE LA HORA DE LA ALARMA
El aparato utiliza una antena interior. Dirija la antena
variando la posición del aparato.
™ desaparecerá de la pantalla.
emisoras).
estación un número entre 1 to 30.
frecuencia seleccionados para la presintonía aparecerán durante
un instante.
frecuencia en su lugar.
A
SLEEP
D
SLEEP
IO
S
S
E
E
T
T
D
D
A
A
Y
Y
S
S
E
E
T
T
A
A
L
L
A
A
R
R
M
M
1
1
2
2
T
T
I
I
M
M
C
C
E
E
L
L
O
O
C
C
K
K
P
P
L
L
A
A
Y
Y
/P
/P
A
A
U
U
S
S
E
E
C
C
D
D
/
R
/
R
A
A
D
D
I
O
I
O
D
I
R
G
A
I
T
D
A
I
O
L
R
O
A
N
D
I
O
C
D
/
T
U
N
I
N
G
S
E
A
R
C
H
Z
Z
F
M
O
O
F
F
F
F
VO
V
O
L
U
LU
M
M
E
E
R
R
A
A
D
D
I
O
I
O
P
P
R
R
E
E
S
E
S
E
T
T
P
P
R
R
O
O
G
G
General
Se pueden ajustar dos horas de alarma diferentes para
ALARM 1 o 2 en modo CD, radio o zumbador. Éste sistema es útil
cuando, por ejemplo, usted necesita despertarse a diferentes horas
durante la semana o el fin de semana.
Gentle wake volume (Volumen de despertador suave)
Una forma segura de despertarse por las mañanas, el volumen del
despertador suave para la alarma empieza con volumen cero
( ) e incrementa su valor gradualmente hasta 16 ( ).
Sin embargo, si desea cambiar los ajustes por defecto del volumen
de la alarma del zumbador, la radio o el CD:
1. En el modo de espera, pulse una vez ALARM 1 MODE/OFF o
ALARM 2 MODE/OFF.
2. Tan pronto como aparezca ‘
pulse 7 o 8 una o más veces
’
hasta que alcance el nivel deseado (0-32). De este modo, usted
puede ajustar el valor de inicio de la alarma.
3. Par ajustar el valor máximo de la alarma, pulse
ALARM 1 MODE/OFF o ALARM 2 MODE/OFF de nuevo para
cambiar a la pantalla .
4. Tan pronto como aparezca ‘
alcance el volumen deseado (un número igual o mayor que el ,
ajuste bajo).
28
pulse 7 u 8 hasta que
’
O
P
O
E
P
N
E
N
•
C
•
L
C
A
A
L
L
A
A
R
R
M
M
M
M
O
1
O
1
D
D
E
E
/
O
/
O
F
F
F
F
1
1
W
W
EE
E
E
K
K
E
EN
N
D
S
D
S
-
L
-
L
EE
E
EP
P
E
E
R
R
Z
Z
R
C
A
SLEEP
D
SLEEP
D
IO
Z
Z
F
S
S
E
E
T
T
D
D
A
M
L
A
L
A
R
M
1
M
O
D
E
/
O
F
F
2
2
V
Page 29

Nota:
l
l
F
M
Z
Z
Z
Z
RADIO
C
D
PLA
Y
/P
A
U
SE
SET DAY
S
L
E
E
P
WEEKEND SLEEPER
A
L
A
R
M
1
M
O
D
E
/
O
F
F
S
E
T
A
L
A
R
M
1
2
T
I
M
E
C
L
O
C
K
CD
/RADIO O
FF
R
A
D
I
O
P
R
E
S
E
T
VO
LUM
E
2
1
D
I
G
I
T
A
L
R
A
D
I
O
PLA
Y
/P
A
U
SE
SET DAY
S
L
E
E
P
WEEKEND SLEEPER
A
L
A
R
M
1
M
O
D
E
/
O
F
F
S
E
T
A
L
A
R
M
1
2
T
I
M
E
C
L
O
C
K
CD
/RADIO
O
FF
R
A
D
I
O
P
R
E
S
E
T
V
O
LU
ME
2
1
O
P
E
N
•
C
L
O
S
E
O
P
E
N
•
C
L
O
S
E
A
L
A
R
M
1
M
O
D
E
/
O
F
F
C
D
/
T
U
R
A
D
I
O
O
N
• Los ajustes del volumen del despertador suave no afectan al
volumen normal de la radio y del reproductor de CD.
• Dado que ALARM 1 MODE/OFF y ALARM 2 MODE/OFF cancelan
la alarma por completo, no es posible modificar el volumen del
despertador suave durante el funcionamiento de la alarma.
AJUSTE DE LAS ALARMAS 1 O 2
1. Ponga el control SET en ALARM 1 o 2.
2. Pulse 7, 8 para ajustar las horas y los minutos:
– Si mantiene apretados 7 u 8 , la hora avanzará o se retrasará,
respectivamente, de manera rápida y continua de minutos a horas.
– Pulse 7 u 8 breve y repetidamente para ajustar la hora
lentamente, minuto a minuto.
3. Suelte 7 u 8 cuando alcance el ajuste correcto de la hora de la
alarma.
4. Vuelva a colocar el control SET de nuevo en la posición CLOCK.
5. Seleccione su elección del modo de alarma pulsando ALARM 1
MODE/OFF o ALARM 2 MODE/OFF más de una vez.
™ Aparecerá la secuencia de visualización del modo de alarma:
• : nivel de volumen por defecto del inicio de la alarma
despertador suave;
• : nivel de volumen máximo por defecto de la alarma
despertador suave;
• con para la alarma del zumbador;
• con para la alarma de la radio;
• : aparece y un número de pista comprendido entre 1 y 99.
• Alarma desconectada: no , o en la pantalla.
6. Si ha seleccionado la alarma del CD, por favor, lea en el
siguiente capítulo el modo de alarma del CD: selección de
una pista de CD en otras opciones.
Modo de alarma del CD: selección de una pista del CD
Usted puede programar y seleccionar un número de pista del CD
entre 1 y 99 cuando el aparato está en modo de espera o con la
radio encendida. Sin embargo, si el número de pista programado
no existiera en su CD, sonará la primera pista del CD durante la
activación de la alarma.
1. Introduzca un CD dentro del compartimento del CD.
2. Pulse ALARM 1 MODE/OFF o ALARM 2 MODE/OFF hasta que
aparezca el número de pista del CD en la pantalla.
3. Tan pronto como desaparezca la pantalla de alarma del CD,
pulse 7 u 8 hasta que visualice el número de pista deseado.
™ La pantalla vuelve a mostrar el reloj en el modo de espera.
4. Para cambiar el número de pista programado,
pulse ALARM 1 MODE/OFF o ALARM 2 MODE/OFF de nuevo
repetidamente hasta que aparezca la alarma del CD.
ALARMA
Español
29
Page 30

ALARMA
l
F
M
Z
Z
Z
Z
RADIO
C
D
P
LA
Y
/PA
U
S
E
SET DAY
S
L
E
E
P
WEEKEND SLEEPER
A
L
A
R
M
1
M
O
D
E
/
O
F
F
S
E
T
A
L
A
R
M
1
2
T
I
M
E
C
L
O
C
K
CD/R
ADIO
OFF
R
A
D
I
O
P
R
E
S
E
T
V
O
LU
ME
2
1
D
I
G
I
T
A
L
R
A
D
PLA
Y/PA
U
S
E
SET DAY
S
L
E
E
P
WEEKEND SLEEPER
A
L
A
R
M
1
M
O
D
E
/
O
F
F
S
E
T
A
L
A
R
M
1
2
T
I
M
E
C
L
O
C
K
CD/RADIO
OFF
R
A
D
I
O
P
R
E
S
E
T
VO
LUM
E
2
1
O
P
E
N
•
C
L
O
S
E
O
P
E
N
•
C
L
O
S
E
A
L
A
R
M
1
M
O
D
E
/
O
F
F
R
A
D
I
O
O
N
O
O
Nota:
– La opción de alarma del zumbador (BUZZER) sustituirá
automáticamente a la alarma del CD si:
– ha introducido incorrectamente un CD;
– ha introducido un CD dañado;
– ha olvidado introducir un CD;
– ha abierto la puerta del CD.
DESCONEXIÓN DE LA ALARMA
Español
Existen tres maneras de desconectar la alarma. A menos que la
desconecte por completo, el RESET DE LA ALARMA DE 24 HORAS
actuará automáticamente después de transcurridos 59 minutos
desde el momento en que la alarma se disparó por primera vez.
Reset de la alarma de 24 horas
Si desea que el modo de alarma se pare inmediatamente, pero, al
mismo tiempo, desea que el ajuste de la alarma se guarde para el
día siguiente:
• Pulse 24 HR RESET o CD/RADIO OFF 9.
™ Escuchará un tono de confirmación de la activación del reset
de 24 horas.
Cancelación de la alarma por completo
Para cancelar la hora ajustada de la alarma antes de que se dispare,
o durante la activación de la alarma:
• Pulse ALARM 1 MODE/OFF o ALARM 2 MODE/OFF una o
más veces hasta que el indicador de alarma seleccionado
desaparezca de la pantalla.
Repetir alarma
Repite la llamada de alarma a intervalos de 9 minutos.
• Durante la llamada de la alarma,
pulse REPEAT ALARM/
• Si lo desea, repita (hasta un período máximo de 59 minutos).
BRIGHTNESS CONTROL.
O
P
O
E
P
N
E
N
•
C
•
L
C
A
A
L
L
A
A
R
R
M
M
M
M
O
1
O
1
D
D
E
E
/
O
/
O
F
F
F
F
1
1
W
W
E
E
EK
EK
E
E
N
N
D
SL
D
S
-
-
LE
E
E
E
P
P
E
E
R
R
Z
Z
R
C
A
SLEEP
D
SLEEP
D
IO
Z
Z
F
S
S
E
E
T
T
D
D
A
A
Y
Y
M
L
A
L
A
R
M
1
M
O
D
E
/
O
F
F
2
2
V
V
O
O
L
U
L
U
M
M
E
E
Notas:
• El modo de alarma , o seleccionado en la pantalla
parpadeará durante la duración de las repeticiones de la alarma.
• Si utiliza el modo de alarma CD, la reproducción del CD
continuará en el punto en que se detuvo por la alarma de
repetición.
• En el modo de alarma del CD, la reproducción del CD continuará
durante 59 minutos si no se apaga l’alarma.
30
Page 31

ALARMA SLEEP
SLEEP
ZZZZZZZ
Z
Z
Z
Z
Z
A
O
A
L
WEEKEND SLEEPER
Esta característica desactiva la alarma cada sábado y domingo y
prosigue la función de alarma de lunes a viernes. Sin embargo,
asegúrese de que primero ha ajustado los días (véase el capítulos:
AJUSTE DEL DÍA).
1. Pulse WEEKEND SLEEPER una o más veces hasta que
aparezca o para una o más alarmas.
2. Para cancelar la función weekend sleeper, repita el paso 1 hasta
que y/o desaparezcan de la pantalla.
SLEEP
Sobre Sleep
El radio reloj CD tiene un temporizador sleep interno que permite
que el aparato se apague automáticamente durante la reproducción
de un CD o de la radio después de un período de tiempo
determinado. Existen cuatro tiempos de sleep preprogramados para
que se apague por sí mismo: 10, 30, 60, 90 minutos y apagado.
Ajuste de Sleep
1. Pulse PLAY•PAUSE o RADIO ON/ BAND.
• Para el modo CD, asegúrese de que primero ha introducido el
disco.
2. Seleccione el tiempo de duración que desee pulsando SLEEP
una o más veces hasta que aparezca el tiempo de sleep
deseado.
3. Para cancelar la función sleep, usted puede:
• Pulsar SLEEP una o más veces hasta que desaparezca de
la pantalla;
• Pulsar CD/ RADIO OFF 9.
• Pulse REPEAT ALARM/
BRIGHTNESS CONTROL.
Español
L
A
A
R
R
M
M
M
M
O
1
O
1
D
D
E
E
/
O
/
O
F
F
F
F
1
1
W
W
E
E
E
E
K
K
E
E
N
N
D
S
D
S
-
LE
-
LE
E
E
P
P
E
E
R
R
Z
Z
R
C
A
SLEEP
D
SLEEP
D
IO
S
S
E
E
T
T
D
D
A
A
Y
Y
S
S
E
E
T
T
A
A
L
L
A
A
R
R
M
M
1
1
2
2
T
T
I
I
M
M
C
C
E
E
L
L
O
O
C
C
K
K
P
P
L
L
A
A
Y
Y
/P
/P
A
A
U
U
S
SE
E
D
R
I
G
A
I
D
T
A
I
O
L
A
L
A
R
M
1
M
O
D
E
/
O
F
F
2
2
Z
Z
F
M
C
C
D
D
/
R
/
R
A
A
D
D
I
O
I
O
O
O
F
F
F
F
R
O
A
N
D
I
FMRADIO
SLEEP
V
V
O
O
L
U
LU
M
M
E
E
R
R
A
A
D
D
I
O
I
O
P
P
R
R
E
E
S
E
S
E
T
T
31
Page 32

MANTENIMIENTO
REPRODUCTOR DE CD Y MANEJO DE LOS CD
• ¡Nunca toque la lente del reproductor de CD!
• Los cambios bruscos de temperatura pueden generar
condensación y cubrir la lente de su reproductor de CD. En este
caso, la reproducción de CD es imposible. No intente limpiar la
lente; deje el aparato en un lugar cálido hasta que se evapore la
humedad.
• Mantenga siempre cerrada la puerta del CD para que no entre
Español
polvo. Para limpiarlo, desempolve el compartimento con un paño
suave y seco.
• Cuando extraiga un CD de su caja, presione el eje central al
levantar el CD. Coja siempre el CD por los bordes y devuelva el
CD a su caja tras haberlo usado para evitar que se ralle y
ensucie de polvo.
• Para limpiar el CD, hágalo pasando un paño suave que no deje
hebras en línea recta desde el centro hacia el borde. No utilice
limpiadores, ya que puede dañar el disco.
• Nunca escriba sobre un CD ni pegue etiquetas.
GENERAL
• Si no va a utilizar su radio reloj CD durante un largo tiempo,
desconecte el enchufe de la toma de la pared.
• No exponga el aparato o los CD a la humedad, la lluvia, la arena
o a un calor excesivo provocado por un calentamiento del equipo
o la luz directa del sol.
• Para limpiar el aparato, utilice una gamuza suave humedecida
ligeramente. No utilice limpiadores que contengan alcohol,
disolventes, amoniaco o que sean abrasivos, ya que éstos
pueden dañar la carcasa.
X
32
Page 33

SOLUCIÓN DE PROBLEMAS
Si ocurriera algún fallo, primero compruebe los puntos que aparecen en la siguiente lista antes de
llevar el aparato a un servicio técnico. Si no es capaz de solucionar el problema, siguiendo estas
indicaciones, póngase en contacto con su vendedor o con su servicio técnico.
ADVERTENCIA:¡Nunca abra el aparato ya que corre el riesgo de recibir una
descarga eléctrica! Bajo ninguna circunstancia intente repararlo
por su cuenta: invalidaría la garantía.
Problema Posible causa Solución
No hay sonido Volumen no ajustado Ajuste el VOLUMEN
No se produce ninguna respuesta Descarga electrostática Desconecte el aparato del enchufe
al actuar sobre las teclas y vuélvalo a conectar pasados
5 minutos
REPRODUCTOR DE CD
El reproductor de CD no funciona CD muy rallado o sucio Sustituya/limpie el CD
La lente del láser está empañada Espere hasta que la lente se
aclimate
Lente del láser sucia Limpie la lente con un disco de
limpieza de lentes
CD-R(W) no finalizado Utilice un CD-R(W) finalizado
RADIO
Se oye un chisporroteo ocasional Señal débil Extienda el cable flexible
durante la recepción de la FM por completo
Se oyen un chisporroteo continuo/ Interferencias eléctricas producidas Mueva el aparato lejos de
silbidos durante la por la TV, ordenadores, otros equipos eléctricos
recepción de la MW/ LW
ALARMA
La alarma no funciona Hora de la alarma no ajustada Ajuste la hora de la alarma
Modo alarma sin seleccionar Véase el capítulo Ajuste de
la alarma 1 o alarma 2
Volumen demasiado bajo del Véase el capítulo Gentle wake
modo de alarma de la radio/ volume
CD/ zumbador
La función Weekend-Sleeper Selección del día sin ajustar/ Véase el capítulo
no funciona incorrecto Ajuste del día
Weekend-Sleeper sin ajustar Ajuste el Weekend-Sleeper
Español
Este producto cumple los requisitos sobre interferencias de radio de la Unión Europea.
La placa de especificaciones está situada en la parte inferior del equipo.
33
Page 34

BEDIENELEMENTE
OBERES UND VORDERES BEDIENFELD
1
WEEKEND SLEEPER– Deaktivieren von
Wecker 1 oder 2 für
das Wochenende
2
ALARM 1 MODE/OFF oder ALARM 2
MODE/OFF
von Wecker 1 oder 2
3
DISPLAY–Anzeigen der Uhr-/Weckzeiten
4
REPEATALARM/
–
9 Minuten langes Abschalten des Weckers;
–
Helligkeitsänderung der Anzeigebeleuchtung
5 24 HR RESET
Deutsch
– 24 Stunden langes Anhalten des aktiven
Weckers
6 OPEN•CLOSE – Öffnen/Schließen der
7
SLEEP
8 SET DAY
9 SET Regler
–
Einstellen/ Prüfen/ Abschalten
und des Gerätestatus
BRIGHTNESS CONTROL
CD-Lade
Einstellen der Schlafzeit
–
– Einstellen des Tages zur
Aktivierung des WochenendSleepers
– Einstellen der Zeiten für
ALARM 1/ 2/ TIME/ CLOCK
0 7, 8
– Einstellen von Uhr-/Weckzeiten;
– Einstellen des minimalen und maximalen
Sanftwecker-Lautstärkepegels für Wecker 1
oder 2;
– Wahl eines CD-Wecktitels für Wecker 1
oder 2
! PLAY•PAUSE 2;– Starten/Unterbrechen
des CD-Abspielens
@ RADIO ON/ BAND
– Einschalten des Radios;
– Auswahl des FM/ MW/ LW-Wellenbereichs
# CD/TUNING SEARCH ∞, §
–
Überspringen von CD-Titeln/Suche nach einer
bestimmten Passage;
Abstimmen auf Radiosender
–
$ CD/RADIO
–
Anhalten der CD/Radio/Sleep-Funktion;
– 24 Stunden langes Anhalten des aktiven
Weckers
% PROG –
^
RADIO PRESET
&
VOLUME
*
Netzanschlußkabel - für Stromnetz
(
Drahtantenne – Verbessern des FM-
OFF 9
Programmieren von
Tuner-Vorwahlsendern
4, 3 –
Auswahl von
Vorwahlsendern
4, 3 –
Einstellen des
Soundpegels
Empfangs
ACHTUNG
Der Gebrauch von Bedienelemente oder Einstellungen bzw. Verfahrensausführungen
die hier nicht ausdrücklich erwähnt worden sind, kann eine gefährliche
Strahlendosierung oder andere unsichere Operationen zur Folge haben.
Umweltinformationen
Alles überflüssige Verpackungsmaterial wurde vermieden. Wir haben unser möglich-stes getan,
damit die Verpackung leicht in drei Monomaterialien aufteilbar ist: Wellpappe (Schachtel),
expandierbares Polystyrol (Puffer) und Polyäthylen (Taschen, Schaumstoffolien).
Ihr Gerät besteht aus Materialien, die von darauf spezialisierten Betrieben wiederverwertet
werden können. Bitte halten Sie sich beim Recyceln von Verpackungsmaterial, erschöpften
Batterien und alter Ausrüstung an örtliche Bestimmungen.
34
Page 35

STROMNETZ UND DEMO-MODUS
F
M
Z
Z
Z
Z
RADIO
C
D
P
LA
Y
/P
A
U
S
E
SET DAY
S
L
E
E
P
WEEKEND SLEEPER
A
L
A
R
M
1
M
O
D
E
/
O
F
F
S
E
T
A
L
A
R
M
1
2
T
I
M
E
C
L
O
C
K
CD/RAD
IO
O
FF
R
A
D
I
O
P
R
E
S
E
T
V
O
LU
M
E
2
1
D
I
G
I
T
A
L
R
A
D
I
O
P
L
A
Y
/P
A
U
SE
SET DAY
S
L
E
E
P
WEEKEND SLEEPER
A
L
A
R
M
1
M
O
D
E
/
O
F
F
S
E
T
A
L
A
R
M
1
2
T
I
M
E
C
L
O
C
K
C
D/RADIO
O
FF
R
A
D
I
O
P
R
E
S
E
T
V
O
LUM
E
2
1
O
P
E
N
•
C
L
O
S
E
O
P
E
N
•
C
L
O
S
E
A
L
A
R
M
1
M
O
D
E
/
O
F
F
C
D
R
A
D
I
O
O
N
1. Prüfen, ob die auf dem Typenschild (auf der
Geräteunterseite) angegebene Netzspannung mit Ihrer
örtlichen Netzspannung übereinstimmt. Wenn dies nicht der Fall
ist, sich an Ihren Fachhändler oder an Ihre Service-Organisation
wenden.
2. Den Netzstecker in die Steckdose stecken. Die Stromversorgung
ist jetzt eingeschaltet, und in der Anzeige erscheint der PHILIPS
demo mode.
™ PH..IL ..IPS rollt ununterbrochen über die Anzeige.
• Beliebiges Bedienelement drücken (mit Ausnahme von
REPEAT ALARM/
BRIGHTNESS CONTROL am Gerät), um den
Demo-Modus zu verlassen.
3. Um das Gerät vollständig von der Stromversorgung zu trennen,
ist der Netzstecker zu ziehen.
SEPARAT GESPEISTE RESERVE
Die separat gespeiste Reserve erlaubt die bequeme Speicherung
Ihrer Tages-, Weck- und Uhrzeiteinstellungen (bis zu 3 Minuten) bei
einer Stromunterbrechung, z.B. Wechselstromausfall.
Der komplette CD-Radiowecker nebst Beleuchtung wird
abgeschaltet. Sobald die Stromversorgung wiederhergestellt ist,
zeigt die Anzeige die richtige Zeit an.
• Wenn die Stromversorgung nach 3 Minuten zurückkehrt,
erscheint der PHILIPS demo mode in der Anzeige, und Sie
müssen die Tages- und Uhrzeit erneut eingeben.
INSTALLATION
Deutsch
GRUNDFUNKTIONEN
Beleuchtungshelligkeit
1. Prüfen, ob der Regler SET in die Stellung CLOCK gedreht ist.
2. REPEAT ALARM/
BRIGHTNESS CONTROL einmal oder mehrmals
drücken.
– Die Helligkeit der Anzeige ändert sich in dieser Reihenfolge:
LOW ™ MEDIUM ™ BRIGHT ™ LOW...
Lautstärke
VOLUME 4 oder 3 zur Einstellung des Lautstärkepegels drücken.
Der Lautstärkepegel vo: wird als eine Zahl von 0-32 angezeigt.
35
Page 36

UHR CD-WIEDERGABE
CD
CD
CD
F
M
Z
Z
Z
Z
R
A
D
IO
C
D
P
L
A
Y
/P
A
U
S
E
S
E
T
D
A
Y
SLEEP
W
E
E
K
EN
D
-
SL
E
E
P
ER
S
E
T
A
L
A
R
M
1
2
T
I
M
E
C
L
O
C
K
C
D
/
R
A
D
I
O
O
F
F
P
R
O
G
R
A
D
IO
P
R
E
S
E
T
V
O
L
U
M
E
2
1
D
I
G
I
T
A
L
R
A
D
I
O
P
L
A
Y
/P
A
U
S
E
S
E
T
D
A
Y
SLEEP
W
E
E
K
EN
D
-
SL
E
E
P
E
R
S
E
T
A
L
A
R
M
1
2
T
I
M
E
C
L
O
C
K
C
D
/
R
A
D
I
O
O
F
F
P
R
O
G
R
A
D
IO
P
R
E
S
E
T
V
O
L
U
M
E
2
1
A
L
A
R
M
1
M
O
D
E
/
O
F
F
C
D
/
T
U
N
I
N
G
S
E
A
R
C
H
R
A
D
I
O
O
N
1
D
EINSTELLEN DER UHRZEIT
Die Zeit wird im 24 Stunden-Format angezeigt.
1. Den Regler SET auf TIME drehen.
2. 7, 8 drücken, um sowohl die Stunden als auch Minuten
einzustellen.
™ Während Ihr Finger 7 bzw. 8 gedrückt hält, nimmt die Zeit
(zuerst die Minuten und danach die Stunden) schnell und
kontinuierlich zu/ab.
™ 7 oder 8 kurz und wiederholt drücken, um die Zeit langsam,
Minute für Minute, einzustellen.
3. Den Regler SET auf CLOCK einstellen, nachdem Sie die
richtige Einstellung erreicht haben.
Deutsch
EINSTELLEN DES TAGES
Die Einstellung des Tages ermöglicht Ihnen das Einstellen der
WEEKENDSLEEPER-Funktion. Wenn Sie versuchen, den
WEEKENDSLEEPER vor Einstellung des Tages zu benutzen, blinkt
' ' kurz in der Anzeige, um Sie daran zu erinnern, den Tag
zuerst einzustellen.
1. SET DAY drücken.
2. Bei vorhandener Tagesanzeige SET DAY erneut einmal oder
mehrmals drücken, um den mit ' ' 1-7 (Montag-Sonntag)
numerierten Tag zu wählen.
– Die Anzeige kehrt zur Uhrzeit zurück.
W
W
EE
E
EK
K
E
E
N
N
D
S
D
SL
-
L
-
E
E
E
EP
PE
E
R
R
Z
Z
R
C
A
SLEEP
D
SLEEP
D
IO
S
S
E
E
T
T
D
D
A
A
Y
Y
S
S
E
E
T
T
A
A
L
L
A
A
R
R
M
M
1
1
2
2
T
T
I
I
M
M
C
C
E
E
L
L
O
O
C
C
K
K
P
P
L
L
A
A
Y
Y
/P
/P
A
A
U
U
S
S
E
E
C
C
D
D
/
R
/
R
A
A
D
D
I
O
I
O
D
I
R
G
A
I
T
D
A
I
O
L
R
O
A
N
D
I
O
C
D
/
T
U
N
I
N
G
S
E
A
R
C
A
L
A
R
M
1
M
O
D
E
/
O
F
F
2
2
Z
Z
F
M
O
O
F
F
F
F
H
V
V
O
O
L
U
L
U
M
M
E
E
R
R
A
A
D
D
IO
I
O
P
P
R
R
E
E
S
E
S
E
T
T
P
P
R
R
O
O
G
G
CD-WIEDERGABE
1. OPEN•CLOSE drücken, um die CD-Tür zu öffnen.
2. Eine CD mit der bedruckten Seite nach oben einlegen, und die
Tür zudrücken.
3. PLAY/PAUSE 2; drücken, um mit dem Abspielen (der
Wiedergabe) zu beginnen.
• Der CD-Anzeiger , ’ ‘ und die Gesamtzahl Titel
werden angezeigt, darauf folgt kurz die aktuelle Titelnummer,
bevor zur Uhrzeit zurückgekehrt wird.
• ' ' wird gezeigt, wenn Sie die CD-Tür nicht geschlossen
haben oder wenn Sie die CD-Tür beim Abspielen öffnen.
• ' ' wird gezeigt, wenn keine CD eingelegt wurde oder
eine CD falsch eingelegt wurde.
• ' ' wird gezeigt, wenn die CD-R(W) nicht fertig ist.
• ' ' zeigt einen allgemeinen Geräte-Bedienungsfehler an.
™ Der CD-Anzeiger erscheint während der CD-Wiedergabe.
4. Den Sound mit VOLUME 4 oder 3 einstellen.
5. Zur Unterbrechung PLAY•PAUSE 2; drücken.
• Die aktuelle Titelnummer erscheint kurz vor der Rückkehr zur
Uhrzeit, mit und Blinken während der Unterbrechung.
36
O
P
O
E
P
N
E
N
•
C
•
L
C
O
L
S
O
E
S
A
A
L
L
A
A
R
R
M
M
M
M
O
1
O
1
D
D
E
E
/
O
/
O
F
F
F
F
1
1
WEEKEND-
WEEKEND-
SLEEPER
SLEEPER
Z
Z
RADIO
C
S
S
L
D
L
E
E
E
E
P
P
SET DAY
SET DAY
S
S
E
E
T
T
A
A
L
L
A
A
R
R
M
M
1
1
2
2
T
T
I
I
M
M
C
C
E
E
L
L
O
O
C
C
K
K
PLA
P
Z
Z
F
M
LA
Y
Y
/P
/P
A
A
U
U
SE
SE
CD
CD/RADIO
/RAD
IO
O
O
FF
FF
D
I
R
G
A
I
T
D
A
I
O
L
R
O
A
N
D
I
O
C
E
A
L
A
R
M
1
M
O
D
E
/
O
F
F
2
2
VO
V
O
LU
LUM
M
E
E
R
R
A
A
D
D
I
O
I
O
P
P
R
R
E
E
S
E
S
E
T
T
Page 37

CD-WIEDERGABE RADIO
RADIO
P
L
A
Y
/P
A
U
S
E
D
A
Y
S
E
T
A
L
A
R
M
1
2
T
I
M
E
C
L
O
C
K
C
D
/
R
A
D
I
O
O
F
F
P
R
O
G
R
A
D
IO
P
R
E
S
E
T
V
O
L
U
M
E
D
I
G
I
T
A
L
R
A
D
I
O
P
L
A
Y
/P
A
U
S
E
D
A
Y
S
E
T
A
L
A
R
M
1
2
T
I
M
E
C
L
O
C
K
C
D
/
R
A
D
I
O
O
F
F
P
R
O
G
R
A
D
I
O
P
R
E
S
E
T
V
O
L
U
M
E
C
D
/
T
U
N
I
N
G
S
E
A
R
C
H
R
A
D
I
O
O
N
R
A
C
D
6. PLAY•PAUSE 2; erneut drücken, um das Abspielen wiederaufzunehmen.
7. CD/RADIO OFF 9 drücken, um das Abspielen anzuhalten.
™ Der CD-Anzeiger verschwindet aus der Anzeige, und der
CD-Spieler wird abgeschaltet.
™ Das Gerät kehrt nach dem letzten Titel automatisch zur Standby-
Uhrzeit zurück.
Wahl eines anderen Titels
Die Titelnummer erscheint kurz in der Anzeige, wenn man ∞ oder
§ zum Überspringen von Titeln drückt.
• § einmal oder mehrmals drücken, um den/die nächsten Titel zu
überspringen.
• ∞ mehr als einmal drücken, um zu vorherigen Titeln zu springen.
• ∞ einmal drücken, und die Abspielfunktion kehrt an den Anfang
des aktuellen Titels zurück.
Auffinden einer Passage innerhalb eines Titels
1. Während des Abspielens ∞ oder § drücken und gedrückt halten.
™ Die CD wird mit hoher Geschwindigkeit und geringer
Lautstärke abgespielt; in der Anzeige erscheinen ’ ’ und
Ihre aktuelle Titelnummer.
2. ∞ oder § loslassen, wenn Sie die von Ihnen gewünschte
Passage erkennen.
™ Es folgt die Rückkehr zur normalen CD-Wiedergabe und
Uhrzeitanzeige.
RADIO
1. RADIO ON/ BAND drücken, um den Radiomodus einzuschalten.
™ ’ ’ und erscheinen in der Anzeige, gefolgt vom zuletzt
gewählten Wellenbereich und Angaben zum Vorwahlsender.
2. RADIO ON/ BAND erneut drücken, wenn Sie einen anderen
Wellenbereich wollen.
3. Den Sound mit VOLUME 4 oder 3 einstellen.
Automatisches Abstimmen
• Zur Abstimmung auf Ihren Sender ∞ oder § eine Sekunde oder
länger drücken.
™ Das Radio stellt sich automatisch auf einen Sender mit
ausreichend Emp-fang ein. Beim automatischen Suchlauf
erscheint ’ ’ in der Anzeige.
Manuelles Abstimmen
• Zum Abstimmen auf einen Sender ∞ oder § drücken und
gedrückt halten.
• Loslassen, wenn es sich bei der Frequenz in der Anzeige um die
ungefähre Frequenz handelt.
• Präzise abstimmen, indem ∞ oder § kurz einmal oder
mehrmals gedrückt wird.
SLEEP
D
SLEEP
IO
F
S
S
E
E
T
T
D
D
A
A
Y
Y
S
S
E
E
T
T
A
A
L
L
A
A
R
R
M
M
1
1
2
2
T
T
I
I
M
M
C
C
E
E
L
L
O
O
C
C
K
K
M
P
P
L
L
A
A
Y
Y
/P
/
P
A
A
U
U
S
S
E
E
C
C
D
D
/
R
/
R
A
A
D
D
I
O
I
O
O
O
F
F
F
F
D
I
R
G
A
I
T
D
A
I
O
L
R
O
A
N
D
I
O
C
D
/
T
U
N
I
N
G
S
E
A
R
C
H
Deutsch
Z
Z
V
V
O
O
L
U
LU
M
M
E
E
R
R
A
A
D
D
I
O
I
O
P
P
R
R
E
E
S
E
S
E
T
T
P
P
R
R
O
O
G
G
37
Page 38

PROG
PROG
RADIO
F
M
Z
Z
Z
Z
R
A
D
IO
C
D
P
L
A
Y
/P
A
U
S
E
S
E
T
D
A
Y
SLEEP
W
EE
K
E
N
D
-
SL
EE
P
E
R
S
E
T
A
L
A
R
M
1
2
T
I
M
E
C
L
O
C
K
C
D
/
R
A
D
I
O
O
F
F
P
R
O
G
R
A
D
I
O
P
R
E
S
E
T
VO
LU
M
E
2
1
D
I
G
I
T
A
L
R
A
D
I
O
P
L
A
Y
/P
A
U
S
E
S
E
T
D
A
Y
SL
EEP
W
E
E
K
E
N
D
-
SL
EE
P
ER
S
E
T
A
L
A
R
M
1
2
T
I
M
E
C
L
O
C
K
C
D
/
R
A
D
I
O
O
F
F
P
R
O
G
R
A
D
I
O
P
R
E
S
E
T
V
O
L
U
M
E
2
1
A
L
A
R
M
1
M
O
D
E
/
O
F
F
C
D
/
T
U
N
IN
G
S
E
A
R
C
H
R
A
D
I
O
O
N
R
C
D
A
V
O
Y
O
O
O
Deutsch
RADIO WECKER
Verbesserung des Empfangs
FM: Die Drahtantenne auf der Rückseite des Gerätes ganz her-
ausziehen, um optimalen Empfang zu erzielen.
MW/ LW:Benutzt eine eingebaute Antenne. Die Antenne durch
Einstellen der Geräteposition ausrichten.
4. CD/RADIO OFF 9 drücken, um das Radio abzuschalten.
™ verschwindet aus der Anzeige.
Programmieren von Radiosendern
Sie können bis zu 30 Radiosender speichern.
1. Auf Ihren gewünschten Sender abstimmen (siehe Abstimmen
auf Radiosender).
2. PROG drücken, um Programmierung zu aktivieren.
™ Anzeige: blinkt.
3. PRESET 4 oder 3 einmal oder mehrmals drücken, um diesem
Sender eine Nummer von 1 bis 30 zuzuordnen.
4. PROG erneut drücken, um die Einstellung zu bestätigen.
™ Anzeige: verschwindet, die Vorwahlnummer und die
Frequenz des Vorwahlsenders werden kurz angezeigt.
5. Die vier o.g. Schritte wiederholen, um weitere Sender abzuspeichern.
• Sie können einen Vorwahlsender durch Speichern einer anderen
Frequenz an seiner Stelle löschen.
EINSTELLEN DER WECKZEIT
Allgemeines
Zwei verschiedene Weckzeiten, ALARM 1 oder 2, können im
CD-, Radio- oder Summermodus eingestellt werden. Dies kann sich
als sinnvoll erweisen, wenn Sie zum Beispiel unter der Woche und
am Wochenende zu verschiedenen Zeiten aufwachen müssen.
Gentle wake volume (Sanftweck-Lautstärke)
Zum garantierten Aufstehen am Morgen beginnt die Gentle wake
volume für den Wecker ab Lautstärke ( ) und nimmt bis zum
Höchstwert von 16 ( ). llmählich zu. Wenn Sie jedoch die
vorgegebenen Lautstärkeeinstellungen für den Summer-, Radiooder CD-Wecker ändern wollen:
1. Im Standby-Modus ALARM 1 MODE/OFF oder ALARM 2
MODE/OFF einmal drücken.
2. Sobald ‘
erscheint, 7 oder 8 einmal oder mehrmals
’
drücken, bis Sie den gewünschten Pegel (0-32) erreichen.
Dadurch wird die Ausgangslautstärke Ihres Weckers eingestellt.
3. Zum Einstellen der maximalen Lautstärke für Ihren Wecker
ALARM 1 MODE/OFF oder ALARM 2 MODE/OFF erneut
drücken, um zur Anzeige zu gehen.
4. Sobald ‘
gewünschten Lautstärkepegel erreichen (eine Zahl, die größer
als die geringe Einstellung, , oder ihr gleich ist).
38
erscheint, 7 oder 8 drücken, bis Sie den
’
W
W
E
E
EK
E
SL
SLE
E
E
A
SLEEP
D
SLEEP
IO
F
S
S
E
E
T
T
D
D
A
A
Y
Y
S
S
E
E
T
T
A
A
L
L
A
A
R
R
M
M
1
1
2
2
T
T
I
I
M
M
C
C
E
E
L
L
O
O
C
C
K
K
A
A
L
L
A
A
R
R
M
M
M
M
O
1
O
1
D
D
E
E
/
O
/
O
F
F
F
F
1
1
K
E
E
N
N
D
D
-
-
E
PE
P
E
R
R
SLEEP
SLEEP
S
S
E
E
T
T
D
D
A
M
P
P
L
L
A
A
Y
Y
/P
/P
A
A
U
U
S
S
E
E
C
C
D
D
/
R
/
R
A
A
D
D
I
O
I
O
O
O
F
F
F
F
D
I
R
G
A
I
T
D
A
I
O
L
R
O
A
N
D
I
O
C
D
/
T
U
N
I
N
G
S
E
A
R
C
H
Z
Z
R
C
A
D
D
IO
F
Z
Z
VO
V
O
L
U
LU
M
M
E
E
R
R
A
A
D
D
I
O
I
O
P
P
R
R
E
E
S
E
S
E
T
T
P
P
R
R
O
O
G
G
O
P
O
E
P
N
E
N
•
C
•
L
C
L
A
L
A
R
M
1
M
O
D
E
/
O
F
F
2
2
Z
Z
M
V
Page 39

Hinweis:
l
l
F
M
Z
Z
Z
Z
RADIO
C
D
P
LA
Y
/P
A
U
SE
SET DAY
S
L
E
E
P
WEEKEND SLEEPER
A
L
A
R
M
1
M
O
D
E
/
O
F
F
S
E
T
A
L
A
R
M
1
2
T
I
M
E
C
L
O
C
K
CD
/RADIO OFF
R
A
D
I
O
P
R
E
S
E
T
VOLU
ME
2
1
D
I
G
I
T
A
L
R
A
D
I
O
P
LA
Y
/P
AU
SE
SET D
AY
S
L
E
E
P
WEEKEND SLEEPER
A
L
A
R
M
1
M
O
D
E
/
O
F
F
S
E
T
A
L
A
R
M
1
2
T
I
M
E
C
L
O
C
K
CD/RADIO
OFF
R
A
D
I
O
P
R
E
S
E
T
VO
LU
ME
2
1
O
P
E
N
•
C
L
O
S
E
O
P
E
N
•
C
L
O
S
E
A
L
A
R
M
1
M
O
D
E
/
O
F
F
C
D
/
T
U
R
A
D
I
O
O
N
• Die Gentle wake volume-instellungen haben keinen Einfluß auf
den Lautstärkepegel bei normaler CD- und Radio-Wiedergabe.
• Es ist nicht möglich, den Gentle wake volume-bereich
während des aktiven Weckrufs zu überprüfen, weil Drücken von
ALARM 1 MODE/OFF oder ALARM 2 MODE/OFF den Wecker
völlig abstellt.
ZEITEINSTELLUNG - WECKER 1 ODER WECKER 2
1. Den Regler SET auf ALARM 1 oder 2 einstellen.
2. 7 oder 8 drücken, um sowohl die Stunden als auch Minuten
einzustellen:
– Während Ihr Finger 7 bzw. 8 gedrückt hält, nimmt die Zeit (zuerst die
Minuten und danach die Stunden) schnell und kontinuierlich zu/ab.
– 7 oder 8 kurz und wiederholt drücken, um die Zeit langsam,
Minute für Minute, einzustellen.
3. 7 oder 8 loslassen, wenn Sie die richtige Weckzeiteinstellung
erreicht haben.
4. Den Regler SET wieder auf CLOCK einstellen.
5. Den Weckmodus Ihrer Wahl durch Drücken von ALARM 1
MODE/OFF oder ALARM 2 MODE/OFF (mehr als einmal) wählen.
™ Die Weckmodusanzeigen erscheinen kurz der Reihe nach:
• : normaler Lautstärkepegel für Beginn der Sanftweckfunktion;
• : normaler maximaler Lautstärkepegel für Sanftweckfunktion;
• mit für Wecksummer;
• mit für Radiowecker;
• : und eine Titelnummer 1-99 werden gezeigt.
• Alarm off: Anzeige ohne , oder .
6. Falls Die den CD-Wecker gewählt haben, lesen Sie bitte das
nächste Kapitel – CD-Weckmodus: Wahl eines CD-Titels –
bzgl. weiterer Optionen.
CD-Weckmodus: Wahl eines CD-Titels
Sie können eine CD-Titelnummer zwischen 1 und 99 programmieren
und wählen, wenn sich das Gerät im Standby- oder RadioAbspielmodus befindet. Wenn die programmierte Titelnummer
jedoch nicht auf Ihrer CD existiert, wird der erste Titel der CD
während des Weckrufs abgespielt.
1. Eine CD in das CD-Fach einlegen.
2. ALARM 1 MODE/OFF oder ALARM 2 MODE/OFF drücken, bis
die CD- und Titelnummernanzeige erscheint.
3. Sobald die CD-Weckanzeige erscheint, 7 oder 8 drücken, bis die
gewünschte Titelnummer gezeigt wird.
™ Die Anzeige kehrt zur Standby-Uhrzeit zurück.
4. Zur Überprüfung Ihrer programmierten Titelnummer ALARM 1
MODE/OFF oder ALARM 2 MODE/OFF erneut und wiederholt
drücken, bis die CD-Weckanzeige erscheint.
WECKER
Deutsch
39
Page 40

WECKER
l
F
M
Z
Z
Z
Z
RADIO
C
D
PL
A
Y/P
A
U
SE
SET D
AY
S
L
E
E
P
WEEKEND SLEEPER
A
L
A
R
M
1
M
O
D
E
/
O
F
F
S
E
T
A
L
A
R
M
1
2
T
I
M
E
C
L
O
C
K
C
D/RA
DIO
O
FF
R
A
D
I
O
P
R
E
S
E
T
VO
LUM
E
2
1
D
I
G
I
T
A
L
R
A
D
PL
A
Y
/P
A
U
SE
SET D
AY
S
L
E
E
P
WEEKEND SLEEPER
A
L
A
R
M
1
M
O
D
E
/
O
F
F
S
E
T
A
L
A
R
M
1
2
T
I
M
E
C
L
O
C
K
CD
/RA
DIO O
FF
R
A
D
I
O
P
R
E
S
E
T
VO
LUM
E
2
1
O
P
E
N
•
C
L
O
S
E
O
P
E
N
•
C
L
O
S
E
A
L
A
R
M
1
M
O
D
E
/
O
F
F
R
A
D
I
O
O
N
O
O
Hinweis:
– Die Wecksummeroption (BUZZER) löst automatisch den CD-
Wecker ab, wenn Sie:
– eine CD falsch eingelegt haben;
– eine beschädigte CD eingelegt haben;
– vergessen haben, eine CD einzulegen;
– die CD-Tür aufgedrückt haben.
ABSCHALTEN DES WECKERS
Der Wecker kann auf dreierlei Weise abgestellt werden. Wenn Sie
den Wecker nicht ganz abstellen, wird die 24 StundenWeckerrückstellung nach 59 Minuten automatisch gewählt, ab dem
Zeitpunkt, zu dem Ihre Weckzeit (erstmals) beginnt.
Deutsch
24 hour alarm reset (24 Stunden-Weckerrückstellung)
Wenn Sie den Wecker sofort anhalten wollen, aber auch dieselbe
Weckereinstellung am darauffolgenden Tag beibehalten wollen:
• 24 HR RESET oder CD/RADIO OFF 9 drücken.
™ Sie hören einen Piepton, der bestätigt, daß 24 Stunden-
Weckerrückstellung aktiviert wurde.
Völliges Abstellen des Weckers
Zum Abstellen der eingestellten Weckzeit, bevor sie beginnt, oder
während des Weckrufs:
• ALARM 1 MODE/OFF oder ALARM 2 MODE/OFF einmal oder
mehrmals drücken, bis der gewählte Weckanzeiger aus der
Anzeige verschwindet.
Weckwiederholung
Dadurch wird Ihr Weckruf in 9-Minuten-Intervallen wiederholt.
• Während des Weckrufs REPEAT ALARM/
drücken.
• Falls gewünscht wiederholen (bis zu maximal 59 Minuten).
Hinweise:
• Der gewählte Weckmodus , oder in der Anzeige
blinkt während der gesamten Weckwiederholungsdauer.
• Wenn Sie den CD-Weckmodus benutzen, wird die CDWiedergabe an der Stelle wieder aufgenommen, wo die
Unterbrechung durch die Weckwiederholung erfolgte.
• Während des CD-Weckvorgangs wird das CD-Abspielen
59 Minuten lang fortgesetzt, wenn die Weckfunktion nicht
gestoppt wird.
BRIGHTNESS CONTROL
O
P
O
E
P
N
E
N
•
C
•
L
C
A
A
L
L
A
A
R
R
M
M
M
M
O
1
O
1
D
D
E
E
/
O
/
O
F
F
F
F
1
1
W
W
E
E
E
E
K
K
EN
E
N
D
S
D
S
-
L
-
L
E
E
E
EP
PE
E
R
R
Z
Z
R
C
A
SLEEP
D
SLEEP
D
IO
Z
Z
F
S
S
E
E
T
T
D
D
A
A
Y
Y
M
L
A
L
A
R
M
1
M
O
D
E
/
O
F
F
2
2
V
V
O
O
L
U
L
U
M
M
E
E
40
Page 41

WECKER SLEEP
SLEEP
ZZZZZZZ
Z
Z
Z
Z
Z
A
O
A
L
WEEKEND SLEEPER (WOCHENEND-SLEEPER)
Dieses Funktion deaktiviert den Wecker jeden Samstag und
Sonntag und stellt die Weckfunktion von Montag bis Freitag
wieder her. Es ist jedoch sicherzustellen, daß zuerst der Tag
eingestellt wurde (siehe Kapitel EINSTELLEN DES TAGES).
1. WEEKEND SLEEPER einmal oder mehrmals drücken, bis
oder für einen oder beide Alarm(e) erscheint.
2. Zum Aufheben der WEEKEND SLEEPER-funktion Schritt 1
wiederholen, bis und/oder aus der Anzeige verschwindet.
SLEEP
Zur Sleep-Funktion
Der CD-Radiowecker hat einen eingebauten Timer, der es
ermöglicht, das Gerät - im Radio- oder CD-Abspielmodus - nach
einer festgelegten Zeitspanne automatisch abzuschalten. Es gibt
vier Sleep-Zeiten, bevor sich das Gerät abschaltet: 10, 30, 60, 90
Minuten und aus.
Einstellen der Sleep-Funktion
1. PLAY•PAUSE oder RADIO ON/ BAND drücken.
• Beim CD-Modus sicherstellen, daß Sie zuerst eine CD eingelegt
haben.
2. Ihre Schlummerzeit durch Drücken von SLEEP (einmal oder
mehrmals) wählen, bis die gewünschte Sleep-Zeit gezeigt wird.
3. Zum Aufheben der Sleep-Funktion können Sie entweder:
• SLEEP einmal oder mehrmals drücken, bis aus der
Anzeige verschwindet;
• CD/ RADIO OFF 9 drücken.
• REPEAT ALARM/
BRIGHTNESS CONTROL drücken.
L
A
A
R
R
M
M
M
M
O
1
O
1
D
D
E
E
/
O
/
O
F
F
F
F
1
1
W
W
E
E
E
EK
K
E
E
N
N
D
SL
D
SL
-
-
E
E
E
E
P
P
ER
E
R
Z
Z
R
C
A
SLEEP
D
SLEEP
D
IO
S
S
E
E
T
T
D
D
A
A
Y
Y
S
S
E
E
T
T
A
A
L
L
A
A
R
R
M
M
1
1
2
2
T
T
I
I
M
M
C
C
E
E
L
L
O
O
C
C
K
K
P
P
L
L
A
A
Y
Y
/P
/P
A
A
U
U
S
S
E
E
D
R
I
G
A
I
D
T
A
I
O
L
A
L
A
R
M
1
M
O
D
E
/
O
F
F
2
2
Z
Z
F
M
C
C
D
D
/
R
/
R
A
A
D
D
I
O
I
O
O
O
F
F
F
F
R
O
A
N
D
I
FMRADIO
SLEEP
V
V
O
O
LU
L
R
R
A
A
D
D
I
O
IO
P
P
R
R
E
E
S
E
S
E
T
T
Deutsch
U
M
M
E
E
41
Page 42

PFLEGE
UMGANG MIT DEM CD-SPIELER UND DEN CDS
• Die Linse des CD-Spielers sollte niemals berührt werden!
• Plötzliche Änderungen der Umgebungstemperatur können zu
Kondensation und zum Beschlagen der Linse Ihres CD-Spielers
führen. Abspielen einer CD ist dann nicht möglich. Nicht
versuchen, die Linse zu reinigen, sondern das Gerät in einer
warmen Umgebung lassen, bis die Feuchtigkeit verdunstet.
• Die CD-Tür stets schließen, um das CD-Fach staubfrei zu halten.
Reinigung: das Fach mit einem weichen, trockenen Tuch
abstauben.
• Zur Herausnahme einer CD aus ihrer Schutzhülle die
Zentralspindel beim Anheben der CD drücken. Die CD stets am
Deutsch
Rand anheben und nach Gebrauch wieder in ihre Schutzhülle
einlegen, um Kratzer und Staubeinwirkung zu vermeiden.
• Die CD durch eine geradlinige Bewegung von der Mitte zum
Rand mit einem weichen, fusselfreien Tuch reinigen. Keine
Reiniger benutzen, da sie den Tonträger beschädigen können.
• Niemals auf eine CD schreiben oder Aufkleber an ihr anbringen.
ALLGEMEINES
• Wenn Sie Ihren CD-Radiowecker längere Zeit nicht zu benutzen
gedenken, den Netzstecker ziehen.
• Das Gerät oder die CDs nicht Feuchtigkeit, Regen, Sand oder zu
starker Erwärmung, die durch Heizanlagen oder direkte
Sonneneinstrahlung verursacht wird, aussetzen.
• Zur Reinigung des Gerätes ein weiches, leicht angefeuchtetes
Polierleder benutzen. Keine Reinigungsmittel benutzen, die
Alkohol, Spiritus, Ammoniak oder scheuernde Stoffe enthalten,
weil dadurch das Gehäuse beschädigt werden kann.
X
42
Page 43

FEHLERSUCHE
Wenn ein Fehler auftritt, zuerst die nachstehenden Punkte überprüfen, bevor das Gerät zur Reparatur
gegeben wird. Wenn Sie das Problem nicht durch Befolgen dieser Ratschläge lösen können, sollten
Sie sich an Ihren Händler oder an Ihr Reparaturzentrum wenden.
WARNHINWEIS: Das Gerät nicht öffnen, weil Stromschlaggefahr besteht! Unter gar
keinen Umständen sollten Sie versuchen, das Gerät selbst zu
reparieren, weil die Garantie dadurch erlischt.
Problem Mögliche Ursache Abhilfe
Kein Sound Lautstärke nicht eingestellt Die Lautstärke einstellen
Keine Reaktion auf irgendeine Elektrostatische Entladung Den Gerätestecker ziehen und das
Tastenbetätigung Gerät nach 5 Minuten wieder
anschließen.
CD-SPIELER
CD-Wiedergabe ist nicht möglich CD ist stark zerkratzt oder verschmutzt CD austauschen/reinigen
Laserlinse ist beschlagen Warten, bis Linse sich
akklimatisiert hat
Laserlinse verschmutzt Linse durch Abspielen einer
Reinigungs-CD reinigen.
CD-R(W) ist nicht fertig Eine fertige CD-R(W) benutzen
RADIO
Gelegentliches ‚Knistern‘ während Schwaches Signal Drahtantenne ganz herausziehen
einer FM-Sendung
Ständiges Knistern/Zischen Elektrische Störung seitens Gerät von anderen Elektrogeräten
während MW/LW-Sendung Fernsehern, Computern, entfernen
Leuchtstofflampen usw.
WECKER
Der Wecker funktioniert nicht Weckzeit nicht eingestellt Die Weckzeit einstellen
Weckmodus nicht gewählt Siehe Kapitel „Zeiteinstellung –
WECKER 1 oder WECKER 2"
Lautstärke für Radio-/ CD-/ Siehe Kapitel
Summer-Weckmodus zu gering. Gentle wake volume
Wochenend-Sleeper funktioniert Tageswahl nicht eingestellt/falsch Siehe Kapitel
nicht EINSTELLEN DES TAGES
Wochenend-Sleeper nicht eingestellt Wochenend-Sleeper einstellen
Deutsch
Dieses Produkt entspricht den Funkentstörvorschriften der Europäischen Union.
Das Typenschild befindet sich auf der Geräteunterseite.
43
Page 44

TOETSEN
BOVEN- EN VOORKANT
1
WEEKEND SLEEPER– om wekker 1 of 2 uit
te schakelen tijdens
het weekend
2
ALARM 1 MODE/OFF of ALARM 2
MODE/OFF
–
om wekker 1 of 2 in te
schakelen/ te controleren/ uit te schakelen
3
DISPLAY–geeft de tijd/ de wektijden weer
en geeft informatie over het
apparaat
4
REPEATALARM/BRIGHTNESS CONTROL
– om de wekker voor 9 minuten uit te zetten;
– om de sterkte van de displayverlichting te
wijzigen
5 24 HR RESET –
om de wekker voor 24 uur uit te zetten
6 OPEN•CLOSE – om de cd-houder te openen/
Nederlands
7
8 SET DAY
SLEEP – om de sluimertijd in te stellen
sluiten
– om de dag in te stellen zodat u
de weekendfunctie kunt
gebruiken
9 SET control
– m de tijd in te stellen voor
ALARM 1/ 2/ TIME/ CLOCK
0 7, 8
– om de tijd/ wektijden in te stellen;
– om het begin- en eindniveau van het
wekvolume in te stellen voor wekker 1 of 2;
– om het cd-nummer te kiezen waarmee u
gewekt wilt worden voor wekker 1 of 2
! PLAY•PAUSE 2;– om het afspelen van een
cd te starten/ te onderbreken
@ RADIO ON/ BAND
– om de radio aan te zetten;
– om het golfgebied te kiezen: FM/ MW/ LW
# CD/TUNING SEARCH ∞, §
– om naar een ander cd-nummer te gaan/ om
een bepaalde passage te zoeken;
– om af te stemmen op een radiozender
$ CD/RADIO
OFF 9
– om de cd-speler/ radio/ sluimerfunctie uit te
schakelen;
– om de wekker voor 24 uur uit te zetten
% PROG –
om een voorkeurzender te
programmeren
^
RADIO PRESET
om af te stemmen
4, 3 –
op een geprogrammeerde zender
&
VOLUME
4, 3 –
om het geluidsniveau in te stellen
*
Netsnoer - voor de netvoeding
(
Draadantenne –
om de FM-ontvangst te verbeteren
osdE
utomatically.
for repair.
error message
Fan error
LET OP
Het gebruik van de toetsen en regelingen of het toepassen van de aanwijzingen
anders dan hier beschreven, kan leiden tot blootstelling aan gevaarlijke straling
of tot onveilige werking.
Met het oog op het milieu...
Wij hebben alle overbodige verpakkingsmaterialen weggelaten en ervoor gezorgd dat de
verpakking gemakkelijk in drie materialen te scheiden is: karton (doos), polystyreenschuim (buffer)
en plastic (zakken, beschermfolie).
Uw apparaat bestaat uit materialen die door een gespecialiseerd bedrijf gerecycleerd
kunnen worden. Informeer waar u verpakkingsmateriaal, lege batterijen en oude
apparatuur kunt inleveren.
44
Page 45

NETVOEDING EN DEMONSTRATIEPROGRAMMA
F
M
Z
Z
Z
Z
RADIO
C
D
P
L
A
Y
/P
A
U
SE
SET DAY
S
L
E
E
P
WEEKEND SLEEPER
A
L
A
R
M
1
M
O
D
E
/
O
F
F
S
E
T
A
L
A
R
M
1
2
T
I
M
E
C
L
O
C
K
CD
/RA
DIO
O
FF
R
A
D
I
O
P
R
E
S
E
T
VO
LUM
E
2
1
D
I
G
I
T
A
L
R
A
D
I
O
P
LA
Y
/P
A
U
SE
SET DAY
S
L
E
E
P
WEEKEND SLEEPER
A
L
A
R
M
1
M
O
D
E
/
O
F
F
S
E
T
A
L
A
R
M
1
2
T
I
M
E
C
L
O
C
K
CD/RAD
IO
O
FF
R
A
D
I
O
P
R
E
S
E
T
VO
LUM
E
2
1
O
P
E
N
•
C
L
O
S
E
O
P
E
N
•
C
L
O
S
E
A
L
A
R
M
1
M
O
D
E
/
O
F
F
C
D
R
A
D
I
O
O
N
1. Controleer of de netspanning aangegeven op het typeplaatje
op de onderkant van het apparaat overeenkomt met de
plaatselijke netspanning. Is dit niet het geval, raadpleeg dan uw
leverancier of serviceorganisatie.
2. Steek de netstekker in het stopcontact.
De netvoeding is nu ingeschakeld en in het display verschijnt de
PHILIPS demo mode.
™ PH..IL ..IPS loopt keer op keer over het display.
• Druk op een willekeurige toets (met uitzondering van REPEAT
ALARM/
BRIGHTNESS CONTROL op het apparaat) om het
demonstratieprogramma af te sluiten.
3. Trek de netstekker uit het stopcontact als u de netvoeding
helemaal wilt uitschakelen.
BACK-UP-VOEDING
Dankzij de back-up-voeding blijven de dag-, wek- en
tijdsinstellingen gedurende 3 minuten bewaard wanneer de
voeding onderbroken wordt bijvoorbeeld bij stroomuitval.
De hele klokradio/cd-speler en de displayverlichting worden
uitgeschakeld. Zodra de stroom terugkeert, geeft het display
opnieuw de juiste tijd aan.
• Als na 3 minuten de stroom terugkeert dan verschijnt in het
display de PHILIPS demo mode en moet u de dag en de tijd
opnieuw invoeren.
INSTALLATIE
Nederlands
BASISFUNCTIES
Sterkte van de displayverlichting
1. Controleer of de SET knop op CLOCK staat.
2. Druk één of meerdere keren op REPEAT ALARM/
CONTROL
– De sterkte van de displayverlichting verandert als volgt:
LOW ™ MEDIUM ™ BRIGHT ™ LOW...
Volume
Druk op VOLUME 4 of 3 om volumeniveau in te stellen. Het
volumeniveau vo: wordt weergegeven door een cijfer van 0-32.
BRIGHTNESS
45
Page 46

KLOK AFSPELEN VAN EEN CD
CD
CD
F
M
Z
Z
Z
Z
R
A
D
IO
C
D
P
L
A
Y
/P
A
U
S
E
S
E
T
D
A
Y
SLEEP
W
E
E
K
E
N
D
-
S
LE
EP
E
R
S
E
T
A
L
A
R
M
1
2
T
I
M
E
C
L
O
C
K
C
D
/
R
A
D
I
O
O
F
F
P
R
O
G
R
A
D
I
O
P
R
E
S
E
T
V
O
L
U
M
E
2
1
D
I
G
I
T
A
L
R
A
D
I
O
P
L
A
Y
/P
A
U
S
E
S
E
T
D
A
Y
SLEEP
W
E
EK
E
N
D
-
SLE
EP
E
R
S
E
T
A
L
A
R
M
1
2
T
I
M
E
C
L
O
C
K
C
D
/
R
A
D
I
O
O
F
F
P
R
O
G
R
A
D
I
O
P
R
E
S
E
T
V
O
LU
M
E
2
1
A
L
A
R
M
1
M
O
D
E
/
O
F
F
C
D
/
T
U
N
I
N
G
S
E
A
R
C
H
R
A
D
I
O
O
N
1
D
INSTELLEN VAN DE KLOK
Voor het weergeven van de tijd in het display wordt een 24-uurssysteem gebruikt.
1. Draai de SET knop op TIME.
2. Druk op 7, 8 om zowel het uur als de minuten in te stellen.
™ Houd 7 respectievelijk 8 ingedrukt; de tijd loopt snel en continu
vooruit/ achteruit, eerst de minuten en dan de uren.
™ Druk herhaaldelijk kort op 7 of 8 om de tijd langzaam in te
stellen, minuut per minuut.
3. Draai de SET-knopop CLOCK nadat u de juiste tijd bereikt heeft.
INSTELLEN VAN DE DAG
Als u de dag ingesteld heeft, kunt u gebruik maken van de
WEEKENDSLEEPER. Probeert u de WEEKENDSLEEPER te
gebruiken zonder dat de dag ingesteld is dan knippert ' ' kort
in het display om u eraan te herinneren dat u eerst de dag in moet
Nederlands
stellen.
1. Druk op SET DAY.
2. Druk, terwijl in het display de dag weergegeven wordt, opnieuw
één of meerdere keren op SET DAYom de dag te kiezen; de dag
wordt kort weergegeven door ' ' 1-7 (maandag-zondag).
– In het display verschijnt opnieuw de tijd.
W
W
EE
E
E
K
K
E
E
N
N
D
SL
D
SL
-
-
E
E
E
E
P
P
E
ER
R
Z
Z
R
C
A
SLEEP
D
SLEEP
D
IO
S
S
E
E
T
T
D
D
A
A
Y
Y
S
S
E
E
T
T
A
A
L
L
A
A
R
R
M
M
1
1
2
2
T
T
I
I
M
M
C
C
E
E
L
L
O
O
C
C
K
K
P
P
L
L
A
A
Y
Y
/P
/P
A
A
U
U
S
S
E
E
C
C
D
D
/
R
/
R
A
A
D
D
I
O
I
O
D
I
R
G
A
I
T
D
A
I
O
L
R
O
A
N
D
I
O
C
D
/
T
U
N
I
N
G
S
E
A
R
C
H
A
L
A
R
M
1
M
O
D
E
/
O
F
F
2
2
Z
Z
F
M
O
O
F
F
F
F
V
V
O
O
L
U
L
U
M
M
E
E
R
R
A
A
D
D
I
O
I
O
P
P
R
R
E
E
S
E
S
E
T
T
P
P
R
R
O
O
G
G
AFSPELEN VAN EEN CD
1. Druk op OPEN•CLOSE om de cd-deur te openen.
2. laats een cd in de speler met de bedrukte kant naar boven en
druk de deur dicht.
3. Druk op PLAY/PAUSE 2; om het afspelen te starten.
• In het display verschijnen de cd-indicator , ’ ‘ en het
totale aantal nummers gevolgd door het huidige nummer; kort
daarna verschijnt opnieuw de tijd.
• ' ' verschijnt als u de deur van de cd-speler niet
dichtgedaan heeft of wanneer u de deur opent tijdens het
afspelen.
• ' ' verschijnt als er geen cd in de speler zit of als de cd
verkeerd geplaatst is.
• ' ' verschijnt als de cd-r(w) niet afgesloten is.
• ' ' geeft een algemene fout aan bij het bedienen van het
apparaat.
™ De cd-indicator blijft staan terwijl de cd speelt.
46
O
P
O
E
P
N
E
N
•
C
•
L
C
O
L
S
O
E
S
A
A
L
L
A
A
R
R
M
M
M
M
O
1
O
1
D
D
E
E
/
O
/
O
F
F
F
F
1
1
WEEKEND-
WEEKEND-
SLEEPER
SLEEPER
Z
Z
RADIO
C
S
S
L
D
L
E
E
E
E
P
P
SET DAY
SET DAY
S
S
E
E
T
T
A
A
L
L
A
A
R
R
M
M
1
1
2
2
T
T
I
I
M
M
C
C
E
E
L
L
O
O
C
C
K
K
PL
P
Z
Z
F
M
LA
A
Y
Y
/PA
/PA
U
U
S
S
E
E
CD/RAD
C
D/RADIO
IO
OFF
O
FF
D
I
R
G
A
I
T
D
A
I
O
L
R
O
A
N
D
I
O
C
E
A
L
A
R
M
1
M
O
D
E
/
O
F
F
2
2
VO
V
O
LU
LU
M
M
E
E
R
R
A
A
D
D
I
O
I
O
P
P
R
R
E
E
S
E
S
E
T
T
Page 47

AFSPELEN VAN EEN CD RADIO
RADIO
CD
P
L
A
Y
/P
A
U
S
E
D
A
Y
S
E
T
A
L
A
R
M
1
2
T
I
M
E
C
L
O
C
K
C
D
/
R
A
D
I
O
O
F
F
P
R
O
G
R
A
D
I
O
P
R
E
S
E
T
V
O
L
U
M
E
D
I
G
I
T
A
L
R
A
D
I
O
P
L
A
Y
/P
A
U
S
E
D
A
Y
S
E
T
A
L
A
R
M
1
2
T
I
M
E
C
L
O
C
K
C
D
/
R
A
D
I
O
O
F
F
P
R
O
G
R
A
D
I
O
P
R
E
S
E
T
V
O
L
U
M
E
C
D
/
T
U
N
I
N
G
S
E
A
R
C
H
R
A
D
I
O
O
N
R
A
C
D
4. Stel het geluid in met VOLUME 4of 3.
5. Druk op PLAY•PAUSE 2; om het afspelen te onderbreken.
• Het huidige nummer verschijnt kort en vervolgens verschijnt
opnieuw de tijd; blijft knipperen gedurende de onderbreking.
6.
Druk opnieuw op PLAY•PAUSE 2; om verder te gaan met afspelen.
7. Druk op CD/RADIO OFF 9 om het afspelen te beëindigen.
™ De CD indicator verdwijnt uit het display en de cd-speler wordt
uitgeschakeld.
™ Na het laatste nummer gaat het apparaat automatisch in
stand-by waarbij het display de tijd weergeeft.
Kiezen van een ander nummer
Het volgnummer verschijnt kort in het display wanneer u op ∞ of §
drukt om naar een ander nummer te gaan.
• Druk één of meerdere keren op § naar het/ een volgend
nummer te gaan.
• Druk meer dan één keer op ∞ om naar een vorig nummer te gaan.
• Druk eenmaal op ∞ en het huidige nummer begint opnieuw
vanaf het begin te spelen.
Zoeken naar een passage binnen een nummer
1. Houd, tijdens het afspelen, ∞ of § ingedrukt.
™ De cd wordt versneld en zachtjes afgespeeld; in het display
verschijnen ’ ’ en het huidige nummer.
2. Laat ∞ of § los zodra u de gewenste passage herkent.
™ Het afspelen van de cd gaat op de normale manier verder en in
het display verschijnt opnieuw de tijd.
Nederlands
RADIO
1. Druk op RADIO ON/ BAND om de radio aan te zetten.
™ In het display verschijnen ’ ’ en gevolgd door het
golfgebied dat u als laatste gekozen heeft en informatie over
geprogrammeerde zenders.
2. Druk opnieuw op RADIO ON/ BAND als u een ander golfgebied
wilt kiezen.
3. Stel het geluid in met VOLUME 4 of 3.
Automatisch afstemmen
• Houd ∞ of § langer dan één seconde ingedrukt om af te
stemmen op een zender.
™ De radio stemt automatisch af op een zender die sterk genoeg is.
Tijdens het automatisch zoeken verschijnt in het display ’ ’.
Handmatig afstemmen
• Houd ∞ of § ingedrukt om af te stemmen op een zender.
• Laat los wanneer de frequentie in het display in de buurt komt
van de gewenste frequentie.
Druk één of meerdere keren kort op ∞ of § om exact af te stemmen.
•
SLEEP
D
SLEEP
IO
Z
Z
F
S
S
E
E
T
T
D
D
A
A
Y
Y
S
S
E
E
T
T
A
A
L
L
A
A
R
R
M
M
1
1
2
2
T
T
I
I
M
M
C
C
E
E
L
L
O
O
C
C
K
K
M
P
P
L
L
A
A
Y
Y
/
P
/P
A
A
U
U
S
S
E
E
C
C
D
D
/
R
/
R
A
A
D
D
I
O
I
O
O
O
F
F
F
F
D
I
R
G
A
I
T
D
A
I
O
L
R
O
A
N
D
I
O
C
D
/
T
U
N
I
N
G
S
E
A
R
C
H
V
V
O
O
L
U
L
U
M
M
E
E
R
R
A
A
D
D
I
O
I
O
P
P
R
R
E
E
S
E
S
E
T
T
P
P
R
R
O
O
G
G
47
Page 48

RADIO WEKKER
PROG
PROG
RADIO
F
M
Z
Z
Z
Z
R
A
D
IO
C
D
P
L
A
Y
/P
A
U
SE
S
E
T
D
A
Y
SLEEP
W
E
EK
E
N
D
-
S
LE
E
P
ER
S
E
T
A
L
A
R
M
1
2
T
I
M
E
C
L
O
C
K
C
D
/
R
A
D
I
O
O
F
F
P
R
O
G
R
A
D
I
O
P
R
E
S
E
T
V
O
L
U
M
E
2
1
D
I
G
I
T
A
L
R
A
D
I
O
P
L
A
Y
/P
A
U
S
E
S
E
T
D
A
Y
SL
EEP
W
E
E
K
E
N
D
-
SL
E
E
PE
R
S
E
T
A
L
A
R
M
1
2
T
I
M
E
C
L
O
C
K
C
D
/
R
A
D
I
O
O
F
F
P
R
O
G
R
A
D
I
O
P
R
E
S
E
T
V
O
LU
M
E
2
1
A
L
A
R
M
1
M
O
D
E
/
O
F
F
C
D
/
T
U
N
IN
G
S
E
A
R
C
H
R
A
D
I
O
O
N
R
C
D
A
V
O
Y
O
O
O
Verbeteren van de ontvangst
FM: rol de draadantenne aan de achterkant van het apparaat
helemaal uit voor de beste ontvangst.
MW/ LW:hiervoor wordt de ingebouwde antenne gebruikt. Richt
de antenne door het apparaat te draaien.
4. Druk op CD/RADIO OFF 9 om de radio uit te schakelen.
™ verdwijnt uit het display.
A
SL
D
SL
EEP
EEP
Programmeren van radiozenders
U kunt in het totaal 30 radiozenders in het geheugen opslaan.
1. Stem af op de gewenste zender (zie Afstemmen op een
radiozender).
2. Druk op PROG om te beginnen met programmeren.
™ Display: knippert.
3. Druk één of meerdere keren op PRESET 4 of 3 om een nummer
van 1 tot 30 toe te kennen aan deze zender.
4. Druk opnieuw op PROG om te bevestigen.
™ Display: verdwijnt, het zendernummer en de frequentie
Nederlands
van de geprogrammeerde zender worden kort weergegeven.
5. Herhaal deze vier stappen om nog meer zenders op te slaan.
• U kunt een geprogrammeerde zender wissen door een andere
frequentie op dezelfde plaats op te slaan.
INSTELLEN VAN DE WEKTIJD
IO
S
S
E
E
T
T
D
D
A
A
Y
Y
S
S
E
E
T
T
A
A
L
L
A
A
R
R
M
M
1
1
2
2
T
T
I
I
M
M
C
C
E
E
L
L
O
O
C
C
K
K
P
P
L
L
A
A
Y
Y
/P
/P
A
A
U
U
S
S
E
E
C
C
D
D
/
R
/
R
A
A
D
D
I
I
D
I
R
G
A
I
T
D
A
I
O
L
R
O
A
N
D
I
O
C
D
/
T
U
N
I
N
G
S
E
A
R
C
Z
Z
F
M
O
O
O
O
F
F
F
F
H
V
V
O
O
L
U
L
U
M
M
E
E
R
R
A
A
D
D
I
O
IO
P
P
R
R
E
E
S
E
S
E
T
T
P
P
R
R
O
O
G
G
Algemeen
U kunt twee verschillende wektijden instellen, wekker 1 en 2
(ALARM 1 en 2) waarbij u tevens kunt kiezen om gewekt te worden door een cd, de radio of de zoemer. Dit is handig als u doordeweeks op een andere tijd gewekt moet worden dan in het weekend.
Gentle wake volume (
Wekvolume van zacht naar hard)
Om er zeker van te zijn dat u ‘s ochtends wakker wordt, start het
gentle wake volume zachtjes bij niveau nul ( ) en gaat het
vervolgens steeds harder klinken tot niveau 16 ( ). Indien u
dat wilt, kunt u de standaardinstelling van het wekvolume van de
zoemer, radio of cd ook wijzigen:
1. Druk vanuit stand-by eenmaal op ALARM 1 MODE/OFF of
ALARM 2 MODE/OFF.
2. Druk, zodra ‘ ’ verschijnt, één of meerdere keren op 7 of 8
tot u het gewenste niveau bereikt heeft (0-32). Zo stelt u het
volumeniveau in waarmee de wekker begint.
3. Om het maximale volume van uw wekker in te stellen, drukt u
nogmaals op ALARM 1 MODE/OFF of ALARM 2 MODE/OFF
zodat in het display verschijnt.
4. Druk, zodra ‘ ’ verschijnt, op 7 of 8 tot u het gewenste
volumeniveau bereikt heeft (een cijfer gelijk aan of groter dan
het beginniveau, ).
48
O
P
O
E
P
N
E
N
•
C
•
L
C
A
A
L
L
A
A
R
R
M
M
M
M
O
1
O
1
D
D
E
E
/
O
/
O
F
F
F
F
1
1
W
W
EE
E
E
K
K
EN
E
N
D
S
D
S
-
L
-
L
EE
E
EP
P
E
E
R
R
Z
Z
R
C
A
SLEEP
D
SLEEP
D
IO
Z
Z
F
S
S
E
E
T
T
D
D
A
M
L
A
L
A
R
M
1
M
O
D
E
/
O
F
F
2
2
V
Page 49

Opmerking:
l
l
F
M
Z
Z
Z
Z
RADIO
C
D
P
LA
Y
/P
A
U
SE
SET DAY
S
L
E
E
P
WEEKEND SLEEPER
A
L
A
R
M
1
M
O
D
E
/
O
F
F
S
E
T
A
L
A
R
M
1
2
T
I
M
E
C
L
O
C
K
CD
/RA
DIO O
FF
R
A
D
I
O
P
R
E
S
E
T
VOLUM
E
2
1
D
I
G
I
T
A
L
R
A
D
I
O
PLA
Y
/PA
U
SE
SET DAY
S
L
E
E
P
WEEKEND SLEEPER
A
L
A
R
M
1
M
O
D
E
/
O
F
F
S
E
T
A
L
A
R
M
1
2
T
I
M
E
C
L
O
C
K
CD/RADIO O
FF
R
A
D
I
O
P
R
E
S
E
T
VO
LU
ME
2
1
O
P
E
N
•
C
L
O
S
E
O
P
E
N
•
C
L
O
S
E
A
L
A
R
M
1
M
O
D
E
/
O
F
F
C
D
/
T
U
R
A
D
I
O
O
N
• De instelling van het gentle wake volume heeft geen invloed
op het normale volumeniveau van de cd-speler of de radio.
• Het bekijken van het gentle wake volume is niet mogelijk
terwijl de wekker afgaat; immers, wanneer u op ALARM 1
MODE/OFF of ALARM 2 MODE/OFF drukt, wordt de wekker
helemaal uitgeschakeld.
INSTELLEN VAN WEKKER 1 OF 2
1. Draai de SET knop op ALARM 1 of 2.
2. Druk op 7, 8 om zowel het uur als de minuten in te stellen:
– Houd 7 respectievelijk 8 ingedrukt; de tijd loopt snel en
continu vooruit of achteruit, eerst de minuten en dan de uren.
– Druk herhaaldelijk kort op 7 of 8 om de tijd langzaam in te
stellen, minuut per minuut.
3. Laat 7 of 8 los zodra u de juiste wektijd bereikt heeft.
4. Draai de SET-knopterug op CLOCK.
5. Kies de manier waarop u gewekt wilt worden door één of
meerdere keren op ALARM 1 of 2 MODE/OFF te drukken.
™ De verschillende wekinstellingen verschijnen
achtereenvolgens in het display:
• : standaardbeginniveau van het wekvolume;
• : standaardeindniveau van het wekvolume;
• en voor wekken met de zoemer;
• en voor wekken met de radio;
• : en een cd-nummer 1-99 wordt weergegeven
• Alarm off: display zonder , of .
6. Als u ervoor gekozen heeft gewekt te worden door de cd, zie dan
het hoofdstuk ‘Wekken met de cd: Kiezen van een nummer’
voor verdere instellingen.
Wekken met de cd: Kiezen van een nummer
U kunt een cd-nummer tussen 1 en 99 kiezen en programmeren
terwijl het apparaat stand-by staat of terwijl de radio speelt.
Programmeert u echter een nummer dat niet op de cd staat dan zal
u gewekt worden door het eerste nummer van de cd.
1. Plaats een cd in het cd-vak.
2. Druk op ALARM 1 MODE/OFF of ALARM 2 MODE/OFF tot het
cd-display met een cd-nummer verschijnt.
3. Druk, zodra het cd-display verschijnt, op 7 of 8 tot het gewenste
cd-nummer verschijnt.
™ Het display gaat terug in stand-by waarbij de tijd
weergegeven wordt.
4. Om te controleren welk nummer u geprogrammeerd heeft:
druk opnieuw herhaaldelijk op ALARM 1 MODE/OFF of
ALARM 2 MODE/OFF tot het cd-display verschijnt.
WEKKER
Nederlands
49
Page 50

WEKKER
l
F
M
Z
Z
Z
Z
RADIO
C
D
PLA
Y
/PA
U
SE
SET DAY
S
L
E
E
P
WEEKEND SLEEPER
A
L
A
R
M
1
M
O
D
E
/
O
F
F
S
E
T
A
L
A
R
M
1
2
T
I
M
E
C
L
O
C
K
CD/RAD
IO OFF
R
A
D
I
O
P
R
E
S
E
T
VOLUM
E
2
1
D
I
G
I
T
A
L
R
A
D
P
LA
Y/PA
U
SE
SET DAY
S
L
E
E
P
WEEKEND SLEEPER
A
L
A
R
M
1
M
O
D
E
/O
F
F
S
E
T
A
L
A
R
M
1
2
T
I
M
E
C
L
O
C
K
CD/RADIO
O
FF
R
A
D
I
O
P
R
E
S
E
T
VO
LU
ME
2
1
O
P
E
N
•
C
L
O
S
E
O
P
E
N
•
C
L
O
S
E
A
L
A
R
M
1
M
O
D
E
/
O
F
F
R
A
D
I
O
O
N
O
O
Opmerking:
– U wordt automatisch gewekt door de zoemer (BUZZER) in
plaats van de cd-speler in de volgende gevallen:
– indien u de cd verkeerd in de speler geplaatst heeft;
– indien de cd beschadigd is;
– indien u vergeten bent een cd in de speler te plaatsen;
– indien u de cd-deur geopend heeft.
UITZETTEN VAN DE WEKKER
U kunt de wekker op drie manieren uitzetten. Als u de wekker
niet zelf helemaal uitgeschakeld heeft dan wordt automatisch,
59 minuten nadat de wekker voor het eerst afging, de optie
UITZETTEN VOOR 24 UUR gekozen.
Uitzetten voor 24 uur
Als u de wekker meteen wilt uitzetten maar deze tegelijk zo wilt
instellen dat hij de volgende dag op dezelfde tijd en op dezelfde
Nederlands
manier weer afgaat:
• Druk op 24 HR RESET of CD/RADIO OFF 9.
™ Een pieptoon geeft aan dat de functie UITZETTEN VOOR
24 UUR geactiveerd is.
De wekker helemaal uitschakelen
Om de wekker uit te schakelen voor deze afgegaan is, of terwijl deze
afgaat:
• Druk één of meerdere keren op ALARM 1 MODE/OFF of
ALARM 2 MODE/OFF tot de indicator van het gekozen
weksignaal uit het display verdwijnt.
Weksignaal herhalen
Met deze optie gaat de wekker 9 minuten later opnieuw af.
• Druk terwijl de wekker afgaat op REPEAT ALARM/ B
CONTROL
.
• Herhaal indien gewenst (tot een maximum van 59 minuten).
Opmerkingen:
• De indicator van het gekozen weksignaal , of blijft
knipperen zolang het weksignaal herhaald wordt.
• Als u ervoor gekozen heeft om gewekt te worden door de cdspeler dan gaat het afspelen van de cd verder vanaf het punt
waar gestopt werd toen u op REPEAT ALARM drukte.
• Bij wekken met de cd gaat het afspelen van de cd gedurende
59 minuten door behalve als de wekker uitgeschakeld wordt.
RIGHTNESS
O
P
O
E
P
N
E
•
N
C
•
L
C
A
A
L
L
A
A
R
R
M
M
M
M
O
1
O
1
D
D
E
E
/
O
/
O
F
F
F
F
1
1
W
W
E
E
EK
E
K
E
E
N
N
D
SL
D
S
-
-
L
E
EE
E
PE
P
E
R
R
Z
Z
R
C
A
SLEEP
D
SLEEP
D
IO
Z
Z
F
S
S
E
E
T
T
D
D
A
A
Y
Y
M
L
A
L
A
R
M
1
M
O
D
E
/
O
F
F
2
2
V
V
O
O
L
U
L
U
M
M
E
E
50
Page 51

WEKKER SLEEP
SLEEP
ZZZZZZZ
Z
Z
Z
Z
Z
A
O
A
L
WEEKENDSLEEPER-FUNCTIE
Deze functie zorgt ervoor dat de wekker op zaterdag en zondag niet
afgaat en van maandag tot vrijdag wel. Hiervoor moet u wel eerst de
dag ingesteld hebben (zie hoofdstuk: INSTELLEN VAN DE DAG).
1. Druk één of meerdere keren op WEEKEND SLEEPER tot
of averschijnt voor één van de of voor beide wekkers.
2. Wilt u de weekendfunctie uitschakelen, herhaal dan stap 1 tot
en/of uit het display verdwijnt.
SLEEP (SLUIMEREN)
De sluimertijd
Dit klokradio/cd-speler heeft een ingebouwde timer, die automatisch
de radio of de cd-speler uitzet na een bepaalde tijd. Voor de duur
van de sluimertijd kunt u kiezen uit vier mogelijkheden: 10, 30, 60,
90 minuten of uit.
Aanzetten van de sluimerfunctie
1. Druk op PLAY•PAUSE of RADIO ON/ BAND.
• Wilt u naar een cd luisteren, plaats dan eerst een cd in de speler.
2. Kies uw sluimertijd door één of meerdere keren op SLEEP te
drukken tot in het display de gewenste sluimertijd verschijnt.
3. TU kunt de sluimerfunctie op één van de volgende manieren
uitschakelen:
• Druk één of meerdere keren op SLEEP tot uit het display
verdwijnt;
• Druk op CD/ RADIO OFF 9.
• Druk op REPEAT ALARM/
BRIGHTNESS CONTROL.
L
A
A
R
R
M
M
M
M
O
1
O
1
D
D
E
E
/
O
/
O
F
F
F
F
1
1
W
W
E
E
E
E
K
K
E
E
N
N
D
SL
D
S
-
-
LE
E
E
E
PE
P
E
R
R
Z
Z
R
C
A
SLEEP
D
SLEEP
D
IO
S
S
E
E
T
T
D
D
A
A
Y
Y
S
S
E
E
T
T
A
A
L
L
A
A
R
R
M
M
1
1
2
2
T
T
I
I
M
M
C
C
E
E
L
L
O
O
C
C
K
K
P
P
L
L
A
A
Y
Y
/P
/P
A
A
U
U
S
S
E
E
D
R
I
G
A
I
D
T
A
I
O
L
A
L
A
R
M
1
M
O
D
E
/
O
F
F
2
2
Z
Z
F
M
C
C
D
D
/
R
/
R
A
A
D
D
I
O
I
O
O
O
F
F
F
F
R
O
A
N
D
I
FMRADIO
SLEEP
V
V
O
O
L
LU
R
R
A
A
D
D
I
O
I
O
P
P
R
R
E
E
S
E
S
E
T
T
U
M
M
E
E
Nederlands
51
Page 52

ONDERHOUD
ONDERHOUD VAN DE CD-SPELER EN DE CD’S
• Raak de lens van de cd-speler nooit aan!
• Bij plotse temperatuurveranderingen kan er condens ontstaan en
kan de lens van de cd-speler beslaan. Het afspelen van een cd is
dan niet mogelijk. Probeer niet de lens schoon te maken maar
laat de cd-speler enige tijd acclimatiseren in een warme
omgeving tot de condens verdwenen is.
• Houd het cd-vak altijd dicht zodat er geen stof in komt. Maak
het cd-vak schoon met een zachte droge doek.
• U kunt de cd het eenvoudigst uit het doosje nemen door in het
midden te drukken terwijl u de cd optilt. Houd de cd’s altijd bij
de rand vast en berg ze na gebruik weer op in het doosje om te
voorkomen dat er krassen of vuil op komen.
• Maak de cd schoon door met een zachte, pluisvrije doek vanuit
het midden in een rechte lijn naar de rand te wrijven. Gebruik
geen schoonmaakmiddelen want deze kunnen de cd
Nederlands
beschadigen.
• Schrijf nooit op een cd en plak er geen stickers op.
ALGEMEEN
• Trek de stekker uit het stopcontact als u uw klokradio/ cd-speler
langere tijd niet zult gebruiken.
• Bescherm het apparaat en de cd’s tegen vocht, regen, zand en
extreem hoge temperaturen zoals bij verwarmingsapparatuur of
in de volle zon.
• Maak het apparaat schoon met een zachte, vochtige zeemlap.
Gebruik geen schoonmaakmiddelen die alcohol, ammonia,
benzine of schuurmiddel bevatten want die kunnen uw apparaat
beschadigen.
X
52
Page 53

VERHELPEN VAN STORINGEN
Als zich een probleem voordoet, controleer dan eerst de punten op de onderstaande lijst voor u het
apparaat ter reparatie aanbiedt. Kunt u het probleem niet oplossen aan de hand van deze
aanwijzingen, raadpleeg dan uw leverancier of serviceorganisatie.
WAARSCHUWING:Maak het apparaat niet open want dan loopt u het risico een
elektrische schok te krijgen! Probeer in geen geval zelf het
apparaat te repareren want dan vervalt de garantie.
Probleem Mogelijke oorzaak Oplossing
Geen geluid Het volume staat te zacht Zet het volume harder
Het apparaat reageert op geen Elektrostatische ontlading Haal de stekker uit het
enkele toets stopcontact en sluit 5 minuten
later weer aan
CD SPELER
Het afspelen van een cd lukt niet De cd is beschadigd of vuil Vervang de cd/ maak deze schoon
De lens van de laser is beslagen Wacht tot de lens
geacclimatiseerd is
De lens van de laser is vuil Maak de lens schoon door een
schoonmaak-cd voor cd-lenzen
af te spelen
De cd-r(w) is niet afgesloten Gebruik een afgesloten cd-r(w)
RADIO
Af en toe gekraak bij Zwak signaal Rol de draadantenne helemaal uit
FM-ontvangst
Constant gekraak/ gefluit Elektrische storingen van tv’s, Zet het apparaat uit de buurt
bij MW/ LW-ontvangst computers, tl-lampen enzovoort van andere elektrische apparatuur
WEKKER
De wekker gaat niet af De wektijd is niet ingesteld Zet de wektijd
De manier van wekken is niet Zie hoofdstuk instellen van
ingesteld WEKKER 1 OF 2
Het volume van de radio/ Zie hoofdstuk
cd-speler/ zoemer staat te Gentle wake volume
zacht om u te wekken
De weekendfunctie werkt niet De dag staat niet/ niet correct Zie hoofdstuk INSTELLEN VAN
ingesteld DE DAG
De weekendfunctie is niet Schakel de weekendfunctie in
ingeschakeld
Nederlands
Dit apparaat voldoet aan de radio-ontstoringseisen van de Europese Unie.
Het typeplaatje vindt u op de onderkant van het apparaat.
53
 Loading...