

Philips AJ394017, AJ39401798 User Manual

CD Clock Radio
R
E
P
E
A
T
A
L
A
R
M
R
E
P
E
A
T
A
L
A
R
M
AM
z
z
AM
z
z
F
M
1
0
4
1
0
0
9
6
92
8
8
108
k
H
z
F
M
1
0
4
1
0
0
9
6
92
8
8
108
A
M
8
7
0
8
3
0
8
0
0
2
2
5
255
275
k
H
z
A
M
8
7
0
8
3
0
8
0
0
2
2
5
255
275
k
H
z
k
H
z
ALM1
A
LM
2
RADIO
O
N
IN
W
EEKEND
SLEEPER
BUZZER
RADIO
O
N
IN
W
EEKEND
SLEEPER
BUZZER
T
R
A
C
K
S
E
LE
C
T
P
LA
Y
O
F
F
DBB
T
R
A
C
K
S
E
L
E
C
T
P
L
A
Y
O
FF
DBB
SLUMBER
SLUMBE
R
2
4
H
R
S
R
E
S
ET
P
U
S
H
•
O
P
E
N
d
u
a
l
a
l
a
r
m
SLUMBER
2
4
H
R
S
R
E
S
E
T
P
U
S
H
•
O
P
E
N
d
u
a
l
a
l
a
r
m
A
LM
1
ALM2
BRIGHTNESS
A
LM
1
ALM2
BRIGHTNESS
COM
PAC
T
DISC
C
L
O
C
K
R
A
D
IO
C
O
M
PA
CT
DISC
C
L
O
C
K
R
A
D
IO
Toll Free Help Line
Ligne d'assistance en service libre
Linea de ayuada telefónica sin cargo
800-531-0039
AJ 3940
AJ 3941

INDEX
CLASS 1
LASER PRODUCT
No abrir, riesgo de choque eléctrico
Verifique que el voltaje de alimentación
sea el requerido para su aparato
ATENCIÓN
TS
Para evitar el riesgo de choque eléctrico, no quite la tapa.
En caso de requerir servicio, dirijase al personal calificado.
PRECAUCIÓN - ADVERTENCIA
English .......................................... 4
Français....................................... 17
Español........................................ 30
µ México 2
Es necesario que lea cuidadosamente su instructivo de manejo.
Canada
English: This digital apparatus does not
Français: Cet appareil numérique n’émet pas de
2
exceed the CLass B limits for radio
noise emissions from digital
apparatus as set out in the Radio
InterferenceREgulations of the
Canadian Department of
Communications.
bruits radioélectriques dépassant les
limits applicables aux appareils
numériques de Classe B prescrites
dans le Règlement sur le Brouillage
Radioélectrique édicté par le
Ministère des Communications du
Cananda

.
S
L
U
M
B
E
R
2
4
H
R
S
R
E
S
E
T
R
E
P
E
A
T
A
L
A
R
M
P
U
S
H
•
O
P
E
N
T
R
A
C
K
S
E
LE
C
T
PLAY
F
M
104
100
96
9
2
88
1
0
8
k
H
z
ALM1
ALM2
O
FF
RADIO
O
N
IN
W
E
E
K
E
N
D
S
L
E
E
P
E
R
B
U
Z
Z
E
R
DBB
A
M
SLUMBER
z
z
d
u
a
l
a
la
r
m
A
L
M
1
A
L
M
2
B
R
I
G
H
T
N
E
S
S
C
O
M
PA
CT
DISC
C
L
O
C
K
R
A
D
IO
1
2
3
4
5
6
7
8
9
0
!
@
#
$
%
^
&
*
(
¡
)
A
M
8
7
0
8
3
0
800
225
255
2
7
5
kH
z
CAUTION
AVIS
RISK OF ELECTRIC SHOCK
DO NOT OPEN
NE PAS OUVRIR
RISQUE DU CHOC ELECTRIQUE
™
£
≤
3
Return your Warranty Registration card today to
CAUTION
RISK OF ELECTRIC SHOCK
DO NOT OPEN
CAUTION: TO REDUCE THE RISK OF ELECTRIC SHOCK, DO NOT
REMOVE COVER (OR BACK). NO USER-SERVICEABLE PARTS
INSIDE. REFER SERVICING TO QUALIFIED SERVICE PERSONNEL.
ensure you receive all the benefits you’re entitled to.
• Once your Philips Magnavox purchase
is registered,you’re eligible to receive all
the privileges of owning a Philips
Magnavox product.
Warranty
Verification
Registering your product
within 10 days confirms
your right to maximum
protection under the
terms and conditions of
your Philips Magnavox
warranty.
Owner
Confirmation
Your completed Warranty
Registration Card serves
as verification of
ownership in the event of
product theft or loss.
Know these
ssaaffeettyysymbols
• So complete and return the Warranty
Registration Card enclosed with your
purchase at once.And take advantage
of these important benefits.
Model
Registration
Returning your Warranty
Registration Card right
away guarantees you’ll
receive all the information
and special offers which
you qualify for as the
owner of your model.
For Customer Use
Enter below the Serial No.which is
located on the rear of the cabinet.Retain
this information for future reference.
Model No. _______________________
This “bolt of lightning”
indicates uninsulated material
t
electrical shock.For the safety of
everyone in your household,please do
not remove product covering.
s
literature closely to prevent operating
and maintenance problems.
4
within your unit may cause an
The “exclamation point” calls
attention to features for which
you should read the enclosed
Serial No. ________________________
WARNING:TO PREVENT
FIRE OR SHOCK HAZARD, DO
NOT EXPOSE THIS EQUIPMENT TO
RAIN OR MOISTURE.
CAUTION:To prevent electric
shock,match wide blade of plug to
wide slot,and fully insert.
MAC5097

LIMITED W ARRANTY
PORTABLE AUDIO
One Y ear Free Exchange
This product must be carried in for an exchange.
WHO IS COVERED?
You must have proof of purchase to exchange the
product.A sales receipt or other document showing that
you purchased the product is considered proof of
purchase. Attach it to this owner’s manual and keep both
nearby.
WHAT IS COVERED?
Warranty coverage begins the day you buy your
product.For one year thereafter, a defective or
inoperative product will be replaced with a new,
renewed or comparable product at no charge to you.A
replacement product is covered only for the original
warranty period.When the warranty on the original
product expires,the warranty on the replacement
product also expires.
WHAT IS EXCLUDED?
Your warranty does not cover:
• labor charges for installation or setup of the
product,adjustment of customer controls on the
product,and installation or repair of antenna
systems outside of the product.
• product repair and/or part replacement because of
misuse, accident, unauthorized repair or other cause
not within the control of Philips Consumer
Electronics Company.
• reception problems caused by signal conditions or
cable or antenna systems outside the unit.
• a product that requires modification or adaptation
to enable it to operate in any country other than
the country for which it was designed,
manufactured,approved and/or authorized,or repair
of products damaged by these modifications.
• incidental or consequential damages resulting from
the product.(Some states do not allow the
exclusion of incidental or consequential damages,so
the above exclusion may not apply to you. This
includes,but is not limited to, prerecorded material,
whether copyrighted or not copyrighted.)
• a product used for commercial or institutional
purposes.
WHERE IS EXCHANGE AVAILABLE?
You may exchange the product in all countries where
the product is officially distributed by Philips Consumer
Electronics Company. In countries where Philips
Consumer Electronics Company does not distribute the
product,the local Philips service organization will
attempt to provide a replacement product (although
there may be a delay if the appropriate product is not
readily available).
BEFORE REQUESTING EXCHANGE...
Please check your owner’s manual before requesting an
exchange.Adjustments of the controls discussed there
may save you a trip.
This warranty gives you specific legal rights.You may have other rights which vary from state/province to state/province.
Philips Service Solutions Group,P.O.Box 2976,Longview,Texas 75606,(903) 242-4800
EL6095T001 / MAC5433 / 01-99
EXCHANGING A PRODUCT IN U.S.A.,
PUERTO RICO OR U.S.VIRGIN ISLANDS...
Contact your dealer to arrange an exchange.Or,ship
the product,insured and freight prepaid,and with proof
of purchase enclosed,to the address listed below.
(In U.S.A.,Puerto Rico and U.S. Virgin Islands, all implied
warranties,including implied warranties of merchantability
and fitness for a particular purpose, are limited in duration
to the duration of this express warranty. But,because some
states do not allow limitations on how long an implied
warranty may last,this limitation may not apply to you.)
EXCHANGING A PRODUCT IN CANADA...
Please contact Philips at:
(In Canada,this warranty is given in lieu of all other
warranties.No other warranties are expressed or
implied,including any implied warranties of
merchantability or fitness for a particular purpose.
Philips is not liable under any circumstances for any
direct,indirect, special,incidental or consequential
damages,howsoever incurred,even if notified of the
possibility of such damages.)
TO GET OUT-OF-WARRANTY EXCHANGE...
In U.S.A.,Puerto Rico or U.S. Virgin Islands, contact Philips
Service Company at (800) 851-8885 to obtain the cost of
out-of-warranty exchange.Then carefully pack the product
and ship it to the Small Product Service Center (address
listed above).In Canada, call the phone number listed above
under “Exchanging a Product in Canada” to obtain the cost
of out-of-warranty exchange.
REMEMBER...
Please record the model and serial numbers found on
the product below.Also,please fill out and mail your
warranty registration card promptly.It will be easier for
us to notify you if necessary.
MODEL # __________________________________
SERIAL # __________________________________
Small Product Service Center
Philips Service Company
907 Snapps Ferry Road,Plant 2, Building 6
Greeneville,TN 37743
1-800-661-6162 (French Speaking)
1-800-363-7278 (English Speaking)
5
SAFETY
English
WARNING
To reduce the risk of fire or electric
shock, do not expose this appliance to
rain or moisture.
CAUTION
Use of controls or adjustments or
performance of procedures other than
herein may result in hazerdous
radiation exposure
SAFETY INSTRUCTIONS – Read before operating equipment
This product was designed and manufactured to meet strict
quality and safety standards. There are, however, some
installation and operation precautions which you should be
particularly aware of.
1. Read Instructions - All the safety and operating
instructions should be read before the appliance is operated.
2. Retain Instructions - The safety and operating instructions
should be retained for future reference.
3. Heed Warnings - All warnings on the appliance and in the
operating instructions should be adhered to.
4. Follow Instructions - All operating and use instructions
should be followed.
5. Water and Moisture - The appliance should not be used
near water - for example, near a bathtub, washbowl, kitchen
sink, laundry tub, in a wet basement or near a swimming
pool, etc.
6. Carts and Stands - The appliance should be used only
with a cart or stand that is recommended by the
manufacturer.
6A. An appliance and cart combination should be
7. Wall or Ceiling Mounting - The appliance should be
mounted to a wall or ceiling only as recommended by the
manufacturer.
8. Ventilation - The appliance should be situated so that its
location or position does not interfere with its proper
ventilation. For example, the appliance should not be
situated on a bed, sofa, rug, or similar surface that may
block the ventilation openings; or, placed in a built-in
installation, such as a bookcase or cabinet that may impede
the flow of air through the ventilation openings.
9. Heat - The appliance should be situated away from heat
sources such as radiators, heat registers, stoves, or other
appliances (including amplifiers) that produce heat.
10. Power Sources - The appliance should be connected to a
power supply only of the type described in the operating
instructions or as marked on the appliance.
moved with care. Quick stops, excessive force,
and uneven surfaces may cause the appliance
and cart combination to overturn.
The set complies with the FCC-Rules, Part 15
and with CFR 1040,10. Operation is subject to
the following two conditions:
1. This device may not cause harmful
interference, and
2. This device must accept any interference
received, including interference that may
cause undesired operation
11. Grounding or Polarization -
The precautions that should be
taken so that the grounding or
polarization means of an
appliance is not defeated.
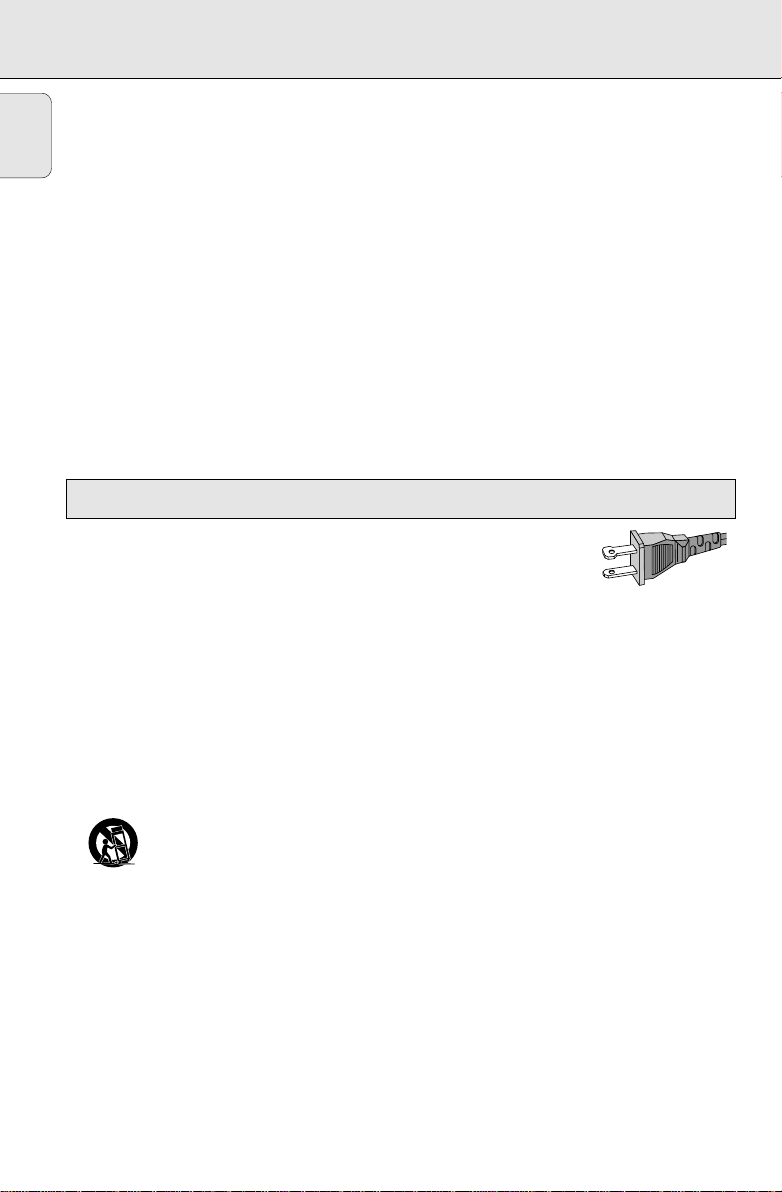
CAUTION:To prevent electric shock, match the
wide blade of this plug to the wide slot, fully insert. Do not
use this (polarized) plug with an extension cord, receptacle
or other outlet unless the blades can be fully inserted to
prevent blade exposure.
12. Power-Cord Protection - Power supply cords should be
routed so that they are not likely to be walked on or pinched
by items placed upon or against them, paying particular
attention to cords and plugs, convenience receptacles, and
the point where they exit from the appliance.
13.Cleaning - The appliance should be cleaned only as
recommended by the manufacturer.
14. Power Lines - An outdoor antenna should be located away
from power lines.
15. Nonuse Periods - The power cord of the appliance should
be unplugged from the outlet when left unused for a long
period of time.
16. Object and Liquid Entry
objects do not fall and liquids are not spilled into the
enclosure through openings.
17. Damage Requiring Service - The appliance should be
serviced by qualified service personnel when:
A. The power-supply cord or the plug has been damaged; or
B. Objects have fallen, or liquid has spilled into the
appliance; or
C. The appliance has been exposed to rain; or
D. The appliance does not appear to operate normally or
exhibits a marked change in performance; or
E. The appliance has been dropped, or the enclosure
damaged.
18.Servicing - The user should not attempt to service the
appliance beyond that described in the operating
instructions. All other servicing should be referred to
qualified service personnel.
91/8 EL 4562-1
- Care should be taken so that
AC
Polarized Plug
6

CONTROLS INSTALLATION
TOP, FRONTSIDE and BACK PANEL
1 SLUMBER - to adjust the slumber time
2
DAY/REPEAT ALARM
– to switch off the alarm for a 9 minute
period
– to set the day for weekend sleeper
activation
3 24 HR RESET - to stop the active alarm for
24 hours
4 PUSH•OPEN - to open/close the CD door
5 TRACK SELECT - to select/review TRACK
SELECT number for ALM 1 or 2
6 DISPLAY - to show the clock/alarm times
and status of the set
7 PLAY 2 - to start CD playback
8 9 OFF
– to stop CD/Radio/Slumber function
– to cancel the TRACK SELECT setting
– to cancel alarm setting(s)
9 DBB - for an enhanced dynamic bass boost
0 ALM 2 - to set/review/switch off ALM 2
! BRIGHTNESS - to change the brightness of
the display illumination
@ ALM 1 - to set/review/switch off ALM 1
# ∞ / §
– to adjust clock/alarm times;
– to set the day
– to skip CD tracks/search for a particular
passage
– to set a CD track for ALM 1 or ALM 2 in
TRACK SELECT mode
– to select the buzzer melody for ALM 1 or
ALM 2
$ WEEKEND SLEEPER - to deactivate ALM1
or ALM 2 for the weekend
% TIME - to set the clock time
^ BUZZER - to select the buzzer mode for
ALM 1 or 2 - to select the buzzer melody
& RADIO ON
– to switch on the radio
– to select radio mode for ALM 1 or ALM 2
* BAND - to select FM/AM waveband
( p - 3.5 mm socket for plugging in
headphones/active speakers
) VOLUME - to adjust the sound level
¡ TUNING - to tune to radio stations
™ Battery door - for backup batteries
£ Pigtail antenna - antenna to improve FM
reception
≤ Power cord - for AC power supply
English
POWER CONNECTION
1. Check if the power supply as shown on the type plate (on the
bottom of the set) corresponds to your local power supply. If it
does not, consult your dealer or service center.
™ If your set is equipped with a voltage selector, found on the
bottom right-hand corner of the set, adjust the selector to
correspond with your local power.
2. Connect the power plug to the wall socket.
– The power supply is now switched on and the numbers on
the display will start to flash. You will need to set the
correct time.
3. To switch off the power supply completely, pull the power plug
out of the wall outlet.
7

INSTALLATION
Power breakdown
English
In the event of a power failure the set will be completely
switched off. Disconnect the set first and re-plug after
3 seconds or more. Most of the settings will remain in the
memory, but you will need to reset the time and day on the
clock.
To retain the clock time and the set alarm time(s) in the event of
an AC power failure or disconnection, insert 3x AA/L6/UM3
batteries (not supplied) into the the battery compartment:
this will act as a power backup. However, the time will not be
illuminated on the clock display. Operation of the alarms, CD
player and radio are also excluded. For clarity, the battery
backup is used to retain the set clock and alarm time(s)
only. As soon as the power supply returns, the set will resume
the standby mode and the display will indicate the correct time.
1. Connect the power plug to the wall outlet.
2. Insert the batteries into the battery compartment
• Replace the batteries at least once a year to prevent battery
leakage, or as often as necessary according to power
breakdown usage.
Batteries contain chemical substances, so they should
be disposed of properly
Connecting headphones / loudspeakers
Connect headphones / active loudspeakers with a 3.5 mm plug
into the p jack.
™ The built-in loudspeakers of the set will now be muted.
Illumination brightness
Press BRIGHTNESS once or more to change the brightness of
the display.
™The brightness of the display will change in this sequence:
LOW ™ MEDIUM ™ BRIGHT ™ LOW....
Clock display
The time is displayed using the 12 hour clock with AM/PM
indicators.
8
General
BUZZ
D
C
E
The data for the clock time and date need to be entered
separately.
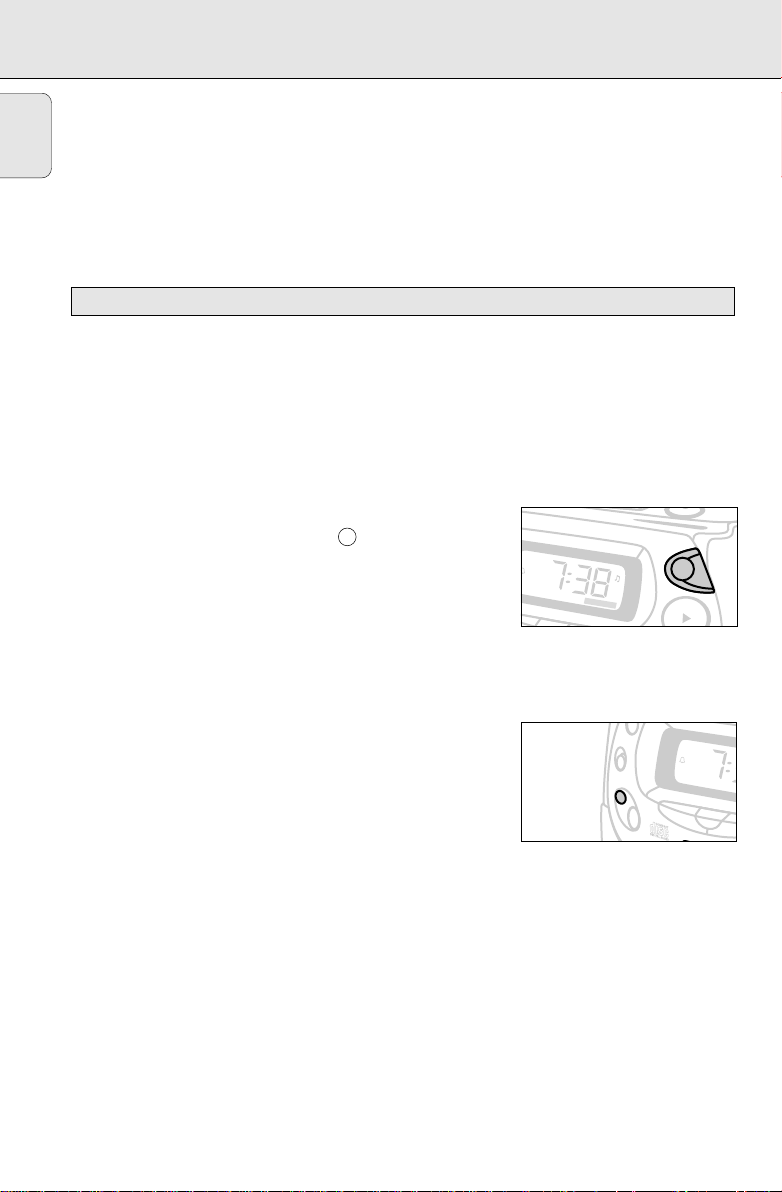
Setting the time
1. Press and hold the TIME button
2. Press ∞ / § to set and adjust both the hours and minutes:
– with you finger held down on ∞ or § respectively, the
time will increase/decrease rapidly and continuously from
minutes to hours.
– Press ∞ or § briefly and repeatedly to adjust the time
slowly, minute by minute.
3. Release the TIME and ∞ or § buttons when you have
reached the correct setting.
Setting the day
After setting the clock time, you will need to set the day. This
enables you to set the alarm functions and WEEKEND SLEEPER
later.
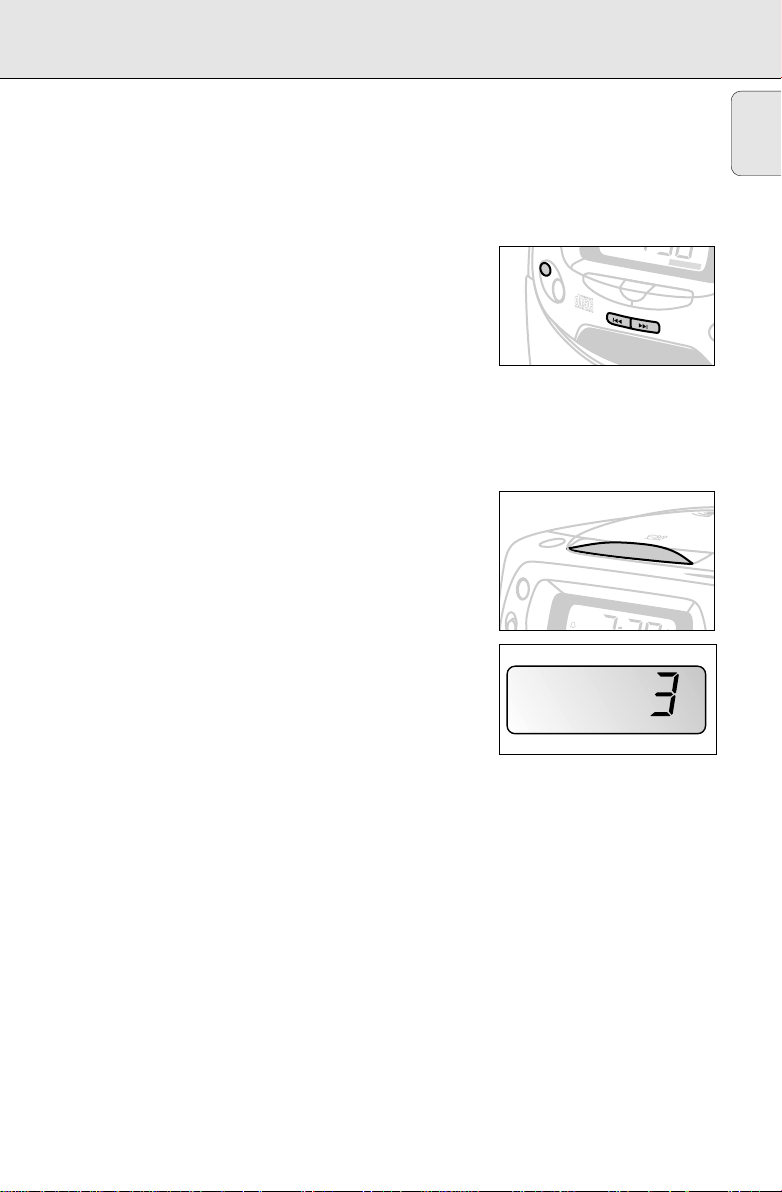
1. Press and hold
DAY/REPEAT ALARM.
– 00 will flash in the display, or a number from 1-7
indicating the last selected day setting:
1 = Monday
2 = Tuesday
3 = Wednesday
4 = Thursday
5 = Friday
6 = Saturday
7 = Sunday
2. While 00 flashes, press the ∞ or § controls briefly once or
more to set the day.
3. Release
DAY/REPEAT ALARM and ∞ or § when you have
reached the correct day.
– The display will revert to show the clock time.
SETTING DATA
ER
IN
BRIGHTNESS
A
LM
1
W
EEKEND
SLEEPER
SLUMBER
RADIO
O
N
C
O
ALM1
AM
ALM2
A
M
8
7
0
8
3
0
F
M
8
0
0
8
8
2
2
5
92
9
6
1
0
0
d
u
a
l
a
l
a
R
E
P
E
A
T
A
L
A
R
M
M
PACT
DISC
C
LO
C
K
R
A
D
IO
r
ALM2
255
m
SLUMBER
275
English
k
H
z
T
R
A
S
E
L
9
CD PLAYER
CD
CD
z
z
English
CD PLAYBACK
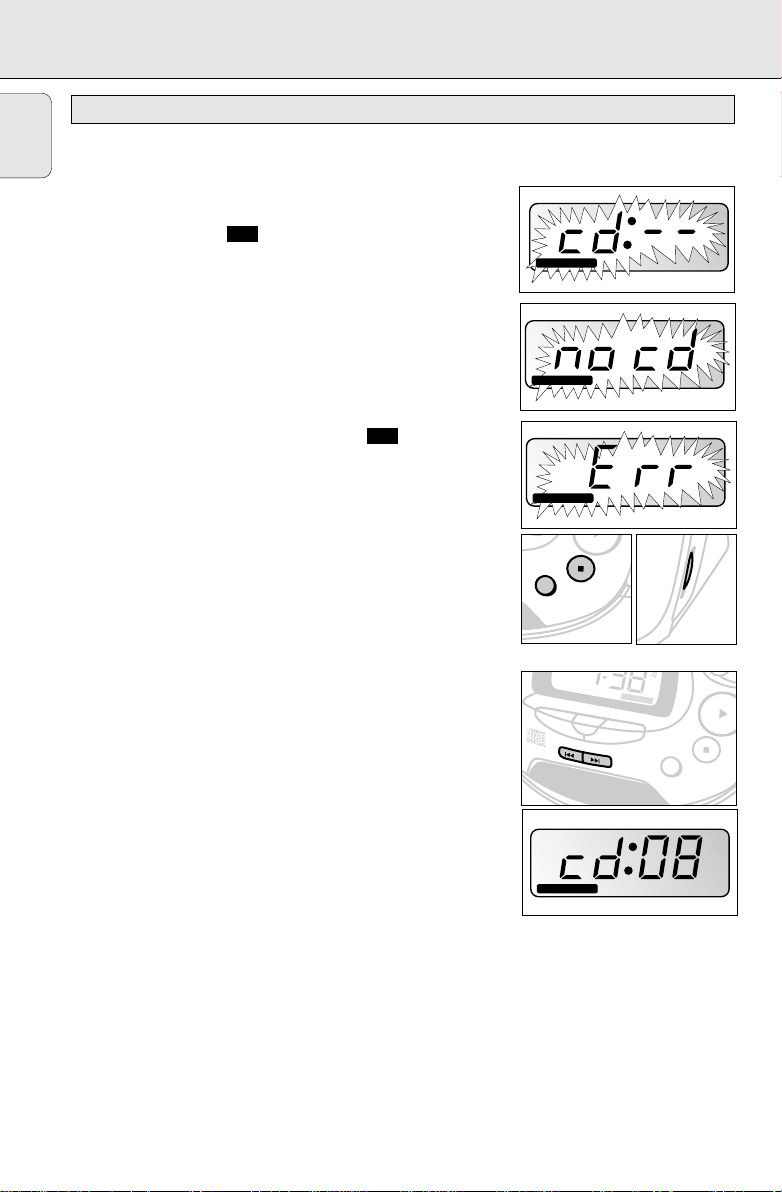
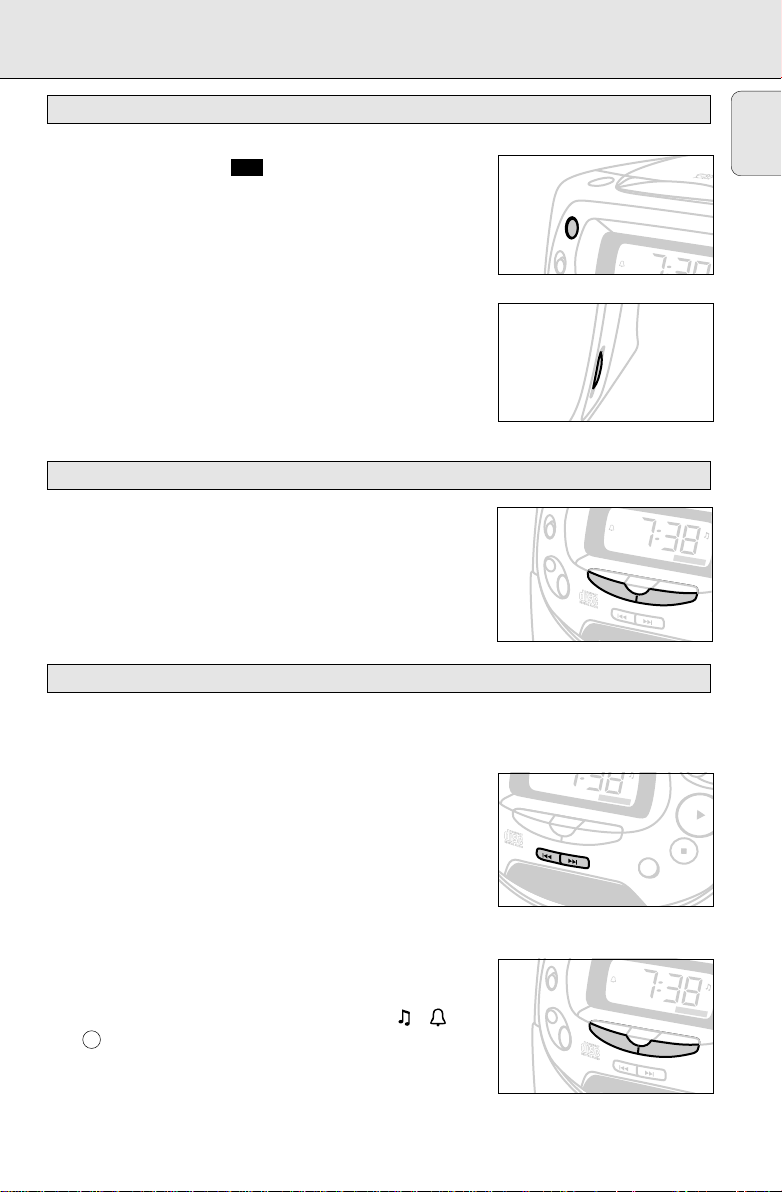
1. Press PUSH•OPEN to open the CD door.
2. Insert a CD with the printed side facing up, and press the
door to close.
3. Press PLAY2 to start playback.
™ The CD indicator , ’cd--‘ appear, ’--‘ flashes
briefly in the display followed by the total number of tracks
and the current track number.
™ door will be displayed if you have not closed the CD door.
™ If no CD has been inserted, the CD indicator will disappear
from the display. ‘no Cd’ flashes followed by ‘Err’
indicating an error in CD operation has occurred.
™ The display reverts to show the clock time.
™ At the start of each track, the track number will be
displayed briefly and the CD indicator will remain
throughout CD playback.
4. Adjust the sound by using the VOLUME and DBB controls.
5. To check the current track number during playback,
press PLAY2.
6. Press 9 OFF to stop playback.
™ The CD indicator disappears from the display and the CD
player is switched off.
™ The CD player is automatically switched off after the last
track.
Selecting a different track
During playback, to jump to the next or a previous track, press
SEARCH ∞ or § once more until the desired track number
appears in the display.
Finding a passage within a track
1. During playback, press and hold down the SEARCH ∞ or §
button.
™ The CD is played at an increasingly high speed and low
volume; the display will show ‘Cd:’ and your current track
number.
2. Release the SEARCH ∞ or § button when you recognize
the passage you want. Normal CD playback and the clock
display will resume.
DBB
CD
CD
CD
O
FF
z
z
A
LM
1
BRIGHTNESS
SLUMBER
ALM2
P
L
A
Y
DBB
O
A
M
8
7
0
8
3
0
F
M
8
0
0
8
8
2
2
5
92
255
9
6
275
k
1
H
0
0
1
0
4
108
CD
FF
z
10
RADIO ALARM
•
M
m
O
N
O
N
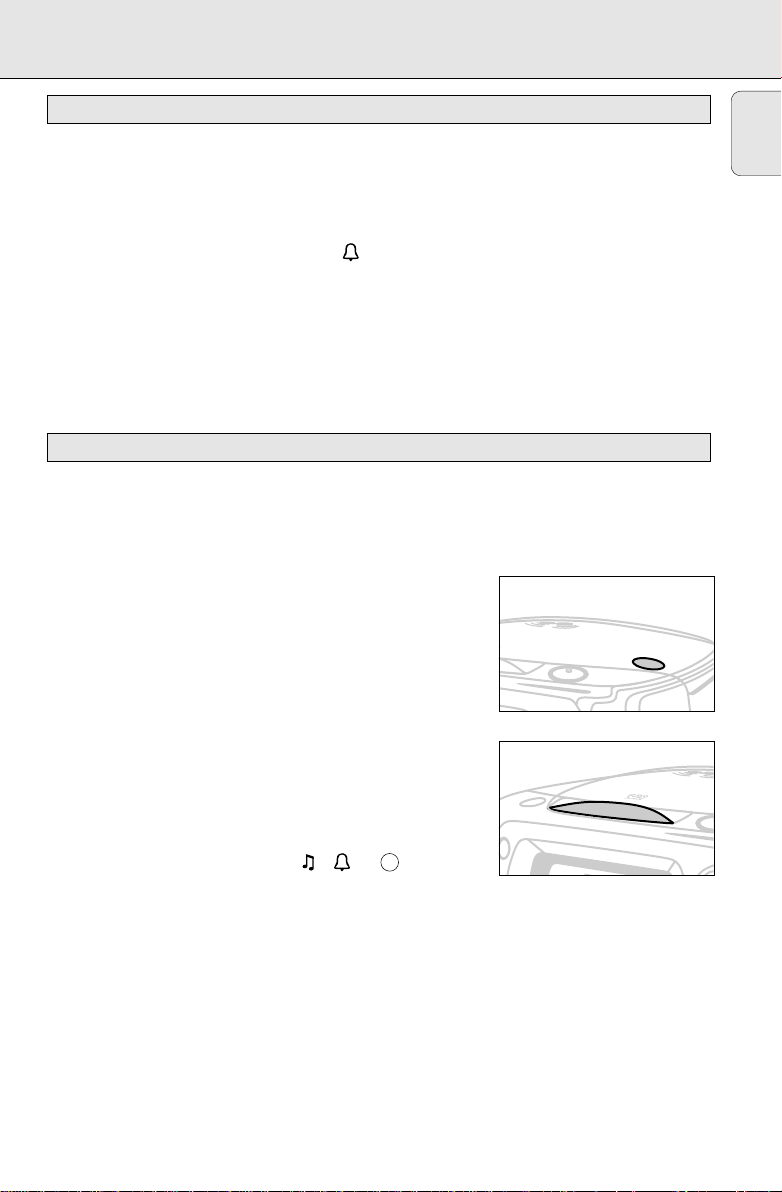
RADIO RECEPTION
1. Press RADIO ON to switch on the radio mode.
™ The RADIO indicator appears in the display.
2. Adjust the BAND switch to select the waveband.
3. Use the TUNING control to find your station.
To improve radio reception
FM: extend the pigtail wire at the back of the set
completely for optimum reception.
AM: uses a built-in aerial. Direct the aerial by adjusting the
position of the set.
4. Adjust the sound using the VOLUME and DBB controls.
5. Press 9 OFF to switch off the radio.
™ The RADIO indicator disappears from the display and the
radio is switched off.
SETTING THE ALARM TIME
General
Two different alarm times ALM 1 or ALM 2 can be set in a
variety of modes. This can be useful when for example you need
to be woken up at a different time during the week or at the
weekend.
Note: The ALM 1 or 2 button should be held down throughout
steps 1-4 below.
RADIO
BUZZER
IN
W
EEKEND
SLEEPER
SL
UM
BER
RADIO
O
N
AM
z
z
A
LM
A
M
8
7
0
1
ALM
AM
C
O
1
BRIGHTNESS
d
u
a
l
R
E
P
E
A
T
A
L
A
M
PAC
T
DISC
C
LO
C
K
R
SLUMBER
ALM2
English
a
l
a
r
R
M
A
D
IO
AL
ALM2
SETTING ALARM 1 or 2
1. Press and hold down the ALM 1 or 2 button.
™ day appears in the display if you have not set the day
(see SETTING THE DAY)
2. Press ∞ or § to set and adjust both the hours and minutes:
– With ∞ or § pressed, the display will increase or
decrease the alarm time rapidly and continuously from
minutes to hours.
– Press ∞ or § briefly and repeatedly to adjust the alarm
time minute by minute.
3. Release ∞ or § when you have reached the correct alarm
time setting.
4. Select your choice of alarm mode by pressing CD 2, BUZZER
or RADIO.
5. Release the ALM 1 or 2 button.
™ The display will show the selected alarm icon , or
under ALM 1 or ALM 2.
6. To review the alarm time, press your selected ALM 1 or 2
button.
z
z
A
LM
1
BRIGHTNESS
SLUMBER
ALM2
P
L
A
Y
DBB
O
z
BRIGHTNESS
ALM2
FF
SLUMBER
A
LM2
A
M
8
7
0
8
3
0
F
M
8
0
0
8
8
2
2
5
92
255
9
6
275
k
1
H
0
0
1
0
4
108
AM
z
W
SLEEPER
EEKEND
z
A
LM
1
A
M
8
7
0
IN
BUZZER
11
ALARM
•
z
TNESS
LEEPER
M
IMPORTANT !
English
If you want the alarm to wake you up, FIRST CHECK if:
– you have adjusted the volume loud enough when using the
CD / TRACK SELECT/ RADIO alarm modes;
– you have disconnected the headphones;
– the loudspeakers are switched on if you are using amplified
loudspeakers in the headphone socket.
SETTING TRACK SELECT
You can program and set a TRACK SELECT number between
01-99, when the set is in the standby mode or during CD
playback.
However, if the track number programmed does not exist on your
CD, the first track of the CD will be played during the alarm call.
1. Insert a CD into the CD compartment
2. Press and hold down the selected ALM 1 or 2 button and set
your alarm time using the ∞ or § controls.
3. Before releasing ALARM, press the CD 2 button.
™ The display will show the CD icon under ALM 1 or
ALM 2
4. Hold down the TRACK SELECT button and select your track
number by pressing ∞ or §.
5. Release the TRACK SELECT and SEARCH ∞ or § controls
when you have found the desired track number.
6. To review your programmed track number, press TRACK
SELECT again.
™ The selected track number and alarm number will be
shown.
Note:
– The BUZZER alarm option will automatically replace the CD /
TRACK SELECT alarm if you have;
– inserted a CD incorrectly;
– inserted a damaged CD;
– forgotten to insert any CD.
2
4
H
R
R
S
E
S
E
C
O
M
PAC
T
DISC
C
LO
C
K
R
A
D
IO
T
R
A
ALM1
AM
SLUMBER
BRIGH
C
SE
L
E
C
ALM
2
P
O
N
BUZZER
IN
W
EEKEND
S
T
K
T
L
A
Y
ALM
1
AM
z
z
BRIGHTNESS
A
LM
1
AL
12
•
SETTING BUZZER MELODIES
M
T
ALARM
You can set 4 different melodies for both alarm 1 or 2. The buzzer
melodies are set at a fixed volume and cannot be adjusted.
1. Press and hold down the selected ALM 1 or 2 button and set
your alarm time using the ∞ or § controls.
2. Before releasing ALM 1 or 2 press the BUZZER button.
™ The display will show the buzzer icon under ALM 1
or ALM 2.
3. Hold down BUZZER and press ∞ or § repeatedly until you
find the desired melody.
– The buzzer melody and alarm number will be shown and
the buzzer melody played as long as you press BUZZER
4. To review your selected buzzer melody over the speakers,
press BUZZER.
SWITCHING OFF THE ALARM
There are three ways to switch off the alarm. Unless you cancel
the alarm completely, the 24 HR RESET will be automatically
selected after 59 minutes, from the time your alarm goes first off.
24 hours reset
If you want the alarm mode to be stopped immediately but also
wish to retain the same alarm setting for the following day:
1. Press 24 HR RESET
™ You will hear a long beep tone to confirm that the 24 HR
RESET has been activated.
English
•
H
O
S
P
U
E
N
P
2
4
H
R
R
S
E
S
E
T
DAY/REPEAT ALARM
This will repeat your alarm call at 9 minutes intervals.
1. During the alarm call, press
DAY/REPEAT ALARM.
™ After 9 minutes the alarm will call again.
2. You can press
DAY/REPEAT ALARM again as often as
desired.
™ The icon of your selected alarm , or and ‘ : ’ in
the display will flash throughout the time when
DAY/REPEAT ALARM is active.
SLUMBER
RADIO
N
d
u
a
l
a
l
a
r
R
C
O
M
PA
ALM
1
AM
m
E
P
E
A
T
A
L
A
R
M
C
T
DISC
C
L
O
C
K
R
A
D
IO
T
R
A
C
K
S
E
L
E
C
AL
T
13
 Loading...