

Page 1
PHILIPS
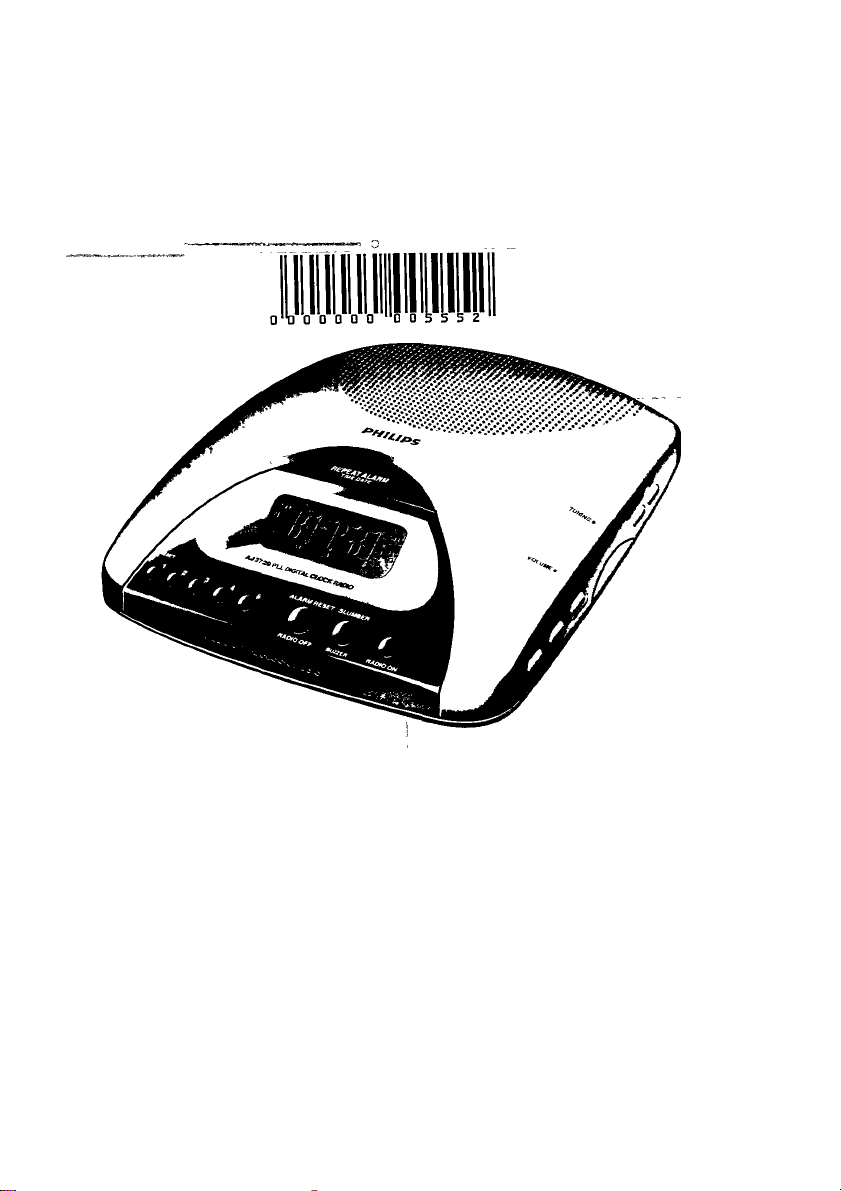
AJ 3720 Clock Radio
Instructions for use
Mode d'emploi
Instrucciones de manejo
Bedienungsanleitung
Gebruiksaanwijzing
Istruzioni per l'uso
Manual de utilizagäo
Brugsanvisning
Bruksanvisning
Käyttöohje
OSriYÍsq xPnoscoq
PHILIPS
Page 2
CH) Norge
ADVARSEL
Typeskilt finnes pà apparatens bakside.
Observer: Nettbryteren er sekundert innkoplet. Den
innebygde netdelen er derfor ikke frakoplet nettet sà
lenge apparatet er tilsluttet nettkontakten.
For à redusere faren for brann eller elektrisk slot, skal
apparatet ikke utsettes for regn eller fukighet.
Ò Italia
DICHIARAZIOIME PI COIMFORIVIITA'
Si dichiara che l’apparecchio AJ 3720 Philips
risponde alle prescrizioni deH'art. 2 comma 1 del
D. M. 28 Agosto 1995 n. 548.
Fatto a Eindhoven, il 20/05/1997
Philips Sound & Vision
Philips, Glaslaan 2, SFF 10
5616 JB Eindhoven, The Netherlands
Important notes for users ¡n the U.K.
Mains plug
This apparatus is fitted with an appwed moulded 13
Amp plug. To change a fuse in this type of plug
proceed as follows:
• Remove fuse cover and fuse.
• Fix new fuse which should be a BS1362 5 Amp,
A.S.T.A. or BSI approved type.
• Refit the fuse cover.
If the fitted plug is not suitable for your socket outlets,
it should be cut off and an appropriate plug fitted in
its place.
If the mains plug contains a fuse, this should have a
value of 5 Amp. If a plug without a fuse is used, the
fuse at the distribution board should not be greater
than 5 Amp.
Note: The severed plug must be disposed to avoid a
possible shock hazard should it be inserted into a
13 Amp socket elsewhere.
How to connect a plug
The wires in the mains lead are coloured with the
following code: blue = neutral (N), brown = live (L),
As these colours may not correspond with the colour
markings identifying the terminals in your plug,
proceed as follows:
Connect the blue wire to the terminal marked N or
coloured black.
Connect the brown wire to the terminal marked L or
coloured red.
Do not connect either wire to the earth terminal in
the plug, marked E (or A) or coloured green (or
green and yellow).
Before replacing the plug cover, make certain that the
cord grip is clamped over the sheath of the lead - not
simply over the two wires.Copyright in the U.K.:
Recording and playback of material may require
consent. See Copyright Act 195B and The Performer’s
Protection Acts 1958 to 1972.
__________
INDEX
Deutsch. .... 31
Page 3
® ® @® @
Page 4
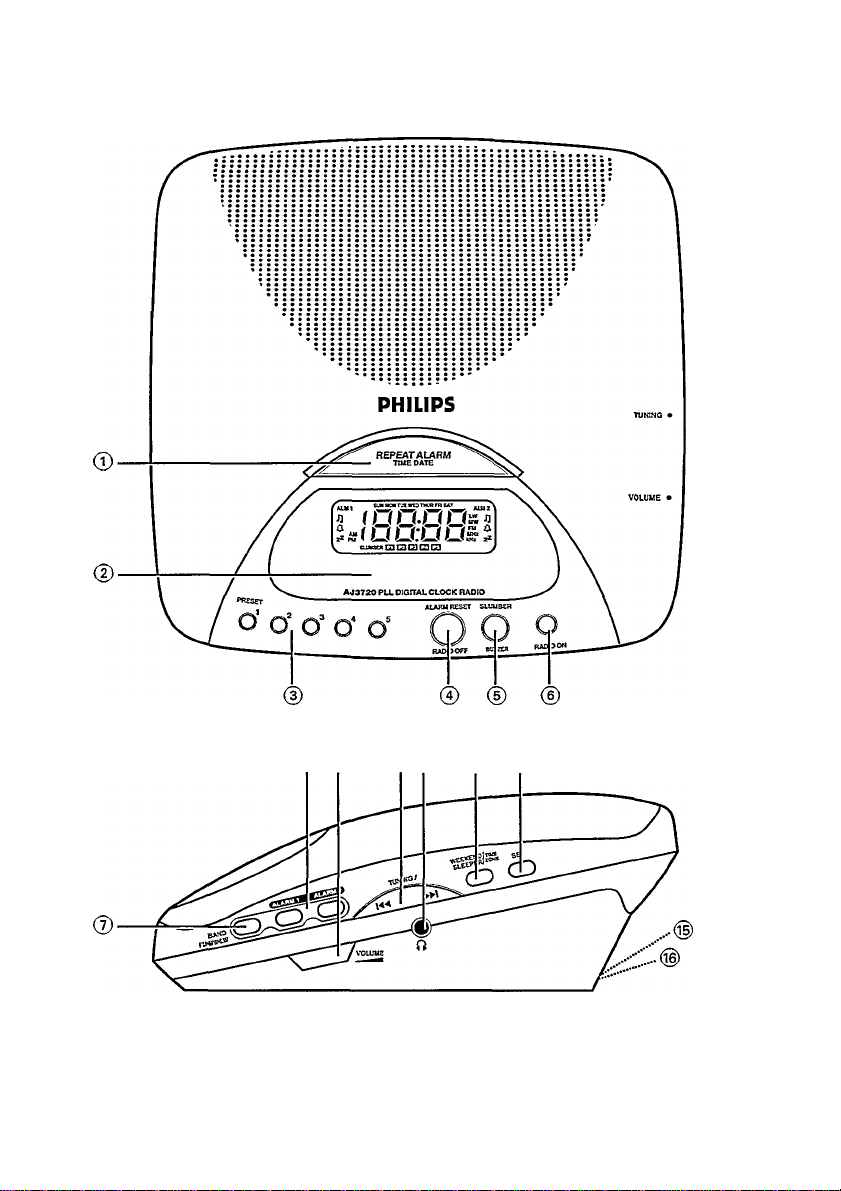
CONTROLS
TOP, FRONT and SIDE PANEL
m
3
CQ
© REPEAT ALARM/riME DATE:
- To switch off the alarm for a 9 minute
period.
- To display/adjust the date (month and day)
and the year
- To resume clock time display
® DISPLAY: To show the status of the set
® PRESET 1-5:
- To select a preset radio station
- To select a preset radio alarm
® ALARM RESET/RADIO OFF:
- To stop the active alarm for 24 hours
- To switch off alarm 1 or 2 completely
- To switch off the radio
© SLUMBER/BUZZER
- To adjust the slumber time on/off
- To select the buzzer mode for alarm 1 or 2
® RADIO ON
- To switch on the radio
- To go to radio display for 10 seconds
- To select the radio mode for alarm 1 or 2
© BAND: To select the waveband
INSTALLATION
ALARM l:To set, review or switch off alarm 1
(D
ALARM 2: To set, review or switch off alarm 2
VOLUME: To adjust the radio sound level
(D
ÖQ)
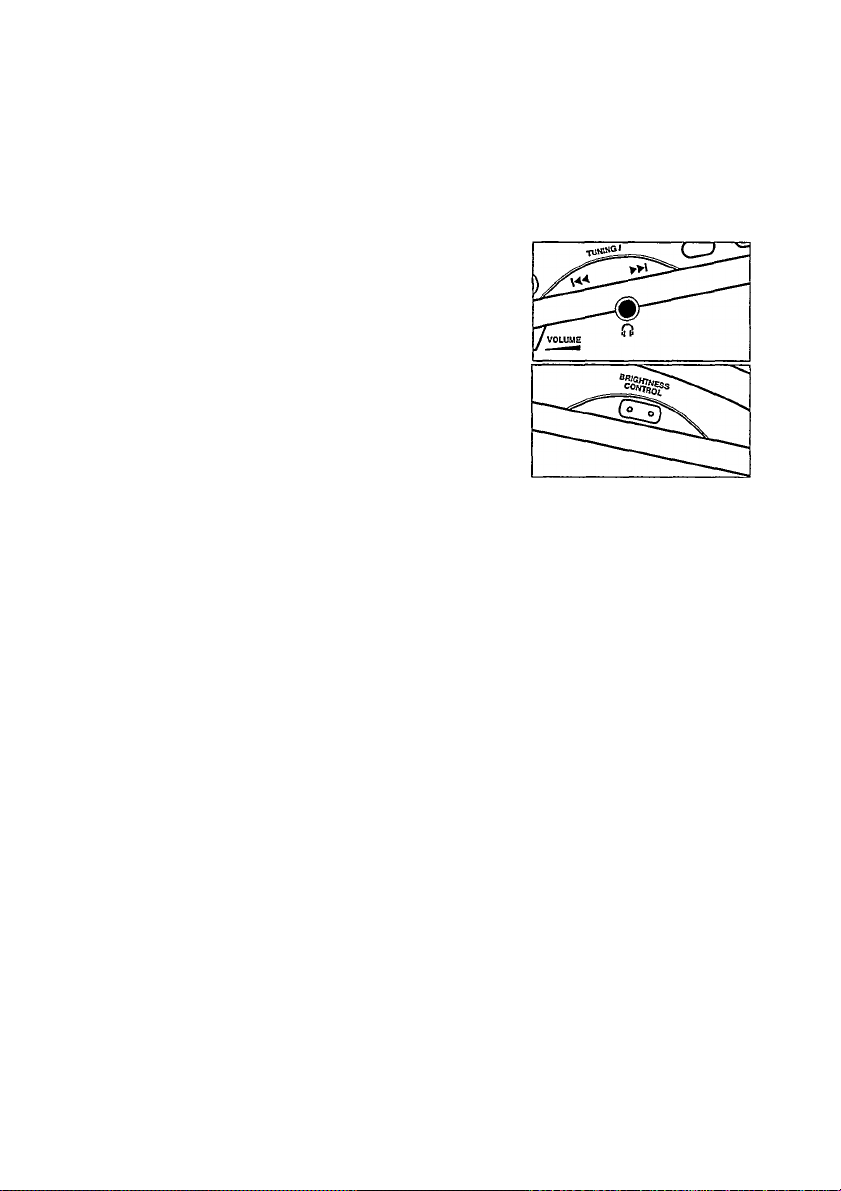
TUNING / or ►>! (up or down)
To tune to radio stations automatically or
manually
To adjust the clock time, alarm time, date,
yearand time zone settings
0:3.5 mm headphone socket
WEEKEND SLEEPERAimezone:
To activate or deactivate the weekend
sleeper for alarm 1 or 2
To select the time zone
SET:
To confirm preset stations stored
To activate the setting mode for clock time
BRIGHTNESS CONTROL To change the
brightness of the display illumination
Pigtail: For FM reception
MAINS: for connecting the set to the mains
supply
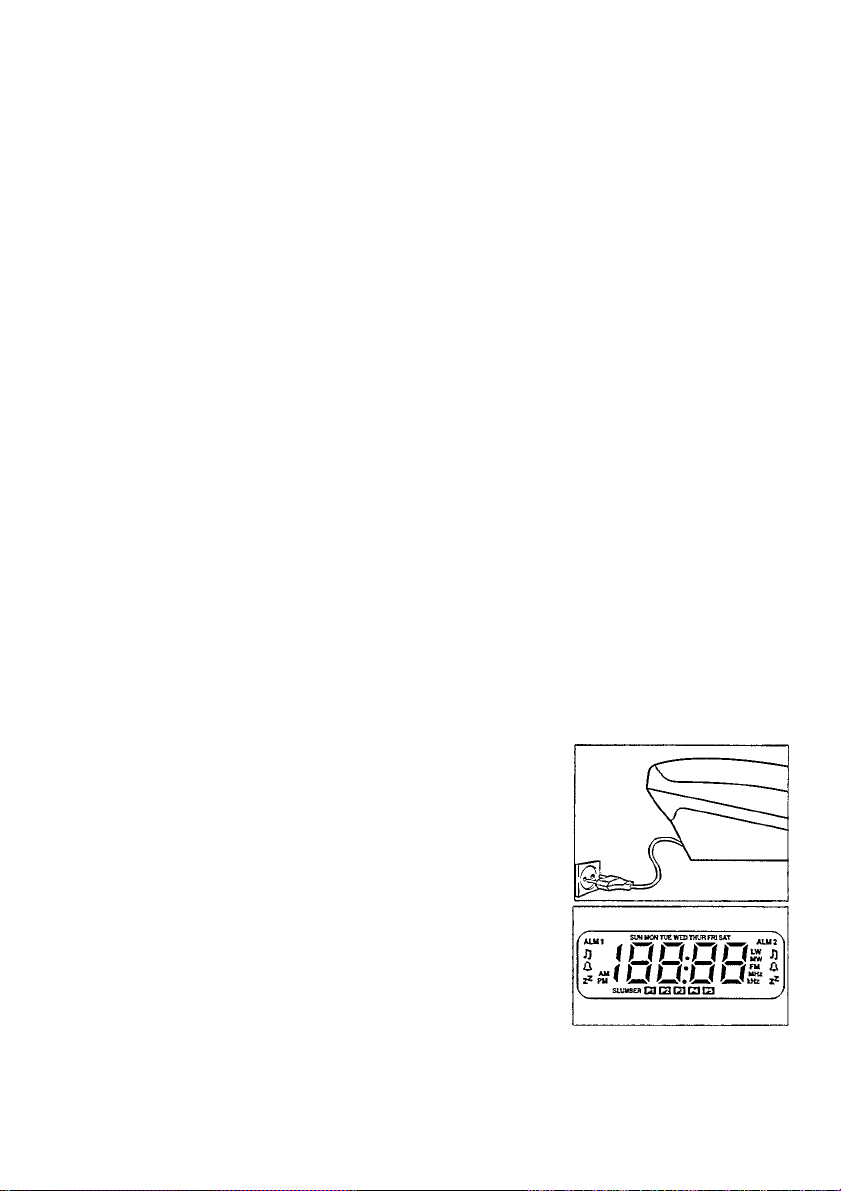
MAINS CONNECTION
1. Check if the mains voltage as shown on the type plate (on the
bottom of the set) corresponds to your local mains voltage. If
it does not, consult your dealer or service organisation.
If your set is equipped with a voltage selector, found on the
bottom right-hand corner of the set, adjust the selector to
correspond with your local mains.
2. Connect the mains plug to the wall socket.
- The mains supply is now switched on and the numbers on
the display will start to flash. You will need to set the
correct time.
3. To switch off the mains supply completely, pull the mains plug
out of the wall socket.
Page 5
INSTALLATION
Power breakdown
In the event of a power failure the set will be completely
switched off. Disconnect the set first and re-plug after 3
seconds or more. Most of the settings will remain in the
memory, but you will need to reset the clock time, date and year.
For users in the U.K.: please follow the instructions on page 2
Connecting headphones / loudspeakers
Connect headphones / loudspeakers with a 3.5 mm plug into the
0 socket.
—The built-in loudspeaker will now be muted.
Illumination brightness
Adjust the BRIGHTNESS CONTROL to change the brightness of
the display.
— There are two settings: BRIGHT — DIM
Clock display
The time is displayed using the 24 hour clock.
Page 6

SEHING DATA
SEHING THE TIME, DATE AND YEAR
General
The data for the clock time, date and year need to be entered
separately.
Setting the time
7. If necessary, press the REPEAT ALARM/time date button
until the display shows the time mode.
- If the time display 00:00 is already flashing, go to step 3.
2. Press SET to activate the setting mode.
-*The time display will start flashing.
3. Use TUNING /k< or ►» to adjust the hours and minutes.
- With TUNING / r« or pressed, the display will
increase or decrease the minutes and hours rapidly and
continuously.
- Press TUNING / r« or briefly and repeatedly to adjust
the time minute by minute.
4. Press SET when you have reached the correct time.
Setting the date and year
Both the day and the year display modes will be shown for 10
seconds, before reverting back to the clock time display.
The date modes refer to the month and day. Eg. December 31st
will be displayed as 12--31.
• There is no need to adjust the days of the week (mon-sun) as
this is done automatically after you have set the date/year
correctly.
7. Press the REPEAT ALARMAime date button repeatedly until
the display shows the mode you wish to set (date/year).
2. Use TUNING /«◄ or to adjust the month and day and the
year.
- With TUNING / r« or w pressed, the display will increase
or decrease the days/years rapidly and continuously.
- Press TUNING / «◄ or briefly and repeatedly to adjust
the display day by day or year by year.
- Press SET when you have reached the correct date/year.
3. The date/year is now set. Press the REPEAT ALARM/time
DATE button if you wish to return to the clock display
immediately.
Page 7

SETTING DATA RADIO
TIME ZONE SETTING
This feature allows you to set the clock display with up to 2 hours
difference from normal local time. The TIME ZONE setting can be
useful when you want to change to or from summer time if there
is a seasonal time difference. However, make sure the time zone
is set at 00;00 if there is no time difference.
1. Press the WEEKEND SLEEPER/timezone button once.
— If the display shows the time zone setting 00:00, no time
difference has been selected.
2. Press TUNING / r« or briefly to select up to -2:00 or
2:00 hours difference respectively.
3. Press the WEEKEND SLEEPER/timezone button twice if you
wish to exit the time zone display immediately.
Note: If you press the WEEKEND SLEEPER/time zone button
twice before adjusting the time difference, the display
will show 'Auto' or 'Std.'.
- The 'Auto' and 'Std' function is available on the AJ 3740
version only.
• Press WEEKEND SLEEPER/time zone again until you re
enter the time zone display.
RADIO RECEPTION
When you switch on the radio, the last preset or station tuned to
will be heard.
1. Press RADIO ON to switch on the radio mode.
-*The radio frequency and waveband appear in the display
for 10 seconds before reverting back to the clock display.
Press RADIO ON again if you want to view the radio
display.
2. Adjust the BAND switch to select the waveband.
3. Tune to the station either manually, automatically o: by
using the presets.
To improve radio reception
FM: extend the pigtail wire at the back of the set
completely for optimum reception.
MW/LW: uses a built-in antenna. Direct the antenna by
adjusting the position of the set.
4. Adjust the sound using the VOLUME control.
5. To switch off the radio, press ALARM RESET/RADIO OFF.
—The display reverts to showing the clock time.
Page 8

RADIO
TUNING TO A STATION
MANUAL tuning
This is usefui if you know the radio frequency of the station.
1. Press the TUNING /r« or control briefly until you find the
desired station.
AUTOMATIC tuning
1. Keep TUNING /m^ orw pressed until the display frequency
starts to run and then release.
- The display will show Srch.
2. When a station has been found, tuning will stop, or you can
stop the automatic tuning by pressing the TUNING /«◄ or^w
control again. Repeat until you have found the desired station.
Preset stations
Storing preset stations
You can programme up to five stations from one or more bands.
You can also replace a preset station with another frequency. The
preset number of the station selected will be indicated in the
display.
1. Select and press a preset button 1 to 5.
2. Follow steps 1 to 4 under RADIO RECEPTION and tune to the
station either manually or automatically.
3. Press the SET button to confirm the preset number and
station while the display shows the desired frequency.
—The preset number indication will blink once.
Selecting preset stations
• Select and press a preset button (1 -5) to recall the
corresponding frequency and waveband stored.
ALARM
SETTING THE ALARM TIME
General
Two different alarm times can be set in a variety of modes. This
can be useful when for example you need to be woken up at a
different time during the week or at the weekend.
/Vote; To set the alarm, complete each step within 10 seconds.
Setting alarm 1 or 2
1. Press the ALARM 1 or 2 button.
—The alarm time appears in the display
Page 9

Z Use TUNING / or to set the alarm time;
- With TUNING / h« or ►» pressed, the display will increase
or decrease the alarm time rapidly and continuously from
minutes to hours.
- Press TUNING/!« orw briefly and repeatedly to adjust
the alarm time minute by minute.
3. Select the alarm mode by selecting one of the following alarm
modes:
SLUMBER/BUZZER - For the buzzer option (this is set at a fixed
volume and cannot be adjusted)
RADIO ON - For the last station tuned to
PRESET 1-5 - To select a preset radio station
ALM1 or 2 and the chosen alarm mode indication will appear
in the display;
- and the preset number for the radio options
- O for the buzzer option.
4. To review the alarm time, press the ALARM 1 or 2 button.
IMPORTANT!
If you want the alarm to wake you up, FIRST CHECK if:
- you have adjusted the volume loud enough when using the
radio alarm modes;
- you have disconnected the headphones.
Weekend sleeper
This feature deactivates the alarm every Saturday and Sunday and
resumes the alarm function Monday to Friday.
1. Press ALARM 1 or 2.
-* The display will show the set alarm time.
2. Press WEEKEND SLEEPERAimezone once.
If the weekend sleeper is activated, zz will appear in the
display for ALARM 1 or 2.
3. To cancel the weekend sleeper function, repeat steps 1 and 2
until zz no longer appears in the display.
Cancelling the alarm completely
When an alarm is cancelled, the selected alarm indication and
symbol disappear from the display.
/. To cancel the set alarm time before it goes off, press the
activated ALARM 1 or 2 button.
- The display will show the alarm time.
2. Press ALARM RESET/RADIO OFF.
- The selected alarm indication and symbol disappear from
the display.
ALARM
no-jn
UU\JU
PLL DIGrrAL CLOCK RADIO
ALARM RESET SLUMBER
Page 10

ALARM on/off
SWITCHING OFF THE ALARM
There are two ways to switch off the alarm. Unless you cancel the
alarm completely, the ALARM RESET will be automatically
selected after 60 minutes, from the time your alarm first sounds.
Note: During an alarm call or repeat alarm, only the ALARM
RESET/RADIO OFF and REPEAT ALARMAime date
controls on the set will operate.
Alarm reset
If you want the alarm mode to be stopped immediately but also
wish to retain the same alarm setting for the following day:
1. Press ALARM RESET/RADIO OFF.
You will hear a long beep tone confirm that the ALARM
RESET has been activated.
Repeat alarm
This will repeat your alarm call at approximately 9 minute
intervals.
1. During the alarm call, press REPEAT ALARM/timedate.
After 9 minutes the alarm will call again.
2. You can press REPEAT ALARM/time date again as often as
desired.
-■The alarm mode indication J] or in the display will
flash throughout the time when REPEAT ALARM/timedate
is active.
jj:
I
u
n
1.3 n
V3U
10
Page 11

SLUMBERING
SLUMBER
About slumber time
The clock radio has a built-in device called the slumber, which
enables the set to be automatically switched off during radio
playback after a set period of time. There are three slumber times:
60,30 or 10 minutes before the set turns itself off. You can set the
slumber time when the radio is either on or off.
Setting the slumber
1. Select your slumber time by pressing the SLUMBER/buzzer
once or more;
once: 60 minutes;
twice. 30 minutes;
three times: 10 minutes.
-*• The display will show and the selected slumber
period.
-'The word slumber appears when slumber is active.
2. To cancel the slumber function,
- press the SLUMBER/buzzer button repeatedly until the
radio is switched off, or
- Press ALARM RESET/RADIO OFF to cancel immediately
and switch off the set.
GENERAL
MAINTENANCE
HGITAL CLOCK RADIO
ALARM RESET SLUMBER
_____
OO
n jn
LU
o>
s
- If you do not intend to use your clock radio for a long time,
withdraw the plug from the wall socket.
- Do not expose the set to humidity, rain, sand, or excessive
heat caused by heating equipment or direct sunlight.
- A chamois leather slightly moistened with water is sufficient
for cleaning the housing. Do not use cleaning agents
containing alcohol, spirits, ammonia or abrasives as these may
harm the housing.
Environmental information
All redundant packaging material has been omitted. We have done our utmost to make the
packaging easily separable into three mono materials: cardboard (box), expandable polystyrene
(buffer) and polyethylene (bags, protective foam sheet).
Your set consists of materials which can be recycled if disassembled by a
specialized company. Please observe the local regulations regarding the disposal of
packaging materials, exhausted batteries and old equipment.
11
Page 12

TROUBLESHOOTING
If a fault occurs, first check the points listed below before taking the set for repair.
If you are unable to remedy a problem by following these hints, consult your dealer or sen/ice centre.
WARNING: Under no circumstances should you try to repair the set yourself, as this
would invalidate the guarantee.
PROBLEM
- POSSIBLE CAUSE
• REMEDY
GENERAL
No sound
- Volume not adjusted
• Adjust the volume
- Headphones are connected
• Disconnect the headphones
No reaction to any operation of the
controls
- Electrostatic discharge
_____________________________
• Disconnect the set from the mains supply
and reconnect the set after 3 seconds
Time incorrect by 1-2 hours
____________
- Time zone setting incorrect
• Press the WEEKEND SLEEPER/timezone
button and then press TUNING /or
until the time zone is correct
RADIO
Occasional crackling sound during FM
broadcast
- Weak signal
_____________________________
• Extend wire antenna fully
Continuous crackling/hiss disturbance
during AM broadcast
- Electrical interference from TVs, computers,
fluorescent lamps, etc.
___________________
• Move set away from other electrical
equipment
ALARM
The alarm does not function
- Alarm time not set
* •
• Set the alarm time
- Alarm mode not selected
• see'SETTING THE ALARM'
- Weekend sleeper selected for Saturday and
Sunday
• Deactivate weekend sleeper
- Volume too low for alarm radio options
• Adjust the volume
This product complies with the radio
interference requirements of the European
Union.
The production plate is located on the
bottom of the set
12
Page 13

Notes
104
Page 14

Page 15

AJ 3720 CLOCK RADIO
A\
3140 115 24421
Meet Philips at the Internet
http://www.philips.com
Printed in Hong Kong
C€
TCtext/JW/9723
 Loading...