

Page 1
KPENTONE 3005C
(uo SO^OLjd jnoX)
Dd
V9l,^A9+:indinO
veo ZH09/09~A0t^3-00l.:indNI
(ido)z 091.090- X i.oi.dd9 (3aq)^ q d B-M6-VSQ naooi/M
d3idvavd3MOd
pjC3 XjOUJ3|^
(uo SO^OLjd jnoX)
>IO
^apno JSMOJ
SdlllHd
Xofug
dn^as
'SJ3UMO 3A¡133dS3J Jj3L|l JO S3!UOJ}33|g
sdj|!L|(j 3>|[j|>|U!UO>| p X)j3dojd 3i|i 3je s>|jELU3pEjj_
'33!)ou inoqijM 33uBi|3 o) )33¡qns 3jb suo!)B3i^j33ds
'P3AJ3S3J nqSu iiv
•A’lSl s3mojj33|3 sdiijqj 3>|[!p|umo>| @ goOZ
3UJ03|aM/uj03‘sd!|!L|d‘MMM :d|3ij 3Uj|uo
vs ^oddns puB iianpojd jnoX ja^sjSa'^
¡sd¡|¡L|c| 0UUOD|0/\/\
asn
p00U II noX 0S|0 ;'BL|/\/\
jojdepB J3Moj apmS jjbis >|3!n^ |EnuEiu jasn |E^jSjQ
pUEl^S aUJEJJ aUJEJJO)OL|cJ
SVdd^ddZ
xoq 9L|; U| S^:^'BL|/\/\ 0UUEJJO;OL|d
SdHIHd
'Supujjd o)OL|d i33Jjp )Joddns )ou saop ‘o|\| v
¿XE|dsjp o^oqd jEijSjQ luojj so^OLjd ^uud | ue^ ^
'saojAap |EUJ3)xa uo so^oLjd a^ajap o) suopEjado suoddns v. ‘sa^ V
¿pjED XjOLuauj uo so^oijd a^a|ap o^ aiuEjj o)oi|d asn | ue^ ^
■pajaauuoa Xpuajjna pjEa
aij) uj so)oqd MOL|S3p!|s 3L|) mol|s ||!m aoiEJj o)oqd ‘saji^ v
¿spjEO Xjoujauj
)U3J3jj!P Sujsn Xq SMoqsapjjs o:ioqd auajajjip uaa/A^aq qa^jMS | ue;^ ^
'XjOLuauj |EUJ3)U! aqi uj ujaq:^ MajAaj Xeuj nox'sSESsaoi
„paqsjujj,, q^!M sujjyuoa uaajas aq) ja^^E pajdoa 3je so)oqd aqj, v
¿apjsu! pajo:^s
XpE3J|E 3JE so)oqd aq) j¡ aas o) ajaaqa | UEa AAoq ‘so^oqd SujXdoa ja^y ^
'XE|ds!p oioqd lE^jSjp joj^uoa oi aiuEJj
aq) p >|aEq aq^ u¡ sXa>| aq^ asfi ‘pajqEua-qano^ )ou s¡ uaajas aqj_ y
¿p3|qEU3-qano:^ uaajas aq:^ S| ^
suo|:i.S0n^ p0>|svXpu0nb0jj
‘paSSnjdun sj auJEJj o^oqd
aq^ j! pasEja 3je sSujuas
j^o/uo ojny NOlinVD
apOLU 9LU|) JJO/UO 19$
'SDNIJ-LdS ^!X3 puE nuauj umuj ujn^aj o)Xa>| p ssaj^j •
*3ujp no o)nE JO uo o^nE )3s o:^ sXa>| ‘ ^ ssaj^j •
‘J3)U3 ssajd uaq) puE ‘j;^o
^ ss3J(j 'qa^jMS o:^ Jl^O/^O o:^ sXa>| ^ ‘ ^ ssaj^j •
‘jaaua
o) Xa>| /V ss3J^ 'UOI^O )33|as 0:1 sXa>| ‘ ^ ssaj^j •
'J3)U3
o)Xa>| /V ssaj^j □ :ia3|3s 0:1 sXa>| ‘ ^ ssaj^j.
'X|!Ep
saujp )3s-3jd ^E no puE uo ujni o) paiqEua aq uEa XEjdsjp o^oq^j
apoui j^o/uo V&S
SUOI^DUnj JBKUYl }^0/UO
apolu ^o/uo
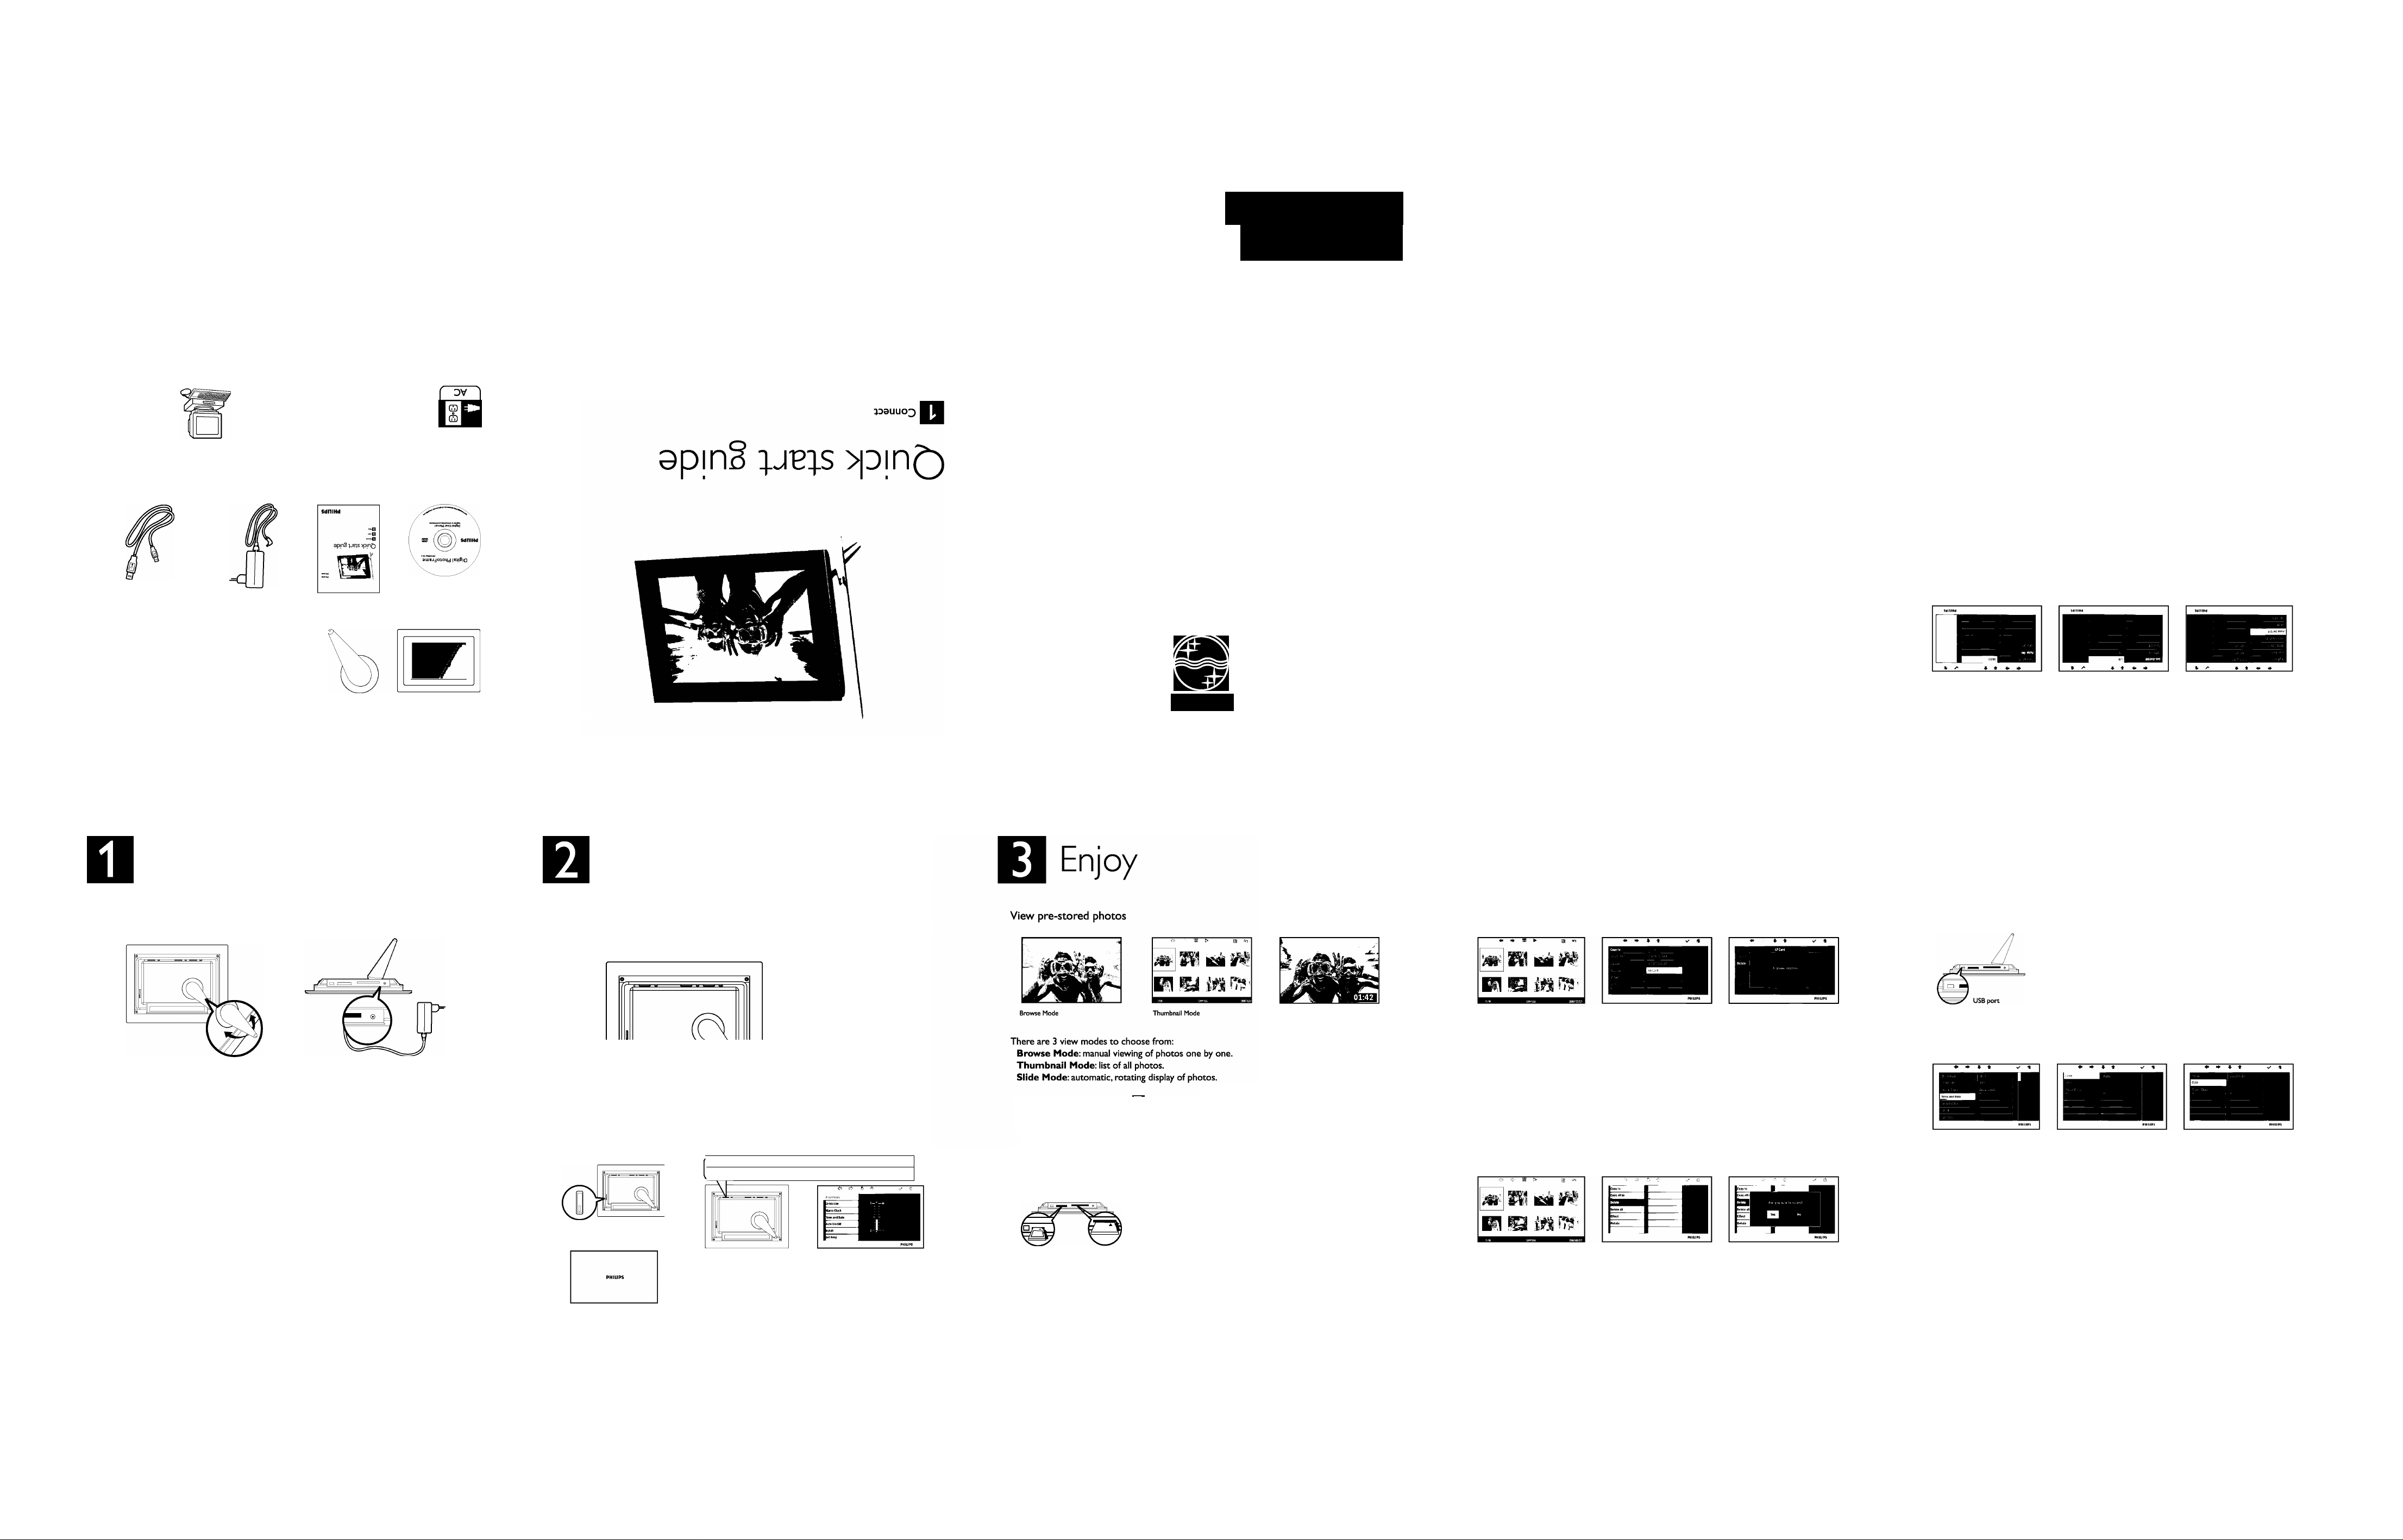
Connect
Attach the Stand
O
* Place the head of the stand in the socket.
• Rotate counterclockwise until the stand
clicks into place.
CAUTION To help prevent damage, do
not hold the frame by the stand.
Grasp the frame firmly using two hands.
Connect the power adaptor
o
Connect the supplied power adaptor to
the photo frame and then plug it to a
power outlet.
Setup
Locate the control keys
• Control keys on the back of the frame and corresponding function icons on the front of the
LCD display enable you to maneuver through the menus and customize your settings.
NOTE Not all of the
icons will appear on the
screen at the same time.
©
o
©
Back/Left ♦ Up
Next/Right
Slide Mode II Browse Mode
Show/Hide menu ■ Photo menu
Return 0 Clock
Down
Turn on
the PhotoFrame
PhotoFrame (back)
Choose language
e
C ^ ^ 0
Power button
PhotoFrame (front)
Startup screen
PhotoFrame (back)
Menu buttons are on the back of the photo frame. Icons
indicate location of buttons found on the back of the panel.
• Press '#■, keys to select Press V key to
Push the power button on
the back of the frame for
approximately 2 seconds.
The power LED will glow
blue and the Startup screen
will appear.
enter.
• Press '#■, keys to select Language settings. Press ✓
key to enter.
• Press -#■, keys to select. Press key to set your
language.
• Use iH key to return and exit SETTINGS.
MainMenu OK Up Down Right Left
Enter
it Main Menu
SS Thumbnail Mode
EB Add/Cancel photo
^ ^ 0 ^ ^
PhotoFrame (front) Language Setting
• Press keys to select Press ✓ key to enter.
• Press keys to select Internal Memory. Press ✓ key to enter.
• Press keys to select Album. Press key to enter Thumbnail Mode, and press ^
key to enter Slide Mode, press II key to enter Browse Mode.
• You may also enter Siide Mode directly by pressing ^ key from the main menu.
View photos from your memory card
Photo display (underside) Digital/MMC/
xD/Memory Stick card. Slide
card with end first and face up.
User right slot for Compact Flash card.
Slide card with end first and
face down.
left slot right slot
• Press keys to select ^ Press ✓ key to enter.
• Press ♦ , keys to select inserted memory card. Press ^ key to enter.
. Press keys to select Aibum. Press key to enter Thumbnaii Mode, After a few
seconds, photos in your memory card will appear.
. Then press ^ key to enter Siide Mode, press II key to enter Browse Mode.
If the memory card is inserted before the power is ON, Slideshow will automatically start.
Slide Mode
Copy or copy all photos from your memory card
Thumbnail Mode Copying photo mode Copied photo mode
Copying photo mode
• In the thumbnail mode, use ^ ^ keys to select photo.
• Press EB key to add/cancel selected photos. After selecting, press ■ key to show photo
menu.
• Press , -#■ keys to select Copy to or Copy aii to your memory card.
• Press ✓ key to copy.
Photo frame will keep a resized copy of the photo until it’s internal memory is full (message
shown).
Delete or Delete all photos from your memory card
Thumbnail Mode Deleting photo mode Deleted photo mode
Deieting photo mode
• In the thumbnail mode, use ^ keys to select photo.
• Press B key to add/cancel selected photos. After selecting, press ■ key to show photo
menu.
• Press , -#■ keys to select Deiete or Deiete aii from your memory card.
• Press ^ key to delete.
Copy/ Delete photos by connecting to your computer
You may copy, delete and move photos by connecting the
photo framewith the computer through the provided USB
cable.
• Turn on the power of the photo frame, and then plug the
smaller end of the USB cable into the USB port on the
underside of the photo frame.
• Plug the other end of the USB cable into the USB port of
the computer.
Set Time and Date functions
SetTime/Date mode Set Time mode Set Date mode
Set Time functions
• Press '#■, -#■ keys to select □ Press ✓ key to
enter.
• Press , ’#■ keys to select Time and Date. Press ✓ key
to enter.
• Press ♦ , -#■ keys to select Time to setup. Press >/ key
to set
• hour and minutes.
Press fi key to return main menu and exit SETTINGS.
Set Date functions
• Press keys to select [3 Press ^ key to
enter.
• Press ♦ , -#■ keys to select Time and Date. Press ^ key
to enter.
• Press '#■, -#■ keys to select Date to setup. Press V key to
set year, month and day.
• Press fl key to return main menu and exit SETTINGS.
CAUTION Time and date
settings are erased if the
photo frame is unplugged.
 Loading...