

Philips 7FF2FPA-27B, 7FF2FPA-27E User Manual

Register your product and get support at
www.philips.com/welcome
PhotoFrame
7FF2FPA
EN User manuals 1


Content
1. What is in box
2. Connect
2.1 Attach the Stand
2.2 Connect the power adaptor
3. Setup
3.1 Turn on the photo frame
3.2 Chose Language
4. Enjoy
4.1 View pre-stored photos
4.2 View photos from your memory card
4.3 Copy or copy all photos from your
memory card
4.4 Delete or Delete all photos from
your memory card
4.5 Copy/ Delete photos by connecting
to your computer
4.6 Set Time and Date functions
4.7 Set Auto on/off timer functions
5. Frequently asked questions
6. Service and Warranty
2
3
3
3
3
3
4
4
4
5
5
6
6
7
7
8
9
ENGLISH
Content
1

Introduction
Philips digital PhotoFrame can be placed either
vertically or horizontally to fit the photos on
display. Its internal rechargeable battery provides
you with the freedom to pass it around and
show photos without the power cord. Or,
you can place it somewhere in a room for a
continuous display by connecting it to the mains
power supply.
1. What is in box
Digital PhotoFrame Power adaptor USB Cable to PC
(male B type plug)
Digital photo display 7FFI series
Quick start guide
Connect
1
Setup
2
Enjoy
3
Quick start guide User manual CD Frame Stand
What else you’ll need
AC
Power outlet Digital Photos on memory card or PC
2
What is in box
2. Connect
2.1 Attach the Stand
• Place the head of the stand in the socket.
• Rotate counterclockwise until the stand clicks
into place.
3. Setup
ENGLISH
Locate the control keys
Control keys on the back of the frame and
corresponding function icons on the front of the
LCD display enable you to maneuver through
the menus and customize your settings.
Caution:
To help prevent damage, do not hold the frame
by the stand. Grasp the frame firmly using two
hands.
2.2 Connect the power adaptor
• Connect the supplied power adaptor to the
photo frame and then plug it to a power
outlet.
Back/Left Up Enter
Next/Right Down Main menu
Slide mode Browse Thumnail
mode mode
Show/Hide Photo Add/Cancel
menu menu photo
Return Clock
Note:
Not all of the icons will appear on the screen at
the same time.
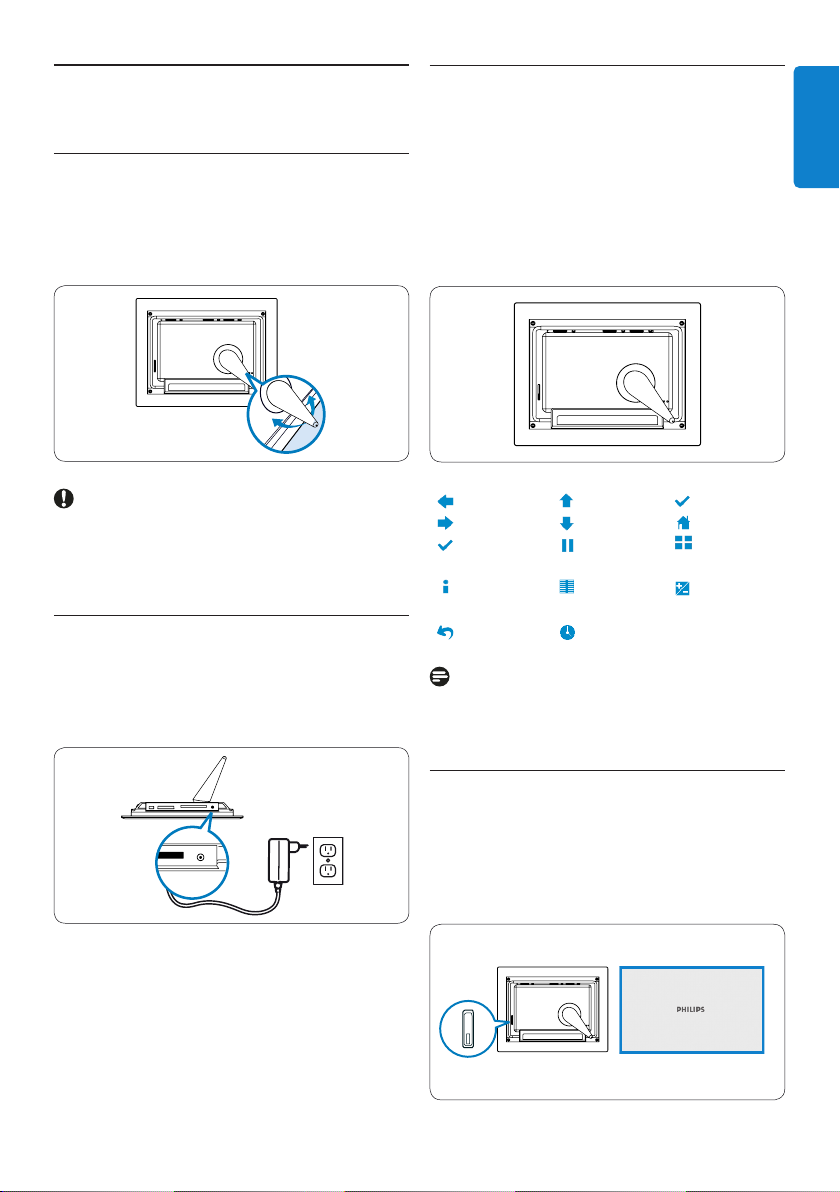
3.1 Turn on the photo frame
• Push the power button on the back of the
frame for approximately 2seconds.
• The power LED will glow blue and the
Startup screen will appear.
PhotoFrame (back)
Power button
PhotoFrame (front)
Startup screen
Connet / Setup
3
 Loading...