

Page 1
Artwork: Photo display Quick Start Guide
Extend: 4pp + 4pp
Size: Open: 591W X 2lOHmm Close: I48.5W x llOHmm
Material: 140gsm White, silk coated
Printing: 2C X 2C - Pantone 3005C + Black
Finishing: Folded sheet
Date prepared: August 05 2006
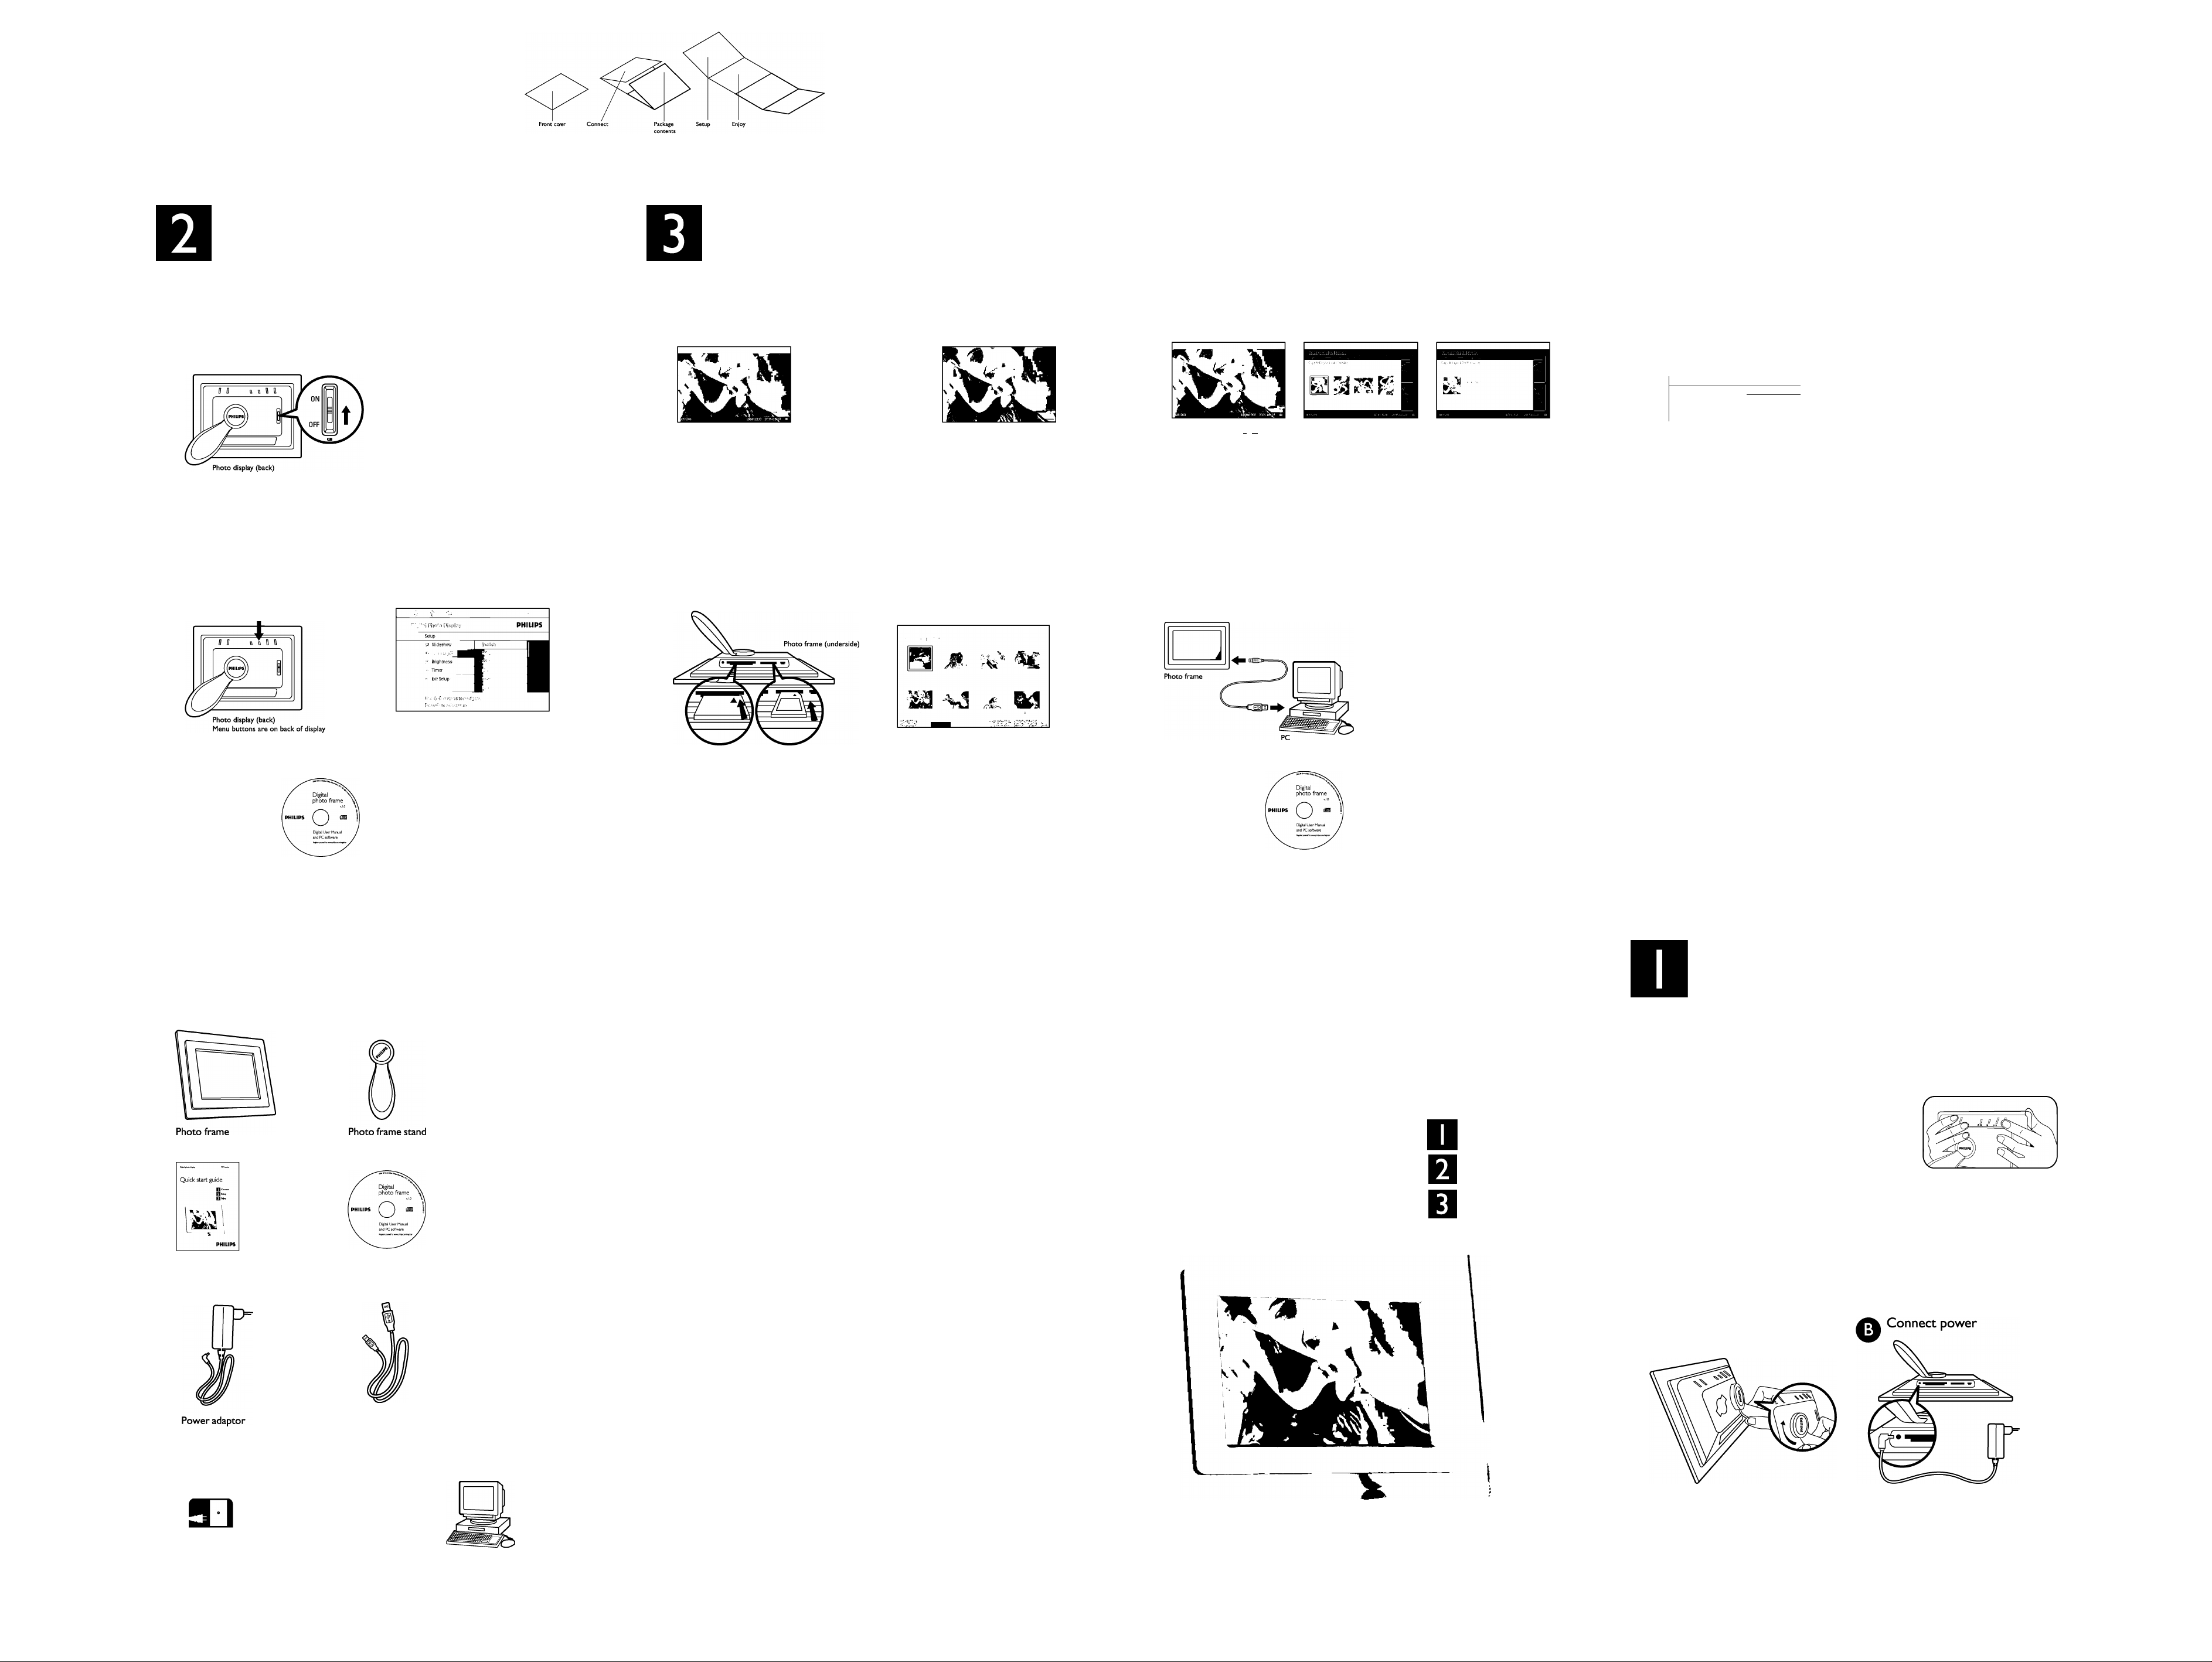
Setup
Turn on photo display
O
Slide power switch up to
ON position
> The power LED will be green
and the Startup screen will appear
Choose language
o
Press key to enter SETUP
For other Setup
preferences, see
digital user manual
PHILIPS
Reading photos from m (06)
Please wait...
Photo display (front): Startup screen
Photo display (front); Setup screen
Icons indicate position of buttons on back of display
• Press O, O keys to select LANGUAGE
settings and^ key to enter
• Press ^ keys to select and
^ key to set your language
• Use"^ key to return and exit SETUP
Enjoy
View pre-stored photos
_ M -e ^
Browse mode
Manual viewing of photos
one-by-one
There are 3 view modes for you
to choose from. Press S key to
toggle between the modes
Use ^ key to view the previous
photo and key to view the next
View digital camera photos from memory card
Use left slot for Compact Use right slot for Memory Stick/
Flash card, slide card in Secure Digital/ MMC card, slide
end first and face down card in end first and face up
Insert your memory card
into the photo frame
Thumbnail mode
List of all photos
Slideshow mode
Automatic, rotating display of photos
• Photos pre-stored on the display
will appear if no memory card
Photo frame (front): Thumbnail mode
> After a few seconds photos on
your memory card will appear
Copy photos from your memory card
Photo frame (front): Browse mode Photo orientation mode Copied photo mode
Use keys to select photo
Press 0 key to copy photo
> Small photos of 4 different
orientations will appear
Select the correct orientation of
the photo and press ^ key
> Photo frame will keep a resized copy of
the photo until its internal memory is full
Press 0 in Thumbnail mode and follow
screen instructions for multi-photo copy
Press TU to select correct orientation
for each photo after multi-photo copy
To copy Photos from PC to Photo Display
After installing Photo Frame Auto Run
PC Software to PC,
(User manual and Auto Run software
on CD)
• Connect the supplied PC USB cable
to Photo Frame
• Connect the PC USB cable plug to
the PC
> The application will start automatically
and provide easy-to-use user interface
for user to browse and preview the
For transferring photos
from PC and other
operations, see
digital user manual
photos in both PC directories and Photo
Frame albums, and for user to perform
operations, such as copying, moving and
deleting photofs).
Delete photos from digital photo frame
Press m key, select DELETE,
highlight DELETE PHOTO,
Photo Menu 1
W Show In Slideshow Dü.;c Photo 1
■i- Older in Slideshow
ESilf^nu
Photo frame (front): Delete mode
and press ^ to confirm
Press Iml in Thumbnail mode and
follow screen instructions for
multi-photo delete
Photo frame can not delete
photos on memory cards or digital
cameras
Set Time-related functions
Set 6PM-6AM brightness
You may select a different brightness
Setup
Slideshow
(j Status
Photo frame (front): Time functions mode
Set current time
• Current time must be set before
enabling other time-related functions
• Press key to enter SETUP
• Press key to enter
CURRENT TIME setting
• Press to set hours and
minutes
• Press V to confirm
PHILIPS
level for photo frame in the evening
• Press key to enter SETUP
• Go to TIME FUNCTIONS and
choose 6PM-6AM BRIGHTNESS
• Press to select and ^
to confirm
Set Auto on/off timer
Photo frame can be enabled to turn
on and off at pre-set times daily
• Press key to enter SETUP
• Go to TIME FUNCTIONS and
choose AUTO ON/OFF TIMER
• Press ^ ^ and ^to enable
this feature
• Go to AUTO ON AT setting to
set turn on time
• Go to AUTO OFF AT setting to
set turn off time
What’ in the box
Quick start guide
Digital user manual
Frequently Asked Questions
Q Is the LCD screen touch-enabled?
A The LCD screen is not touch-enabled. Use the keys in the back to control
Digital photo frame
Q After copying photos, how can I check if the photos are already stored inside?
A The photos are copied after the screen confirms with "photo copied" message. You may
then remove the card/ camera to view internal photos.
Q Can I switch between different slideshows photos by using different memory cards?
A Yes, Digital photo frame will slideshow photos stored in the card or camera
currently connected
Q Will the LCD screen be damaged if I keep showing the same photo for a long time?
A No, Digital photo frame can display the same photo continuously without any damage
to the LCD screen
Q Can I use Digital photo frame to delete photos on memory card or camera?
A No, it does not support operations to delete photos on external devices
Q Can I print photos from Digital photo frame?
A No, it does not support direct photo printing
Q What can I do if my digital camera does not work with digital photo frame?
A Currently some cameras are not compatible with digital photo frame.
Please use compatible memory cards to view photos instead.
Digital photo frame 7FFI series
Quick start guide
Connect
Setup
Enjoy
Connect
Locate control keys
• Use your photo frame by pressing the control keys in the back.
© IS H
Previous/Left
<h
Next/Right ^ Photo setting
Up
❖
Down
<¡¡>4 Setup
^ Confirm
Escape
Switch view
e
Show/Hide icon
CD
Copy
e
Delete
0
What else you’ll need
©
©
AC
Power outlet (your photos on)
Memory card
USB cable to PC
(male USB type A plug)
OR
(your photos on)
PC
Need help?
User manual
See the digital User manual that comes with your photo frame
Online help: www.p4c.philips.com
I80BI lOIAI 1001
Specifications are subject to change without notice.
Trademarks are property of Koninklijke Philips Electronics N.V. or their respective owners.
W
© 2006 Koninklijke Philips Electronics N.V. All rights reserved.
www.philips.conn
Display design may differ from that illustrated
PHILIPS
Attach stand
o
Place head of stand in socket
Rotate clockwise until stand
locks in-place
Connect the supplied power
cable from the photo frame
to a power outlet
> The internal battery will be
charged at the same time
C3D
o
C3
 Loading...