

Philips 725H-05 User Manual
Quick install Guide
Welcome to the growing family of owners of PHILIPS equipment.
Thank you for buying a DVDR 725H/05. The following pages contain
explanations of the main features that will help you better understand
how the DVDR 725H/05 works.
You will find step-by-step descriptions of each function in the respective
chapter of the User manual.
Features
The DVDR 725H/05is a DVD recorder that can store TV-shows on a built-in hard disk (HDD).
Moreover, it is a DVD player that can play back DVDs, audio and (s-)video CDs, and MP3 CDs. You can play back and edit the stored TV shows
(or camcorder recordings), and save (archive) these on DVD+RW/+R media for later viewing.
But your DVDR 725H/05is more than just an ordinary DVD recorder with a built-in hard disk.
From now on, it's better to use your TV set just as a monitor and tune to the various TV channels from your DVD recorder, taking advantage of
features like FlexTime, Instant Replay, or the abitity to pause live TV.
FlexTime:
•
With FlexTime, you can watch or rewind a TV show while it is being recorded.
You don't have to wait until the end of the recording before starting playback.
Instant Replay:
•
You can repeat a scene of a live TV show at the touch of a button ( JUMP BACK ), as often as you like.
Pause Live TV
•
You can pause a live TV show by pressing PAUSE 9 to, say, answer a phone call, while the recording continues. By pressing PLAY G , you
can resume playback of the show at the scene it was interrupted.
ENGLISH
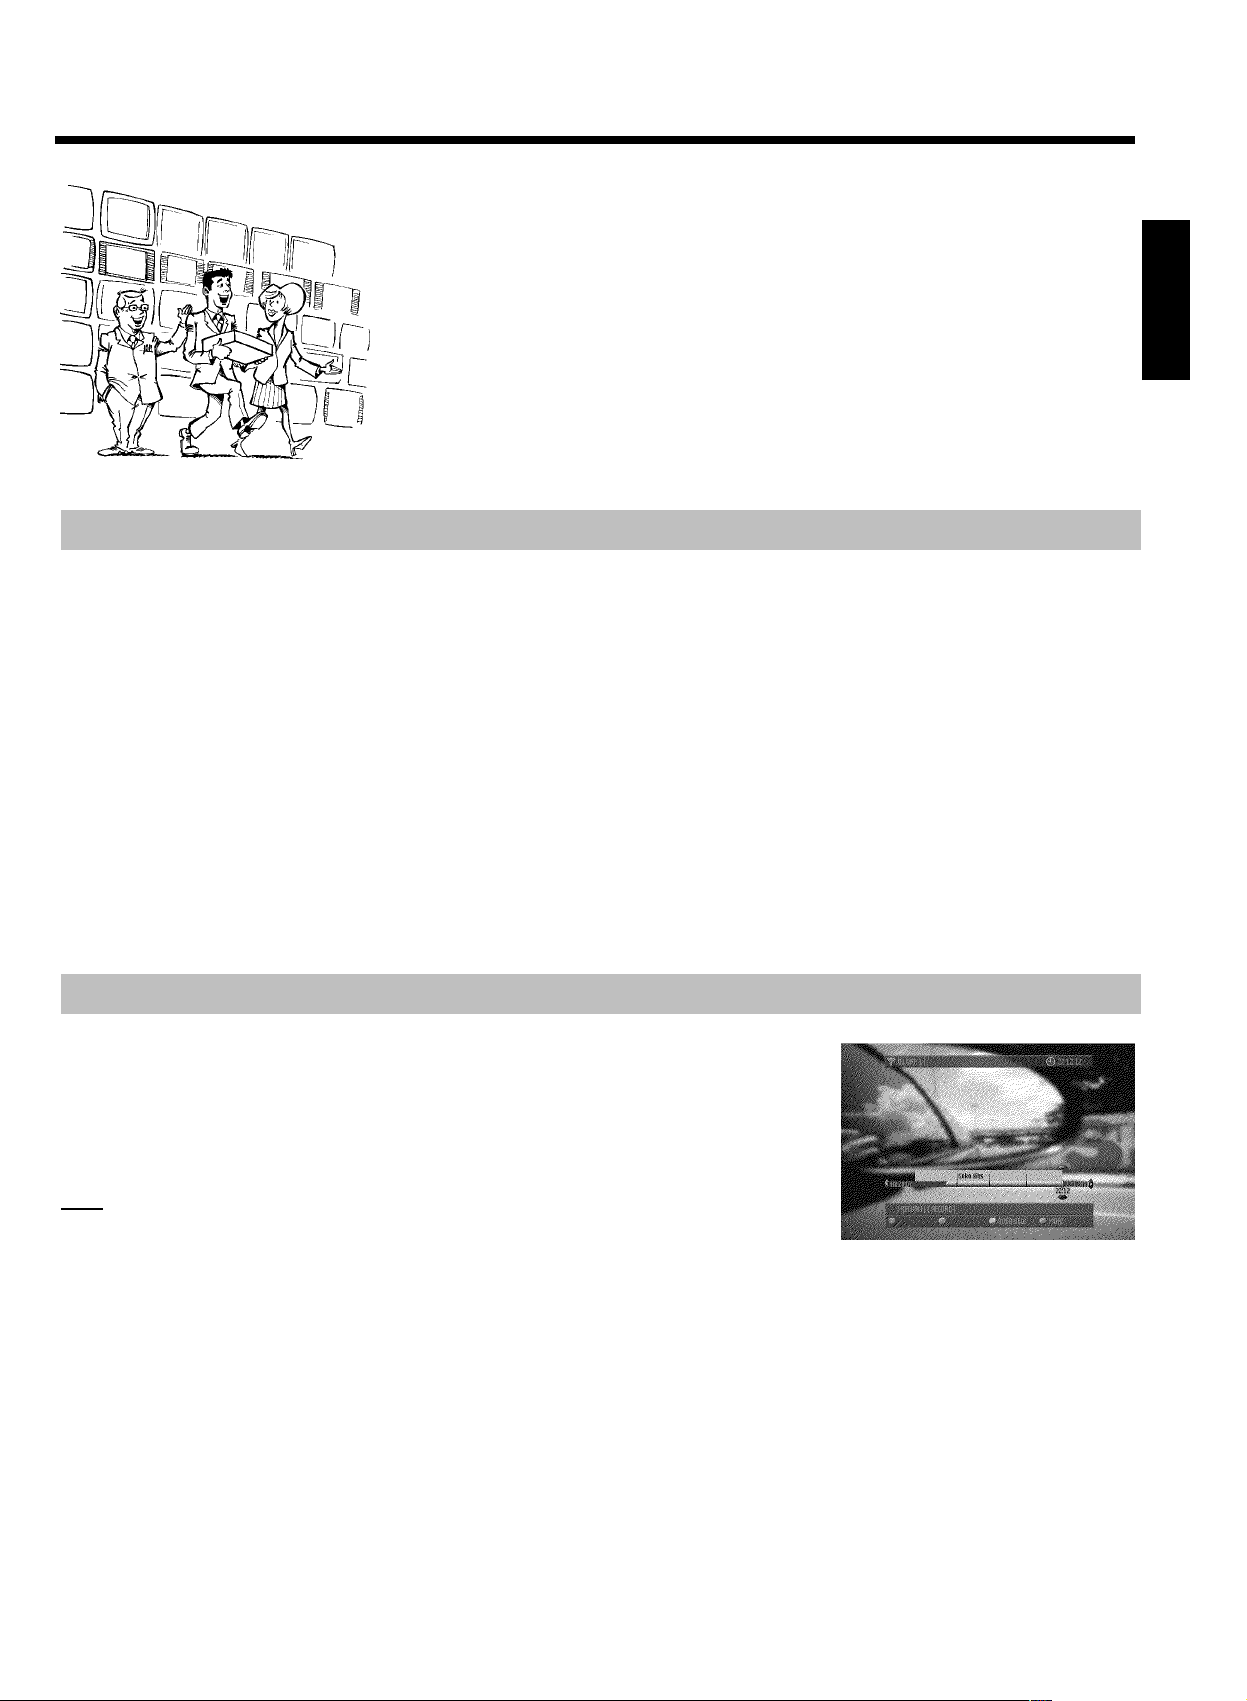
Time Shift Buffer
The above features are available because the DVDR 725H/05uses a so-called Time Shift Buffer.
As soon as you turn on your DVD recorder, it starts recording from the current TV channel into the
Time Shift Buffer. The DVD recorder stores all the TV shows you watched since you turned on the
recorder. If you watched a TV show for more than 60 seconds, the recorder will insert a marker. If
information is already available from the GUIDE Plus+
mark the beginning of the TV show.
Note:When you are recording from a cable box through the external input jacks, the title and start/end
information will not be available.
If the Time Shift Buffer is full (the default setting is 3 hours) the recorder will delete the oldest
recording to make room for new recordings. You can mark TV shows or parts of these to be recorded permanently on the HDD while the other
contents of the Time Shift Buffer will be deleted.
The Time Shift Buffer can be best compared to a conveyor belt running from right to left. A TV show resembles a package on this conveyor belt. If
you change the programme number or the GUIDE Plus+
belt. You can adjust the time a package will remain on the conveyor belt from 1 to 6 hours (the default setting is 3 hours).
As long as the packages are still on the conveyor belt, you can mark them red ( REC/OTR n ) or remove the marker ( RED function button).
You can only mark the package that's directly in front of you.
At the end of the conveyor belt (the preset time has expired), the recorder will decide whether a package will be stored (marked red) or
destroyed (unmarked). Only the packages that are marked red will be stored.
If you delete the Time Shift Buffer, the recorder will immediately remove all packages from the belt, storing only those you marked red.
®
system, the recorder will store the title and
®
system detects the start of a TV show, a new package will be placed on the conveyor
1

Quick install Guide
Simultaneous recording and playback
Thanks to the built-in HDD and the high data rates it can achieve, you can record and play back at the same time.
This enables you to:
watch, pause, or rewind a TV show while it is being recorded (FlexTime, Pause live TV)
•
watch a TV show stored on the HDD while another recording is being made
•
playback a DVD while the HDD records a TV show.
•
store (archive) a TV show from the HDD to a DVD+RW/+R while another show is being recorded on the HDD.
•
Media Browser
The Media Browser provides an overview of all the recordings on the HDD. You can display a list of all
recordings according to certain criteria ('Recording Date', 'Protected'...). You can select recordings
in the Media Browser for playback, editing, or storage on a DVD+RW/+R (archiving). Moreover, you
can lock recordings that you can only play back after entering a valid PIN code. If you haven't entered a
PIN code yourself, then the PIN code is '0000'.
Changing the PIN code
1 Press DISC MENU and then SYSTEM MENU ,
2 Select 'A' with D , then select the '(Disc features)' symbol with B , and confirm with C .
3 Confirm 'Access control' with C and enter the 4-digit code. Re-enter the code for confirmation and press SYSTEM MENU to end.
For more information, read chapter 'Access control (child lock)' in the user manual.
Archiving titles on a DVD+RW/+R
You can copy (archive) recordings from the HDD to a DVD+RW/+R.
To do so, select the desired recording in the Media Browser and press the 'ARCHIVE' colour function button. That's all!
Since the archiving process will take some time, you can switch to a different TV programme in the meantime by pressing CHANNEL q ,
CHANNEL r . Please note that you cannot use the FlexTime, Instant Replay, and Pause LiveTV features of the Time Shift Buffer or play back a
recording from the HDD during the archiving process, since the HDD is already playing back a recording (copying from the HDD to the
DVD+RW/+R). Nevertheless, it is possible to make recordings into the Time Shift Buffer (the Time Shift Buffer is filled). If you turn off the DVD
recorder using STANDBY m , the archiving process will continue until it is completed, and then the DVD-Recorder will switch off automatically.
Time Shift Buffer (continued)
The Time Shift Buffer is the heart of your DVDR 725H/05. All recordings, except those via the front sockets, will be made into the Time Shift
Buffer first.
You can mark a recording to be stored permanently on the HDD.
Recordings are copied on the HDD when:
the preset Time Shift Buffer period expires (the default setting is 3 hours)
•
the Time Shift Buffer is deleted ('Flush Buffer'function( SYSTEM MENU button, 'Set up'menu ))
•
you turn off the DVD recorder with STANDBY m
•
you switch to camera mode using CAM (switch back with the same button).
•
date/time or channel settings have changed (menu is called up).
•
You can either set markers yourself or the DVD recorder can set such markers automatically, e.g. : timer recordings. The Time Shift Buffer keeps
record of which TV shows you watched during the last hours. This is shown using the so-called time bar with a series of recorded programmes on
the screen.
On the right-hand side, you can see a moving IIIIIIIIII symbol indicating that the Time Shift Buffer is being filled.
On the left-hand side, you can also see a moving IIIIIIIIII symbol indicating that the Time Shift Buffer is being emptied, i.e. recordings are being
discarded. The programmes in the Time Shift Buffer are separated by a vertical line. The name of the TV show is displayed above the line. The
time information on both sides of the time bar indicate the start and end time of the Time Shift Buffer. The current recording time is on the
right-hand end, and the oldest recording on the left-hand end.
2

Quick install Guide
Navigation in the Time Shift Buffer
You can move to any position within the Time Shift Buffer and watch the recording that was stored at that time.The indicator (yellow rectangle on
the time bar) shows the playback position in the Time Shift Buffer. You can move this indicator using the C , D buttons. If the playback position
is as far on the right-hand side as it can get, you are watching the current (live) picture of the TV channel you are tuned in. In the header of the
Time Shift Buffer, you will see an aerial symbol (contrary to the HDD symbol that appears when playing back from the HDD).
The following is a short overview of the basic buttons for navigation in the Time Shift Buffer:
N , JUMP BACK , D
When you reach the left end of the time bar, the recorder will switch to normal playback speed.
O , JUMP FWD , C
When you reach the right end of the time bar, you are watching the current TV programme. It is not possible to move further to the right. In
order to do so, the recorder would have to anticipate the future programme. You can use O to 'catch up' with the current TV programme.
PAUSE 9 If you stopped playback, the indicator will remain at that position until the preset time of the Time Shift Buffer has reached that
position (the indicator reaches the left end of the time bar). When it reaches the end, the DVD recorder will automatically switch to playback.
PLAY G Playback at normal speed. The limits of the Time Shift Buffer cannot be exceeded.
Recordings using the Time Shift Buffer
Recordings are always stored in the Time Shift Buffer first.
The following recording options are available:
Programmed recordings (TIMER) that will be carried out automatically at a predefined date/time
•
Direct recording of the current, live TV programme.
•
Marking of TV shows that have already been stored in the Time Shift Buffer.
•
You can mark recordings in the Time Shift Buffer to store them on the HDD instead of having them discarded when the Time shift Buffer period
expires. When a TV show is marked, a red marker appears on the time bar of the Time Shift Buffer. This marker indicates the recording. You
don't need to do anything else.
ENGLISH
The DVD recorder automatically transfers a show to the HDD when:
the preset Time Shift Buffer period expires (the default setting is 3 hours).
•
the Time Shift Buffer is deleted ('Flush Buffer'function( SYSTEM MENU button, 'Set up'menu )).
•
you turn off the DVD recorder with STANDBY m .
•
you switch to camera mode using CAM (switch back with the same button).
•
date/time or channel settings have changed (menu is called up).
•
In the case of programmed recordings, the marker is set automatically. After that, the recording is also automatically stored on the HDD. When a
red marker has been set, you do not need to do anything else. Even if you turn off the recorder with STANDBY m , the recording will be stored
first before the DVD recorder automatically switches off.
3

Quick install Guide
Programming a recording
You have the following options for programming a recording:
®
The GUIDE Plus+
Select the TV show you want to record from an overview displayed on the screen.
The VIDEO Plus+
By entering the PlusCode programming number, you automatically set start/stop time, date, and programme number
Manual programming.
Manually started recordings
To record the current TV show, press REC/OTR n .
If you want to stop the recording, press the STOP h button. Select 'Yes' using D and confirm with OK .
If you want to mark a TV programme in the Time Shift Buffer, move the button on the time bar using C , D within the desired programme and
press REC/OTR n . To remove the marker, press the RED function button. The time bar must be visible. ( INFO button)
Recording mode
system:
®
system:
Recordings on the HDD will be carried out in an adjustable recording quality, the so-called recording mode. The higher the quality, the greater the
HDD space required. The recording quality is indicated as M1, M2, M2x, M3, M4, M6, and M8. The number indicates the number of hours that will
fit on a single-layer, 4.7GB DVD+RW or DVD+R. This means that you can store only 1 hour of 'M1' recordings on a DVD+RW/+R, while 8 hours
of 'M8' recordings will fit on the same disc.
This is particularly important when you want to copy recordings from the HDD onto a DVD+RW/+R. The quality of recordings on the HDD
cannot be changed at a later stage.
For example:
A 3-hour movie that was stored on the HDD in recording quality 'M1' will not fit on a DVD+RW/+R (M1=1 hour on a DVD+RW/+R). Only 1
hour of this movie can be copied onto a DVD+RW/+R. If you recorded the same movie in recording mode M3, the entire movie would fit on a
DVD+RW/+R. (M3=3 hours on a DVD+RW/+R).
A few closing instructions
If you have any problems operating the device:
1) Read the items in the User Manual in the section 'Before you call an engineer'
2) Visit the Internet site http://www.philips.com/support to get some online help,
3) Call the customer support service. You will find the telephone numbers at the back of the User manual.
4
Quick install Guide
Connecting to the TV
1 Switch off your TV set.
2 Remove the aerial cable plug from your TV set. Insert it into the
ANTENNA IN socket at the back of the DVD recorder.
3 Insert one end of the supplied aerial cable into the TV
OUT socket at the back of the DVD recorder and the other end
into the aerial input socket at the back of the TV set.
4 Connect socket EXT1 TO TV-I/O or sockets S-VIDEO OUT
(Y/C) , VIDEO OUT (CVBS) , AUDIO OUT L/R with the
corresponding sockets of your TV set.
Connecting to the mains
Always check if the local mains voltage matches the voltage range
printed on the type plate at the back or bottom of the DVD-recorder.
If not consult your dealer or the customer support from your country.
1 Switch on the TV set.
2 Insert one end of the supplied mains cable into the mains socket
4MAINS at the back of the DVD recorder and the other end
into the wall socket.
Initial installation
1 Press STANDBY-ON m on the front of the DVD-recorder
P 'PHILIPS' and then 'IS TV ON?' will appear on the display.
2 If necessary, select the programme number for the input socket at
the TV set.
P The initial installation menu appears on the screen.
Virgin mode
Menu Language
English
Español
Français
Italiano
Deutsch
Press OK to continue
3 Select your favourite setting using B or A .
Confirm with OK .
4 Proceed in the same way with the further menus: 'Audio
Language', 'Subtitle', 'TV shape','Country'.
P Autoinstall starts after the confirmation of the message 'If you
have connected the antenna - press OK' using OK .
P When Autoinstall is complete, 'Autoinstall complete' will
briefly appear on the TV screen.
5 End with SYSTEM MENU .
6 Press GUIDE/TV .
Setup Home
Press Aor Bto select. Then press OK to confirm.
Setup
Choose item to set up :
Language English
Country United Kingdom
Postal code XXXXX
External receiver 1 None
External receiver 2 None
External receiver 3 None
ENGLISH
7 Select line 'Postal code' and confirm with OK .
8 Choose the entry position using C , D . Enter the local post
code of your location using A , B , or the number buttons
0..9 .
O Depending on the country you select, you can also enter
letters using B or A .
9 Confirm the local post code with OK .
0 To end, press GUIDE/TV .
5
 Loading...