

Page 1
QUICK USE GUIDE DVDR 520H
Switch on the TV set and
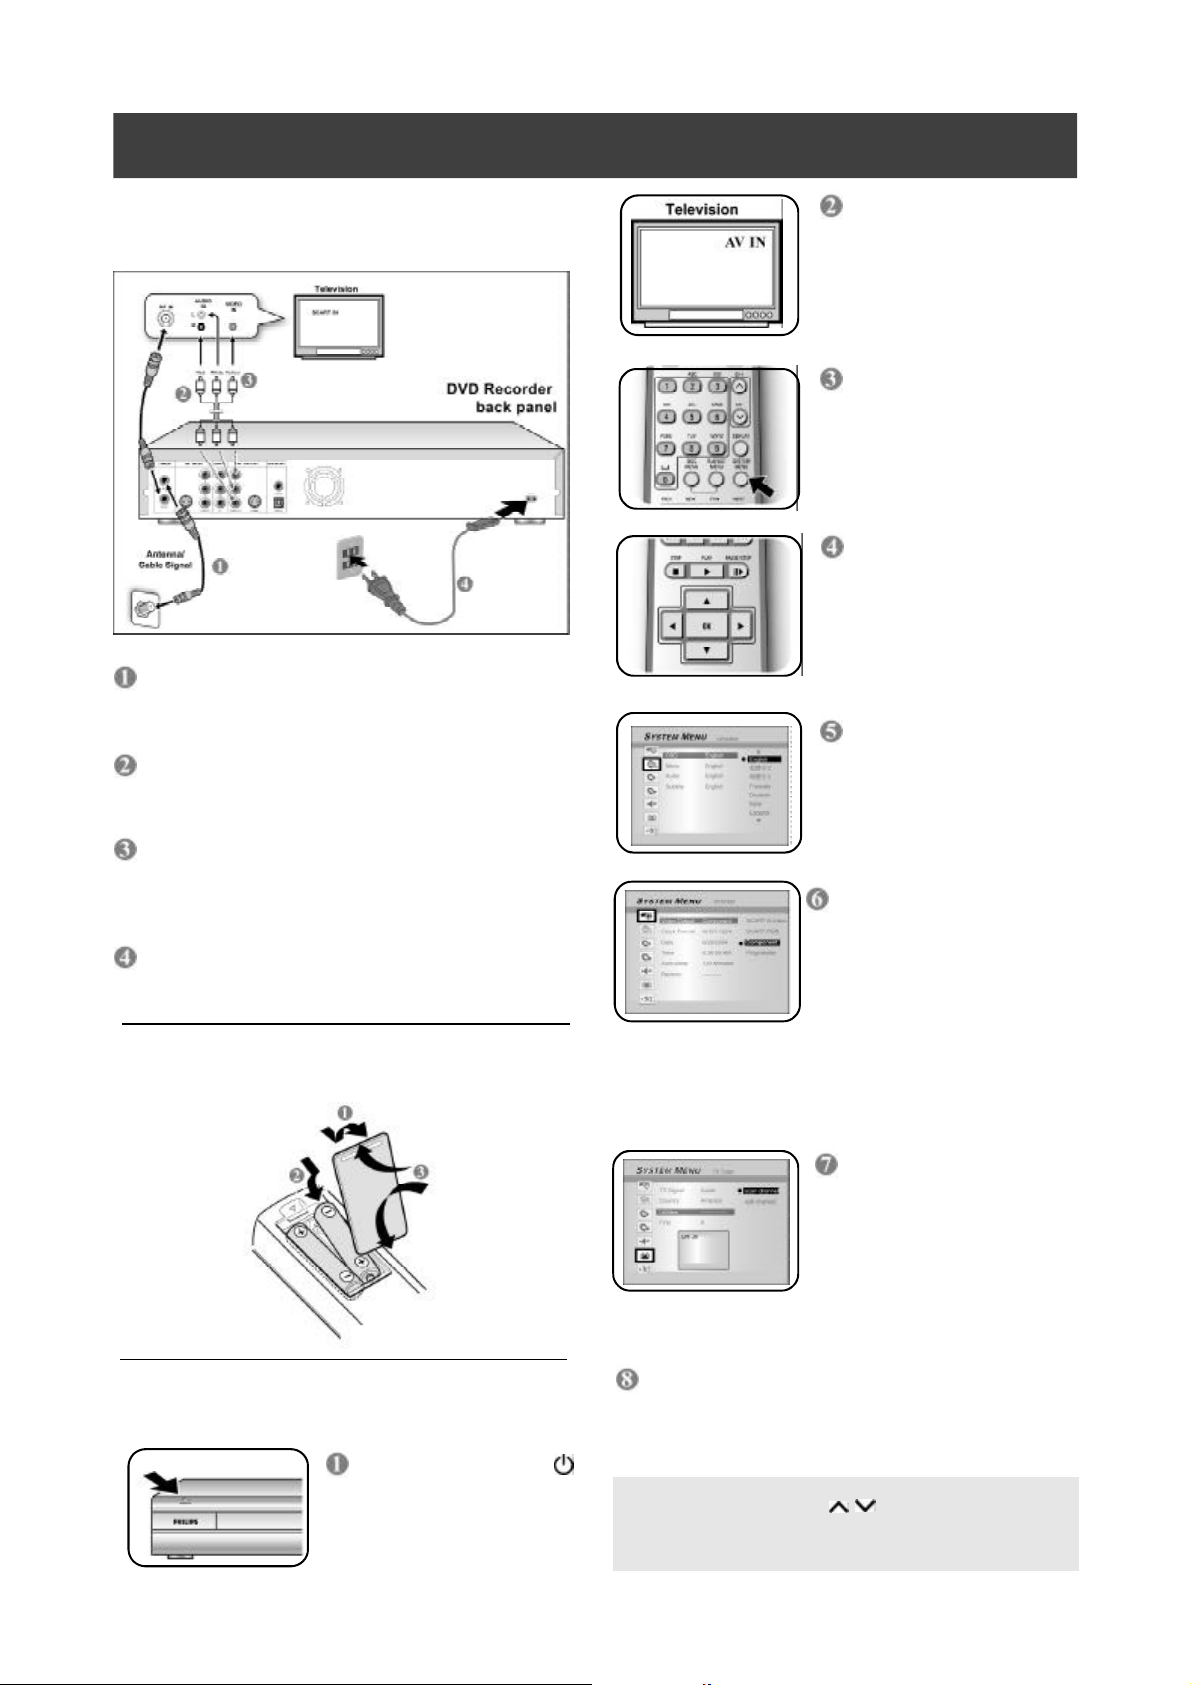
1 CONNECT THE DVD RECORDER
Connect the antenna cable from the wall
antenna outlet to the RF IN terminal on the
back of the DVD recorder.
Use another antenna cable to connect the DVD
recorder’s RF OUT terminal to the antenna
in terminal at the back of your TV set.
select t he correct video
input.
Press the [SYSTEM
MENU] button to adjust
your peference setting of
this DVD recorder.
Press [p] [q] to select
an item in the menu.
Press [u] to access the
selected item’s options.
Press [OK] to confirm your
selection.
Language menu
appears. OSD lanuage:
select on-screen display
language.
Use AUDIO/VIDEO cables (red/white/yellow)
to connect the DVD recorder’s AV OUT
termianls to the AV IN terminals at the b ack of
your TV set.
Connect the power cable from the DVD
recorder’s AC IN terminal to the power outlet.
2 PREPARE THE REMOTE CONTROL
3 START INSTALLATION
Press [STANDBY-ON ]
to switch on the DVD
recorder.
System menu appears.
Video output: sets video
output
TV Type: sets the TV type
Date: set the system
date using the
numbered buttons.
Time: set the system
time using the
numbered buttons.
TV tuner menu
appears.
TV channel search: Go to
“Utilities” and then “start
scan.” Press [OK] to start
automatic TV channel
scan to search and store
available channels.
When completed, press [SYSTEM MENU] to
exit the menu.
The DVD Recorder is ready for use!
NO PICTURES! Check if Video Input of the TV set is switched to
“AV” and press [CHANNEL ] button to select the right
channel.
NO SOUND! Check if the audio L/R jacks on the recorder are connected to the TV set, stereo system or receiver.
Page 2
...cont.
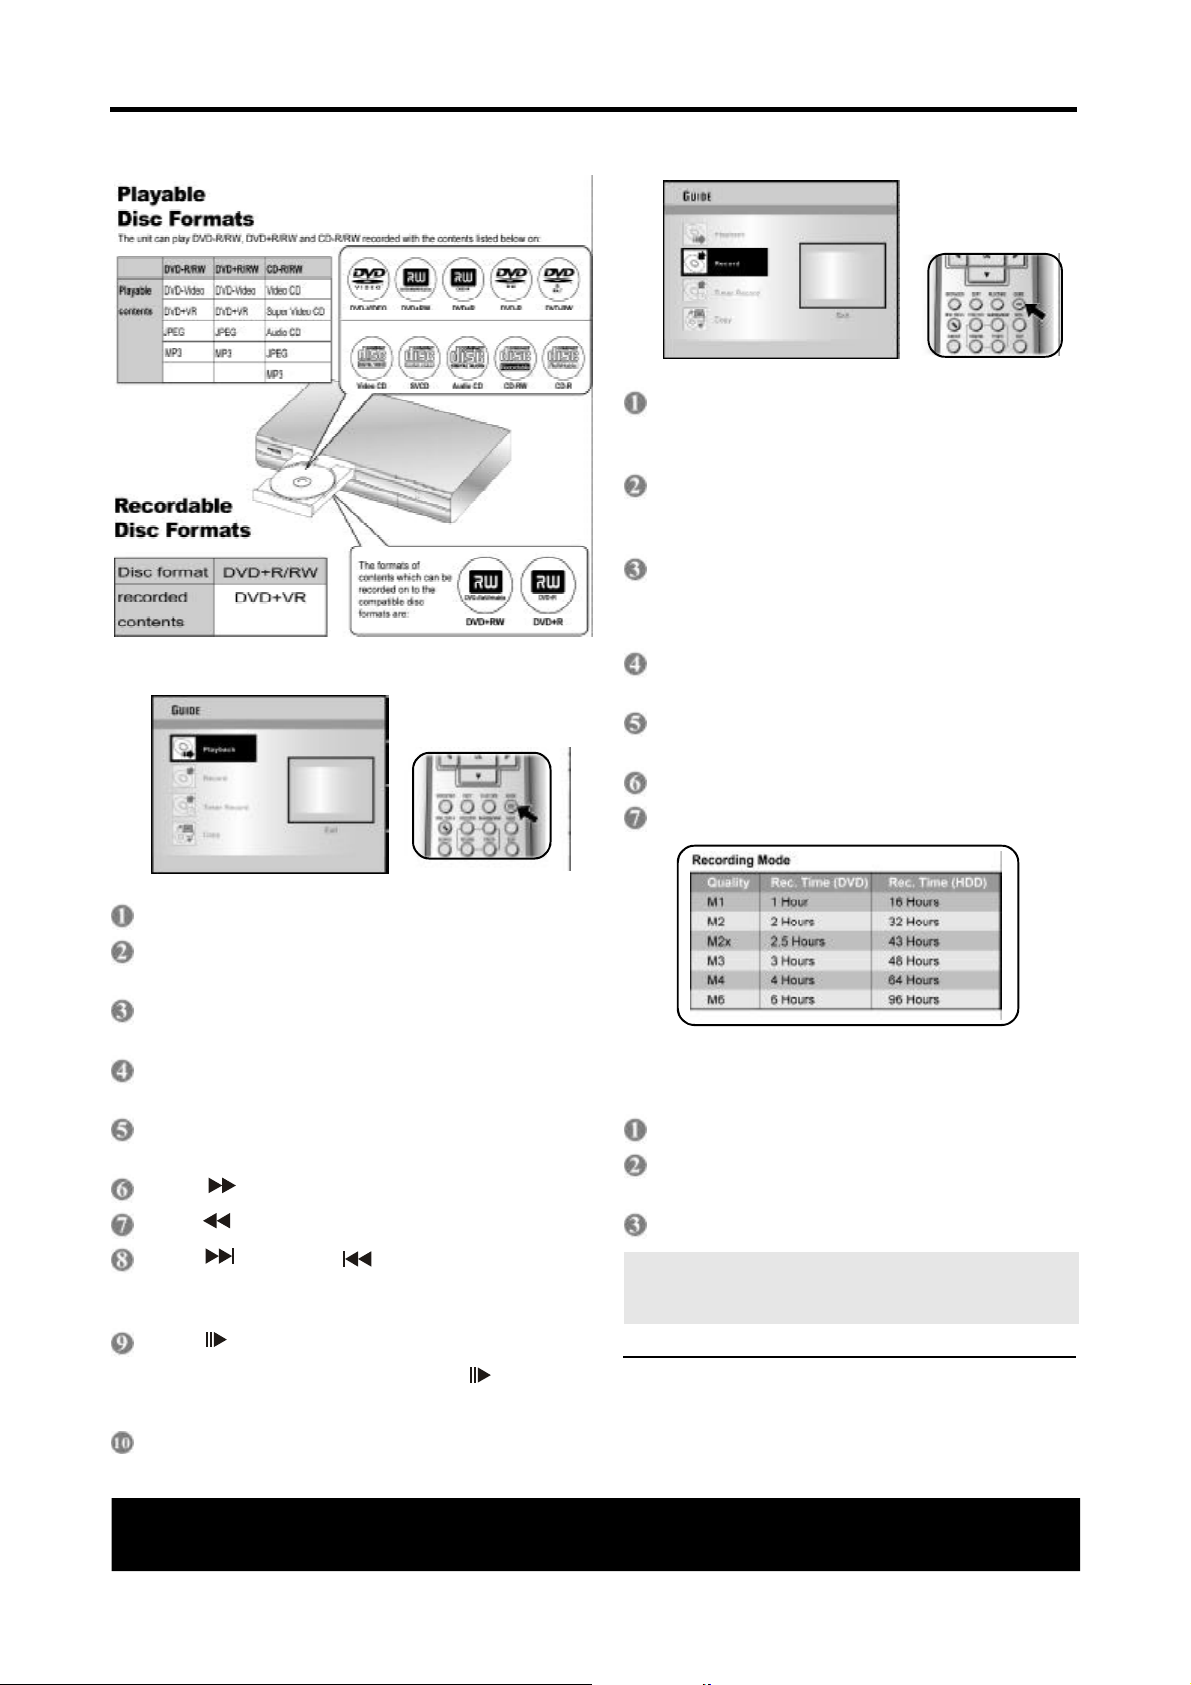
4 START PLAYBACK WITH GUIDE MENU
5 START RECORDING WITH GUIDE MENU
Insert a recordable DVD+R/+RW disc with
the label facing up or assure t he HDD
has enough available recording space.
Press the [GUIDE] button for the GUIDE
menu, press [p] [q] to go t o “Record” and
press [OK].
Press [p] [q] to select signal input and
press [OK].
If TV is selected, press [p] [q] for channel selection.
Press [p] [q] to select DVD or HDD and
press [OK].
Press [p] [q] to set record ing mode and press
[OK].
Insert a disc if you’re playing back from a d isc.
Press the [GUIDE] button for the GUIDE menu,
press [p] [q] to go to “Playback” and press [OK].
Press [p] [q] to select DVD or HDD and press
[OK].
Press [p] [q] to select the file type for
playback and pr ess [OK].
Press [p] [q][t] [u] to select the file and press
[OK] to start playback from.
Press [ F.F. ] for fast-forward scanning.
Press [ REW] for fast-reverse scanning.
Press [ NEXT] or [ PREVIOUS] to advance or ret urn to the next or previous chapter/track.
Press [ PAUSE/STEP] to pause playback.
Press [OK] to start recording.
Press [STOP] to stop recording.
To play the DVD+R disc on other DVD players after recording, you must finalize the disc first:
Press the [Disk Tools] button.
Press [p] [q] to select “Finalize (Make
Compatible)” and press [OK].
Press [OK] to start finalizing the disc.
Once the DVD+R disc is finalized, no further
record ings and editings can be made to the disc.
You can not un-finalize a finalized disc.
When playback is paused, press [ PAUSE/
STEP] again to start “frame by frame mode.”
Press [STOP] to stop playback.
Need Help?
Please visit: www.p4c.philips.com
Detailed playback and recording features and ad-
ditional functions are described in the accompanying
user’s manual.
P/N: 7819900927
 Loading...