

PHILIPS 46PFL9706H, 37PFL9606H, 32PFL9606H, 52PFL9606H User Manual
!!!"#$%&%#'"()*+!,&()*,
-,.%'/,012)301#0)43(/15641.,/1'3##)0/15/
78881',0%,'19*50/1:;<1=>
?@AB:7C8C
?DAB:7C8C
E8AB:7C8C
F@AB:7C8C
ECAB:7D8C
G',01*5635&

1
1.1
1.2
1.3
1.4
1.5
2
2.1
2.2
2.3
2.4
2.5
2.6
3
3.1
3.2
3.3
3.4
3.5
3.6
4
4.1
4.2
4.3
4.4
4.5
4.6
4.7
5
5.1
5.2
5.3
5.4
5.5
5.6
5.7
6
6.1
6.2
6.3
6.4
6.5
6.6
6.7
7
7.1
7.2
7.3
7.4
7.5
7.6
7.7
7.8
Contents
Getting started 3
TV tour 3
Setting up 7
Keys on the TV 10
Register your TV 11
Help and support 12
Basics 13
Remote control 13
Menus 16
Watch TV 18
3D 22
Connected devices 24
Subtitles, timers and locks 25
Smart TV 26
Net TV 26
Interactive TV 29
Videos, photos and music 30
Pause TV and recording 32
Games 34
Text 35
Setup 37
Picture and sound 37
Ambilight 39
Channels 41
Network 43
Devices 45
Universal access 46
Software 47
Connections 48
First connections 48
Cables and connections 49
Connect devices 51
Connect more devices 59
Network 64
SD card 65
Common interface CAM 66
Troubleshooting 67
Contact information 67
TV and remote control 68
TV channels 69
Picture and sound 70
Devices 71
Videos, photos and music 72
Network 73
Specifications 74
Software 74
Environmental 75
Power and reception 77
Display and sound 78
Display resolutions 79
Multimedia 80
Connectivity 81
Dimensions and weights 82
Index 83
2 Contents
1
1.1
Getting started
TV tour
Smart TV
Connect your Smart TV to the Internet and you can rent a
movie from your home, browse the Net TV apps, watch
programmes you missed or check the TV guide. View your
photos and videos from your PC, tablet PC or phone.
Connect a USB Hard Drive and pause a TV broadcast or record
your favourite show.
Read more about Smart TV in Help > Smart TV.
Read more about setting up the Internet connection in Help >
Setup > Network.
3D Full HD
On this TV, you can watch 3D programmes and movies in full
High Definition resolution with 3D Max.
When 3D programmes are broadcast or you start a 3D movie,
the TV switches to 3D. All you need to do is to put on your
active 3D glasses.
Read more about 3D in Help > Basics > Watch 3D .
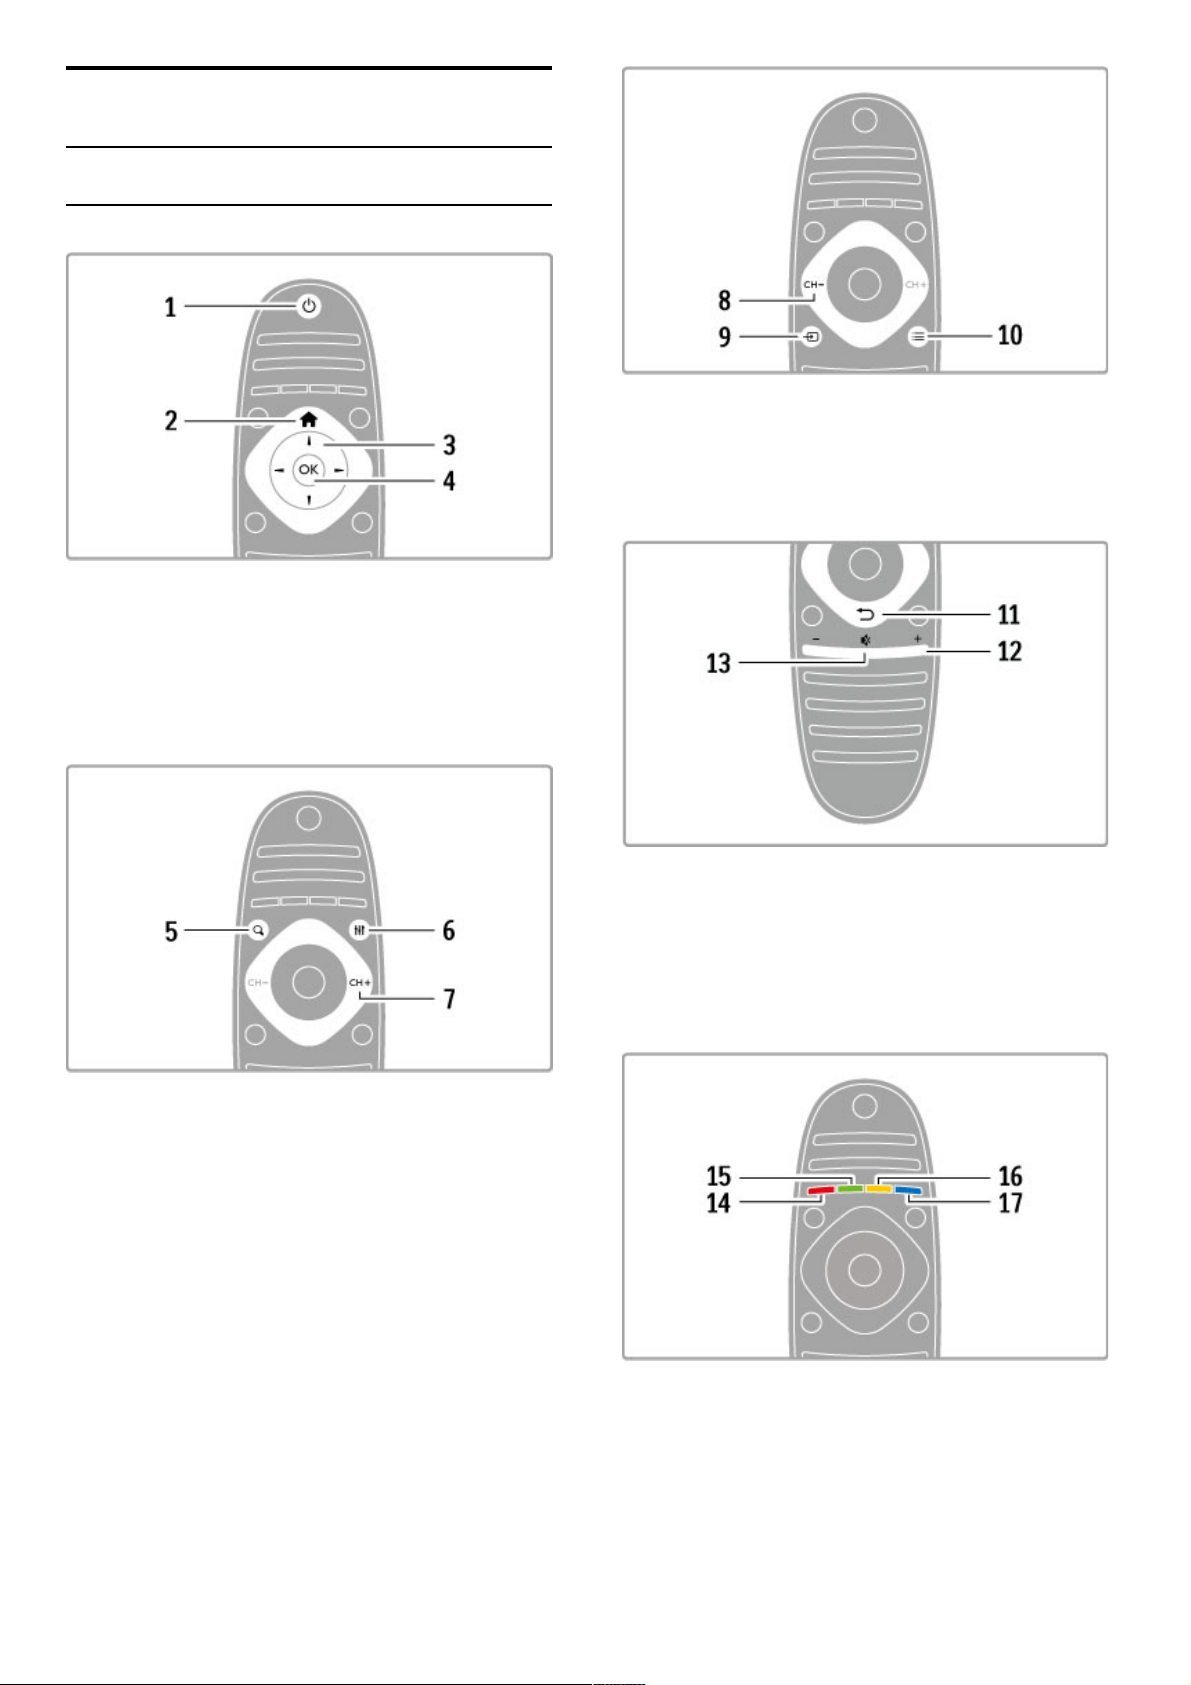
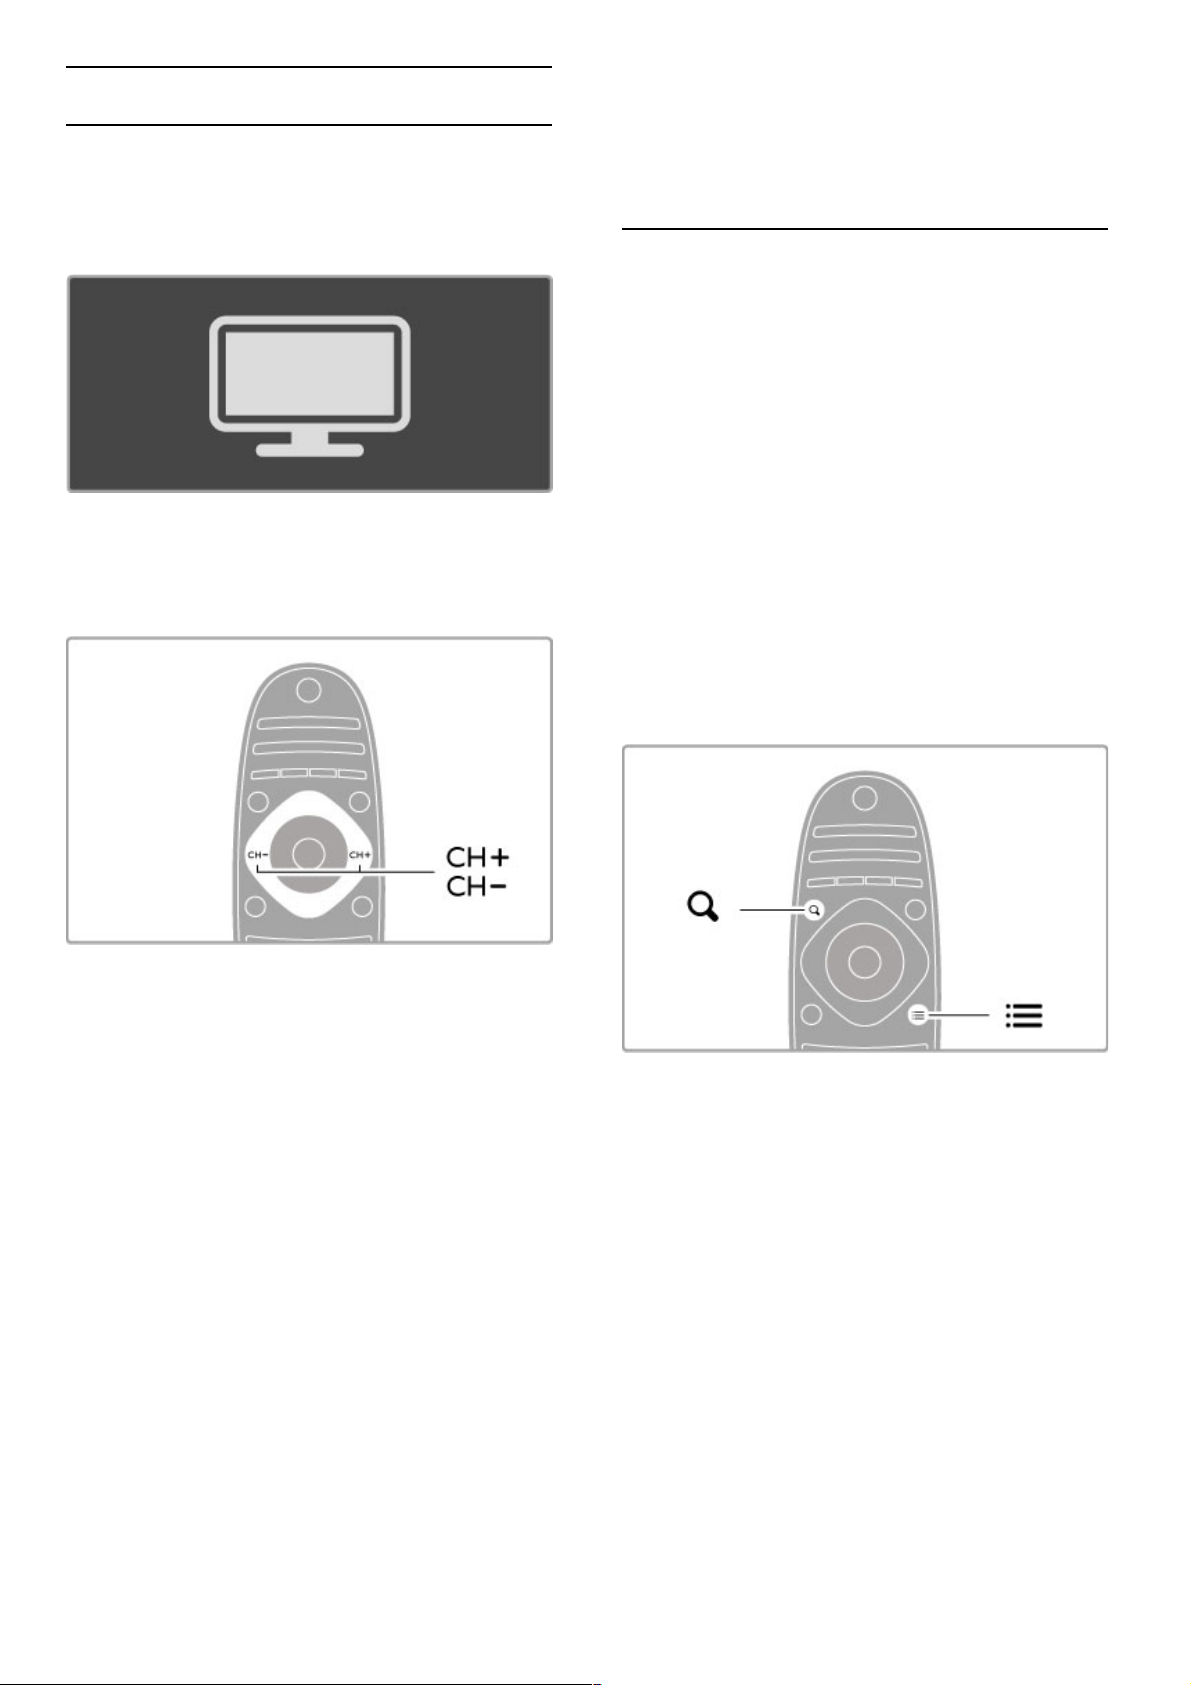
The remote control
To adjust the volume.
To switch TV channels.
To open or close the Home menu h .
Open the Home menu as a starting point to operate the TV.
In the Home menu, you can start or stop a TV activity, such as
watching TV - Watch TV - or watching a movie from a
connected DVD player.
Getting started / TV tour 3
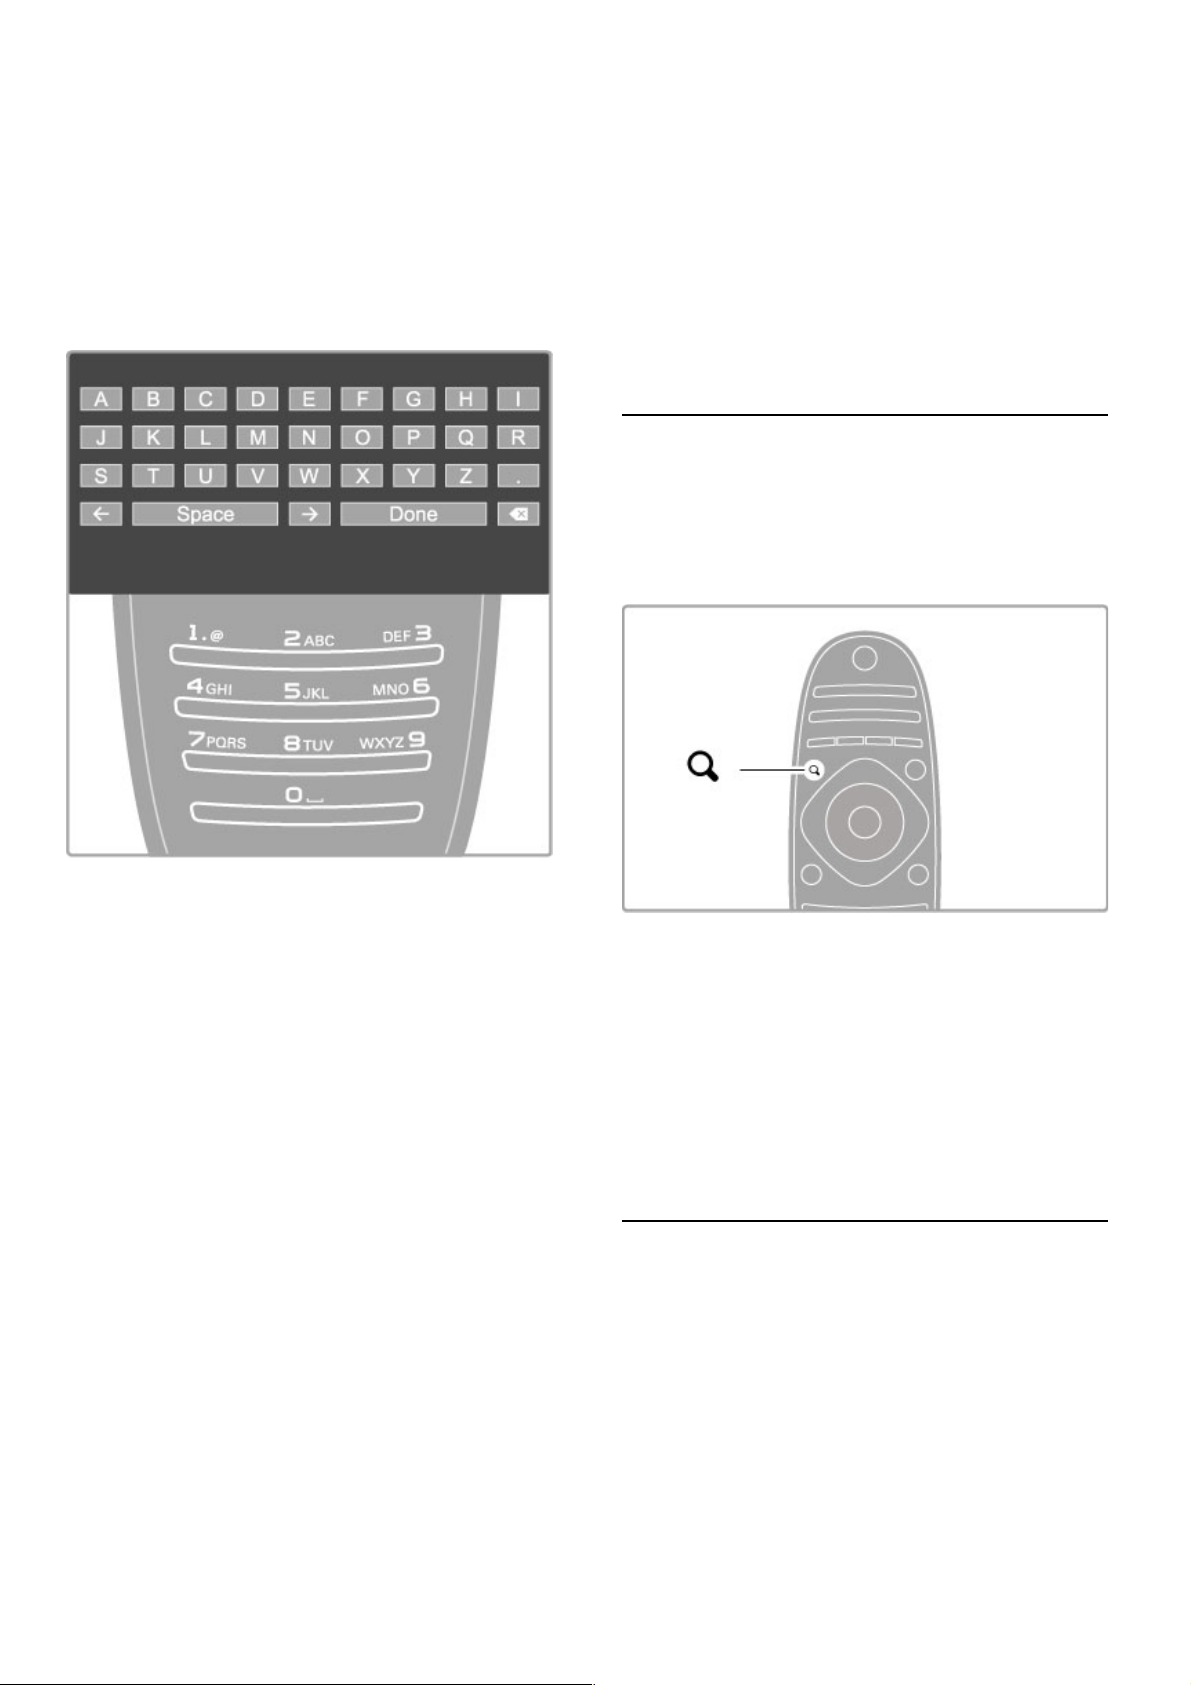
To open or close the FIND menu ¬.
Open the Find menu to open the list of channels while you are
watching TV channels or the list of videos and music while you
browse your PC on TV.
To open or close the ADJUST menu t
Open the Adjust menu to quickly adjust the picture and sound
settings.
You can set the Smart picture setting to Game, which is ideal for
gaming, or change the Smart sound setting of the TV
loudspeakers.
To open or close the OPTIONS menu r.
Open the Options menu to select optional settings related to
what you are watching or doing on TV.
Back È .
With Back, you can go back to the previous TV channel or go
one step back in a menu.
Red
With the red key, you can select the red option or open digital
Interactive TV or some TV demonstration clips.
Green
With the green key, you can select the green option or the Eco
settings.
4 Getting started / TV tour
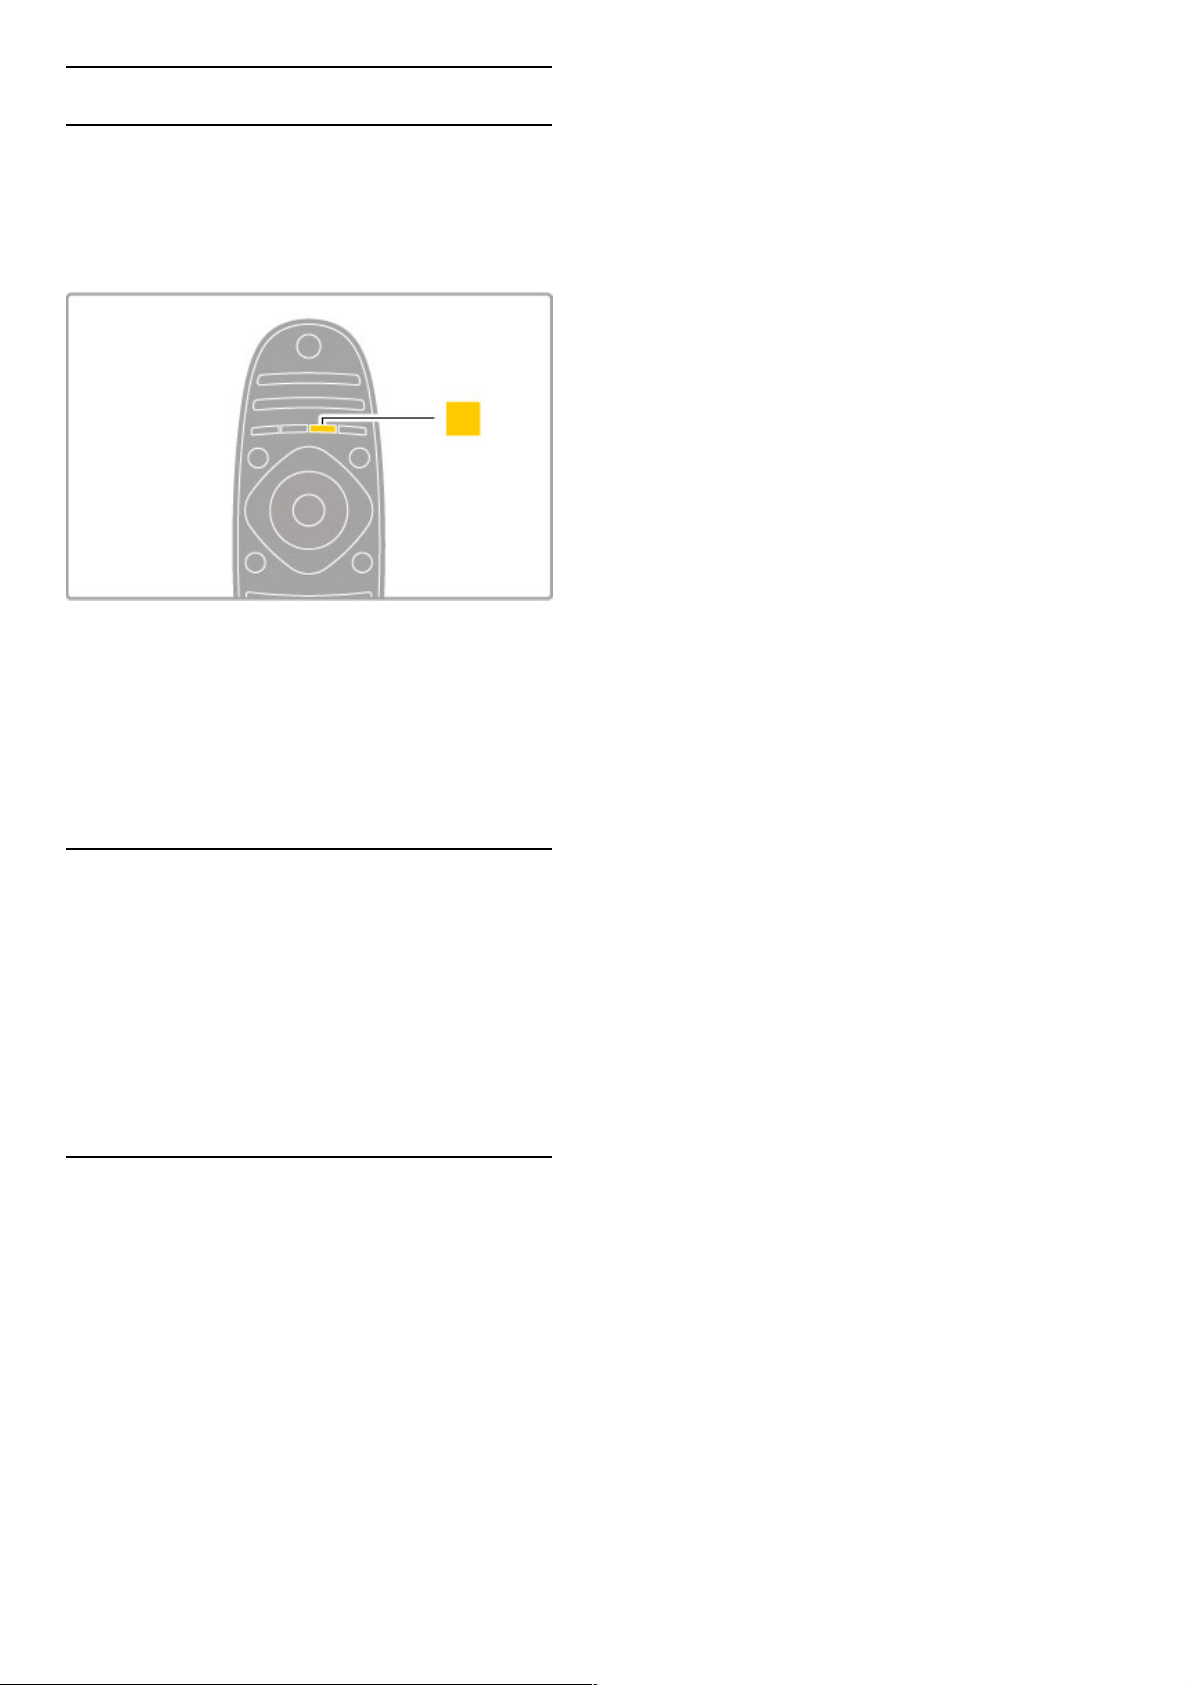
Yellow
With the yellow key, you can select the yellow option.
Blue
With the blue key, you can select the blue option.
Read more about the remote control in Help > Basics >
Remote control > Overview.
Or go to the ¬ Search page in this Help to look for any topic.
Press u to select the next TV tour .
Connecting devices
Use the HDMI™ connection to connect a DVD, Blu-ray Disc
player or game console.
The HDMI connection offers the best picture and sound quality
and, if your device has EasyLink (HDMI -CEC), the TV can add
the device to the Home menu automatically.
When a device is added to the Home menu, you can select it to
watch its programme. If the device has no EasyLink or you do
not use the HDMI connection, you must add the connected
device in the Home menu using Add your devices.
Read more about Add your devices in Help > Basics > Menus >
h Home.
Read more about using EasyLink in Help > Basics > Remote
control > Operate devices.
In the chapter Help > Connections, drawings like these will help
you to connect most common devices.
Getting started / TV tour 5

HD TV
This TV can display High Definition programmes, but to enjoy
HD TV you need to get programmes in HD first. If you are not
watching HD programmes, the picture quality will be that of a
normal TV.
Watch HD TV programmes from . . .
• a Blu-ray Disc player
• a digital HD receiver connected with HDMI and with a
subscription to HD programmes
• over -the-air HD broadcasts
• channels offering HD on a digital network
• an HD game console connected with HDMI and playing an
HD game
HD video clip
To experience the stunning sharpness and picture quality of HD
TV, you can start the High Definition video clip from the Home
menu. Press Home > Setup > Watch demos (on the second
page of the Setup menu).
Contact your dealer for more information.
Go to www.philips.com/support to find FAQs featuring the list of
HD channels or providers in your country.
6 Getting started / TV tour
1.2 Setting up
Stand or wall mounting
The foot of the TV stand has the TV loudspeakers built-in.
Always connect the cable of the foot to the TV for sound. For
best sound, place the TV on a hard surface.
Wall mounting
With the foot and neck of the TV stand, you can mount the TV
to the wall. Combine the foot and neck to make a swivel mount
or alternatively use only the foot to mount the TV close to the
wall.
Find all mounting instructions in the Quick Start Guide that came
with the TV. In case you lost this guide, you can download the
guide from www.philips.com
Use the product type number of the TV to look for the Quick
Start Guide to download.
Caution
Wall mounting the TV requires special skills and should only be
performed by qualified personnel. The TV wall mounting should
meet safety standards according to the TV's weight. Read also the
safety precautions before positioning the TV.
TP Vision Netherlands B.V. bears no responsibility for improper
mounting or any mounting that results in accident or injury.
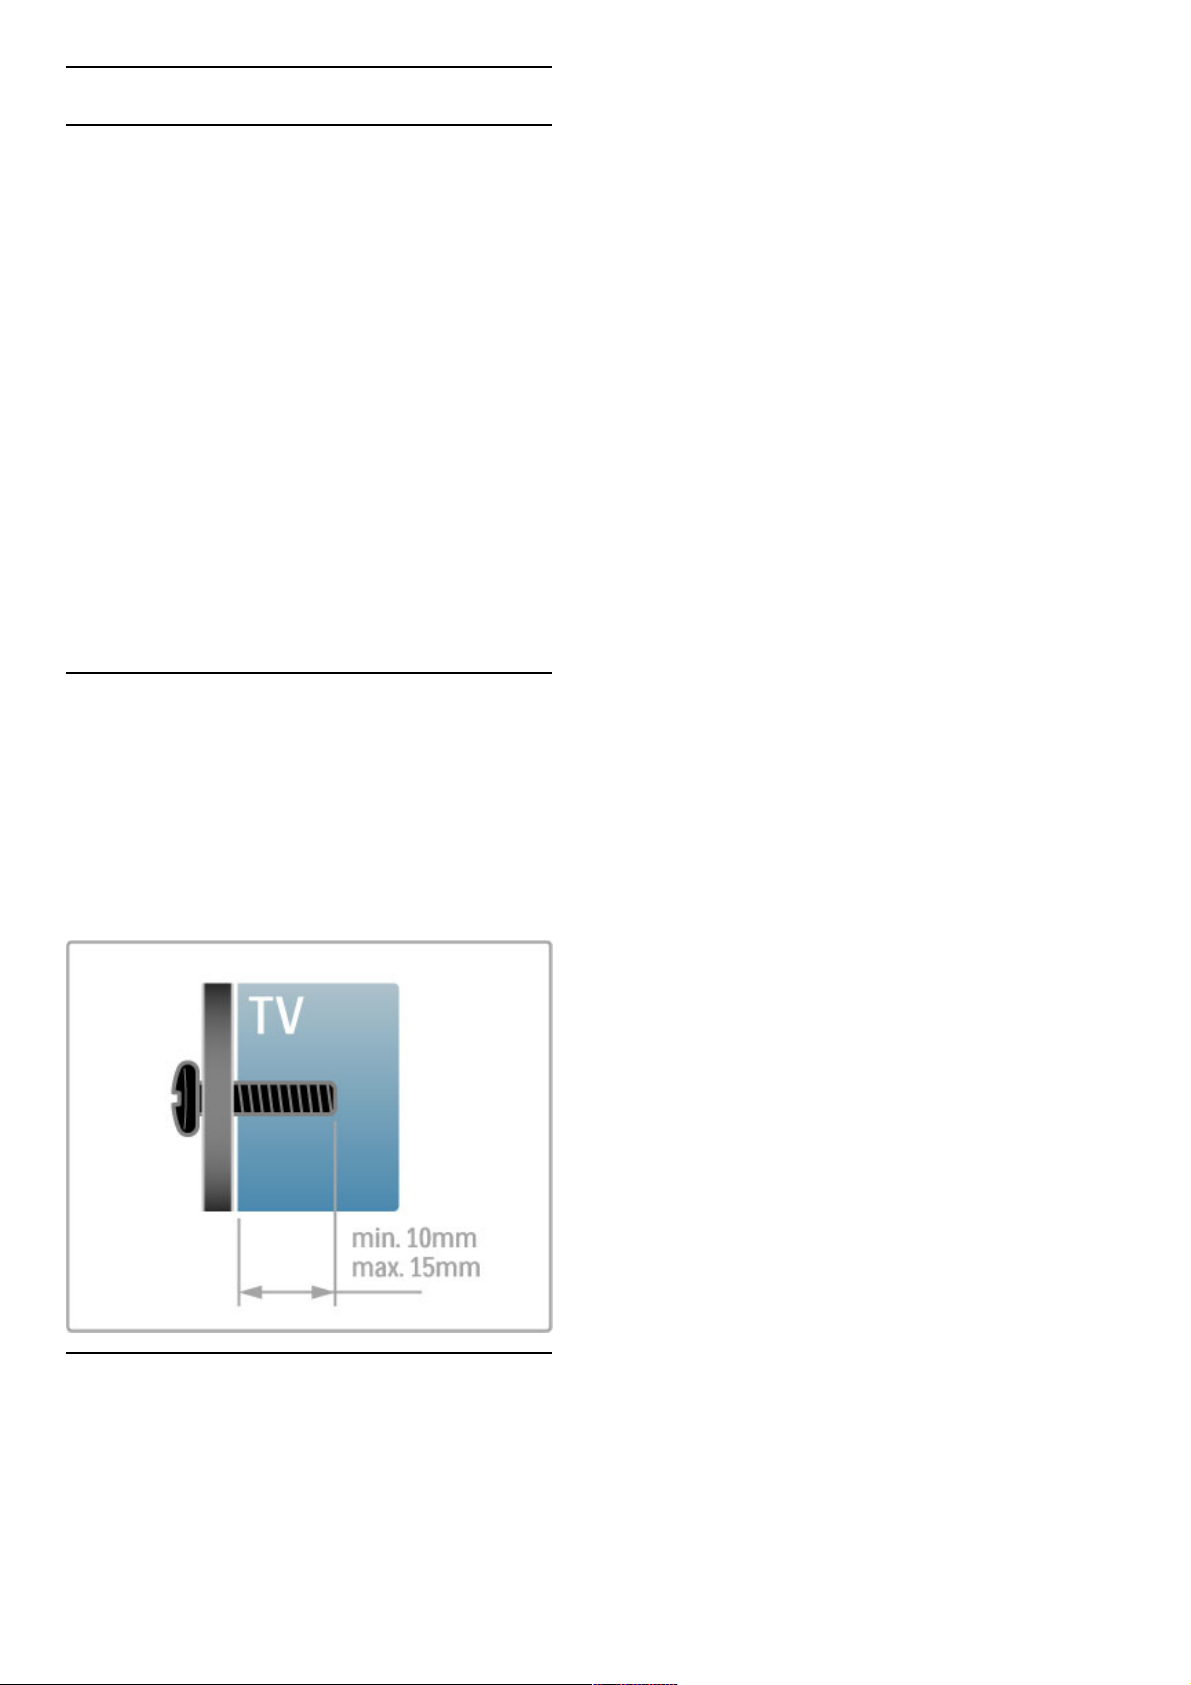
VESA info
Your TV is prepared for a VESA-compliant wall mount bracket
(sold separately). Find the suitable VESA code next to the TV
type number.
52PFL9606 - VESA MIS -F 300,300,M6
46PFL9706 - VESA MIS -F 300,300,M6
37PFL9606 - VESA MIS -F 200,200,M6
32PFL9606 - VESA MIS -F 200,100,M6
Use a screw length as shown in the drawing.
Position the TV
Carefully read the safety precautions before you position the TV.
• Position the TV where light does not shine directly on the
screen.
• Dim lighting conditions in the room for best Ambilight effect.
• Position the TV up to 25 cm away from the wall for the best
Ambilight effect.
Getting started / Setting up 7
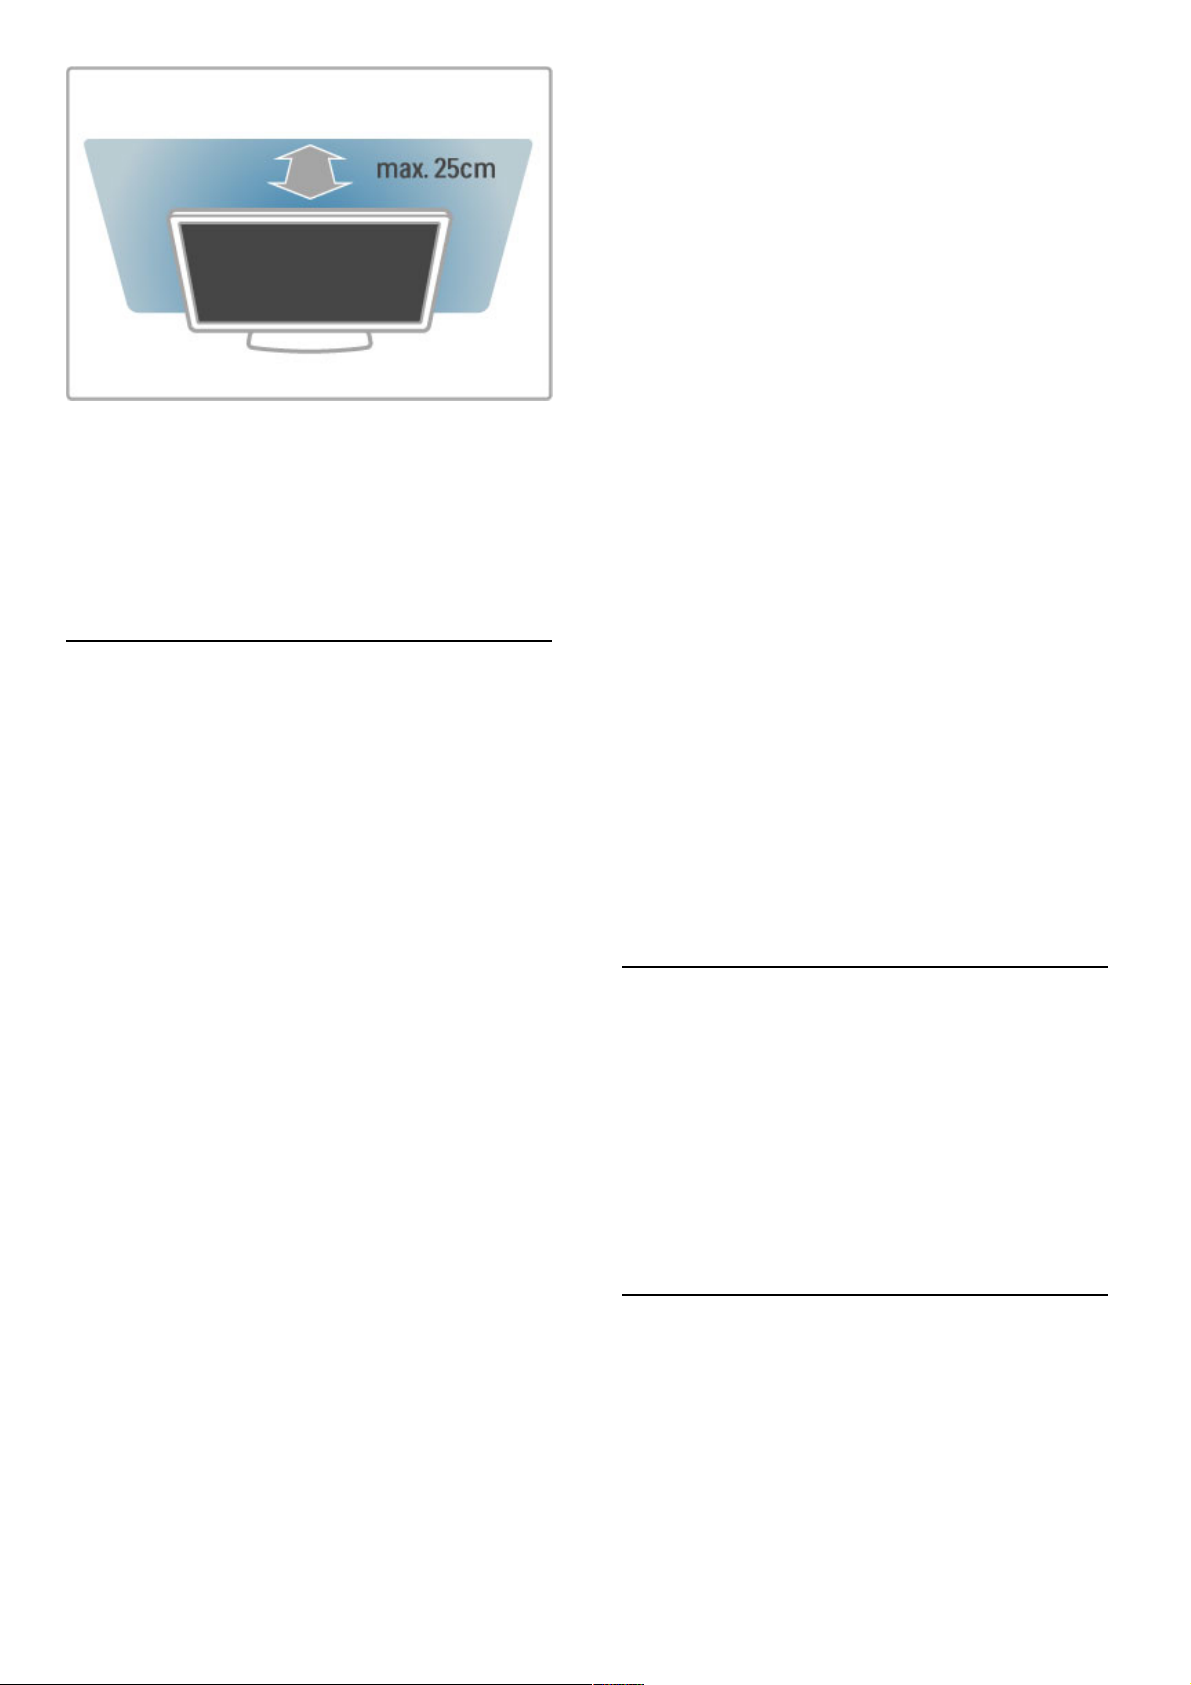
Position the TV at the ideal viewing distance. Get more from
HD TV picture or any picture without straining your eyes. Find
the 'sweet spot', right in front of the TV, for the best possible
TV experience and relaxed viewing.
The ideal distance to watch TV from is three times its diagonal
screen size. When seated, your eyes should be level with the
centre of the screen.
For best sound, place the TV on a hard surface.
Safety
Read and understand all instructions before you use the TV. If
damage is caused by failure to follow instructions, the warranty
does not apply.
Risk of electric shock or fire!
• Never expose the TV to rain or water. Never place liquid
containers, such as vases, near the TV. If liquids are spilt on or
into the TV, disconnect the TV from the power outlet
immediately. Contact Consumer Care to have the TV checked
before use.
• Never expose the TV, remote control or batteries to excessive
heat. Never place them near burning candles, naked flames or
other heat sources, including direct sunlight.
• Never insert objects into the ventilation slots or other openings
on the TV.
• Never place heavy objects on the power cord.
• Avoid force coming onto power plugs. Loose power plugs can
cause arcing or fire. Ensure that no strain is exerted on the
power cord when you swivel the TV screen.
• To disconnect the TV from the mains power, the power plug
of the TV must be disconnected. When disconnecting the power,
always pull the power plug, never the cord. Ensure that you have
full access to the power plug, power cord and outlet socket at all
times.
Risk of injury or damage to the TV!
• Two people are required to lift and carry a TV that weighs
more than 25 kg or 55 lbs.
• If you mount the TV on a stand, only use the supplied stand.
Secure the stand to the TV tightly. Place the TV on a flat, level
surface that can support the weight of the TV and the stand.
• When wall mounted, ensure that the wall mount can safely
bear the weight of the TV set. TP Vision Netherlands B.V. bears
no responsibility for improper wall mounting that results in
accident, injury or damage.
• Parts of this product are made of glass. Handle with care to
avoid injury or damage.
Risk of damage to the TV!
Before you connect the TV to the power outlet, ensure that the
power voltage matches the value printed on the back of the TV.
Never connect the TV to the power outlet if the voltage is
different.
Risk of injury to children!
Follow these precautions to prevent the TV from toppling over
and causing injury to children:
• Never place the TV on a surface covered by a cloth or other
material that can be pulled away.
• Ensure that no part of the TV hangs over the edge of the
mounting surface.
• Never place the TV on tall furniture, such as a bookcase,
without anchoring both the furniture and TV to the wall or a
suitable support.
• Teach children about the dangers of climbing on furniture to
reach the TV.
Risk of swallowing batteries!
The remote control may contain coin-type batteries which can
easily be swallowed by small children. Keep these batteries out of
reach of children at all times.
Risk of overheating!
Never install the TV in a confined space. Always leave a space of
at least 10 cm or 4 inches around the TV for ventilation. Ensure
curtains or other objects never cover the ventilation slots on the
TV.
Lightning storms
Disconnect the TV from the power outlet and antenna before
lightning storms. During lightning storms, never touch any part of
the TV, power cord or antenna cable.
Risk of hearing damage!
Avoid using earphones or headphones at high volumes or for
prolonged periods of time.
Low temperatures
If the TV is transported in temperatures below 5°C or 41°F,
unpack the TV and wait until the TV temperature reaches room
temperature before connecting the TV to the power outlet.
Screen care
• Never touch, push, rub or strike the screen with any object.
• Unplug the TV before cleaning.
• Clean the TV and frame with a soft damp cloth. Never use
substances such as alcohol, chemicals or household cleaners on
the TV.
• To avoid deformations and colour fading, wipe off water drops
as quickly as possible.
• Avoid stationary images as much as possible. Stationary images
are images that remain onscreen for extended periods of time.
Stationary images include onscreen menus, black bars, time
displays, etc. If you must use stationary images, reduce screen
contrast and brightness to avoid screen damage.
Screen care 46PFL9706
Moth eye
• For excellent brightness and contrast, even in bright daylight
conditions, the screen of this TV has a Moth -eye anti-reflective
finishing. Avoid touching the TV screen as much as possible. Only
remove the protective sheet after setting up the TV.
8 Getting started / Setting up

• For eventual cleaning of the TV screen, only use the cleaning
cloth supplied with the TV. Use an alcohol based window
cleaner for greasy stains. Apply the liquid on the cloth first before
cleaning the screen. To replace the cloth supplied, contact
Consumer Care.
www.philips.com/support
The protective sheet is made from PET and is recyclable.
Temperature and humidity
In rare occasions, depending on temperature and humidity, minor
condensation can occur on the inside of the TV glass front (on
some models). To prevent this, do not expose the TV to direct
sunlight, heat or extreme humidity. If condensation occurs, it will
disappear spontaneously while the TV is playing for a few hours.
The condensation moisture will not harm the TV or cause
malfunction.
Getting started / Setting up 9
1.3 Keys on the TV
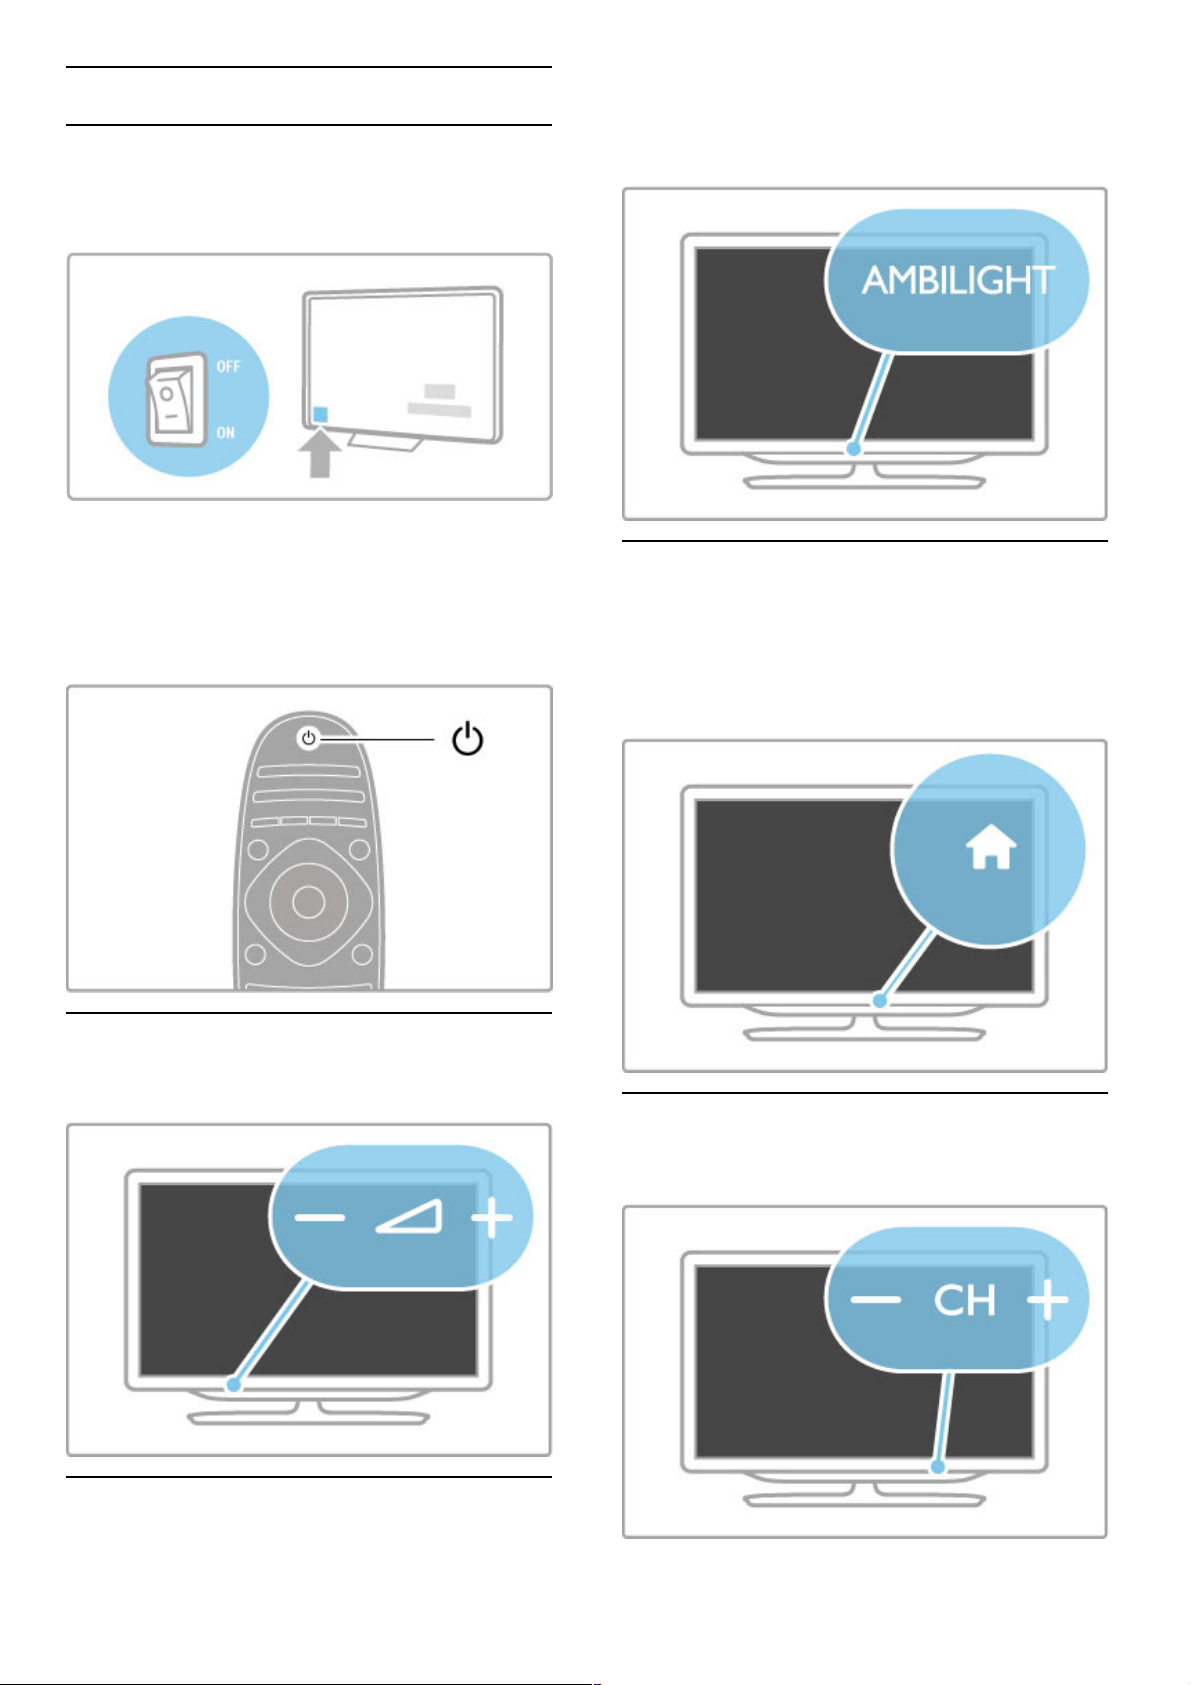
Power switch
Switch the TV on or off with the power switch at the right-hand
side of the TV. When switched off, the TV does not consume
any energy.
If the red indicator light is off, switch on the TV with the power
switch.
If the red indicator is on (standby indication), press O on the
remote control to switch on the TV. Alternatively, you can
switch on the TV from standby with CH+ , CH- or h . It takes a
few seconds for the TV to start up.
V Volume
Press V (Volume) - or + to adjust the volume. Or use the +
or - keys on the remote control.
Ambilight
Press Ambilight, to switch Ambilight on or off.
While the TV is on standby, you can switch Ambilight on and
create an Ambilight Lounge light effect in your room. Read more
about Ambilight and Lounge light in Help > Setup > Ambilight
h Home
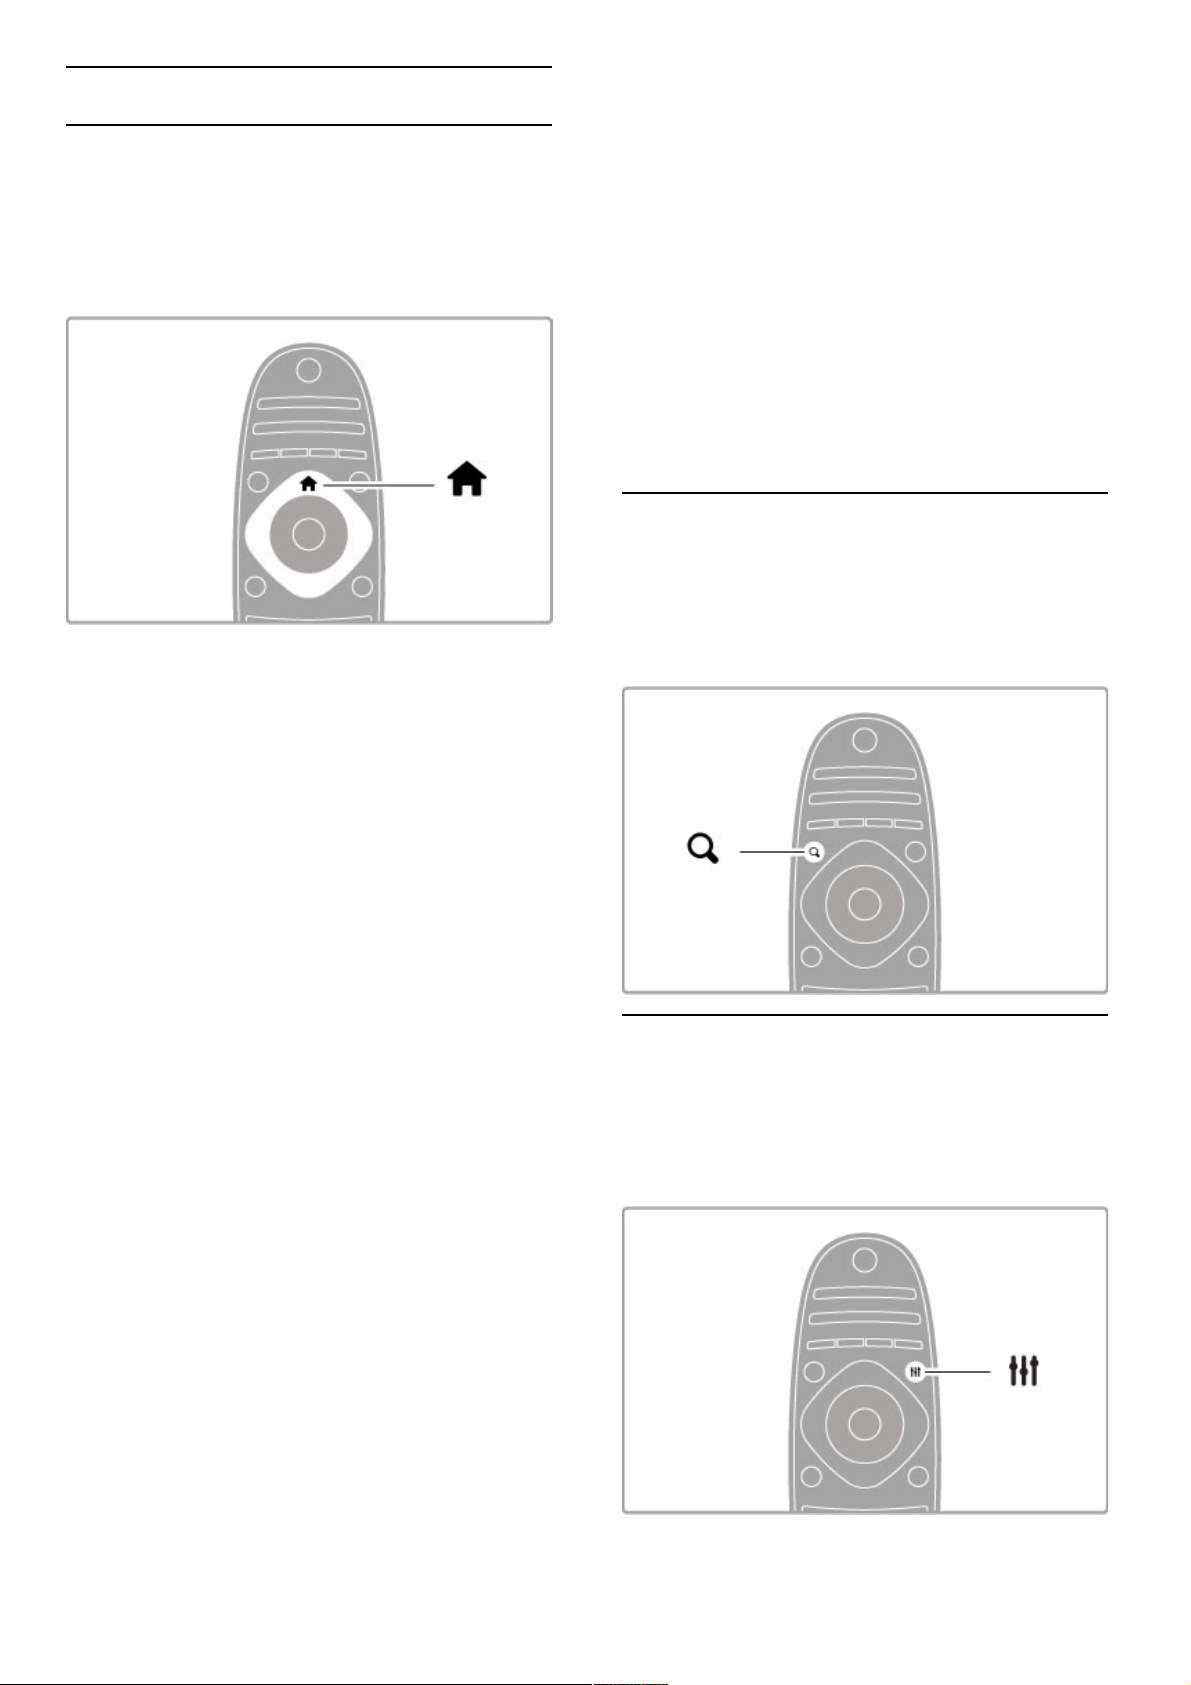
Press h (Home) to open the Home menu on screen. You can
navigate the Home menu with the volume - or + (left or right)
and the channel - or + (down or up) keys on the TV. To
confirm your choice, press h again.
Read more about Home in Help > Basics > Menus > h Home
CH Channel
Press CH (Channel) - or + to switch channels. Or use the W or
X keys on the remote control.
10 Getting started / Keys on the TV

1.4 Register your TV
Congratulations on your purchase and welcome to Philips.
Register your TV and enjoy a range of benefits including full
support (including downloads), privileged access to information
about new products, exclusive offers and discounts, the chance to
win prizes and even participate in special surveys about new
releases.
Go to www.philips.com/welcome
Getting started / Register your TV 11
1.5 Help and support
Using Help and Search
Help
You can open Help from the Home menu. In most cases, you
can also press the yellow key on your remote control to open
or close Help directly. For some activities, like Text, the colour
keys have specific functions and cannot open Help.
Before you follow the Help instructions, close Help. Press the
yellow key or press h to close Help. When you press the
yellow key again, Help will open on the page where you closed
it.
¬ Search
In Help, use ¬ Search to find a topic you need. Select a topic
from the list with the navigation keys and press OK. The topic
you are looking for might not be on the first page but a few
pages further on. Press x to go to the next page.
Online support
To solve any Philips TV related problem, you can consult our
online support. You can select your language and enter your
product model number.
Go to www.philips.com/support
On the support site you can find your country's telephone
number to contact us as well as answers to frequently asked
questions (FAQs).
You can download new TV software or the manual to read on
your PC. You can email a specific question or, in some countries,
chat online to one of our collaborators.
Consumer Care
For support, you can call the Consumer Care hotline in your
country. Find the telephone number in the printed documentation
that came with the TV.
Or consult our website www.philips.com/support
TV model number and serial number
You might be asked to provide the TV product model number
and serial number. Find these numbers on the packaging label or
on the type label on the back or bottom of the TV.
12 Getting started / Help and support
2
2.1
Basics
Remote control
Overview
1 Standby O
To switch the TV on or back to standby.
2 Home h
To open or close the Home menu.
3 Navigation key
To navigate up, down, left or right.
4 OK key
To activate a selection.
5 Find ¬
To open or close the channel list or your list of photos, music or
movies.
6 Adjust t
To open or close the most used settings for picture, sound,
Ambilight or 3D.
7 CH+ / Next W
To switch to the next channel, page or chapter.
8 CH- / Previous X
To switch to the previous channel, page or chapter.
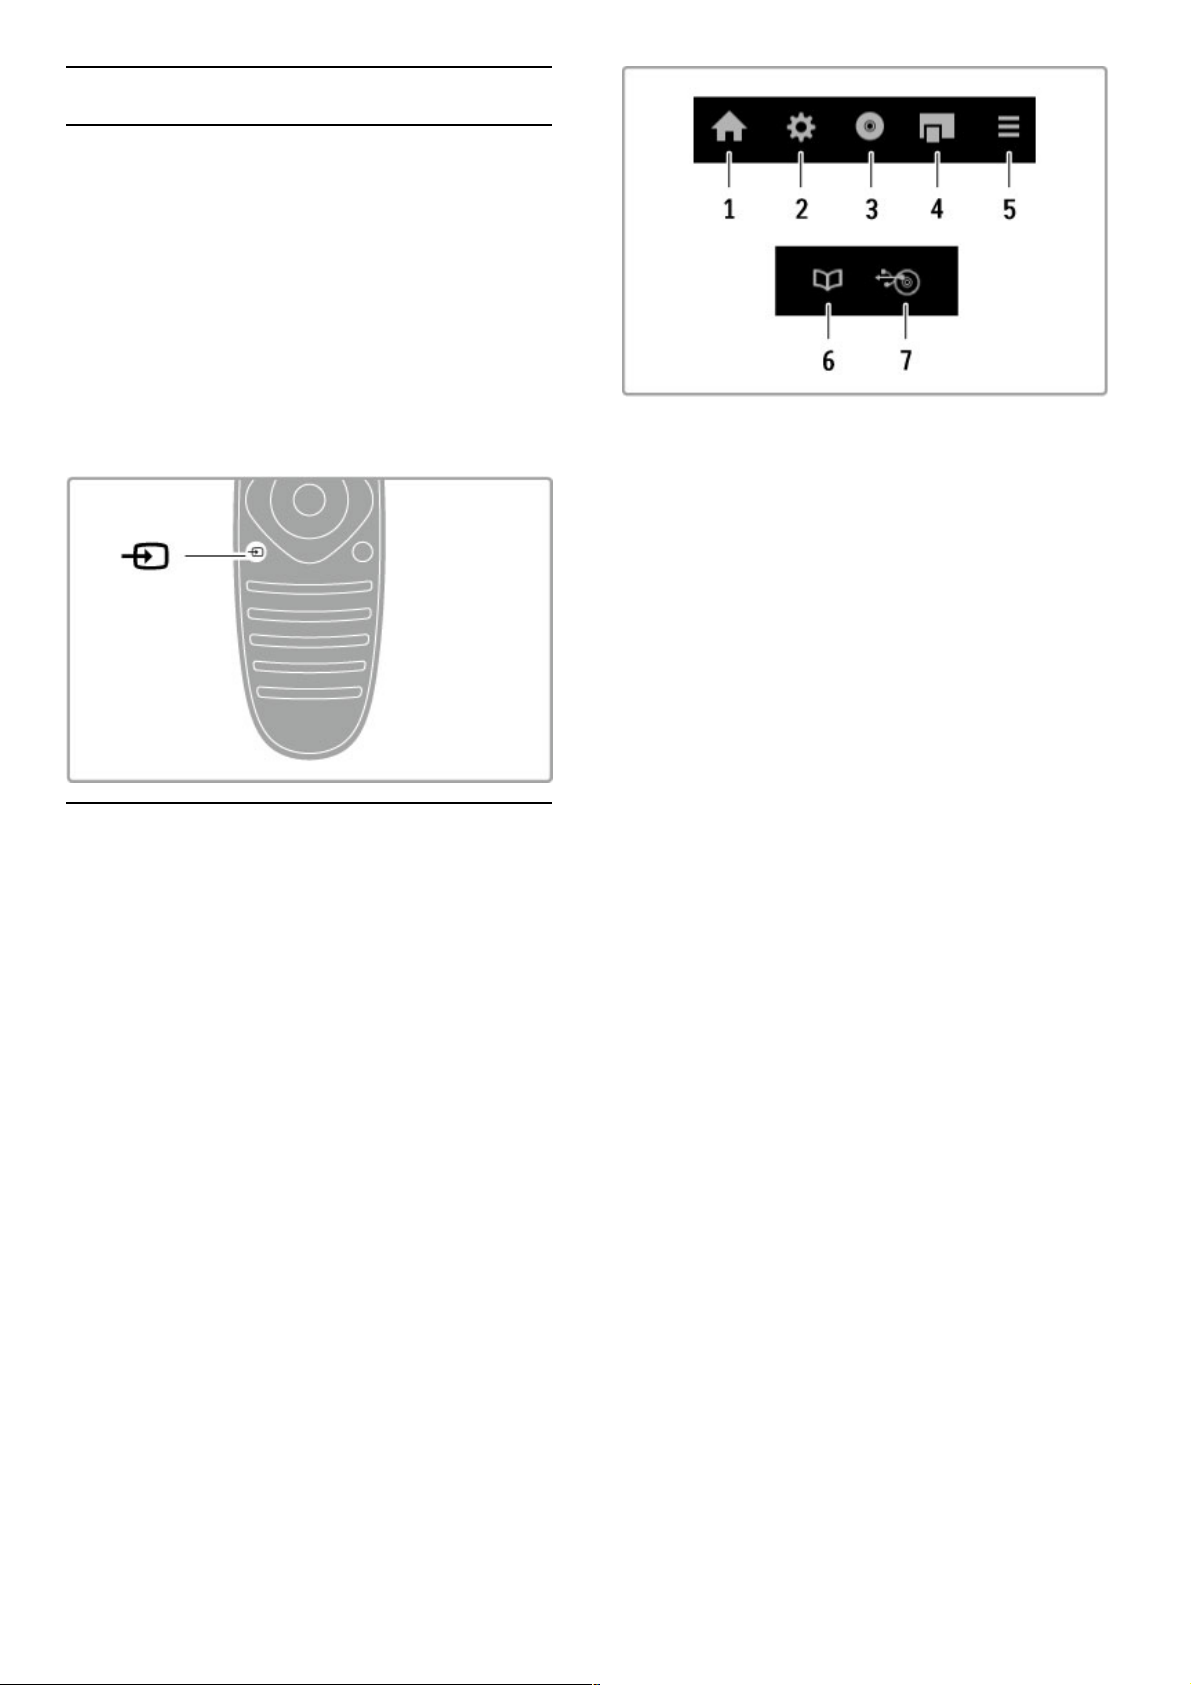
9 Source Ú
To switch directly to a TV connection.
10 Options r
To open or close the Options menu.
11 Back È
To go back to the previous channel. To exit a menu without
changing a setting. To go back to the previous Text or Net TV
page.
12 Volume V
To adjust the volume level.
13 Mute m
To mute the sound or to restore it.
Basics / Remote control 13
14 Red colour key
To open interactive TV or to select a Text page.
15 Green colour key
To open the Eco settings or to select a Text page.
16 Yellow colour key
To select a Text page.
17 Blue colour key
To select a Text page.
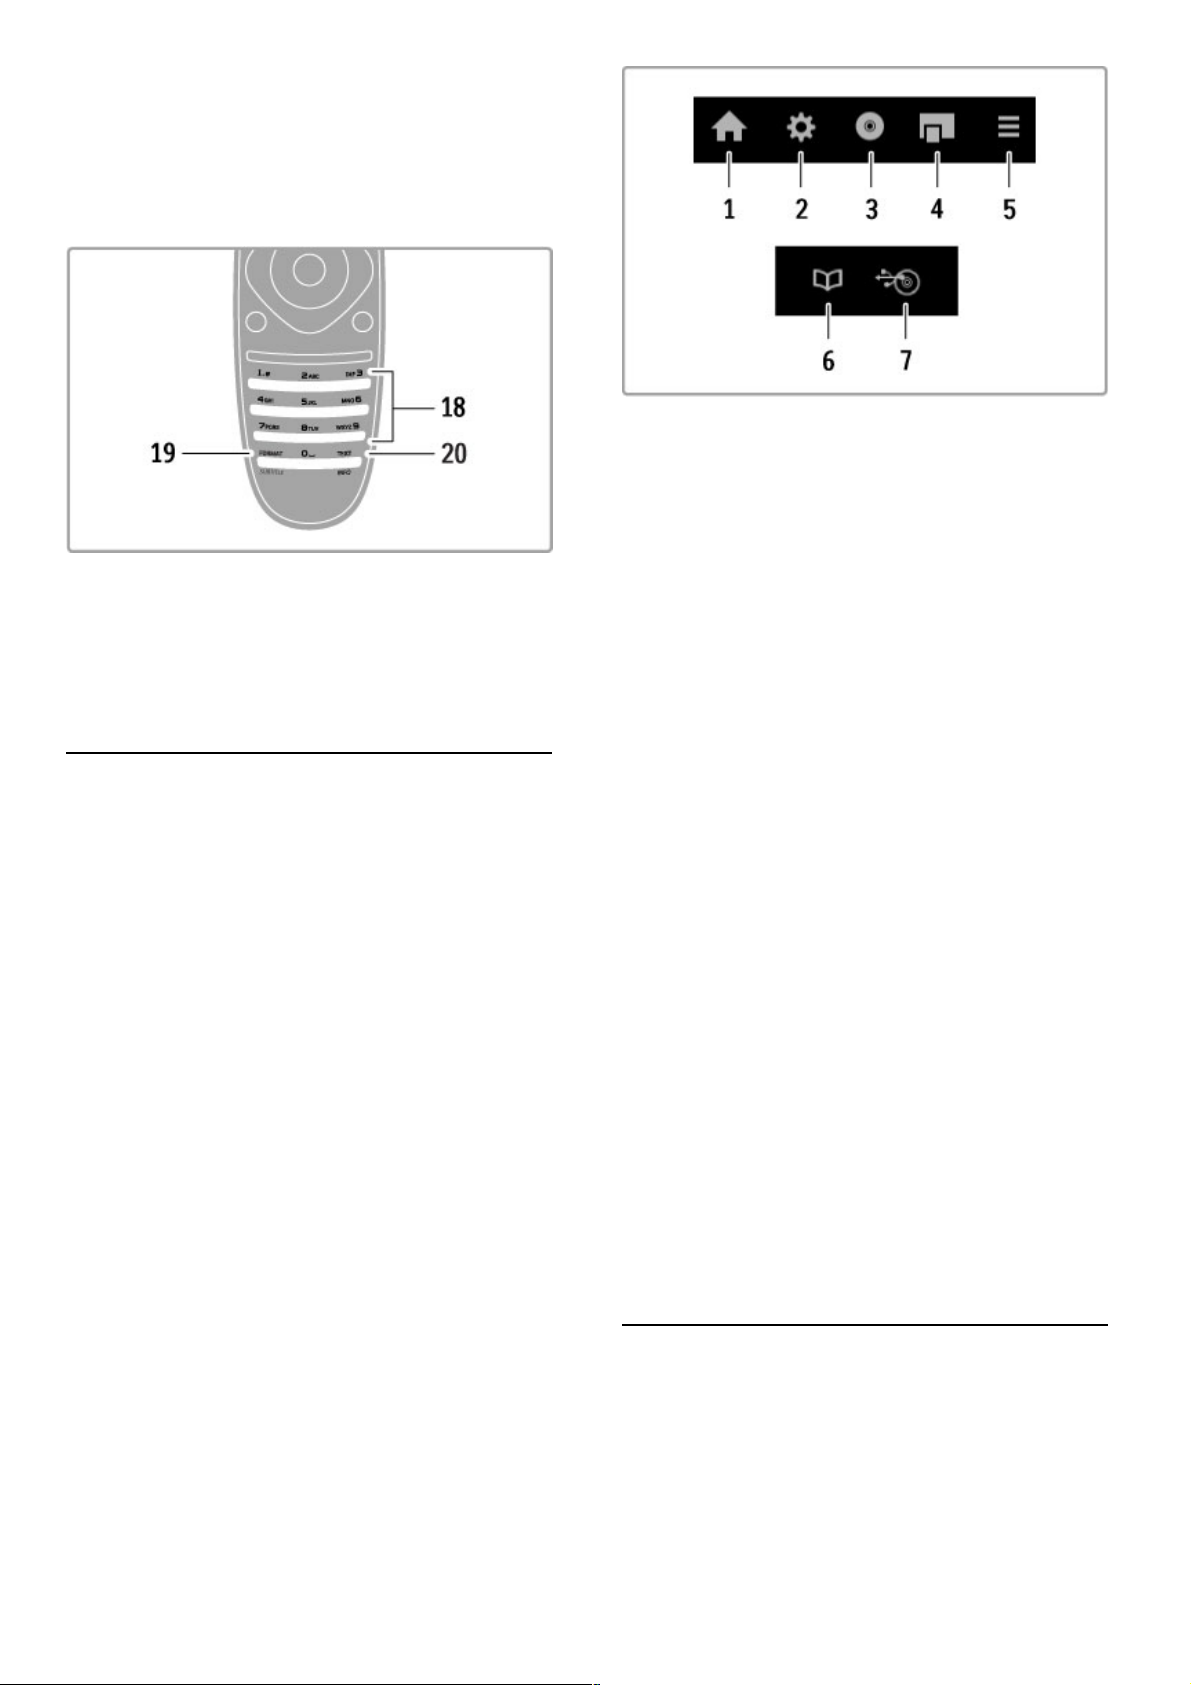
18 Number keys and text keypad
To select a TV channel directly or to enter text.
19 Format / Subtitles
To open or close the Format menu. / Keep this key pressed for
3 seconds to show or hide subtitles.
20 Text / Info
To open or close text. / Keep this key pressed for 3 seconds to
open or close information on next programmes.
Operate devices
The remote control of the TV can also operate a connected
device. The device must have EasyLink (HDMI -CEC) and have it
switched on. The device must also be connected with an HDMI
cable.
Operate an EasyLink device
To operate such a device with the TV remote control, select the
device -or its activity- in the h Home menu and press OK.
The commands of all keys, except the h key, the t ADJUST
key and the r OPTIONS key, are forwarded to the device.
Switch back to TV
To switch the remote control back to operate the TV, press h
(Home) and select Watch TV and press OK.
Show device keys
When operating a device, some of the keys might not be
available on the TV remote control. To make these keys
selectable on TV, press r OPTIONS and select Show device
keys. Select the key you need and press OK .
To hide the device keys, press È (Back).
In general, these keys open the following device menus:
1 Home menu
2 Setup menu
3 Disc menu (disc content)
4 Pop -up menu
5 Options menu
6 Programme guide
7 Media selection
One Touch Play
Insert a disc into an EasyLink HDMI-CEC device and press Play
on the device. The TV switches on from standby and starts
playing the disc.
System Audio Control
If you connect an EasyLink audio system, you can listen to the
audio from the TV through the audio system. The TV speakers
are muted automatically. You can control the volume of the
audio system with the TV remote control.
Surround mode
With recent Philips devices, you can change the surround sound
setting of the device on the TV. To change this setting, press t
ADJUST, select Surround mode and press OK . On Next mode,
press OK to toggle through the available modes on the device.
Smart sound
With recent Philips devices, you can change the Smart sound
setting of the device on the TV. To change this setting, press t
ADJUST, select Smart sound and press OK . Select a sound
mode from the list.
Screen off
If a recent Philips audio device only sends audio to the TV, the
device may suggest switching off the TV screen. To switch off
the screen when this message appears, select Screen off and
press OK . To switch the screen back on, press h (Home).
System Standby
Press O on the remote control to switch the TV and all
EasyLink devices to standby.
Read more about EasyLink in Help > Setup > Devices >
EasyLink HDMI-CEC .
IR sensor
Always make sure you point the remote control at the remote
control infrared sensor on the front of the TV.
14 Basics / Remote control
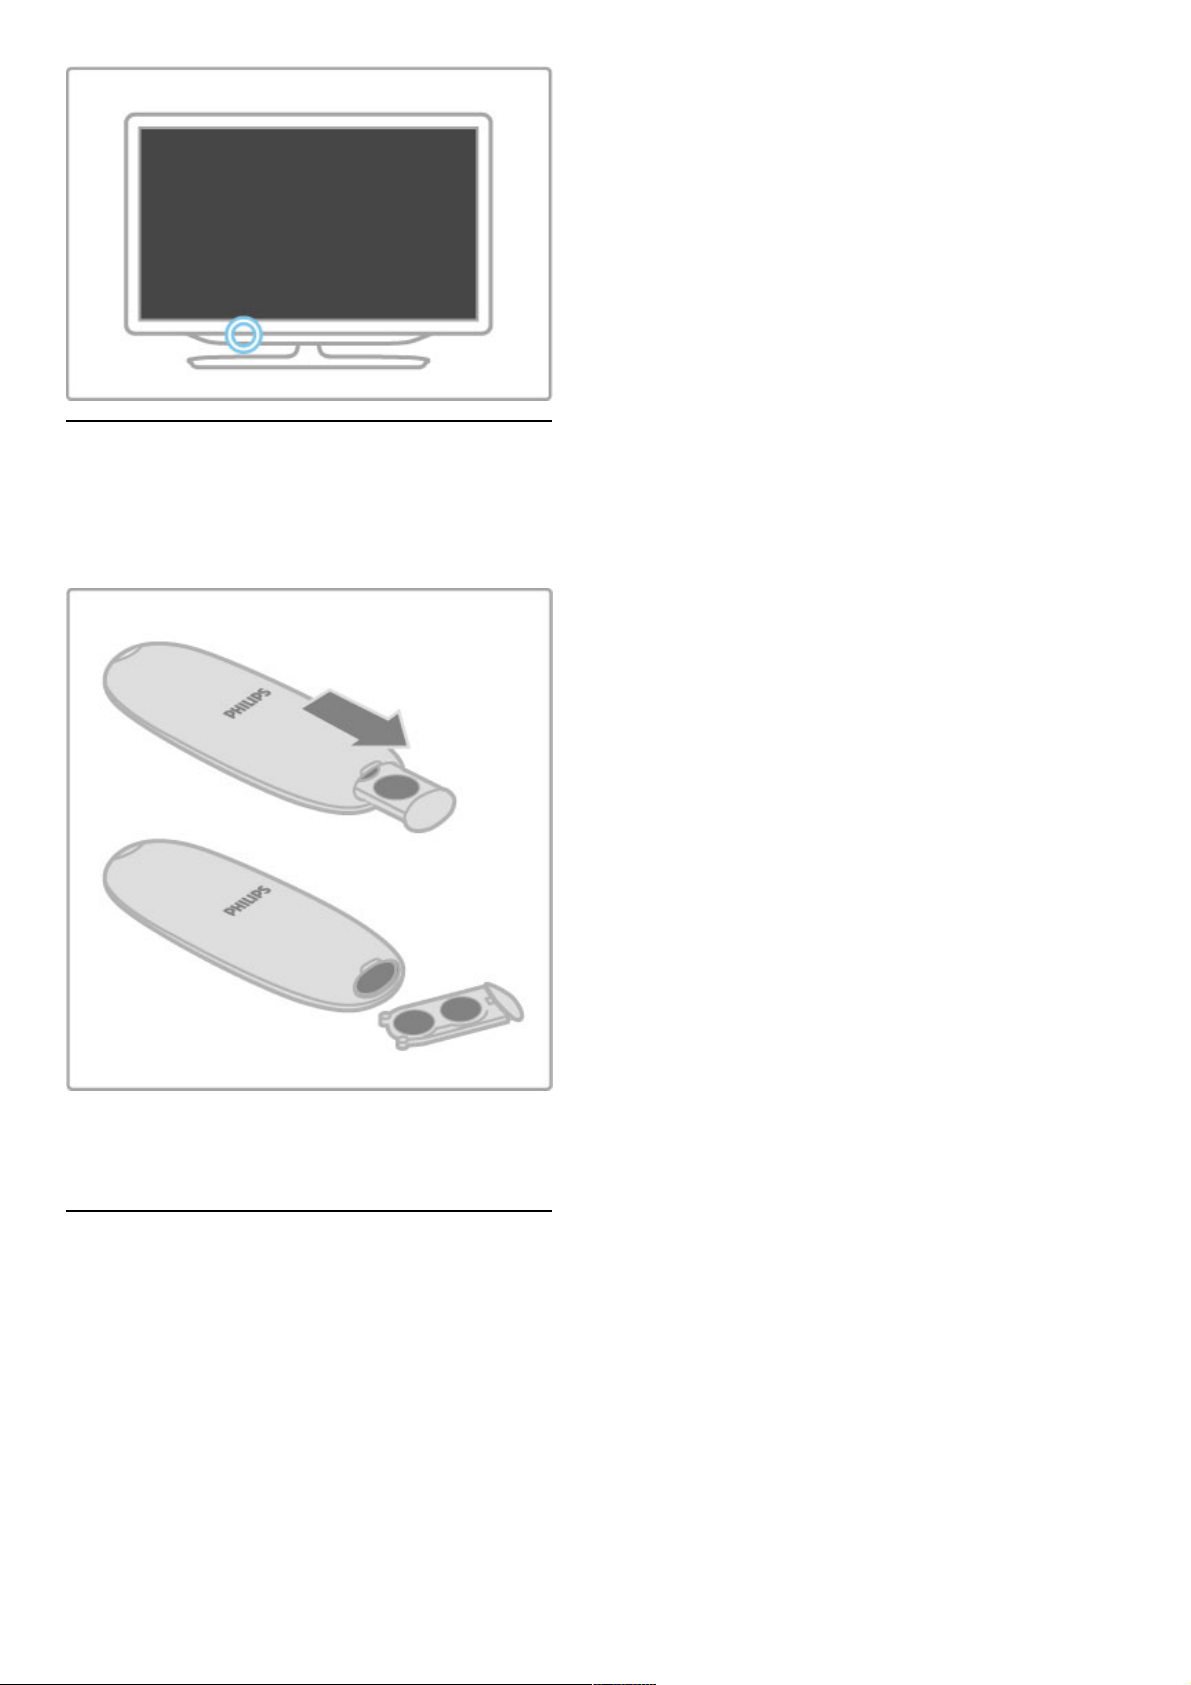
Batteries
To replace the batteries of the remote control, slide open the
small tray at the bottom of the remote control. Use 2 coinshaped batteries (Type CR2032 – 3V). Make sure the + side of
the batteries (top side) point upwards. The small tray has a +
indicator.
Remove the batteries if you are not using the remote control for
a long time.
Dispose of batteries according to the end of use directives. Read
Help > Specifications > Environmental > End of use.
Cleaning
Your remote control is treated with a scratch-resistant coating.
To clean the remote control, use a soft damp cloth. Never use
substances such as alcohol, chemicals or household cleaners on
the TV or remote control.
Basics / Remote control 15
2.2 Menus
h Home
In the Home menu, you start watching TV or start watching a
movie disc or any other TV activity.
Press h to open the Home menu.
To start an activity, select it with the navigation keys and press
OK.
To close the Home menu, press h again.
Add your devices
A connected device should be added to the Home menu for
easy selection.
If your connected device does not have EasyLink (HDMI-CEC)
or is not connected with an HDMI cable, you need to manually
add your device to the Home menu with Add your devices.
Devices with EasyLink (HDMI -CEC) and connected with an
HDMI cable automatically show their activity in the Home menu.
A single device can add several activities.
If an EasyLink device does not appear automatically, EasyLink on
the device may be switched off.
Add a device manually
In the Home menu, select Add your devices and press OK .
Follow the instructions on screen.
The TV asks you to select the device and the connection to
which the device is connected.
The device or its activities are now added to the Home menu.
Rename a device
To rename an added device or activity, select the device in the
Home menu and press r OPTIONS and select Rename. Use
the keypad on the remote control as you do for SMS/text
messaging to enter the new name.
Remove a device
To remove a device or activity from the Home menu, select it
and press r OPTIONS and then select Remove this device . If
a device or activity keeps appearing in the Home menu after you
deleted it, switch off the EasyLink setting on the device to
prevent the icon from being automatically added again.
Read more about EasyLink in Help > Basics > Remote control >
Operate devices.
Reorder
To reorder a device or an activity in the Home menu, select it
and press r OPTIONS.
1 Select Reorder.
2 With the navigation keys, reposition the device or activity
where you want it. You can only reorder the sequence of the
added devices and activities.
3 Press OK to confirm the position. All devices and activities shift
to the right.
You can highlight another device or activity and reposition it.
To stop Reorder, press r OPTIONS and select Exit reorder.
Restore device activities
To recall a deleted activity from a device with several activities,
select the device or one of its activities and press r OPTIONS.
Select Restore device activities and press OK . All deleted
activities of this device appear again.
¬ FIND
With ¬ FIND you open the Channel list while you are
watching TV channels or you open the list of pictures, music and
videos while browsing your PC or connected USB device.
Press ¬ FIND to open the list.
To close the list, press ¬ again.
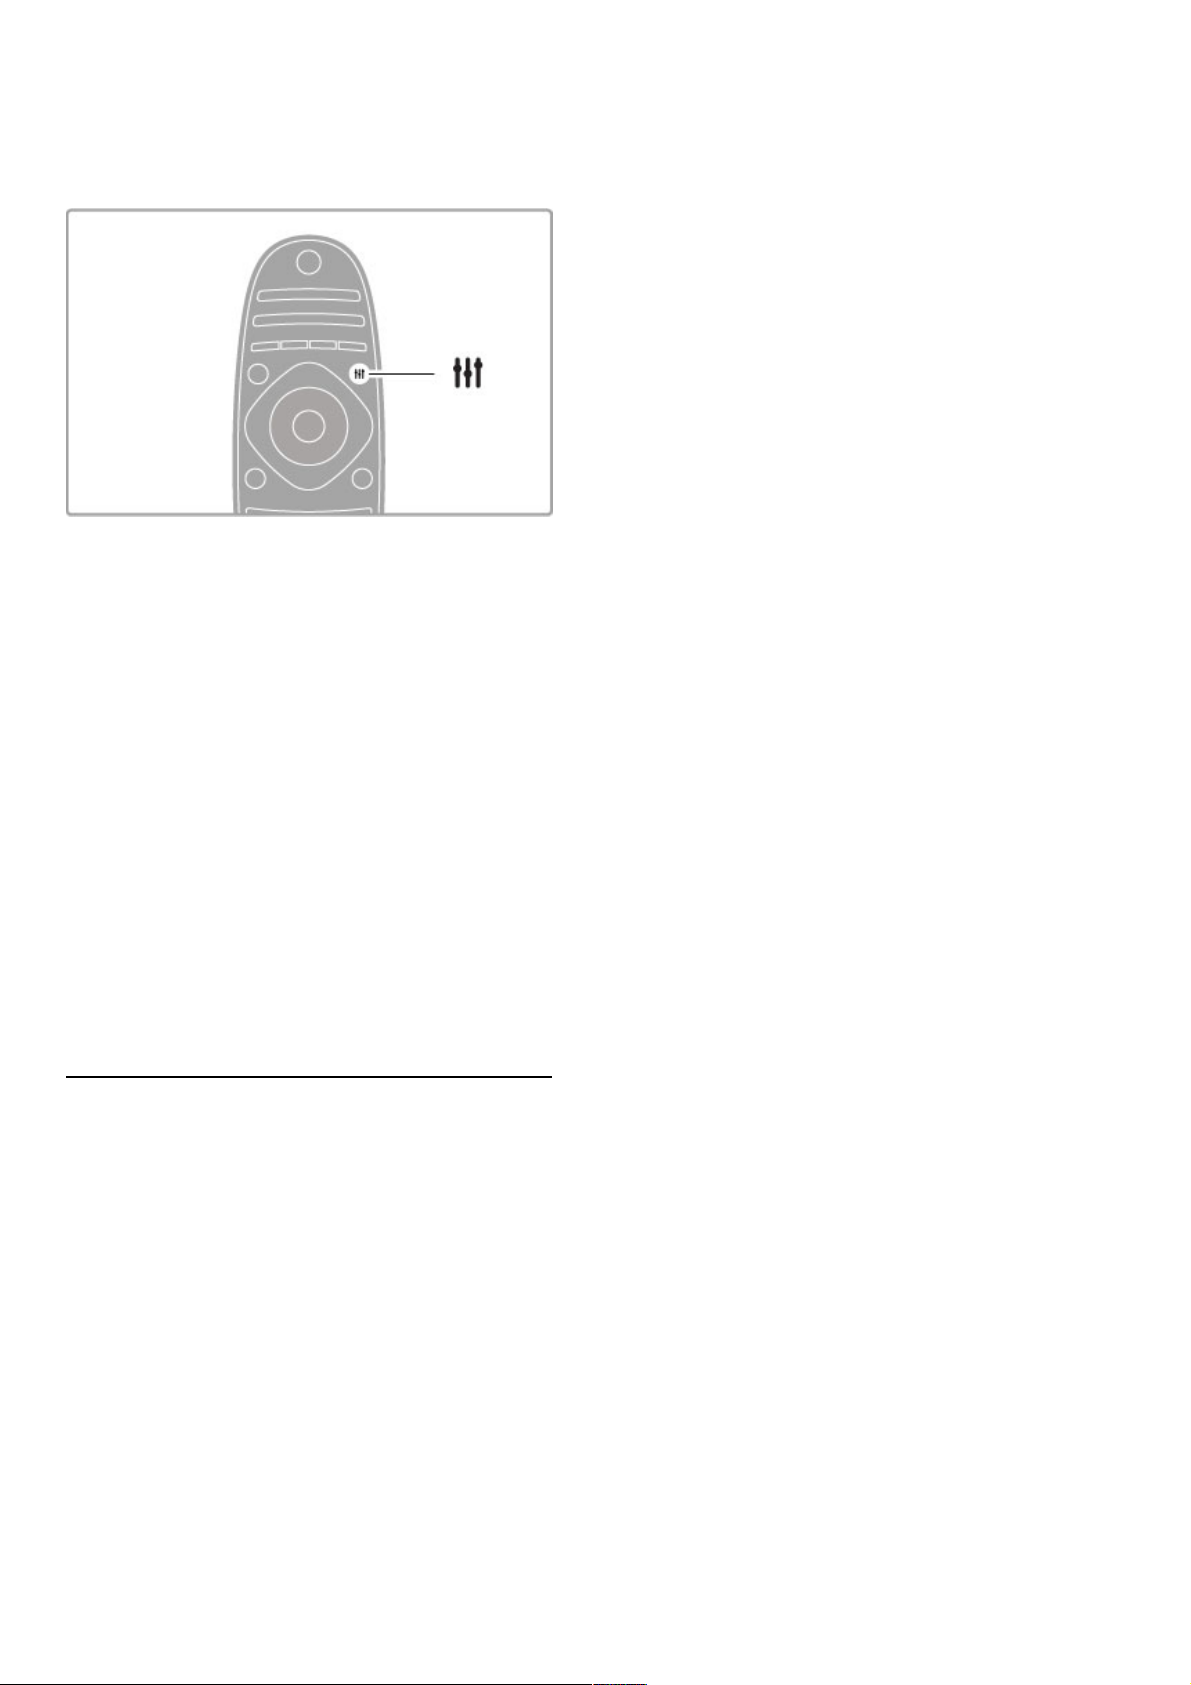
t ADJUST
With the ADJUST menu, you can adjust picture, sound,
Ambilight and 3D settings quickly.
Press t ADJUST to open the Adjust menu.
Select your choice with the navigation keys and press OK .
To close the menu, press t ADJUST again.
16 Basics / Menus

In the Adjust menu you can adjust these settings:
• 3D
• 3D depth
• Two player gaming
• Ambilight On or Off
• Ambilight dynamics
• Picture format
• Smart picture (presets)
• Smart sound (presets)
• Speakers
• Surround
• Picture shift
Ambilight
Read more about the Ambilight settings in Help > Setup >
Ambilight.
Picture format
Read more about the Picture format settings in Help > Basics >
Watch TV > Picture format.
Smart picture, Smart sound
You can set the TV to the pre-defined setting that best suits
what you're watching.
Read more about Smart settings in Help > Basics > Watch TV
> Smart picture and sound.
Speakers
To hear the sound through the TV speakers, close Help, press t
ADJUST, select Speakers and select TV.
Select Amplifier if you want to hear the sound through a
connected Home Theatre System or Amplifier.
These settings temporarily override any EasyLink settings.
Surround
To switch the TV automatically to the best surround sound mode
(only available when a Home Theatre System is connected), close
Help, press t ADJUST, select Surround and select On.
Picture shift
You can shift the picture on screen in a vertical or a horizontal
direction to view subtitles fully (depending on the TV input).
While watching TV, press t ADJUST, select Picture shift and
press OK . Shift the picture with the navigation keys. Press OK to
stop Picture shift.
r OPTIONS
With the OPTIONS menu, you select optional settings related to
what you are watching or doing on TV.
Press r OPTIONS at any time to see which options are
available.
To close the menu, press r OPTIONS again.
Basics / Menus 17
2.3 Watch TV
Switch channels
To watch TV and switch channels, make sure the Watch TV
option is selected in the Home menu.
To watch TV, press h, select Watch TV and press OK .
To switch channels , press CH+ or CH- on the remote control.
You can use the number keys if you know the channel number
or press ¬ FIND to open the Channel list to select a channel.
To switch back to the previous channel, press È (Back).
Radio channels
If digital broadcasting is available, digital radio stations are installed
during installation. Switch to a radio channel just like you switch
to a TV channel. A DVB-C channel installation usually places radio
stations from channel number 1001 onwards.
Options for watching TV channels
If you watch digital broadcast TV channels, press r OPTIONS
to view the available options:
• What's on
• Status
• Video selection
What's on
This option shows information on the current and next
programme on this channel. Use the navigation keys to scroll
through text or to go to the next column.
Status
Depending on the broadcast, the Status page will show relevant
information. You can use this information to improve the channel
signal or to check if certain services are available.
Video selection
Digital TV channels can offer multi video signals (multi-feed
broadcasts), different camera viewpoints or angles of the same
event or different programmes on one TV channel. The TV
shows a message to advise if any such TV channels are available.
When available, press r OPTIONS and select Video selection
to select your choice.
Channel list
In the Channel list, you can look up all installed TV and radio
channels.
While watching TV, press ¬ FIND to open the Channel list.
Press ¬ FIND again or È (Back) to close the Channel list
without changing the channel.
In the Channel list, you can navigate to a TV channel or radio
station and press OK to watch the TV channel or listen to the
radio station.
The Channel list can have several pages. To view the next or
previous Channel list page, press W or X.
Select list
Use this option to select which channels are shown in the
Channel list. The list you select here determines which channels
you flick through with CH+ and CH-.
Mark as favourite
When a channel is highlighted in the Channel list, you can set it
as a favourite channel.
Read Basics > Watch TV > Favourite channels.
Reorder
You can reposition channels within the list.
1 Press r OPTIONS and select Reorder to start reordering
channels.
2 Highlight a channel and press OK.
3 Reposition the channel where you want it with the navigation
keys. Alternatively, enter the new position directly with the
number keys.
18 Basics / Watch TV
Channel list options
With the Channel list on screen, press r OPTIONS to select
the following options :
• Select list
• Mark as favourite
• Reorder
• Rename
4 Press OK to confirm the position. You can insert the channel
or swap it.
You can highlight another channel and do the same.
To stop Reorder, press r OPTIONS and select Exit reorder.
Rename
You can rename a channel in the Channel list.
1 In the channel list, highlight the channel you want to rename.
2 Press r OPTIONS and select Rename to start renaming. You
can enter text directly with the remote control keypad or open a
full keyboard on top of the text entry menu.
Enter text with the remote control keypad
Use the navigation keys to position the cursor in the text. Press
È (Back) to delete a character.
Use the remote control keypad as you do for SMS/text
messaging to enter a character. Use the 1 key to select a special
character. Select Clear to delete a character.
Select Done to end Rename.
Enter text with the on-screen keyboard
To open the on -screen keyboard on top of the text entry menu,
press OK when the cursor in the text flashes.
On the keyboard, use the navigation keys to highlight a character
and press OK to enter it. To delete a character, press È (Back)
or highlight ! and press OK .
To switch from uppercase to lowercase or to a set of special
characters, press W (Next) or X (Previous).
To edit a character within a line of text, position the cursor on
this character and use the z and Z keys at both ends of the
on-screen spacebar.
To close the on -screen keyboard, highlight Done and press OK .
USB keyboard
You can use a connected USB keyboard to rename channels. To
connect a USB keyboard, read Help > Connections > Connect
more devices > Keyboard and mouse.
Favourite channels
In the Channel list you can mark a channel as a favourite. You
can set the Channel list to only zap through your list of favourite
channels.
To open the Channel list, while you are watching TV channels,
press ¬ FIND .
Mark a channel as favourite
While watching TV, press ¬ FIND to open the Channel list.
Navigate to the channel you want to mark as favourite and press
r OPTIONS . Select Mark as favourite.
In the Channel list, the favourite channel is marked with a F.
You can unmark a favourite channel with Unmark favourite.
Channel list of favourites
You can set the Channel list to only flick through your favourite
channels.
With the list on screen, press r OPTIONS and select Select
list. Select Favourites from the list and press OK. With this list
selected, you will only flick through your favourites.
Programme guide
If programme guide information is available in your area, you can
open an on -screen programme guide with scheduled TV
programmes.
The Programme guide is provided by the broadcaster or Internet.
Basics / Watch TV 19
Open the Programme guide
While watching TV, press h , select Programme guide and press
OK.
To quit the Programme guide without changing a setting, press
È (Back).
First use
The first time you open the Programme guide, the TV scans all
TV channels for programme guide information. This can take
several minutes. The data is stored in the TV. The TV can store
programme data for up to eight days.
Programme guide options
With a programme selected in the guide, press r OPTIONS to
select the following:
• Set reminder
To set an on -screen reminder for when a programme is due to
start, select Set reminder and press OK. The programme is
marked with a © (Clock). To cancel this reminder, select Clear
reminder and press OK .
• Change day
View the previous or next day's programmes.
• More info
Shows the programme details and summary.
• Search by genre
View all programmes selected by genre.
• Scheduled reminders
If a reminder is set, you can view a list of all scheduled
reminders.
• Update programme guide
After the first scan, the TV stores the programme guide data. If
you update or reinstall channels or reorder the Channel list, you
will need to update the Programme guide.
To update, select Update programme guide . Reminders are
cleared.
Broadcaster or Network
To select where the Programme guide information comes from,
press h > Setup > TV settings > Preferences > Programme
guide.
Select From the network or From the broadcaster.
From the network
Until you link up with Net TV, programme guide information
comes from the broadcaster. Once you are connected with Net
TV, the TV switches automatically to the Internet for programme
guide information.
From the broadcaster
Guide information comes from the broadcaster/operator.
Smart picture and sound settings
For easy picture or sound adjustment, you can select a preset
setting for each.
While watching TV, press t ADJUST to open the Adjust menu
and select Smart picture or Smart sound . Make a selection from
the list and press OK.
Smart picture and Smart sound
Smart settings are a combination of preset settings suited to a
specific use such as gaming or daylight viewing.
You can adjust a specific setting, like Brightness or Contrast, Bass
or Treble, of a chosen smart setting. The smart setting will
remember the adjustments you made.
Adjust smart settings
To adjust a specific setting of a smart setting, select the smart
setting and press OK . Then press h and select Setup. Select
TV settings, navigate to the individual setting and adjust it.
To return to the original smart setting values, undo the
adjustments you made by first setting the TV in the smart setting
you want to reset. Then press h > Setup > TV settings, select
Reset and press OK.
Read more about adjusting separate settings in Help > Setup >
Picture and Sound and Ambilight.
Smart picture list
• Personal - Your choices made in Personalise picture and sound
• Vivid - Ideal for daylight viewing
• Natural - Natural picture settings
• Cinema - Ideal for watching movies
• Game - Ideal for gaming
• Energy saving - Energy-conscious settings
• Standard - Factory standard settings
• Photo - Ideal for viewing photos
• ISF Day and ISF Night - ISF Calibration settings
Smart sound list
• Personal - Your personal choices made in Personalise picture
and sound
• Standard - Factory standard
• News - Ideal for speech
• Movie - Ideal for watching movies
• Game - Ideal for gaming
• Drama - Ideal for TV soaps
• Sports - Ideal for sports programmes
Picture format
20 Basics / Watch TV
If black bars appear on the screen, you can adjust the picture
format to a format that fills the screen.
While watching TV, press t ADJUST to open the Adjust menu
and select Picture format. Select a format from the list and press
OK.
Picture formats
The following formats are available according to the picture on
screen:
• Auto fill
Automatically enlarges the picture to fill the screen. Minimal
picture distortion, subtitles remain visible. Not suitable for PC
input.
• Auto zoom
Automatically zooms the picture in to fill the screen as much as
possible without distortion. Black bars may be visible. Not suitable
for PC input.
• Super zoom
Removes the black bars on the side of 4:3 broadcasts. The
picture is adjusted to fit the screen.
• Movie expand 16:9
Scales the picture to a 16:9 format.
• Wide screen
Stretches the picture to a 16:9 format.
• Unscaled
Expert mode for HD or PC input. Pixel for pixel display. Black
bars may appear with pictures from a PC.
Switch to standby
If the TV is on, press O on the remote control to switch to
standby. The red standby key indicator is on.
Although the TV consumes very little power when on standby,
energy does continue to be consumed.
When you do not use the TV for an extended period of time,
switch the TV off completely with the power switch.
Auto switch off
If you use the TV as a monitor or use a digital receiver to watch
TV (a set top box - STB) and you do not use the remote
control of the TV, switch off the automatic switch off.
This will prevent the TV from switching off automatically after a
4-hour period without a key press on the remote control of the
TV.
To switch off the automatic switch off, press the green key while
you are watching TV channels and select Auto switch off and
select Off.
Basics / Watch TV 21
2.4 3D
What you need
This is a 3D Max TV. To watch 3D on this TV, you will need
the Philips 3D Max active glasses PTA516 (sold separately).
Other active 3D glasses might not be supported.
To ensure the IR reception of the glasses, clear objects away
from the 3D transmitter on the TV.
Watch 3D
To start watching a 3D movie or programme, insert a 3D movie
into a 3D Blu-ray Disc player or tune to a TV channel that
broadcasts programmes in 3D.
Press h (Home) and select the 3D Blu-ray Disc player or
select Watch TV and tune to the TV channel.
Start 3D
The TV can detect when 3D is available. When the 3D message
appears, select Start 3D and press OK . Put on the 3D glasses.
If the TV cannot detect the 3D signal (the 3D signal tag is
missing), the 3D programme is shown as a double image on
screen.
To switch the double image to 3D, press t ADJUST, select 3D
and select Side by side or Top / bottom according to the double
image positions.
You might need to select the inverted format if the normal
format results in strange 3D effects.
Stop 3D
To stop watching 3D, press t ADJUST and select 2D in the
3D menu.
You can also stop 3D when you switch to another channel or
connected device.
2D to 3D conversion
You can convert any 2D programme to watch it in 3D.
To convert a 2D programme to 3D, press t ADJUST, select
3D and select 2D to 3D conversion.
To stop the 2D to 3D conversion, select 2D in the 3D menu or
switch to another activity in the Home menu. The conversion will
not stop if you switch between TV channels.
3D depth
You can change the depth of 3D for a weaker or stronger 3D
effect.
To set the 3D depth, press t ADJUST and select 3D depth.
Use the slider bar to set the 3D depth and press OK .
Specifics
• If a 3D TV broadcast is switched to 2D, the TV shows only
the 3D -left picture.
• 3D is not available in Multi view
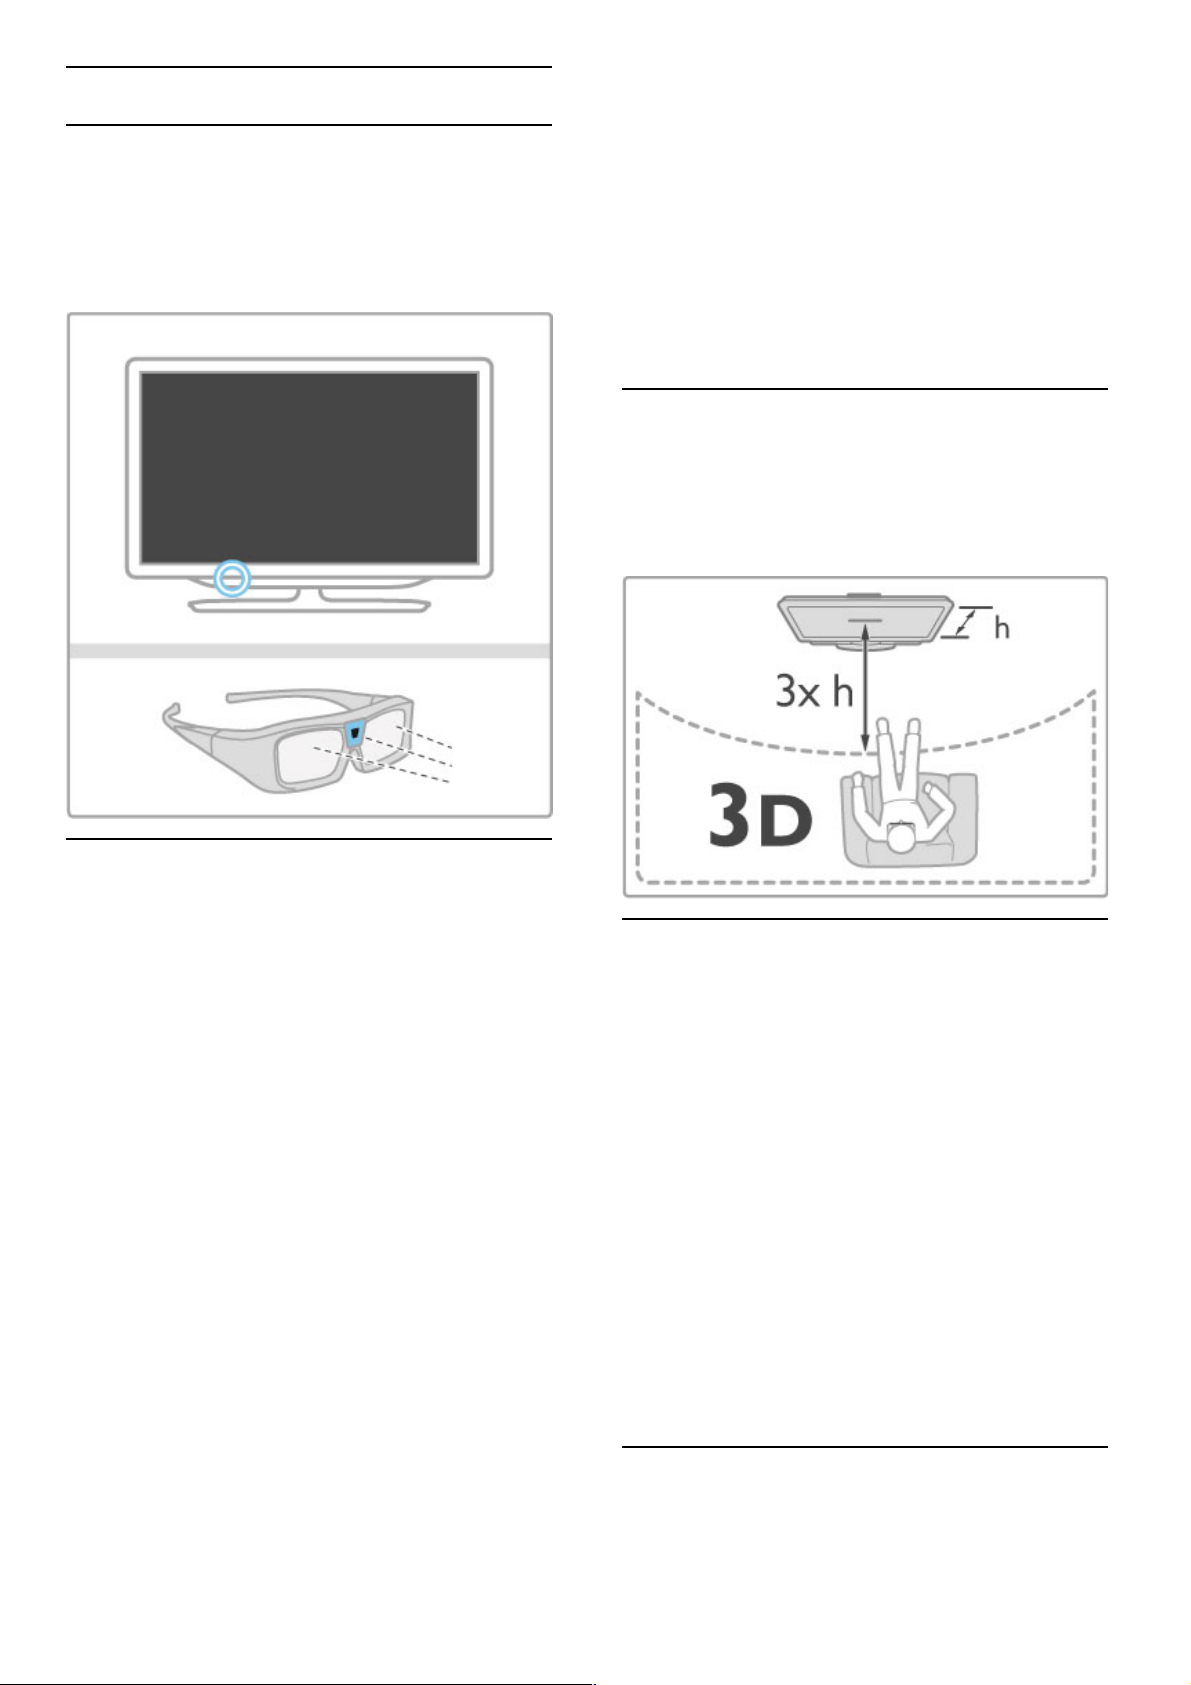
Optimal 3D viewing
For an optimal 3D viewing experience, we recommend that you:
• sit at least 3 times the height of the TV screen away from the
TV, but no further than 6 metres away.
• avoid fluorescent lighting (such as TL lighting or certain energy
saving light bulbs which operate on a low frequency) and direct
sunlight as they may interfere with the 3D experience.
Health warning
• If you or your family has a history of epilepsy or photosensitive
seizures, consult a medical professional before exposing yourself
to flashing light sources, rapid image sequences or 3D viewing.
• To avoid discomfort such as dizziness, headache or
disorientation, we recommend not watching 3D for extended
periods of time.
If you experience any discomfort, stop watching 3D and do not
immediately engage in any potentially hazardous activity (for
example driving a car) until your symptoms have disappeared. If
symptoms persist, do not resume watching 3D without consulting
a medical professional first.
• Parents should monitor their children during 3D viewing and
ensure they do not experience any discomfort as mentioned
above. Watching 3D is not recommended for children under 6
years of age as their visual system is not fully developed yet.
• Do not use the 3D glasses for any purpose other than
watching 3D TV.
• CHOKING HAZARD - Do not let children under 6 years of
age play with the 3D glasses, they could choke on the battery lid
or battery (if present).
Cleaning and care
22 Basics / 3D

• Do not expose the 3D glasses to direct sunlight, heat, fire or
water. This may result in a product malfunction or fire.
• Use a clean soft cloth (microfibre or cotton flannel) to clean
the lenses to avoid scratching them. Never spray cleaner directly
onto the 3D glasses. This may damage the electronics.
• Do not drop, bend or apply force to the lenses of the 3D
glasses.
• Do not use cleaning chemicals containing alcohol, solvent,
surfactant, or wax, benzene, thinner, mosquito repellent or
lubricant. Using these chemicals can cause discoloration or cracks.
Basics / 3D 23
2.5 Connected devices
Select a device
Select from the Home menu
To select and watch a connected device or activity, press h to
open the Home menu and select the device or its activity and
press OK . Make sure the device is switched on.
Add a connected device to the Home menu for easy selection.
Read more about Add your devices in Help > Basics > Menus >
Home menu.
Select from the list of connections
To open the list of connections, press Ú SOURCE . Select the
TV connection and press OK to switch to the device on that
connection. Make sure the device is switched on.
Operate devices
The remote control of the TV can also operate a connected
device. The device must have EasyLink (HDMI -CEC) and have it
switched on. The device must also be connected with an HDMI
cable.
Operate an EasyLink device
To operate such a device with the TV remote control, select the
device -or its activity- in the h Home menu and press OK.
The commands of all keys, except the h key, the t ADJUST
key and the r OPTIONS key, are forwarded to the device.
If the key you need is not on the TV remote control, you can
show extra keys on screen with Show device keys.
Show device keys
To show the device keys on screen, press r OPTIONS and
select Show device keys. Select the key you need and press OK .
To hide the device keys, press È (Back).
In general, these keys open the following device menus:
1 Home menu
2 Setup menu
3 Disc menu (disc content)
4 Pop -up menu
5 Options menu
6 Programme guide
7 Media selection
Read more about EasyLink in Help > Setup > Devices >
EasyLink HDMI-CEC .
24 Basics / Connected devices
2.6 Subtitles, timers and locks
Subtitles
Programme subtitles are available most of the time. You can
switch subtitles on or off. How to set subtitles depends on
whether a channel is analogue or digital.
Switch on subtitles
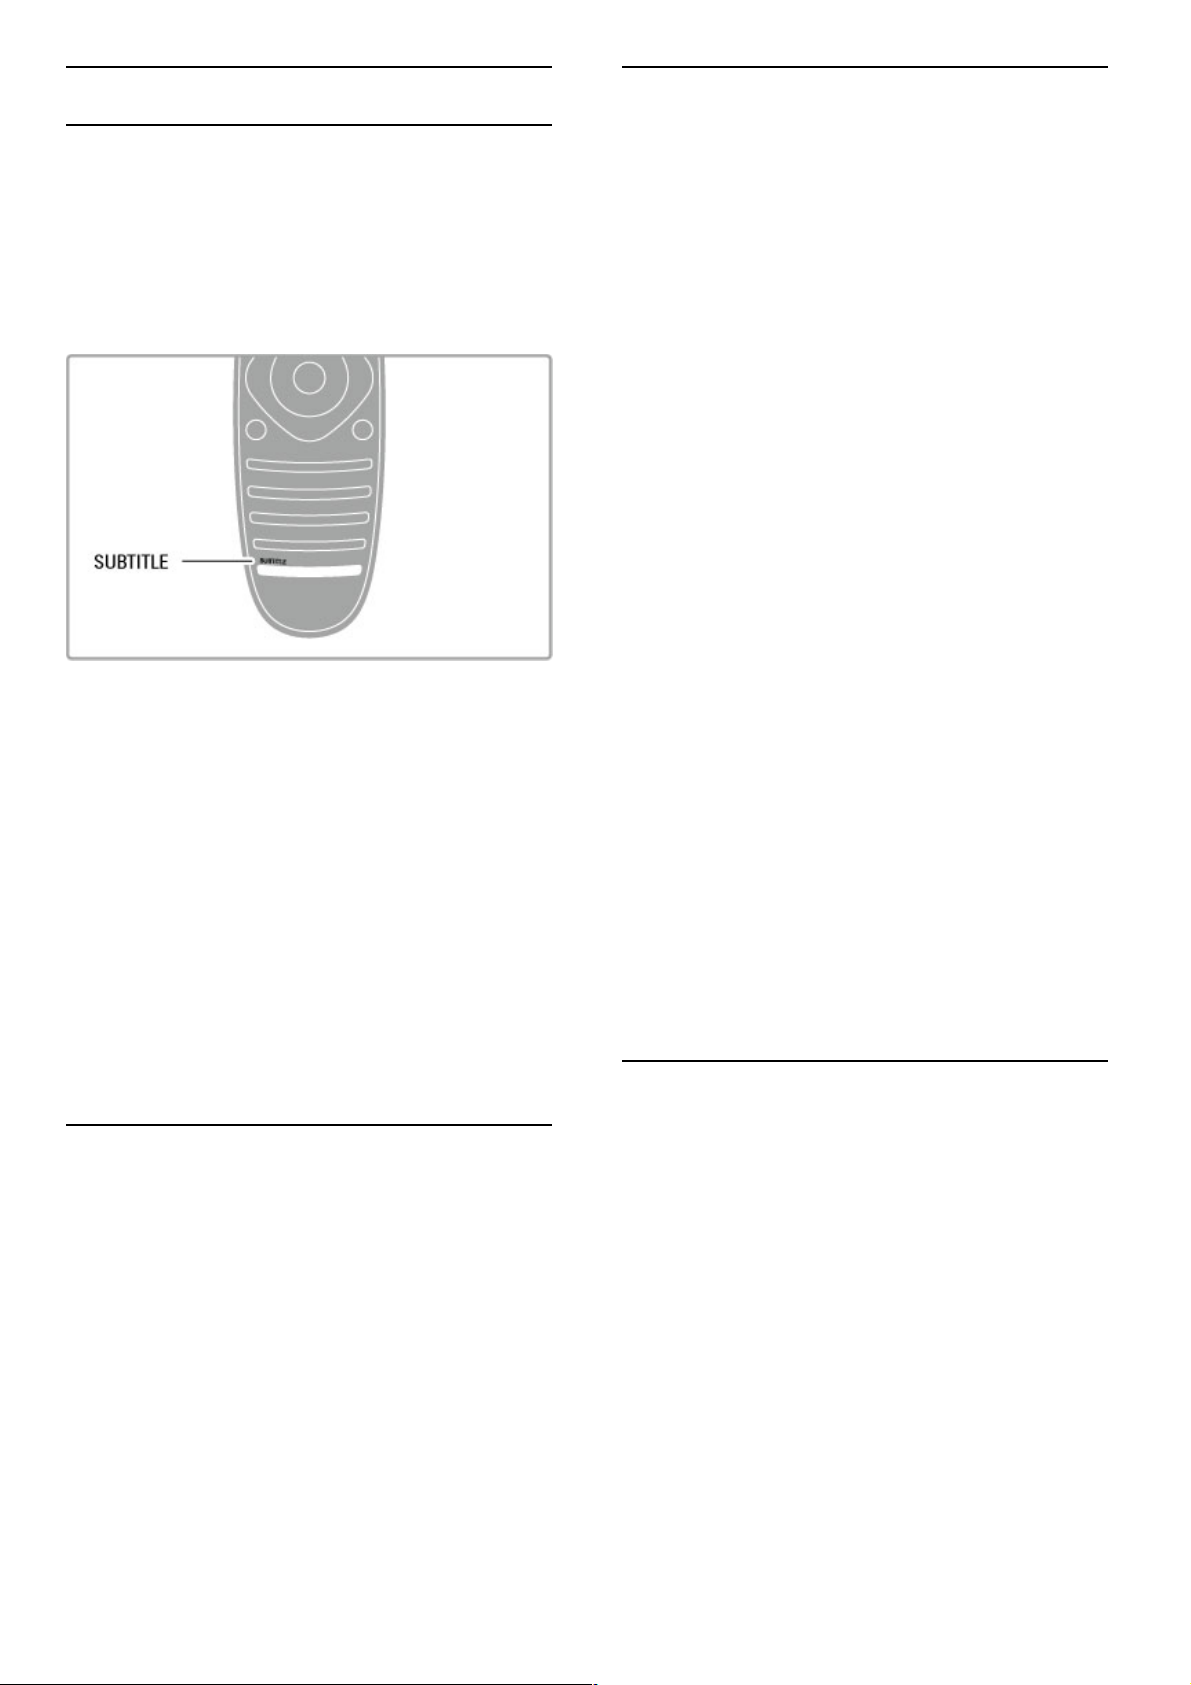
To open the Subtitle menu, press SUBTITLE. You can switch
subtitles On or Off. Select On during mute to show subtitles only
when the sound is muted with m.
For analogue channels
To make subtitles available for a channel, switch to the channel
and press TEXT to open Text. Enter the page number for
subtitles, usually 888, and press TEXT again to close Text. With
subtitles switched on in the Subtitle menu, subtitles will be shown
if available. Each analogue channel must be set up separately.
For digital channels
There is no need to activate subtitles in Text for digital channels.
You can set a preferred primary and secondary subtitle language.
If these subtitle languages are not available for a channel, you can
select another available subtitle language.
To set the primary and secondary subtitle language, press h and
select Setup > Channel settings and select Languages > Primary
and Secondary subtitles.
To select a subtitle language when none of your preferred
languages is shown, press r OPTIONS , select Subtitle language
and select a language you want temporarily.
Audio languages
Digital TV channels can broadcast audio that transmits several
languages for a programme. You can set the TV to switch to
your preferred language if it is available.
Set your language
To set your preferred audio language, press h and select Setup
> Channel settings and select Languages > Primary and
Secondary audio. The TV will automatically switch to one of your
languages, if one of them is available.
To check if an audio language is available, press r OPTIONS
and select Audio language. You can select another audio language
from the list.
Some digital TV channels broadcast special audio and subtitles
adapted for people who are hearing or visually impaired. Read
Help > Setup > Universal access.
Child locks
To prevent children from watching a channel or a programme,
you can lock channels or lock age-rated programmes.
Parental rating
Some digital broadcasters have rated their programmes. When
the rating is equal or higher than the rating you have set for your
child's age, the programme will be locked.
To watch a locked programme you must enter the child lock
code. The parental age rating is set for all channels.
Set an age rating
Press h and select Setup > Channel settings and select Child
lock > Parental rating.
To select an age rating, you must first enter your 4 -digit child
lock code. If no child lock code is set, you can set the code
now.
When the code is entered, you can select the age rating. When
the rating of a programme is equal or higher than the rating you
have set for your child's age, the programme will be locked. The
TV will ask for the code to unlock the programme. For some
operators, the TV only locks programmes with a higher rating.
Lock a channel
To lock a channel, press h and select Setup > Channel settings
and select Child lock > Channel lock . In the list of channel
numbers, select a channel and press OK to lock a channel.
In the list, a locked channel is marked with an X. Now, you can
select another channel to lock or unlock. The lock is activated as
soon as you close the menu.
You cannot lock programmes from connected devices.
Change code
To change the current lock code, press h and select Setup >
Channel settings and select Child lock > Change code.
Enter the current code and then enter the new code twice. The
new code is set.
Forgotten your code?
If you have forgotten your code to unlock, call Consumer Care
in your country. Find the telephone number on the
documentation that came with the TV or go to
www.philips.com/support.
Sleep timer
With the sleep timer, you can set the TV to switch to standby
automatically after a specified time.
To set the sleep timer, press h > Setup > TV settings >
Preferences > Sleep timer. With the slider bar you can set the
time up to 180 minutes in increments of 5 minutes. If set to 0
minutes, the sleep timer is switched off.
You can always switch off your TV earlier or reset the time
during the countdown.
Basics / Subtitles, timers and locks 25
3
3.1
Smart TV
Net TV
What is Net TV?
Net TV offers Internet applications called apps. These apps are
tailored for your TV. With these apps you can read your
national newspaper, look at infotainment, or rent a movie from a
video store or watch programmes you missed with catch-up TV
apps. A wide range of Net TV apps are available depending on
your country.
Smart USB Recording
With your TV connected to the Internet, you can also record
programmes from the TV programme guide. To record
programmes, you must connect a USB Hard Disk Drive to your
TV. (Only in selected countries.)
Net TV specifics
• The availability of Net TV apps varies per country.
• With Net TV, you can view any Internet website you like but
most of them are not tailored for a TV screen and some plug-ins
(e.g. to view pages or videos) are not available on your TV.
• Net TV apps can be added, changed or stopped.
• Net TV shows one page at a time and full screen.
• You cannot download and save files or install plug-ins.
Net TV forum website
Find out more on Net TV apps at the Net TV forum website.
www.supportforum.philips.com
TP Vision Netherlands B.V. bears no responsibility regarding the
content and the quality of the content provided by the content
service providers.
What you need
To enjoy Net TV you must connect the TV to a router with a
high-speed (broadband) connection the Internet. You can use a
home network connected to the Internet. You do not need a
computer.
Read more about connecting to your home network in Help >
Setup > Network.
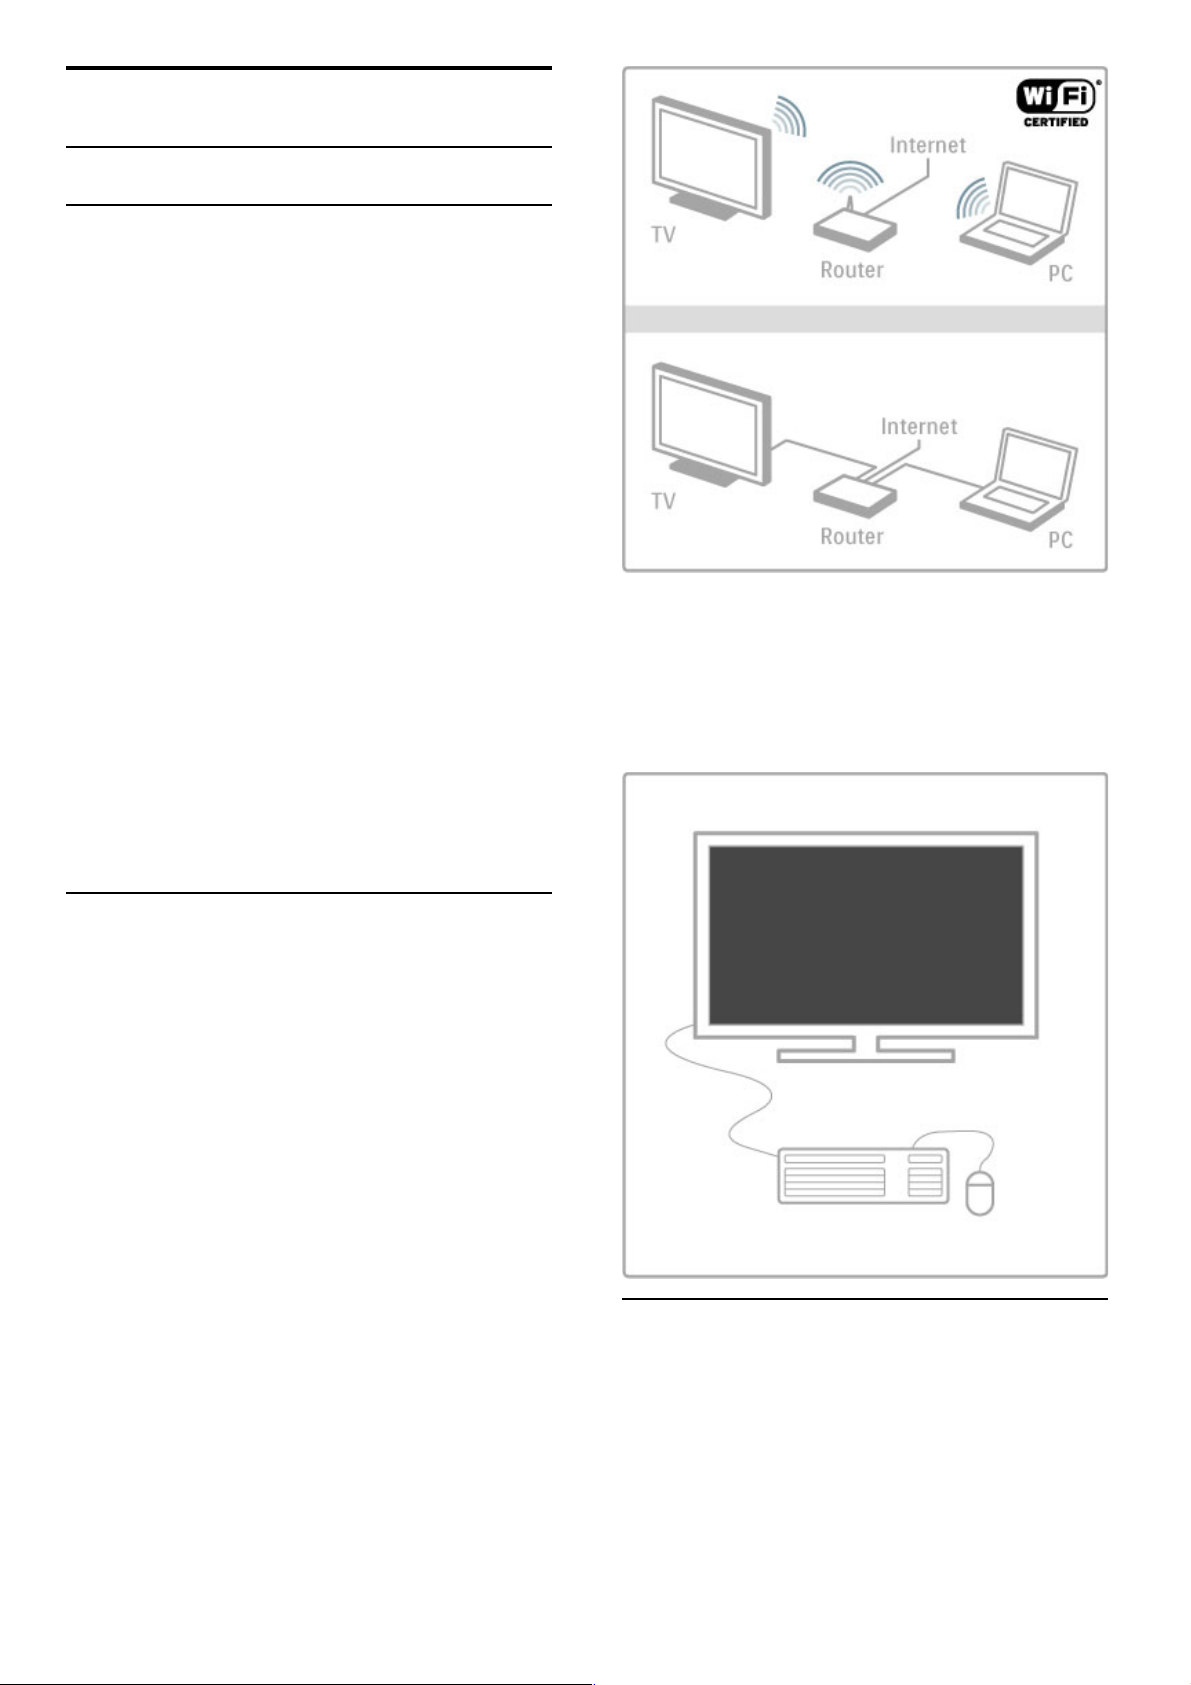
Keyboard and mouse
To enter text or to navigate a page, you can connect a USB
keyboard and a USB mouse to the TV. The USB mouse can only
navigate pages on the Internet, it cannot navigate Net TV app
pages.
Read more about connecting a keyboard or mouse in Help >
Connections > Connect more devices > Keyboard and mouse .
Configure
The first time you open Net TV, you must agree to the terms
and conditions before you can continue. Press OK to agree.
Press È (Back) to quit Net TV.
Register
If you agree, you can register with Club Philips. Select Register
and press OK . Enter your email address, select Continue and
press OK . Confirm the email address.
26 Smart TV / Net TV
 Loading...