

Page 1
4000 Ser ies
Page 2

This logo labelled on the product itself indicates that the Environmental Protection Use Period thereof
is 10 years.
The Environmental Protection Use Period of electrical information products refers to the time period
during which the toxic and hazardous substances or elements contained within the product will not
leak or suddenly spoil, and users of such products will not cause any serious environmental pollution or
serious damage to human and proper ty.
During the Environmental Protection Use Period, please use this product according to the instructions
given in this user manual.
The Environmental Protection Use Period does not cover consumable parts: the battery.
Suggestive description of the Recycling Administrative Regulations for
Waste Electrical and Electronics Products
In order to care and protect the Ear th in a better way, please adhere to the national and applicable laws
in relation to the recycling management of waste electrical and electronics products when the user no
longer needs to use this product, or when it has reached the end of its product life.
Page 3
Contents
Your TV
Control Panel
Remote Control
Remote control usage
7
Troubleshooting
General issues
Channel issues
Picture issues
Sound issues
5
5
5
6
HDMI connection issues
Computer connection issues
Contact us
14
14
14
15
15
15
15
16
Use your TV
Switch TV on or off
Watch connected devices
Switch channels
Adjust TV volume
Date and time
PC Setting
TV Operation
5
Channel Settings
LOCK
Time Setting
Settings
EPG
Recording Option
Time-shift Option
USB Media Function
Product information
Display resolutions
Multimedia
Sound power
Inherent resolution
Tuner / Reception / Transmission
Remote Control
Power Supply
Supported TV mounts
7
7
7
7
8
8
8
9
9
10
10
10
11
11
12
12
13
13
13
13
13
14
14
14
14
Page 4
Caution
2017©TP Vision Europe B.V. All rights
reserved. Specifcations are subject to change
without notice. Trademarks are the proper ty
of Koninklijke Philips N.V or their respective
owners. TP Vision Europe B.V. reser ves the right
to change products at any time without being
obliged to adjust ear lier supplies accordingly.
The material in this manual is believed
adequate for the intended use of the system.
If the product, or its individual modules or
procedures, are used for purposes other than
those specified here in,confirmation of their
validity and suitability must be obtained. TP
Vision Europe B.V. warrants that the material
itself does not infringe any United States
patents. No fur ther warranty is expressed or
implied.
TP Vision Europe B.V. cannot be held
responsible neither for any error s in the
content of this document nor for any problems
as a result of the content in this document.
Errors repor ted to Philips will be adapted and
published on the Philips support website as
soon as possible.
manual, or any adjustments and assembly
procedures not recommended or authorised
in this manual shal void the warranty.
Pixel characteristics
This LCD/LED product has a high number of
color pixels. Although it has effective pixels of
99.999% or more, black dots or bright points of
light (red, green or blue) may appear constantly
on the screen. This is a structural property of
the TV (within common industr y standards)
and is not a malfunction.
Mains fuse
This TV is fitted with an app roved moulded
plug. Should it become necessary to replace
the mains fuse, this must be replaced with a
fuse of the same value as indicated on the plug
(example 10A).
Remove fuse cover and fuse.
The replacement fuse must comply with
BS 1362 and have the ASTA approval
mark. If the fuse is lost, contact your
dealer in order to verify the correct type.
Terms of warranty
Risk of injury, damage to TV or void of
warranty! Do not attempt to repair the
TV yourself.
Use the TV and accessories only as
intended by the manufacturer.
The caution sign printed on the back of
the TV indicates risk of electric shock.
Never remove the TV cover. Always
contact Philips Customer Support for
service or repairs.
Any operation expressly prohibited in this
Page 5
Important
Read and understand all instructions before you
use your TV. If damage is caused by failure to
follow instructions, the warranty does not apply.
Safety
Never expose the TV to rain or water.
Never place liquid containers, such as vases,
near the TV. If liquids are spilt on or
into the TV, disconnect the TV
from the power outlet immediately.
Contact Philips Consumer Care to have
the TV checked before use.
Never place the TV, remote control or
batteries near naked flame or rather heat
sources, including direct sunlight.
To prevent the spread of fire, keep candles
or other flames away from the TV, remote
control and batteries at all times.
Never inser t objects into the ventilation
slots or other openings on the TV.
When the TV is swivelled ensure that no
strain is exerted on the power cord. Strain
on the power cord can loosen connections
and cause arcing.
To disconnect the TV from the mains power,
the power plug of the TV must be
disconnected. When disconnecting the
power, always pull the power plug, never
the cord. Ensure that you have full access to
the power plug, power cord and outlet
socket at all times.
Never expose the remote control or
batteries to rain, water or excessive heat.
Avoid force coming onto power plugs.
Loose power plugs can cause arcing or fire.
TV
Two people are required to lift and carry a
TV that weighs more than 25 kg or 55 lbs.
When stand mounting the TV, use only the
supplied stand. Secure the stand to the TV
tightly. Place the TV on a flat, level surface
that can support the combined weight of
the TV and the stand.
When wall mounting the TV, use only a
wall mount that can suppor t the weight of
the TV. Secure the wall mount to a wall
that can support the combined weight of
the TV and wall mount TP Vision Europe
B.V. bears no responsibility for improper
wall mounting tat results in accident, injury
or damage.
If you need to store the TV, disassemble
the stand from the TV. Never lay the TV
on its back with the stand installed.
Before you connect the TV to the power
outlet, ensure that the power voltage
matches the value printed on the back of
the TV. Never connect the TV to the
power outlet if the voltage is different.
Parts of this product may be made of glass.
Handle with care to avoid injury and
damage.
TV
Never place the on a surface covered
by a cloth or other material 1:hat can be
pulled away.
Ensure that no part of the TV hangs over
the edge of the surface.
Never place the TV on tall furniture (such
as a bookcase) without anchoring both the
furniture and TV to the wall or a suitable
support.
Educate children about the dangers of
climbing on furniture to reach the TV.
TV
Page 6
The product/remote control may contain a
coin-type battery, which can be swallowed.
Keep the battery out of reach of children
at all times!
Risk of damage to the TV screen!
Never touch, push, rub or strike the screen
with any object.
To avoid deformations and color fading,
wipe off water drops as soon as possible.
Never install the in a confined space.
Always leave a space of at least 4 inches or
10 cm around the TV for ventilation.
Ensure curtains or other objects never
cover the ventilation slots on the TV.
Never place the or any objects on the
power cord.
Disconnect the TV from the power outlet
and antenna before lightning storms.
During lightning storms, never touch any
part of the TV, power cord or antenna
cable.
TV
If the is transported in temperatures
below 5°C or 41°F, unpack the TV and wait
until the TV temperature matches room
temperature before connecting the TV to
the power outlet.
TV
TV
Your product is designed and manufactured
with high quality materials and components,
which can be recycled and reused.
When this crossed-out wheeled bin symbol is
attached to a product it means that the product
is covered by the European Directive 2002/96/
EC. Please inform yourself about the local
separate collection system for electrical and
electronic products.
Please act according to your local rules and
do not dispose of your old products with your
normal household waste.
Correct disposal of your old product helps to
prevent potential negative consequences for the
environment and human health.
Avoid stationary images as much as
possible. Stationary images are images that
remain on-screen for extended periods
of time. Example: on-screen menus, black
bars and time displays. If you must use
stationary images, reduce screen contrast
and brightness to avoid screen damage.
Unplug the TV before cleaning.
Clean the TV and frame with a soft, damp
cloth. Never use substances such as alcohol,
chemicals or household cleaners
on the TV.
Your product contains batteries covered by the
European Directive 2006/66/EC, which cannot
be disposed of with normal household waste.
Please inform yourself about the local rules
on separate collection of batteries because
correct disposal helps to prevent negative
consequences for the environment and human
health.
Page 7
Your TV
Congratulations on your purchase, and
welcome to Philips! To fully benefit from the
support that Philips offers, register your TV at
www.philips.com/welcome.
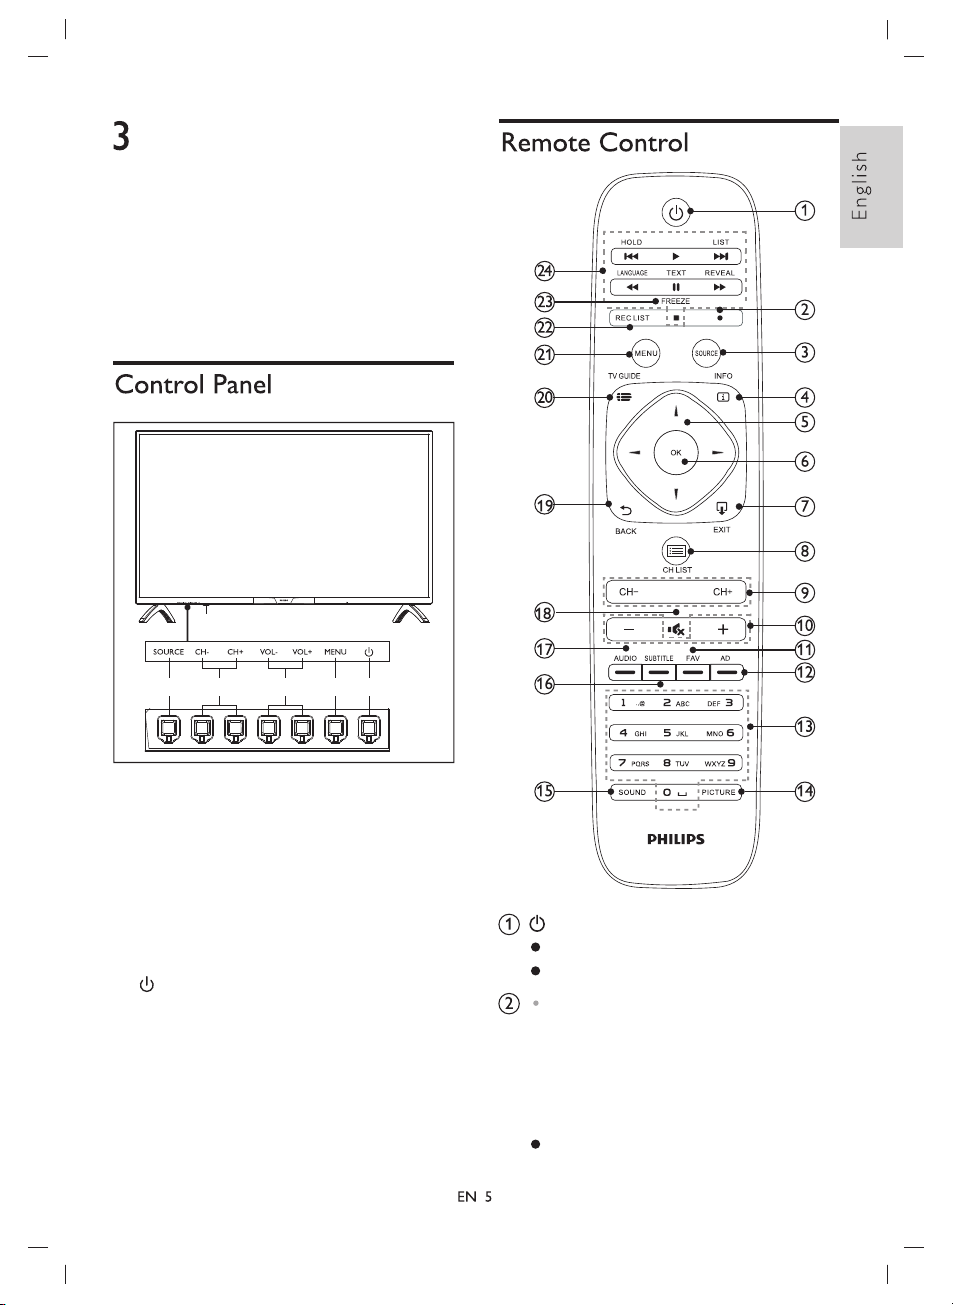
(The following machine picture only for
reference, please refer to the actual object.)
1
2 3 4 5 6
1. Indicator/Remote Control Sensor.
2. Source: display the list of signal sources.
3. CH+/-: switch to the previous/next
channel.
4. Vol+/-: increase/reduce the volume.
5. Menu: turn on/off the main menu.
6. : turn on/off the TV; to cut off power
supply, please unplug the power cable.
Standby/Power on
Switches the TV to standby if it is on
Powers on the TV if it is in standby.
Recording
Before recording, you need to prepare
the following:
1. a connected USB Hard Drive
formatted on this TV.
2. digital TV channels installed on this TV.
To record TV program, press the red
Record)
( on the remote control.
.
●
Page 8
To schedule a recording of an upcoming
TV program, press TV GUIDE then select
the TV program you wish to record. Press
the red (Record) on remote control to
●
set the recording schedule.
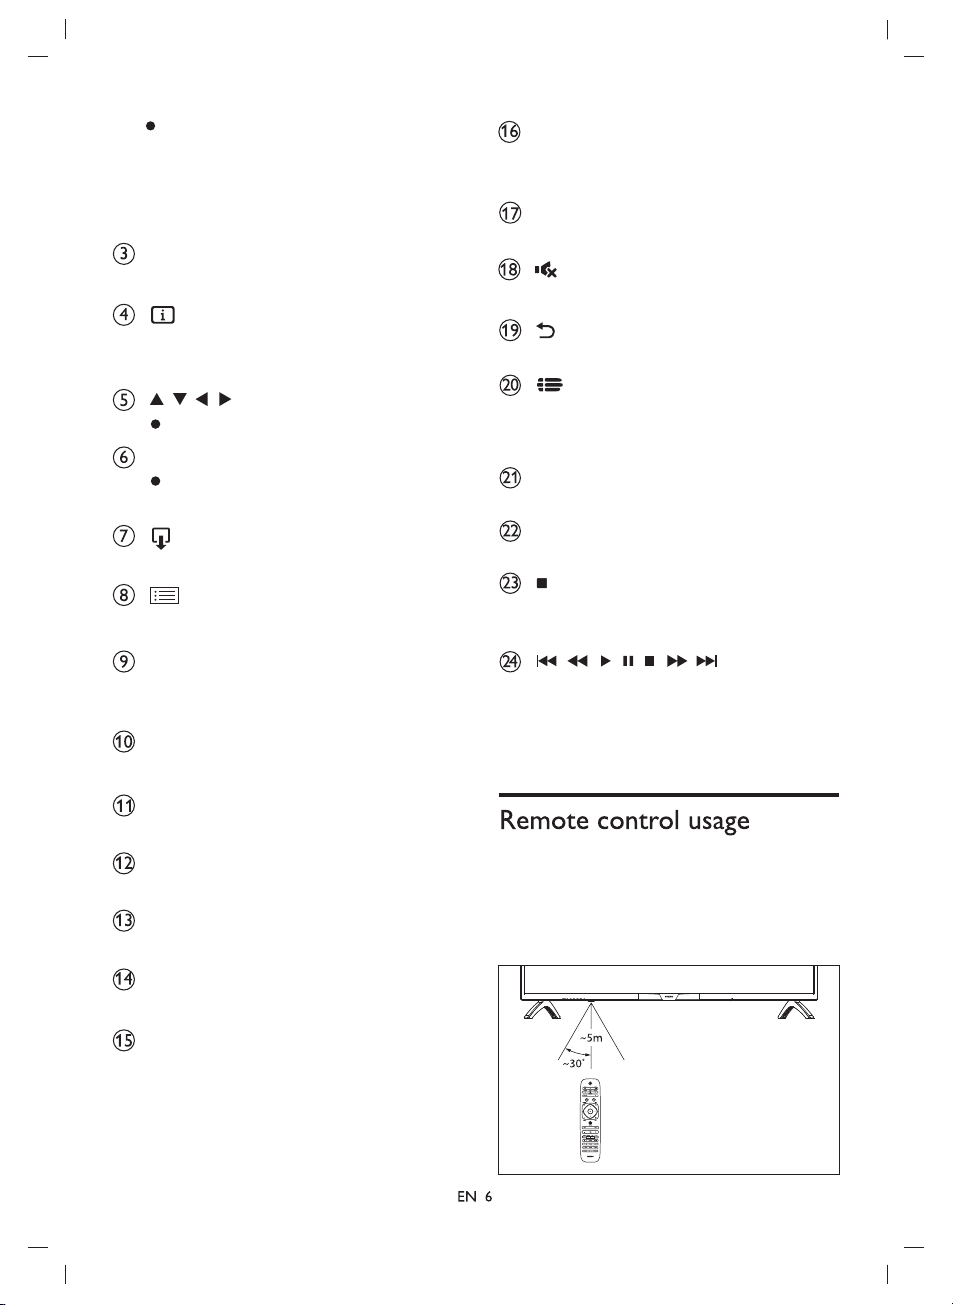
SOURCE
Select a input source for the TV.
INFO
Disp
lay the program information when
available.
, , ,
In menu mode navigate the : menu.
OK
Navigation keys
In menu mode: confirm the
selection.
EXIT
Press this button to exit menu.
C H LIST
Look through channel list.
+/-
CH
Switch to the previous/next
mode.
+/-
Increase/reduce the volume.
input or
channel in TV
SUBTITLE
Display subtitle
channel has subtitle option.
AUDIO
Audio Language shortcut.
(Mute)
Mute or unmute the sound.
BACK
Return to the previous operation.
TV GUIDE
Gives instant access to TV program guide.
● (EPG) is
availability of electronic program guide
dependent on broadcaster s or operators.
MENU
Turn on/off the menu.
REC LIST
To view the list of recordings .
FREEZE
To freeze a scene in the TV program. Press
again to return to the current scene.
, , , , , ,
Shortcut keys in USB mode: Previous,
Rewind, Start, Pause, Stop, Fast Forward,
Next.
message, when current
FAV
Favorite channels.
AD
Audio Description shortcut.
Numeric keys (0~9)
Select a channel or value.
PICTURE
Switch to the present image mode.
SOUND
Switch to the present audio mode.
When you use the remote control, hold it close
to the TV and point it at the remote control
sensor. Make sure that the line-of-sight between
the remote control and TV is not blocked by
furniture, walls or other objects.
Page 9
Use your TV
This section helps you perform basic TV
operations.
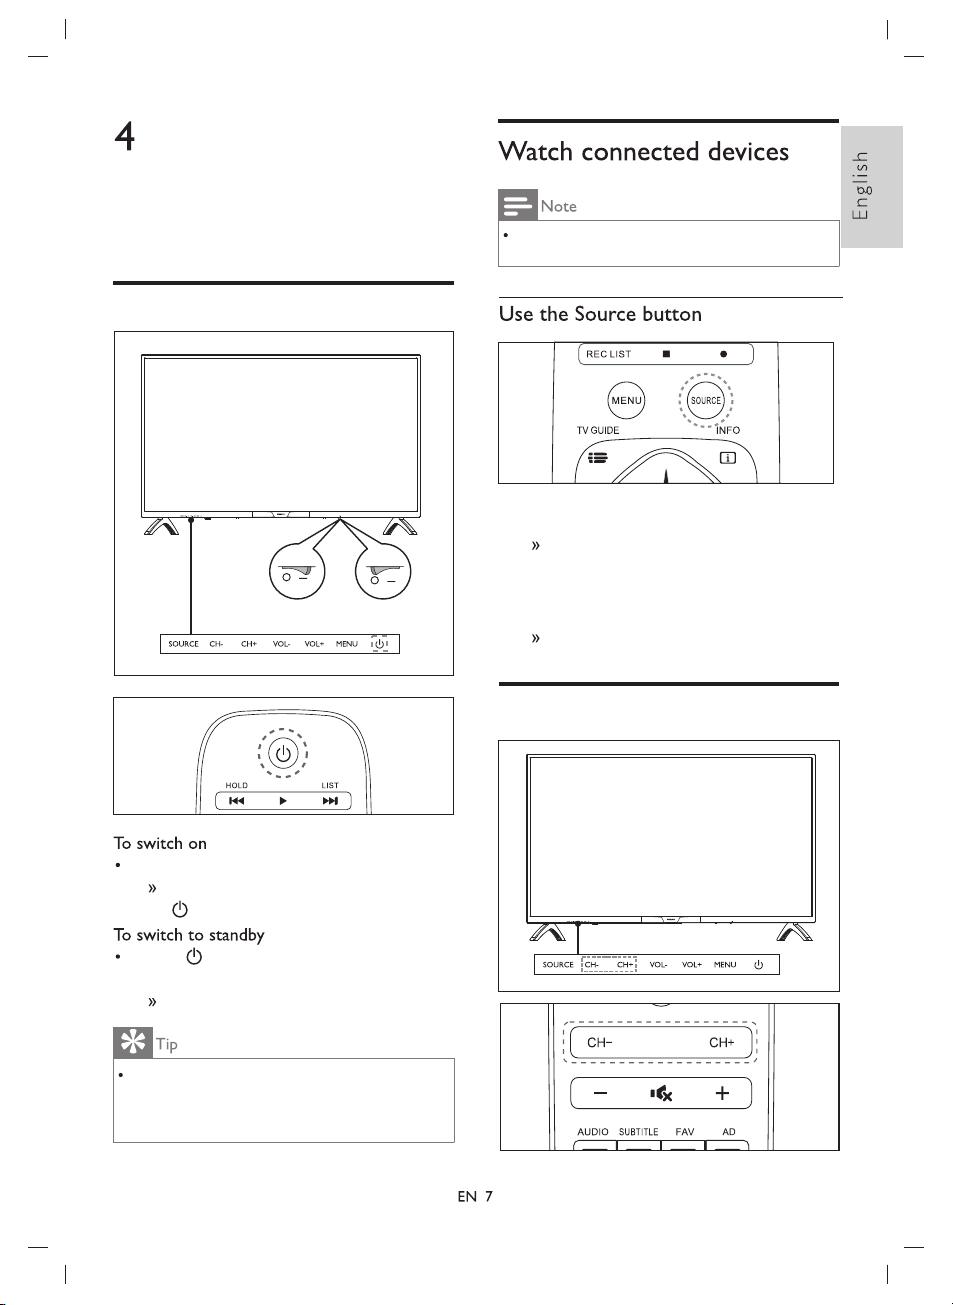
Switch TV on or off
Power off
Power on
Switch on the device before selecting it as an external
signal source.
1 Press SOURCE key.
The source list appears.
2 Press ▲/▼ key to select a device.
3 Press OK key to select.
The TV switches to the selected device.
Switch channels
Plug in the power plug.
If the standby indicator is lights up, press
(Standby-On) on the remote control,
Press (Standby-On) on the remote
control.
The TV will switch into standby status.
Though your TV consumes ver y little power when in
standby mode, energy continues to be consumed. When
not in use for an extended per iod of time, disconnect the
TV power cable from the power outlet.
Page 10
●
Press CH+/- key on the remote control or
on the TV.
●
Enter a channel number using the numeric
buttons on the remote control.
Press key on the remote control to
●
switch and return to the previous channel.
Connect DTV signal, the clock displays
synchronize with the time in current code
stream. Press key to check current time,
current time will be displayed in program
information.
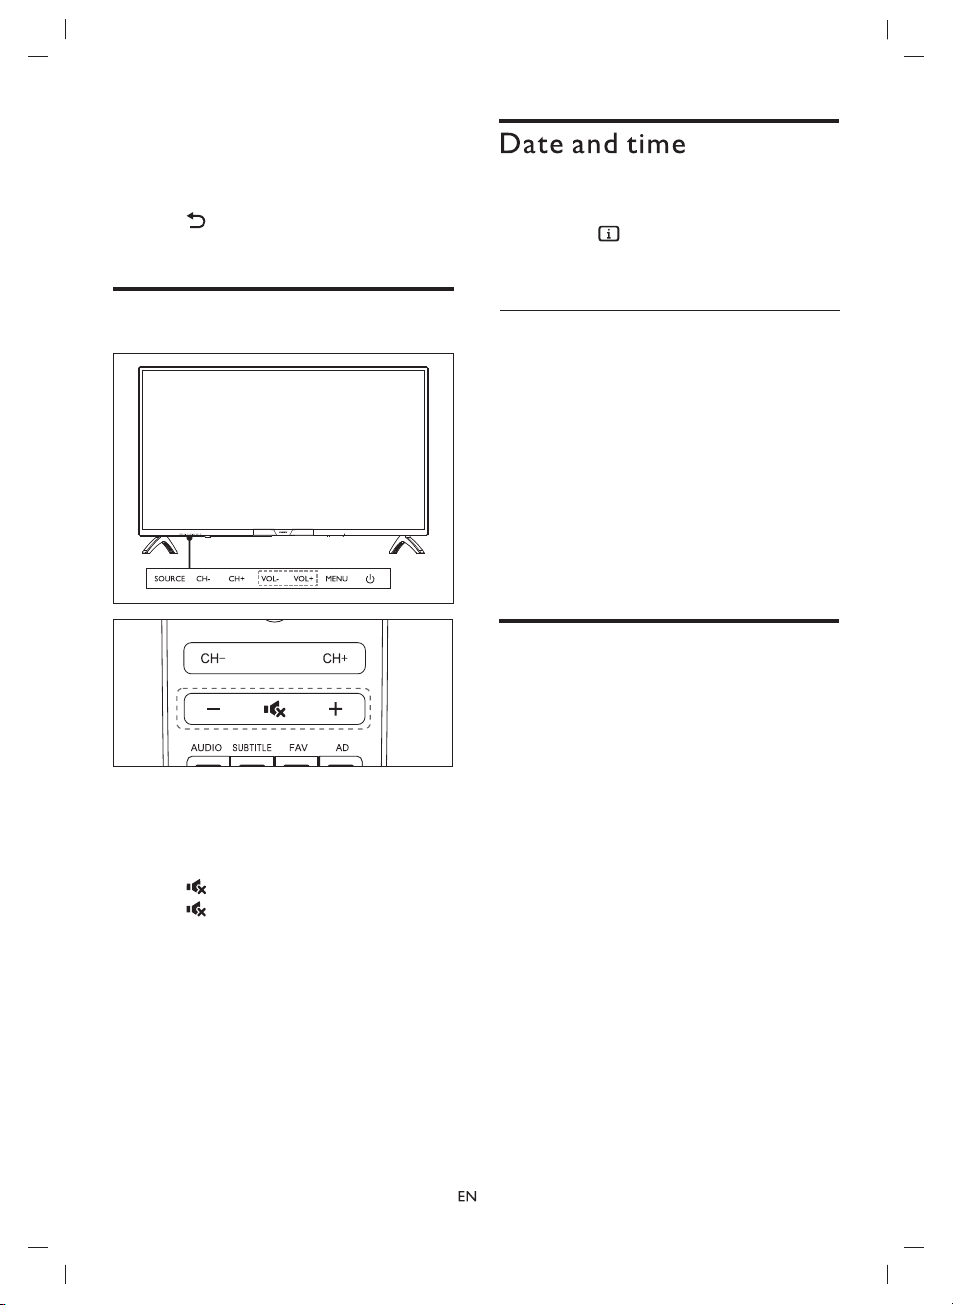
Adjust TV volume
To increase or decrease volume
● Press VOL+/- on the TV or the Volume
Control +/- on the remote control.
To mute or unmute sound
● Press (Mute).
● Press again to restore the sound.
Time zone
Set time zone information according to the
following steps:
1 Press MENU key.
2 Choose the following pass:
Time--> Time Zone.
3 Choose one time zone, press OK key to
confirm.
4 Twice press MENU key to close it.
PC Setting
When use your TV as the monitor, please make
sure that VGA cable has been connected
.
properly (The PC refresh rate can’t exceed of
the TV).
●
Horizontal Position Move the screen
toward left or right
●
Vertical Position: Move the screen toward
up or down
●
: .
Size Set the size of the screen
●
: .
Phase Set a value of phase Phase
:
.
.
adjustment is to ensure that the ADC can
make sample at the right time and
get the best visual performance.
●
Auto Adjust Automatically adjust to obtain
the best setting
:
.
8
Page 11
5 TV Operation
Channel Settings
Auto Tuning
Press MENU key, the channel icon will show on
the screen.
Press t/u key to select channel, and press OK
key to enter the channel menu. Press ▲/▼ key
to select Auto Tuning. then press OK to enter.
press ▲/▼ key to select DVB type. Press OK
key to next operation. Select DVB-T, press OK
key to enter submenu. Press t/u key to select
tune type, and press ▲/▼ key to select country.
Press OK key the TV will be start auto tuning.
Tip
During auto tuning, press MENU key to exit it.
control to delete the selected channel.
● Move: Press Green key on the remote
control to focus on a channel, press ▲/▼
key to select the channel position, press
Green key to confirm.
● Favorite: After choosing a channel, press
Yellow key on the remote control to your
favorite channel, press Yellow key again to
cancel it.
● Skip: After selecting channel, press Blue key
on the remote control to skip the channel,
press Blue key again to cancel it.
Tip
Press MENU key to return channel menu.
Signal Information
Press ▲/▼ key to select Signal Information in
channel menu. Press OK key to view the signal
information.(Only in DTV mode.)
DTV Manual Tuning
Select DTV signal in source menu.
Press ▲/▼ key to select DTV Manual Tuning in
channel menu. Press OK key to enter submenu,
press t/u key to adjust channel and press
OK key to search.
ATV Manaul Tuning
Select ATV signal in source menu.
Press ▲/▼ key to select ATV Manual Tuning in
channel menu. Press OK key to enter submenu.
Press t/u key to select Storage to, TV system,
Current Channel, Fine-Tune. Press t/u key to
adjust these items, you can storage a channel by
press Red key on the remote control to save in
current channel position. Select search and
press OK key to search for the TV.
Channel Edit
Press ▲/▼ key to select Channel Edit, press OK
key enter to channel list.
● Delete: Press Red key on the remote
Software Update (OAD)
Press ▲/▼ key to select Software Update
(OAD) in channel menu. Press t/u key to
select turn on or off.
OAD Tuning
Turn on Software Update (OAD), press OK
key to Tuning, and press key to exit tuning.
Software Update (USB)
Press ▲/▼ key to select Software Update
(USB) in channel menu. Update software of
TV by U disk.
9
Page 12
LOCK
Press MENU key, the LOCK icon will show on
the screen. Press t/u key to select Lock, then
press OK key to enter lock menu. Input a
password in the lock system, then press OK
key to enter, press ▲/▼ key to select on or off.
●
Set password: Set a new password for your
TV.
● Block Program: Press Green key on the
remote control to lock your program in the
program list.
● Parental Guidance: Adjust the program
blocking level, this function help parents to
block unsuitable channel for their child age.
Note
Please input “3448” in lock system, if you have forgotten
your password by watching TV.
Time Setting
Press MENU key ,the Time icon will show on
the screen, press t/u key to select Time and
press OK key menu submenu. (The time is
means that the current code stream time of
system.)
● Off time: press ▲/▼ key to select off time,
press OK key to enter and press ▲/▼ key
to select : off time mode, hour, minute.
● Off time mode: Press▲/▼ key to select
off time mode, press t/u key to select
off time of TV, such as: Off, Once,
Everyday, Mon~Fri...etc.
● Hour: Press ▲/▼ key to select hour,
press t/u key to adjust hours for off
time of TV.
● Minute: Press ▲/▼ key to select minute,
Press t/u key to adjust minutes for off
time of TV.
★ Set the off time that the TV will switch off
automatically at the time by you selected.(It
is available in TV Mode.)
● On time: press ▲/▼ key to select on time,
press OK key to enter and press ▲/▼ key
to select: On time mode, Input Source,
Channel, Volume.
● On time mode: Press ▲/▼ key to select
On time mode, press t/u key to select
the on time of TV ,such as : Off, Once,
Everyday, Mon~Fri...etc.
● Hour: Press ▲/▼ key to select hour,
press t/u key to adjust hours for the on
time of TV.
● Minute: Press ▲/▼ key to select minute,
press t/u key to adjust minutes for the
on time of TV.
● Input Source: Press ▲/▼ key to select
input source, press t/u key to set input
source signal for the on time of TV.
● Channel: Press ▲/▼ key to select
channel, press t/u key to set your
channel for the on time of TV.
● Volume: Press ▲/▼ key to select volume,
press t/u key to set volume for the on
time of TV.
★ Set the on time that the TV will be switched
on automatically and tune to the mode of
your TV at the time by you selected. (It is
available in TV Mode.)
● Sleep Timer: Press ▲/▼ key to select sleep
timer, press OK key to enter and press ▲/▼
key to set the sleep time of TV.
● Time Zone: Press ▲/▼ key to select time
zone, press OK key to enter and press ▲/▼
/t/u key to set the time zone of TV.
Settings
Press MENU key, the settings icon will show on
the screen, press t/u key to select settings and
press OK key to enter submenu.
● OSD Language: Press ▲/▼ key to select
OSD Language, and press t/u key to select
the language for TV.
● Audio Language: Press ▲/▼ key to select
Audio Language, press OK key to enter and
press ▲/▼/t/u key to select Audio
language.
● Subtitle: Press ▲/▼ key to select Subtitle,
and press t/u key to turn on or off.
10
Page 13
● Subtitle Language: Turn on the subtitle, and
select press ▲/▼ key to select subtitle
language. Press OK key to enter, then press
▲/▼/t/u key to select subtitle language.
● Hearing Impaired: Press ▲/▼ key to select
hearing impaired, and press t/u key to turn
on or off.
● PVR File System: Press ▲/▼ key to select
PVR File System, press OK key to enter
submenu.
● Select Disk: Press ▲/▼ key to select disk,
press OK key to enter and select a
device for record files.
● Check PVR File System: Press ▲/▼ key
to select Check PVR File System, and
press OK key to check the device
information.
● Format: Press ▲/▼ key to select Format,
press OK key to format the USB device.
● Free Record Limit: Press ▲/▼ key to
select Free Record Limit, press t/u key
to select limit time of record file.
● Restore user Default: Press ▲/▼ key to
select Restore user Default, press OK key
to resume the factor y setting. press t/u
key to select YES or NO, press OK key to
confirm this operation.
● Shop Mode: Press ▲/▼ key to select shop
mode, press t/u key to turn on or off.
Tip
Press MENU key to return main menu.
Note
The auto mode does not set record time.
● Prev. Day: Press Green key on remote
control to view the program information of
the previous day.
● Next Day: Press Yellow key on remote
control to view the program information of
the next day.
● Remind: Press Blue key on remote control
to remind your program.
Recording Option
In DTV mode, press red point key ● key on the
remote control. Record option menu will show
on the screen, and the TV system begin
recording now.
Press ■ key on the remote control to stop and
quit the recording.
After quit recording, press REC LIST key on the
remote control to TV the recorded list, you can
press Green key on the remote control to view
the file information or delete it by pressing Red
key, and press OK key to play it normally.
Note
This function need connect with USB device, the USB of
FAT32 format must be used. The USB of NTFS format
does not support recording. The duration of each
recording should be no longer than 6 hours.
EPG
Press TV GUIDE key on the remote control to
access TV program guide list(It is available in
DTV Mode).
● Record: Press Red key on the remote
control to record the program, then the
recorder menu will show on TV. You can
select channel and record mode, set the
start time and end time; then press OK key
to confirm. Finished record program, the
new task will be appeared in schedule list.
Recording options menu introduction.
Play: Play the current video.
FB: Fast back for the video, press u(play) key
to play normally.
FF: Fast forward for the video, press u(play)
key to play normally.
FB30S: Play backward 30 seconds.
FF30S: Play Fast forward 30 seconds.
Pause: Pause the video.
Stop: Stop recording and quit the recording
function.
11
Page 14
Time-shift Option
In DTV mode, press u(start) key on the
remote control, time-shift option menu will
show on the screen, and the program is in
suspended status. press ■ key on the
remote control to stop and quit time-shift
function. When you leave program for a
short time, time-shift function can suspend
and cache the playing program to U disk.
When you resume playing, the program can
continue to be played.
Time-shift options menu introduction
Play: play the current video.
FB: Fast back for the video, press u(play)
key to play normally.
FF: Fast forward for the video, press u(play)
key to play normally.
FB 30S: play backward 30 seconds.
FF 30S: play forward 30 seconds.
Pause: pause the video
Stop: stop and quit time-shift function.
USB Media Function
Please insert a USB device into the USB
interface of the TV, press SOURCE key to TV
the source menu. Press t/u key to select USB,
and press OK key to enter USB menu.
Note: USB device file format are NTFS, FAT
or FAT32. When connecting the USB port
on an external device current is exceeded
500mA, it will be caused damage of the TV. If
the USB device is working, do not pull out
immediately, it will be caused damage of the TV
system or the USB device system.
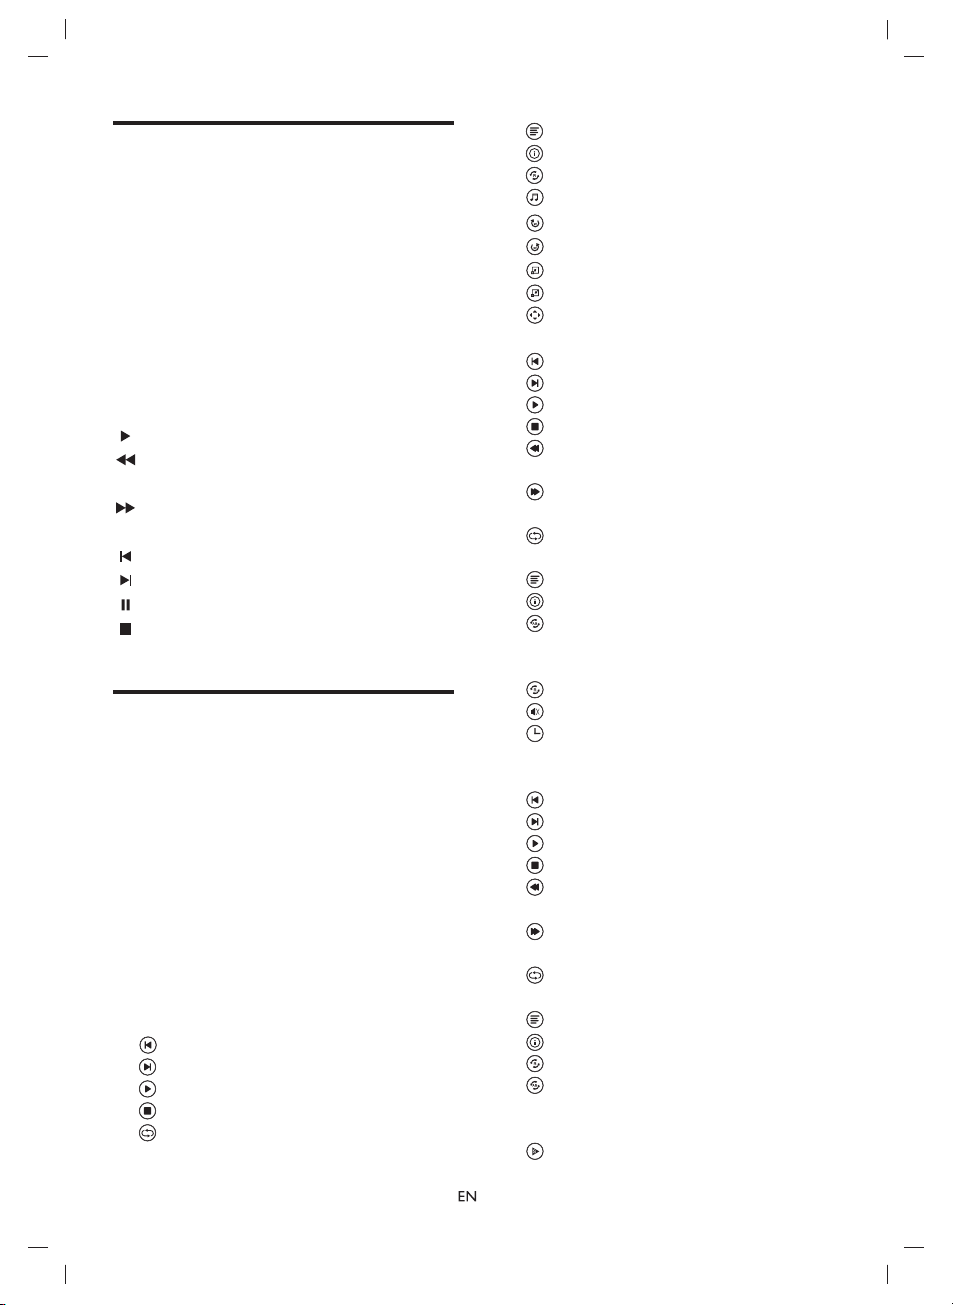
Media player UI icon introduction
● Picture player menu options
: Play the previous picture.
: Play the next picture.
: Pause/play lantern slide.
: Quit the picture window.
: Set repeat mode: repeat none, repeat
Single, repeat all.
: Show the picture playlist.
: View the picture information.
: Set random on or off.
: Play the background music.
: Rotate 90° right .
: Rotate 90° left.
: Zoom in the picture.
: Zoom out the picture.
: Move the picture.
● Music player menu options
: play the previous music.
: Play the next music.
: Pause/play the music.
: Quit the music window.
: Fast backward of the music, and press
u(play) key to play normally.
: Fast forward of the music, press u(play)
key to play normally.
: Set repeat mode: repeat none, repeat
single, repeat all.
: Show the music playlist.
: View the music information.
: Set A-B repeat playing, set point A and
point B, the music will repeat between
A and B.
: Set random on or off.
: Turn on or off the sound of music.
: Select the playing time point of the
music.
● Video player menu options
: Play the previous video.
: Play the next video.
: Pause/play the video.
: Quit the video window.
: Fast backward of the video, and press
u(play) key to play normally.
: Fast forward of the video, and press
u(play) key to play normally.
: Set repeat mode: repeat none, repeat
single, repeat all.
: Show the video playlist.
: View the video information.
: Set random on or off.
: Set A-B repeat playing, set point A and
point B, the video will repeat between
A and B.
: Slow motion of the video, slow down
12
Page 15
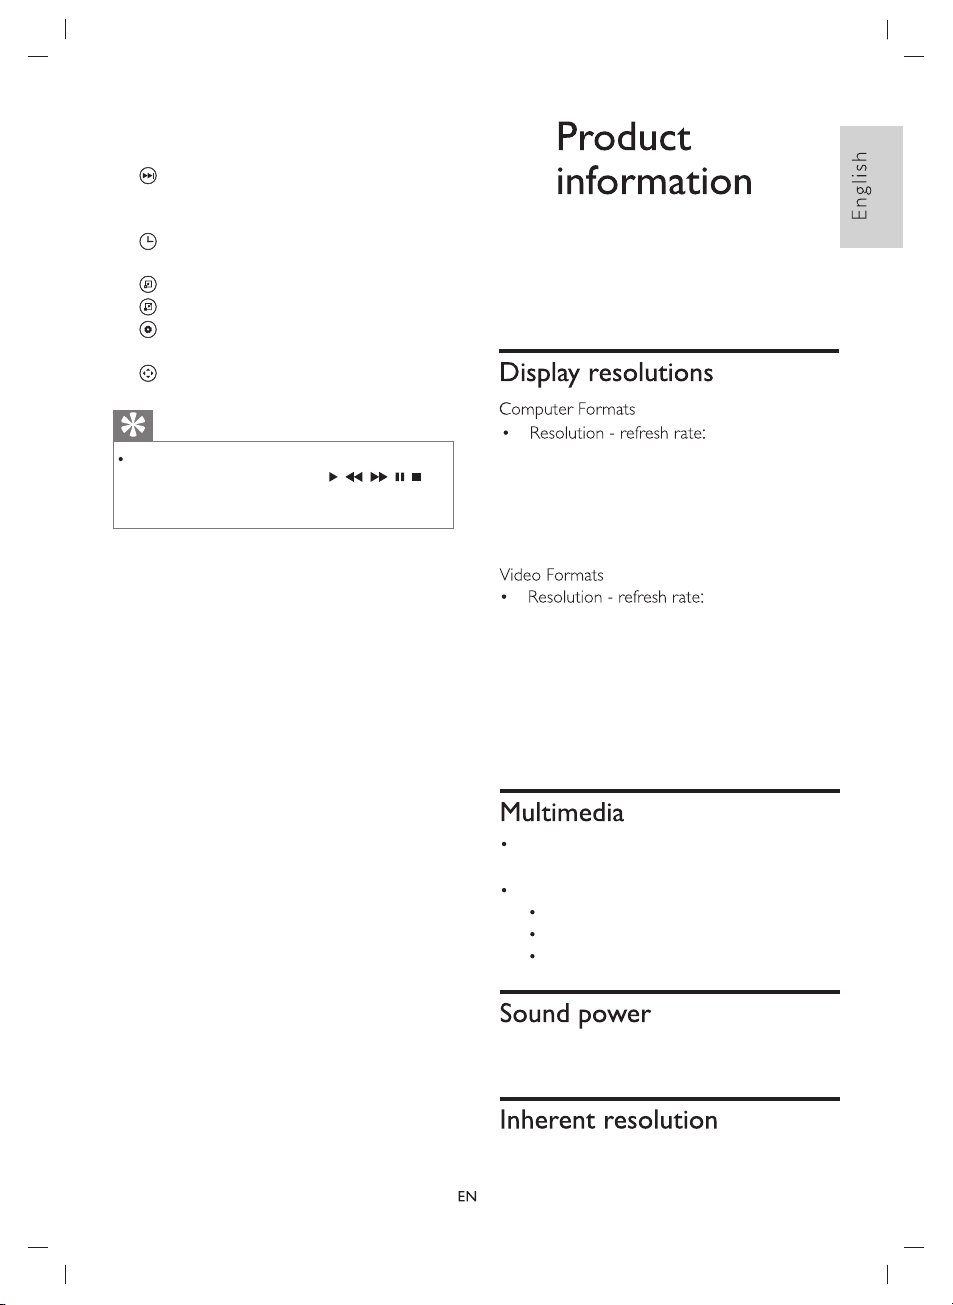
play speed, and you can press u(play)
key to play normally.
: Step forward of the video, play on step
by step, and you can press u(play) key
to play normally.
: Select the playing time point of the
video.
: Zoom in the image.
: Zoom out the image.
: Select aspect ratio of the video, such as:
Auto, 4:3, Full.
: Move the picture.
Tip
The text operation is same as the picture, please refer to
picture options. Also you can press , , , , key
on the remote control to the media player, press INFO
key to show the tool bar on the screen.
6
Product information is subject to change
without notice. For detailed product
information, please visit
www.philips.com/support.
640 x 480 - 60Hz●
800 x 600 - 60Hz
●
1024 x 768 - 60Hz
●
1360 x 768 - 60Hz
●
1920 x 1080 - 60Hz
●
●
480i - 60Hz
4
●
80p - 60Hz
●
576i - 50Hz
●
576p - 50Hz
●
720p - 50Hz, 60Hz
●
1080i - 50Hz, 60Hz
●
1080p - 50Hz, 60Hz.
Supported stor age device: USB ( NTFS, FAT or
FAT 32 USB storage devices are suppor ted.)
Compatible multimedia file formats:
Image: JPEG
Audio: MP3
Video: MPEG 2/MPEG 4 , H.264
● W x 2
43" : 8
● W x 2
50" : 8
43" : 1920
● x 1080
50" : 1920
● x 1080
13
Page 16
Tuner / Reception /
Transmission
● Aerial input: 75ohm coaxial (IEC75)
● Supported Systems:
ATV: PAL, SECAM, I, D/K, B/G, L
DTV: DVB-T/T2.
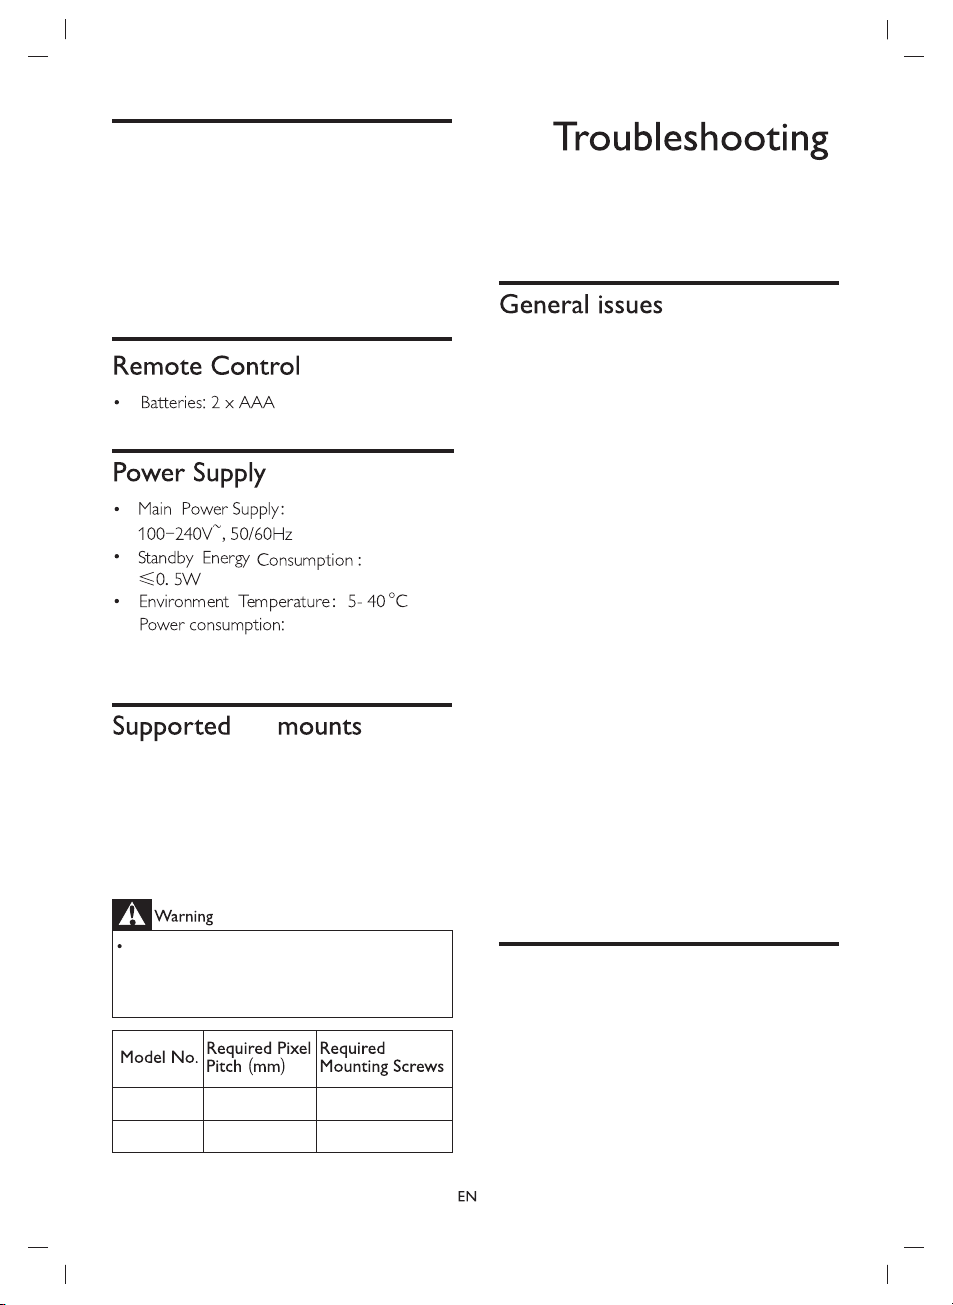
●
43" : 75W
●
50" : 110W
TV
To mount the , please purchase a Philips
mount or any TV mount compliant with the
VESA standard. To prevent damage to cables
and connectors, be sure to leave a clearance
gap of at least 2.2 inches or 5.5cm between the
back of the TV to the wall.
TV TV
7
This section covers common problems and their
accompanying solutions.
The TV cannot be switched on:
● Disconnect the power cable from the
power outlet. Wait for one minute before
reconnecting it.
● Check that the power cable is securely
connected.
The remote control is not working properly:
● Check that the remote control batteries
are correctly inserted according to the +/orientation.
● Replace the remote control batteries if
they are flat or weak.
● Clean the remote control and TV sensor
lens.
The TV menu is in the wrong language.
● Change the TV menu to your preferred
language.
When turning the TV On/Off or to Standby,
you hear a creaking sound from the TV
chassis
● No action is required. The creaking sound
comes from the normal expansion and
contraction of the TV as it cools down and
warms up. This does not impact its
performance.
Please follow all instructions provided with the
mount. TP Vision Europe B.V. bears no responsibility
for improper TV mounting that results in accident,
injury or damage.
43"
50"
400 x 200
200 x 200 4 x M6
TV
4 x M6
Channel issues
Previously installed channels do not appear in
the channel list:
● Check that the correct channel list is
selected.
14
Page 17
The TV is on, but there is no picture:
● Check that the antenna is properly
connected to the TV.
● Check that the correct device is selected as
the TV source.
There is sound but no picture:
● Check that the picture settings are
correctly set.
Poor TV reception from the antenna
connection:
● Check that the antenna is properly
connected to the TV.
● Loudspeakers, unearthed audio devices,
neon lights, high buildings and other large
objects can influence reception quality. if
possible, try to improve the reception
quality by changing the antenna direction
or moving devices away from the TV.
● If the reception on one particular channel is
poor, please fine tune this channel.
There is poor picture quality from connected
devices:
● Check that the devices are connected
properly.
● Check that the picture settings are
correctly set.
The picture does not fit the screen; it is too
big or too small:
● Tr y using a different picture format.
The picture position is incorrect:
● Picture signals from some devices may not
fit the screen correctly. Please check the
signal output of the device.
The pictures are showing but sound quality is
poor:
● Check that all cables are properly
connected.
● Check that the volume is not set to 0.
● Check that the sound is not muted.
● Check that the sound settings are correctly
set.
The pictures are showing but sound comes
from one speaker only:
● Verify that sound balance is set to the
centre.
Please note that HDCP (High-bandwidth
●
Digital Content Protection) support can
delay the time taken for a TV to TV
content from a HDMI device.
● If the TV does not recognize the HDMI
device and no picture is displayed, please
try switching the signal source to another
device before switching it back again.
● If there are intermittent sound disruptions,
please check that output settings from the
HDMI device are correct.
TV
Check that your PC uses the
●
supported resolution and refresh rate.
● Set the TV picture format to unscaled.
15
Page 18
Contact us
If you cannot resolve your problem, please refer
to the FAQs for this model at
www.philips.com/suppor t.
If the problem remains unresolved, please
contact your local Philips Customer Ser vice
Centre.
Do not attempt to repair the yourself. This may cause
severe injury, irreparable damage to your TV or void your
warranty.
Please make a note of your model and serial number
before you contact Philips Customer Service Centre.
These numbers are printed on the back/bottom of the
TV and on the packaging.
TV
TV
16
 Loading...