

Philips 29PT9420/69R User Manual

TV
TV
cover 2145.3 (16x24) 24-10-2002 08:48 Pagina 1

cover 2145.3 (16x24) 24-10-2002 08:48 Pagina 2
1
English
Contents
Preparation 2
Keypad on top of the TV 2
Your remote control 3-5
Use of the menus and the menu system 6
Menu Info / Remote Control Info 7
Select the menu language 7
Store TV channels
Automatic installation 8
Manual installation 9
Give name 9
Reshuffle the channel list 9
Select favourite TV channels 9
Install TV setup
Speakers 10-11
General 11-12
Source 12
Demo 12
Installation
TV menu
Picture menu 13
Sound menu 14-15
Features menu 15-16
Dual screen/PIP 16
Multipip 17
Teletext 17-18
Connect Peripheral Equipment
Connecting and selecting equipment 20-24
Remote control functions for peripherals 24
Recording 24
Before calling service 25
Tips 26
Glossary 26
Specifications 27
Help?
If this instruction manual does not
give an answer or if ‘Before calling
service’ do not solve your TV
problem, you can call your Local
Philips Customer or Service Centre.
See the supplied World-wide
guarantee booklet.
Please, have the Model and Product
number which you can find at the
back of your television set or on the
packaging, ready, before calling the
Philips helpline.
Model:
Product No:
Operation
315 2145.3 (16X24) 31-10-2002 08:43 Pagina 1
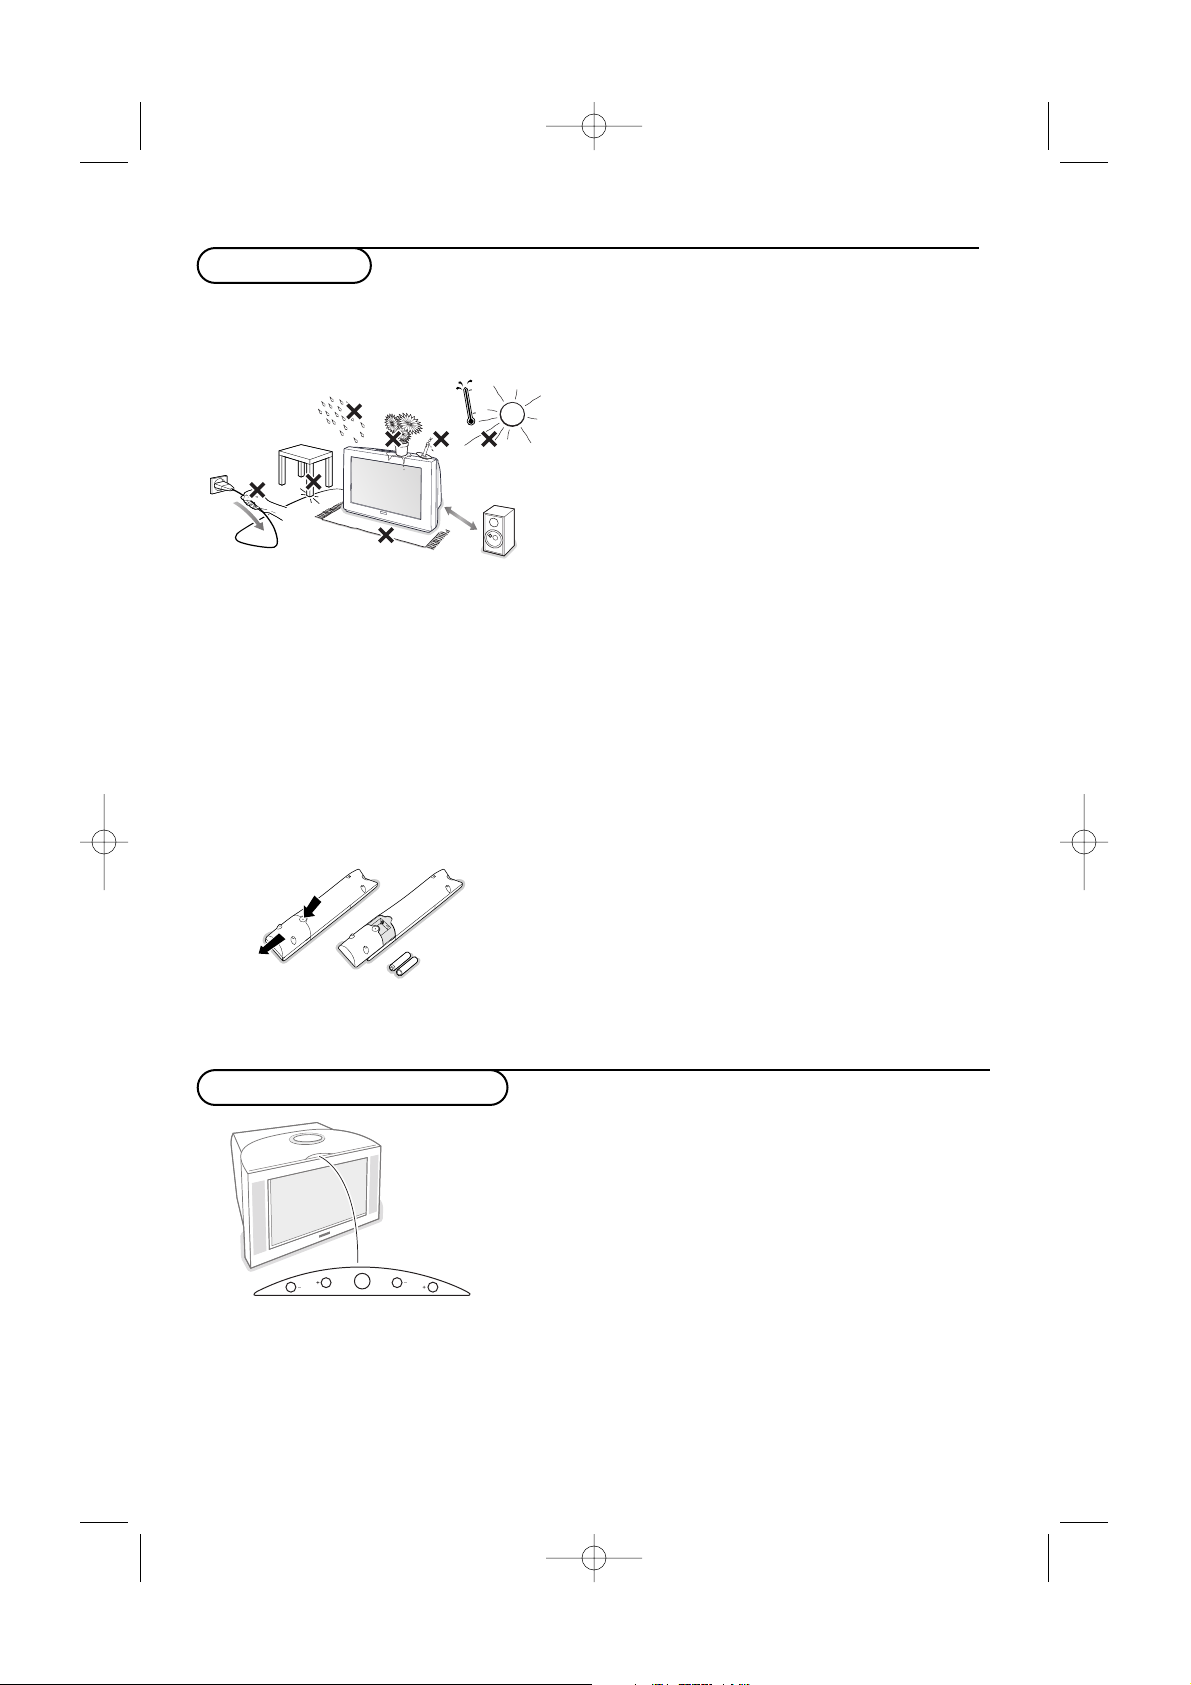
2 Installation
& Place the TV on a solid surface.
For ventilation, leave at least 5 cm free all
around the TV.
Do not place the TV on a carpet.
To prevent any unsafe situations, do not place
any objects on top of the TV. Avoid heat,
direct sunlight and exposure to rain or water.
Keep mobile telephones at a safe distance to
avoid disturbances in picture and sound.
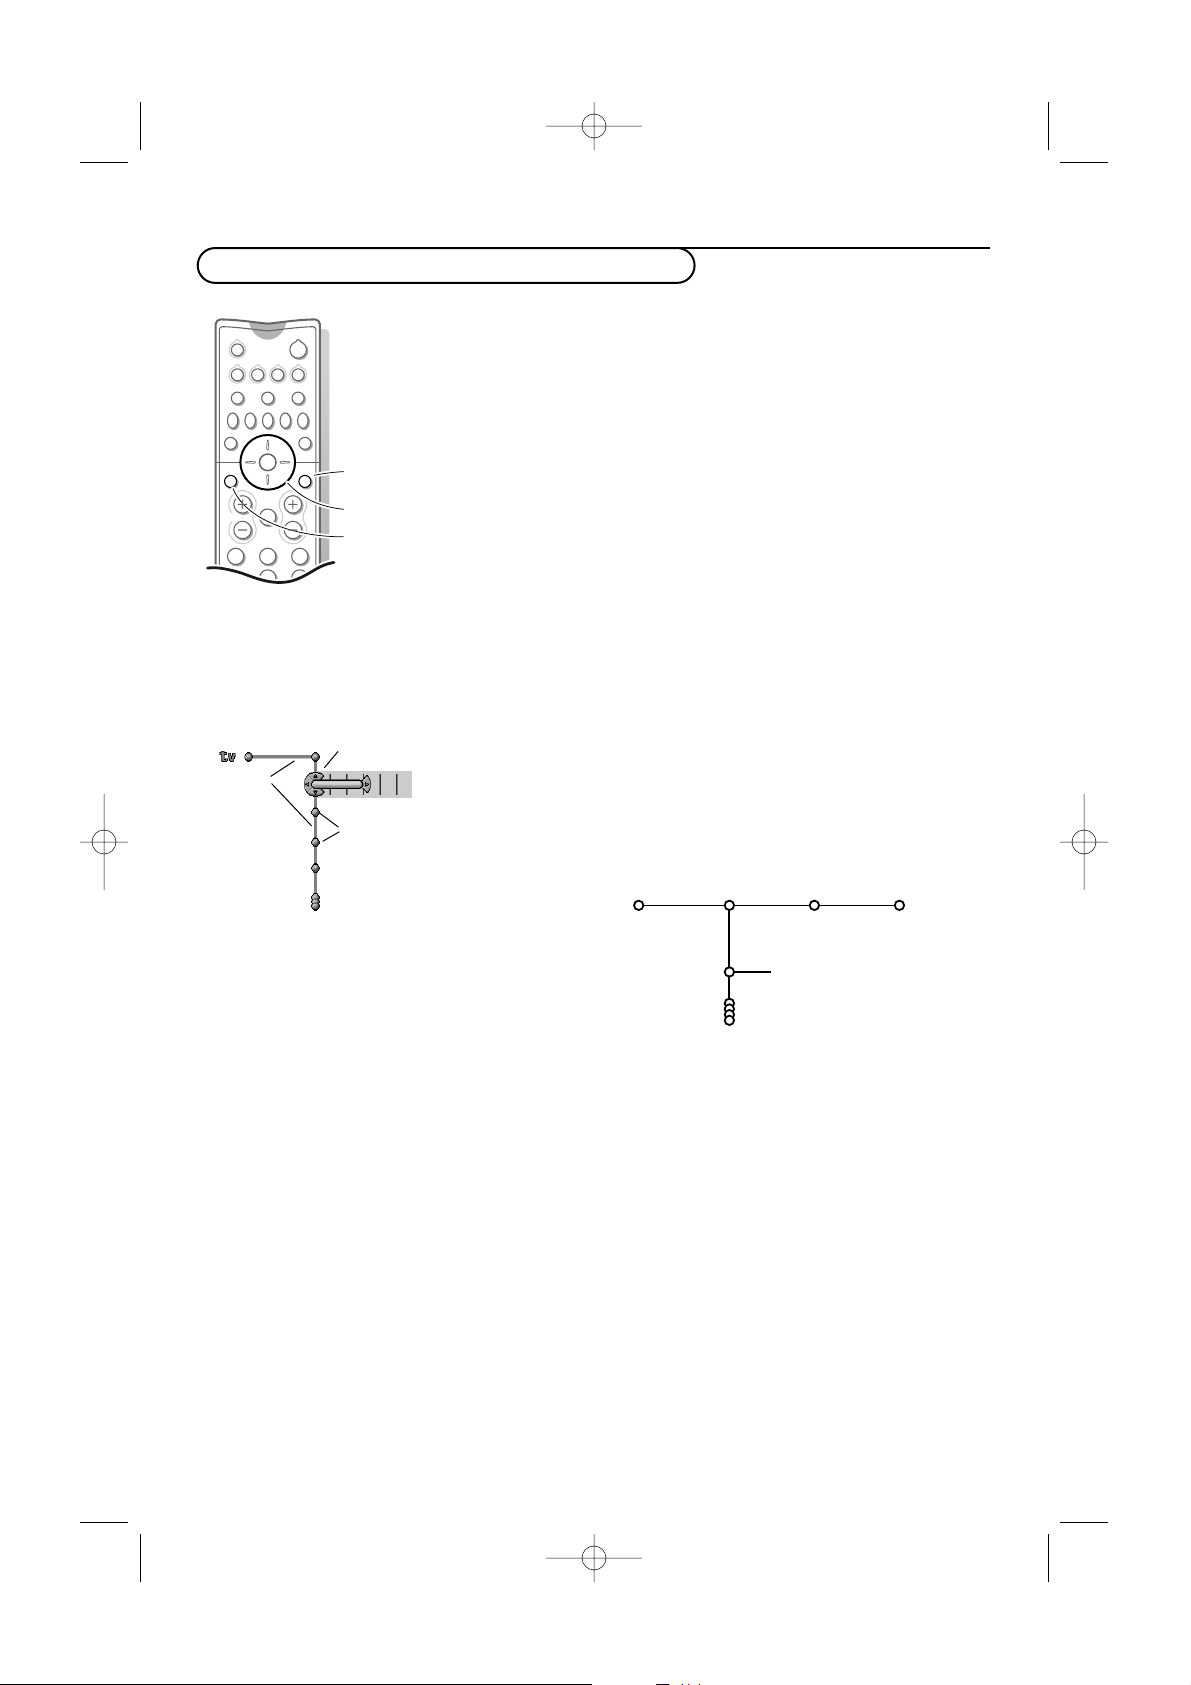
é Insert the aerial plug firmly into the aerial
socket x at the back of the TV. For best
picture quality use the suppressor-aerial cable
supplied.
“ Remote control: Remove the cover of the
battery compartment.
Insert the 2 batteries supplied (Type R6-1,5V).
Preparation
The batteries supplied do not contain the
heavy metals mercury and cadmium.
Nevertheless in many countries exhausted
batteries may not be disposed of with your
household waste. Please check on how to
dispose of exhausted batteries according to
local regulations.
Note: this remote control functions with TVs and
other equipment which use the RC6 signalling
standard.
‘ Insert the mains plug of the TV in the wall
socket having a mains voltage of 220V-240V.
To prevent damaging the mains (AC) cord
which could cause a fire or electric shock, do
not place the TV on the cord.
( Switch the TV on : Press the power switch
A on the front of your TV.
A green indicator on the front of the TV
lights up when the screen is on.
If the indicator is red, press the
- CH + keys
on the remote control.
The green lamp blinks every time you press a key
on the remote control.
When you switch on your set for the first time,
the menu
Language automatically appears on
the screen.The explanation appears in different
languages one at a time. Choose your own
language and press the OK key on the remote
control.
V
CH
M
Keypad on top of the TV
Should your remote be lost or broken you can still change
some of the basic settings with the keys on top of your TV.
• Press the V - or + key to adjust the volume.
• Press the CH - and + key to browse through the TV
channels or sources stored and to select them.
• Press the
M key to summon the main menu.
Use the V - and + keys to select the menu items in the
horizontal axis.
Use the
CH - and + keys to select submenu items in the
vertical axis.
Note:
- Sometimes not all the menu items are visible on the screen.
Press the
CH + key to reveal all items.
- Exit lets you dismiss the menu. Select
Exit and press the M key.
2
315 2145.3 (16X24) 31-10-2002 08:43 Pagina 2
AA - 1,5V
min.
1m
3
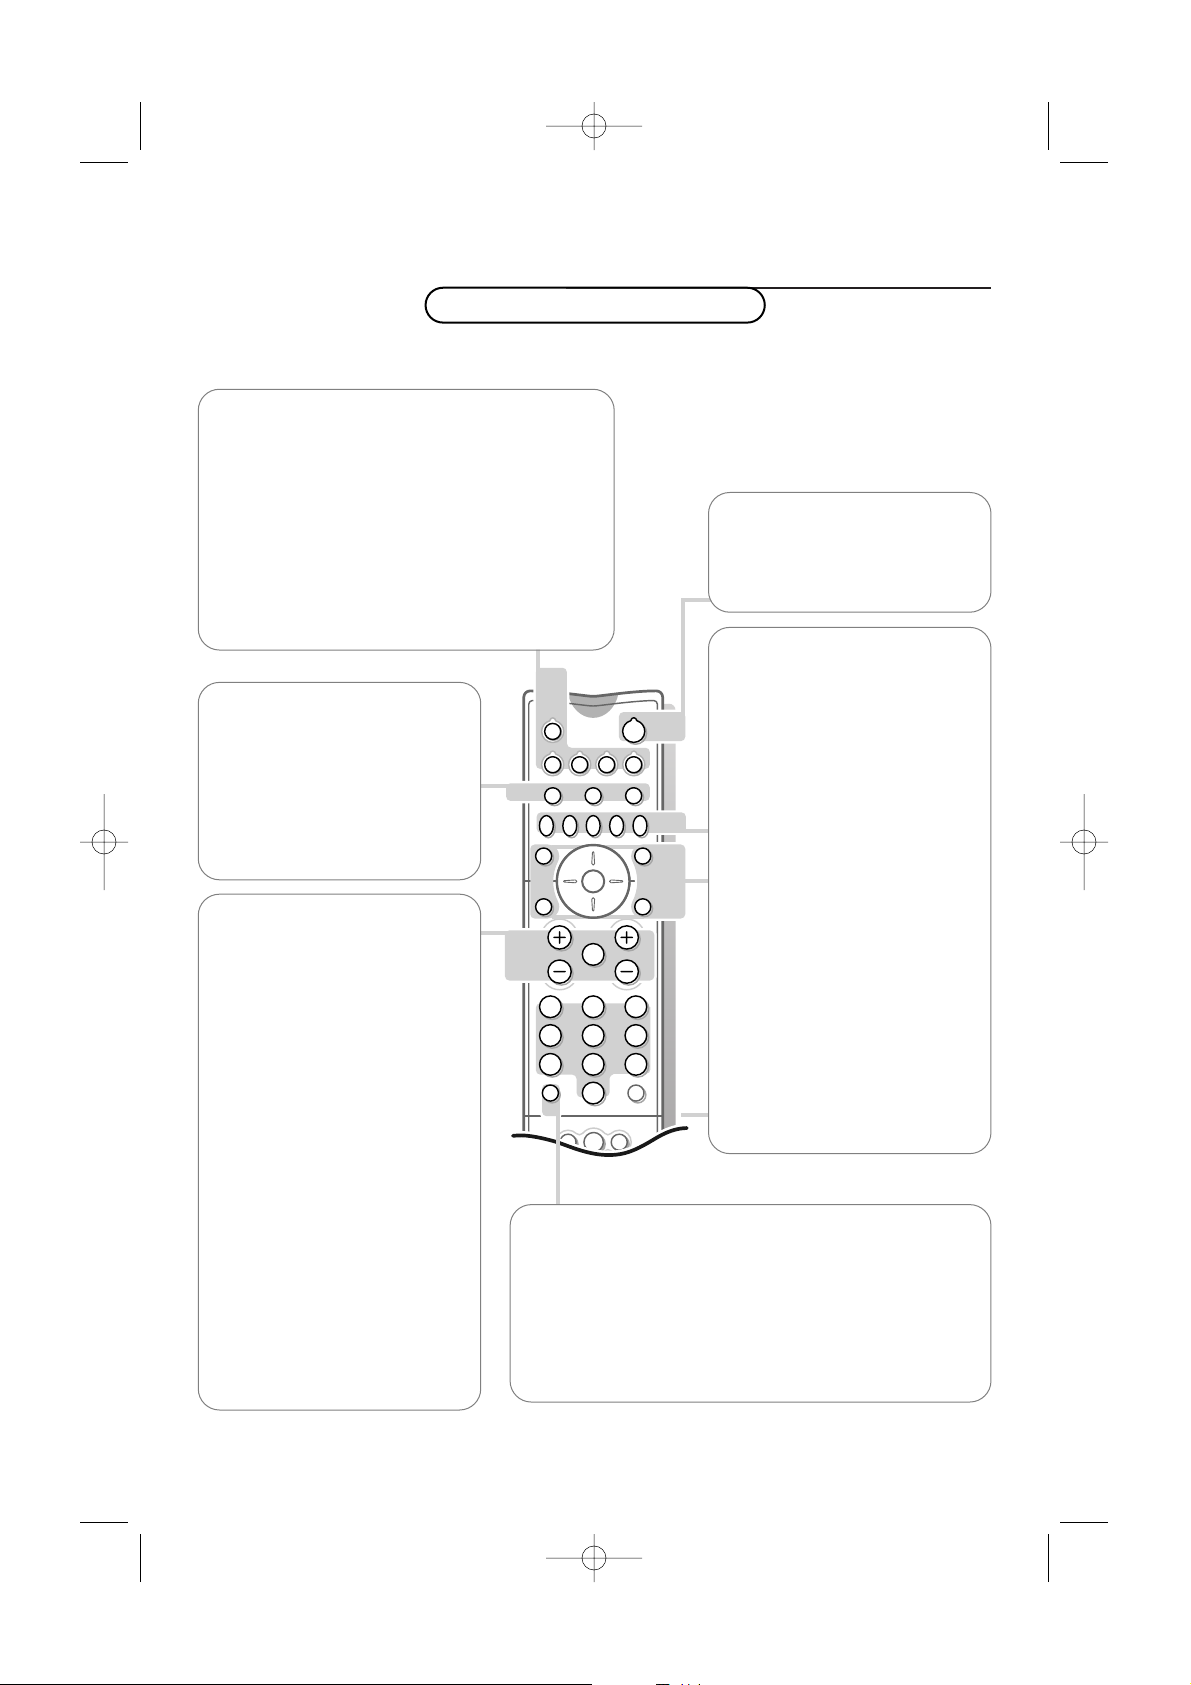
Use of the remote control
Installation
M h a
SMART
ACTIVE
CONTROL
SMART
PICTURESOUND
213
546
879
0
B
v
®Ò‡π
†
bx
Ï
i
DVDVCR AMP AUX
¬V CH
0
Sb fi
OK
MENU
PIXEL
PLUS
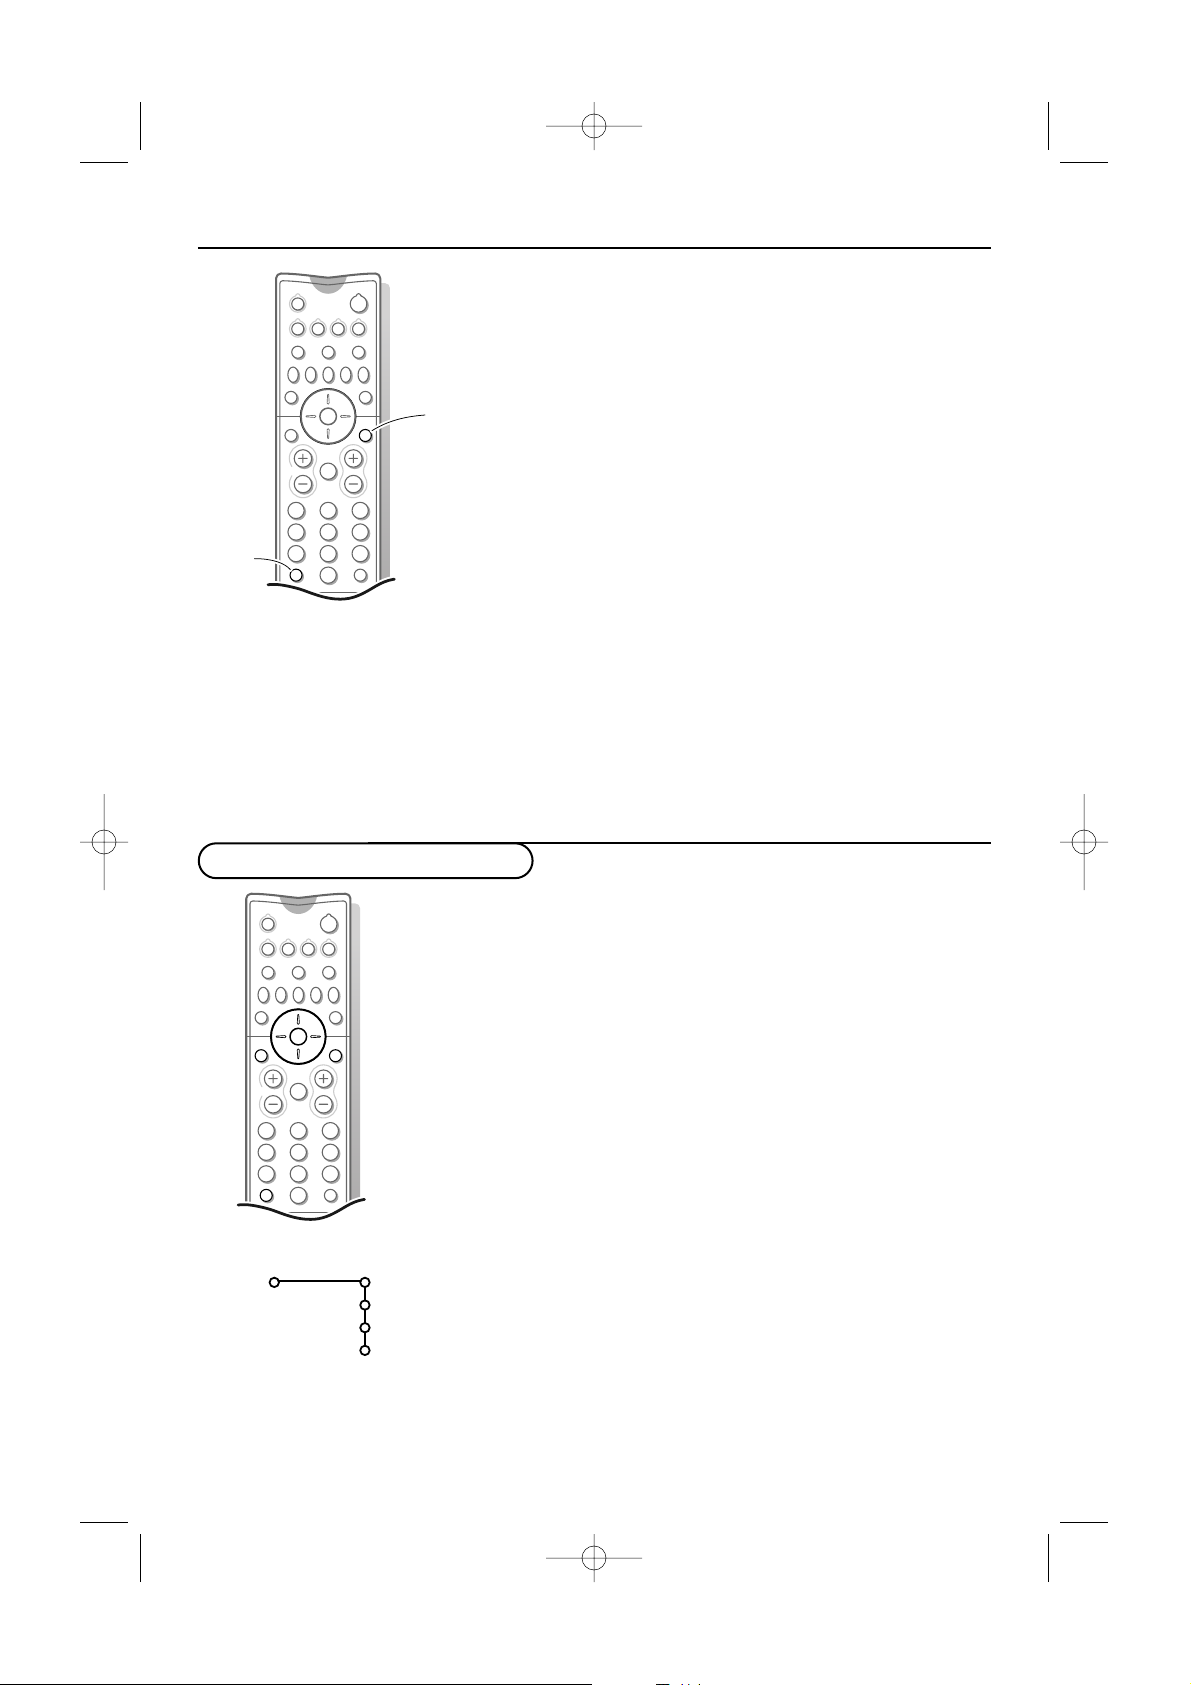
v Select peripherals
Press this key repeatedly to select
AV1 , AV2, AV3,
AV4 or SIDE, according to where you connected
the peripherals (p. 20).
VCR DVD AMP AUX
Press one of these keys to use the remote control
directly in the video recorder, DVD, amplifier or
other auxiliary mode (
CD, SAT). A green indicator
lights up.
To return to TV mode, press the key again or wait
for the indicator to dim (20 sec.)
B Standby
The set is switched off and the
red indicator lights up.
To switch the TV on again, press
again.
®Ò‡π†
Video recorder see p. 20
x Switching Pixel Plus
demo on/off
& Press the Pixel Plus key.
The TV screen is divided into 2
parts:
- in the left part Pixel Plus and
Digital Natural Motion switched
off;
- in the right part Pixel Plus and
Digital Natural Motion switched
on.
é Press the Pixel plus key again to
switch the Pixel Plus demo off.
b Teletext on/off p. 17
Ï Main menu on/off p. 13
OK Press this key to activate
your choice, when in the menus.
b Dual screen see p. 16.
S Freeze
To activate/de-activate the frozen
picture, p. 12 and to hold a
teletext page. See p. 18.
fi Multipip
see p. 17.
Use the on-screen info for more information about the different
keys. See p. 7.
3
Use of the remote control
V Press + or - to adjust the
volume.
¬ Interrupt the sound or
restore it.
CH Channel selection
To browse through the TV
channels and sources stored.
Only those channels which are
in the favourite list can be
selected with the
- CH + keys.
0/9 Digit keys
To select a TV channel.
For a two digit channel number,
enter the second digit within 2
seconds.
To switch immediately to a
selected one digit TV channel,
keep the digit key pressed a bit
longer.
i Screen information
Press to display information about the selected TV channel
and programme.
Menu / Remote Control Info
When the menu is on screen, press i to display info on
the selected menu item.While the menu info is displayed,
press any key to display remote control info. See p. 7.
315 2145.3 (16X24) 31-10-2002 08:43 Pagina 3

4
U
QZq c
h
213
546
879
0
B
v
®Ò‡π
†
bx
Ï
i
VCR DVD AMP AUX
¬V CH
0
Sb fi
OK
MENU
PIXEL
PLUS
4
Use of the remote control
0 Smart surf
With this feature you can easily switch between up to 9 different TV channels/sources.
In the menu system, you can set Smart surf to 2- or 9-channel.
Press this key to select the previously viewed TV channel or source in case of a 2 channel
surf, or to select the surf ring in case of a 9 channel surf.
In case of a 9 channel surf, a list appears at the right side of the screen. On top, the most
recent channel is displayed.The puck is on the channel number currently viewed.
Press the 0 key to turn to the next channel in the list or press cursor up/down to
immediately select the desired TV channel of the list.
To add a new channel or source: tune to the channel or source you wish to add.
Press the 0 key. Press the cursor right to add.
If there are already nine channels/sources in the list, the one at the bottom of the list will be
removed.
To remove a channel or source: select the channel number you want to remove.
Press the 0 key. Press the cursor right to remove.
Press the OK key or wait for the time out to dismiss the Smart surf display.
U Time display: The time
is displayed on the screen.
h Teletext function p. 18.
Q Surround mode
Press this key repeatedly to
select another available
surround mode: Stereo, Dolby 3
Stereo, 3D Surround, Hall or
Dolby Pro Logic.
Z ZOOM on/off
Press the
ZOOM Z key to
activate/ deactivate the zoom
function.Press the OK key
repeatedly to select one of the
zoom magnifications (x1, x4, x9,
x16). Use the cursor up/down,
left/right to shift the selected
zoom window over the screen
with the cursor.
The zoom window is reset
after: selecting another TV
channel, another picture format
or when another picture format
is selected automatically.
q Picture format
Press this key repeatedly to
select another picture format:
Auto format, 4:3 or Vertical
squeeze.
Auto format makes the picture
fill the screen as much as
possible.
Vertical squeeze squeezes the
picture to a wide screen picture
format.
c Swapping screens
See p. 16.
Auto format
Vertical squeeze
315 2145.3 (16X24) 31-10-2002 08:43 Pagina 4
5
Mah
213
546
879
0
i
¬V P
0
SMART
SMART
ACTIVE
CONTROL
rc2049 use rc 3
5Use of the remote control
Personal refers to the personal
preference settings of picture
and sound selected in the
picture and sound menu.
Remark: the moment you are in a
predefined smart sound or picture
setting and you modify a setting in
the picture or sound menu, all
values of the menu will overwrite
the previously made Personal
settings. The predefined factory
settings remain unchanged.
Smart Keys
To select predefined picture and
sound settings.
M Smart Sound
Each time it is pressed, a
different sound setting is
selected, corresponding with
specific factory settings of treble
and bass.
a Smart Picture
Each time it is pressed, a
different picture setting is
selected, corresponding with
specific factory settings of
Contrast, Colour, Sharpness,
Dynamic Contrast and Colour
enhancement.
h Active control
Active control is a pro-active and automatic system. The TV continuously
measures and corrects all incoming signals in order to provide the best
picture possible.Thanks to the Ambient Light Sensor which measures the
light conditions of the room, the contrast, dynamic contrast, brightness and
colour picture settings are adjusted automatically. The light sensor is active
when the Active control function is switched to Medium or Maximum.
Press the h key repeatedly to select the Active Control values Off,
Minimum, Medium (recommended) or Maximum.
Off Sharpness and Dynamic Contrast are controlled automatically
Minimum Sharpness, Dynamic Contrast and Noise Reduction are
controlled automatically.
Medium Sharpness, Dynamic Contrast, Noise reduction and Colour are
controlled automatically.
Maximum Sharpness, Dynamic Contrast, Noise reduction, Colour and
Contrast are controlled automatically.
Press the cursor right to select
INFO+.
The Active Control demo menu appears.
The picture settings are being adapted continuously and automatically.
The menu items cannot be selected.
The sliders will be moving, showing how the TV is tweaking the current
picture. None of the sliders is user controllable.
Press the OK key to switch off the Demo.
315 2145.3 (16X24) 31-10-2002 08:43 Pagina 5
66 Installation
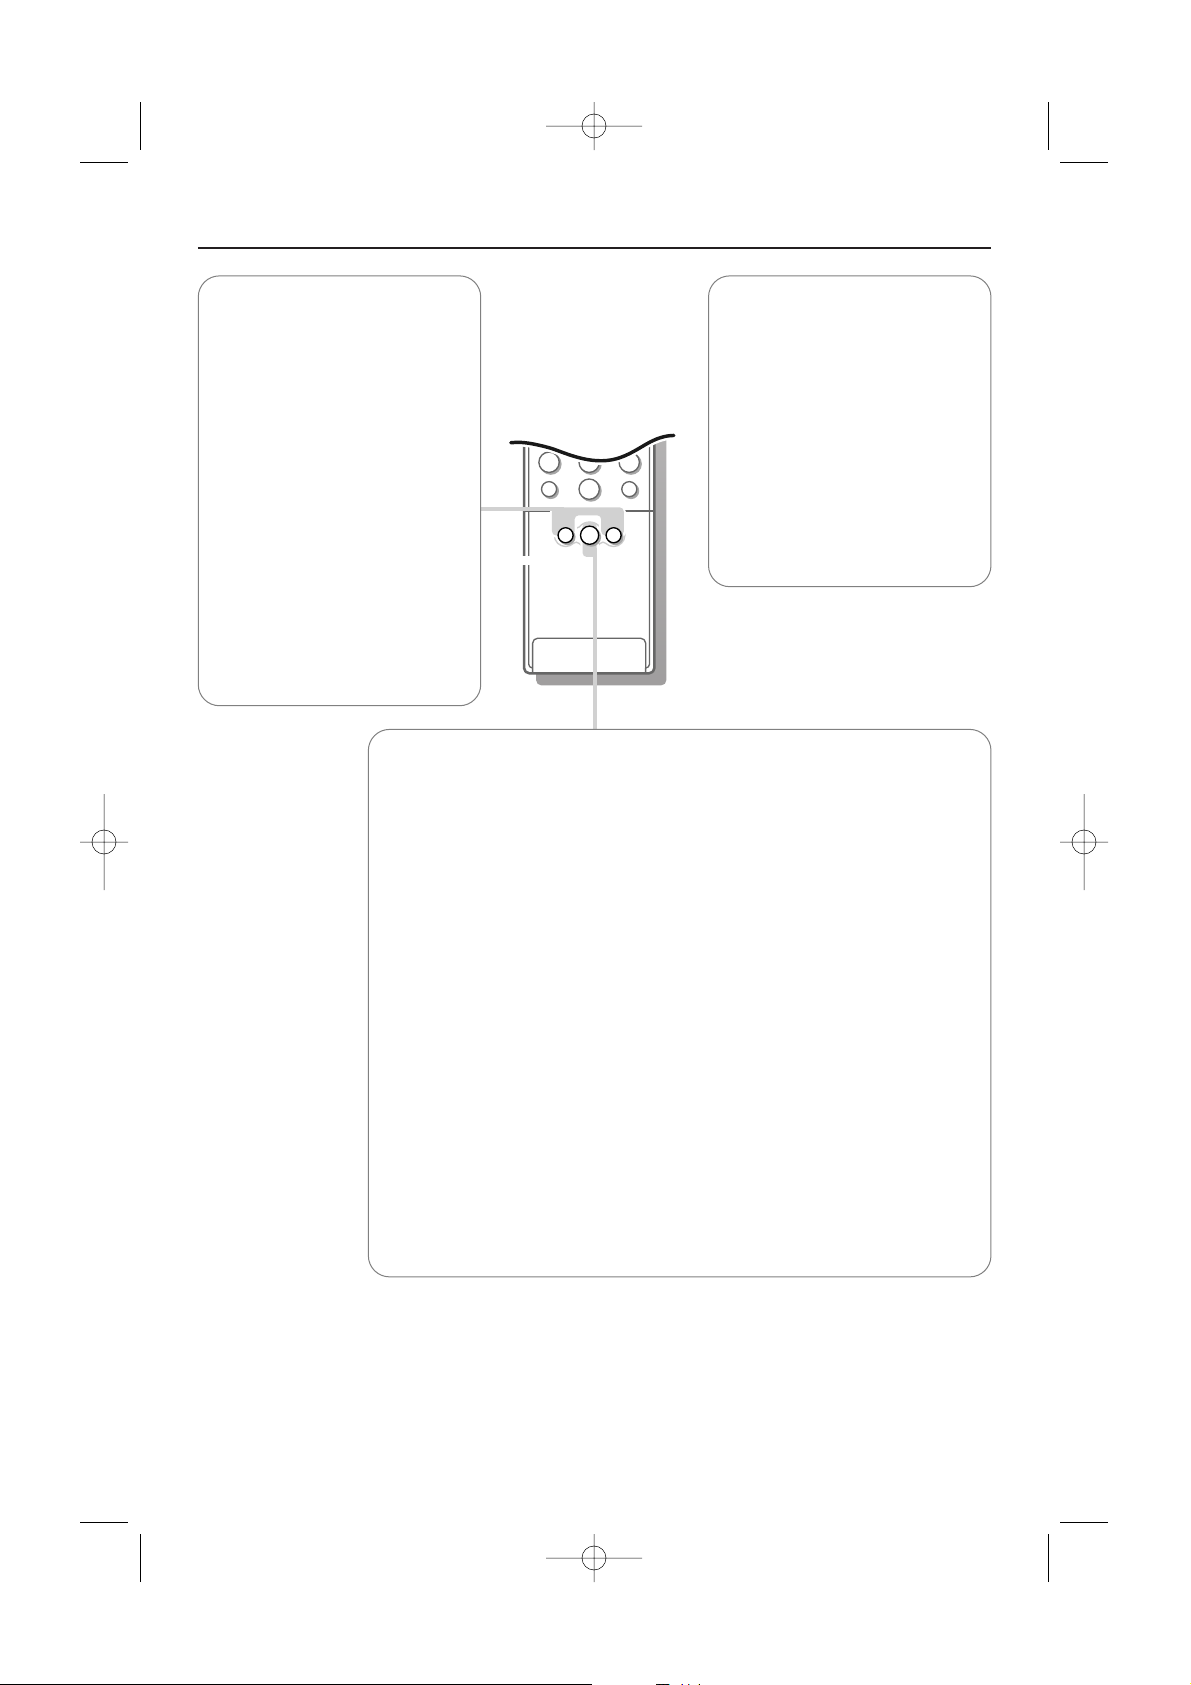
Use of the menus and the menu system
213
546
B
w
bx
Ï
VCR DVD AMP AUX
¬V CH
Sb fi
OK
MENU
PIXEL
PLUS
OK key to
activate
cursor to select
adjustments
return or switch
main menu on/off
& Press the MENU Ï key on the remote control to
summon the main menu.
Note: Should your remote control be lost or broken you can still
use the keys on top of the TV. See p. 2.
é Use the cursor in the up/down direction to select the TV,
Settings, Install or Demo menu.
Note: Sometimes not all the menu items are visible on the screen.
Press the cursor down to reveal all items.
“ Use the cursor left/right to select the menu item.
‘ Use the cursor up/down again to select the control you
want to select or to adjust. For instance, see Picture menu.
( Press the
MENU Ï key to turn off the main menu.
The menu system
Pipes, balls and a puck
The hierarchy of menus and controls is
represented by an animated visual mechanism of
pipes, balls and a puck. Unlike a map, however, the
animated mechanism constantly shows the current
whereabouts, continually expands the view of the
immediate neighbourhood.
The puck surrounds the ball indicating the user’s
current position in the menu hierarchy.The puck is
always present when the menu system is displayed.
The puck is divided into 4 parts.They correspond
to the directional controls (up/down, left/right) on
the remote control.The arrows on the cursor
indicate which directions to choose. In this way
users can navigate through the menu hierarchy to
the control they wish to adjust.
When menu items are more numerous than can
fit comfortably on the TV display, only a portion
are shown.
Those omitted are indicated by a cluster of balls
which indicates that there are ‘more’ below.
Direct selection and control
Menu items are controlled as soon as they are
selected by the puck. Only a few items require
information with the OK key.
List controls
A list control is used to select one or more items
from a list of options. Press the right key to move
the puck into the list.At least one item is the
current value and is highlighted.
Moving the puck up or down with the up/down
key causes the list to move up or down.
pipes
puck
balls
Picture Sound Features
Digital options
100 Hz Dig. Scan
Pixel Plus
Double lines
TV
315 2145.3 (16X24) 31-10-2002 08:43 Pagina 6
77Installation
213
546
879
0
B
w
x
Ï
i
VCR DVD AMP AUX
¬V CH
0
Mqa
SMARTSMART
Sb fi
OK
MENU
PIXEL
PLUS
Ï
Language
English
....
.....
Install
Menu Info
& Press the MENU Ï key and select a menu item or
submenu item.
é Press the i key on the remote control to get
information about the selected menu item.
“ Press the i key again to exit.
Remote Control Info
& Press the MENU Ï key.
é Press the i key.
“ Press any key on the remote control (except the
cursor keys, the OK, the
MENU Ï, the digit, the i
and the B keys) and you get information about the
pressed key.
The normal function of the key is not executed.
The moment one of the remote control keys which do
not invoke remote control info, is pressed, remote info
is cancelled.
‘ Press the i key to display the menu that was on
screen before a remote control key for info was
pressed.
213
546
879
0
B
w
x b
Ï
i
VCR DVD AMP AUX
¬V CH
0
Mqa
SMARTSMART
Sb fi
OK
MENU
PIXEL
PLUS
Select the menu language
& Press the MENU Ï key on the remote control.
When you switch on your TV for the first time and no
channels are stored so far, the menu Language
automatically appears on the screen. This menu also has
an additional item
Exit with which the menu can be
dismissed.The explanation appears in different languages
one at a time. Choose your preferred language and press
the OK key on the remote control. Proceed with the Install
menu.
é Use the cursor down to select Install.
“ Use the cursor right to select Language.
Follow the instructions on screen.
‘ Use the cursor up/down to select your preferred
language and press the OK key to confirm your
selection.
( Proceed with the Install menu.
315 2145.3 (16X24) 31-10-2002 08:43 Pagina 7
 Loading...