

Philips 28PW8505/12, 28PW8505/12S, 32PW8505/12, 32PW8505/58, 28PW8505/58 User Manual

Contents
1
English
Your remote control 2
Preparation 3
Installation 4
Store TV channels 4
Select the menu language and country 4
Automatic installation 5
Manual installation 5
Give name 6
Reshuffle the programme list 6
Select favourite TV channels 6
Install TV setup 7
EasyLink features are based on the “one touch operation” approach.This
means that a sequence of actions are executed at the same time in both
the television and the video cassette recorder, provided both are fitted
with the EasyLink function and connected with the eurocable
supplied with your video recorder.
Installation
Operation
Use of the remote control 8-10
Use of the menus
Picture menu 11
Sound menu 11
Features menu 12
NEXTVIEW 13-16
Teletext 17-19
The keys on top of the TV 19
Connect peripheral equipment
Connecting and selecting equipment 20-23
Remote control functions for peripherals 23-24
Recording 25
Tips 26
Index 26
Glossary 27
M h a
SMART
PICTURE
ACTIVE
CONTROL
SMART
SOUND
213
546
879
0
B
w
®
Ò
‡π
†
æ b
qÏ
i
Mqa
bQ
TV VCR DVD SAT
TUNER CD TAPE CDR
SMARTSMART
PICTURESOUND
¬V P
0
◊
MENU
U
XP
fh
OK
o
œ
pπ
® S
yÚ
INSTANT
ZOOM
2 Preparation
Preparation
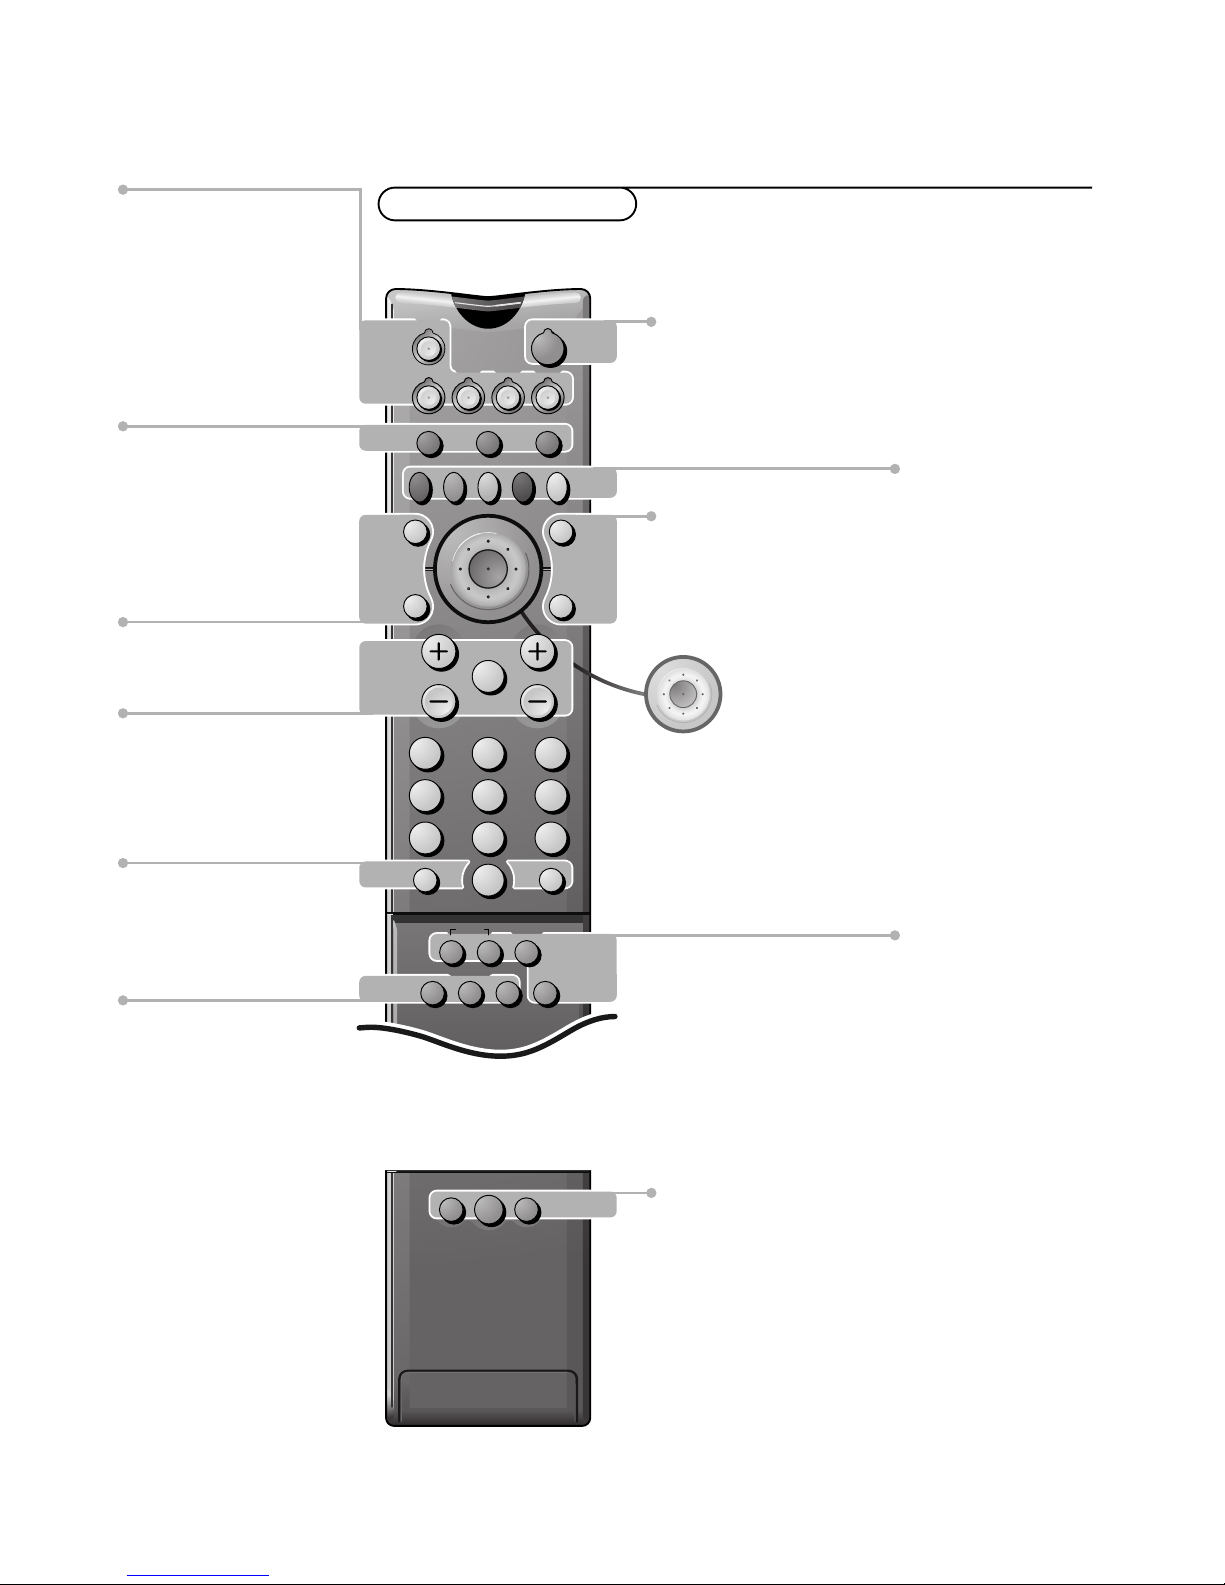
Your remote control
Teletext p. 18
U time display/subpage selection
f solution to puzzles
display PDC/VPS code
h enlarge
P no function
Smart Controls
M smart sound p. 9
h active control on/off p.9
a smart picture p. 9
B switch to standby p. 8
i on screen info p. 8
0 previous programme p. 8
◊ video recorder/DVD function p. 8
X bilingual choice/sound info p.10
TXT language group selection p. 17
EasyLink p. 11
®
INSTANT recording
S freeze the picture p. 10
hold teletext page p. 18
b teletext on/off p. 17
Ï main menu on/off p. 8
cursor to select
your choice p. 11
OK activate your choice
Installation p. 4
V volume up/down p. 8
¬ sound mute p. 8
P programme selection p. 8
Peripherals p. 23
w selection of EXT1, EXT2 or
FRONT
TV, video recorder (VCR), DVD,
Satellite (SAT), TUNER, CD, TAPE or
cd-recordable (CDR) selection.
Colour keys
-
NEXTVIEW selection p. 13
- direct teletext page or
subject selection p. 17
Audio- and Video equipment p. 23-24
O no function
b dual screen on p. 9
Q incredible surround on/off p. 8
æ
NEX
TVIEW/TXT programme
guide on/off p. 13
q picture format p. 10

& Place the TV on a solid surface.
For ventilation, leave at least 5 cm free all around the TV.
Do not place the TV on a carpet.
To prevent any unsafe situations, do not place any objects on top of the TV.
Avoid heat, direct sunlight and exposure to rain or water.
é Insert the aerial plug firmly into the aerial socket x at the back of the
TV.
“ Insert the mains plug in the wall socket having a mains voltage of 220V-240V.
To prevent damaging the mains (AC) cord which could cause a fire or electric
shock, do not place the TV on the cord.
‘ Remote control: Remove the cover of the battery compartment.
Insert the 2 batteries supplied (Type R6-1.5V).
Press the TV key to be sure your remote control is in the TV mode.
The batteries supplied do not contain the heavy metals mercury and cadmium.
Nevertheless in many countries exhausted batteries may not be disposed of with
your household waste. Please check on how to dispose of exhausted batteries
according to local regulations.
Note: this remote control functions with TVs which use the RC6 signalling standard.
( Switch the TV on : Press the power switch A on the front of your TV.
A green indicator on the front of the TV lights up and the screen comes on.
If the indicator is red, press the -P+ key on the remote control.
The green lamp blinks every time you press a key on the remote control.
When you switch on your set for the first time, the menu
LANGUAGE
automatically appears on the screen.The explanation appears in different languages
one at a time. Choose your own language and press the OK key on the remote
control.
Go on to page 4.
3Preparation
Preparation
CABLE
R6 / AA
B
w
æ b
bQ
VCRTV DVD SAT
CDTUNER TAPE CDR
TV

4
Installation
Store TV channels
After the new or extra TV channels have been stored, the TV automatically transfers
those TV channels to the video recorder if it is equipped with the EasyLink function.
The message EasyLink : downloading ...... appears on the screen. The
programme list of the video recorder is now the same as the one of the TV. If the TV
is connected to a video recorder which supports the
NEXTVIEWLink function, the TV
also automatically transfers the language and country selections to the video
recorder.
First, select your language and country.
& Select Menu language and press the OK key in the centre of the cursor.
é Select your language and press the OK key in the centre of the cursor.
Use the cursor up/down to scroll through the list and to bring up other
languages which are not displayed on the screen at present.
“ Select Country and press the OK key in the centre of the cursor.
‘ Select the country where you are now located and press the OK key in the
centre of the cursor.
Use the cursor up/down to scroll through the list and bring up other
countries which are not displayed on the screen at present.
Select
Other when none of the countries applies.
You can now search for and store the TV channels in two different ways:
using automatic installation or manual installation (tuning-in channel by
channel).
Select your choice and press the OK key in the centre of the cursor.
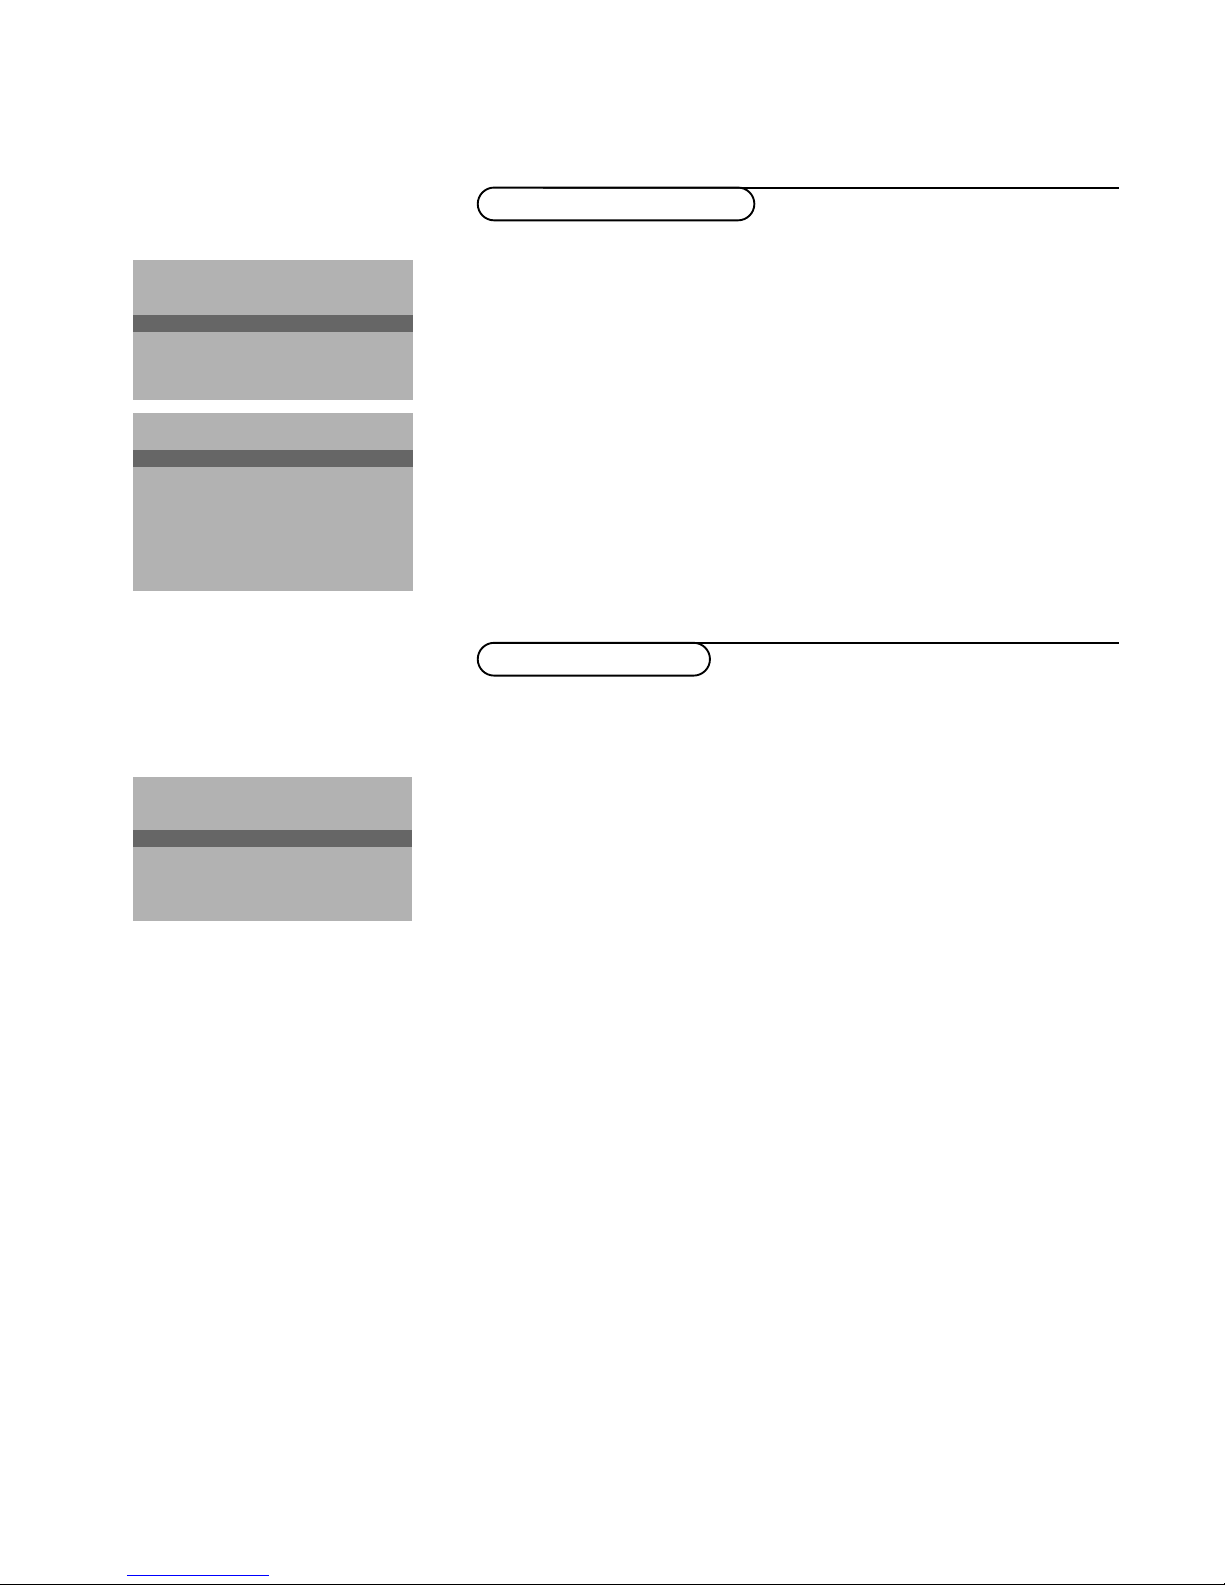
Select the menu language and country
MENU TITLE
Menu language
Country
Automatic Installation
J INSTALLATION
MENU TITLE
United Kingdom
....
....
J Country
MENU TITLE
English
....
....
J Menu language
& Open the door of the remote control.
é Press U and f at the same time.
Installation
Select the
INSTALLATION
menu
& Use the cursor in the up/down, left/right directions to select a menu item.
é Press the OK key in the centre of the cursor to activate.
“ Use the Ï key to return or to switch the menu off.
To use the menus
o
œ
pπ
o
œ
pπ
OK OK
213
546
879
0
i
¬V P
0
◊
U
X®S P
f h
INSTANT
ZOOM
yÚ
213
B
w
æ b
q Ï
TV VCR DVD SAT
TUNER CD TAPE CDR
¬V P
bQ
MENU
select menu item
return or switch
main menu off
activate
MENU TITLE
Subject 1
Subject 2
Subject 3
J Subject 4
Subject 5
Subject 6
J Subject 4 L M
Searching for and storing TV channels is done channel by channel.
You must go through every step of the Manual installation menu.
Selection mode is only present and lights up if the country selected also
offers the channel option (C-channels for aerial channels, S-channels for cable
channels).
You can choose either channel or frequency mode.
& Select the TV system
Select the country or part of the world from where you want to receive the
TV channel.
If you are connected to a cable system, select your country or part of the
world where you are now located.
é Press the cursor down and enter the programme number with the digit keys.
“ Search for a TV channel
Press the cursor left/right.
The frequency or the channel number increases until a TV channel is found.
Direct selection of a TV channel
If you know the frequency, the C- or S-channel number, enter it directly with
the digit keys 0 to 9.
Ask for a list from your cable company or dealer, alternatively consult the
Table of frequencies on the inside backcover of this handbook.
‘ Fine tune
In case of poor reception, you can improve the reception by adjusting the
frequency with the cursor left/right.
( To store your TV channel, select Store and press the OK key in the centre of
the cursor.
Repeat steps
& to ( to store another TV channel.
§ To exit from the menu press the Ï key on the remote control.
In the Automatic installation menu select
Start and press the OK key in the
centre of the cursor to activate the searching. All TV channels are searched
for and stored automatically.
If a cable system which broadcasts ACI (Automatic Channel Installation) or a
TV channel transmitting a teletext page with the frequencies and programme
names of all the TV channels which can be received, is detected, the search is
stopped and a programme list appears.
The programme list is automatically filled with all the programme numbers
and names of the TV channels transmitted.
It is possible that the cable company or the TV channel displays a broadcast
selection menu. Layout and items are defined by the cable company or the TV channel.
Make your choice with the cursor and press the OK key in the centre of the cursor.
To exit from the menu press the Ï key on the remote control.
Go on to page 6.
5Installation
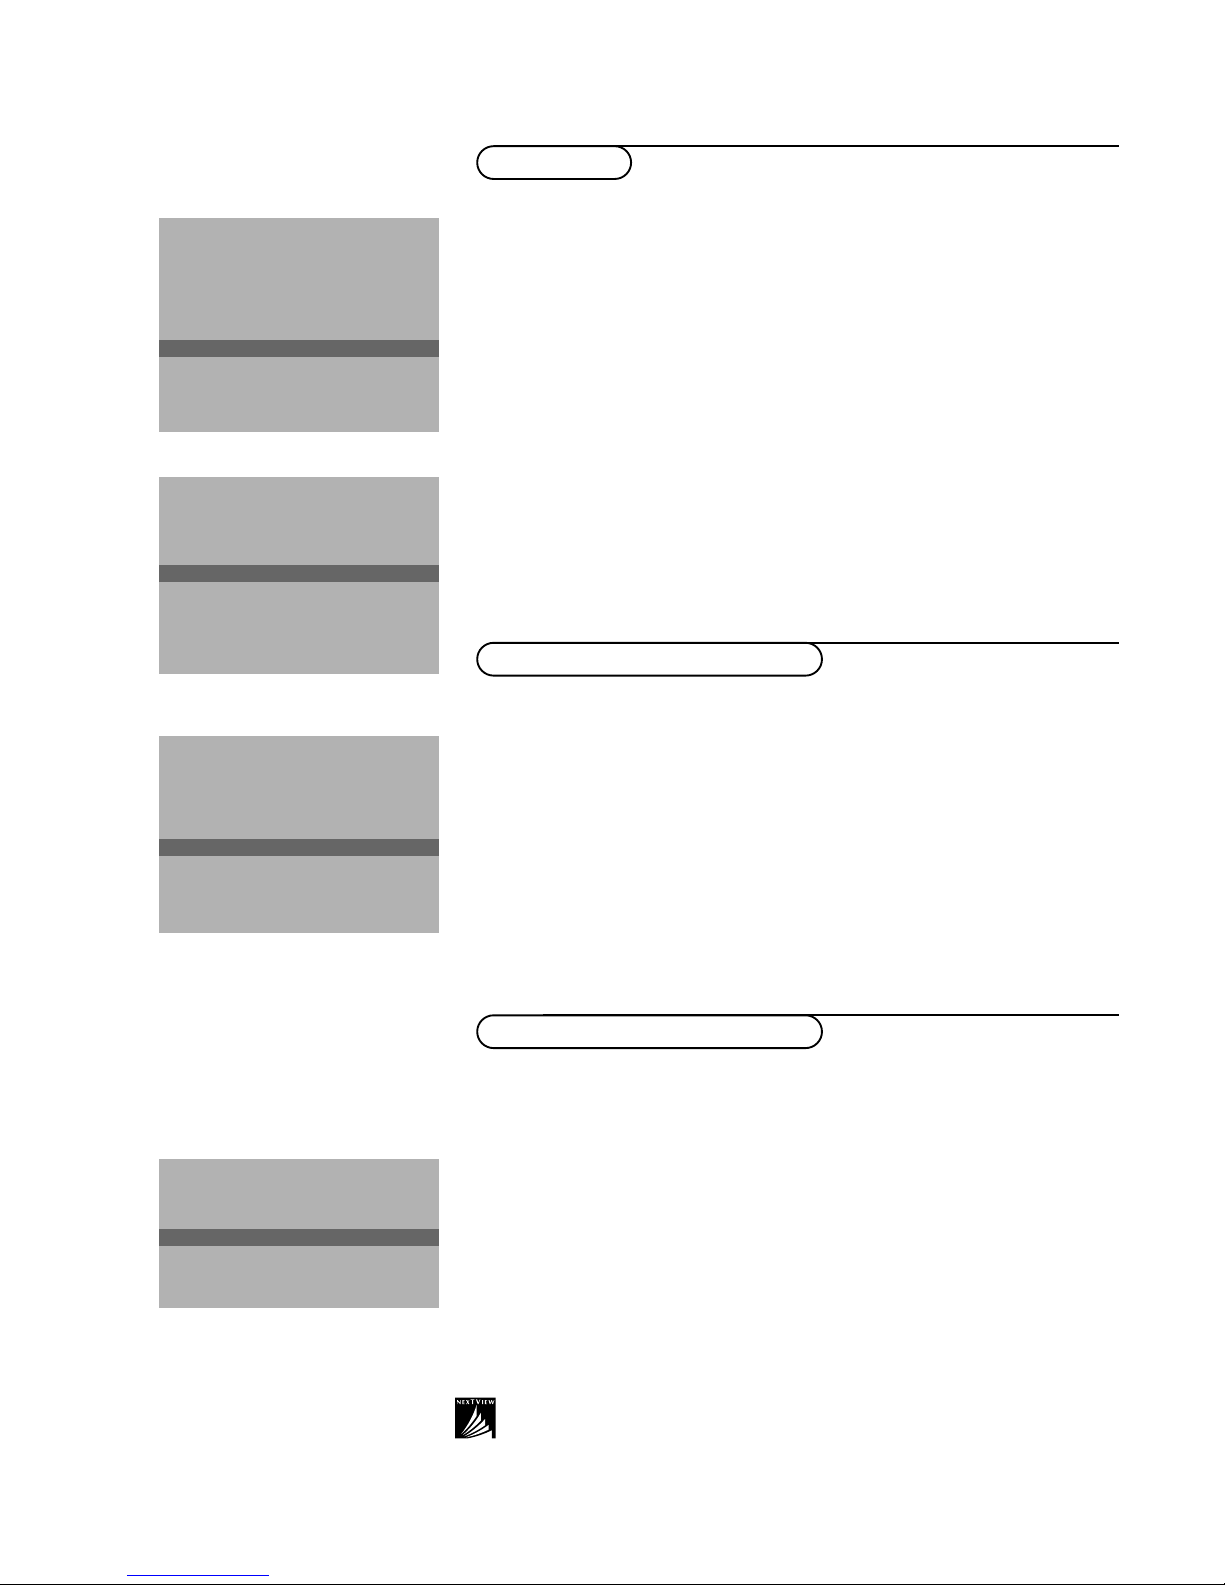
Manual installation
Automatic installation
Automatic installation
Start
Stop
TV is searching
One moment please ...
J Stop K
Automatic installation
Start
Stop
1 BBC1
2 BBC2
3 CNN
....
....
J Start K
Manual installation
(Selection mode)
System
Programme no.
Search
Fine tune
Store
J System K
6
Installation
Give name
It is possible to change the name stored in the memory or to assign a name
to a TV channel which has not yet been entered.A name with up to 5 letters
or numbers can be given to the programme numbers 0 to 99. For example
SUPER, BBC1,... Between 99 and 0 you can also name any peripherals that
are connected to a euroconnector.
& Select Give name in the INSTALLATION menu and press the OK key in the
centre of the cursor.
é Select the programme number.
“ Press the OK key in the centre of the cursor.
‘ Select the character with the cursor up/down.
( Select the following position with the cursor right.
§ Select the following character.
è Press the OK key when finished.
! Press the Ï key to return to the INSTALLATION menu.
Space, numbers and other special characters are located between Z and A.
According to your preference you can change the order of the stored TV
channels.
& Select Reshuffle in the INSTALLATION menu and press the OK key in the
centre of the cursor.
é Select the programme number you want to exchange.
“ Press the OK key in the centre of the cursor.
‘ Select the new number you want to exchange it with.
( Press the OK key in the centre of the cursor.
Repeat the operation until all TV channels are allocated as you like.
§ Press the Ï key to return to the INSTALLATION menu.
Reshuffle the programme list
After leaving the installation you can browse through the TV channels by
pressing the - P + key. Only those TV channels which are in the favourite list
will be displayed. Non-favourite TV channels can still be selected with the digit
keys. By default all stored channels are added to the favourite list.
& Select Favourite programmes in the INSTALLATION menu and press
the OK key in the centre of the cursor.
é Select your favourite programme number.
“ Select Ye s or No with the cursor left/right.
‘ Repeat for every TV channel you want to make a favourite or a
non-favourite TV channel.
( Press the Ï key to return to the INSTALLATION menu.
In order for
NEXTVIEW to function properly, the first TV channel from the favourite list
should also broadcast the correct local date and time via teletext.
Select Favourite TV channels
INSTALLATION
Menu language
Country
Automatic installation
Manual installation
Give name
Reshuffle
Favourite programmes
SETUP
J Give name
Give name
EXT1
EXT2
FRONT
0
1 BBC1
2 BBC2
3 ....
4 ....
5 ....
J 0
Reshuffle
EXT1
EXT2
FRONT
0
1 CNN
2 BBC2
3 ....
4 ....
5 ....
J 1 CNN
Favourite programmes
0 ... No
1 ... Yes
2 ... No
3 .... No
4 .... Yes
5 ....
J 2 ... Yes

7Installation
The Setup menu allows you to adjust initial settings, i.e. those which are not
related to the installation of the TV channels.
The Setup menu contains items that control the settings of the TV’s functions,
features, services and peripherals you may have connected.
& Use the cursor in the up/down, left/right directions to select the menu item.
é Use the OK key in the centre of the cursor to activate.
“ Use the Ï key to return or switch menu off.
Digital sources
See Connect Peripheral Equipment, p. 21 to connect your digital equipment,
like a DVD, a digital satellite tuner or a similar digital device.
Define Decoder/Descrambler programme numbers
If a decoder or a descrambler is connected, see p. 20, you can define one or
more programme numbers as decoder programme numbers.
Press the cursor left/right to select the input used to connect to your
decoder
Off, EXT1 or EXT2.
Select
Off if you do not want the selected programme number being
activated as a decoder programme number.
Select
EXT2 when the decoder is connected to your EasyLink video recorder.
When selecting the decoder, the message EasyLink: downloading presets....
appears on the screen.
Picture tilt (if provided)
Select Picture tilt with the cursor up/down.
Keep the cursor left/right pressed to adjust the rotation of the picture.
Information line
Select
On and after the selection of a TV programme or after pressing the
i key on the remote control, a TV channel which broadcasts teletext may
transmit the name of the TV channel, the programme name or another
message.This is displayed on screen next to information about sound and
picture format.
When selected
Off, only sound and picture format information is displayed
after the selection of a TV channel or after pressing the i key.
Factory settings
Select
Factory settings and press the OK key in the centre of the cursor to
restore picture and sound settings, predefined in the factory.
Auto format
Selecting
Ye s causes the screen to automatically fill as much of the picture as
possible when TV programmes are not carrying special signals detecting the
correct screen format.
With the q key on the remote control you can still select other picture
formats. See p. 10.
Installation
Select
Installation and press the OK key in the centre of the cursor to
return immediately to the
INSTALLATION menu.
‘ To exit from the menu press the Ï key repeatedly.
Install TV Setup
INSTALLATION
Menu language
Country
Automatic installation
Manual installation
Give name
Reshuffle
Favourite programmes
SETUP
J SETUP
Decoder/Descrambler
Programme
Decoder status
J Programme
SETUP
Digital Sources
Decoder/Descrambler
(Picture tilt)
Information line
Factory settings
Auto format yes/no
INSTALLATION
J Digital sources

8
Use of the remote control
Operation
Use of the remote control
M h a
SMARTACTIVESMART
PICTURESOUND
213
546
879
0
B
w
®
Ò
‡π
†
æ b
q Ï
i
TV VCR DVD SAT
TUNER CD TAPE CDR
¬V P
0
◊
b Q
MENU
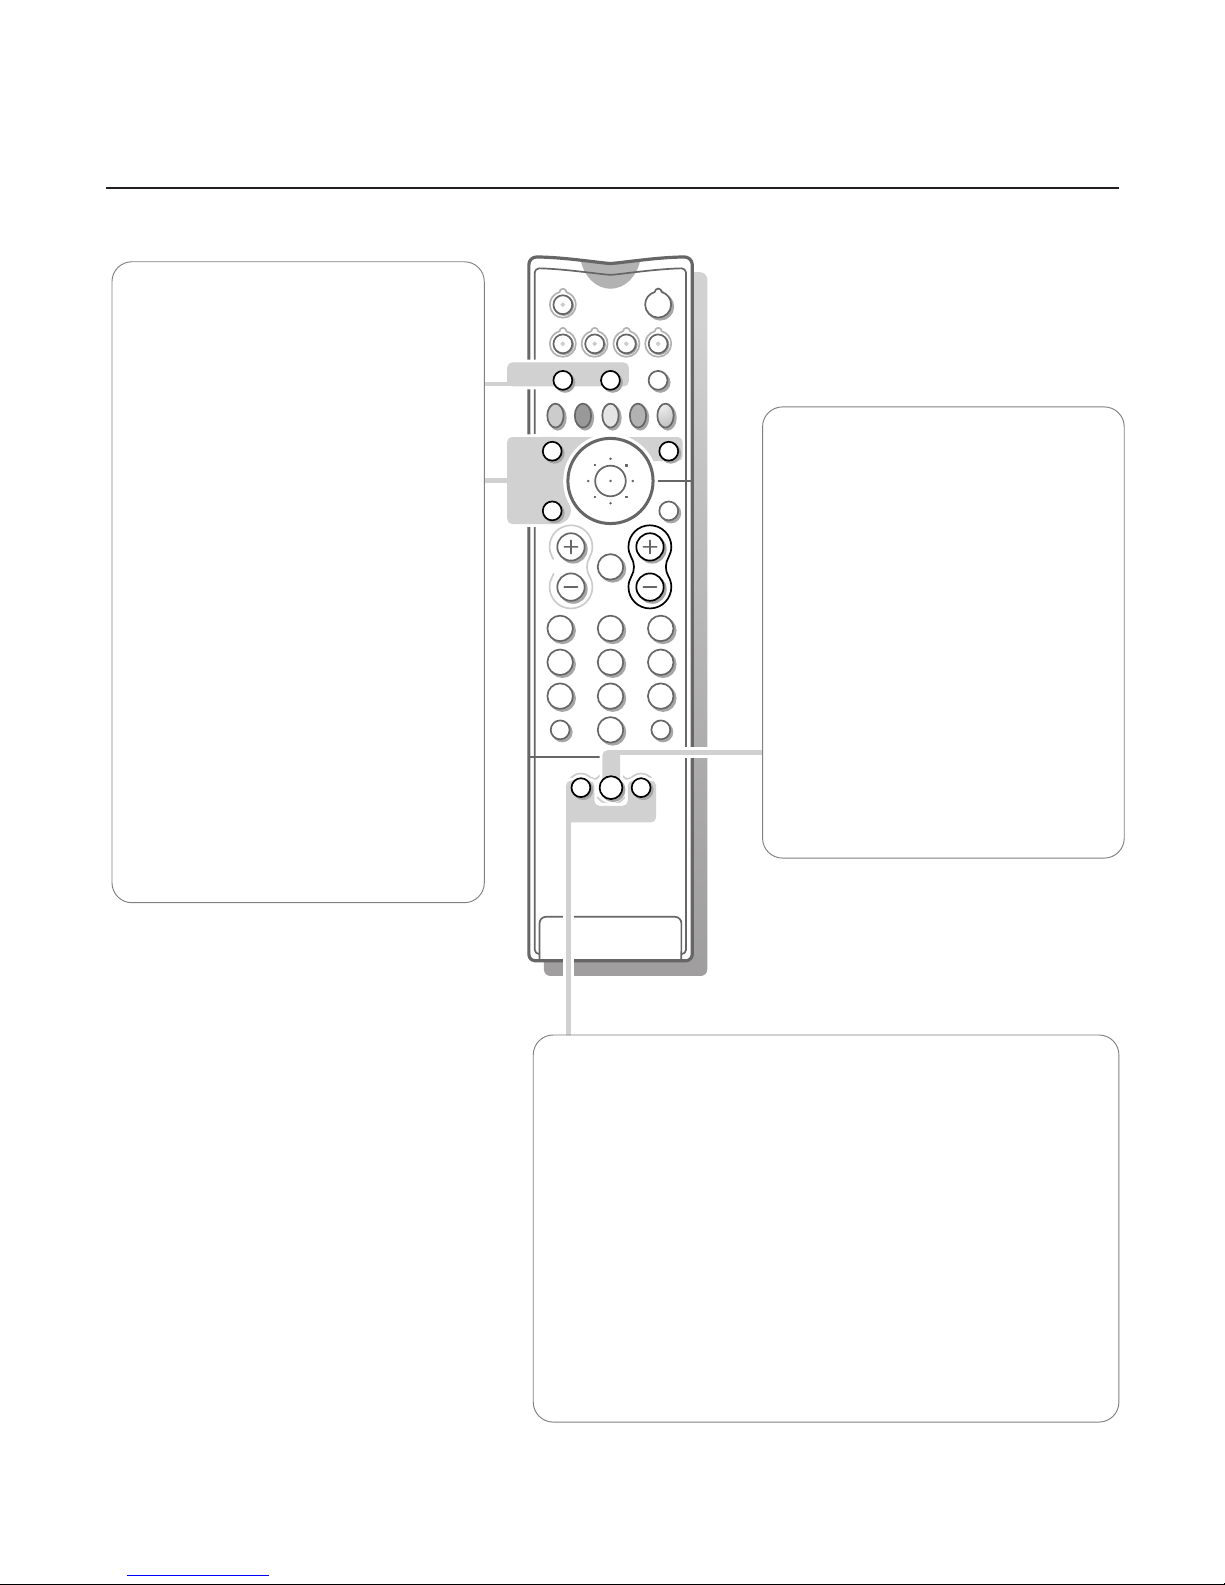
w Select peripherals
Press this key repeatedly to select
EXT1,
EXT2
or FRONT, according to where you
connected the peripherals (p. 23).
TV VCR DVD SAT TUNER CD TAPE CDR
Press one of these keys to use the remote
control directly in the TV, video recorder,
DVD or satellite mode. A green indicator
lights up. Press the same key again within 3
seconds to use the remote control in the
mode indicated below the key (tuner, CD,
tape or CD-recordable).
A red indicator lights up.
Press the key again to return to the function
mentioned above the key.
B Standby
The set is switched off and the red indicator
(orange in the case of
NEXTVIEW info
acquisition) lights up.
To switch the TV on again, press - P + or the
digit keys.
If your EasyLink video recorder has the
system standby function and you press the
standby key for 3 seconds, both the TV and
video recorder are switched to standby.
Your TV consumes energy in the standby mode.
Energy consumption contributes to air and water
pollution.We advise to switch off your TV
overnight instead of leaving it on standby.You
save energy.
®Ò‡π†Video recorder see p. 23
æ NEXTVIEW/TXT programme guide
on/off see p. 13
Q Incredible Surround
In
MONO sound mode, this feature, when
switched on, enables you to hear a spatial
effect of sound.
In
STEREO sound mode, when Incredible
Surround On is selected, it seems as though
the loudspeakers are spread further apart
from one another
i Screen information
Press for 5 seconds to activate/de-activate
the extended or reduced display of TV
channel and programme information on the
screen.
Press briefly to display information about the
selected TV channel and programme, the
sound reception, picture settings and the
remaining time set with the sleeptimer.
0/9 Digit keys
To select a TV channel.
For a two digit programme number, enter the
second digit within 2 seconds.
To switch immediately to a selected one digit
TV channel, keep the digit key pressed a bit
longer.
0 Previous programme
The previously selected TV channel is displayed.
The ◊ indication is only video recorder/DVD.
Use of the remote control
b Teletext on/off see p. 17
Ï Main menu on/off see p. 11
V Volume
Press + or - to adjust the volume.
¬ Mute
Temporarily interrupt the sound or restore
it.
P Programme selection
To browse through the TV channels
activated in the Favourite Programme menu.
9Use of the remote control
Mah
213
546
879
0
B
w
®
Ò
‡π
†
æ b
q Ï
i
TV VCR DVD SAT
TUNER CD TAPE CDR
¬V P
0
◊
b Q
SMART
PICTURE
SMART
SOUND
ACTIVE
CONTROL
MENU
h Active control
Active control is a pro-active and automatic
system.The TV continuously measures and
corrects all incoming signals in order to
provide the best picture possible.
Press the h key to select the Active
Control values Off or On.
Off Sharpness and Dynamic Contrast are
controlled automatically
On Sharpness, Dynamic Contrast and Noise
Reduction are controlled automatically.
Press the cursor in the up/down directions
while the selected Active Control setting
information is on top of the screen.
The Active Control menu appears.
The picture settings are being adapted
continuously and automatically.
The menu items cannot be selected.
Press the cursor in the up/down directions
again to switch off the menu.
b Dual screen
& Press the b key to switch on Dual screen.
The TV screen is divided into 2 parts:
- the left side for the normal main
picture,
- the right side for teletext broadcast by
the selected TV channel or for
NEXTVIEW/Teletext Guide.
To operate
NEXTVIEW/Teletext Guide, see
p. 13, to operate teletext, see p. 17.
If Dual screen is
Off, the picture, teletext or
NEXTVIEW/Teletext Guide is displayed full screen.
é Press the q key to select a vertical
squeezed or a non vertical squeezed picture
size.
“ Press + P - to run through the teletext
pages.
‘ When in Teletext Dual screen, press the b
key to return to a full picture screen or
press the b key to return to a full Teletext
screen.
( When in NEXTVIEW/Teletext Guide Dual
screen, press the æ key to return to a full
picture screen or press the b key to
return to a full
NEXTVIEW/Teletext Guide
screen.
Smart Keys
To select predefined picture and sound settings.
M Smart Sound
Each time it is pressed, a different sound setting is selected, corresponding
with specific factory setting of Treble and Bass.
a Smart Picture
Each time it is pressed, a different picture setting is selected, corresponding
with specific factory settings of Contrast, Colour, Sharpness and Dynamic
Contrast.
Personal refers to the personal preference settings of picture and sound
selected in the picture and sound menu.
Remark: the moment you are in a predefined smart sound or picture setting and
you modify a setting in the picture or sound menu, all values of the menu will
overwrite the previously made settings.
 Loading...