

Page 1

Operating Instructions
c=5
-§
i2>
(5>
5!M
,ej,r,
39
«9
3
<*5
Cb
3
a
pt.2
PHIUPS
PHILIPS
3139 125 24731
Page 2

DvD
s
cs
Gao
&
Contents
General Information............................................................................................................................................3
Television controls...................................................................................................................................3
Your remote control.................................................................................................................................4
Before Calling For Service.................................................................................................................................5
What you should know.......................................................................................................................................6
Preparation..........................................................................................................................................................7
Connect your antenna.............................................................................................................................7
Connect to power.....................................................................................................................................7
Preparing your remote control...............................................................................................................8
Switch on your television........................................................................................................................8
Installation menu and its sub-menus............................................................................................................... 9
instailation..........................................................................................................................................................10
Menu Language......................................................................................................................................10
Channel System.....................................................................................................................................10
Automatic installation (Store channels automatically)
Manual Installation.................................................................................................................................12
Give Name (Enter or modify a channel name)....................................................................................14
TV Configuration (Select your television configuration with external equipments)
Operating your television.................................................................................................................................18
Picture menu.......................................................................................................................................................19
Sound menu.......................................................................................................................................................20
Features menu.................................................................................................................................................. 21
Picture Mode......................................................................................................................................................26
4:3..............................................................................................................................................................26
Movie Expand 14:9.................................................................................................................................26
Movie Expand 16:9.................................................................................................................................26
Super Wide..............................................................................................................................................26
Wide screen.............................................................................................................................................26
Continuous Zoom..............................................................................................................................................27
Stereo sound......................................................................................................................................................28
Incredible sound and Spatial sound...............................................................................................................29
Incredible Picture..............................................................................................................................................30
Closed caption.................................................................................................................................................. 31
Subtitle Shift......................................................................................................................................................33
Smart Controls...................................................................................................................................................34
Select picture settings...........................................................................................................................34
Select sound settings............................................................................................................................35
Picture In Picture (PIP)......................................................................................................................................36
Picture enhancement features.........................................................................................................................38
Freeze picture.........................................................................................................................................38
DNR..........................................................................................................................................................38
Video Cassette Recorder Functions............................................................................................................... 39
External Connections.......................................................................................................................................40
For playing back programmes from a VCR or Laser disc player on the television
For playing back programmes from a S-VHS VCR on the television................................................40
For playing back programmes from a Camcorder on the television
Record programmes onto a video cassette recorder (VCR)
Record programmes from a S-VHS VCR to another S-VHS VCR
View what you have connected to the external connections............................................................43
Enhance the sound of the television....................................................................................................44
External speakers connections (optional)
Frequency tables...............................................................................................................................................46
Specifications....................................................................................................................................................47
..........................................................................................
.....................................................................
......................
.......................
...............................................
.............................................................
.....................................................
11
16
40
41
42
42
45
Page 3
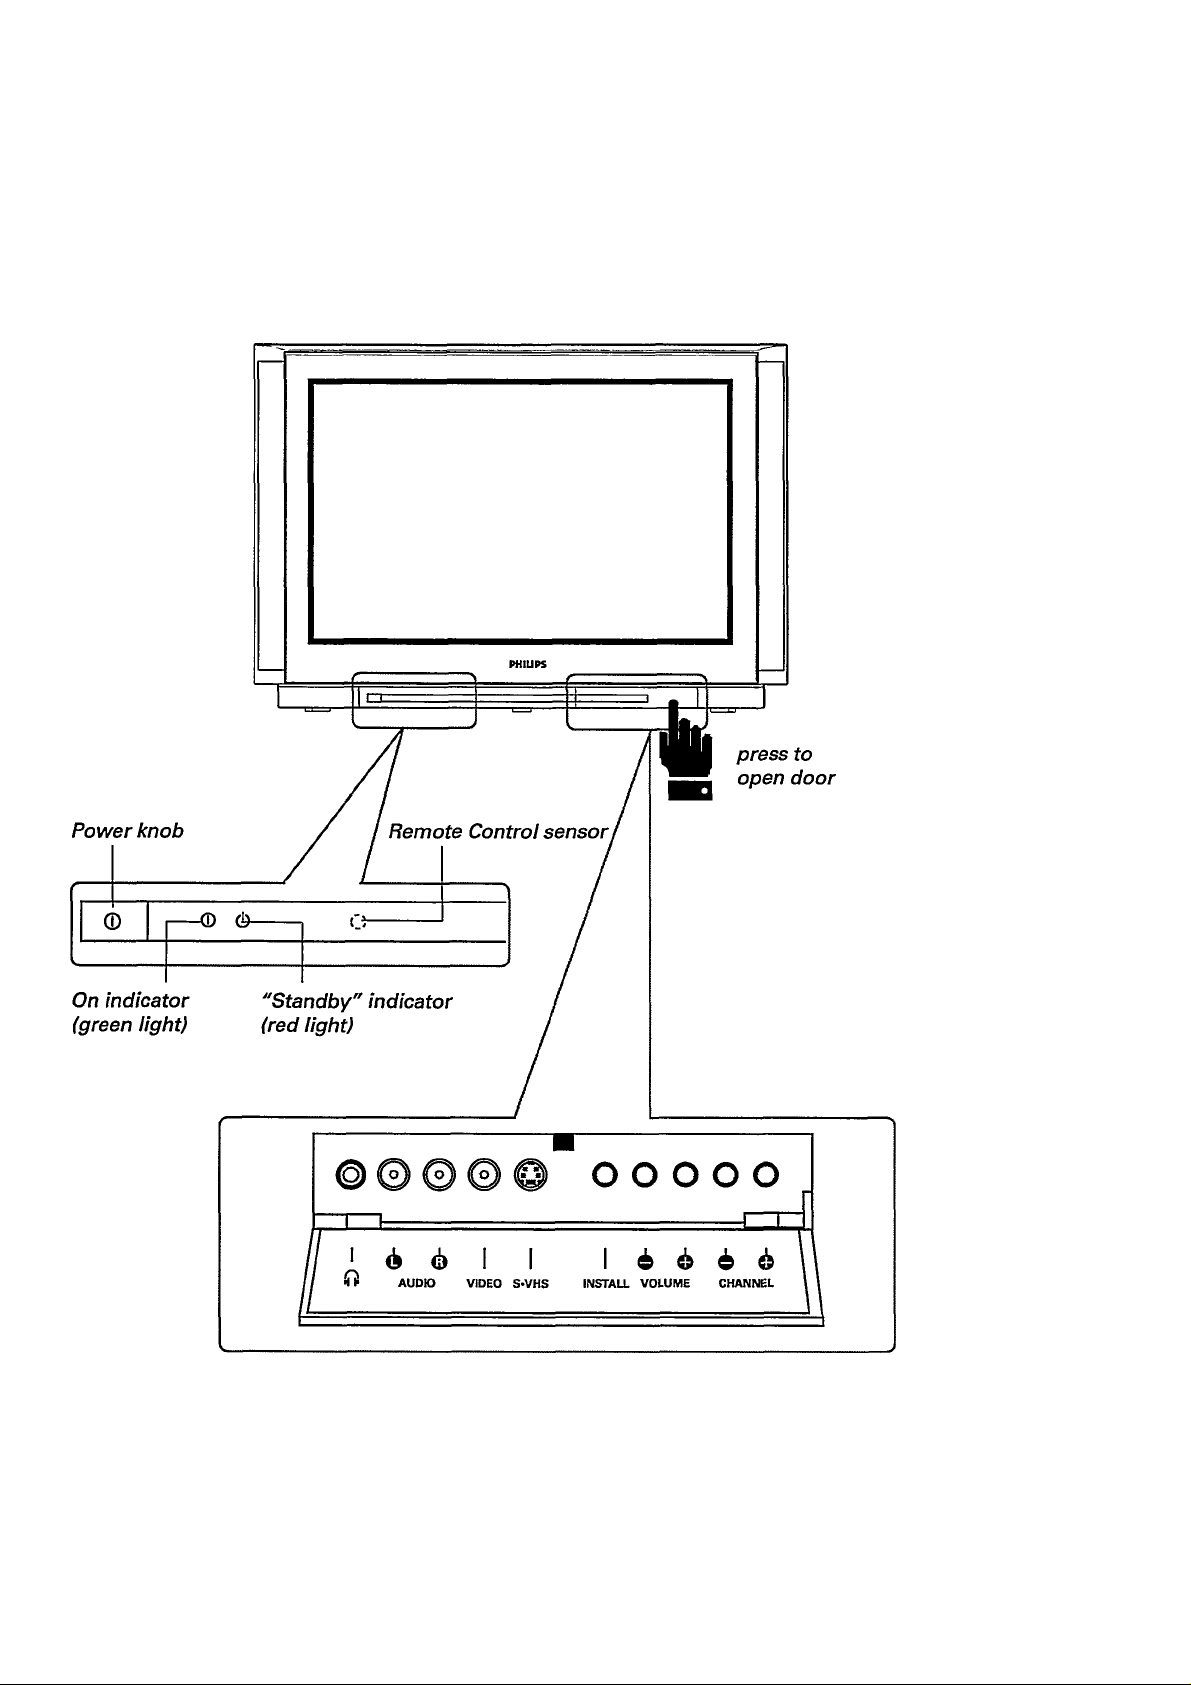
General Information
Television controls
'??)
s
033
Page 4
... general information
Your remote control
t$D
S
cac
ei>
g?
Picture In
ON/OFF
SOURCE
posmoN move screens
PROGRAM+/-
Picture:
switch on/off
select source
select channel
number of PIP
screen
SWAP switch screen
STILL
SCAN
freeze screen
run through
all the chan
nels available
for PIP
SMART Controls:
PICTUREpicture settings
SOUND
sound settings
SMART COKTROIS
PICTUBE ) C SOUM? ^
Q
:—
1
Switch off temporarily
OK confirm your choice
◄ ► select your choice.
Select a higher or lower
channel number
Switch off sound tempo
rarily
Select channel number
directly
Interchange current and
last viewed channel
number
Display information
Switch on/off Closed
Caption
DNR
B
INCREDIBLEoptimise picture
PICTURE
Q
____________
not applicable
reduce picture
interference
not applicable
subtitle shift
VCR functions:
■ stop tape
rewind tape
• record onto tape
►► forward tape
► play tape
Page 5

Before Calling For Service
Please make these simple checks before calling for service. These tips can save you time and
money since charges for TV installation and adjustments of customer controls are not covered
under your warranty.
Symptoms
Colour patch
(unevenness)
'Ghosts' or
double images or
Teletext garbled
No Power
No picture
Good picture
but no sound
Items to Check and Actions to follow
• Switch off the TV with the mains power button and wait for 20
minutes before switching on again.
• This may be caused by obstruction to the antenna due to high
rise buildings or hills. Using a highly directional antenna may
improve the picture.
• Check that the TV set's AC power cord is plugged Into mains
socket.
• Unplug the TV, wait for 60 seconds. Then re-insert plug into the
mains socket and switch on the TV again.
• Check antenna connections at the rear of the TV to see if they
are properly connected to the TV input terminal.
• Possible TV station trouble. Try another channel.
• Adjust the contrast and brightness settings
• Increase the VOLUME.
• To check that the TV is not muted, press the i]3( button on the
remote control.
• When no TV signal is detected, the TV automatically mutes
the sound.
This is a proper set operation and does not indicate a malfunction.
©
s
003
Good sound but
poor or abnormal
colour or no
picture
Snowish picture
and noise
Horizontal dotted
lines
One white line
across the screen
TV not
responding to
remote control
• Adjust the contrast and brightness setting.
• Check the antenna connection.
• This may be caused by electrical interference (e.g. hairdryer, nearby
neon lights, etc.).
• Switch off the equipment.
• Switch off the TV immediately and consult the service
personnel.
• Check batteries and replace them if necessary.
• Clean the remote control sensor lens on the TV.
• Operating range between TV and remote control should not be
more than 6 metres.
Page 6
ODD
gJ
c=)
©
g?
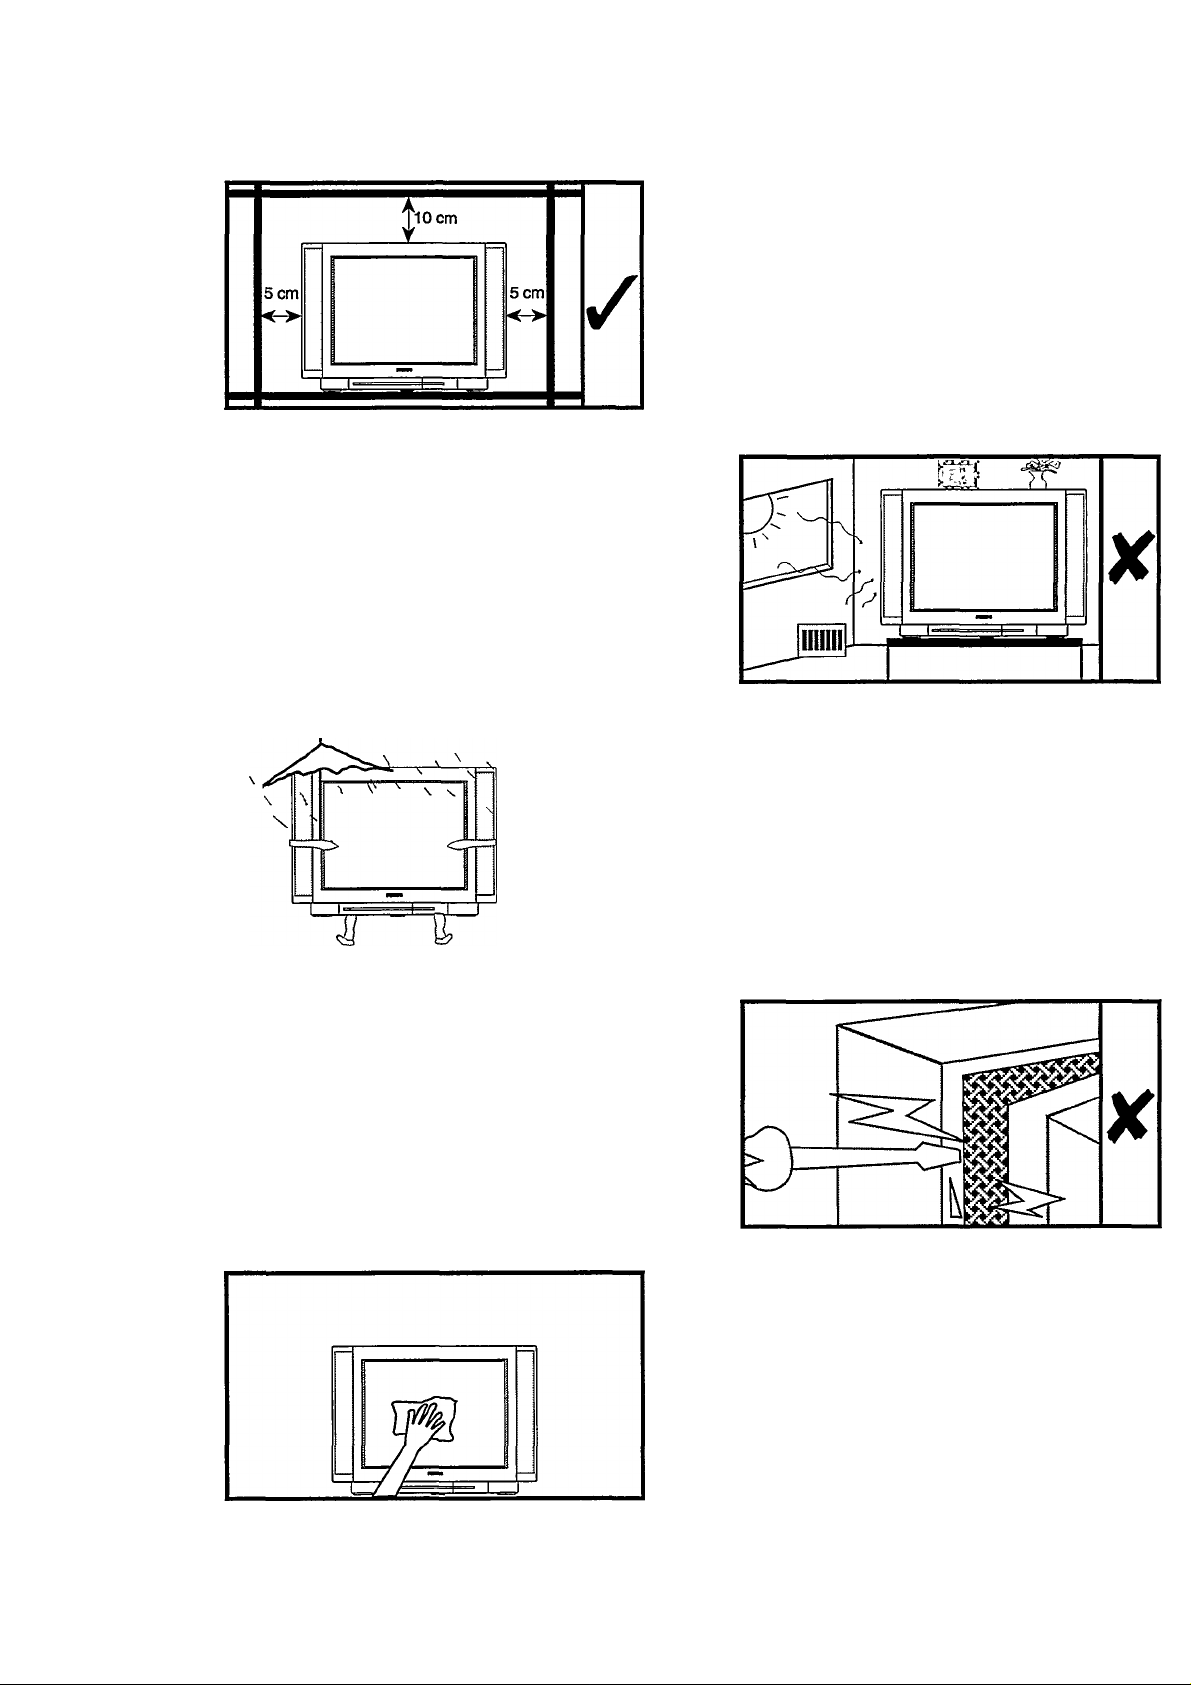
What you should know
Place your television on a solid base.
Leave at least a free space of 5 cm on both
sides and 10 cm from the top for good venti
lation of your television.
Do not place your television near a radiator
or other sources of heat.
Do not place any objects above your televi
sion or cover the ventilation slots.
Do not place your television in a position
where light falls directly onto the screen.
X
Never attempt to repair your television.
Always consult skilled television service
personnel.
Do not expose your television to rain or
excessive moisture.
• Before you start cleaning, switch off the
television.
• Clean your television screen with a piece of
SOFT, DRY cloth only when necessary.
Note : DO NOT use hard cloth or detergent
cleaners as it will damage the screen's coating.
6
Page 7
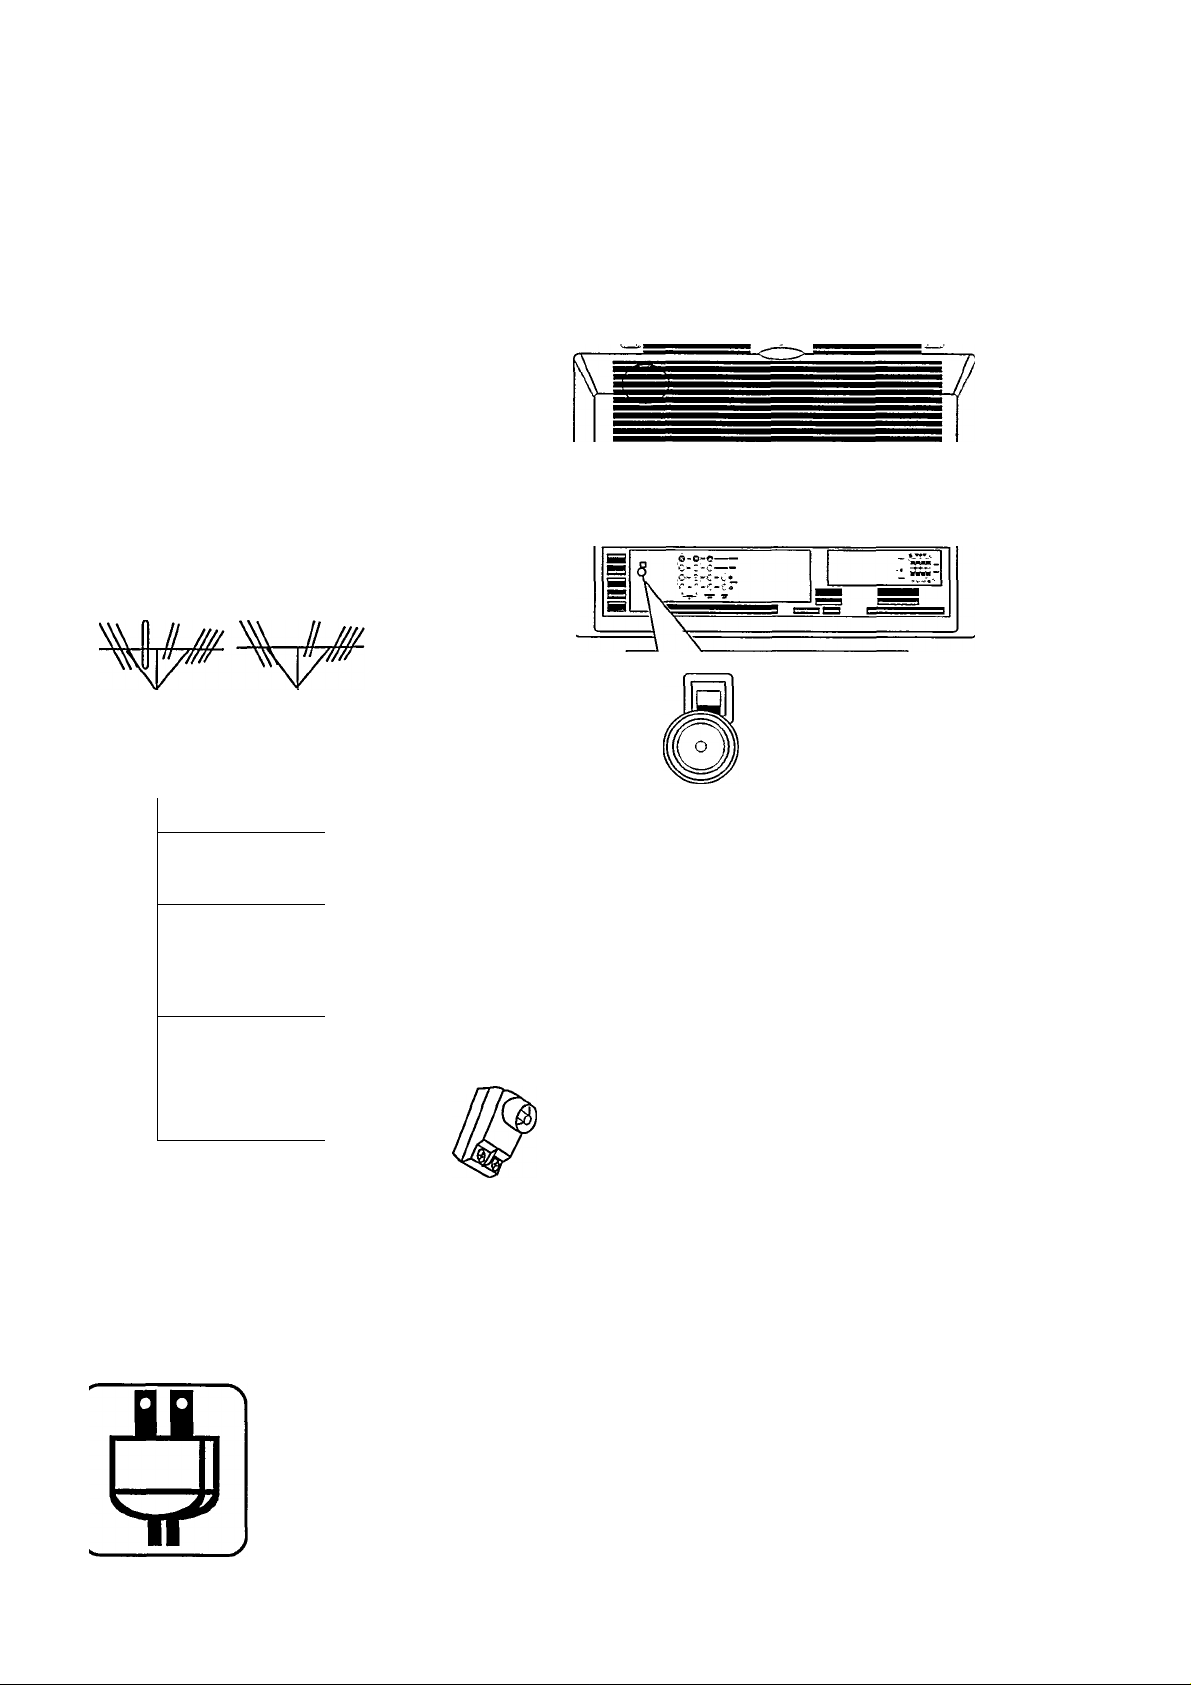
Preparation
Connect your antenna
We recommend that you use a good outdoor antenna for best reception of broadcast VHF/UHF
channels. You may need to use one of the adaptors/mixers (not supplied). Consult your local dealer
if you have any queries or need any assistance on connection.
Back of television
Antena UHF Antena VHF
ATTENUATOR
• ON
•OFF
i»n
s
aiy
^ CABLE
1
Option 1
a
UHF/VHF coaxial
(75 ohms)
Option 2
CK
VHF coaxial
(75 ohms)
Option 3
UHFfita
(300 ohms)
Atenuador On/Off
The attenuator switch should
always be at the "OFF"
position.
Switch on the attenuator only
if the television programmes
have interference from other
channel.
Connect to power
Referto the specification pageforthe correct operating voltage. Consultyour local dealer if your mains
supply is different.
Connect your television to the mains supply socket and switch on.
Page 8
OBii
S
Cat.
QX>
... preparation
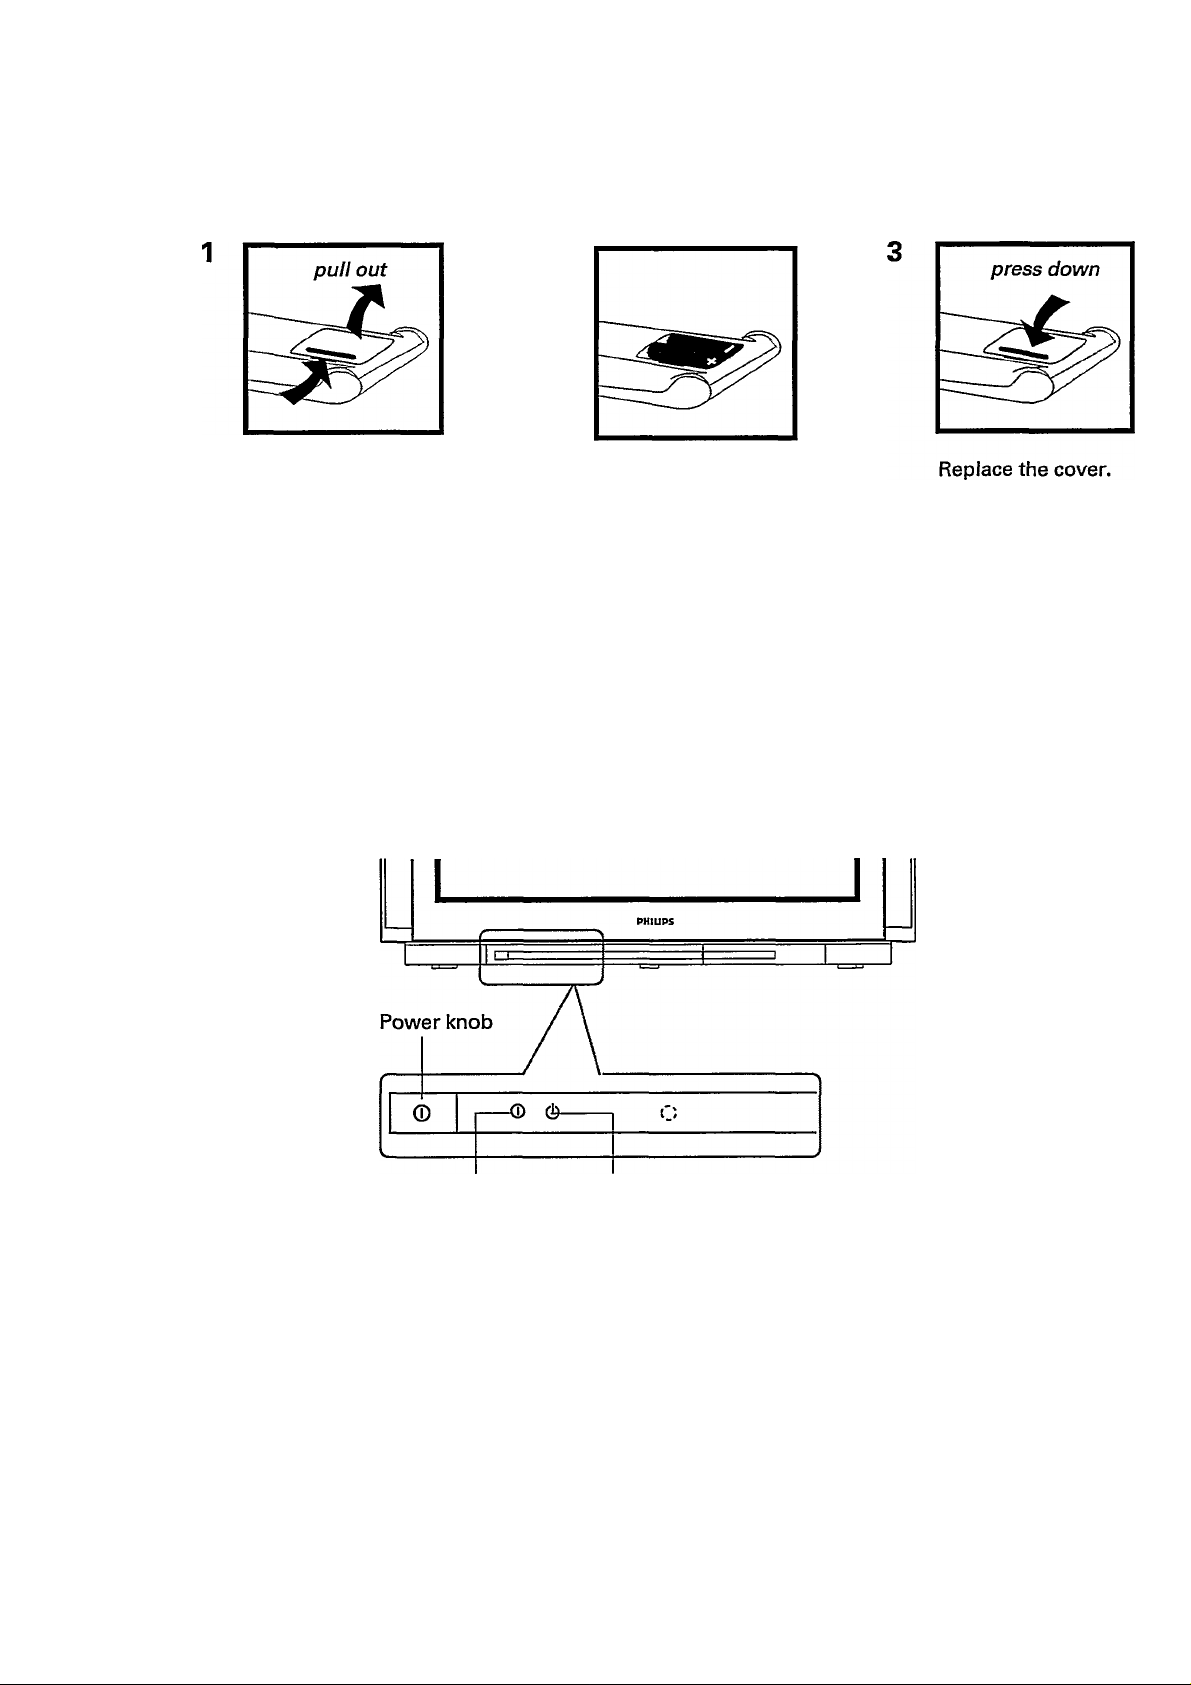
Preparing your remote control
2
Remove the battery
cover at the back of
your remote control.
Note :
• Remove the batteries from the remote control if you do not use it for an extended period. This is
to prevent possible damage due to battery leakage.
• Make sure that there is no obstruction between the remote control and the television.
• Do not use old and new batteries together.
Insert two batteries
(Type AAA, 1.5 V) into
the compartment.
Switch on your television
• Press the power knob © button on the front, bottom left of your television.
A green or red indicator light appears.
green light red light
If the indicator light is GREEN, it means:
Your television is switched ON. Wait a few seconds for the screen to light up. If no signal input is
detected, you will see a blue screen with the word "PHILIPS".
If the indicator light is RED, it means:
Your television is switched on but the screen stays dark. Your television is on 'standby'.
• Press any digit button, CH + or — button, A/CH button, (¡) button or VIDEO button on
your remote control.
The screen lights up. If no signal input is detected, you will see a blue screen with the word
"PHILIPS".
Note : If there is no signal detected after about 10 minutes, your television will switch over to
standby. ________________
8
Page 9
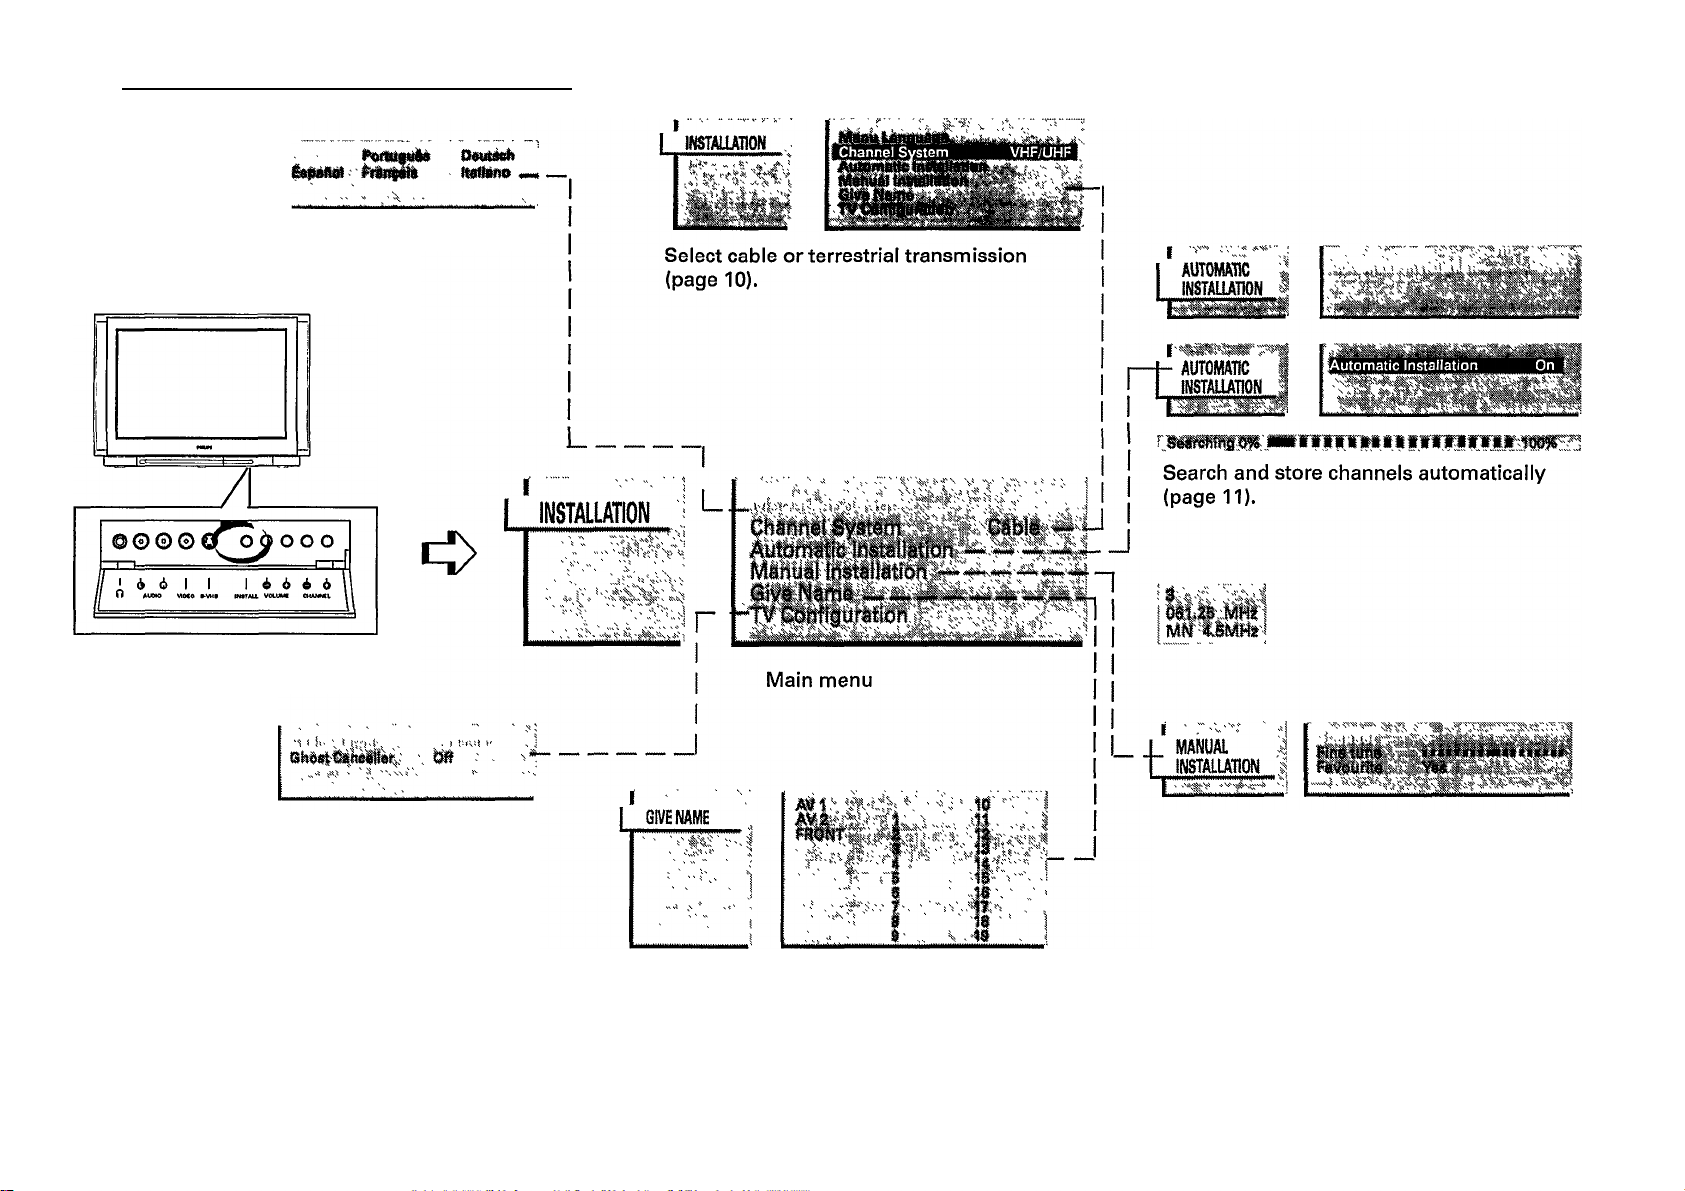
Installation menu and its sub-menus
MENU
LANGUAGE
r
Select or change menu languages (page 10).
Press INSTALL button to go into
the INSTALLATION menu.
TV CONFIG.
Select your television configuration with
external equipment (page 16).
Fine tune a channel or include/exclude a
channel number in the "Favourite" list
(page 12).
Enter or modify a channel name (page 14).
Page 10
Installation
Menu Language
Use this function to select the On-Screen-Display and the Menus language. The languages
available foe selection are English and Chinese.
Press INSTALL button to go into the INSTALLATION menu.
The sub-menu Menu Language is highlighted.
toil
§i
CSj
to
g?
© © © © o o o
I 6 I I 16 6 6 6
0 AUDIO VDEO 8*VHS INSTAa VOLUME CHANNEL
• Press OK button to confirm selection.
The languages available for selection appear.
giSTALIATlON
^ y V. ,
LANGUAGE
r
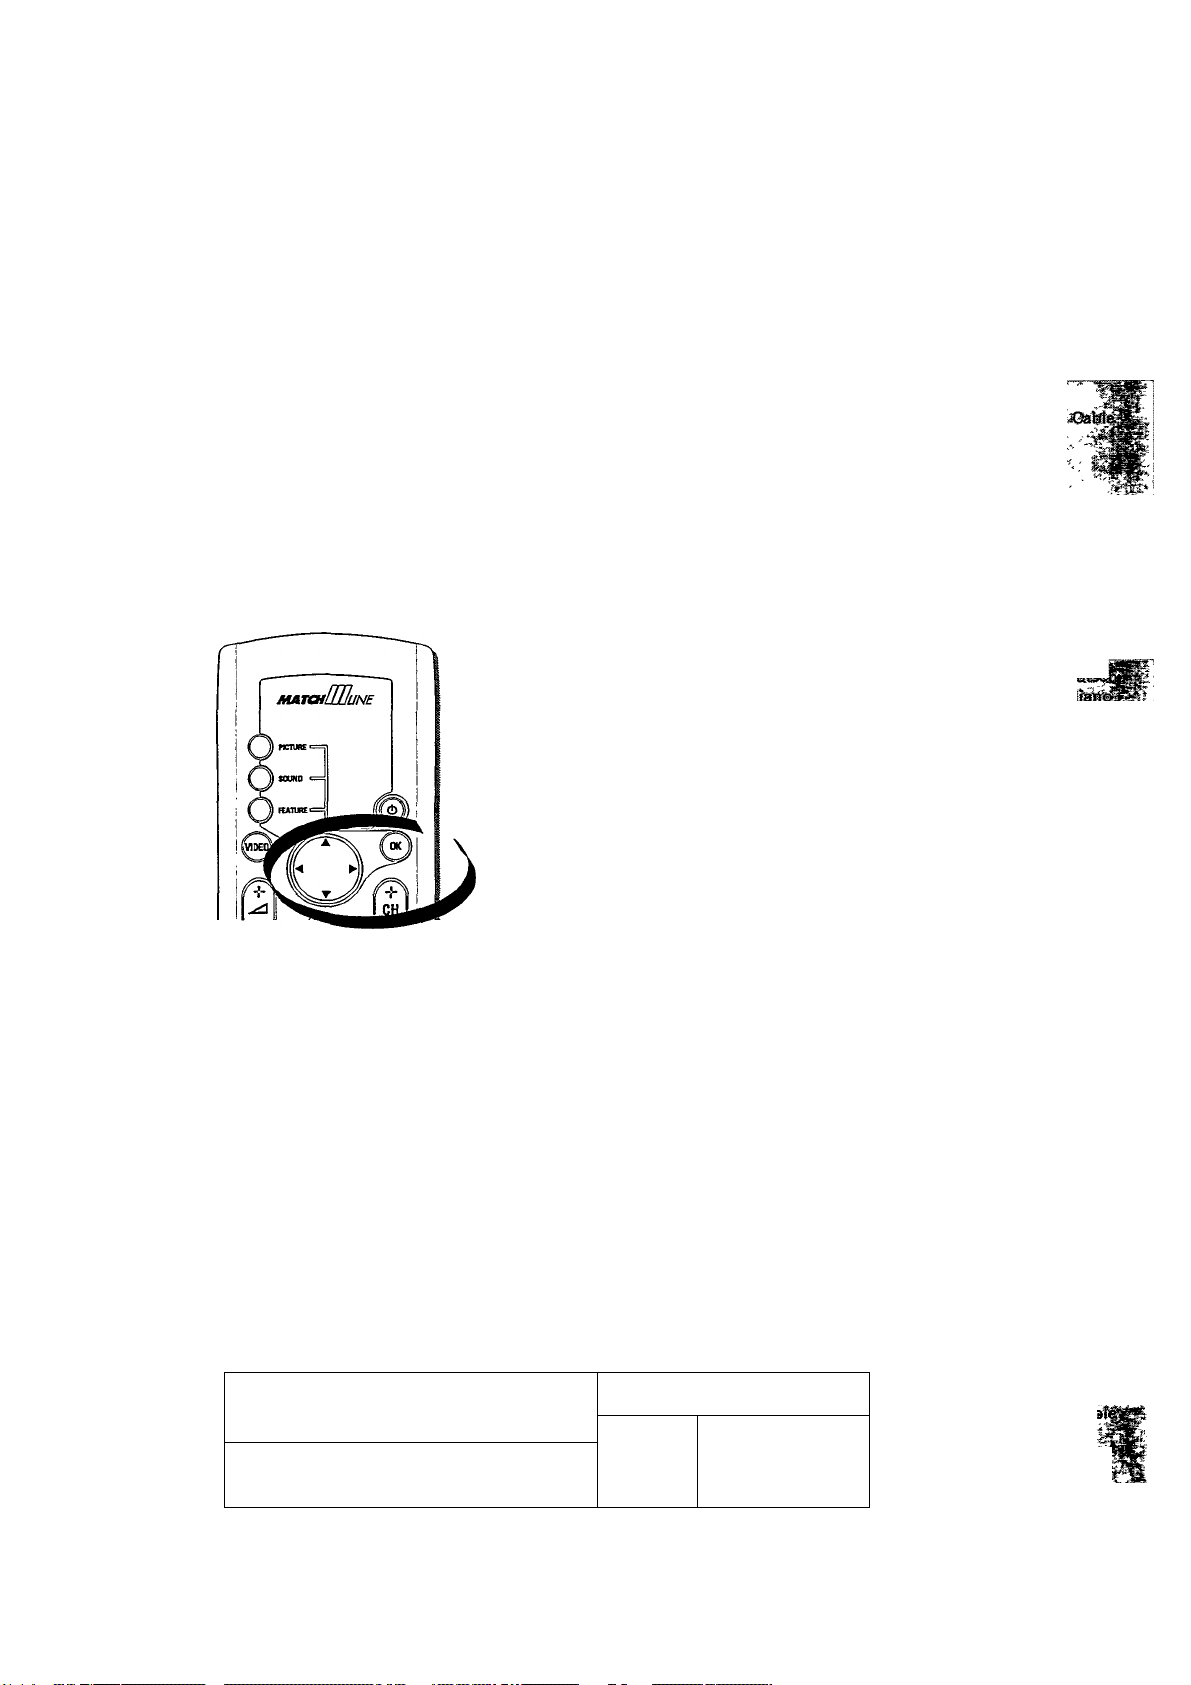
• Highlight the language of your choice by the ◄ or ► button and confirm selection by
the OK button .
The INSTALLATION menu appears and from now onwards all the On-Screen-Display
and Menus are presented in the language of your choice.
Note : If you had made the wrong choice, press OK button and make your choice again.
• Press INSTALL button once to return to INSTALLATION menu.
Channel System
You can select either cable or terrestrial transmission.
• Press INSTALL button to go into the INSTALLATION menu.
©©©©^^'oj>ooo ^
f/>66l 1 I6666\
I 0 AUDIO VDEO S>VHS INSTAU VOLUME CHANNEL \
1 ^ mSTALlATfON i
_ 1' ;
10
' Si\«fiawe z C'k
” .y -
Page 11
... installation
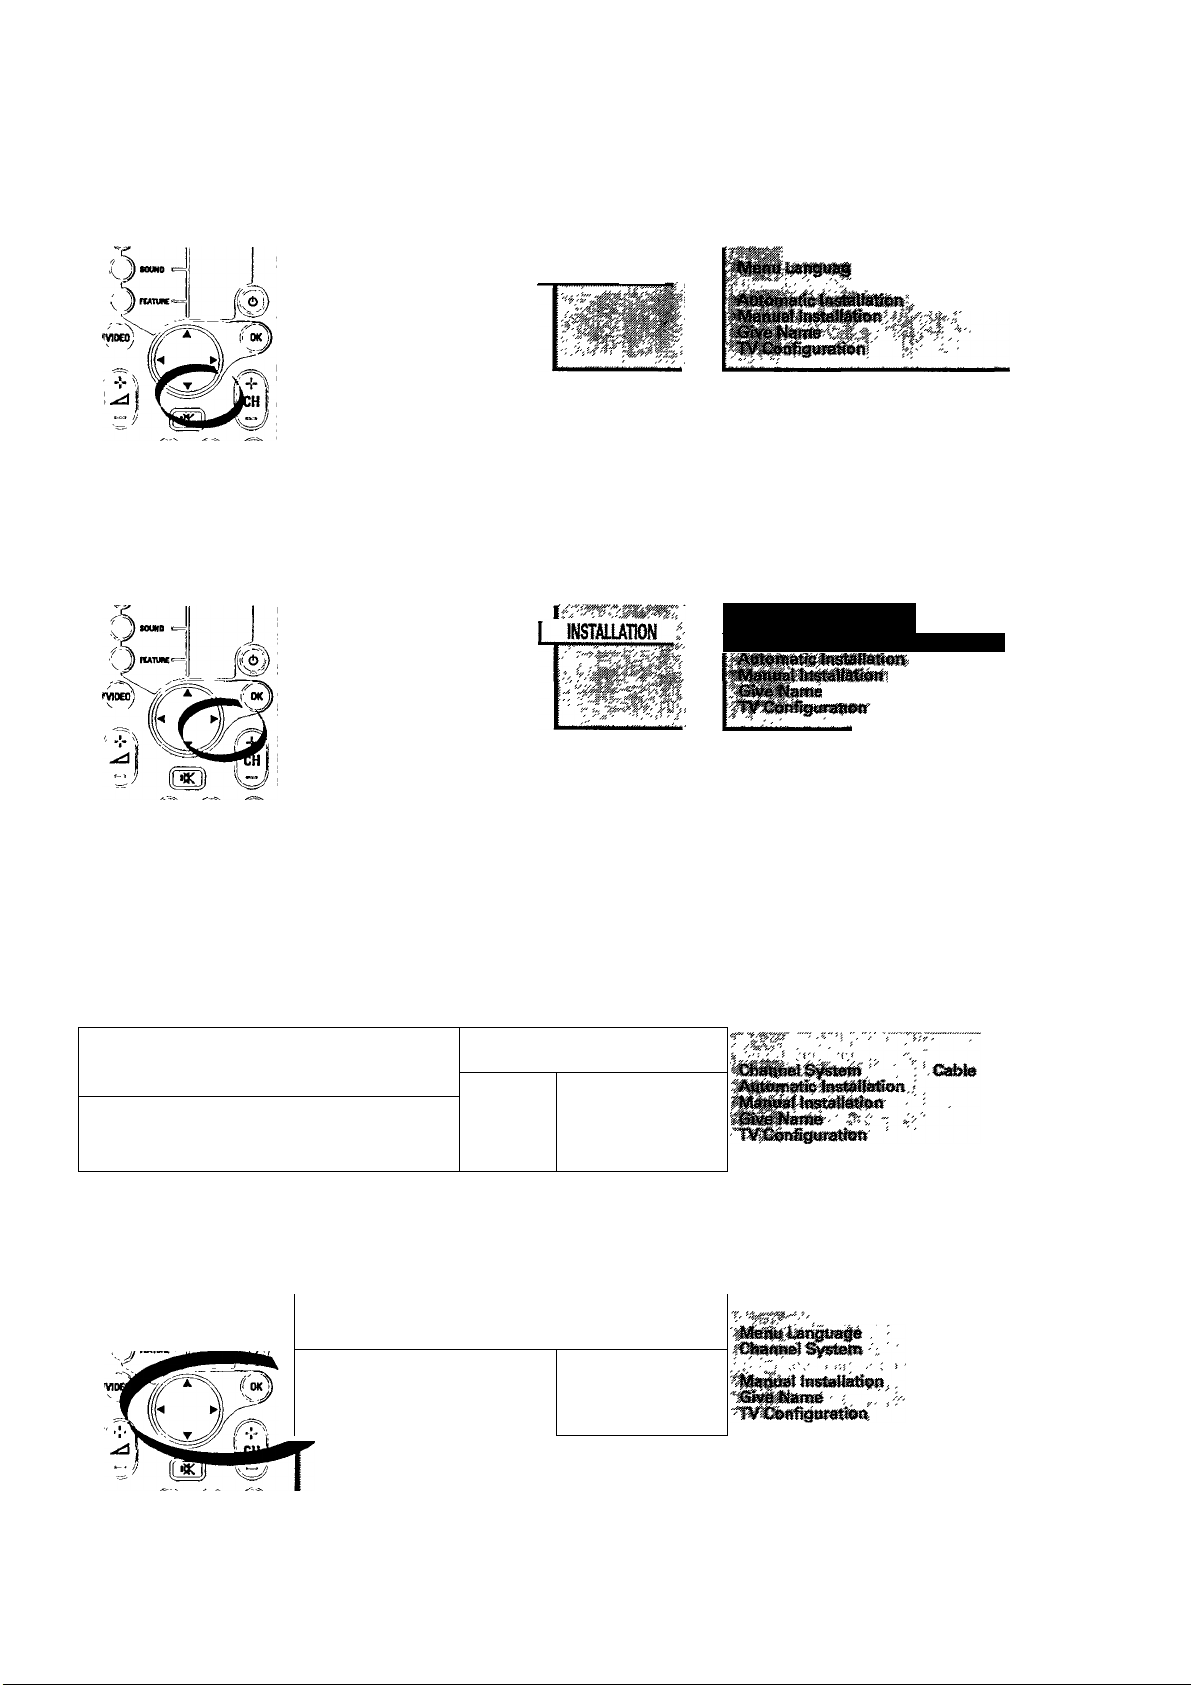
• Press T button to highlight Channel System
[ roiATOI
Press ► button to select either Cable (for cable transmission) or VHF/UHF (for terrestrial
transmission).
From now on all the channels will be in the transmission system that you have selected.
1 Channel System VHF/UHF
■' yji-
..
(»?)
<==.
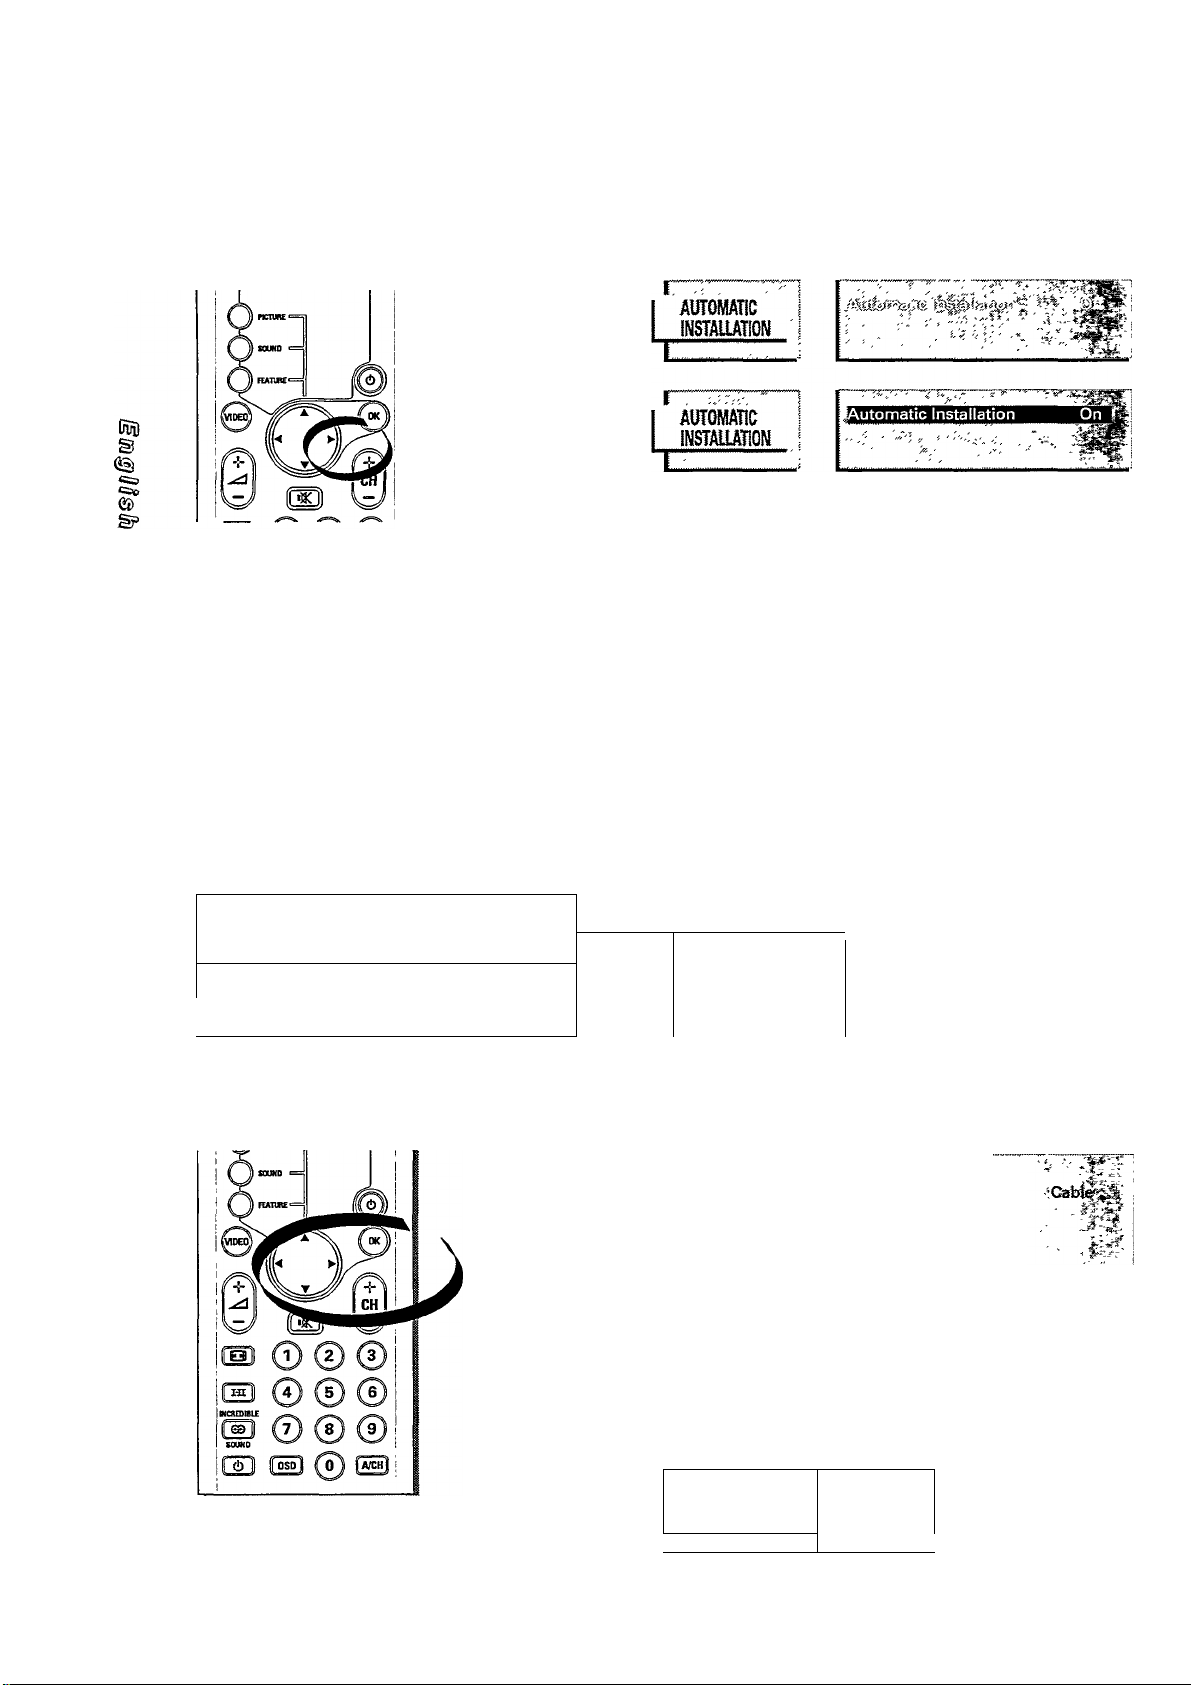
Automatic Installation (Search and store channels automatically)
• Press INSTALL button to go into INSTALLATION menu.
© © © © o o o ^
//'¿61 1 l¿¿¿¿l
II O AUDIO Vl0€0 t*VH8 VUTALL VOLUMC CHAMNEL 1
Press T button to highlight Automatic Installation and OK button to confirm selection.
1
1 INSTALUTJON ‘ : i
V-'-
SNSTAilATiON .
L
':feV
11
Page 12
... installation
Press ► button to start searching for all available channels.
An indicator will appear at the bottom of the screen showing the status of the search from 0%
to 100%.
To interrupt, press INSTALL button and to go back to INSTALLATION menu.
Once completed, a word Ready appears. You can also see a list of channels found.
Note : Programme number 0 is not installed and reserved for external connection via antenna
input.
Press INSTALL button once to return to INSTALLATION menu and again to quit.
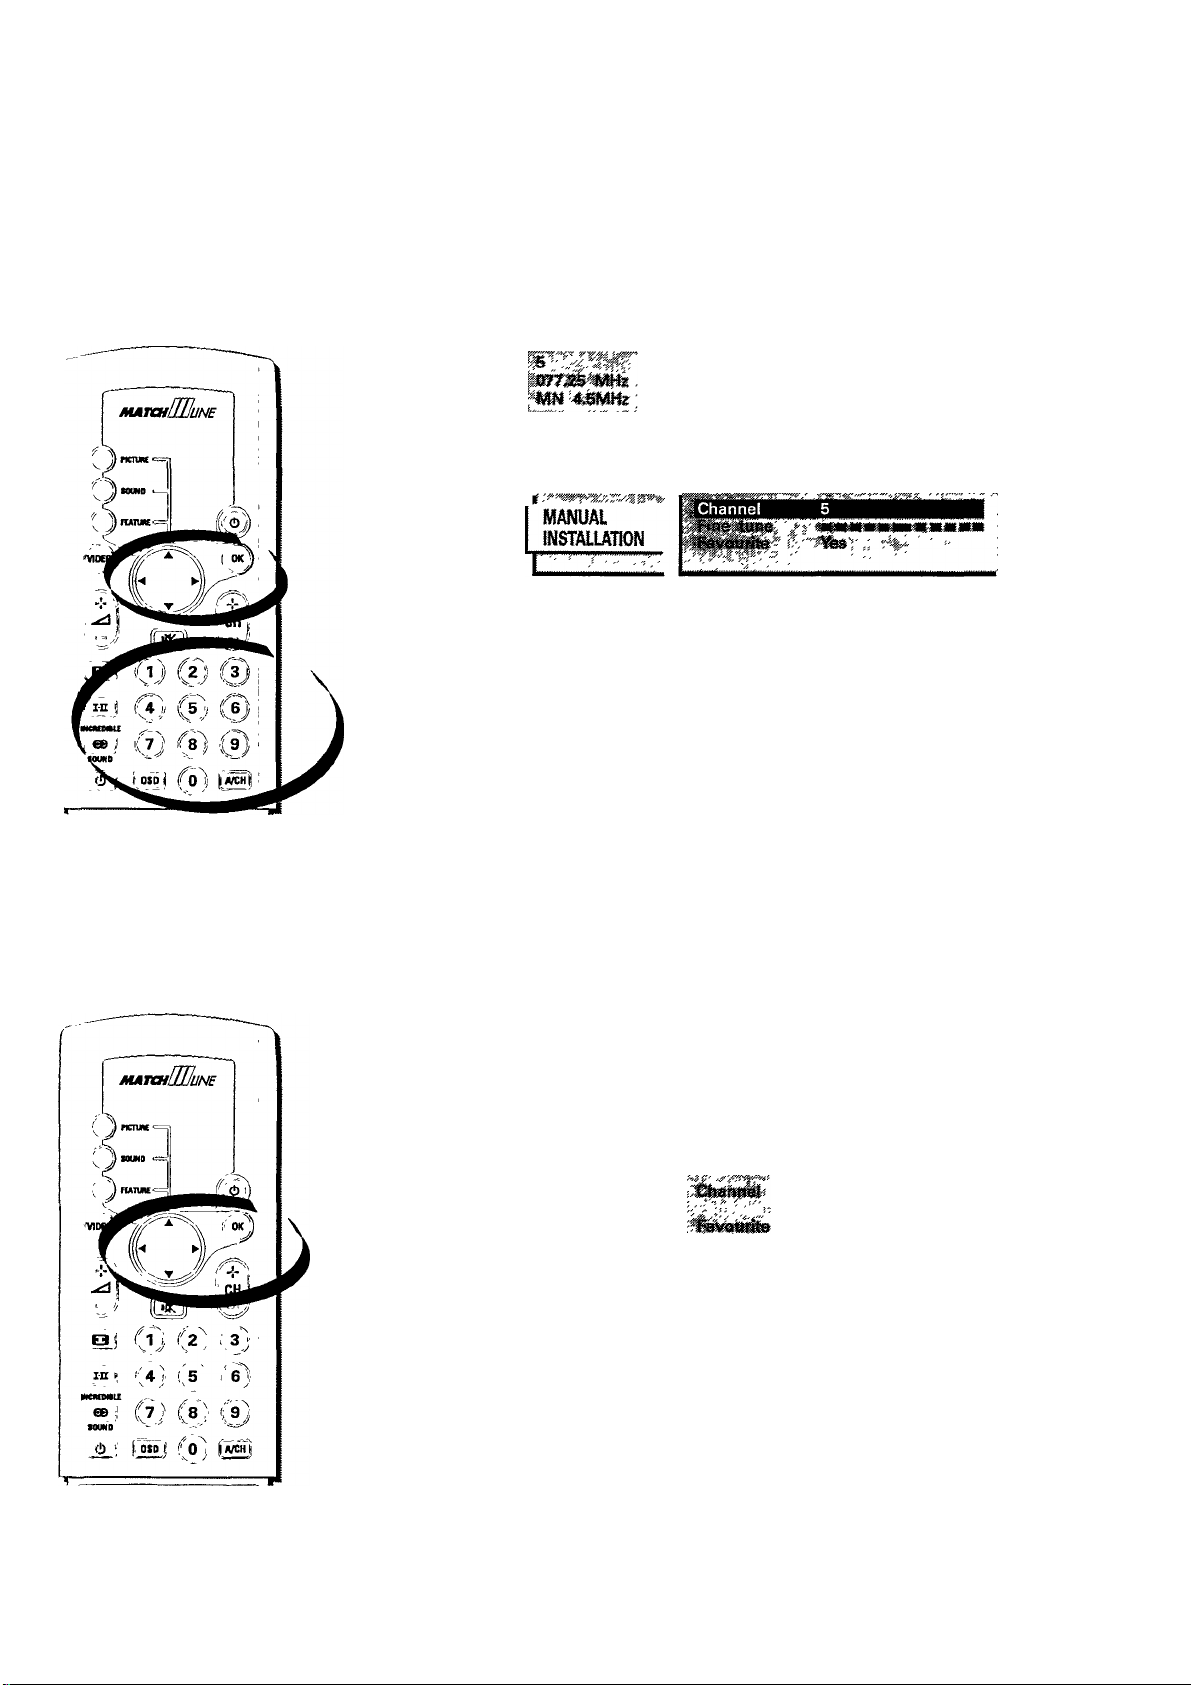
Manual Installation
Use to fine tune a particular channel when the reception is poor or to include or exclude a channel
in the "Favourite” list.
• Press INSTALL button to go into INSTALLATION menu.
r?
'^aisTAUAioN ;
©© © ©
/ ' Ó Ò 1 1 1 6 Ò 6 Ó \
II ii AUDIO VDEO »VHS
Press T button to highlight Manual Installation and OK button to confirm selection.
The MANUAL INSTALLATION menu appears and Channel is highlighted.
INSTAIL VOWME CHANNEL 1
L
"^TAUATiON
,• ; 1
—
....................
...........................
ìiamé, ‘ " ,.y.- - ' ' '■
"Give name
TY Oenifsttrattoa
-
fa^tlatiou
.......
:«i
I 4.B!«ife i
i«hz j
'manual i
INSTAUAnON !
i
__________
12
Piaataae
favourite '
^
Page 13
... installation
Channel
• Press OK button to confirm. To enter a channel number you wish to fine tune press either one
of the following buttons :
^ ◄ or ►
@ digit 0 to 9
<»?>
dig
Fine Tune
• Press T button to highlight Fine Tune and OK button to confirm selection.
• Press or ► button to adjust until picture is the best.
MANUAL
INSTALLATION
mmmmm rmmmmm
13
Page 14
insta/lation
Favourite
This feature allows you to put channel numbers into a “favourite" list. Channel numbers which are
in this list can be easily access by pressing CH + or — . Those that are not in, can only be access
by pressing the channel number directly. It is recommended that you do not put those channels
that have bad reception or those that you do not watch often in this list.
• Press T button to highlight Favourite and OK button to confirm selection.
• Press ◄ or ► button to select Yes or No.
S'-: -i
Miit !
MANUAL ^
INSTALLATION I
CbanneV-».
I
ìmiàB.mk.-
MANUAL
INSTALLATION
Give Name (Enter or modify a channel name)
You can enter or modify an existing name of a programme number by the following steps.
Favourite
• Press INSTALL button to go into INSTALLATION menu.
©©©© #o ® o o o
/ • è Ò I I I Ó Ò Ó Ó
0 AUDIO VDEO S«VHS INSTALL VOLUME CHATTEL
INSTALIAION ,
L
14
-¿rdj-'Sdy "
i
Chaiiuet^iftèni' , -CaMè:jt
AutontaiicÌnstàfiatìoR '
1^3ì>«ai ìn5taiÌ8if®R '
Give Name
TV ConfiguratìoR
Page 15
... installation
• Press T button to highlight Give Name and OK button to select it.
The current channel number and name (if any) is highlighted.
I mmim
GIVE NAME I
• Highlight the channel number of your choice by pressing , A or T button and select by
pressing OK button. A block appears on the first position of the name. Refer to the table below
for buttons to use to enter or modify the programme name.
ig
5iM
G№ENAME
Button Function
OK
►
◄
A
▼
Start or end the process
Select next character position
Select previous character position
Select the next character or number for the current position
Select the previous character or number for the current position
Note : The possible characters for a programme name are "A ... Z, *, /, +,#, 0 ... 9 and [Space]"
Repeat the same steps for other channel numbers. If you have completed, press INSTALL button
once to go back to INSTALLATION menu and again to quit.
15
Page 16

installation
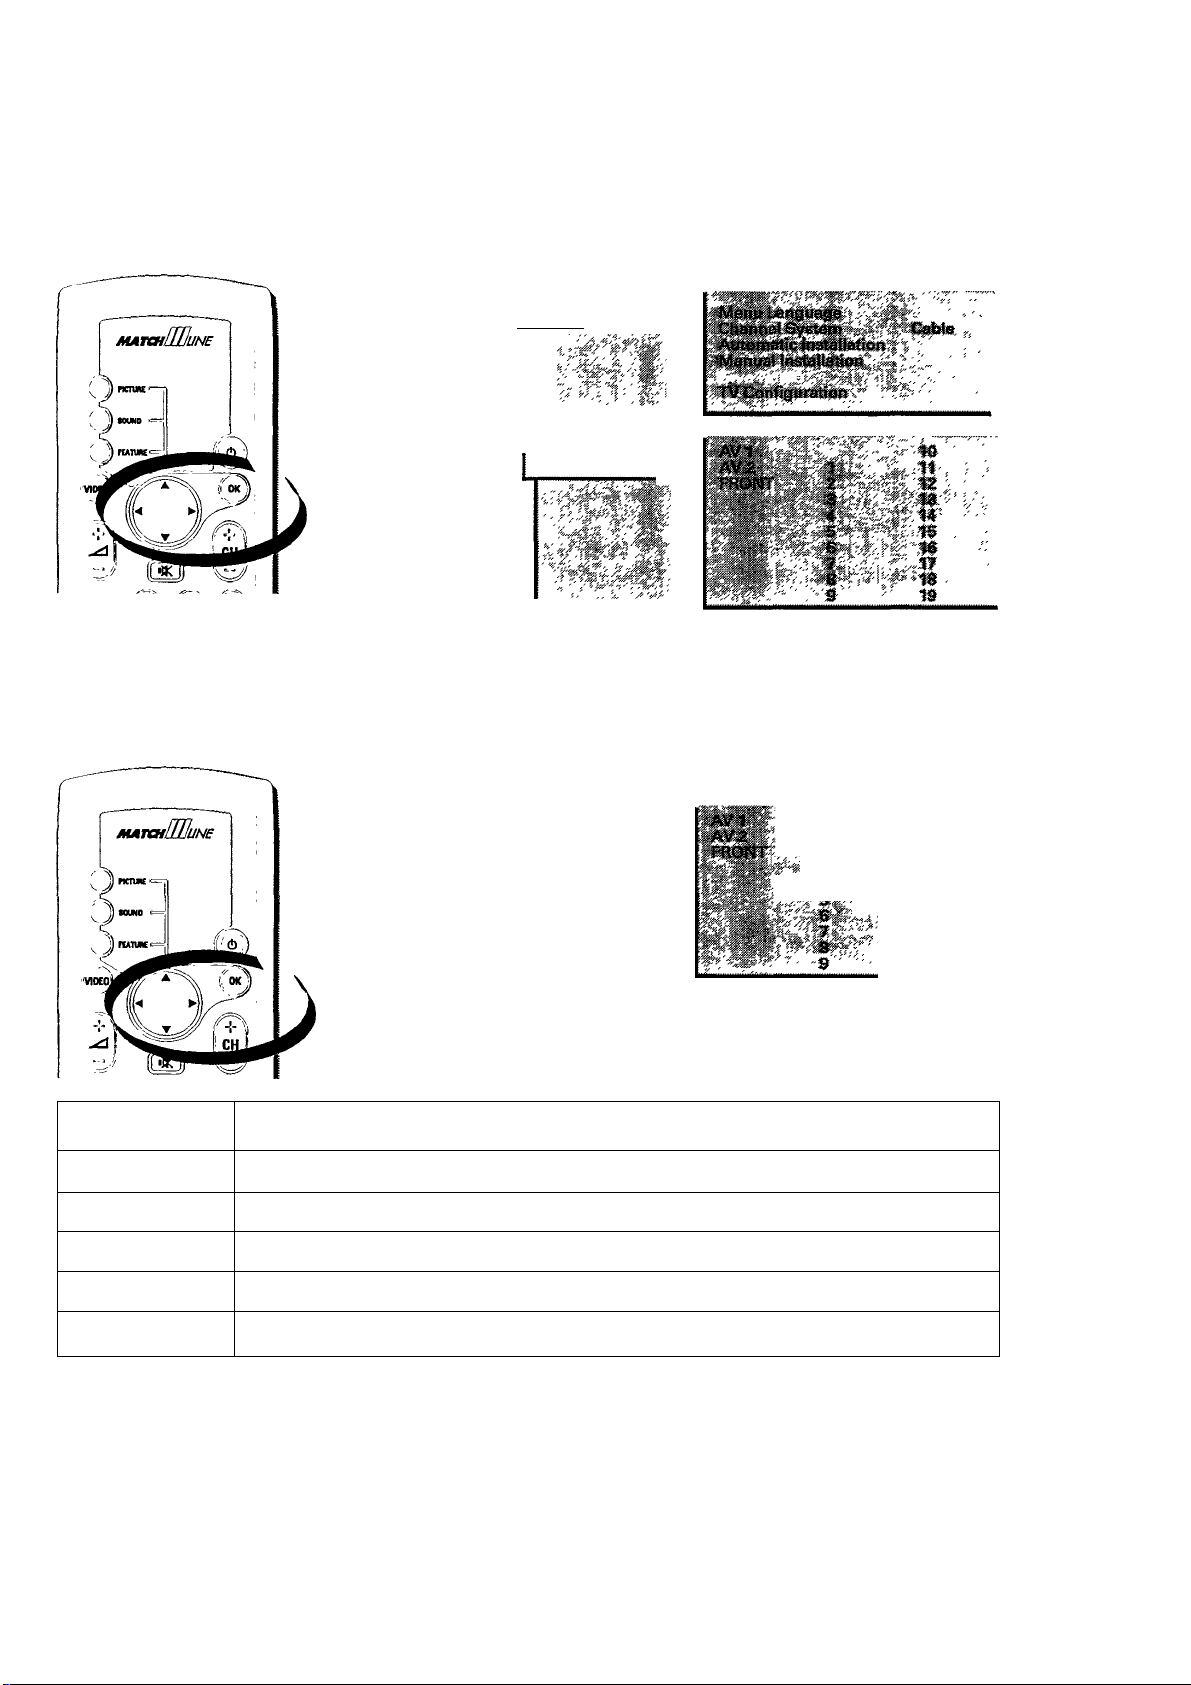
TV Configuration (Select your television configuration with external
equipment)
• Press INSTALL button to go into INSTALLATION menu.
PDii
S
e©
<==.
g?
©0 0©
< 6 (!) I I 16 6 6 6
0 AUDIO VDEO 8.VKS INSTALL VOLUME CHANNEL
Press V button to highlight TV Configuration and OK button to select it.
The TV CONFIG, menu appears and Audio Output is highlighted.
iTo 6 o o o
1 ^ALLATION I
\ iSTAUATION " i
TVCONRG.
'{Mann, iaiigqsge''
'MaB'wartTsialiaf©« . '•* '
"fj/
' ' I
Audio Output
If you have connected the audio out sockets of your television to an external amplifier, you can
make a constant or variable audio output selection.
• Select Variable with or ► button if you want to adjust the volume of your audio equip
ment via your television.
'WCONRG.
OR
• Select Constant with or ► button if you want to adjust the volume with the volume con
trol of your audio equipment.
TVCONRG.
lAudio Output Variable
B^ost Gaflc^ller
lAudio Output
BbostCancelier .
16
Off . 1
Constant 1
I
Page 17

installation
Ghost Canceller
You are recommended to use this feature when you receive "ghosts" or double images in your off-
air picture. First you have to connect one end of a "Ghost Canceller Set-Top Box" (not provided) to
the "MONITOR OUT" and another end to the "VIDEO IN 1" at the back of the television.
0
ág
g?)
g
-
I©"
©-0 ©
0-©-©-[©1
-
X
t
Ghost Canceller
Set-Top Box
Press the T button to highlight Ghost Canceller.
Press ◄ or ► button to select On.
Once your connection is done, you are recommended to leave the selection as "On" to
improve the reception of the programme you are watching. The channel "AV 1" is not
selectable after this.
vjconm.
If you have completed, press INSTALL button once to go back to INSTALLATION menu and
again to quit.
I Ghost Canceller On 1
17
Page 18

Operating your television
Remote Control
1a,2
la,3
1a,6
7
Button
no.
la
2
4
5
5a
6
Function
Switch off your television tempora
rily (standby).
A red indicator light appears on the
front of the television.
Switch on again from standby.
Select a higher or lower programme
numbers. The numbers must be in
the 'Favourite Programme’ list.
Key in programme number directly.
For 2-digit programme number, you
have to complete keying in within 2
seconds.
Adjust volume.
Switch off sound temporarily.
appear on the
screen.
Switch on sound again.
Switch between last viewed and
current programme number.
Switch on or off on screen informa
tion such as picture mode, status of
DNR, programme number and name
and sound mode (refer to Fig. 1
below).
Note : For pernament display of
information, press button for more
than 4 seconds.
8
Select a time for the television to
switch to standby. Select "Off" if
you do not wish to use this
function.
Note : This function is similar to
"Sleep timer" in the Feature menu.
programme name
programme number —|
sound mode
status of DNR
picture mode
18
Fig. 1
Page 19

Picture menu
The picture menu allows you to make adjustment to the following : Picture, Brightness, Colour,
Tint (for NTSC programmes only). Sharpness and White Tone.
Picture
Bright
Colour
Tint
<=5
033
• Press PICTURE button on your remote control to start the PICTURE menu.
• Press A or ▼ button to highlight your choice.
• Press or ► button to make your selection. An adjustment bar appears. (Please refer to the
table below for the possible adjustment)
• Press OK button to return to PICTURE menu.
Note : The adjustment bar will return to the picture menu after 2 seconds if you do not make any
selection.
Sub-menu Selections
Picture
Brightness
Colour
Tint
Sharpness
White Tone
If you are satisfied with your selection, press PICTURE button to exit,
increase or decrease
increase or decrease
increase or decrease
increase or decrease
increase or decrease
Cool, Normal or Warm
19
Page 20

Sound menu
The sound menu aloows you to mak e adjustment to the following : Balance, Treble, Bass,
Headphone VoL, and Headphone Bal.
! SOUND
Press SOUND button on your remote control to start the SOUND menu.
Press A or T button to highlight your choice.
Press ◄ or ► button to make your selection. (Please refer to the table below for the possible
adjustment)
Press SOUND button to exit.
3^1©:; '-.'i -ФтштШ ’ihii
®Headphdne,¥df*-' .аштшщщ
■HeadphoneSai' ■«•«■iHliaiS
Sub-menu
Balance increase or decrease
Treble
Bass
Headphone Vol. increase or decrease
Headphone Bal.
Selections
increase or decrease
increase or decrease
increase or decrease
20
Page 21

Features menu
The features menu consists of the following : Sleeptimer, PIP Size, Child Lock, Message and
Timers.
• Press FEATURE button on your remote control to start FEATURE menu.
Sleeptimer is automatically highlighted.
«=5
§
as
Sleeptimer
You can use this feature to set a time for your television to switch to 'standby' (switch off tempo
rarily).
• Press and hold down ► button to increase the timer in steps of 15 minutes to a maximum of
180 minutes or press and hold down ◄ button to decrease the timer.
If you do not wish to set the timer, select Off.
•',''5'
I Sleeptimer 15 Min.
..«f
"Tadi
VM&0
One minute before your television switches to 'standby', the time appears on the screen together
with the message Good Night and starts to count down.
21
Page 22

CC D
§
eg!
... features menu
Child Lock
When Child Lock is On, it will disable the CHANNEL & or 0 button on your television's con
trols while control via the remote control is still possible.
Press T button to highlight Child Lock.
Press ◄ or ► button to select either On or Off.
When it is On, your television's screen will display Child Lock On! whenever you press
CHANNEL 0 or 0 button on your television's controls. Also, whenever you switch on your
television via the power knob or mains supply it will automatically go to standby mode.
(Refer to section on 'Operating your television' on the various ways to switch on)
Sleeptimer 15 MÌ».
Child Lock On
Message
Tlm^
PAL~B6
Closed Caption Type T^t
Closed Captfen Display Video
Message
Use this feature to create your message for display on the screen.
• Press T button to highlight Message.
• Press OK button to select it.
A sub-menu appears for you to key in your message and at the same time Change is
highlighted.
Sleepdmer
Child Lock
Hmens
PAL-8<3
Closed Caption Type Textl
Closed Capdon Display Video
I“":
I lyiESSAGE
15 Mm
On
22
Page 23

... features menu
Change Message (make a message or edit an existing message)
• Press OK button to select Change .
A block appears below the word Message :. Use ►,
your message. Refer to the table below for the function of each button.
A,T
or OK button to nnake or edit
I MESSAGE
is!
ilM
Button Function
OK
►
◄
A
r
Note : The possible characters for a programme name are "A... Z, *, /, +,., #, 0 ... 9 and [Space]".
Start or end the process
Select next character position
Select previous character position
Select the next character or number for the current position
Select the previous character or number for the current position
Clear Message (delete the message that you have made completely)
• Press T button to highlight Clear .
• Press OK button to confirm selection.
The whole message will be deleted completely.
I MESSAGE
1 Clear
1 itei
Mo
1
23
JN0
Page 24

m
s
©
g?
.. menu operation
Run Message (select the frequency of display of your message)
• Press ▼ button to highlight Run .
• Press or ► button to select No or Continuous*.
No : Do not run message.
Continuous : Run message continuously.
*Note:The Run Message will be reset to NO once you switched off your television. You can
also clear the message when it is running by pressing OK button.
Message:
I MESSAGE
Change
Clear
If you have finished with your selection, press FEATURE button once to go to FEATURE menu.
To see the message running, remove all menus on the screen.
Timers
This feature is for you to switch the channel that you are watching to another channel at a specific
time. You must first go to the FEATURE menu and select TIMERS. Actual Time is highlighted.
I FEATURES
I TIMERS
Sleeptimer
€3iiid Lock
Message
■Timers
PAL-8G
Closed Caption Type Textl
Closed Caption Display
Channel
Start Time
Cancel Timef
15 Min,
On
Video
Press A or T button to highlight your choice.
Press OK to confirm.
Press or ► button or digit buttons to key in the value.
24
Page 25

features menu
Sub-menu
Actual Time
Programme
Start Time
Cancel time
To select What to do
The present time. Key in time starting with hour then
The channel that you want to
switch to at the pre-set time.
The pre-set time that you
want the channel switching to
occur.
Cancel the 'Start Time’.
minutes.
Key in the programme number for the
desired television channel.
Key in time starting with hour then
minutes.
Press OK.
PAL-BG
Only selectable when you are in the " FRONT" playback channel. When you are playing back tape
in the PAL-BG format and there is no colour in the picture, then select “ On ” to produce the colour.
I FEATURES
t:
•s
oao
For menu items "Closed Caption Type" and "Closed Caption Display" refer to section on "Closed
Caption".
When you have finished, press FEATURE button to go back to FEATURE menu and again to exit.
25
Page 26

Picture Mode
Your television offers you 5 different picture modes to choose from.
• Press O button to cycle through the different picture mode and make your choice.
4:3
This mode leaves conventional 4:3 picture as they are, with black bars on both sides of your
screen.
Movie Expand 14:9
This feature is recommended for viewing "letter-box" movie (picture with a black bar on the top
and bottom) with 14:9 format. When you select this mode, you are able to fill the screen at the top
and bottom. Because your television's screen format is 16:9 you will see a black bar on both sides
of the screen. If you watch a 4:3 picture in this mode, the picture will be expanded and some
information at the top and bottom will be lost. Press A or T to move the picture up or down.
Movie Expand 16:9
This feature is recommended for viewing "letter-box" movie (picture with a black bar on the top
and bottom) with 16:9 format. When you select this mode, you are able to fill up the whole screen .
If you watch a 4:3 picture in this mode, the picture will be expanded and some information at the
top and bottom will be lost. Press A or T to move the picture up or down.
Super Wide
Ideal for conventional 4:3 television broadcasts and pre-recorded software, including movies
trimmed to 4:3. It creates a wide and natural picture by enlarging the entire picture. The top and
bottom parts will be expanded slightly out of the viewing screen. Press A or T to move the
picture up or down if required.
Wide Screen
Since your television and the picture are in the same format, there will be no loss of information
when you select this mode.
26
Page 27

Continuous Zoom
An exclusive PHILIPS feature specially built for your viewing pleasure in the 4:3, Movie Expand
14:9 and Movie Expand 16:9 picture mode.
To enlarge picture size
Press and hold ► button until the desired picture size is
obtained.
To reduce picture size
Press and hold -4 button until the desired picture size is
obtained.
4:3
eg
34]
Increase picture
size
i
Reduce picture
size
i
Movie Expand
16:9
27
Screen Display
Page 28

Stereo sound
If the television programme is transmitted in Stereo, you can
select MONO sound.
• Press I-H button to toggle between the two sound modes
and make your selection.
In some programmes, there are up to two different languages in
simultaneous transmission.
• Press I-H button to toggle between Main Stereo and SAP
(second audio programme) and make your selection.
28
Page 29

Incredible sound and Spatial sound
In STEREO mode, you can boost the sound to enhance the stereo
effect. The word INCREDIBLE SOUND appears momentarily on the
screen.
• Press ® button to switch on or off this effect.
<==>
3i{l
Note : When switching from stereo to mono programmes you may
experience a small decrease in volume.
In MONO mode, you can enhance the sound with a 'surround' effect
. The word SPATIAL appears momentarily on the screen.
• Press ® button to switch on or off this effect.
29
Page 30

C5ii
©
(is
«Sc
(S>
g?
Incredible Picture
This feature automatically optimise the picture you are watching.
Note : If you press SMART CONTROL PICTURE button. Incredible Picture is automatically
switched on.
Press INCREDIBLE PICTURE button to switch on this feature.
30
Page 31

Closed Caption
What is Closed Caption?
Closed Captioning allows you to read the voice content of television programmes on the screen.
Designed to help the hearing impaired, this feature uses on screen 'text boxes’ to show dialogue
and conversations while the television programmes is in progress. Closed Caption is also
available for some laser discs and video tapes. There are four caption mode (Caption 1, 2,3 or 4)
and four text mode (Text 1, 2,3 or 4). They may be transmitted simultaneously and can be used
for different ianuguages and information.
Caption 1,2,3 or 4
Dialogues (and descriptions) for the action of the
captioned television programme showing on the screen.
During screening of the programme, the text can appear
up to 4 rows simultaneously anywhere on the screen.
Smith : This is Mr Brown from ABC
Company.
Tanya : How do you do Mr Brown.
Brown : How do you do.
Example of a Caption mode
Closed Caption Programme On CNN
All items are based on standard time
(est.) Check local listings for the time
in your area.
06:00 Top of the World
10:00 Little House on the Prairie
12:00 News at Noon
12:30 The Animal Kingdom
Text 1,2,3 or 4
Often used for channel guides, schedules or bulletin
board information for closed caption programmes. The
complete screen is used for displaying text.
Note : This mode is not selectable when the picture
display on the screen is "4 : 3“ or "Wide Screen".
Example of a Text mode
Important:
1. Not all television programmes and product commercials are made for broadcast with
Closed Caption information included. Neither are all Closed Caption modes (Caption 1 to 4 or
Text 1 to 4) necessarily being used by a broadcast station during transmission of a closed
caption programme. Check with your local listings for details.
ág
(??>
ig)
§
Ü30
2. Broadcast station will often use spelling abbreviations, symbols and other grammatical
shortcuts in order to keep pace with the on screen action. These vary with the source of the
captioned text material and do not indicate a need for service of the television.
To activate Closed Caption
• Press CCD button on the lower half of the remote
control once and the status appears.
• Press CCD button again to select either On or Off.
31
Page 32

closed caption
To select Closed Caption Type/Display
• Press FEATURES button on your remote control to start the FEATURES menu.
• Press A or ▼ button to highlight your choice.
• Press ◄ or ► button to make your selection. (Please refer to the table below for the possible
adjustment)
• Press FEATURES button to exit.
* Example of Closed Caption Display
I FEATURES
PI P
Size
Child Usck
Timers
PAL-^S
Ck;sed Capfen Type
Ciosed Capdon Display
Sub-menu Selections
Ciosed Caption Type
Text 1, Text 2, Text 3,
Text 4, Caption 1,
Caption 2, Caption 3
or Caption 4
Closed Caption Display *
Video, Meshed or
Normal
>C ku
imge
On
Textl
Vìdee
lunt WWisi(Uarte)^s.aal8S.
Executive : OK. This quarter's sales
is.
_________
Video
Manager: Please give me an
account of this quarter's sales.
Executive; OK. This quarter's sales
is
.................
Meshed
32
Manager: Please give me an
account of this quarter's sales.
Executive : OK. This quarter's sales
is..................
Normai
Page 33

Subtitle Shift
Use this feature when the subtitles of the programme that you are watching were hidden from
your view e.g. Fig. 1 and Fig. 2.
Fig. 1 Picture in 'Movie Expand 14:9' mode
subtitles....subtitles....subtitles...
Fig. 2 Picture in ‘Letterbox' mode
......
-........................................
...
Press Q until the word Subtitle shift OIM appears.
The picture mode is automatically selected to 'Movie Expand 16:9' regardless of whichever
picture mode you were in and the subtitles will be shifted up. You may noticed a slight
deformation at the bottom of the picture in Fig. 3 but not in Fig. 4. For this reason, 'Subtitle
Shift' feature is recommended for 'Letterbox' picture.
.L. a!aI
«Si
§
a®
• Press twice to switch off 'Subtitle Shift'.
The word Subtitle OFF appears momentarily and your last picture mode is restored.
33
subtitles....subtitles....subtitles
subtitles....subtitles....subtitles..
Fig. 4
subtitles....subtitles....subtitles..
-CIlKttlflAe AtnKflflAC «JnKflflA«!:
Page 34

Smart Controls
You can choose the different picture and sound presentations available according to your prefer
ence.
Close the lower half of your remote control to access to the Smart Controls buttons on the cover.
Select picture settings
• Press SMART CONTROLS PICTURE button repeatedly to select Rich, Natural, Soft, Game
Mode and Personal.
The selection possibilities are displayed briefly on the top of the screen.
(Sil
S
Cs
<a>
Rich - Very vibrant colours.
Natural - Natural and original colours.
Soft - Warm colours and gives a cinema like effect when light is switched off.
Personal - The picture settings which you have last adjusted in this channel.
Game Mode - Picture and sound settings recommended for video games.
34
Page 35

... smart controls
Select sound settings
• Press SMART CONTROLS SOUND button repeatedly to select Music, Movie, Voice and
Personal.
The selection possibilities are displayed briefly on the top of the screen.
Music
Movie
Voice
Personal
Emphasizes bass frequency so that music is dynamic.
Emphasizes low and high frequencies to give sensation to the action.
Emphasizes speech frequency so that voice is clear.
The sound settings which you have last adjusted in this channel.
•=3
ig
35
Page 36

(Sal
5
eg
6
g?
Picture In Picture (PIP)
Open the lower half of your remote control to access to the PIP function
buttons
With Picture In Picture (PIP), you can call up a subscreen within your main screen. Therefore, you
can watch two channels at the same time.
Page 37

picture in picture
«=>
033
37
Page 38

Picture enhancement features
DNR
If you encounter some picture interference (like snowy
picture) on your television, switch on DIMR to improve the
picture.
• Press DNR button to switch to On or Off.
Before DNR (DNR Off)
38
Page 39

Video Cassette Recorder Functions
Your remote control has been designed specially to be used with selected PHILIPS brand video
cassette recorders. Please refer to the individual equipment's instruction manual when using this
remote control to ensure compatibility.
Open the lower half of your remote control to access to your video cassette
recorder functions buttons
Button Function
©
i§
iao
■
◄◄
•
►►
►
To stop movement of video tape.
To rewind, or playback video tape in
reverse at fast speed.
To record programme onto video
tape.
To advance, or playback videotape
at fast speed.
To playback video tape.
39
Page 40

External Connections
For playing back programmes from a VCR or Laser disc player on the
television
Connect your peripheral equipment e.g. video cassette recorder (VCR), laser disc player etc. to the
sockets at VIDEO IIM 1 and 2. The programmes will appear in channels named AV 1 CVBS and
AV 2 CVBS respectively. For mono equipment, you need not connect the AUDIO R (right) socket.
For playing back programmes from a S-VHS VCR on the television
If you have a S-VHS VCR, connect up the S-VIDEO socket from the television to the S-VHS socket
of the VCR to enhance the picture quality. The programmes will appear in a channel named AV 1 Y/
C. Note : You need not connect the VIDEO socket from the television.
Page 41

... external connections
For playing back programmes from a Camcorder on the television
Connect the equipment to the sockets on the front of the television. The programmes will appear
in a channel named FRONT CVBS. For mono equipment, you need not connect the AUDIO R
(right) socket.
§
If you have a S-VHS Camcorder, connect up the S-VHS socket from the television to the S-VHS
socket of the Camcorder to enhance the picture quality. The programmes will appear in a channel
named FRONT Y/C. Note : You need not connect the VIDEO socket from the television.
to AVout
socket
to S-VHS
socket
ooooo
1 1
r
/ 0
6 6 1 1
AUDIO VIDEO S'VHS
1 6 6
INSTALL VOLUME
6 6
CHANNEL
41
Page 42

05D
S
ea
<=>
(S)
g?
... external connections
Record programmes onto a video cassette recorder (VCR)
Connect your equipment to the sockets at MONITOR OUT. For mono equipment, you need not
connect the AUDIO R (right) socket.
f
-----------------------------„ e-O-.O;——
D —-
O 'oi-io'-io'-v-l.
^ ^rnmm
\
c
sa c ‘
Back view of television
Record programmes from a S-VHS VCR to another S-VHS VCR
Connect up the S-VIDEO sockets from the television to both the input and Output in order to
enhance the picture quality.
Note : You need not connect the VIDEO socket from the television.
Page 43

... external connections
View what you have connected to the external connections
y,V1 CVBS
Press VIDEO button
repeatedly and select the
screen you want.
i
(»9
g
Television
FRONT Y/C
Screen display
AVI CVBS : Select this if you wish to play back programmes from the equipment you
have connected to the sockets at VIDEO IN 1.
Note ; This is not selectable if the "Ghost Canceller" feature is switched “ON".
AVI Y/C : Select this if you wish to play back programmes from the equipment you
have connected to the sockets at VIDEO IN 1 (with S-VIDEO socket con
nected).
AV 2 CVBS ; Select this if you wish to play back programmes from the equipment you
have connected to the sockets at VIDEO IN 2.
AV 2 Y/C : Select this if you wish to play back programmes from the equipment you
have connected to the sockets at VIDEO IN 2 (with S-VIDEO socket con
nected).
FRONT CVBS
FRONT CVBS : Select this if you wish to play back programmes from the camcorder or com
puter game equipment you have connected to the sockets at the front of your
television.
FRONT Y/C : Select this if you wish to play back programmes from the camcorder or com
puter game equipment you have connected to the sockets at the front of your
television (with S-VHS socket connected).
Television : Last viewed television programmes.
43
Page 44

tiD
S
©
gP
... external connections
Enhance the sound of the television
Connect the AUDIO OUT sockets to an external amplifier.
Back view of television
0
External amplifier
44
Page 45

... external connections
External speakers connections (optional)
You may connect external rear and front speakers (not provided) to enhance the sound output of
the television.
Note : Surround Sound speakers must be connected in pairs and to the rear speakers sockets.
Back view of television
Right rear speaker
(5W, sq;
If you are using exter
nal front speakers,
slide this switch to the
position ,to
switch off the sound
from your television's
speakers.
Right front speaker
(17 W, 8 a)
How to connect the front and rear speakers
• Push down the connector clip (as shown).
• Insert the end of the red (black/white) into the red
socket and the black wire into the black socket.
Repeat the same for the other pair of wires.
Left rear speaker
(5W, 8D.)
Left front speaker
(17 W, 8 LI)
45
Page 46

Frequency tables
Table 1 — NTSC (Broadcast channels)
0Ш
s
e=>
ег
g?
Channel
No.
Picture
Freg. (MHz)
2 55.25 19 501.25
3 61.25 20 507.25
4
5 77.25 22
6
7
8
9
10
11
12
13
14
15
16 483.25 33 585.25
17 489.25 34 591.25
18 495.25 35 597.25
67.25
83.25 23 525.25 40 627.25 57
175.25 24 531.25
181.25
187.25
193.25 27 549.25 44
199.25
205.25 29 561.25 46 663.2 5 63
211.25 30 567.25
471.25
477.25 32 579.25
Channel
No.
Freg. (MHz)
21 513.25
25
26
28
31
Picture
519.25 39
537.25 42 639.25 59
543.25 43 645.25 60 747.25 77*
555.25 45
573.25 48 675.25 65 777.25 82*
Channel
No.
36
37
38
41
47
49
50
51
52
Freg. (MHz)
* Not implemented at the time of printing.
Table 2 — NTSC (Cable channels)
Channel
No.
Cl
C2 55.25 C34 283.25
C3 61.25 C35 289.25
C4
C5 77.25 C37 301.25
C6 83.25 C38 307.25
C7
C8
C9
CIO
C11
Cl 2
C13
C14 121.25 C46 355.25
C15
Cl 6
C17
Cl 8
Cl 9
C20
C21
C22 169.25 C54 403.25 C86 595.25
C23 217.25 C55
C24 223.25 C56 415.25
C25
C26
C27 241.25 C59
C28 247.25 C60
C29
C30
C31
C32
Picture
Freg. (MHz)
73.25
67.25 C36 295.25 C68 487.25 Cl 00
175.25 C39 313.25 C71 505.25 Cl 03
181.25 C40 319.25
187.25 C41 325.25 C73 517.25 Cl 05
193.25 C42 331.25
199.25 C43 337.25
205.25 C44 343.25 C76 535.25 Cl 08
211.25 C45 349.25
127.25 C47 361.25 C79 553.25 cm
133.25
139.25
145.25 C50 379.25
151.25 C51 385.25
157.25 C52 391.25 C84 583.25 C116
163.25 C53 397.25 C85 589.25
229.25 C57 421.25
235.25 C58 427.25
253.25
259.25 C62 451.25
265.25 C63 457.25
271.25 C64 463.25
Channei
No.
C33
C48
C49
C61
Picture
Free. (MHz)
277.25 C65 469.25 C97
367.25 C80
373.25 C81 565.25 C113
409.25 C87 601.25 C119
433.25 C91 625.2 5 Cl 23
439.25 C92 631.25
445.25 C93 637.25
Channel
No.
C66
C67
C69
C70
C72
C74
C75
C77
C78
C82
C83
C88
C89
C90
C94
C95 91.25
C96 97.25
Picture
603.25 53
609.25
615.25 55
621.25
633.25 58
651.25
657.25
669.25 64
681.25 66
687.25
693.25 68
699.25 69
Free. (MHz)
Channel
Picture
475.25
481.25
493.25
499.25
511.25
523.25
529.25
541.25
547.25
559.25
571.25
577.25
607.25
613.25
619.25
643.25
No.
Picture
Freq. (MHz)
705.25 70* 807.25
54 711.25
717.25 72* 819.25
56 723.25 73* 825.25
729.25
735.25
741.25
61 753.25 78*
62 759.25 79*
765.25
771.25 81 * 873.25
783.25 83* 885.25
67 789.25 85 73.25
795.25 86 89.25
801.25 87 109.25
Channei
No.
C98
C99 115.25
Cl 01 655.25
Cl 02
Cl 04 673.25
Cl 05 685.25
Cl 07 691.25
Cl 09 703.25
Clio
C11 2
Cl 14 733.25
C11 5
C11 7 751.25
C11 8 757.25
Cl 20
Cl 21
Cl 22
Cl 24 793.25
Cl 25
Picture
Freg. (MHz)
103.25
109.25
649.25
661.25
667.25
679.25
697.25
709.25
715.25
721.25
727.25
739.25
745.25
763.25
769.25
775.25
781.25
787.25
799.25
Channel No.
71*
74*
75*
76*
80*
Picture
Freq. (MHz)
813.25
831.25 92 139.25
837.25 93 145.25
843.25 94 151.2 5
849.25 95
855.25 96 163.25
861.25 97
876.25 98
879.25
Channel No.
88
89
90
91
99
Picture
Freq. (MHz)
115.25
121.25
127.25
133.25
157.25
169.25
217.25
223.25
46
Page 47

Specifications
Model no. 28PW778A, 28PW778B
Screen size 71 cm
Screen visible area
Length 58.0 cm
Height 32.7 cm
Diagonal 66.4 cm
Screen Format
Colour Transmission System NTSC M (3.58-4.5), PAL M (3.58-4.5) and PAL N
Playback NTSC M, PAL M, PAL N and PAL B/G
16:9
(3.58-4.5)
(»?>
==J
f??)
5iM
Sound Transmission System
Tuning channels PLL
Antenna input
Video Connections
Front sockets
- Headphone 0 3.5 mm
Back sockets
- Video In 1 1 X S-Video, 1 X Video, 2 x Audio
- Video In 2 1 X S-Video, 1 X Video, 2 x Audio
Monitor Out 1 X S-Video, 1 X Video, 2 x Audio
- Audio out 2 X Audio
Audio Output
Internal speakers - Squeeters
- Tweeter 2 X 5 W, 8 Q at 10% THD
- Subwoofer
External speakers(not provided)
- Front 2 X 17 W, 8 Q at 10% THD
- Rear (Surround) 2 X 5 W, 8 £2 at 10% THD
Main Voltage, Frequency 100-250 V~, 50/60 Hz
BTSC Stereo
75 ohms co-axial
1 X S-VHS, 1 X Video, 2 x Audio
2 X 9 W, 12 Q at 10% THD
1 X 15 W, 8 £2 at 10% THD
Power Consumption
Dimensions
Width
Height 49.7 cm
Depth
Weight (Approx, and excluding packaging)
Note : The specification is subjected to change without notification
125 W
73.8 cm
53.4 cm
42 kg
47
Page 48

Page 49

Page 50

 Loading...