

Page 1
Hospitality Television
20/26/32HF5335D
15/20HF5234
- 1 -
Page 2

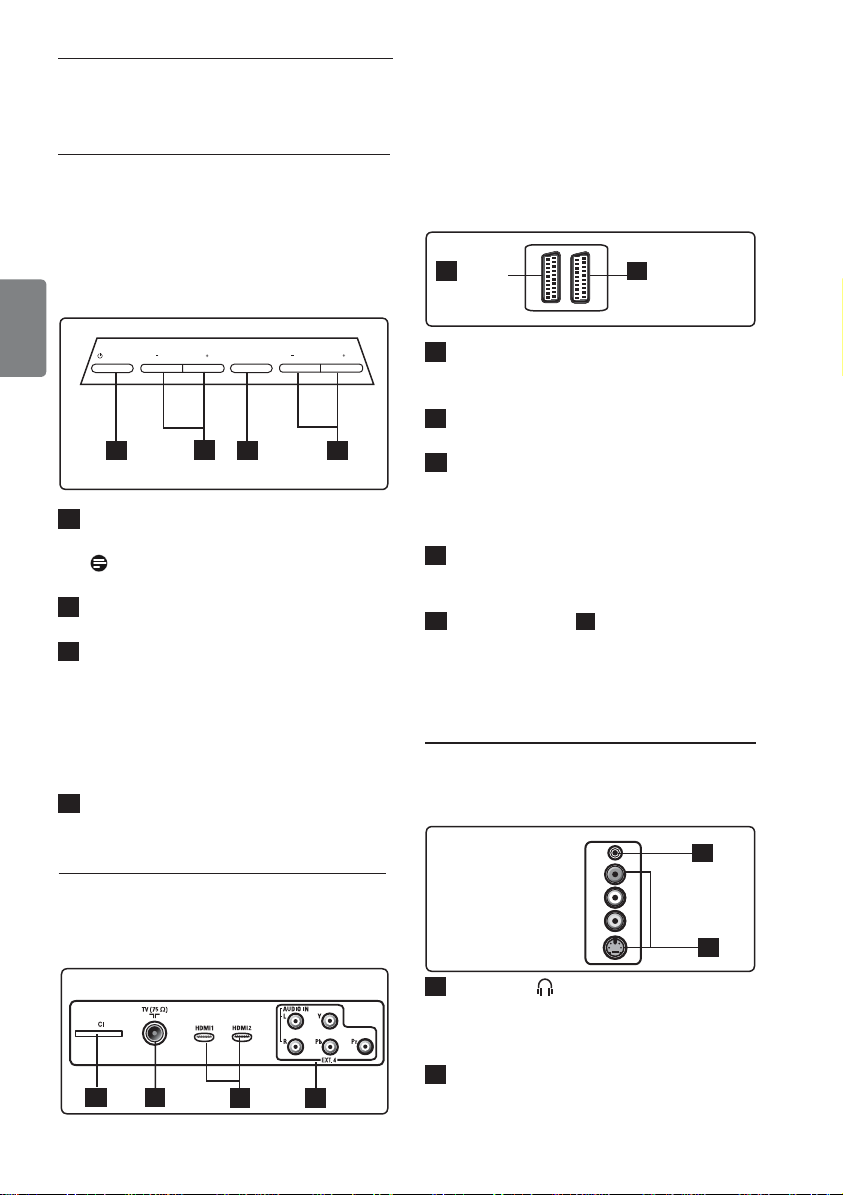
Installation of your Philips Hotel TV
1. Introduction
This addendum has been designed to help you install programmes on this Digital TV and activating the hotel
mode.
Use this addendum in conjunction with the User Manual of this television.
Please handle the TV with care and wipe with a soft cloth to ensure your TV keeps looking new.
2. The benefits of the Philips hotel TV
This TV is specially designed for hotels. The Philips hotel TV offers all kind of features to
Maximise the convenience for the hotel and meet the needs for the guest
Welcome message to give a friendly welcome to your guest when activating the tv
Remote control features like low battery detection and an anti-theft screw for preventing of theft for
batteries
Access to the user menu can be blocked. This prevents users (e.g. guests) from deleting or changing
program settings and/or modifying picture and sound settings. This ensures that TVs are always set up
correctly.
A
switch-on
specified program and volume level.
The maximum volume can be limited in order to prevent disturbance.
The television keys VOLUME +/- , PROGRAM +/- and MENU can be blocked.
Screen information can be suppressed.
Programmes can be blanked
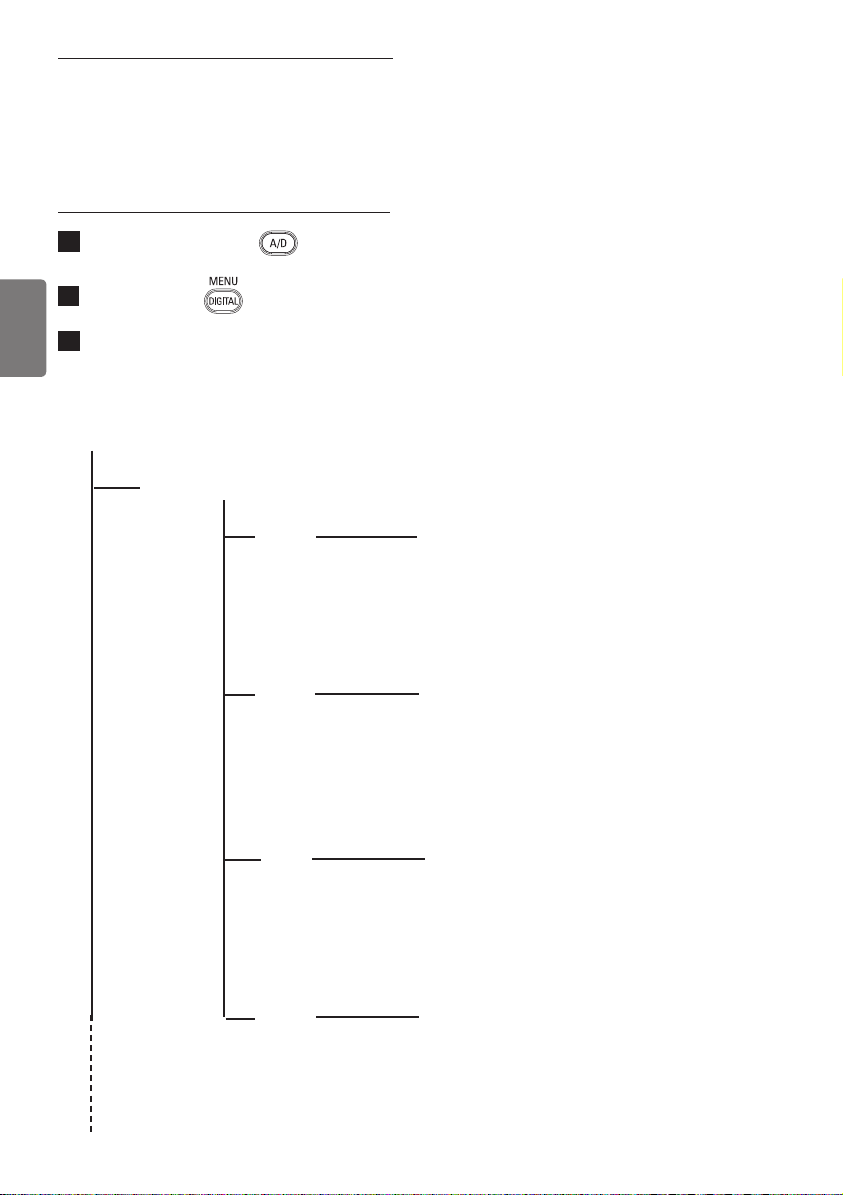
3. Installing the channels
Installing Digital Programs (only applicable for 20/26/32HF5335D)
Ensure the TV is in Digital mode. If it is in Analogue mode, press the A/D (Analogue/Digital) key on the
Remote Control to enter the Digital mode.
volume and programme can be selected. After switching on, the TV will always start on the
1. Press the
2. Press the Up/Down Arrow Key to scroll to the item called INSTALLATION and press the Right Arrow
Key
3. Press the Up/Down Arrow Key to scroll to the item called SERVICE SETUP and press the Right Arrow
Key
4. Press the Up/Down Arrow Key to scroll to the item called REINSTALL ALL SERVICES and press the Right
Arrow Key
5. Press the Up/Down Arrow Key to scroll to the item called SEARCH and press OK to start the scan.
(Menu Digital) key on the Remote Control
The
TV will now start to scan and install all available (Digital) TV channels and Radio stations automatically.
When the scan is completed, the TV menu will indicate the number of digital services found.
6. Press the OK key again to Store all the services that have been found.
- 2 -
Page 3
Installing Analogue Programs
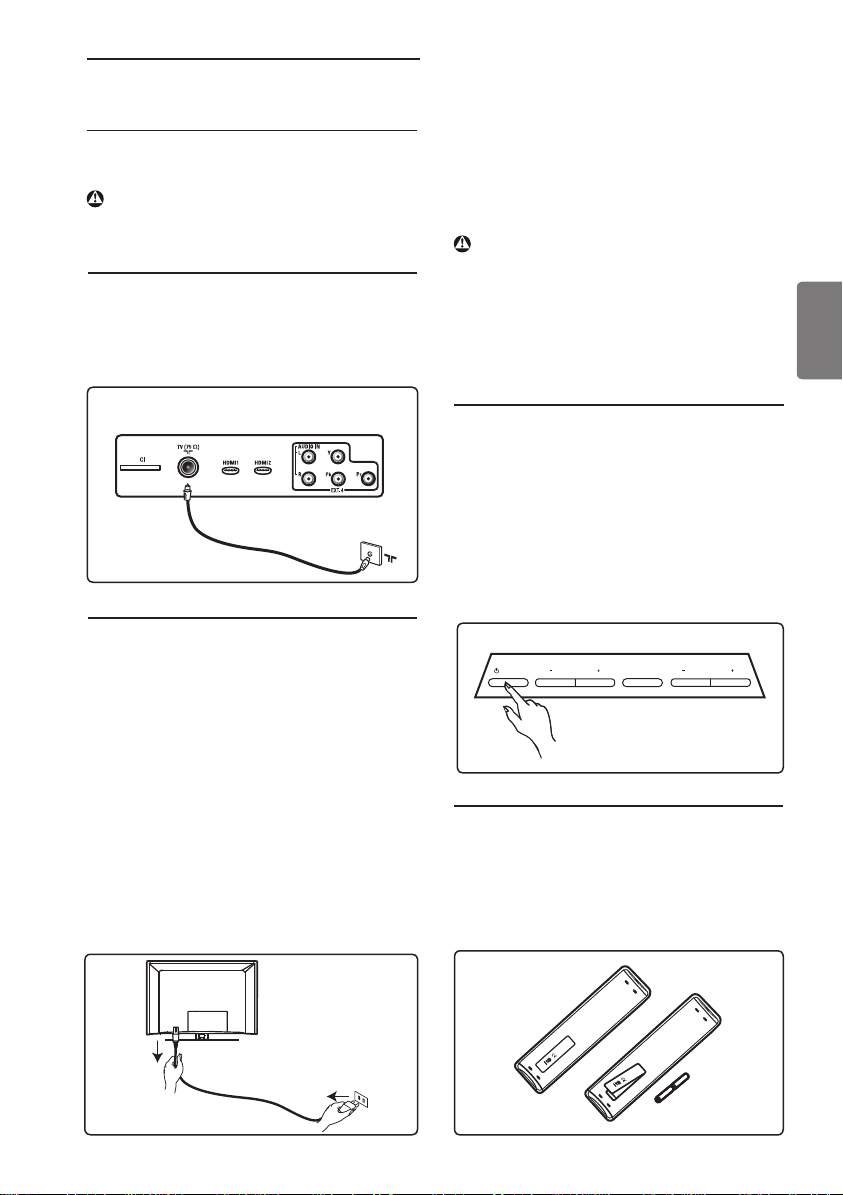
Ensure the TV is in Analogue mode. If it is in Digital mode, press the A/D (Analogue/Digital) key on the
Remote Control to enter the Analogue mode.
1. Press the
2. Press the Up/Down Arrow Key to scroll to the item called INSTALL and press OK
3. Press the Up/Down Arrow Key to scroll to the item AUTO STORE and press OK
The TV will now start to scan and install all available (Analogue) TV channels automatically. This operation will
take a few minutes. The TV display will show the progress of the scan and the number of programmes found.
Refer to the chapter on
can also refer to the chapter on
preferred.
4. Activating the Hotel Mode Setup menu (BDS)
1. Switch on the television and select an analogue channel
2. On the Remote Control, press keys: [3, 1, 9, 7, 5, 3, MUTE]
3. The BDS HOTEL MODE SETUP MENU becomes visible
4. Use the cursor keys to select and change any of the following settings:
5. Select “STORE” and press [CURSOR RIGHT] to save the settings and exit BDS Hotel Mode
setup. Press [MENU] to exit without saving.
6. For BDS Hotel Mode settings to take effect, you must turn the TV set Off, then back On.
BDS Hotel Mode Functions
This paragraph describes the functionality of each item in the BDS Hotel Mode Setup menu.
BDS MODE
ON BDS Hotel Mode is ON:
The user menu is blocked.
All settings of the Hotel Mode Setup menu are in effect.
Automatic Tuning of Analogue Programmes
Function Possible selections
BDS MODE ON /OFF
SWITCH ON SETTINGS
SWITCH ON VOLUME 0-100, LAST STATUS
MAXIMUM VOLUME 0-100
SWITCH ON CHANNEL USER DEFINED, LAST STATUS
POWER ON ON/STANDBY/LAST STATUS
DISPLAY MESSAGE ON/OFF
WELCOME MESSAGE LINE 1/LINE 2/CLEAR
CONTROL SETTINGS
LOCAL KEYBOARD LOCK ON/OFF/ALL
REMOTE CONTROL LOCK ON/OFF
OSD DISPLAY ON/OFF
HIGH SECURITY MODE ON/OFF
AUTO SCART ON/OFF
MONITOR OUT ON/OFF
BLANK CHANNEL ON/OFF
STORE >
(Menu TV) key on the Remote Control
in the User Manual for more details. You
Manual Tuning of Analogue Programmes
in the User Manual if a manual scan is
- 3 -
Page 4

OFF BDS Hotel Mode is OFF:
The TV operates as a normal consumer TV
SWITCH ON VOL
When the user switches the TV ON, it will play at the specified volume level. There are 2 options:
LAST STATUS Upon start-up, the TV volume will be set to the level before the TV set was
USER DEFINED As specified by installer
Remark: “SWITCH ON VOL” cannot exceed the MAXIMUM VOL level. This is the volume level with which
the Hotel Mode Setup menu was entered.
MAXIMUM VOL
The TV Volume will not exceed the selected volume level.
SWITCH ON CHANNEL
When the user switches the TV ON, it will tune to the specified channel. There are 2 options:
LAST STATUS The TV will switch on to the last channel that was shown before the TV set
USER DEFINED Any analogue channel can be chosen to be the first channel to switch on
POWER ON
The Power On function allows the TV to enter a specific mode of operation (On or Standby) after the mains
power is activated.
ON When set, the TV will always turn ON after the mains power is enabled.
STANDBY When set, the TV will always turn to STANDBY after mains power is enabled
LAST STATUS When set, the TV will always turn to the last power status before the mains power was
DISPLAY MESSAGE
ON Enables display of the Welcome Message for 30 seconds after the TV set is turned on
OFF Disables the display of the Welcome Message.
If OSD DISPLAY is set to OFF, then the Welcome Message is automatically disabled.
WELCOME MESSAGE
The Welcome Message function allows the TV to show a customized greeting to the hotel guest whenever the
TV is switched on. This helps to personalize the hotel experience for guests.
The Welcome Message can consist of 2 lines of text, with each line containing a maximum of 20 alphanumeric
characters. Use the Remote Control arrow keys to create the Welcome Message.
To enable the display of the Welcome Message, the DISPLAY MESSAGE option must be ON
To clear the Welcome Message from the TV’s memory, select CLEAR
LOCAL KEYBOARD LOCK
ON The television keys VOLUME +/-, PROGRAM +/- and MENU are blocked.
OFF The television keys VOLUME +/-, PROGRAM +/- and MENU function normally
ALL The television keys VOLUME +/-, PROGRAM +/-, MENU and POWER are blocked.
REMOTE CONTROL LOCK
ON Standard Remote Control keys are disabled.
OFF All Remote Control keys will function normally.
OSD DISPLAY
ON Normal screen information is displayed (e.g. programme information)
OFF Screen information is suppressed.
last turned off.
was turned off
disabled.
- 4 -
Page 5

HIGH SECURITY MODE
ON Allows access to the BDS Hotel Mode Setup Menu via the special BDS Setup Remote only.
(RC2573/01)
OFF Allows access to the BDS Hotel Mode Setup Menu via BDS Setup Remote or via normal Remote
Control (using special key code sequence).
AUTO SCART
The Auto Scart function enables auto-detection of AV devices that are connected to the TV’s Scart connector.
ON Enables Auto Scart switching in BDS Hotel Mode.
OFF Disables Auto Scart switching in BDS Hotel Mode.
MONITOR OUT
ON Allows audio & video output from TV via relevant AV connectors (if available).
OFF Disables both Audio & Video output from the TV (to prevent illegal copying).
BLANK CHANNEL
The Blank Channel function disables the display of video on the TV, but does not affect the audio output. This
function can be used for audio applications (example: Off-air radio transmission, music channels, and so on),
which do not necessarily require the display of video.
ON The current programme is blanked
OFF The current programme is not blanked (normal visible; DEFAULT value)
BLANK CHANNEL can be set for every channel. Use [P+ / P-] to go through all the programmes and set the
desired status per channel. The programme number is visible in the top left corner.
Low Battery Check
This television set has a special feature which checks the battery power level of a TV Remote Control, and
indicates if the battery is low and requires changing.
(Note: The Low Battery Check function works only with certain models of Remote Controls. Please check
with the Philips sales representative if the Remote Control used with this TV supports this function)
To activate the Low Battery Check function, hold the TV Remote Control in front of the TV, and press and
hold the OK button on the Remote Control for at least 5 seconds. A message will appear on the TV screen to
indicate if the battery power level is OK, or if it is Low. If the message indicates that the battery level is low, it
is recommended to change the batteries of the Remote Control immediately.
5. Cloning of settings
Cloning of analogue TV channels and TV settings as described in the chapter
Hotel Mode Set-up menu
For 15/20HF5234
o Wireless cloning with the SmartLoader 22AV1120 or 22AV1135
o Cloning off all adjustable TV settings + analogue channel table
For 20/26/32HF5335D
o Wired cloning with the SmartLoader 22AV1135 using the wire packed with the SmartLoader
o Cloning off all adjustable TV settings + analogue channel table (digital channel table via automatic
installation)
Instruction for cloning of settings between TVs
Philips SmartLoader (22AV1135/00)
The Philips SmartLoader is an installation tool especially designed for easy and fast installation and copying of
TV settings on Philips Institutional TV’s.
- 5 -
Page 6

The Philips SmartLoader works in 2 modes – Wireless and Wired:
Wireless mode ---- through infrared sensor (15/20HF5234)
Switch the SmartLoader to “Wireless” mode by sliding the side-switch to the icon on the SmartLoader
device. Point the Wireless SmartLoader to the TV’s infrared receiver (optimal distance of 5-30cm) and proceed
with the Installation procedure listed below.
Wired mode ---- using the by-packed accessory cable(s) (20/26/32HF5335D)
Switch the SmartLoader to “Wired” mode by sliding the side-switch to the icon on the SmartLoader
device.
Examine the rear connectors of the TV set to determine if the 3-pin or 4-pin female connector wire (packed
with the Wireless SmartLoader) should be used. Plug in the correct connector wire to the corresponding
opening on the TV set (usually marked as SERV C), and then connect the RJ11 jack end of the accessory wire
to the RJ11 socket on the SmartLoader.
The Installation Procedure consists of three simple steps:
1. Choosing a Master TV
The Master TV is the TV set whose installation and configuration settings are to be copied into other TV’s (of
the same type only).
2. Programming the SmartLoader with the settings from the Master TV
Follow these steps to program the SmartLoader with the settings of the Master TV.
a) Wireless method
Set the SmartLoader to “Wireless” mode using the side switch.
Turn on the TV, and while holding the SmartLoader, point it in the direction of the
TV. Press the “MENU” Key on the SmartLoader.
b) Wired method
Connect the SmartLoader to the TV using the appropriate accessory cable.
Set the SmartLoader to “Wired” mode using the side switch.
Turn on the TV, and while holding the SmartLoader, point it in the direction of the
TV. Press the “MENU” Key on the SmartLoader.
The Master TV will show the following menu:
SMARTLOADER TO TV >
TV TO SMARTLOADER >
On the TV screen, highlight the menu option “TV TO SMARTLOADER”
Press the right arrow key on the SmartLoader to start the programming process
A number display (from 0~100) will be shown on screen, indicating the percentage of the programming
progress from the TV to the SmartLoader. When the programming is completed, “##” will show “100” and the
message “DONE” will appear.
TV TO SMARTLOADER ## (0-100)
The SmartLoader is programmed and can be used to install and configure other TVs.
Copying the settings of the Master TV to other TVs with the SmartLoader
Follow these steps to install and configure the settings of a Philips TV with the SmartLoader.
- 6 -
Page 7

a) Wireless method
Set the SmartLoader to “Wireless” mode using the side switch.
Turn on the TV, and while holding the SmartLoader, point it in the direction of the
TV. Press the “MENU” Key on the SmartLoader.
b) Wired method
Connect the SmartLoader to the TV using the appropriate accessory cable.
Set the SmartLoader to “Wired” mode using the side switch.
Turn on the TV, and while holding the SmartLoader, point it in the direction of the
TV. Press the “MENU” Key on the SmartLoader.
On the TV screen, highlight the menu option “SMARTLOADER TO TV”
Press the right arrow key on the SmartLoader to initiate the copying process
> A number display (from 0~100) will be shown on screen, indicating the percentage of the installation
progress from the SmartLoader to the TV. When the data transfer is completed, “##” will show “100” and
the message GOODBYE will appear.
SMARTLOADER TO TV ## (0-100)
> The TV will go to Standby mode. When the TV is next powered on, it will be configured with the settings
from the Master TV, and ready for use.
Problems and Solutions:
1.
The message “I2C ERROR” is displayed on the screen.
Bad connection of RJ11 wire or wrong data transmission has occurred. Try again.
2.
The message “WRONG VERSION” is displayed on the screen.
The program contained in the SmartLoader has a software code incompatible with the actual TV.
Reprogram the Wireless SmartLoader from a Master TV whose software code is compatible with the
actual TV.
3.
TV doesn’t respond to the SmartLoader.
Check if the LED on the SmartLoader lights up in green when pressing any button.
If the LED is red, it means that the batteries are low and should be replaced.
Bring the SmartLoader closer to the TV infrared receiver and try again.
Notes:
Make sure that the 3 R6/AA sized batteries are placed correctly in the bottom compartment of the
SmartLoader. The LED on the SmartLoader should light up in green when pressing any button, indicating
operational batteries. When the LED shows red, the batteries need to be replaced.
The SmartLoader can only copy the settings between 2 TVs of the same type. Once the
SmartLoader is programmed with the settings from a Master TV of a certain type or model,
then these settings can be installed on another TV of the same model only.
The SmartLoader cannot be used to copy the (digital) channel table of a Digital TV set.
If the SmartLoader is used with a DVB (European Digital) TV set, then the TV set must first
be switched to Analog mode.
- 7 -
Page 8

Y
T
Disposal of your old product.
our product is designed and manufactured with high quality materials and
components, which can be recycled and reused. When this crossed-out wheeled bin
symbol is attached to a product it means the product is covered by the European
Directive 22002/96/EC. Please find out more about the separate collection system for
electrical and electronic products in your local neighborhood.
2007© Koninklijke Philips Electronics N.V. all rights reserved
Specifications are subject to change without notice
Trademarks are property of Koninklijke Philips Electronics N.V. or their respective owners.
Please act according to your local rules and do not dispose of your old products with
your normal household waste. The correct disposal of your old product will help
prevent potential negative consequences for the environment and human health.
he packaging of this product is intended to be recycled. Apply to the
local authorities for correct disposal.
- 8 -
Page 9

www.philips.com/support
TR KULLANIM KILAVUZU
Page 10

Page 11

Model
www.philips.com/support
Serial
Country Number Tariff
Austria 0810 000205 €0.07/min
Belgium 078250145 €0.06/min
Czech Rep 800142840 free
Denmark 3525 8759 local
Finland 09 2311 3415 local
France 0821 611655 €0.09/min
Germany 01803 386 852 €0.09/min
Greece 0 0800 3122 1280 free
Hungary 0680018189 free
Ireland 01 601 1777 local
Italy 840320086 €0.08/min
Luxemburg 40 6661 5644 local
Netherlands 0900 8407 €0.10/min
Norway 2270 8111 local
Poland 0223491504 local
Portugal 2 1359 1442 local
Slovakia 0800004537 free
Spain 902 888 784 €0.10/min
Sweden 08 5792 9100 local
Switzerland 0844 800 544 local
UK 0870 900 9070 local
This information is correct at the time of press.
For updated information, see www.support.philips.com
Page 12
Geri Dönüşüm
Bu ürünün ambalajı geri dönüştürülecek
şekilde hazırlanmıştır. Doğru atma konusunda
yerel mercilere başvurun.
Eski ürününüzün atılması
Ürününüz yüksek kaliteli malzeme ve
bileşenlerle tasarlanıp üretilmiştir;
bu malzeme ve bileşenler geri dönüştürülebilir
ve tekrar kullanılabilir. Üzerinde çarpı işareti
olan bu tekerlekli çöp kutusu bir ürüne
koyulduysa, ürünün 2002/96/EC sayılı Avrupa
Direktifi kapsamında olduğu anlamına gelir.
Lütfen bölgenizdeki elektrikli ve elektronik
ürünleri ayrı toplama sistemi hakkında
bilgi edinin. Lütfen bölgenizdeki kurallara
uyguhareket edin ve eski ürünlerinizi normal
ev atıklarınızla birlikte atmayın. Ürününüzün
doğru bir şekilde atılması, çevre ve insan
sağlığı üzerindeki olası olumsuz sonuçların
önlenmesine yardımcı olacaktır.
Pillerin atılması
Ürünle verilen pillerde ağır metaller, cıva ve
kadmiyum yoktur. Lütfen boşalan pillerin yerel
mevzuata göre nasıl atılacağın öğrenin.
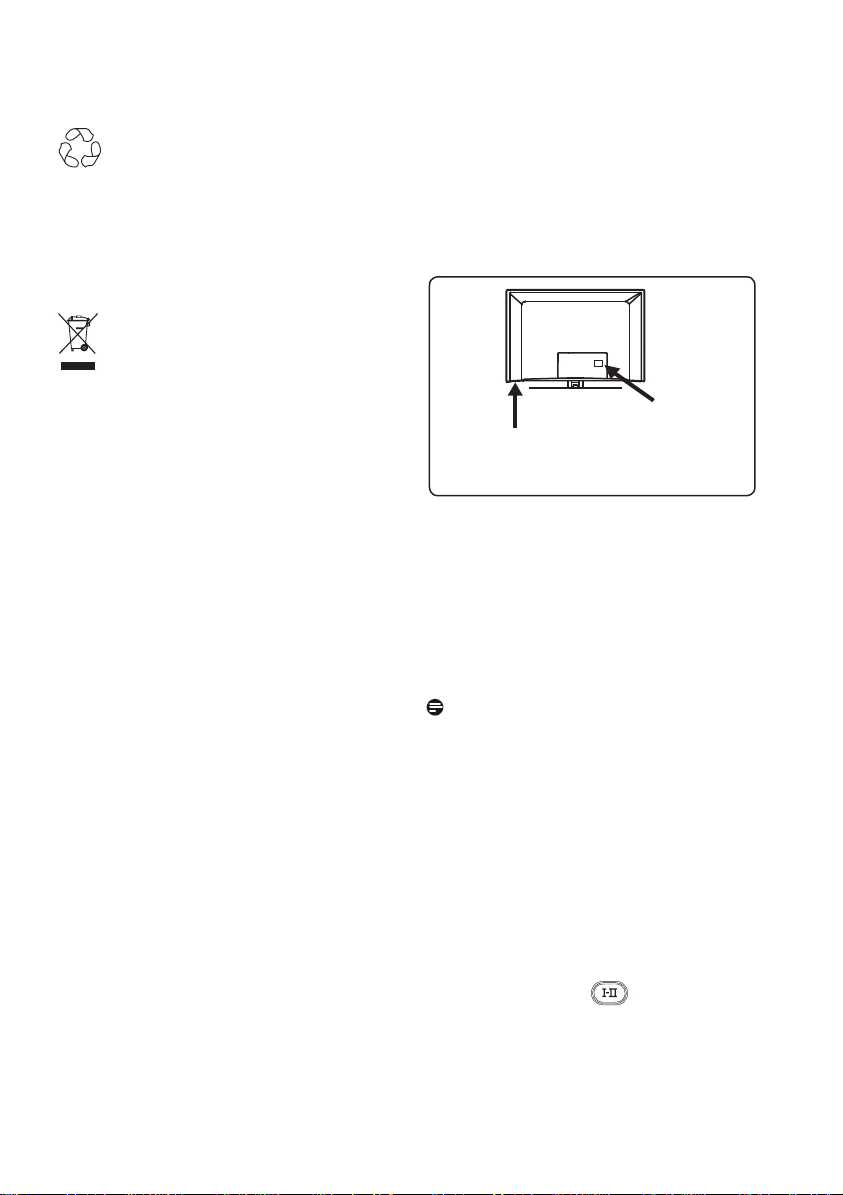
Ürün bilgileri
• Model ve Seri numarası televizyonunuzun
arkasında, sol alt tarafında ve ambalajın
üstünde bulunabilir.
Televizyonun
arkası
Televizyonun
sol alt tarafı
• Bu televizyon için Bekleme Modu Güç
Tüketimi 1 Watt’tan düşüktür.
• Televizyonun Güç Tüketimi, TV’nin
arkasındaki tip plakasında bulunabilir.
• Ürünün diğer spesifi kasyonları için
www.philips.com/support adresindeki ürün
broşürüne bakın.
Not
Spesifikasyonlar ve bilgiler, önceden
bildirilmeden değiştirilebilir.
• Daha fazla yardıma gereksinim duyarsanız,
lütfen ülkenizdeki müşteri destek servisini
arayın. Ürünle verilen Dünya garanti
kitapçığında ilgili telefon numaraları ve
adresler verilmektedir.
Önemli
• Bu sette AC3 (ses formatı) desteklenmez.
Alternatif bir ses seçmek için uzaktan
kumanda üzerindeki tuşunu kullanın.
• Bazı TV antenlerinin TV setinden güç
alması gerekir. Bu set, bu özelliği
desteklemez.
Page 13

İçindekiler
1 Giriş ........................................... 3
1.1 Önemli Bilgiler. ....................................3
1.1.1 TV ekranında sabit görüntüler. ........ 3
1.1.2 Elektrikli, Manyetik ve
elektromanyetik Alanlar (“EMF”). ... 3
1.2 Dijital TV nedir. ...................................4
1.3 Dijital ve Analog kanallar. .................. 4
2 Güvenlik .................................... 5
2.1 Genel .....................................................5
2.2 Ekran bakımı ......................................... 5
3 Televizyon tuşlarına
ve konektörlere genel bakış .... 6
3.1 Yan kontroller. ....................................6
3.2 Arka konektörler ................................ 6
3.3 Yandaki konektörler ..........................6
4 Başlarken ................................... 7
4.1 Başlamadan önce ................................. 7
4.2 Anten takma ......................................... 7
4.3 Elektriğe bağlama ................................7
4.4 TV’yi açma ............................................7
4.5 Uzaktan kumandayı kullanma ........... 7
5 Uzaktan kumanda işlevleri ...... 8
6 Dijital ana menüye ve alt
menülere genel bakış ...............10
7 TV’yi ilk kez açma ....................13
8 Başlıktaki bilgileri anlama ........ 14
8.1 Başlık açıklaması. .................................14
8.2 Simgelerin açıklaması .......................... 14
9 Hizmet listeleri ......................... 15
9.1 Rearrange services (Hizmetleri
yeniden düzenle) .................................15
9.2 View new TV channels (Yeni TV
kanalları izle) veya Listen to new Radio
stations (Yeni Radyo istasyonları dinle)
................................................................ 15
10 Hizmet ayarları ......................... 16
10.1 Add new services (Yeni hizmetler
ekle) ....................................................... 16
10.2 Reinstall all services (Tüm hizmetleri
yeniden kur) .........................................16
10.3 Manual install services (Hizmetleri el
ile kur) ...................................................17
Türkçe
11 Test reception (Test alımı) ..... 18
12 Preferences (Tercihler) ........... 19
13 Access restrictions (Erişim
kısıtlamaları). ............................ 20
14 Favourite (Sık İzlenen) listenizi
ayarlama ....................................21
15 Information (Bilgi). ................... 22
16 Options (Seçenekler) menüsünü
kullanma .................................... 23
17 TV Rehberi ................................ 24
18 Dijital teleteks (MHEG) ........... 25
19 Conditional Access Module
(CAM) (Koşullu Erişim Modülü)
.................................................... 26
20 Analog programları otomatik
olarak ayarlama ........................ 27
21 Elle Hafıza .................................28
22 Program Sıralama .................... 29
23 Kanala İsim Verme ................... 30
24 Favori Programları Seçme ...... 21
1
Page 14

25 Özellikler....................................32
25.1 Zamanlayıcı......................................... ..32
25.2 Ebeveyn Kilidi................................... ....33
25.3 Çocuk Kilidi.......................................... 34
25.4 Aktif Kontrol..................................... ...34
26 Görüntü ve Ses ayarları....... ....35
27 Akıllı Görüntü ve Ses........ ....... 36
28 Ekran Biçimleri...................... ... 37
Türkçe
32.6 DVD oynatıcı, Uydu alıcısı veya Kablo
TV bağlama ........................................... 46
32.7 Bilgisayar bağlama................................47
32.8 Fotoğraf Makinesi, Kamera, Oyun
konsolu bağlama .................................. 48
32.7 Connect a PC....................................... 47
32.8 Connect a Camera, Camcorder or
Game console...................................... 48
32.9 Kulaklık bağlama .................................. 48
33 Sorun giderme .......................... 49
29 Teletekst..................................38
30 TV’yi PC Monitörü olarak
kullanma .................................... 40
30.1 PC donanımını bağlama......................40
30.2 Bilgisayar bağlıyken TV ayarlarını
yapma.......................................... ...........40
31 TV’yi HD (Yüksek Tanımlı)
modunda kullanma ................... 41
31.1 HD cihazını bağlama....... .................... 41
31.2 HD modunda iken TV ayarlarını
yapma .....................................................41
31.3 Features (Özellikler) Menüsünde Mod
Seçimi .....................................................42
31.4 Features (Özellikler) menüsünde
Display (Görüntü) (native 1080i)
Seçeneği ................................................ 42
31.5 Desteklenen giriş biçimleri................ 43
32 Diğer ekipmanları bağlama ..... 44
32.1 VCR veya DVD kayıt cihazı bağlama
................................................................ 44
32.2 Kod Çözücü ve VCR bağlama .......... 44
32.3 VCR veya VCR ile DVD kayıt cihazı
bağlama .................................................. 45
32.4 Uydu alıcısı bağlama ............................45
32.5 DVD oynatıcı, Kablo TV veya Oyun
konsolu bağlama .................................. 46
34 Sözlük.................................... .... 51
2
Page 15

1 Giriş
Bu televizyonu aldığınız için teşekkür ederiz.
Bu kılavuz yeni TV’nizi kurup çalıştırmanız
için gereken tüm bilgileri içermektedir.
Bu yönerge kılavuzunda sorununuz
için bir yanıt bulamazsanız veya
Sorun Giderme sayfası TV ile ilgili
sorununuzu çözmezse, bölgenizdeki Philips
Müşteri İlişkileri veya Hizmet Merkezi’ni
arayabilirsiniz. Ayrıntılar için size verilen
Dünya Çapında garanti kitapçığına bakın.
Philips müşteri destek hizmetini aramadan
önce Model ve Ürün numarasını hazır
bulundurun (numaraları televizyonunuzun
arkasında veya yanında ya da ambalaj
üzerinde bulabilirsiniz).
1.1 Önemli bilgiler
1.1.1 TV ekranında sabit görüntüler
LCD ve Plazma Panellerin bir özelliği, aynı
görüntünün uzun süre gösterilmesinin
ekranda kalıcı bir görüntü izine neden
olabilmesidir. Buna fosfor yanığı adı verilir.
TV’nin normalde tüm ekranda görüntülerin
hareket edipdeğiştiği resimler göstermek için
kullanılması gerekir.
Sabit görüntü örnekleri (bu tam kapsamlı
bir liste değildir; izlerken başka örneklerle
karşılaşabilirsiniz).
• TV ve DVD menüleri: DVD disk içerik
listeleri.
• Siyah çubuklar: Ekranın sağında ve
solunda siyah şeritler göründüğünde,
resim formatının resim tüm ekranı
kaplayacak şekilde değiştirilmesi önerilir;
• TV kanalı logosu: Bu logolar parlak ve
sabitse sorun yaratır. Hareketli veya
düşük kontrastlı grafik öğeler ekranda
dengesiz yaşlanmaya daha az yol açar;
• Borsa şirketi simgeleri: TV ekranının alt
tarafında gösterilir;
• Alışveriş kanalı logoları ve fiyat
gösterimleri: Parlaktır ve TV ekranında
aynı noktada sürekli veya tekrar tekrar
gösterilir.
• Sabit resim örnekleri arasında şunlar
da yer alır: logolar, bilgisayar görüntüleri,
saat, 4:3 modunda teletekst ve
görüntüler, durağan görüntüler veya
karakterler vb.
İpucu:
İzlerken kontrastı ve parlaklığı azaltın.
1.1.2 Elektrikli, Manyetik ve
Elektromanyetik Alanlar (“EMF“)
• Royal Philips Electronics, her elektronik
cihaz gibi, genelde elektromanyetik
sinyaller alıp veren çok sayıda tüketici
ürünü imal edip satmaktadır.
• Philips’in başlıca İş İlkeleri’nden biri,
yürürlükteki tüm yasal şartlara ve
ürünlerin imal edildiği zamanki ilgili EMF
standartlarına uyacak şekilde,
ürünlerimizde gerekli tüm sağlık ve
güvenlik önlemlerini almaktır.
• Philips, sağlığı olumsuz etkilemeyen
ürünler geliştirme, imal etme ve pazarlama
konularında tavizsiz bir tavra sahiptir.
• Philips, ürünlerinin kullanım amacı
doğrultusunda, doğru bir şekilde
kullanılması durumunda, günümüzün
bilimsel kanıtlarına göre güvenli olduğunu
teyit eder.
• Philips, uluslararası EMF ve güvenlik
standartlarının geliştirilmesinde aktif
rol alarak, ürünlerine standardizasyondaki
gelişmelerin erkenden entegrasyonunu
sağlar.
Türkçe
3
Page 16

1.2 Dijital TV nedir?
Not
Dijital Televizyon, analog TV’de
görebileceğiniz girişim olmadan, size daha
kapsamlı bir TV izleme seçeneği sunar.
Televizyon izlemeyi yepyeni bir deneyime
dönüştürebilir. Geniş ekran programlama
seçenekleri daha fazladır. Favori
programlarınızın pek çoğu dijital kanallarda
geniş ekran biçiminde yayınlanır ve bu
Türkçe
özellik analog TV tarafından düzgün şekilde
desteklenmez.
Dijital TV yepyeni bir etkileşim deneyimi
sunar. Uzaktan kumandanızı kullanarak,
örneğin dijital metin gibi eski teleteks
sistemine göre çok daha net her türlü
bilgiye erişebilirsiniz. Bu özellik sayesinde,
izlemekte olduğunuz programın yanı
sıra programla ilgili bilgilerin de keyfi ni
çıkarabilirsiniz. Ayrıca aynen gazetede
veya TV dergisinde olduğu gibi, dijital
programların tam listesini görüntülemeniz
için size hızlı ve kolay bir yol sağlayan
Elektronik Program Rehberine
erişebilirsiniz.
• Bölüm 6 ile 19 arasında, TV’nizi
Dijital modda çalıştırmak için gerekli
tüm bilgiler verilmektedir. Bölüm 20
ile 29 arasında, TV’nizi Analog modda
çalıştırmak için gerekli tüm bilgiler ve
yönergeler verilmektedir.
1.3 Dijital ve Analog kanallar
Televizyon ilk açıldığında, her zaman Dijital
moddadır.
TV’de analog ve dijital mod arasında geçiş
yapmak için uzaktan kumandanın
tuşunu kullanın. Kanalları seçmek için P + /
– tuşlarını veya ile arasındaki
rakam tuşlarını kullanın.
4
Page 17
2 Güvenlik
Uyarı: Bağlantıların asılmadan önce
yapılması gerekmez, ancak kablolar
TV’nin konektörlerine takılmalıdır.
2.1 Genel
1
TV’nin ağırlığı 25kg’den fazla olduğundan,
TV’yi yerinden kaldırmak ve taşımak
için iki kişi gereklidir. TV’nin yanlış şekilde
taşınması ciddi yaralanmalara neden olabilir.
2
TV setini yerleştirdiğiniz yüzeyin eğimsiz
ve TV’nin ağırlığına dayanabilecek
sağlamlıkta olduğundan emin olun.
3
TV’nizi duvara asmak istiyorsanız, TV’yi
kendi başınıza asmaya çalışmayın. TV’nizin
yetkili bir teknisyen tarafından asılması
gereklidir. TV’nin düzgün şekilde
asılmadığında, güvenliği tehlikeye atan
durumlar ortaya çıkabilir.
4
TV’nizi duvara asmadan önce, duvarın
TV’nin ağırlığını taşıyacak kadar sağlam
olduğundan emin olun.
5
Bağlantıların TV’yi asmadan önce yapılması
zorunlu değildir, ancak kablolar TV’ye
takılı olmalıdır.
6
TV’yi yerleştirdiğiniz veya astığınız yer
neresi olursa olsun, havalandırma
deliklerinin hava akımının dolaşabilmesi
için açık olmasına dikkat edin. TV’yi
muhafaza içine yerleştirmeyin.
7
Mumlar gibi çıplak ateş kaynaklarını TV
setinin yakınına koymayın.
8
Televizyonun üstüne veya yanına su dolu
vazo koymayın. TV’nin içine su dökülmesi
elektrik çarpmasına neden olabilir. Üstüne
su dökülmüşse, TV’yi çalıştırmayın. Güç
kablosunu hemen prizden çıkarın ve TV’nizi
yetkili bir teknisyene kontrol ettirin.
9
Televizyonun duvara monte edilmesi
yetkili bir servis elemanı tarafından
yapılmalıdır. Düzgün olmayan ve hatalı
montaj, televizyonu güvenli olmayan bir
hale getirebilir.
X
X
10
Televizyonun duvara monte edilmesi
yetkili bir servis elemanı tarafından
yapılmalıdır. Düzgün olmayan ve hatalı
montaj, televizyonu güvenli olmayan bir
hale getirebilir.
11
Televizyonun duvara monte edilmesi
yetkili bir servis elemanı tarafından
yapılmalıdır. Düzgün olmayan ve hatalı
montaj, televizyonu güvenli olmayan bir
hale getirebilir.
12
Televizyonun duvara monte edilmesi
yetkili bir servis elemanı tarafından
yapılmalıdır. Düzgün olmayan ve hatalı
montaj, televizyonu güvenli olmayan bir
hale getirebilir.
X
X
X
13
Televizyonun duvara monte edilmesi
yetkili bir servis elemanı tarafından
yapılmalıdır. Düzgün olmayan ve hatalı
montaj, televizyonu güvenli olmayan bir
hale getirebilir.
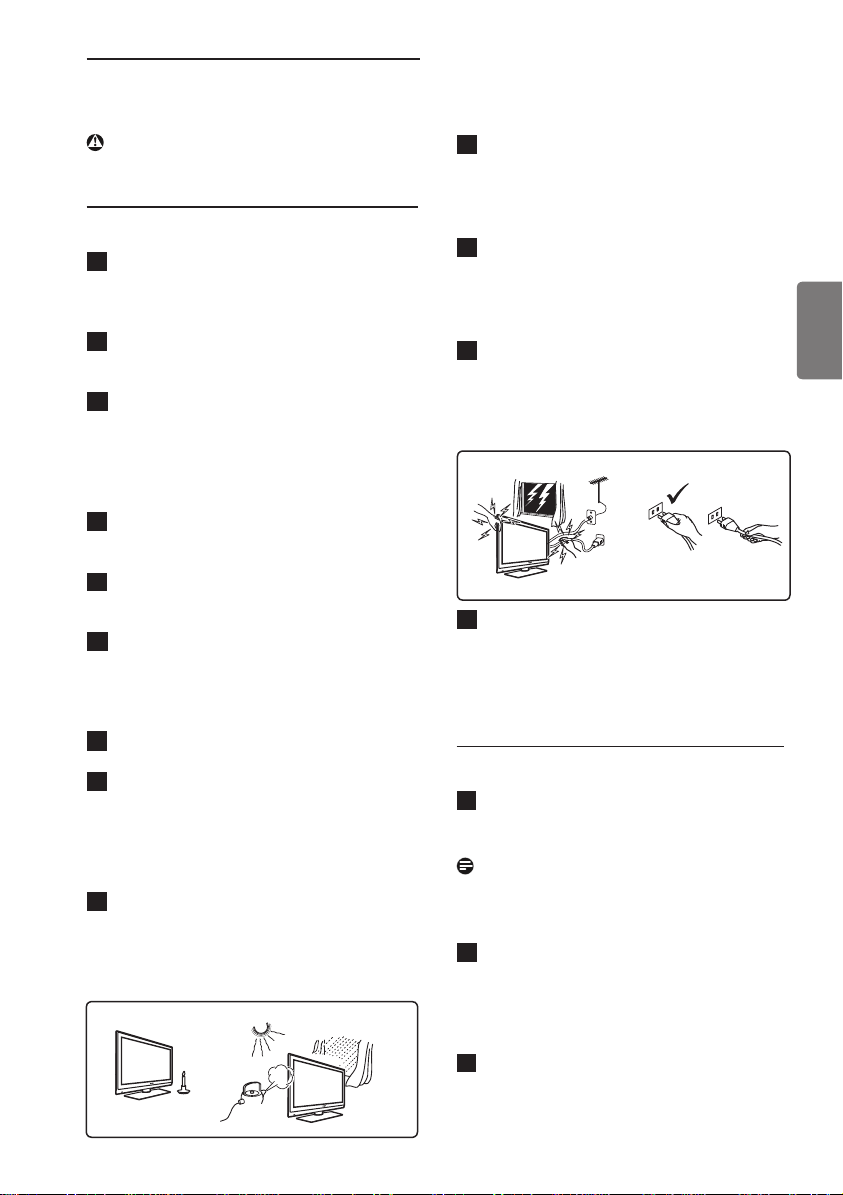
2.2 Ekran bakımı
1
Sehpayı/duvar montajını ve bağlantıları
kurmadan koruyucu tabakayı
çıkarmayın. Lütfen dikkatli taşıyın.
Not
TV’nin cilalı ön cephesini temizlemek
için yalnızca, size verilen yumuşak bezi
kullanın.
2
Su damlatan, çok ıslak bez kullanmayın.
Televizyonu temizlemek için aseton,
tolüen veya alkol kullanmayın. Önlem
olarak, televizyonu temizlerken güç
kablosunu prizden çıkarın.
Ekrana sert bir cisimle dokunmayın,
3
itmeyin, ovmayın veya çizmeyin; ekran
çizilebilir, bozulabilir veya kalıcı bir hasar
olabilir.
Türkçe
5
Page 18
3 Televizyon tuşlarına ve
konektörlere genel bakış
3.1 Yandaki veya üstteki kumanda
düğmeleri
Açma/kapama, menü, ses ve kanal numarası
için yandaki veya üstteki kumanda düğmelerini
kullanın.
PROGRAM
Türkçe
POWER
1
1
POWER (GÜÇ) .: Televizyonu
MENU
2
VOLUME
3
açmak veya kapatmak için kullanılır.
Not: Sıfır güç tüketimi için şebeke
kablosunu prizden çıkarmanız gerekir.
2
PROGRAM + / -: Programları seçmek
için kullanılır.
3
MENU (MENÜ): Menüleri görüntüle
mek veya kapatmak için kullanılır.
PROGRAM + / - tuşları bir menü
öğesini seçmek için kullanılabilir;
VOLUME (Ses) + / - tuşları ise seçilen
menü öğesine girmek ve ayar yapmak
için kullanılabilir.
4
VOLUME (SES DÜZEYI) + / -:
Sesi açmak veya kısmak için kullanılır.
Bu konektörler TV’nin arkasında bulunur ve arka
tarafa doğru bakar.
5
EXT 1
(RGB)
1
CI (Genel Arabirim) yuvası
EXT 2
6
(CVBS /S-VIDEO)
: CAM
(Koşullu Erişim Modülü) ve akıllı kart
bağlamak için .
2
TV Anten yuvası:
4
yuvasına takın.
3
HDMI 1 / HDMI 2: Kablolu yayın
Anten fi şini 75 Ω :
cihazına, DVD oynatıcıya/kayıt cihazına,
Yüksek Tanımlı cihaza veya Kişisel
Bilgisayara bağlamak için kullanılır.
4
EXT4
: Yuvaları aynı olan DVD, Kod
Çözücü gibi cihazlara bağlamak için
kullanılır.
5
EXT 1 (RGB) ve 6
EXT 2 (CVBS/S-
VIDEO): Benzer bağlantıları (“scart
bağlantıları“ da denir) olan
DVD oynatıcı/
kayıt cihazı, VCR, Kod Çözücü gibi
cihazlara bağlamak için kullanılır.
3.3 Yandaki konektörler
Bu konektörler TV’nin yan tarafında bulunur.
1
3.2 Arka konektörler
Bu konektörler TV’nin arkasında yer alır ve
aşağı doğru bakar.
1
2
3 4
6
EXT 3
1
Kulaklık : Kişisel dinleme zevkiniz
2
için, fono jakını TV’nin kulaklık
konektörüne bağlayın.
2
Audio Video (Ses ve Görüntü)
: Fotoğraf
\makinesi veya kamera gibi cihazları
bağlamak için kullanılır.
Page 19
4 Başlarken
4.1 Başlamadan önce
Uyarı: Bağlantıların asılmadan önce
yapılması gerekmez, ancak kablolar
TV’nin konektörlerine takılmalıdır.
4.2 Anten takma
Anten fi şini, TV’nin alt tarafındaki 75 Ω ::
anten yuvasına ve duvardaki anten prizine
sıkıca takın.
TV’nin arkasındaki konektörler
(aşağı doğru bakan)
4.3 Fişi Takma ve Çıkarma
(Plazma TV) - DİKKAT : Bu aygıt bir Sınıf
1 aygıttır. Koruyucu toprak hattı olan bir
ŞEBEKE prizine bağlanmalıdır.
Televizyonunun elektrik kablosunun cihaz
bağlama fişi bağlantı kesme düzeneği olarak
kullanılır.
Güç kablosunun TV elektrik prizine tam
olarak takılı olduğundan emin olun.
Şebeke elektriğini kesmek için, TV’nin
arkasındaki şebeke elektriği kablosunu şebeke
elektriği soketinden çıkarın veya TV’nin fişini
prizden çekin.
Evinizdeki elektrik besleme geriliminin,
TV’nin arkasındaki çıkartmada yazan gerilime
karşılık geldiğini doğrulayın.
Uyarı: TV döner tabana veya döner
kola monte edildiyse, TV döndürülürlen
güç kablosunun üzerine baskı yapmamasını
sağlayın. Güç kablosunun üzerine baskı
yapılması bağlantıları gevşetebilir. Bu durum
elektrik atlamalarına yol açabilir ve yangın
riski doğurur.
4.4 TV’yi açma
• Televizyonu açmak için, yandaki POWER
tuşuna basın. Mavi / yeşil bir gösterge
yanar ve birkaç saniye sonra ekran açılır.
• Televizyon bekleme modunda kalırsa
(kırmızı gösterge), yandaki PROGRAM
+ / - tuşuna veya üst kontrollere ya da
uzaktan kumandadaki P + / - tuşuna basın.
POWER
PROGRAM
MENU
VOLUME
4.5 Uzaktan Kumandayı kullanma
Ürünle birlikte verilen 2 adet pili takın.
Pillerin (+) ve (-) uçlarının doğru
yerleştirildiğinden emin olun (kutunun içinde
işaretlidir).
Türkçe
7
Page 20
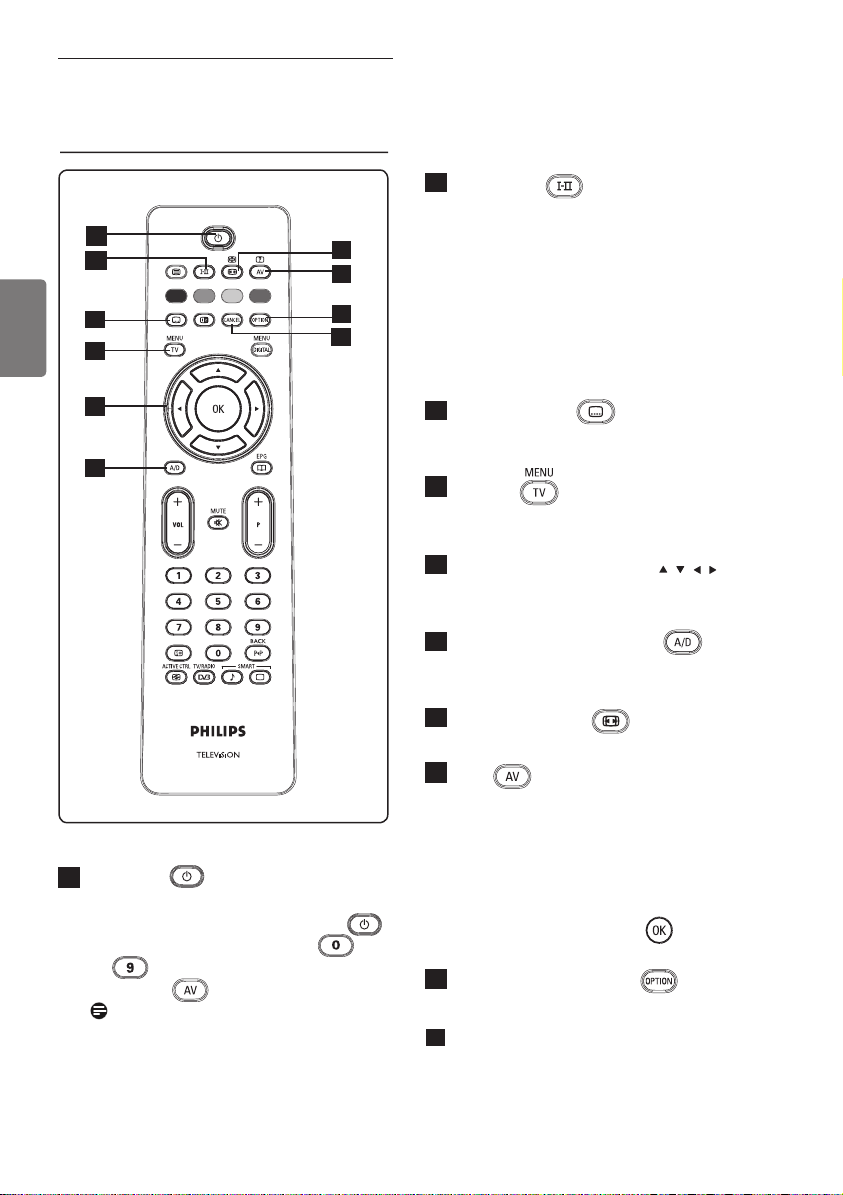
5 Uzaktan kumanda
işlevleri
1
2
3
4
Türkçe
5
6
1
Bekleme
Televizyonu bekleme moduna almak için
kullanılır. TV’yi yeniden açmak için
tuşuna bir kez daha basın veya
ile
P +/- veya tuşuna basın.
Not: TV açıldığında en son izleme
modu görüntülenir.
8
arasındaki rakam tuşlarına,
10
2
Ses modu
Programların Stereo ve Nicam
Stereo veya Mono modunda olmasını
7
8
9
sağlar. Çift dilli programlar için Dual
I veya Dual II’yi seçin (bu tür
yayınlarda seçenek ekranda belirtilir).
Mono seçildiğinde gösterge kırmızı
renkte görünür.
Dijital modda, å-» ses dillerinin listesini
görüntüler.
3
Altyazı modu
Bu tuş, dijital modda altyazı modunu
etkinleştirir veya devre dışı bırakır.
4
MENU
için kullanılır.
5
Yukarı/Aşağı/Sola/Sağa
Bu 4 tuş menü öğelerini seçmek veya
ayarlarını değiştirmek için kullanılır.
6
Analog veya Dijital mod
Televizyonun analog ve dijital modları
arasında geçiş yapmak için kullanılır.
7
Ekran Biçimleri
(Bkz. sayfa 37)
8
AV
TV (Analog), Dijital TV veya bağlı
çevrebirim ekipmanını (EXT 1, EXT
2, EXT 3, EXT 4, HDMI 1 veya HDMI 2)
seçmek üzere Source List’i (Kaynak
Listesi) görüntülemek için kullanılır.
Kaynağı seçmek için
seçimi onaylamak için
seçin.
9
Options (Seçenekler)
(Bkz. sayfa 23)
10
Dijital modda, teleteks modundan
çıkmak için renkli tuş bağlantıları yoksa,
bu tuş MHEG teleteksten çıkış tuşu
görevi görür.
TV’nin analog menülerine girip çıkmak
( )
Î ï
tuşlarını,
Æ /
Cancel (İptal)
tuşunu
Page 21
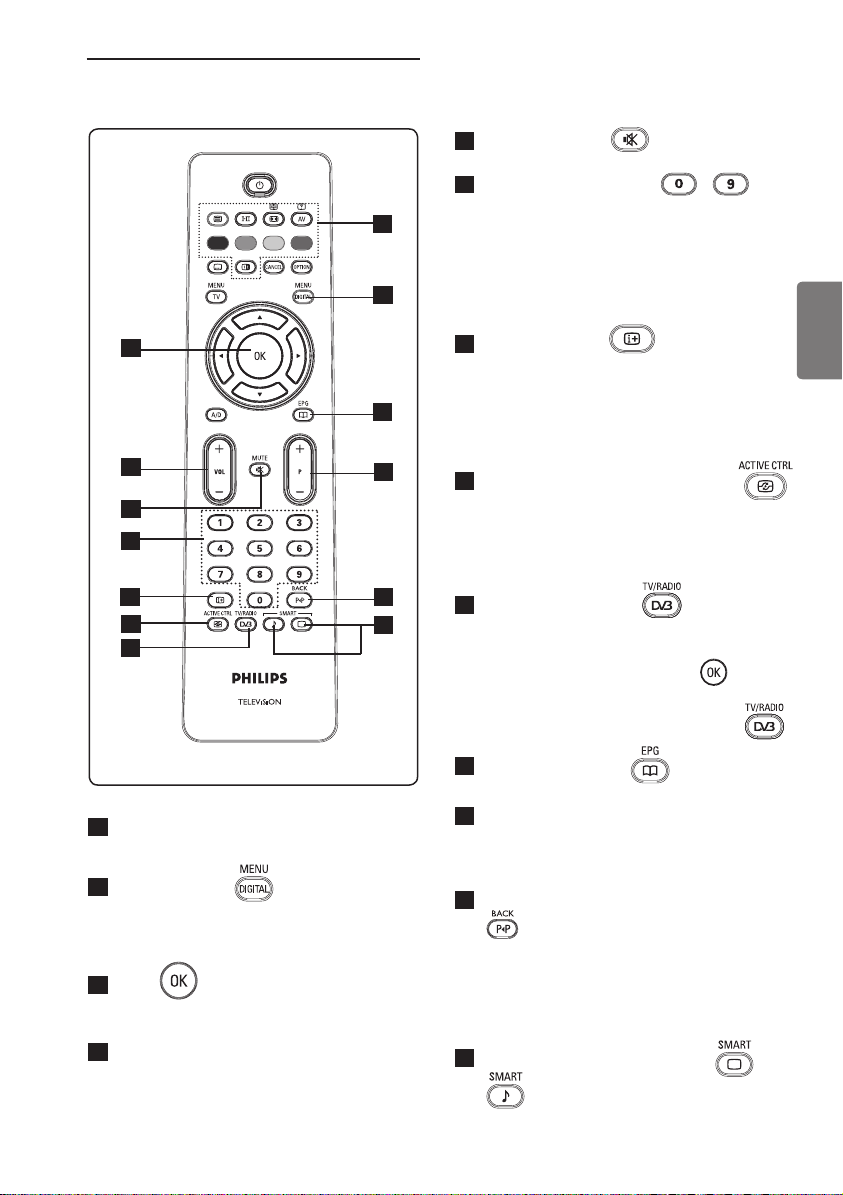
11
12
13
20
14
15
16
17
18
19
Teleteks
11
(Bkz. sayfa 38-39)
Dijital menü
12
Dijital menüyü görüntülemek/menüden
çıkmak için (TV dijital moddayken)
kullanılır.
OK
13
Seçimi onaylar. Ayrıca Dijital modda
program listesine erişir).
Ses (+ VOL -)
14
Sesi yükseltmek veya kısmak için
kullanılır.
21
22
23
Mute (Sessiz)
15
Sesi açmak veya kapatmak için kullanılır.
0/9 / Rakam tuşları /
16
Programlara doğrudan erişmek için
kullanılır.
İki basamaklı bir program numarası için
ilk basamaktan kısa bir süre sonra
kısa çizgi görüntülenmeden ikinci basamak
girilmelidir.
Ekran bilgileri
17
Dijital modda, bilgi başlığını görüntüler/
başlıktan çıkar (bkz. sayfa 14).
Analog modda, programın rakamını, ses
modunu, saati ve uyku zamanlayıcı için
kalan süreyi görüntüler/kaldırır.
Active Control (Aktif Kontrol)
18
Resim ayarını, sinyal ne olursa olsun,
sürekli en iyi görüntü kalitesini sağlayacak
şekilde otomatik olarak ayarlar. (Bkz.
sayfa 34).
Dijital TV / Radyo
19
Dijital modda, bu tuş dijital radyo
istasyonlarına erişmek için kullanılır.
Radyo listesine erişmek için
basın. Not : Dijital video moduna
dönmek için TV/Radio (TV/Radyo)
tuşuna yeniden basın.
20
TV Rehberi EPG
(Bkz. sayfa 24)
Program ( + P – )
21
Önceki veya sonraki kullanılabilir kanalı/
kaynağı (veya dijital menüde sayfayı)
seçer.
Kanal geçişi / Düzenleme veya geri
22
Analog/Dijital modda, önceden izlenen
program ile geçerli programı arasında
geçiş yapmanıza olanak verir. Ayrıca,
favori kanalınızı adlandırırken düzenleme
veya geri tuşu olarak da kullanabilirsiniz.
23
Smart (Akıllı) Resim / Ses
Önceden belirlenmiş bir dizi resim ve ses
ayarına erişir (bkz. sayfa 36).
tuşuna
9
Türkçe
Page 22
6 Dijital ana menüye ve
alt menülere genel
bakış
1
Uzaktan kumandanın tuşunu
kullanarak Dijital modu seçin.
2
Dijital modda, tuşuna basıp ayar
menüsünü görüntüleyin.
3
Menü öğeleri arasında gezinmek,
Türkçe
bunları seçmek ve ayarlamak için
Î ï Í Æ tuşlarını kullanın.
Setup
Favourites
List 1
List 2
List 3
List 4
Name
Select TV channels.
Select Radio stations.
Add all services
Remove all services
Name
Select TV channels.
Select Radio stations.
Add all services
Remove all services
Name
Select TV channels.
Select Radio stations.
Add all services
Remove all services
Name
Select TV channels.
Select Radio stations.
Add all services
Remove all services
10
Page 23

Setup
Preferences
Language
Audio
Location
Country
Time zone
Information
System software
Current software version
Always accept new software
Subtitle/Teletext
Subtitling Mode
Subtitles for hearing impaired
System
Basque, Catalan, Croatian, Czech, Danish, Dutch,
English, Finnish, French, Gaelic, Gallegan, German,
Greek, Hungarian, Italian, Norwegian, Polish,
Portuguese, Russian, Serb, Slovak, Spanish,
Swedish, Turkish, Welsh
On, Off, Auto
Yes, No
Cesky, Dansk, Deutsch, English, Español,
Français, Italiano, Magyar, Nederlands,
Norsk, Polski, Portugués, Suomi, Svenska
Australia, Austria, Belgium, Czech, Denmark,
Finland, France, Germany, Greece, Hungary,
Italy, Netherlands, Norway,
Spain, Sweden, Switzerland, United Kingdom
Yes, No
Poland, Portugal,
Türkçe
Access restrictions
Set pin code protection
Maturity rating
Change pin code
TV channels
Radio stations
On, Off
11
Page 24

Setup
Installation
Service lists
Türkçe
Service setup
Rearrange services
View new TV channels.
Listen to new Radio Stations.
Add new services
Search
TV channels found.
Radio station found.
Other services found.
Store
Discard
Reinstall all services
Search
TV channels found.
Radio station found.
Other services found.
Store
Discard
Test reception
12
Manual install service
Frequency
Network name
Signal quality
Services found
Store
Discard
Frequency
Network name
Signal quality
Signal strength
Page 25

7 TV’yi ilk kez açma
Televizyonunuzu ilk kez açtığınızda ekranda
bir menü görüntülenir.
Setup
Language
Country
Time Zone
Service Scan
Select your preferred language
1
Language (Dil) moduna girmek için Æ
tuşuna, tercih ettiğiniz dili seçmek için
Î ï tuşlarına basın.
2
Seçimi onaylamak için düğmesine
basın.
3
Country (Ülke) veya Time Zone
(Saat Dilimi) seçmek için Î ï
tuşlarına, Country (Ülke) veya Time
Zone (Saat Dilimi) moduna girmek
için Æ tuşuna basın.
Dikkat
Yanlış bir ülke seçerseniz, kanal rakamı
ülkenizin standardına uymaz ve hizmetlerin
tümünü veya bir bölümünü alamayabilirsiniz.
English
Español
Français
Italiano
Magyar
11:28
5
Kullanılabilir analog ve dijital kanalları
taramak üzere Service Scan’i
(Hizmet Tarama) seçmek için ï
tuşuna basın.
6
Kurulumu başlatmak için düğmesine
basın.
Not
Dijital kanal algılanmazsa, analog moda
geçmek için
Not
Herhangi bir zamanda fabrika varsayılan
ayarlarına sıfırlamak isterseniz, TV setinin
yan tarafındaki MENU tuşunu 5 saniye basılı
tutun. Ekranda bir menü görüntülenir. TV’yi
ilk kez açıyormuşsunuz gibi 1 ile 5 arasındaki
adımları tekrarlayın. Bu işlem, hem Dijital
hem de Analog modu fabrika varsayılan
ayarlarına sıfırlar.
tuşuna basın.
Türkçe
Not
Dil, Ülkeden bağımsız olarak seçilebilir.
4
Tercih ettiğiniz Country (Ülke) veya
Time Zone’u (Saat Dilimi) seçmek
için Î ï tuşlarına, seçiminizi onaylamak
için
tuşuna basın.
13
Page 26

8 Başlıktaki bilgileri anlama
Dijital bir program seçtiğinizde, ekranın üst
kısmında birkaç saniye boyunca bilgi başlığı
görüntülenir.
8.1 Başlık açıklaması
Türkçe
önceden
ayarlı
numara
kanal adı program başlığı
Başlıkta geçerli programın önceden ayarlı
numarası, kanal adı, program süresi, yayın
saati, program başlığı ve kalan süresiyle ilgili
bilgiler bulunur.
program
başlangıç ve
bitiş zamanı
2 11:00-11:45 10: 38
BBC 2 Snooker Minutes left : 22
simgeler
TXT
programın kalan
süresi
saat
TXT
Dijital modda Analog Teleteks
bulunduğunu gösterir.
ù Başka diller mevcuttur ve seçenekler
menüsünden seçilebilir.
Ayrıca, tuşuna basarak başka
diller seçebilirsiniz.
u Bu simgenin rengi (kırmızı, yeşil, sarı
veya mavi) seçili Favourite (Sık İzlenen)
listesini gösterir.
Note
Program henüz etkinleştirilmemiş sık
izlenen listelerinden birinde veya birkaçında
kayıtlıysa, beyaz bir
u simgesi görüntülenir.
8.2 Simgelerin açıklaması
i Bu programla ilgili daha fazla bilgi vardır
: Görüntülemek için tuşuna bir kez
ve kaldırmak için ikinci kez basın.
Altyazı kullanılabilir : Altyazı
görüntülemek isterseniz, tuşuna
veya tuşuna basıp seçenekler
menüsüne erişin ve altyazıları seçin.
14
Page 27

9 Hizmet listeleri
9.1 Rearrange services (Hizmetleri
yeniden düzenle)
Bu menü, kayıtlı dijital kanalların ve radyo
istasyonlarının sırasını değiştirmenize olanak
verir.
1
Dijital modda, tuşuna basıp ayar
menüsünü görüntüleyin.
2
ï tuşunu kullanarak Installation
(Kurulum) seçeneğini belirleyin ve
Æ tuşuna iki kez basıp Service lists
(Hizmet listeleri) menüsünü seçin.
Setup
Installation
Service lists
Service setup
Test reception
Manage service lists
3
Î ï tuşlarını kullanarak Rearrange
Rearrange services
View new TV channels
Listen to new Radio stations
Close
11:28
services (Hizmetleri yeniden
düzenle) seçeneğini belirleyin ve Æ
tuşuna basın.
Setup
Installation
Rearrange services
View new TV channels
Listen to new Radio stations
Change preset location of services
4
Î ï tuşlarını kullanarak değiştirmek
1 _
2 _
3 _
4 _
5 _
6 _
7 _
8 _
9 _
Close
11:28
istediğiniz kanalı seçin.
5
Etkinleştirmek için tuşuna basın.
Seçili kanalı kaldırmak isterseniz, kırmızı
tuşa basın.
6
Yeni kanal numarasını seçin (Î ï).
7
Onaylamak için tuşuna basın.
Değiştirme işlemi tamamlanır.
8
Tüm kanallar istenen sırada olana kadar
4
ile 7 arasındaki işlemleri tekrarlayın.
9
Bir önceki menüye geri dönmek için
Í tuşuna basın.
10
Menüden çıkmak için tuşuna basın.
9.2 View new TV channels (Yeni
TV kanalları izle) veya Listen
to new Radio stations (Yeni
Radyo istasyonları dinle)
Bu menü, ilk kurulumun ardından yayıncı
tarafından açılan yeni TV kanalları veya yeni
radyo istasyonları olup olmadığını kontrol
etmenize olanak verir.
1
Dijital modda, tuşuna basıp ayar
menüsünü görüntüleyin.
2
ï tuşunu kullanarak Installation
(Kurulum) seçeneğini belirleyin ve
Æ tuşuna iki kez basıp Service lists
(Hizmet listeleri) menüsünü seçin.
3
Î ï tuşlarını kullanarak View new TV
channels (Yeni TV kanalları izle)
veya Listen to new Radio station
(Yeni Radyo istasyonu dinle)
seçeneğini belirleyin.
4
Yeni hizmetler varsa, Æ tuşuna basıp
listeye girin ve Î ï tuşlarını kullanarak
listede ilerleyin.
5
Bir önceki menüye geri dönmek için Í
tuşuna basın.
6
Menüden çıkmak için tuşuna basın.
Türkçe
15
Page 28

10 Hizmet ayarları
10.1 Add new services (Yeni
hizmetler ekle)
Bu menü, ilk kurulumun ardından yayıncı
tarafından açılan yeni TV kanallarını veya
radyo istasyonlarını aramanıza olanak verir.
1
Türkçe
Dijital modda, tuşuna basıp ayar
menüsünü görüntüleyin.
2
ï tuşunu kullanarak kurulumu seçin ve
Æ tuşuna basın.
3
Service setup (Hizmet ayarları)
seçeneğini belirleyin (ï) ve Æ tuşuna
basın.
Setup
Installation
Service lists
Service setup
Test reception
Install and manage services
4
Æ tuşuna basıp yeni hizmetler ekleyin
ve
tuşuna basarak kurulumu
Add new services
Reinstall all services
Manual install services
Close
etkinleştirin.
Setup
Installation Service setup
Add new services
Reinstall all services
Manual Install services
Scan for new services
Search
TV channels found
Radio stations found
Other services found
Store
Discard
Close
11:28
11:28
Arama başlar; yalnızca yeni kanallar
kaydedilir ve kanal listesi menüsüne
eklenir. Kurulum işleminin tamamlanan
kısmının yüzdesi ve bulunan kanalların
sayısı görüntülenir. Arama tamamlanınca,
tuşuna basıp yeni hizmetleri kabul
edin.
5
Bir önceki menüye geri dönmek için
Í tuşuna basın.
6
Menüden çıkmak için tuşuna basın.
10.2 Reinstall all services (Tüm
hizmetleri yeniden kur)
Bu menü, tüm dijital TV kanallarını ve radyo
istasyonlarını yeniden kurmanıza olanak verir.
1
Dijital modda, tuşuna basıp ayar
menüsünü görüntüleyin.
2
ï tuşunu kullanarak kurulumu seçin ve
Æ tuşuna basın.
3
Service setup (Hizmet ayarları)
seçeneğini belirleyin (ï) ve Æ tuşuna
basın.
4
Reinstall all services (Tüm hizmetleri
yeniden kur) seçeneğini belirleyin (ï) ve
Æ tuşuna basın.
Setup
Installation Service setup
Add new services
Reinstall all services
Manual Install services
Reinstall will remove all service settings
Search
TV channels found
Radio stations found
Other services found
Store
Discard
Close
11:28
16
Page 29

5
Kurulumu başlatmak için düğmesine
basın.
Tüm dijital hizmetler için arama yapılır ve
sonra bunlar otomatik olarak kaydedilir.
Arama tamamlandığında, bulunan dijital
hizmetlerin sayısı menüde görüntülenir.
6
tuşuna basıp hizmetleri kaydedin.
7
Bir önceki menüye geri dönmek için Í
tuşuna basın.
8
Bir önceki menüye geri dönmek için
tuşuna basın.
10.3 Manual install services
(Hizmetleri el ile kur)
Bu menü, hedeflediğiniz kanalın frekansını
tuşlayarak hizmetleri el ile taramanıza olanak
verir.
1
Dijital modda, tuşuna basıp ayar
menüsünü görüntüleyin.
2
ï tuşunu kullanarak kurulumu seçin ve
Æ tuşuna basın.
3
Service setup (Hizmet ayarları)
seçeneğini belirleyin (ï) ve Æ tuşuna
basın.
4
Manual install services (Hizmetleri
el ile kur) seçeneğini belirleyin (ï) ve
Æ tuşuna basın.
Setup
Installation > Service setup
Add new services
Reinstall all services
Manual install services
Manual install services
Frequency
Network name
Signal quality
Signal strength
Services found
Store
Discard
Close
11:28
5
ile arasındaki tuşları
kullanarak hedeflediğiniz kanalın
frekansını girin ve tuşuna basarak
kanalları aramaya başlayın. Arama
tamamlandığında, bulunan dijital
hizmetlerin sayısı menüde görüntülenir.
6
tuşuna basıp hizmetleri kaydedin.
7
Bir önceki menüye geri dönmek için Í
tuşuna basın.
8
Menüden çıkmak için tuşuna basın.
Türkçe
17
Page 30

11 Test reception (Test alımı)
Bu menü, anteninizden aldığınız sinyalin
gücünü kontrol etmenize olanak verir.
1
Dijital modda, tuşuna basıp ayar
menüsünü görüntüleyin.
2
ï tuşunu kullanarak Installation
Türkçe
(Kurulum) seçeneğini belirleyin ve Æ
tuşuna basın.
Setup
Installation
Service lists
Service setup
Test reception
Test signal quality
3
ï tuşunu kullanarak Test reception
Frequency
Network name
Signal quality
Signal strength
Close
(Test alımı) seçeneğini belirleyin ve Æ
tuşuna basın. Mevcut program frekansını,
ağ adını, sinyal kalitesini ve gücünü
gösteren bir mesaj alırsınız.
11:28
5
Frekansı girdikten sonra, tuşunu
kullanarak Frequency (Frekans)
yuvasından çıkın.
6
Bir önceki menüye geri dönmek içinÍ
tuşuna basın.
7
Menüden çıkmak için tuşuna basın.
4
Æ tuşunu kullanarak Frequency
(Frekans) yuvasına girin ve ile
arasındaki tuşları kullanarak test etmek
istediğiniz dijital kanalın frekansını girin.
Æ tuşunu kullanarak bir sonraki karakter
alanına gidin.
Test alımı sinyal gücünün aslında zayıf
olduğunu gösterirse, anteni geliştirmeyi,
yenilemeyi, ayarlamayı veya güncellemeyi
deneyebilirsiniz. Ancak en iyi sonucu elde
etmek için uzman bir anten montajcısıyla
görüşmeniz tavsiye edilir.
18
Page 31

12 Preferences (Tercihler)
Bu menü, tercih ettiğiniz dili seçmenize veya
konumda (ülke ve saat dilimi) değişiklikler
yapmanıza olanak verir.
1
Dijital modda, tuşuna basıp ayar
menüsünü görüntüleyin.
2
ï tuşunu kullanarak Preferences
(Tercihler) seçeneğini belirleyin ve Æ
tuşuna basın.
Setup
Preferences
Language
Location
Select your preferred language
3
Language (Dil) veya Location
Audio
Subtitle / Teletext
Subtitling Mode
Subtitling for hearing impaired
System
Close
11:28
(Konum) seçeneğini belirleyin (ï) ve Æ
tuşuna basın.
4
Î ï tuşlarını kullanarak bir ayar seçin ve
Æ tuşuna basıp alt menüye girin.
Ayarınızı yapın ve
tuşuna veya Í
tuşuna basıp menüden çıkın.
5
Bir önceki menüye geri dönmek için
Í tuşuna basın.
6
Menüden çıkmak için tuşuna
basın.
Varsayılan dil ayarları
• Ses : Ses dilini seçmek içindir.
• Altyazı/Teleteks : Altyazı/teleteks dilini
seçmek içindir.
• Altyazı modu : Off (kapalı), on (açık)
veya auto (otomatik) (altyazı, yalnızca
orijinal ses yayını varsa görüntülenir).
• İşitme bozukluğu olanlar için altyazı:
İşitme bozukluğu olanlar için özel altyazıları
etkinleştirin veya devre dışı bırakın (yayıncı
tarafından kullanıma açılmışsa).
• Sistem : Menü dilini seçmek içindir.
Not
Herhangi bir nedenle yanlış dil seçtiyseniz ve
televizyonu çalıştıran seçili dili anlamıyorsanız,
tercih ettiğiniz dile geri dönmek için
aşağıdakileri yapın.
•
Ekranda menüden çıkmak için tuşuna
basın.
• Menüyü görüntülemek için
tuşuna tekrar
basın.
•
Menüde ikinci öğeyi seçmek için tuşuna,
sonraki menü düzeyine girmek için tuşuna
basın.
• tuşuna tekrar basın ve tuşunu kullanarak
beşinci menü öğesini seçin.
•
tuşuna basıp sonraki menü düzeyine girin.
•
Doğru dili seçmek için
• Seçimi onaylamak için
•
Ekranda menüden çıkmak için tuşuna
basın
.
Î ï
tuşlarını kullanın.
düğmesine basın.
Konum ayarları
• Country (Ülke) : Bulunduğunuz ülkeyi
seçmek içindir.
Dikkat
Yanlış bir ülke seçerseniz, kanal rakamı
ülkenizin standardına uymaz ve
hizmetlerin tümünü veya bir bölümünü
alamayabilirsiniz. Dilin Ülkeden bağımsız
olarak seçilebileceğini unutmayın.
• Time zone (Saat dilimi) : Bulunduğunuz
saat dilimini seçmek içindir.
Türkçe
19
Page 32

13 Access restrictions
(Erişim kısıtlamaları)
Bu menü, dijital kanalların erişim
kısıtlamalarını ayarlamanıza olanak verir.
1
Dijital modda, tuşuna basıp ayar
menüsünü görüntüleyin.
2
ï tuşunu kullanarak Access restriction
(Erişim kısıtlaması) seçeneğini
Türkçe
belirleyin ve Æ tuşuna basın.
3
Æ tuşuna basıp Set pin code
protection (Pin kodu korumasını
ayarla) menüsüne girin.
Access restrictions
Set pin code protection
Switch pin code protection ‘on’ or ‘off’
4
Í Æ tuşlarını kullanarak On (Açık)
Maturity rating
TV channels
Radio stations
Change pin code
seçeneğine ayarlayın ve
On Off
Close
tuşuna basıp
menüden çıkın. Daha sonra diğer ayarlara
erişebilirsiniz.
Uyarı
Herhangi bir erişim kısıtlaması
türünü kullandığınızda, kayıt için program
zamanlarken pin kodunu girmeniz gerekir.
11:28
• TV kanalları: Kilitlemek istediğiniz TV
kanalını seçin ve
tuşuna basın.
• Radyo istasyonu: Kilitlemek istediğiniz
radyo istasyonunu seçin ve tuşuna
basın.
• Pin kodunu değiştir: Æ tuşuna basıp
menüye girin. Ekrandaki yönergeleri
izleyerek erişim kodunuzu değiştirin.
Varsayılan pin kodu 1234’tür. Kişisel
kodunuzu unutursanız, 0711 evrensel
kodunu girip varsayılan pin koduna (1234)
sıfırlayabilirsiniz.
Not
TV’de, Genel Arabirim (CI) yuvası vardır
(bkz. sayfa 26). Bu CI modülü, Pay TV
gibi hizmet sağlayıcılara veya diğer hizmet
sağlayıcılara abone olduğunuzda alınabilir. CI
modülü TV setiyle birlikte verilmez.
CI modülü takıldığında, Access Restrictions
(Erişim Kısıtlamaları) menüsünde CI Access
Restrictions (CI Erişim Kısıtlamaları)
gösterilir. CI modülü ekrandaki mesaj ve
metinlerden sorumludur. Arıza durumunda
veya olağandışı bir durumda CI (genel
arabirim) servis sağlayıcınızı aramalısınız.
5
Bir önceki menüye geri dönmek için
Í tuşuna basın.
6
Menüden çıkmak için tuşuna basın.
• Olgunluk derecelendirmesi :
Kanalı kilitlemek için tercih ettiğiniz
derecelendirmeyi seçin. Olgunluk
derecelendirmesi, yalnızca yayıncı
programla birlikte veri sağlarsa belirli
programları engeller.
20
Page 33

14 Favourite (Sık İzlenen)
listenizi ayarlama
Bu menü, tercih ettiğiniz TV kanallarını ve
radyo istasyonlarını içeren bir sık izlenen
listesi oluşturmanıza olanak verir. Örneğin
ailenizin her üyesi kendi sık izlediği kanal
listesini oluşturabilir.
1
Dijital modda, tuşuna basıp ayar
menüsünü görüntüleyin.
Setup
Favourites
Preferences
Information
Access restrictions
Installation
Make changes to your lists of favourite services
2
Æ tuşuna basıp sık izlenenler listesi
List 1
List 2
List 3
List 4
Close
11:28
menüsüne girin. 4 farklı sık izlenen listesi
oluşturabilirsiniz.
3
Î ï tuşlarını kullanarak Favourite (Sık
İzlenen) listenizi seçin : List 1 (Liste 1),
List 2 (Liste 2), List 3 (Liste 3) veya
List 4 (Liste 4); sonras Æ tuşuna basın.
• Select TV channels (TV kanalları
seç) : Î ï tuşlarını kullanarak sık izlenen
TV kanallarınızı seçin ve
tuşuyla
onaylayın. Çıkmak için Í düğmesine basın.
• Select radio stations (Radyo
istasyonları seç) : Î ï tuşlarını
kullanarak sık dinlenen radyo
istasyonlarınızı seçin ve
tuşuyla
onaylayın. Çıkmak için Í düğmesine basın.
• Add all services (Tüm hizmetleri
ekle) : Tüm hizmetleri sık izlenen listenize
eklemek isterseniz
tuşuna basın.
• Remove all services (Tüm hizmetleri
kaldır) : Tüm hizmetleri sık izlenen
listenizden kaldırmak isterseniz
tuşuna basın.
5
Bir önceki menüye geri dönmek için Í
tuşuna basın.
6
Menüden çıkmak için tuşuna
basın. Sık izlenen listenizi, seçenekler
menüsünden seçebilirsiniz (sonraki
sayfaya bakın).
Türkçe
4
Î ï tuşlarını kullanarak bir ayar seçin ve
Æ tuşuna basıp alt menüye girin.
• Name (Ad) :Í Æ tuşlarını kullanarak
ad görüntü alanında (16 karakter) ilerleyin
ve P + / – tuşlarına basarak karakterleri
seçin. Herhangi bir karakteri düzenlemek
için
tuşunu kullanın. Ad girilince,
tuşuna basıp menüden çıkın.
21
Page 34

15 Information (Bilgi)
Bu menü, yazılım sürümü ve yeni yazılımın
kurulumuyla ilgili bilgiler verir.
1
Dijital modda, tuşuna basıp ayar
menüsünü görüntüleyin.
2
ï tuşunu kullanarak bilgileri seçin ve Æ
tuşuna iki kez basın.
Türkçe
Setup
Favourites
Preferences
Information
Access restrictions
Installation
Provide information on problem reports and installing new software
System software
Close
11:28
Yazılım sürümü görüntülenir.
3
Æ tuşunu kullanarak seçim moduna girin.
4
Í Æ tuşlarını kullanarak Yes (Evet)
veya No (Hayır) modunu seçin. Kanalsız
yükleme özelliğiyle, dijital TV’nizin yazılım
güncellemelerini otomatik olarak kabul
etmek için menüyü etkinleştirebilirsiniz.
Normalde ürün, güncelleme olup
olmadığını bekleme modundayken algılar.
Televizyonu bir sonraki açışınızda,
ekranda yeni yazılım bulunduğunu belirten
bir mesaj görüntülenir.
tuşunu
seçerseniz yazılım yüklemesi etkinleşir.
Yazılım yükleme menüsünde, yazılımın
açıklamasıyla birlikte yüklemenin tarihi
ve saati gösterilir. Bu özellik belirli menüleri,
işlevleri güncelleyebilir veya yeni özellikler
ekleyebilir, ancak TV’nin genel çalışma
biçimi değişmez. Kabul edilen yükleme,
belirlenen saatte ve tarihte gerçekleşir.
Not
Yüklemenin gerçekleşebilmesi için beklenen
zamanda TV bekleme moduna alınmalıdır.
Yeni yazılımı Kanalsız Yükleme
Yeni bir yazılım bulunduğunda, her zaman
yazılımı kabul etmeniz ve yüklemeniz önerilir.
• Yeni bir yazılım bulunursa, TV’yi açtığınızda
bir mesaj görürsünüz. Menüde yüklemenin
tarihini ve süresini belirten bir mesaj
gösterilir. İlerlemek için
düğmesine
basın.
Önemli : Yükseltme işleminin
gerçekleşebilmesi için TV’nizi bekleme
modunda bırakın. Cihazın fişini çekmeyin.
• Yeni yazılım yüklenirken bir sorun oluşursa,
sonraki zamanlanmış yazılım yüklemesiyle
ilgili bilgilendirilirsiniz.
TV’nizi normal şekilde kullanmaya devam
etmek için
•
Yükleme işlemi başarılı olursa bir tebrik
mesajı görüntülenir. Kabul etmek için
düğmesine basın. Yeni yazılım ve yükseltme
tuşuna basın.
yönergelerini şu web sitesinden de
alabilirsiniz : www.philips.com.
5
Bir önceki menüye geri dönmek için
Í tuşuna basın.
6
Menüden çıkmak için tuşuna
basın.
22
Page 35

16 Options (Seçenekler)
menüsünü kullanma
Bu menü, şu özelliklere doğrudan erişim
sağlar: sık izlenen listesi, dil seçimi ve diğer
bazı seçimler.
1
Dijital modda, beyaz tuşuna basıp
seçenekler menüsünü görüntüleyin.
Options
Favourites
Subtitle language
Audio language
Mode
Selects the active favourite list
2
Î ï tuşlarını kullanarak bir ayar seçin
None
List 1
List 2
List 3
List 4
11:28
Exit
ve Æ tuşuna basıp alt menüye girin.
• Favourites (Sık İzlenenler) : Î ï
tuşlarını kullanarak sık izlenen listenizi
seçin ve
Not
tuşuyla onaylayın.
“None” (yok) seçeneği, sık izlenen
listesini devre dışı bırakır. Sık izlenen
listenizi oluşturmak için bkz. sayfa 21.
• Audio language (Ses dili) : Ses dilini
geçici olarak değiştirmek içindir. Ses ve
altyazı dillerini kalıcı olarak değiştirmek
için Preferences (Tercihler) menüsünü
kullanın (bkz. sayfa 19).
• Mode (Mod) : Ses veya video olmadan
yalnızca radyo istasyonlarını, TV
kanallarını veya hizmetleri seçebilirsiniz.
Not (yalnızca İngiltere için)
TV listesi hem radyo istasyonlarını hem
de TV kanallarını içerebilir.
• Banner duration (Başlık süresi) :
Başlığın görüneceği süreyi seçmek içindir.
3
Menüden çıkmak için beyaz tuşuna
basın.
Türkçe
• Subtitle language (Altyazı dili) : Î ï
tuşlarını kullanarak dili geçici olarak
değiştirin ve
tuşuyla onaylayın.
23
Page 36

17 TV Rehberi
TV rehberi, aynen gazetede veya TV
dergisinde olduğu gibi, dijital programların
tam listesini görüntülemeniz için size hızlı ve
kolay bir yol sağlayan Elektronik Program
Rehberidir. Dijital program listesinde
gezinebilir ve programlarla ilgili ayrıntılı bilgi
alabilirsiniz. Ayrıca dijital bir kanaldan kayıt
Türkçe
yapması için TV’yi programlayabilirsiniz.
1
Dijital modda, rehberini
görüntüleyin :
1
BBC
Preset/Servcie Now Next
1. BBC
2. BBC TWO
3. ITC Channel 3
4. Channel 4
5. ITV 2
6. BBC CHOICE
Now/Next Today
See it saw
Snooker
Trisha
Gmtv2
Oakie Doke
Microsoap
Ice Skating
This morning
This afternoon
Bodger & Badger
Top Close Options
Seçili sık izlenen listesindeki tüm dijital
programların listesi görüntülenir.
2
ï tuşunu kullanarak Preset/service
(Önceden ayarlı/hizmet) listesine
girin veya Æ tuşuna basıp Today
(Bugün) listesine erişin.
17:28
• Top (Üst) (sarı tuş) : Doğrudan listenin en
üstüne gitmek içindir.
• Close (Kapat) (mavi tuş) : TV
rehberinden çıkmak içindir.
• Options (Seçenekler) (beyaz tuşu) :
Bu menüyle, sık izlenen listenizi, modu veya
temaları seçebilirsiniz. Temalar ilgi
alanlarıdır; örneğin yalnızca şunların
görüntülenmesini isteyebilirsiniz : dram,
haberler, film, ...
5
Seçili programla (varsa) ilgili daha fazla
bilgi görüntülemek isterseniz
tuşuna basın.
6
Menüden çıkmak için tuşuna basın.
3
Í Æ tuşlarını kullanarak bir program
seçin.
4
TV rehberi özellikleri, ekranın alt
kısmında görüntülenir. Kırmızı, yeşil, sarı,
mavi veya beyaz tuşları kullanarak bunları
etkinleştirin.
24
Page 37

18 Dijital teleteks (MHEG)
Yalnızca İngiltere’de kullanılabilir
Dijital teleteks hizmetleri analog teleteksten
oldukça farklıdır. Dijital teleteks hizmetine
geçiş yaptığınızda gördüğünüz resimler,
yayıncının kararına göre düzenlenen ve
kontrol edilen grafikler ve metinler içerir.
Başka herhangi bir kanal gibi seçtiğiniz bazı
dijital kanallar, özel teleteks hizmetleri
sunar. Ayrıca bazı dijital kanallar, yayınlanan
programla ilgili bilgiler verir (ekranda mesaj
veya yönerge görüntülenebilir).
Bazı durumlarda Dijital metin veya etkileşimli
servisler altyazılara göre öncelikli olabilir.
Bu, altyazılı yayın yapan kanalda Dijital metin
veya etkileşimli servislerden çıkıldığı zaman
altyazıların otomatik olarak görünmemesine
neden olabilir. Böyle durumlarda altyazılar,
uzaktan kumanda üzerindeki
geçiş yapılarak veya kanal değiştirilerek
başlatılabilir.
1
Dijital teleteksi kullanmak için ekrandaki
yönergeleri izleyin.
2
Hizmete bağlı olarak,Í Æ Î ï (imleç
tuşları), (renk tuşları),
(Teleteks Açma/Kapatma tuşu) ve
bazen
kullanmanız istenebilir.
Not
Teleteks modundan çıkabilmeniz için Dijital
Teletekste renkli tuş bağlantıları yoksa, bunun
yerine tuşunu kullanın.
/ sayı tuşlarını
tuşuyla
3
Teleteksi izledikten sonra P + / -
düğmeleriyle başka bir kanal seçin veya
resme dönmek için ekrandaki yönergeleri
izleyin.
Teleteks hizmetine bağlantılar içeren bir
dijital kanala geçiş yaptığınızda, teleteks
işlevini etkinleştirmek için arka planda
yazılım yüklenir. Yazılım yüklemesinin
tamamlanmasına izin vermek için
tuşuna basmadan önce bir süre beklemeniz
gerekir. Yükleme tamamlanmadan önce
tuşuna basarsanız, teleteks ekranı
görüntülenene kadar kısa bir gecikme olur.
Dijital teletekste gezinirken, sayfa kısa bir
gecikmeden sonra yüklenir. Genellikle sayfada
size ilerlemeyi gösteren bir istem veya mesaj
yayınlanır.
Dijital modda Analog teleteks
Not
Tüm ülkelerde kullanılabilir
• Dijital teleteks hizmetlerinin olmadığı
yerlerde dijital kanalda
görürseniz, bu Dijital modda Analog
Teleteks bulunduğunu gösterir.
• Analog teletekse erişmek için tuşuna
basın.
Not
Kurulum sırasında ülke olarak UK (İngiltere)
seçilirse,
tutun.
• Analog Teleteks işlevlerini kullanmak için
bkz. sayfa 38 ve 39.
tuşunu en az 3 saniye basılı
TXT
simgesini
Türkçe
25
Page 38

19 Conditional Access
Module (CAM) (Koşullu
Erişim Modülü)
Conditional Access Module (Koşullu
Erişim Modülü) (CAM) menüsü, CAM’de
bulunan işlevlere erişim sağlar. Modül, TV’nin
arka tarafında (aşağı dönük olarak) bulunan
Genel Arabirim (CI) yuvasına takılabilir.
Türkçe
Not
Bu Genel Arabirim (CI) modülü TV setiyle
birlikte verilmez. Yalnızca Pay TV gibi hizmet
sağlayıcılara veya diğer hizmet sağlayıcılara
abone olduğunuzda alınabilir.
ÖNEMLİ
Modülü takıp çıkarmadan önce mutlaka TV’yi
kapatın.
CAM’yi takma
1
TV’yi kapatın.
Genel
Arabirim
Yuvası
TV’nin arkasındaki
konektörler (aşağı
tarafa doğru
bakan)
2
Bazı modüller, görüntü kartıyla birlikte
sağlanır. Bu tür bir modül kullanırken,
önce görüntü kartını modüle takın.
Modül yuvasına takmadan önce,
görüntü kartının üzerindeki okun
modülün üzerindeki oka dönük
olduğundan emin olun.
3
Modülü TV’deki Ortak Arabirim (CI)
yuvasına takın.
4
TV’yi açın.
5
Ayar menüsünü görüntülemek için
tuşuna basın.
6
ï tuşunu kullanarak Access
restriction (Erişim kısıtlaması)
seçeneğini belirleyin ve Æ tuşuna basın.
7
Æ tuşuna basıp Conditional Access
Module (Koşullu Erişim Modülü)
menüsüne girin.
8
Ekranda belirtildiği gibi CAM işlevlerine
erişmek için
düğmesine basın.
26
Modül
ÖNEMLİ
Herhangi bir modül takılmazsa veya modül
doğru şekilde takılmazsa, Conditional Access
Module (Koşullu Erişim Modülü) menüsü
görüntülenmez. (Modül taktıysanız, yukarıda
2. adımda belirtildiği gibi yerine doğru
şekilde sıkıca oturduğundan emin olun).
Şimdi ekranda görüntülenen işlevler,
ülkenizde seçili Koşullu Erişim Modülü
içeriklerine bağlıdır. Modülle birlikte
gönderilen yönergelere bakın veya satıcınıza
başvurun.
Page 39

20 Analog programları
otomatik olarak
ayarlama
Oto.Hafıza
Bu menü, bölgenizde bulunan tüm analog
programları otomatik olarak aramanıza olanak
verir.
Tüm analog programları otomatik olarak
aramadan önce, TV’nin analog modda
olduğundan emin olun. Dijital modda ise
analog moda girmek için
(Analog /
Dijital) tuşuna basın.
1
tuşuna basın.
Ana Menü
Görüntü
Ses
Özllikler
Kuruluş
2
Î / ï tuşuna üst üste basarak Install’u
Parlaklık
Renk
Kontrast
Keskinlik
Renk Isısı
Kontras+
NR
(Yükle) seçin ve Æ / tuşuna basarak
Install (Yükle) menüsüne girin.
Ana Menü
Görüntü
Ses
Özllikler
Kuruluş
3
ï tuşuna üst üste basarak Auto
Oto.Hafıza
Elle Hafıza
Sırala
İsim
Fav. Program
Store’u (Otomatik Kaydet) seçin ve
Æ / tuşuna basarak kanalları
otomatik olarak arama işlemini başlatın.
Mevcut tüm TV kanalları kaydedilir.
Bu işlem birkaç dakika sürecektir.
Ekranda aramanın ilerlemesi ve bulunan
kanal sayısı görüntülenir.
Program 3
TV 196 MHz
ÖNEMLİ
Aramayı tamamlanmadan önce kesmek veya
aramadan çıkmak için tuşuna basın.
Otomatik kayıt sırasında aramayı keserseniz,
hiçbir kanal kaydedilmez. Kanalların
kaydedilmesi için otomatik aramayı tekrar
yapmanız gerekir.
Not
ATS (Otomatik Ayarlama Sistemi)
özelliği
Verici veya kablo şebekesi otomatik sıralama
sinyali gönderiyorsa, programlar doğru
şekilde numaralandırılır. Böylece yükleme
işlemi tamamlanır. Aksi halde, tercihinize
göre programları numaralandırmak için Sort
(Sıralama) menüsünü kullanabilirsiniz.
ACI (Otomatik Kanal Kurulumu)
özelliği
ACI yayını yapan kablo sistemi veya TV kanalı
algılanırsa, program listesi görüntülenir. ACI
yayını yoksa, kanallar dil ve ülke seçiminize
göre numaralandırılır. Sort (Sıralama)
menüsünü kullanarak bunları yeniden
numaralandırabilirsiniz.
Not
Analog modda Language (Dil) veya
Country (Ülke) seçeneğini değiştiremezsiniz.
Language (Dil) veya Country (Ülke)
seçeneğini değiştirmek isterseniz, Analog
moddan çıkmanız ve Dijital moda girmeniz
gerekir (sayfa 18’de bkz. “Tercihler”).
27
Türkçe
Page 40

21 Elle Hafıza
Bu menü programları birer birer kaydetmek
için kullanılır.
1
tuşuna basın.
2
Î ï tuşuna art arda basarak Kuruluş’u
seçin ve Æ / tuşuna basarak
Türkçe
Kuruluş menüsüne girin.
Ana Menü
Görüntü
Ses
Özllikler
Kuruluş
3
ï tuşuna basarak Elle Hafıza
Oto.Hafıza
Elle Hafıza
Sırala
İsim
Fav. Program
seçeneğini belirleyin ve Æ / tuşuna
basarak Elle Hafıza menüsüne girin.
Kuruluş
Oto.Hafıza
Elle Hafıza
Sırala
İsim
Fav. Program
Sistem
Ara
Prog. No.
İnce Ayar
Hafızaya Al
5
Sistem :
Î ï tuşlarına basarak Avrupa
(otomatik algılama),
Fransa (LL’ standardı),
UK (I standardı),
Batı Avrupa (BG standardı) veya
Doğu Avrupa (DK standardı)
seçeneğini belirleyin.
Seçilen sistemi onaylamak için Æ /
tuşuna basın.
6
Ara :
Æ tuşuna basın. Arama başlar.
Bir program bulununca tarama durur
ve programın adı görüntülenir (varsa).
Bir sonraki adıma gidin. İstediğiniz
programın frekansını biliyorsanız, tuşları
kullanarak bunu doğrudan girebilirsiniz
– .
7
Prog. No. :
İstediğiniz sayıyı
– veya Î ï tuşlarıyla girin.
8
İnce Ayar :
Alış tatmin edici değilse, Î ï tuşlarını
kullanarak ayarlayın.
4
Î ï tuşlarına basıp, Elle Hafıza
menüsündeki öğeleri seçerek ayarlayın
veya etkinleştirin.
Elle Hafıza
Sistem
Ara
Prog. No.
İnce Ayar
Hafızaya A
Avrupa
Fransa
UK
Batı Avrupa
Doğu Avrupa
28
9
Hafızaya Al :
Değişiklikleri kaydetmek için Æ /
tuşuna basın. Program kaydedilmiştir.
10
Kaydedilecek her program için 6 – 9
arasındaki adımları yineleyin.
11
Bir önceki menüye dönmek için Í
tuşuna basın.
12
Menüden çıkmak için tuşuna
basın.
Page 41

22 Program Sıralama
Sıralama özelliği, belirli bir istasyonun
program numarasını değiştirmenize olanak
verir.
1
tuşuna basın.
2
Î / ï tuşuna art arda basarak
Kuruluş’u seçin ve Æ / tuşuna
basarak Kuruluş menüsüne girin.
Ana Menü
Görüntü
Ses
Özllikler
Kuruluş
Oto.Hafıza
Elle Hafıza
Sırala
İsim
Fav. Program
Kuruluş
Oto.Hafıza
Elle Hafıza
Sırala
İsim
Fav. Program
5
Î ï Yeni program numarasını seçmek
001
002
003
004
005
006
007
008
100
için Í tuşlarına basın ve Í tuşuyla
onaylayın. (Ok sağa döner ve sıralama
tamamlanır.)
Türkçe
3
ï tuşuna basarak Sırala’yı seçin ve
Æ /
tuşuna basarak sıralama
moduna girin.
Kuruluş
Oto.Hafıza
Elle Hafıza
Sırala
İsim
Fav. Program
4
tuşlarını kullanarak taşımak stediğiniz
001
002
003
004
005
006
007
008
100
program numarasını seçin ve Î ï
tuşunu kullanarak sıralama moduna girin
(Ok imleci sola döner).
Kuruluş
Oto.Hafıza
Elle Hafıza
Sırala
İsim
Fav. Program
6
Yeniden numaralamak istediğiniz her
4
program için
ve 5 adımlarını
001
002
003
004
005
006
007
008
100
yineleyin.
7
Bir önceki menüye dönmek için
Í tuşuna basın.
8
Menüden çıkmak için tuşuna basın.
29
Page 42

23 Kanala İsim Verme
İsterseniz, TV kanalına bir isim de
verebilirsiniz.
1
tuşuna basın.
2
Î / ï tuşuna art arda basarak
Kuruluş’u seçin ve Æ / tuşuna
basarak Kuruluş menüsüne girin.
Türkçe
Kuruluş
Oto.Hafıza
Elle Hafıza
Sırala
İsim
Fav. Program
001
002
003
004
005
006
007
008
106
z
Ana Menü
Görüntü
Ses
Özllikler
Kuruluş
3
ï tuşuna art arda basarak İsim
Oto.Hafıza
Elle Hafıza
Sırala
İsim
Fav. Program
seçeneğini belirleyin ve Æ / tuşuna
basarak İsim moduna girin.
Kuruluş
Oto.Hafıza
Elle Hafıza
Sırala
İsim
Fav. Program
4
İsim vermek istediğiniz kanalı seçmek
001
002
003
004
005
006
007
008
100
için Î ï tuşlarına basın.
5
İlk isim görüntüleme alanına gitmek için
Æ tuşuna basın.
7
İsim, TV ekranının sol üst köşesinde
görünene kadar Æ /
OK
tuşuna basın.
İsim kaydedilmiştir.
8
Bir önceki menüye dönmek için Í
tuşuna basın.
9
Menüden çıkmak için tuşuna basın.
6
Karakterleri (en çok 5 karakter) seçmek
için Î ï tuşlarına basın ve isim
görüntüleme alanında dolaşmak için
Í Æ tuşlarını kullanın.
30
Page 43

24 Favori Programları
Seçme
Bu özellik sık izlemediğiniz programları
atlayıp, sadece favori programları tutmanıza
olanak verir.
Not: Bir program atlandıktan sonra, ona
P
+ / -
tuşu ile erişilemez. Programa sadece
0 – 9 sayı tuşlarıyla erişebilirsiniz.
1
tuşuna basın.
2
Î / ï tuşuna art arda basarak
Kuruluş’u seçin ve Æ / tuşuna
basarak Kuruluş menüsüne girin.
Ana Menü
Görüntü
Ses
Özllikler
Kuruluş
3
ï tuşuna basarak Fav. Program’ı
Oto.Hafıza
Elle Hafıza
Sırala
İsim
Fav. Program
seçin ve Æ / tuşuna basarak
Fav. Program listesine girin.
4
Atlamak istediğiniz programı seçmek
için Î / ï tuşuna art arda basın.
Kuruluş
Oto.Hafıza
Elle Hafıza
Sırala
İsim
Fav. Program
001
002
003
004
005
006
007
008
100
5
Programı atlamak için Æ / tuşuna
basın. Programın atlandığını belirtmek
üzere menünün sağındaki $ simgesi
kaybolur.
Kuruluş
Oto.Hafıza
Elle Hafıza
Sırala
İsim
Fav. Program
6
Bir önceki menüye dönmek için Í
001
002
003
004
005
006
007
008
100
tuşuna basın.
7
Menüden çıkmak için tuşuna basın.
İpucu
• Atlanan programları tekrar favori
programlar listenize eklemek için
1
– 3
arasındaki adımları tekrarlayın.
• Favori programlar listenize tekrar eklemek
istediğiniz atlanmış programı seçmek için
Î / ï tuşuna art arda basın.
• Bir programı atlamamak için Æ /
\
tuşuna basın. Programın tekrar eklendiğini
belirtmek üzere $ simgesi belirir.
Türkçe
31
Page 44

25 Özellikler
25.1 Zamanlayıcı
Zamanlayıcı özelliği, siz bir kanalı izlerken
TV’nin belirli bir saatte başka bir kanala
geçmesini sağlar. Bu özelliği, TV’nin
bekleme modundan belirli bir saatte
açılmasını sağlamak için alarm olarak da
kullanabilirsiniz. Zamanlayıcının çalışabilmesi
için TV tamamen kapatılmamalıdır. TV
Türkçe
tamamen kapatılırsa, zamanlayıcı da devre
dışı kalır.
1
tuşuna basın.
2
Î ï tuşlarına art arda basarak
Özellikler’i seçin ve Æ/ tuşuna
basarak Özellikler menüsüne girin.
Ana Menü
Görüntü
Ses
Özllikler
Kuruluş
Zamanlayıcı
Çocuk Kilidi
Ebeveyn Kilidi
Aktif Kontrol
3
Æ / tuşuna basarak Zamanlayıcı
menüsüne erişin.
4
Bir Zamanlayıcı öğesi seçmek için Î ï
tuşlarına basın.
Zamanlayıcı
Uyuma
Zaman
Başlangıç
Bitiş
Prog. No.
Geçerli
- - : - -
Uyku : Seçilen süre dolduğunda TV’nin
bekleme moduna geçmesi için bir süre
seçmek istediğinizde kullanılır.
Özelliği devre dışı bırakmak için Kapalı
seçeneğini belirleyin.
Not
TV’nin Uyku moduna geçmesi için bir süre
ayarlandığında, sürenin son dakikasına
gelindiği zaman ekranda geri sayım başlar.
Uyku moduna geçmeyi iptal etmek için
uzaktan kumandanın herhangi bir
düğmesine basın.
Zaman : Geçerli saati girin.
Başlangıç : Başlangıç saatini girin.
Bitiş : Bekleme moduna giriş saatini girin.
Prog. No. : Uyandırma alarmının açacağı
kanalın numarasını girin.
Geçerli : Ayarlar şunlardır:
– Bir kere; tek bir alarm için,
– Günlük; her gün için,
– Kapalı; iptal etmek için.
6
TV’nin bekleme moduna geçmesi
için uzaktan kumandanın
tuşuna basın. TV,
programlanan saatte otomatik olarak açılır.
TV’yi açık bırakırsanız, Başlangıç saatinde
sadece kanal değişir, Bitiş saatinde de
bekleme moduna geçilir.
5
Zamanlayıcı ayarında düzeltmeler yapmak
için Í, Æ, Î, ï veya 0-9 sayı tuşlarını
kullanın.
32
Page 45

25.2 Ebeveyn Kilidi
Ebeveyn Kilidi özelliği, çocuklarınızın belirli
programları izlemesini engellemek için söz
konusu kanalları kilitlemenize olanak verir.
1
tuşuna basın.
2
Î ï tuşlarına art arda basarak
Özellikler’i seçin ve Æ/ tuşuna
basarak Özellikler menüsüne girin.
Ana Menü
Görüntü
Ses
Özllikler
Kuruluş
3
Î ï tuşlarına art arda basarak Ebeveyn
Zamanlayıcı
Çocuk Kilidi
Ebeveyn Kilidi
Aktif Kontrol
.
Kilidi‘ni seçin ve Æ / tuşuna basarak
Ebeveyn Kilidi moduna girin.
Özllikler
Zamanlayıcı
Çocuk Kilidi
Ebeveyn Kilidi
Aktif Kontrol
* * * *
Giriş Kodu
Ebeveyn Kilidi
Prog. Kilitli
Kod Değiştir
Hepsini Sil
Hepsini Kilitli
001
002
003
004
005
006
007
008
106
Ebeveyn Kilidi işlevlerine erişmek ve
bunları etkinleştirmek için Ebeveyn Kilidi
menüsünde, Î, ï, Í, Æ, sayı tuşlarını ve
tuşlarını kullanın.
Ayarların açıklaması:
Program Kilitli
Tek tek programları kilitleyebilirsiniz. Æ
tuşuna basarak Program Kilitli moduna
girin, Î ï tuşlarına basarak kilitleyeceğiniz
veya kilidini açacağınız programı seçin.
Seçtiğiniz programı kilitlemek veya
programın kilidini açmak için Í Æ tuşlarına
basın. Kilitli kanalın numarasının yanında bir
kilit simgesi + görünür. Program Kilitli
modundan çıkmak ve Ebeveyn Kilidi
menüsüne dönmek için tuşuna basın.
Kod Değiştir
Yeni dört basamaklı kodunuzu girmek için
0-9 sayı tuşlarını kullanın ve ardından kodu
tekrar girerek yeni kodu onaylayın.
Türkçe
4
0-9 sayı tuşlarını kullanarak 0711
erişim kodunu tuşlayın. Yanlış mesajı
görüntülenir. 0711 erişim kodunu tekrar
tuşlayın.
5
TV sizden kodu değiştirmenizi ister. 0-9
sayı tuşlarını kullanarak kendi istediğiniz
4 basamaklı kodu girin ve yeni kodu
onaylayın. Yeni kod onaylandıktan sonra,
Ebeveyn Kilidi menüsü görüntülenir.
Hepsini Sil
Kilitli tüm kanalların kilidini açmak için Æ
tuşuna basın.
Hepsi Kilitli
Tüm kanalları kilitlemek için Æ tuşuna basın
Not
TV’yi açıp kilitli bir programı seçerseniz,
seçili kilitli kanala girmek için Erişim Kodu’nu
girmeniz gerekir. Kanalın kilidini açmak için
Ebeveyn Kilidi menüsünden Program
Kilitli’ye gidin ve Í Æ tuşlarına basın
(kilit simgesi + kaybolur).
33
Page 46

25.3 Çocuk Kilidi
25.4 Aktif Kontrol
Çocuk Kilidi menüsünde Açık’ı
seçtiğinizde TV’nin yan kontrolleri kilitlenir.
TV izlemelerini engellemek için uzaktan
kumandayı çocuklardan saklamanız gerekir.
1
tuşuna basın.
Türkçe
2
Özellikler’i seçmek için Î ï tuşlarına
art arda basın ve Özellikler menüsüne
girmek için Æ / tuşuna basın.
3
ï tuşuna basarak Çocuk Kilidi’ni seçin
ve Æ / tuşuna basarak Çocuk Kilidi
menüsüne erişin.
Özllikler
Zamanlayıcı
Çocuk Kilidi
Ebeveyn Kilidi
Aktif Kontrol
Kpalı
Açık
Resim ayarını, sinyal ne olursa olsun, sürekli
en iyi görüntü kalitesini sağlayacak şekilde
otomatik olarak ayarlar.
1
tuşuna basın.
2
Özellikler’i seçmek için Î ï tuşlarına
art arda basın ve Özellikler menüsüne
girmek için Æ/ tuşuna basın.
3
Î ï tuşlarına art arda basarak
Aktif Kontrol’ü seçin ve Æ /
tuşuna basarak Aktif Kontrol
moduna girin.
Özllikler
Zamanlayıcı
Çocuk Kilidi
Ebeveyn Kilidi
Aktif Kontrol
Kpalı
Açık
4
Î ï tuşlarına basarak, Açık seçeneğini
belirleyip kilitleyin veya Kapalı seçeneğini
belirleyip kilidi açın.
5
Æ / Açık veya Kapalı seçeneğini
etkinleştirmek/devre dışı bırakmak için
6
Bir önceki menüye dönmek için Í tuşuna
basın.
7
Menüden çıkmak için tuşuna basın.
34
4
Î ï tuşlarına basarak Açık veya Kapalı
seçeneğini belirleyin.
5
Açık veya Kapalı seçeneğini
etkinleştirmek / devre dışı bırakmak için
tuşuna basın.
Æ /
6
Bir önceki menüye dönmek için Í
tuşuna basın.
7
Menüden çıkmak için tuşuna basın.
Page 47

26 Görüntü ve Ses
ayarları
Görüntü ve Ses menüsünden görüntü ve ses
ayarlarını yapabilirsiniz.
1
tuşuna basın.
2
Î ï tuşlarına basarak Görüntü’yü veya
Ses’i seçin.
3
Æ / tuşuna basarak Görüntü veya
Ses menüsüne girin.
Görüntü
Parlaklık
Renk
Kontrast
Keskinlik
Renk Isısı
Kontras+
NR
Ses
Ekolayzır
Balans
Ses Sınırı
Incr. Surround
4
Î ï tuşlarına basarak Görüntü veya Ses
100
0
120HZ
200HZ
500HZ
1200HZ
3KHZ
7500HZ
12KHZ
63
ayarını seçin.
5
Æ / tuşuna basarak Görüntü veya
Ses ayarını seçin.
6
Î ï tuşlarına basarak Görüntü veya
Ses ayarını yapın.
7
Bir önceki menüye dönmek için Í tuşuna
basın.
8
Menüden çıkmak için tuşuna basın.
Kontrast : TV’nin kontrast değer aralığı
içinde, açık ve koyu tonlar arasındaki farkı
değiştirir.
Keskinlik : Görüntüde ayrıntıların daha iyi
belli olması için netlik derecesini artırır veya
azaltır.
Renk Isısı : Renk ayarını değiştirir: Soğuk
(daha fazla mavi), Normal (dengeli) veya Sıcak
(daha fazla kırmızı).
Kontrast+ : TV’nin kontrast değer aralığını
arttırır. Bu özelliği etkinleştirmek için
Açık’ı seçin.
NR : Sinyal aktarımı zayıf olduğu zaman
resimde küçük noktaların meydana geldiği
“parazitli“ görüntü durumunda iyileştirmeler
yapar.
Bu özelliği etkinleştirmek için Açık’ı seçin.
Ses ayarlarının açıklaması:
Ekolayzer : Ses tonunu ayarlamaya yarar.
Balans : Sağ ve sol hoparlörlerin sesini
dengeler.
AVL : (Otomatik Ses Ayarlayıcı) :
Bu işlev, özellikle program değiştiğinde veya
reklâmlar girdiğinde sesteki ani yükselmeleri
sınırlamak için kullanılır.
Incr. Surround : Stereo yayın sırasında
Incredible Surround ve Stereo arasında seçim
yapın; Mono yayın sırasındaysa Mono
ve Doygun Ses arasında seçim yapın.
Türkçe
Görüntü ayarlarının açıklaması:
Parlaklık : Görüntünün parlaklık düzeyini
değiştirir.
Renk : Rengin yoğunluğunu değiştirir.
35
Page 48

27 Akıllı Görüntü ve Ses
Akıllı Görüntü özelliği 5 görüntü ayarı
seçeneği sunar: Zengin, Doğal, Yumuşak,
Multimedya ve Kişisel.
Ayarlar arasında geçiş yapmak ve istediğiniz
modu seçmek için
düğmesine art arda
basın.
Türkçe
Natural
or
Rich
Not
: Kişisel ayarı, ana menüden
Multimedia
Personal
Görüntü menüsünü kullanarak yaptığınız
ayardır. Bu, Akıllı Görüntü ayarındaki
değiştirilebilen tek ayardır. Diğer tüm
ayarlar önceden fabrikada, uygun şekilde
ayarlanmıştır.
Akıllı Ses özelliği 4 ses ayarı seçeneği sunar:
Filmler, Müzik, Konuşma ve Kişisel.
Ayarlar arasında geçiş yapmak ve istediğiniz
modu seçmek için
düğmesine art arda
basın.
Soft
Görüntü Ayarlarının Açıklaması
Zengin : Parlak ortam için
veya TV’nin kalitesini iyi
kaynaklarda sergilemek
üzere gösterimlerde
kullanmak için uygun
olan parlak ve net resim
ayarları.
Doğal : Oturma odası şartları
ve ortalama sinyaller için
referans modu.
Yumuşak : Kalitesiz sinyaller için
tasarlanmıştır. Oturma
odasında görüntüleme
için uygundur.
Multimedya : Grafik uygulamalar için
en uygun seçenek.
Kişisel : Görüntü ayarları
tercihinize göre yapılır.
Ses Ayarlarının Açıklaması
Music
or
Voice
Movies
Personal
Not
: Kişisel ayarı, ana menüden Ses
menüsünü kullanarak yaptığınız ayardır.
Bu, Akıllı Ses ayarındaki değiştirilebilen tek
ayardır. Diğer tüm ayarlar önceden fabrikada
uygun şekilde ayarlanmıştır.
36
Filmler : Eyleme karşı ilgiyi
vurgular.
Müzik : Düşük tonu vurgular.
Konuşma :
Yüksek tonu vurgular.
Kişisel : Ses ayarları tercihinize
göre yapılır.
Page 49

28 Ekran Biçimleri
4:3 ekranlar için görüntü formatları
Farklı ekran biçimleri arasında geçiş yapmak için
4:3
Bu format, 4:3 biçimindeki görüntülerin ekranın tüm yüzeyini kullanılarak
gösterilmesi için önerilir.
Açılım 4:3
Bu format seçildiğinde, görüntü dikey olarak genişletilir ve yatay siyah
çubukların alanı azaltılır.
Sıkıştırılmış 16:9
Tam ekran film görüntülerini, alttan ve üstten sınırlanmış biçimde sıkıştırmak
için önerilir. Bu format seçildiğinde, TV ekranının üst ve alt kısmında yatay
çubuklar görülebilir.
Geniş ekranlar için görüntü formatları
Farklı ekran biçimleri arasında geçiş yapmak ve istediğiniz biçimi seçmek için
arda basın.
tuşuna basın
tuşuna art
Türkçe
4:3
Görüntü 4:3 biçiminde tekrar oluşturulur ve ekranın iki tarafında siyah bir
bant bulunur.
Sinema Açılımı 14:9
Görüntü 14:9 biçimine genişletilir, resmin iki tarafında ince, siyah bir bant
kalır. Görüntünün üstünden ve altından küçük bir kısım kesiktir.
(posta kutusu biçimi) görüntülerde bu modun kullanılması önerilir. Bu
modda, görüntünün üstünden ve altından büyük bir kısım kesili
Alt Yazı Zum
Bu mod 4:3 biçimindeki görüntüleri, ekranın tüm yüzeyini kullanarak ve
altyazıları göstererek görüntüler. Görüntünün üstünden bir kısım kesiktir.
Süper Geniş
Bu mod 4:3 biçimindeki görüntüleri, ekranın tüm yüzeyini kullanarak ve
görüntünün kenarlarını genişleterek görüntüler.
Geniş Ekran
Görüntü 16:9 biçiminde aktarılan orijinal boyutta görüntülenir. 4:3
biçimindeki bir görüntüyü bu modda görüntülerseniz, görüntü yatay olarak
uzar.
Sinema Açılımı 16:9
Görüntü 16:9 biçimine genişletilir. Üstünde ve altında siyah bant bulunan
37
Page 50

29 Teletekst
Teletekst, gazete gibi okunabilen ve belirli
kanallardan yapılan bir bilgi yayınıdır. Ayrıca
işitme sorunu bulunan veya yayın dilini
(örneğin, kablolu ağlarda, uydu kanallarında
vb.) bilmeyen izleyiciler için altyazılara erişim
sağlar.
Türkçe
1
3
1
Teletekst Açma/Kapatma
Teletekst sayfasını açmak için bu tuşa
basın. Erişebileceğiniz unsurları listeleyen
bir dizin sayfası görüntülenir. Her
unsurun 3 rakamlı bir sayfa numarası
vardır. Seçili kanalda teletekst yayını
yoksa, 100 sayısı görüntülenir ve ekran
siyah olur. Teletekst sayfasından çıkmak
için tekrar
2
Sayfa seçme
İstediğiniz sayfanın numarasını girmek
için
5
2
kullanın. Örnek: Sayfa 120 için 120
girin. Bu sayı ekranın sol üst köşesinde
görüntülenir. Sayfa bulunduğu zaman
sayaç durur ve sayfa görüntülenir. Başka
bir sayfa görüntülemek istediğinizde bu
işlemi tekrarlayın. Sayaç aramaya devam
ediyorsa, sayfa yayınlanmıyor demektir.
Bu durumda başka bir sayı seçin.
3
İstenen unsurlara doğrudan erişim
Ekranın alt tarafında renkli alanlar
görüntülenir. 4 renkli tuş, unsurlara veya
ilgili sayfalara erişmek için kullanılır.
İstenen unsur veya sayfa kullanılamıyorsa,
renkli alanlar yanıp söner.
tuşuna basın.
0 – 9 tuşlarını veya P –/+ tuşlarını
38
4
2
4
Dizin
Sizi dizin sayfasına (genellikle sayfa 100
veya sık kullanılanlar listesi menüsüne)
geri döndürür.
5
Sayfayı bekletme
Bazı sayfalarda alt sayfalar da vardır
ve bunlar otomatik olarak art arda
görüntülenirler. Bu tuş, alt sayfaya gitme
işlemini durdurur (sürekli mevcut sayfayı
görüntüler) veya kaldığı yerden devam
ettirir. İşaret sol üst tarafta görüntülenir.
Bir önceki
seçmek için Í Æ tuşlarını kullanın.
veya bir sonraki alt sayfayı
Page 51

9
9
9
9
9
6
Gizlenmiş bilgiler
Oyun veya bulmaca çözümleri gibi
gizlenmiş bilgileri görüntülemek veya
gizlemek için kullanılır.
7
Sayfayı büyütme
6
8
7
7
Büyütülmüş şekilde sayfanın alt veya üst
kısmını görüntülemenize olanak verir. Bu
tuşa tekrar bastığınızda sayfa normal
boyuta döner.
8
Resim/Teletekst
• düğmesine basın.
• Ekranın sağında teleteksti, solunda yayını
görüntülemek için
• Tam ekran teletekst moduna geçmek
için
• Tam ekran yayın moduna geçmek için
9
Sık izlenen sayfalar
kullanılabilir.
Ekranın alt tarafında görüntülenen
standart renk alanları yerine, ilk 40
kanaldaki sık izlenen 4 sayfayı kaydedebilir
ve sonra bunlara renkli (kırmızı, yeşil, sarı,
mavi) tuşlar yoluyla erişilebilirsiniz. Bu
sık izlenen sayfalar bir defa ayarlandıktan
sonra, teleteksti her seçtiğinizde varsayılan
olarak bunlar görüntülenir.
Sık izlenen sayfaları kaydetmek için
aşağıdakileri yapın:
•
moduna geçin.
• Bir teletekst sayfasını sık izlenen sayfa
olarak kaydetmek için
tuşlarını kullanarak sayfanın numarasını
girin.
• İstediğiniz bir renkli tuşu 5 saniye kadar
basılı tutun. Sayfa kaydedilmiştir.
• Diğer renkli tuşlar için de 2 ve 3.
adımları tekrarlayın.
• Sık izlenen sayfa modundan çıkmak için
çıkmak için, tuşuna basın.
Sık izlenen sayfaların kaydını silmek için
tuşunu 5 saniye kadar basılı tutun.
tuşuna basın.
tuşuna basın.
Not: Yalnızca RF Analog’da
tuşuna basarak sık izlenen sayfa
tuşuna basın. Teletekst modundan
Not
tuşuna basın.
Türkçe
39
Page 52

30 TV’yi PC Monitörü
olarak kullanma
TV’niz bir bilgisayar monitörü olarak da
kullanılabilir.
HDMI konektörü yoluyla yapılabilir. VGA
bağlantısı desteklenmemektedir.
30.1 PC donanımını bağlama
Önemli
TV’nin bir bilgisayar monitörü olarak
Türkçe
çalışabilmesi için aşağıdaki adımlar
uygulanmalıdır.
1
Bilgisayarınızın DVI çıkışını TV’nin
HDMI 1 veya HDMI 2 konektörüne
bağlayın. DVI çıkışı bağlanacaksa
HDMI’den DVI’ye bağlantı için üretilmiş
kablolardan kullanın.
2
Ses kablosunu bilgisayarın ses yuvasına
ve TV’nin L / R Ses yuvalarına (EXT3)
bağlayın.
3
Kaynak Listesini görüntülemek için
kullanarak HDMI 1 veya HDMI 2’yi
seçin.
Not :
PC bağlantısı yalnızca
tuşuna basın ve Î ï tuşunu
Kaynak
TV
EXT 1
EXT 2
EXT 3
EXT 4
HDMI 1
HDMI 2
Digital TV
3
Î ï tuşuna basarak ayarları seçin, Í Æ
tuşuna basarak ayarı seçin veya yapın.
4
Bir önceki menüye dönmek için Í
tuşuna basın.
5
Menüden çıkmak için tuşuna basın.
Görüntü menüsü
• Görüntü menüsünde Parlaklık, Kontrast,
Renk Isısı, Kontrast+, Yatay Değişim
ile Dikey Değişim özellikleri bulunur.
• Yatay Değişim ve Dikey Değişim
özellikleri hariç, diğer tüm özellikler TV
Görüntüsü menüsündekilerle aynı şekilde
çalışır (bkz. sayfa 35).
• Yatay Değişim özelliği, görüntünün
yatay konumunu ayarlamanıza olanak verir.
Dikey Değişim özelliği görüntünün dikey
konumunu ayarlamanıza olanak verir.
Özellikler menüsü
• Özellikler menüsünde Seçim Modu ve
Biçim özellikleri vardır.
• 480p veya 720p çözünürlüklerini
destekleyen bir PC bağladığınızda,
Özellikler menüsünde Seçim Modu
öğesi görüntülenir. Bu, PC ile HD modları
arasında seçim yapmanıza olanak verir.
• Biçim özelliği TV’nin ekran biçimleri ile
aynı şekilde çalışır. (Bkz. sayfa 37).
4
Seçili kaynağa geçmek için Æ / tuşuna
basın.
30.2 Bilgisayar bağlıyken TV
ayarlarını yapma
1
tuşuna basarak ana menüyü
görüntüleyin.
2
Î ï tuşlarına basarak Görüntü, Ses
veya Özellikler seçeneğini elirleyin
ve Æ / tuşuna basarak seçili öğenin
menüsüne girin.
40
Not :
TV’nizi bilgisayara bağlamak için
HDMI kullanırken, ilk defada mükemmel şekilde
çalışmayabilirler. Bu sorun çoğunlukla TV’ye
bağlı cihazın çözünürlüğünü veya ayarlarını
değiştirmekle çözülür. Bazen bir iletişim kutusu
görebilirsiniz ve TV izlemeye devam etmek için
“OK“ tuşuna basmanız gerekebilir. Gerekli
değişiklikleri yapmak için lütfen bağlı cihazın
kullanım kılavuzuna bakın.
Page 53

31 TV’yi HD (Yüksek
Tanımlı) modunda
kullanma
Yüksek tanımlı görüntü sinyalleri üretebilen
bir HD cihazı kullanıyorsanız, HD (Yüksek
Tanımlı) modu daha net görüntü elde etmenizi
sağlar.
31.1 HD cihazını bağlama
Önemli: TV’nin HD modunda çalışabilmesi
için aşağıdaki adımlar uygulanmalıdır.
1
HD cihazınızın HDMI veya DVI çıkışını
TV’nin HDMI 1 veya HDMI 2
konektörüne bağlayın. DVI çıkışı bağlı
ise, DVI’den HDMI’ye bağlantı yapmak
için üretilmiş kablolardan kullanın. HD
cihazının Bileşen Video Çıkışları’nı (Y, Pb,
Pr) (varsa) TV’nin Bileşen Video Girişine
de (Ext 4) bağlayabilirsiniz.
2
Ses kablosunu HD cihazının ses yuvasına
ve TV’nin L/R Ses yuvalarına (EXT3)
bağlayın.
3
Kaynak Listesini görüntülemek için
HDMI 1’i veya HDMI 2’yi (YPbPr
bağlantısı kullanıyorsanız EXT 4’ü) seçin.
tuşuna basın ve Î ï tuşunu kullanarak
31.2 HD modunda iken TV
ayarlarını yapma
1
tuşuna basarak ana menüyü
görüntüleyin.
2
Î ï tuşlarına basarak Görüntü, Ses
veya Özellikler seçeneğini belirleyin
ve Æ / tuşuna basarak seçili öğenin
menüsüne girin.
3
Î ï tuşuna basarak ayarları seçin, Í Æ
tuşuna basarak ayarı seçin veya yapın.
4
Bir önceki menüye dönmek için
Í tuşuna basın.
5
Menüden çıkmak için tuşuna basın.
Görüntü menüsü
• Görüntü menüsünde Parlaklık, Renk,
Kontrast, Keskinlik, Renk Isısı,
Kontrast+, Yatay Değişim ve Dikey
Değişim bulunur.
• Yatay Değişim ve Dikey Değişim
hariç, diğer tüm işlevler TV Görüntüsü
menüsündekilerle aynı şekilde çalışır (bkz.
sayfa 35).
Türkçe
Kaynak
TV
EXT 1
EXT 2
EXT 3
EXT 4
HDMI 1
HDMI 2
Digital TV
4
Seçili kaynağa geçmek için Æ / tuşuna
basın.
• Yatay Değişim özelliği, görüntünün yatay
konumunu ayarlamanıza olanak verir.
• Dikey Geçiş görüntünün dikey
konumunu ayarlamanıza olanak verir.
Ses menüsü
• Ses menüsünde Ekolayzer, Balans,
AVL ve Incredible Surround özellikleri
bulunur ve TV Sesi menüsü ile aynı şekilde
çalışır (bkz. sayfa 35).
41
Page 54

Özellikler (Özellikler) menüsü
• Features (Özellikler) menüsünde Timer
(Zamanlayıcı), Child Lock (Çocuk
Kilidi), Parental Lock (Ebeveyn
Kilidi), Mode Selection (Mod Seçimi)
ve Active Control (Aktif Kontrol)
özellikleri bulunur. Mode Selection
(Mod Seçimi) özelliği hariç, diğer
tüm özellikler TV Sound (TV Sesi)
menüsündekilerle aynı şekilde çalışır (bkz.
Türkçe
sayfa 34-36).
4
Mode Selection (Mod Seçimi)
moduna erişmek için Æ tuşuna basın.
5
PC veya HD modunu seçmek için Î ï
tuşlarına basın.
6
Bir önceki menüye geri dönmek için
Í tuşuna basın.
7
Menüden çıkmak için tuşuna basın.
31. 3 Features (Özellikler)
Menüsünde Mod Seçimi
480p veya 720p çözünürlüğü destekleyen
bir HD (Yüksek Tanımlı) cihaz (sadece
HDMI) bağladığınızda, Features (Özellikler)
menüsünde Mode Selection (Mod
Seçimi) özelliği görüntülenir. Mode
Selection (Mod Seçimi) özelliği PC ile HD
modları arasında geçiş yapmanıza olanak
verir.
1
tuşuna basın.
2
Î ï tuşuna üst üste basarak Features’ı
(Özellikler) seçin ve Æ / tuşuna
basarak Features (Özellikler)
menüsüne girin.
3
Mode Selection’ı (Mod Seçimi)
seçmek için ï tuşuna basın.
Özllikler
Zamanlayıcı
Çocuk Kilidi
Ebeveyn Kilidi
Mod Seçimi
Aktif Kontrol
PC
HD
31. 4 Features (Özellikler)
menüsünde Display (Görüntü)
(native 1080) Seçeneği
Not
Display (Görüntü) (native 1080) özelliği
sadece 1080p modellerinde mevcuttur.
1080i çözünürlüğü destekleyen HD
(Yüksek Tanımlı) cihaz (HDMI veya Y, Pb,
Pr) bağladığınızda, Features (Özellikler)
menüsünde Display (Görüntü) (native
1080) özelliği yer alır. Bu özellik orijinal HD
formatını (sadece 1080i) izlemenize olanak
sağlar. Bu çıkış sinyallerinizden gelen gerçek
HD çözünürlüğüdür.
1
tuşuna basın.
2
Î ï tuşuna üst üste basarak Features’ı
(Özellikler) seçin ve Æ / tuşuna
basarak Features (Özellikler) menüsüne
girin.
3
Display’i (Görüntü) seçmek için ï
tuşuna basın.
42
Page 55

Özllikler
Zamanlayıcı
Çocuk Kilidi
Ebeveyn Kilidi
Aktif Kontrol
Görüntü
31. 5 Desteklenen giri biçimleri
native 1080
Yalnızca 20 inç modeller
SD 480i 576i
4
Display (Görüntü) moduna erişmek için
Æ tuşuna basın.
5
Native 1080’de Off/On (Kapat/Aç)
seçeneğine erişmek için iki kez Æ tuşuna
basın.
Görüntü
native 1080
6
Off/On (Kapat/Aç) seçeneğini belirlemek
Kapat
Aç
için Î ï tuşlarına basın. Orijinal HD
formatını (sadece 1080i) izlemek için On
(Aç) seçeneğini belirleyin.
7
Bir önceki menüye geri dönmek için
Í tuşuna basın.
20 inç harici tüm modeller
HD 720p 1080i 1080p
SD 480i 576i
Not
SD (Standart Tanım) Formatları sadece
YPbPr bağlantıları içindir.
Not
Philips TV’niz HDMI ile uyumludur. İyi bir
görüntü alamıyorsanız, lütfen cihazınızdaki
(DVD oynatıcı, kablolu yayın cihazı vb.)
görüntü biçimini standart bir biçime
dönüştürün. Örneğin, DVD oynatıcı için
720p, 1080i veya 1080p’yi seçin.
Bunun TV’nizdeki bir bozukluk
olmadığını lütfen unutmayın.
Türkçe
8
Menüden çıkmak için tuşuna basın.
43
Page 56

32 Diğer ekipmanları
bağlama
32.1 VCR veya DVD kayıt cihazı
bağlama
Eurocable ile
1
1 ve 2 anten kablolarını gösterildiği
Türkçe
gibi bağlayın.
2
Kabloyu (eurocable) 3 gösterildiği gibi
bağlayın.
3
Kaynak listesini görüntülemek için
uzaktan kumandanın
4
ï tuşuna art arda basarak EXT2 ‘yi
seçin ve Æ / tuşuna basarak seçimi
onaylayın.
tuşuna basın.
Kablo
TV’nin alt
tarafındaki
konektörler
1
2
Recorder
Kayıt cihazı
TV’nin arka
tarafındaki
konektörler
TV’nin alt
1
Kayıt cihazı
tarafındaki
konektörler
2
3
Kablo
Yalnızca anten kablosuyla
1
1 ve 2 anten kablolarını gösterildiği
gibi bağlayın.
2
Kayıt cihazınızın test sinyalini ayarlayın
ve test sinyalini 0 numaralı program
altına kaydedin.
(Bkz. “Elle Hafıza“, sayfa 28. Ayrıca, kayıt
cihazınızın kullanım kılavuzuna da bakın).
32.2 Kod Çözücü ve VCR bağlama
Kod çözücünüze ve kayıt cihazınızın özel
konektörüne (euroconnector) kabloyu (eurocable) 4 takın. Ayrıca, kayıt cihazınızın el
kitabına da
bakın. Uyarı: Bazı kayıt cihazları
ekrandan gelen sinyallere karşı duyarlı
olduğu için, kayıt cihazınızı ekranın çok
yakınına koymayın. Ekranla arasında en az
0,5 m mesafe bırakın.
İpucu
Kod çözücünüzü bir eurocable ile doğrudan
EXT1 veya EXT2’ye de bağlayabilirsiniz.
4
Kayıt cihazı
Kod çözücü
44
Page 57

32.3 VCR veya VCR ile DVD kayıt
cihazı bağlama
Eurocable’lar ile
1
1, 2 ve 3 anten kablolarını
gösterildiği gibi bağlayın.
2
VCR’lerinizi veya DVD kayıt cihazınızı
ve 5 eurocable’larla EXT1 ve
4
EXT2’ye bağlayın.
3
Kaynak listesini görüntülemek için
uzaktan kumandanın
4
ï tuşuna basarak EXT1 veya EXT2’yi
tuşuna basın.
seçin ve Æ/ tuşuna basarak seçimi
onaylayın.
Yalnızca anten kablolarıyla
1
1 ve 2 anten kablolarını gösterildiği
gibi 3 bağlayın.
2
Kayıt cihazınızın test sinyalini ayarlayın
ve test sinyalini 0 numaralı program
altına kaydedin.
(Bkz. “Elle Hafıza“, sayfa 28. Ayrıca, kayıt
cihazınızın kullanım kılavuzuna da bakın).
TV’nin arka
tarafındaki
konektörler
32.4 Uydu alıcısı bağlama
Eurocable ile
1
1 ve 2 anten kablolarını gösterildiği
gibi bağlayın.
2
Uydu alıcınızı eurocable 3 ile EXT1
veya EXT2’ye bağlayın.
3
Kaynak listesini görüntülemek için
uzaktan kumandanın
4
ï tuşuna basarak EXT1 veya EXT2’yi
tuşuna basın.
seçin ve Æ/ tuşuna basarak seçimi
onaylayın.
Bileşen Video konektörleriyle
Bkz. “DVD oynatıcı, uydu
alıcısı veya Kablo
TV bağlama“, s. 46.
TV’nin arka
tarafındaki
konektörler
TV’nin alt
tarafındaki
konektörler
1
Türkçe
Kablo
TV’nin alt
tarafındaki
konektörler
1
Kayıt cihazı
2
3
4
2
Kayıt cihazı
5
Uydu alıcısı / Kablolu yayın cihazı
3
45
Page 58

32.5 DVD oynatıcı, Kablo TV veya
Oyun konsolu bağlama
3
Kaynak listesini görüntülemek için
uzaktan kumandanın
tuşuna basın.
HDMI konektörüyle
HDMI, Dijital görüntü ve ses bağlantısında
öncü ve yeni bir standarttır.
1
Ekipmanınızı HDMI konektörüyle
bağlayın.
Türkçe
2
Kaynak listesini görüntülemek için
uzaktan kumandanın
3
ï tuşuna basarak HDMI 1 veya
HDMI 2’yi seçin ve Æ/ tuşuna
basarak seçimi onaylayın.
TV’nin alt tarafındaki
konektörler
tuşuna basın.
4
ï tuşuna basarak EXT 4’ü seçin ve
Æ/
5
Kablo TV ve/veya uydu alıcısı söz
tuşuna basarak seçimi onaylayın.
konusuysa, Kablo TV kablosunu
ve/veya uydu anteni kablosunu 3 ve
anten kablosunu da 4 bağlayın.
TV’nin alt tarafındaki konektörler
2
DVD
1
32.6 DVD oynatıcı, Uydu alıcısı
veya Kablo TV bağlama
Bileşen Video Konektörleriyle
1
Üç ayrı bileşen video kablosunu 1
DVD oynatıcıdaki YPbPr jaklarına ve
TV’deki EXT4’ün Y (sarı), Pb (mavi) ve
Pr (kırmızı) jaklarına bağlayın.
2
Ses kablosunu DVD’nin ses L ve R
jaklarına ve EXT4 2 ‘ün L/R AUDIO
jakına takın.
46
TV’nin alt tarafındaki konektörler
2
4
3
Uydu alıcısı / Kablolu yayın cihazı
1
Page 59

Not
• Kablolar çoğunlukla renk kodludur.
Kırmızıyı kırmızıya, beyazı beyaza vb.
bağlayın;
• Bileşen video yuvalarının etiketleri,
bağlanan DVD oynatıcıya göre farklılık
gösterebilir. Kısaltmalar değişse de, B harfi
mavi, R harfi kırmızı bileşen sinyallerini ve
Y harfi parlaklık sinyalini gösterir. Tanımlar
ve bağlantı ayrıntıları için, DVD oynatıcının
kullanım yönergelerine bakın;
• İyi bir izleme keyfi sağlamak için,
kipmanınızın desteklenen en yüksek
görüntüleme modlarına ayarlanması
tavsiye edilir.
TV’nin yan tarafındaki
konektörler
Ses
L/R
2
PC
TV’nin alt tarafındaki
konektörler
HDMI
1
DVI
Türkçe
Uyarı
Ekranınızda görüntü kayması, yanlış renkler,
renk olmaması, görüntü olmaması gibi
sorunlar fark ederseniz, bağlantıların doğru
olup olmadığını ve bağlanan ekipmanın
çözünürlük ve sinyal standardının doğru
ayarlanıp ayarlanmadığını kontrol edin.
Ekipmanınızın kullanım kılavuzuna bakın.
32.7 Bilgisayar bağlama
Not
• DVI’den HDMI’ye bağlantı için üretilmiş
kablolar kullanılırken sadece PC’nin dijital
çıkışına bağlantı yapılabilir.
VGA bağlantısı
desteklenmemektedir.
• PC’nizi TV’ye bağlamadan önce, PC
monitör ayarlarında 60 Hz yenileme
sıklığını seçin.
DVI konektörlü PC
1
TV’nizin HDMI konektörlerinden birine
bağlantı yapmak için, DVI’den HDMI’ye
bağlantı için üretilen kablolardan
kullanın 1.
2
Ses kablosunu bilgisayarın AUDIO
(Ses) yuvasına ve TV’nin EXT3 2 L/R
SES yuvalarına bağlayın.
3
Kaynak listesini görüntülemek için
uzaktan kumandanın
4
ï tuşuna basarak HDMI 1 veya
HDMI 2’yi seçin ve Æ/
tuşuna basın.
tuşuna
basarak seçimi onaylayın.
Desteklenen PC çözünürlükleri
640 x 480, 60 Hz 800 x 600, 75 Hz
640 x 480, 72 Hz 800 x 600, 85 Hz
640 x 480, 75 Hz 1024 x 768, 60 Hz
640 x 480, 85 Hz 1024 x 768, 70 Hz
800 x 600, 60 Hz 1024 x 768, 75 Hz
800 x 600, 72 Hz 1024 x 768, 85 Hz
LCD TV için PC çözünürlükleri.
20”LCD TV veya Plazma TV için
uygulanabilir değil.
1280 x 768, 60 Hz
1280 x 1024, 60 Hz
1360 x 768, 60 Hz
47
Page 60

32.8 Fotoğraf Makinesi, Kamera,
Oyun konsolu bağlama
1
Fotoğraf makinenizi, kameranızı veya
oyun konsolunuzu bağlayın.
32.9. Kulaklık bağlama
1
Fişi, gösterildiği gibi, kulaklık yuvasına
takın.
2
Mono ekipman için, VIDEO 2 and
AUDIO L 3 (sadece) bağlantı
noktasına takın.
Stereo cihazlar söz konusu ise, hem
AUDIO L’ye, hem de AUDIO R’ye 3
Türkçe
bağlayın.
Bir S-VHS kamerayla S-VHS kalitesi elde
etmek için, S-VHS kabloları S-VIDEO
girişine1 ve AUDIO L/R girişlerine
bağlayın 3.
Uyarı: 1 ve 2 kablolarını birlikte
bağlamayın. Görüntüde bozulmaya neden
olabilir.
3
Kaynak listesini görüntülemek için
uzaktan kumandanın
4
ï tuşuna basarak EXT 3’ü seçin ve
tuşuna basın.
Æ/ tuşuna basarak seçimi onaylayın.
TV’nin yan tarafındaki konektörler
2
Kulaklık empedansı 8 ila 4.000 Om
arasında olmalıdır. Kulaklık yuvasında
3,5 mm jak vardır.
İpucu
Televizyonun dahili hoparlörlerinden
sesi kapatmak için uzaktan kumandadaki
tuşuna basın. tuşuna tekrar
basın.
48
TV’nin yan tarafındaki konektörler
3
2
1
Page 61

33 Sorun giderme
Televizyonunuz konusunda karşılaşabileceğiniz belirtilerin listesi aşağıda verilmektedir. Servis
çağırmadan önce bu basit kontrolleri yapın.
Belirti Olası çözümler
Ekranda görüntü yok
Zayıf alış
Görüntü yok
Belirli kanallarda ses
yok
Ses yok
Ses girişimi
Dijital modda
televizyonu çalıştıran
ve ekranda seçili olan
dili anlamıyorum
(karlanma)
• Güç kablosunun elektrik prizine ve televizyonunuza doğru
bağlandığından emin olun. Yine güç yoksa, fişi çekin. 60 saniye
bekleyip, fişi tekrar takın. Televizyonu tekrar açın.
• Uzaktan kumandadaki
• Televizyona ve duvar antenine giden anten bağlantısını kontrol
edin.
• Resminizi manuel olarak ayarlamayı deneyin (bkz. sayfa 28).
•
Seçtiğiniz TV sistemi doğru mu? (Bkz. sayfa
•
Sinyal gücünü kontrol etmek için tuşuna basın.
• Verilen kabloların doğru bağlandığını doğrulayın (TV’ye giden
anten kablosu, kayıt cihazınıza giden diğer anten kablosu, güç
kabloları vb.)
• Doğru kaynağı seçtiğinizi doğrulayın. tuşuna basın
• Çocuk kilidinin açık olduğunu doğrulayın.
Seçilen TV sisteminin doğru olduğundan emin olun (bkz. sayfa
•
• Ses düzeyinin minimumda olmadığını doğrulayın.
• Sessiz (
açıksa, sessiz modu devre dışı bırakmak için tuşuna basın.
• İsteğe bağlı ekipman ve TV arasındaki bağlantıları doğrulayın.
• Girişimi önlemek için saç kurutma makinesi, elektrikli süpürge
gibi elektrikli aletleri kapatmayı deneyin.
• Ekranda menüden çıkmak için
•
Menüyü görüntülemek için tuşuna tekrar basın.
• Menüdeki ikinci öğeyi seçmek için tuşuna, sonraki menü
düzeyine girmek için
•
öğesini seçin.
• tuşuna basıp sonraki menü düzeyine girin.
• Doğru dili seçmek için Î
•
Seçimi onaylamak için düğmesine basın.
• Menüden çıkmak için
) modun açık olmamasına dikkat edin. Sessiz mod
tuşuna tekrar basın ve tuşunu kullanarak beşinci menü
düğmesine basın.
tuşuna basın.
ï
vyberte správný jazyk.
tuşuna basın.
28).
28).
tuşuna basın.
Türkçe
TV uzaktan
kumandaya
yanıt vermiyor
• TV’nin önündeki alıcıya yaklaşın.
•
Pillerin doğru yerleştirildiğinden emin olun.
• Pilleri değiştirmeyi deneyin.
49
Page 62

Belirti Olası çözümler
Dijital kanal yok
Ekranda video resmiyle
birlikte
bir veya daha çok
küçük nokta var
HD modunda
kesik kesik veya
Türkçe
titrek resim dijital
ekipman bozulursa
Ses veya görüntü yok,
ancak ön panel kırmızı
ışığı yanıyor
PC modları
çalışmıyor
S-Video rengi
soluklaştı
PC modunda ekranın
üstünde ve altında
siyah çubuk var
AC3 kullanılamıyor
TV anteni setten
elektrik alamıyor
Bir kanaldan diğerine
geçmek çok uzun
sürüyor
Dijital menüye
erişemiyorum
değişmeyen
• Ülkenizde Dijital Video Yayını Karasal sinyali olup olmadığı
konusunda satıcınızla görüşün.
• Bu belirti bir sorun değildir. Sıvı kristal ekran, ince resim
ayrıntıları alabilmeniz için çok yüksek duyarlılık teknolojisiyle
üretilmiştir. Bazen, etkin olmayan pikseller ekranda sabit kırmızı,
mavi, yeşil veya siyah noktalar olarak görünebilir.
Not:
• Bağlı olan DVD oynatıcı veya Kablolu yayın cihazı gibi
parazit görülür. Bağlandığınız dijital ekipmanın kullanım
kılavuzuna bakın.
•Standart ve uyumlu (yüksek kalitede) bir HDMI’den DVI’ye
bağlantı kablosu kullanın.
• Uzaktan kumandadaki
• Bağlantıların doğru olup olmadığına bakın. (Bkz. sayfa 47).
• Kaynağın doğru seçilip seçilmediğine bakın. Kaynak listesine
girmek için düğmesine basın ve doğru kaynağı seçin.
• Bilgisayarı uyumlu bir ekran çözünürlüğüne göre
yapılandırdığınızdan emin olun (bkz. sayfa 47).
• PC’nin grafik kartı ayarını kontrol edin.
•SVHS kablosunun düzgün bağlandığından emin olun.
• Uzaktan kumandadaki P + tuşuna basarak bir kanal yukarı, sonra
da P – tuşuna basarak bir kanal aşağı gidin.
• PC yenileme hızını 60 Hz yapın.
• Bu sette AC3 desteklenmez. Alternatif bir ses seçmek için
uzaktan kumandadaki
• Bazı TV antenlerinin setten elektrik alması gerekir.
Bu set, bu özelliği desteklemez.
• Ücretli TV kanalları, kablo sağlayıcı tarafından şifrelenir ve
şifrenin çözülmesi biraz zaman alabilir. Bu normal bir durumdur
ve herhangi bir şey yapmanız gerekmez.
•TV’nin analog modda olup olmadığını kontrol edin. Analog
moddaysa,
bu, televizyonun performansını etkilemez.
düğmesine basın.
tuşunu kullanın.
tuşuna basıp dijital moda geçin.
50
Page 63

34 Sözlük
DVI (Dijital Görsel Arabirim) : Hem analog
hem de dijital monitörlerle uyum sağlayacak
şekilde Dijital Görüntü Çalışma Grubu
(DDWG) tarafından analog sinyalleri dijital
sinyallere dönüştürmek için oluşturulan dijital
arabirim standardı.
RGB sinyalleri : Bunlar, resmi oluşturan
üç video sinyalidir (Kırmızı, Yeşil ve Mavi).
Bu sinyallerin kullanılması resim kalitesini
geliştirir.
S-VHS sinyalleri : Bunlar, S-VHS ve Hi-8
kayıt standartlarına ait 2 farklı Y/C video
sinyalidir. Parlaklık sinyalleri Y (siyah ve
beyaz) ve renk sinyalleri C (renk) ayrı ayrı
banda kaydedilir. Bu, Y/C sinyallerinin tek
bir video sinyalinde birleştirildiği standart
videodan (VHS ve 8 mm) daha iyi resim
kalitesi sağlar.
16:9 : Ekranın boy-yükseklik oranıdır. Geniş
ekranlı televizyonların oranı 16/9, geleneksel
ekranlı TV setlerinin oranı 4/3’tür.
MHEG (Multimedya ve Hipermedya Bilgi
Kodlama Uzman Grubu) : Çeşitli ortamlar
kullanılarak uygulamalar ve hizmetler
arasında değiş tokuş edilen multimedya ve
hipermedya bilgi nesnelerinin kodlu belirtimi
için standartlar sağlar. Nesneler, multimedya
hipermedya sunumunun yapısını tanımlar.
HDMI (Yüksek Tanımlı Multimedya
Arabirimi) : TV ile set üstü kutu, DVD
oynatıcı ve A/V alıcı gibi herhangi bir HDMI
donanımlı ses/video bileşeni arasında
sıkıştırılmış ve tamamen dijital ses/video
arabirimi sağlar. HDMI gelişmiş veya yüksek
tanımlı videonun yanı sıra iki kanallı dijital
sesi de destekler.
Sistem : Televizyon resimleri tüm ülkelerde
aynı şekilde yayınlanmaz. Farklı standartlar
vardır: BG, DK, I ve LL’. Sistem ayarı
(sayfa 28), bu farklı standartları seçmek
için kullanılır. Bu, PAL veya SECAM renk
kodlamasıyla karıştırılmamalıdır. Avrupa’daki
çoğu ülkede PAL; Fransa’da, Rusya’da ve
çoğu Afrika ülkesinde ise SECAM kullanılır.
ABD ve Japonya NTSC adı verilen farklı bir
sistem kullanır.
MPEG (Film Uzmanları Grubu), sesligörüntülü bilgileri sıkıştırılmış dijital formatta
kodlamak için kullanılan Uluslararası Standart
ailesine verilen takma isimdir.
Türkçe
51
Page 64

© 2007 Koninklijke Philips N.V.
All rights reserved
Document order number: 3139 125 39042
Page 65

Hospitality Television
20/26/32HF5335D
15/20HF5234
- 1 -
Page 66

Installation of your Philips Hotel TV
1. Introduction
This addendum has been designed to help you install programmes on this Digital TV and activating the hotel
mode.
Use this addendum in conjunction with the User Manual of this television.
Please handle the TV with care and wipe with a soft cloth to ensure your TV keeps looking new.
2. The benefits of the Philips hotel TV
This TV is specially designed for hotels. The Philips hotel TV offers all kind of features to
Maximise the convenience for the hotel and meet the needs for the guest
Welcome message to give a friendly welcome to your guest when activating the tv
Remote control features like low battery detection and an anti-theft screw for preventing of theft for
batteries
Access to the user menu can be blocked. This prevents users (e.g. guests) from deleting or changing
program settings and/or modifying picture and sound settings. This ensures that TVs are always set up
correctly.
A
switch-on
specified program and volume level.
The maximum volume can be limited in order to prevent disturbance.
The television keys VOLUME +/- , PROGRAM +/- and MENU can be blocked.
Screen information can be suppressed.
Programmes can be blanked
3. Installing the channels
Installing Digital Programs (only applicable for 20/26/32HF5335D)
Ensure the TV is in Digital mode. If it is in Analogue mode, press the A/D (Analogue/Digital) key on the
Remote Control to enter the Digital mode.
volume and programme can be selected. After switching on, the TV will always start on the
1. Press the
2. Press the Up/Down Arrow Key to scroll to the item called INSTALLATION and press the Right Arrow
Key
3. Press the Up/Down Arrow Key to scroll to the item called SERVICE SETUP and press the Right Arrow
Key
4. Press the Up/Down Arrow Key to scroll to the item called REINSTALL ALL SERVICES and press the Right
Arrow Key
5. Press the Up/Down Arrow Key to scroll to the item called SEARCH and press OK to start the scan.
(Menu Digital) key on the Remote Control
The
TV will now start to scan and install all available (Digital) TV channels and Radio stations automatically.
When the scan is completed, the TV menu will indicate the number of digital services found.
6. Press the OK key again to Store all the services that have been found.
- 2 -
Page 67

Installing Analogue Programs
Ensure the TV is in Analogue mode. If it is in Digital mode, press the A/D (Analogue/Digital) key on the
Remote Control to enter the Analogue mode.
1. Press the
2. Press the Up/Down Arrow Key to scroll to the item called INSTALL and press OK
3. Press the Up/Down Arrow Key to scroll to the item AUTO STORE and press OK
The TV will now start to scan and install all available (Analogue) TV channels automatically. This operation will
take a few minutes. The TV display will show the progress of the scan and the number of programmes found.
Refer to the chapter on
can also refer to the chapter on
preferred.
4. Activating the Hotel Mode Setup menu (BDS)
1. Switch on the television and select an analogue channel
2. On the Remote Control, press keys: [3, 1, 9, 7, 5, 3, MUTE]
3. The BDS HOTEL MODE SETUP MENU becomes visible
4. Use the cursor keys to select and change any of the following settings:
5. Select “STORE” and press [CURSOR RIGHT] to save the settings and exit BDS Hotel Mode
setup. Press [MENU] to exit without saving.
6. For BDS Hotel Mode settings to take effect, you must turn the TV set Off, then back On.
BDS Hotel Mode Functions
This paragraph describes the functionality of each item in the BDS Hotel Mode Setup menu.
BDS MODE
ON BDS Hotel Mode is ON:
The user menu is blocked.
All settings of the Hotel Mode Setup menu are in effect.
Automatic Tuning of Analogue Programmes
Function Possible selections
BDS MODE ON /OFF
SWITCH ON SETTINGS
SWITCH ON VOLUME 0-100, LAST STATUS
MAXIMUM VOLUME 0-100
SWITCH ON CHANNEL USER DEFINED, LAST STATUS
POWER ON ON/STANDBY/LAST STATUS
DISPLAY MESSAGE ON/OFF
WELCOME MESSAGE LINE 1/LINE 2/CLEAR
CONTROL SETTINGS
LOCAL KEYBOARD LOCK ON/OFF/ALL
REMOTE CONTROL LOCK ON/OFF
OSD DISPLAY ON/OFF
HIGH SECURITY MODE ON/OFF
AUTO SCART ON/OFF
MONITOR OUT ON/OFF
BLANK CHANNEL ON/OFF
STORE >
(Menu TV) key on the Remote Control
in the User Manual for more details. You
Manual Tuning of Analogue Programmes
in the User Manual if a manual scan is
- 3 -
Page 68

OFF BDS Hotel Mode is OFF:
The TV operates as a normal consumer TV
SWITCH ON VOL
When the user switches the TV ON, it will play at the specified volume level. There are 2 options:
LAST STATUS Upon start-up, the TV volume will be set to the level before the TV set was
USER DEFINED As specified by installer
Remark: “SWITCH ON VOL” cannot exceed the MAXIMUM VOL level. This is the volume level with which
the Hotel Mode Setup menu was entered.
MAXIMUM VOL
The TV Volume will not exceed the selected volume level.
SWITCH ON CHANNEL
When the user switches the TV ON, it will tune to the specified channel. There are 2 options:
LAST STATUS The TV will switch on to the last channel that was shown before the TV set
USER DEFINED Any analogue channel can be chosen to be the first channel to switch on
POWER ON
The Power On function allows the TV to enter a specific mode of operation (On or Standby) after the mains
power is activated.
ON When set, the TV will always turn ON after the mains power is enabled.
STANDBY When set, the TV will always turn to STANDBY after mains power is enabled
LAST STATUS When set, the TV will always turn to the last power status before the mains power was
DISPLAY MESSAGE
ON Enables display of the Welcome Message for 30 seconds after the TV set is turned on
OFF Disables the display of the Welcome Message.
If OSD DISPLAY is set to OFF, then the Welcome Message is automatically disabled.
WELCOME MESSAGE
The Welcome Message function allows the TV to show a customized greeting to the hotel guest whenever the
TV is switched on. This helps to personalize the hotel experience for guests.
The Welcome Message can consist of 2 lines of text, with each line containing a maximum of 20 alphanumeric
characters. Use the Remote Control arrow keys to create the Welcome Message.
To enable the display of the Welcome Message, the DISPLAY MESSAGE option must be ON
To clear the Welcome Message from the TV’s memory, select CLEAR
LOCAL KEYBOARD LOCK
ON The television keys VOLUME +/-, PROGRAM +/- and MENU are blocked.
OFF The television keys VOLUME +/-, PROGRAM +/- and MENU function normally
ALL The television keys VOLUME +/-, PROGRAM +/-, MENU and POWER are blocked.
REMOTE CONTROL LOCK
ON Standard Remote Control keys are disabled.
OFF All Remote Control keys will function normally.
OSD DISPLAY
ON Normal screen information is displayed (e.g. programme information)
OFF Screen information is suppressed.
last turned off.
was turned off
disabled.
- 4 -
Page 69

HIGH SECURITY MODE
ON Allows access to the BDS Hotel Mode Setup Menu via the special BDS Setup Remote only.
(RC2573/01)
OFF Allows access to the BDS Hotel Mode Setup Menu via BDS Setup Remote or via normal Remote
Control (using special key code sequence).
AUTO SCART
The Auto Scart function enables auto-detection of AV devices that are connected to the TV’s Scart connector.
ON Enables Auto Scart switching in BDS Hotel Mode.
OFF Disables Auto Scart switching in BDS Hotel Mode.
MONITOR OUT
ON Allows audio & video output from TV via relevant AV connectors (if available).
OFF Disables both Audio & Video output from the TV (to prevent illegal copying).
BLANK CHANNEL
The Blank Channel function disables the display of video on the TV, but does not affect the audio output. This
function can be used for audio applications (example: Off-air radio transmission, music channels, and so on),
which do not necessarily require the display of video.
ON The current programme is blanked
OFF The current programme is not blanked (normal visible; DEFAULT value)
BLANK CHANNEL can be set for every channel. Use [P+ / P-] to go through all the programmes and set the
desired status per channel. The programme number is visible in the top left corner.
Low Battery Check
This television set has a special feature which checks the battery power level of a TV Remote Control, and
indicates if the battery is low and requires changing.
(Note: The Low Battery Check function works only with certain models of Remote Controls. Please check
with the Philips sales representative if the Remote Control used with this TV supports this function)
To activate the Low Battery Check function, hold the TV Remote Control in front of the TV, and press and
hold the OK button on the Remote Control for at least 5 seconds. A message will appear on the TV screen to
indicate if the battery power level is OK, or if it is Low. If the message indicates that the battery level is low, it
is recommended to change the batteries of the Remote Control immediately.
5. Cloning of settings
Cloning of analogue TV channels and TV settings as described in the chapter
Hotel Mode Set-up menu
For 15/20HF5234
o Wireless cloning with the SmartLoader 22AV1120 or 22AV1135
o Cloning off all adjustable TV settings + analogue channel table
For 20/26/32HF5335D
o Wired cloning with the SmartLoader 22AV1135 using the wire packed with the SmartLoader
o Cloning off all adjustable TV settings + analogue channel table (digital channel table via automatic
installation)
Instruction for cloning of settings between TVs
Philips SmartLoader (22AV1135/00)
The Philips SmartLoader is an installation tool especially designed for easy and fast installation and copying of
TV settings on Philips Institutional TV’s.
- 5 -
Page 70

The Philips SmartLoader works in 2 modes – Wireless and Wired:
Wireless mode ---- through infrared sensor (15/20HF5234)
Switch the SmartLoader to “Wireless” mode by sliding the side-switch to the icon on the SmartLoader
device. Point the Wireless SmartLoader to the TV’s infrared receiver (optimal distance of 5-30cm) and proceed
with the Installation procedure listed below.
Wired mode ---- using the by-packed accessory cable(s) (20/26/32HF5335D)
Switch the SmartLoader to “Wired” mode by sliding the side-switch to the icon on the SmartLoader
device.
Examine the rear connectors of the TV set to determine if the 3-pin or 4-pin female connector wire (packed
with the Wireless SmartLoader) should be used. Plug in the correct connector wire to the corresponding
opening on the TV set (usually marked as SERV C), and then connect the RJ11 jack end of the accessory wire
to the RJ11 socket on the SmartLoader.
The Installation Procedure consists of three simple steps:
1. Choosing a Master TV
The Master TV is the TV set whose installation and configuration settings are to be copied into other TV’s (of
the same type only).
2. Programming the SmartLoader with the settings from the Master TV
Follow these steps to program the SmartLoader with the settings of the Master TV.
a) Wireless method
Set the SmartLoader to “Wireless” mode using the side switch.
Turn on the TV, and while holding the SmartLoader, point it in the direction of the
TV. Press the “MENU” Key on the SmartLoader.
b) Wired method
Connect the SmartLoader to the TV using the appropriate accessory cable.
Set the SmartLoader to “Wired” mode using the side switch.
Turn on the TV, and while holding the SmartLoader, point it in the direction of the
TV. Press the “MENU” Key on the SmartLoader.
The Master TV will show the following menu:
SMARTLOADER TO TV >
TV TO SMARTLOADER >
On the TV screen, highlight the menu option “TV TO SMARTLOADER”
Press the right arrow key on the SmartLoader to start the programming process
A number display (from 0~100) will be shown on screen, indicating the percentage of the programming
progress from the TV to the SmartLoader. When the programming is completed, “##” will show “100” and the
message “DONE” will appear.
TV TO SMARTLOADER ## (0-100)
The SmartLoader is programmed and can be used to install and configure other TVs.
Copying the settings of the Master TV to other TVs with the SmartLoader
Follow these steps to install and configure the settings of a Philips TV with the SmartLoader.
- 6 -
Page 71

a) Wireless method
Set the SmartLoader to “Wireless” mode using the side switch.
Turn on the TV, and while holding the SmartLoader, point it in the direction of the
TV. Press the “MENU” Key on the SmartLoader.
b) Wired method
Connect the SmartLoader to the TV using the appropriate accessory cable.
Set the SmartLoader to “Wired” mode using the side switch.
Turn on the TV, and while holding the SmartLoader, point it in the direction of the
TV. Press the “MENU” Key on the SmartLoader.
On the TV screen, highlight the menu option “SMARTLOADER TO TV”
Press the right arrow key on the SmartLoader to initiate the copying process
> A number display (from 0~100) will be shown on screen, indicating the percentage of the installation
progress from the SmartLoader to the TV. When the data transfer is completed, “##” will show “100” and
the message GOODBYE will appear.
SMARTLOADER TO TV ## (0-100)
> The TV will go to Standby mode. When the TV is next powered on, it will be configured with the settings
from the Master TV, and ready for use.
Problems and Solutions:
1.
The message “I2C ERROR” is displayed on the screen.
Bad connection of RJ11 wire or wrong data transmission has occurred. Try again.
2.
The message “WRONG VERSION” is displayed on the screen.
The program contained in the SmartLoader has a software code incompatible with the actual TV.
Reprogram the Wireless SmartLoader from a Master TV whose software code is compatible with the
actual TV.
3.
TV doesn’t respond to the SmartLoader.
Check if the LED on the SmartLoader lights up in green when pressing any button.
If the LED is red, it means that the batteries are low and should be replaced.
Bring the SmartLoader closer to the TV infrared receiver and try again.
Notes:
Make sure that the 3 R6/AA sized batteries are placed correctly in the bottom compartment of the
SmartLoader. The LED on the SmartLoader should light up in green when pressing any button, indicating
operational batteries. When the LED shows red, the batteries need to be replaced.
The SmartLoader can only copy the settings between 2 TVs of the same type. Once the
SmartLoader is programmed with the settings from a Master TV of a certain type or model,
then these settings can be installed on another TV of the same model only.
The SmartLoader cannot be used to copy the (digital) channel table of a Digital TV set.
If the SmartLoader is used with a DVB (European Digital) TV set, then the TV set must first
be switched to Analog mode.
- 7 -
Page 72

Y
T
Disposal of your old product.
our product is designed and manufactured with high quality materials and
components, which can be recycled and reused. When this crossed-out wheeled bin
symbol is attached to a product it means the product is covered by the European
Directive 22002/96/EC. Please find out more about the separate collection system for
electrical and electronic products in your local neighborhood.
2007© Koninklijke Philips Electronics N.V. all rights reserved
Specifications are subject to change without notice
Trademarks are property of Koninklijke Philips Electronics N.V. or their respective owners.
Please act according to your local rules and do not dispose of your old products with
your normal household waste. The correct disposal of your old product will help
prevent potential negative consequences for the environment and human health.
he packaging of this product is intended to be recycled. Apply to the
local authorities for correct disposal.
- 8 -
 Loading...