

Page 1
1
Introduction
Table of Contents
Thank you for purchasing this television set.
This handbook has been designed to help you install and operate your TV set.
We would strongly recommend that you read it thoroughly.
We hope our technology meets entirely with your satisfaction.
Note:
Specification and information subject to change without notice.
Installation
Installing your television set . . . . . . . . . . . . . . . . . . . . . . . . . . . . . . . . . . . . . . . . . .2
The keys on the TV set . . . . . . . . . . . . . . . . . . . . . . . . . . . . . . . . . . . . . . . . . . . . . .2
Safety Information . . . . . . . . . . . . . . . . . . . . . . . . . . . . . . . . . . . . . . . . . . . . . . . . . .3
The remote control keys . . . . . . . . . . . . . . . . . . . . . . . . . . . . . . . . . . . . . . . . . . . .4
Quick installation . . . . . . . . . . . . . . . . . . . . . . . . . . . . . . . . . . . . . . . . . . . . . . . . . .5
Programme sort . . . . . . . . . . . . . . . . . . . . . . . . . . . . . . . . . . . . . . . . . . . . . . . . . . . .5
Other settings in the Install menu . . . . . . . . . . . . . . . . . . . . . . . . . . . . . . . . . . . . .5
Manual store . . . . . . . . . . . . . . . . . . . . . . . . . . . . . . . . . . . . . . . . . . . . . . . . . . . . . .6
Operation
Picture settings . . . . . . . . . . . . . . . . . . . . . . . . . . . . . . . . . . . . . . . . . . . . . . . . . . . .7
Sound adjustments . . . . . . . . . . . . . . . . . . . . . . . . . . . . . . . . . . . . . . . . . . . . . . . . .7
Timer function . . . . . . . . . . . . . . . . . . . . . . . . . . . . . . . . . . . . . . . . . . . . . . . . . . . .8
TV lock . . . . . . . . . . . . . . . . . . . . . . . . . . . . . . . . . . . . . . . . . . . . . . . . . . . . . . . . . .8
Teletext . . . . . . . . . . . . . . . . . . . . . . . . . . . . . . . . . . . . . . . . . . . . . . . . . . . . . . . . . .9
Peripherals
Connecting peripheral equipment . . . . . . . . . . . . . . . . . . . . . . . . . . . . . . . . . . . .10
Video recorder . . . . . . . . . . . . . . . . . . . . . . . . . . . . . . . . . . . . . . . . . . . . . . . . . . .10
Other equipment . . . . . . . . . . . . . . . . . . . . . . . . . . . . . . . . . . . . . . . . . . . . . . . . .10
Side connections . . . . . . . . . . . . . . . . . . . . . . . . . . . . . . . . . . . . . . . . . . . . . . . . . .10
To select connected equipment . . . . . . . . . . . . . . . . . . . . . . . . . . . . . . . . . . . . .10
Practical information
Glossary . . . . . . . . . . . . . . . . . . . . . . . . . . . . . . . . . . . . . . . . . . . . . . . . . . . . . . . . .11
Safety Information: Electric, Magnetic and Electromagnetic Fields . . . . . . . . . . . .11
Tips . . . . . . . . . . . . . . . . . . . . . . . . . . . . . . . . . . . . . . . . . . . . . . . . . . . . . . . . . . . .12
EnglishFrançaisMagyarPyccÍËÈ
°
Recycling
This packaging of this set can be recovered or recycled.Apply to the local authorities in order
to minimise environmental waste.
Disposal of your old product.
Your product is designed and manufactured with high quality materials and components, which
can be recycled and reused.
When this crossed-out wheeled bin symbol is attached to a product it means the product is
covered by the European Directive 2002/96/EC. Please inform yourself about the local
separate collection system for electrical and electronic products.
Please act according to your local rules and do not dispose of your old products with
your normal household waste.The correct disposal of your old product will help prevent
potential negative consequences for the environment and human health.
Page 2
The television set has 5 keys which are located
on the front or the top of the set depending
on the model.The on/off key switches the TV
set on/off.
The VOLUME - + (- ” +) keys are used to
adjust sound levels.The PROGRAM - + (- P +
or - +) keys are used to select the required
programmes.To access the menus,
simultaneously hold down the
” - and ” +
keys.The PROGRAM - + keys may then be
used to select an adjustment and the -
” +
keys to make that adjustment.
To exit from the menus, hold down the 2
” -
and
” + keys.
Note: when the Child Lock function is activated,
these keys are unavailable (refer to Features
menu on page 8).
&
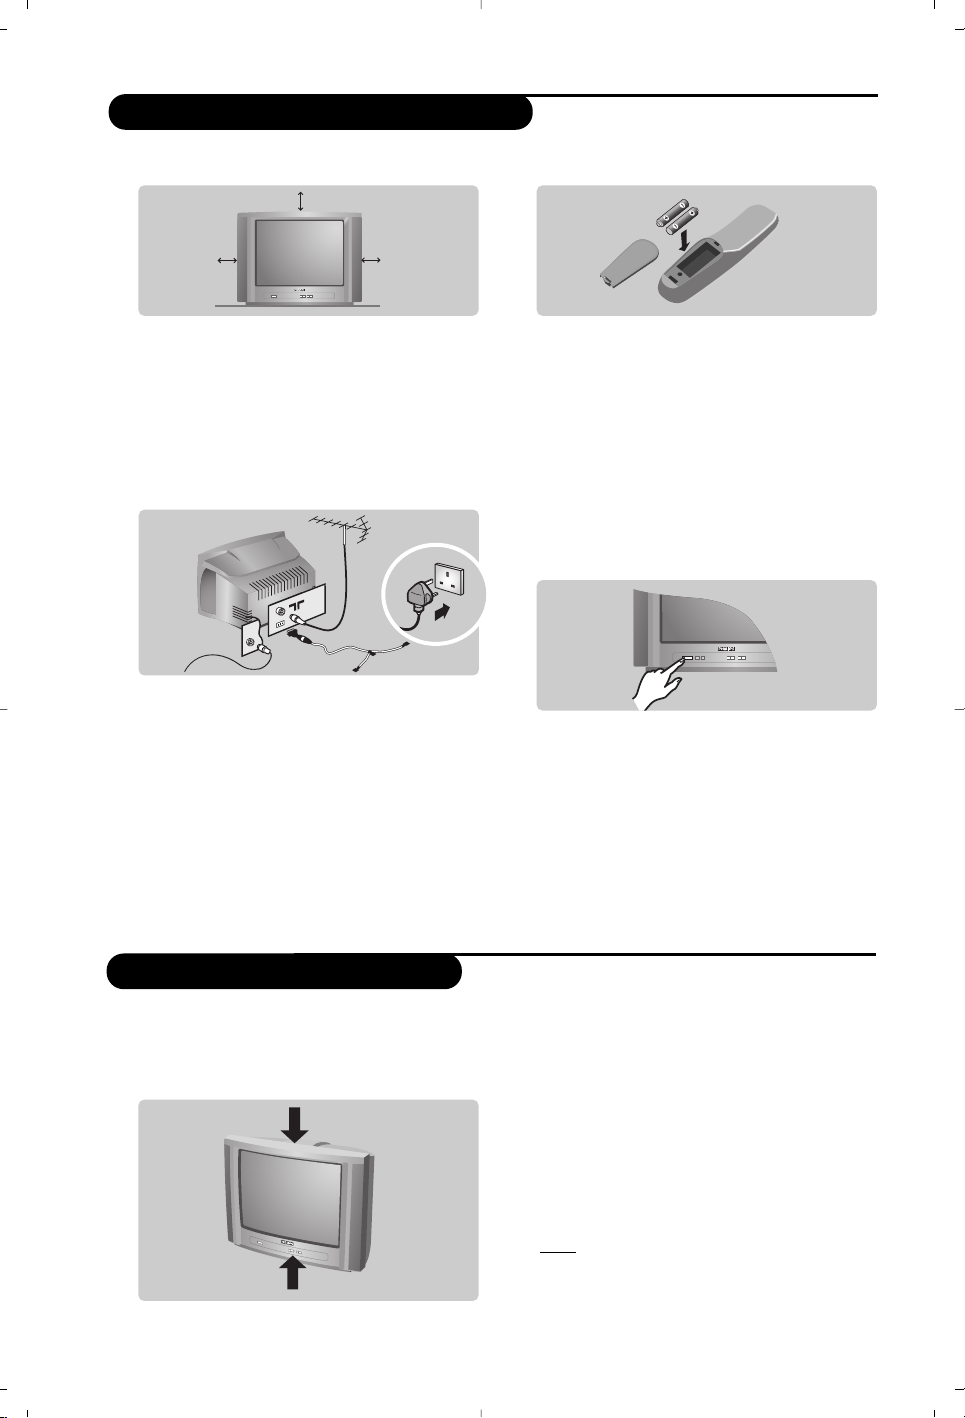
Positioning the television set
Place your TV on a solid, stable surface, leaving
a space of at least 5 cm around the appliance.
To avoid accidents, do not put anything on the
set such as a cloth or cover, a container full of
liquid (vase) or a heat source (lamp).The set
must not be exposed to water.
é
Connections
• Insert the aerial plug into the : socket at
the rear of the set.
• For the versions equipped with a radio:
insert the radio aerial socket into the FM
ANT socket using the adapter supplied.
If you are using an indoor aerial, reception may be
difficult in certain conditions.You can improve
reception by rotating the aerial. If the reception
remains poor, you will need to use an external aerial.
• Insert the mains plug into a wall socket (220240 V / 50 Hz).
“
Remote control
Insert the two R6-type batteries (supplied)
making sure that they are the right way round.
Check that the mode selector is set to TV.
The batteries supplied with this appliance do not
contain mercury or nickel cadmium. If you have
access to a recycling facility, please do not discard
your used batteries (if in doubt, consult your
dealer).When the batteries are replaced, use the
same type.
‘
Switching on
To switch on the set,press the on/off key.
A red indicator comes on and the screen
lights up. Go straight to the chapter Quick
installation on page 5.
If the television remains in standby mode,
press P
# on the remote control.
The indicator will flash when you use the remote
control.
5 cm
5 cm
5 cm
Installing your television set
The keys on the TV set
FM.
ANT.
or
2
Page 3
3
Safety Information
• Plug the TV into a 220V – 240V AC, 50 Hz supply.
• Disconnect mains plug when :
– the red light below the TV screen is flashing continuously.
– a bright white line is displayed across the screen.
– there is a lightning storm.
– the set is left unattended for a prolonged period of time.
• Cleaning the TV screen. Never use abrasive cleaning agents. Use a slight damp chamois leather or soft
cloth.
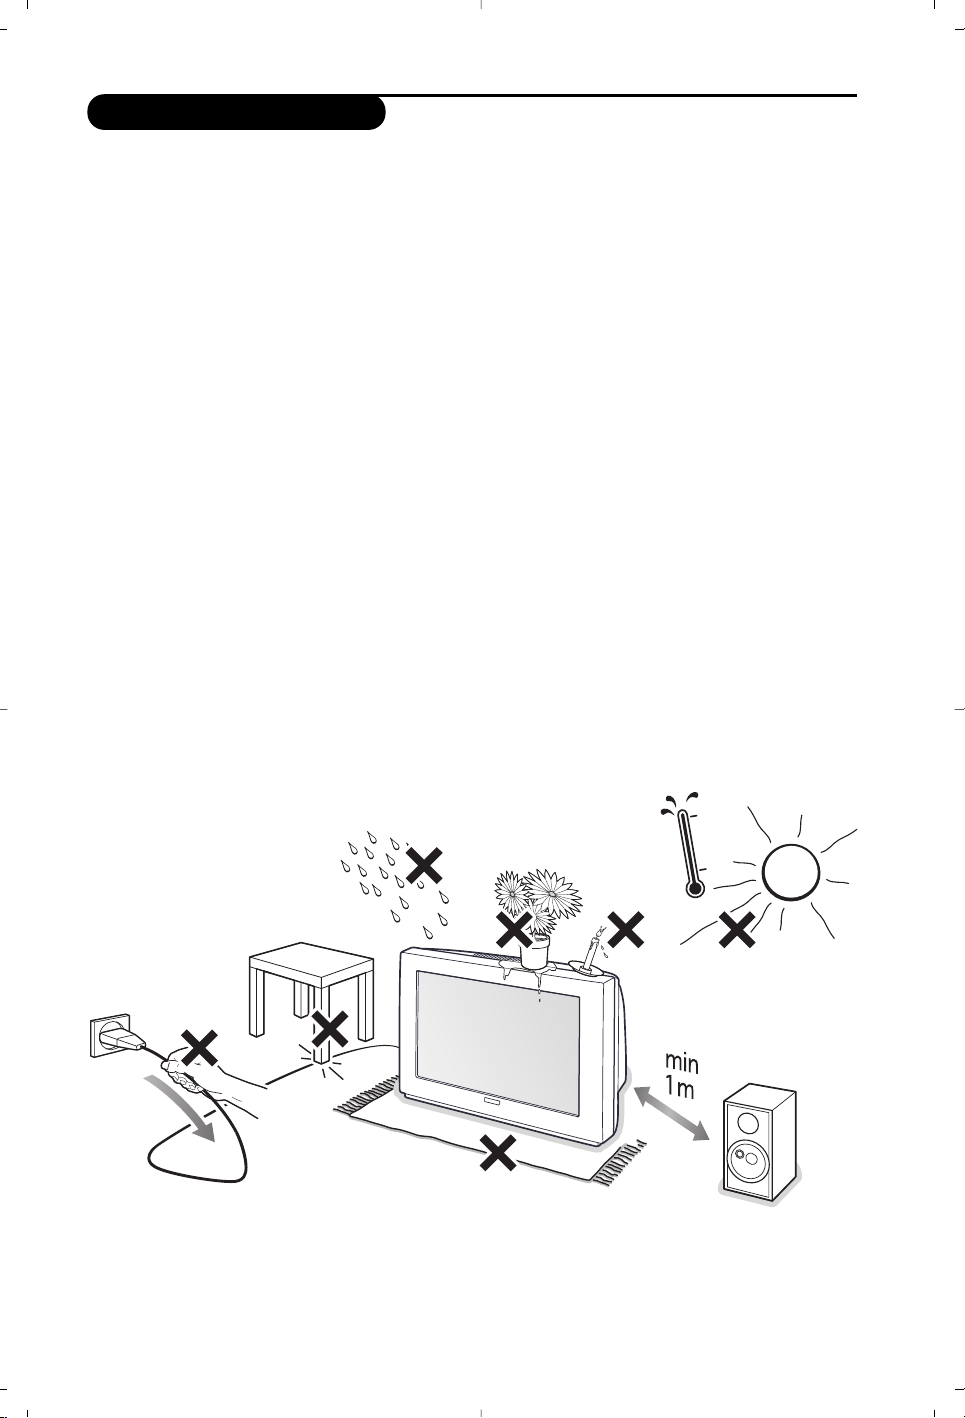
• No naked flame sources, such as lighted candles, should be placed on top of the TV or in the vicinity.
• Do not place your TV set under direct sunlight or heat.
• Do not cover or block the TV as it could lead to overheating.
• Leave at least 5 cm around each side of TV set to allow for proper ventilation.
• Avoid placing your set (e.g. near the window) where it is likely to be exposed to rain or water.
• Battery Usage CAUTION – To prevent battery leakage that may result in bodily injury, property
damage, or damage to the unit:
– Install all batteries correctly, with + and – aligned as marked on the unit.
– Do not mix batteries (old and new or carbon and alkaline, etc.).
– Remove batteries when the unit is not used for a long time.
• The apparatus must not be exposed to dripping or splashing and no objects filled with liquids, such as
vases, shall be placed on the apparatus.
Useful Tips
• Do not leave your set on standby mode for a prolonged period of time. Switch off set to allow it to
be demagnetised.A demagnetised set supports good picture quality.
• Do not shift or move the set around when it is switched on.Uneveness in colour in some parts of
the screen may occur.
• Never attempt to repair a defective TV yourself.Always consult a skilled service personnel.
Page 4
4
Remote control keys
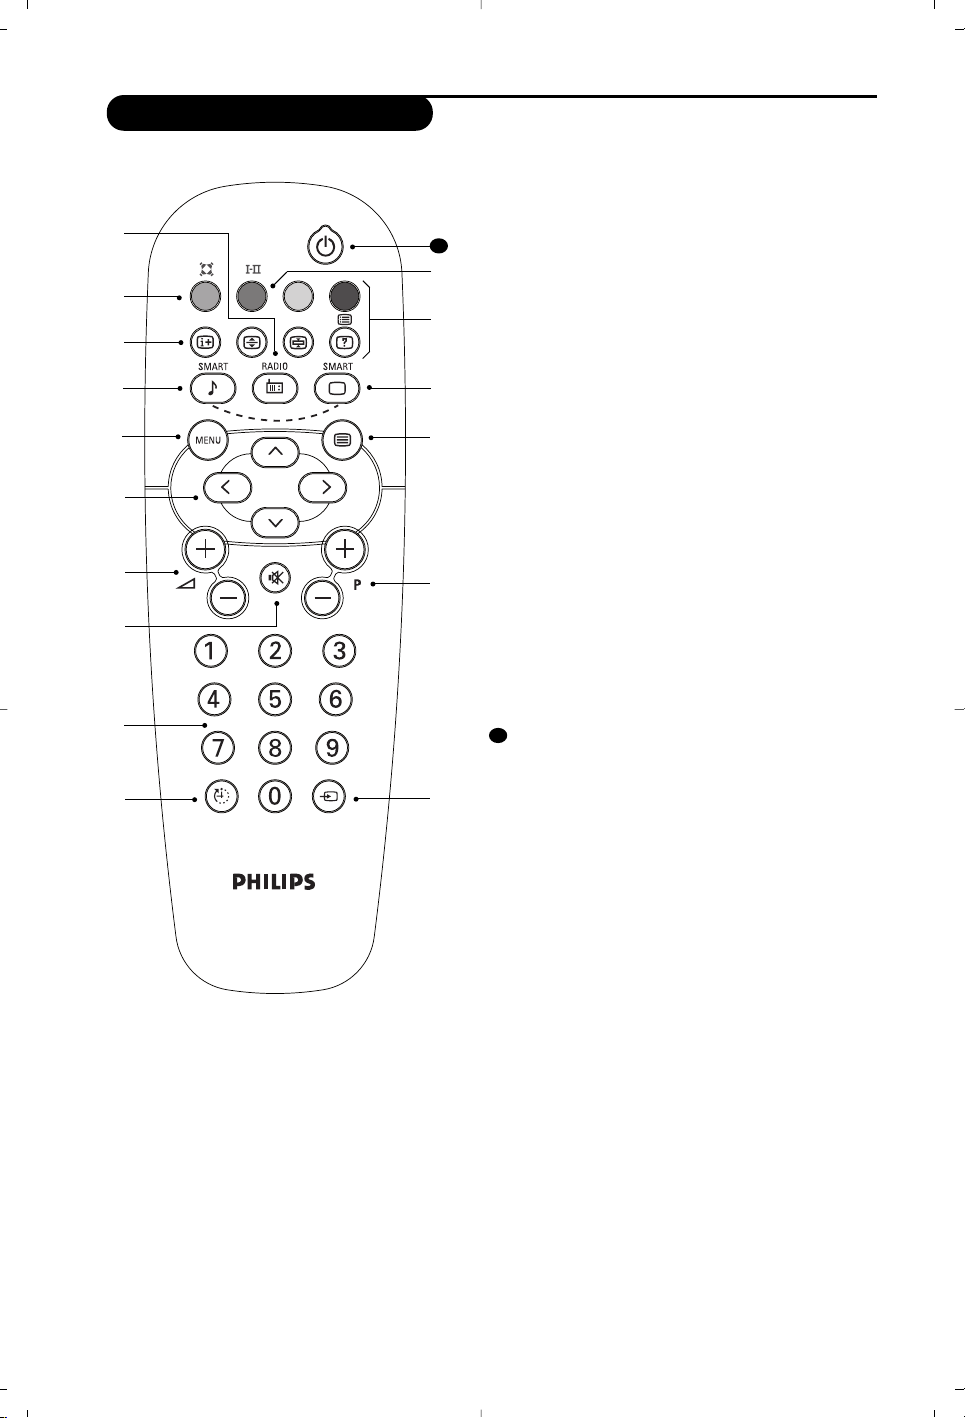
& Radio / TV mode
To switch the TV set to radio or TV mode (for
versions equipped with radio).
é Surround Sound (only available on certain versions).
To activate / deactivate the surround sound effect.
In stereo, this gives the impression that the
speakers are further apart. For models equipped
with Virtual Dolby Surround*,you can experience
Dolby Surround Pro Logic sound effects.In mono, a
stereo spatial effect is simulated.
“ Screen information / permanent no.
To display / clear the program number, name (if it
exists), time, audio mode and time remaining for the
sleep feature. Press the key for 5 seconds to activate
permanent display of the number.
‘ Pre-set sound
Used to access a series of stored settings: Voice,
Music, Theatre and return to Personal.
( Menu
To call up or exit the menus.
§ Cursor / Format
These 4 keys are used to navigate through the
menus.The îÏ keys are used to enlarge or
compress the picture vertically.
è Volume
To adjust the sound level.
! Mute
To mute or restore the sound.
ç Number keys
Direct access to the programmes.For a 2 digit program,
enter the 2nd digit before the dash disappears.
! Sleep
To select an automatic standby after a preset time
(from 0 to 180 minutes).
Standby
Lets you place the TV set on standby.To turn on the
TV, press P @#, b,0 to 9 (or Â).
# Sound mode (only available on stereo versions)
Used to force programmes in Stereo to Mono or,
for bilingual programs, to choose between Dual I or
Dual II. For TV sets equipped for Nicam reception,
depending on the programmes, you can force the
Stereo Nicam sound to Mono or select between
Nicam Dual I, Nicam Dual II and Mono.
The Mono indication is red when in forced position.
$ Teletext keys (p.9)
% Pre-set image
Used to access a series of stored settings: Rich,
Natural, Soft, Multimedia and return to Personal.
& Teletext (p. 9)
( Program selection
To access the next or previous programme.The
number, (name) and sound mode are displayed for a
few moments.
For some programs, the title of the program will be
displayed at the bottom of the screen.
) Selection of EXT socket
Press several times to select EXT and AV.
1
4
5
6
7
8
9
!
%
(
)
&
2
$
#
3
11
11
Page 5

5
Quick installation
Programme sort
Other settings in the Install menu
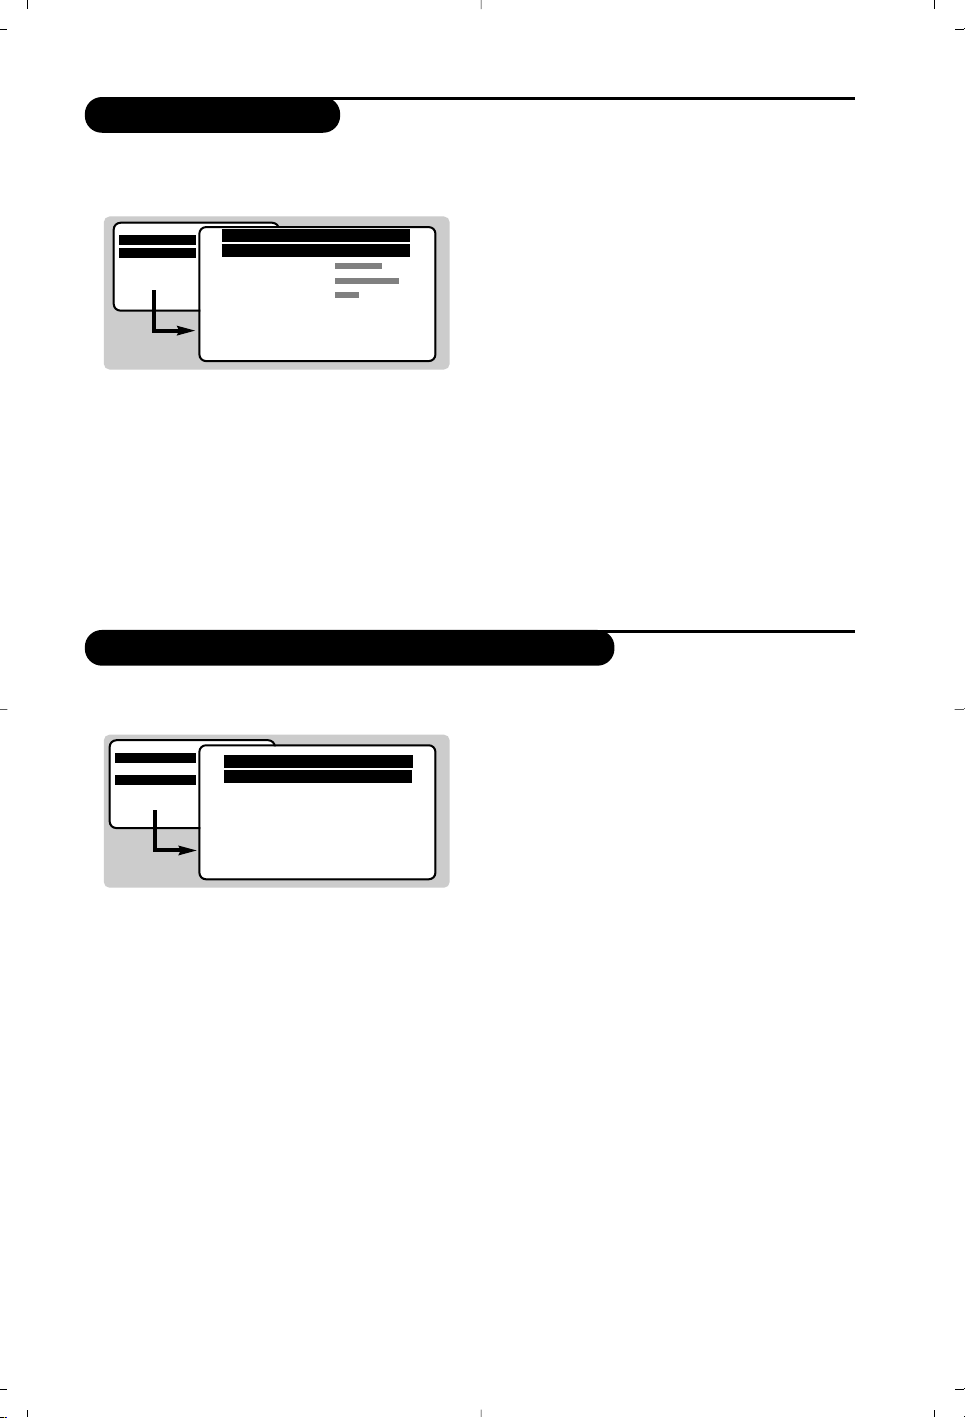
When you turn on the TV set for the first
time, a menu is displayed on screen.This menu
prompts you to select the country and
language for the menus :
If the menu is not displayed, press and hold down
the
”- and ”+ keys on the TV set for
5 seconds to display the menu.
& Use the
îÏ keys on the remote control
to select your country and validate with
¬.
If your country does not appear in the list, select
choice “. . .”
é Next select your language using the
îÏ
keys and validate with ¬.
“ The search starts automatically.
Finally the
INSTALLATION menu appears
automatically.
If the programmes found have not been
correctly numbered,use the
Sort menu to
renumber them.
If no picture is found see Tips (p. 12).
‘ If you want to exit the menus, press
H
several times.
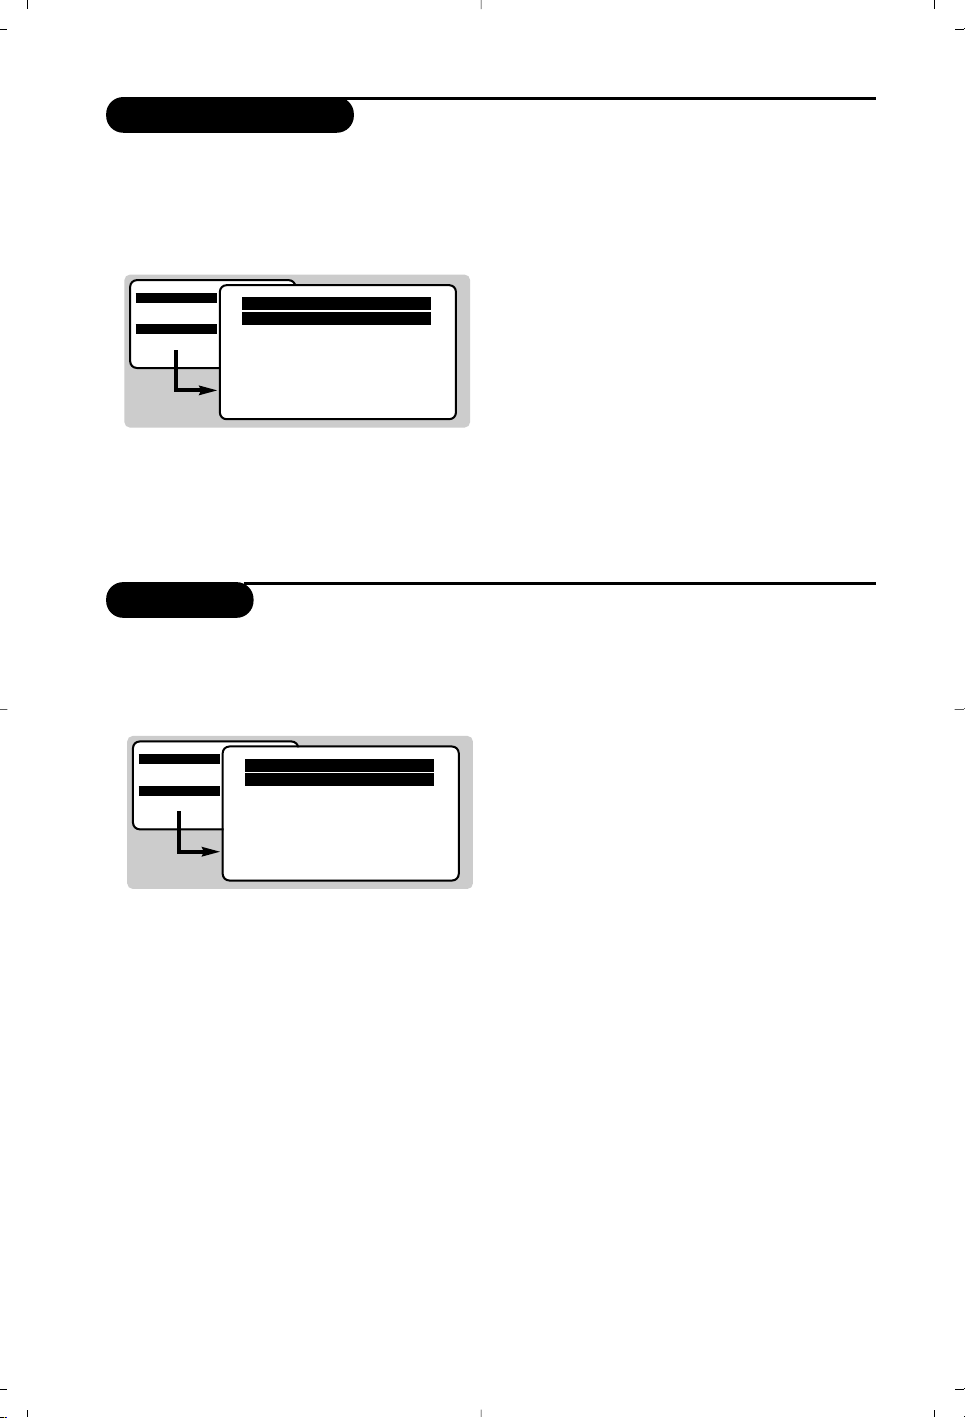
This menu allow you to change the numbering
of programmes.
& Press the
H key.The MAIN MENU is
displayed on the screen.
é Select the
INSTALLATION menu with the
cursor then the
Sort menu.
“ Select the programme you want to move with
the
îÏ keys and press ¬.
‘ Then use the
îÏ keys to choose the new
number and confirm with
È.
( Repeat steps “ and ‘ as many times as
required to move the programmes.
§ To exit the menus,press
H
several times.
& Press the H key and select the Install menu:
é Language : to change the display language for
the menus.
“ Country : to select your country (GB for
Great Britain).
This setting is used for the search, automatic
programme sort and teletext display. If your
country does not appear in the list, select “. . .”
‘ Auto Store : to start automatic search for all
programmes available in your region.
Finally the
INSTALLATION menu appears
automatically.
If the programmes found have not been
correctly numbered,use the
Sort menu to
renumber them.
If no picture is found see Tips (p. 12).
( If you want to exit the menus, press
H
several times.
WELCOME
Country
...
Language
ENGLISH
MAIN MENU
PICTURE
SOUND
FEATURES
INSTALLATION
INSTALLATION
LANGUAGE ENGLISH
Country ...
Auto Store
Manual Store
Sortrt
Page 6

6
This menu is used to store the programmes
one at a time or to add a programme to the
existing list.
& Press the
H key to display the MAIN MENU.
Select INSTALLATION with the cursor then
the manual store
menu then press .
é System : select Europe (automatic detection*)
or according to the versions
Western Europe
(BG standard), Eastern Europe
(DK standard), United Kingdom
(I standard) or France (LL’ standard).
* Except for France (LL’ standard), you must select
the choice
France.
“ Search : press ¬.The search starts.
Once a programme is found, the scanning
stops. Go to the next step. If you know the
frequency of the required programme, enter its
number directly with the
0 to 9 keys.
If no picture is found, consult the possible solutions
(p. 12).
‘
Fine tuning : if the reception is not
satisfactory, adjust using the
Ȭkeys.
(
Programme : enter the desired number with
the keys
Ȭ or 0 to 9.
§
Name : use the Ȭ keys to move around
the name display area (5 characters) and the
îÏ
keys to select the characters.
When the name has been entered press the
È key to exit.
è
Store : press ¬.The programme is stored.
! Repeat steps é to è for each programme to
be stored.
ç To exit the menus press
H several times.
Manual store
MAIN MENU
PICTURE
SOUND
FEATURES
INSTALLATION
Manual Store
Program 01
Name ----System EUROPE
Search 671 MHz
Fine Tune
Store
Page 7
7
Picture settings
Sound adjustments
(only available in stereo versions)
& Press H, select PICTURE and press ¬.
The
PICTURE menu appears :
é Use the
îÏ keys to select a setting and
Ȭ keys to adjust.
“ Once the adjustments have been made select
Store and press ¬ to store them.
‘ Press
H several times to exit the menus.
Description of the adjustments :
• Brightness : this changes the picture brilliance.
• Colour : this changes the intensity of the
colour.
•
Contrast : this changes the difference
between the light and dark tones.
•
Sharpness : this changes the picture
definition.
• Colour Temp. : this changes the colour
rendering:
Cold (bluer), Normal (balanced) or
Warm (redder).
•
NR (Noise Reduction) : reduces picture
noise (snow), in the case of difficult
reception.
•
Contrast+ : automatically adjusts contrast of
the picture by making the darkest part of the
picture permanently black.
•
Store : to store the picture adjustments.
& Press H, select SOUND (Ï) and press ¬.
The
SOUND sound menu is displayed :
é Use the
îÏ keys to select a setting and
the
Ȭ keys to adjust.
“ Once the adjustments have been made select
Store and press ¬ to store them.
‘ To quit the menus press
H several times.
Description of the settings :
•
Treble : this alters the high frequency sounds.
•
Bass : this alters the low frequency sounds.
•
Balance : to balance the sound on the left
and right speakers.
•
Delta Volume* : this is used to compensate
for any volume discrepancies between the
different programmes or EXT sockets.
• AVL (Automatic Volume Leveler) : automatic
volume control which limits increases in sound,
especially on programme change or advertising
slots.
• Store : this is used to store sound settings.
MAIN MENU
PICTURE
SOUND
FEATURES
INSTALLATION
PICTURE
Brightness ---I-------
Colour
Contrast
Sharpness
Colour Temp. Normal
NR OFF
Contrast+ ON
Store
MAIN MENU
PICTURE
SOUND
FEATURES
INSTALLATION
* only available in versions with delta volume feature.
SOUND
Treble ---I-------
Bass ------I---Balance -----I----Delta volume ---I------AVL OFF
Store
Page 8
8
Timer function
TV lock
This menu lets you use the TV set as an alarm
clock.
& Press the
H key.
é With the cursor select the
FEATURES menu
then
Timer :
“
Sleep : to select an automatic standby period.
‘
Time : enter the current time.
(
Start Time : enter the start time.
§
Stop Time : enter the stop time.
è
Program No.: enter the number of the
desired programme for the wake-up alarm.
!
Activate : you can set :
•
Once for a single alarm,
•
Daily for each day,
•
Off to cancel.
ç Press
b to put the TV set in standby.
It will automatically come on at the time
programmed. If you leave the TV set on, it will
just change programmes at the time entered
(and go into standby mode at the
Stop Time).
This menu lets you block use of the TV set.
& Press
H.
é With the cursor select the
FEATURES then
Child Lock :
“ You must enter your secret access code.
The first time, key the code 0711.
The menu is displayed.
‘ Switch
Child Lock to ON.The TV set cannot
be used.You must enter your secret access
code.
( To cancel switch
Child Lock to OFF.
§ To change the code select
New Code and
enter a new 4 figure code. Confirm by
entering a second time.
If you have forgotten your secret code, enter the
universal code 0711.
è Press
H several times to exit the menus.
MAIN MENU
PICTURE
SOUND
FEATURES
INSTALLATION
Timer
Sleep OFF
Time -- : -Start Time -- : -Stop Time -- : -Pr Nr 00
Activate OFF
MAIN MENU
PICTURE
SOUND
FEATURES
INSTALLATION
FEATURES
Timer
Childlock
Page 9

9
Teletext
Press :
You will obtain:
Teletext is an information system broadcast by certain channels which can be consulted like a
newspaper. It also offers access to subtitles for viewers with hearing problems or who are not familiar
with the transmission language (cable networks, satellite channels, etc.).
Teletext call
Selecting a
page
This is used to call teletext, change to transparent mode
and then exit.The summary appears with a list of items
that can be accessed. Each item has a corresponding 3
digit page number.
If the channel selected does not broadcast teletext, the
indication 100 will be displayed and the screen will remain
blank (in this case, exit teletext and select another channel).
Enter the number of the page required using the
0 to 9
or @ P # keys. Example: page 120, enter 120.The
number is displayed top left,the counter turns and then
the page is displayed.Repeat this operation to view
another page.
If the counter continues to search, this means that the page is
not transmitted. Select another number.
Direct access
to the items
Coloured areas are displayed at the bottom of the screen.
The 4 coloured keys are used to access the items or
corresponding pages.
The coloured areas flash when the item or the page is not yet
available.
Contents
This returns you to the contents page (usually page 100).
Enlarge a page
This allows you to display the top or bottom part of the
page and then return to normal size.
Stop sub-page
acquisition
Hidden
information
Certain pages contain sub-pages which are automatically
displayed successively.This key is used to stop or resume
sub-page acquisition.The indication
_ appears top left.
To display or hide the concealed information (games
solutions).
¤
0 9
Ë
›
Ó
Ÿ
Page 10

10
Connecting peripheral equipment
Carry out the connections shown opposite, using a good
quality euroconnector cable.
If your video recorder does not have a euroconnector socket, the only
connection possible is via the aerial cable.You will therefore need to
tune in your video recorder's test signal and assign it programme
number 0 (refer to manual store, p. 6).
To reproduce the video recorder picture, press
0.
Video recorder with decoder
Connect the decoder to the second euroconnector socket of
the video recorder.You will then be able to record scrambled
transmissions.
Video recorder
Satellite receiver, decoder,games, etc.
Make the connections as shown opposite.
Make the connections as shown opposite.
Headphones
When headphones are connected, the sound on the TV set
will be cut.The
@ ” # keys are used to adjust the
volume level.
The headphone impedance must be between 32 and 600 Ohms.
Other equipment
Side connections
564
879
0
Y
To select connected equipment
Press the key to select EXT (and AV) for the side connections.
Most equipment (decoder, video recorder) carries out the switching itself
VCR
Page 11

11
Glossary
RGB Signals :
These are 3 Red, Green and Blue video signals which directly drive the red, green and blue
emitters in the cathode ray tube.
Using these signals provides better picture quality.
NICAM sound :
Process by which digital sound can be transmitted.
System :
Television pictures are not broadcast in the same way in all countries.There are different standards:
BG, DK, I, and L L’.The SYSTEM setting (p.6) is used to select these different standards.This is not to
be confused with PAL or SECAM colour coding. Pal is used in most countries in Europe, Secam in
France, Russia and most African countries.The United States and Japan use a different system called
NTSC.
Safety Information: Electric, Magnetic and Electromagnetic Fields (“EMF”)
1. Philips Royal Electronics manufactures and sells many products targeted at consumers,which, like
any electronic apparatus, in general have the ability to emit and receive electro magnetic signals.
2. One of Philips’ leading Business Principles is to take all necessary health and safety measures for
our products, to comply with all applicable legal requirements and to stay well within the EMF
standards applicable at the time of producing the products.
3. Philips is committed to develop, produce and market products that cause no adverse health effects.
4. Philips confirms that if its products are handled properly for their intended use, they are safe to use
according to scientific evidence available today.
5. Philips plays an active role in the development of international EMF and safety standards, enabling
Philips to anticipate further developments in standardization for early integration in its products.
Page 12

12
Tips
Poor reception
No picture
Peripheral
equipment gives a
black and white
picture
Remote control
No sound
Teletext
The proximity of mountains or high buildings may be responsible for ghost
pictures, echoing or shadows. In this case, try manually adjusting your
picture : see Fine Tuning (p.6) or modify the orientation of the outside
aerial.
Does your antenna enable you to receive broadcasts in this frequency range
(UHF or VHF band) ?
In the event of difficult reception (snowy picture) switch the NR on the
Picture menu to ON (p. 7).
Have you connected the aerial socket properly ?
Have you chosen the right system ? (p. 6). Poorly connected euroconnector
cables or aerial sockets are often the cause of picture or sound problems
(sometimes the connectors can become half disconnected if the TV set is
moved or turned). Check all connections.
To play a video cassette, check that it has been recorded under the same
standard (PAL, SECAM, NTSC) which can be replayed by the video
recorder.
The TV set does not react to the remote control ; the indicator on the set
no longer flashes when you use the remote control ? Replace the batteries.
If on certain channels you receive a picture but no sound,this means that
you do not have the correct TV system. Modify the System setting (p. 6).
Are certain characters not displayed correctly ? Check that the Country
setting has been positioned correctly (p.5).
Standby
Still no results ?
When you switch the TV set on it remains in standby mode and the
indication Locked is displayed when you use the keys on the TV set ?
The Child Lock function is switched On (p. 8).
If the set receives no signal for 10 mins, it automatically goes into standby
mode.
In standby mode, your TV consumes less than 5W depending on model. In order
to be more environmentally friendly,please use the on/off (power) switch to turn
the set off completely.
If your TV set breaks down, never attempt to repair it yourself : contact
your dealer's after-sales service.
Cleaning the set
Only use a clean, soft and lint-free cloth to clean the screen and the casing
of your set. Do not use alcohol-based or solvent-based products.
 Loading...