

Page 1
REF 1045219
0086
*+H906104521909*
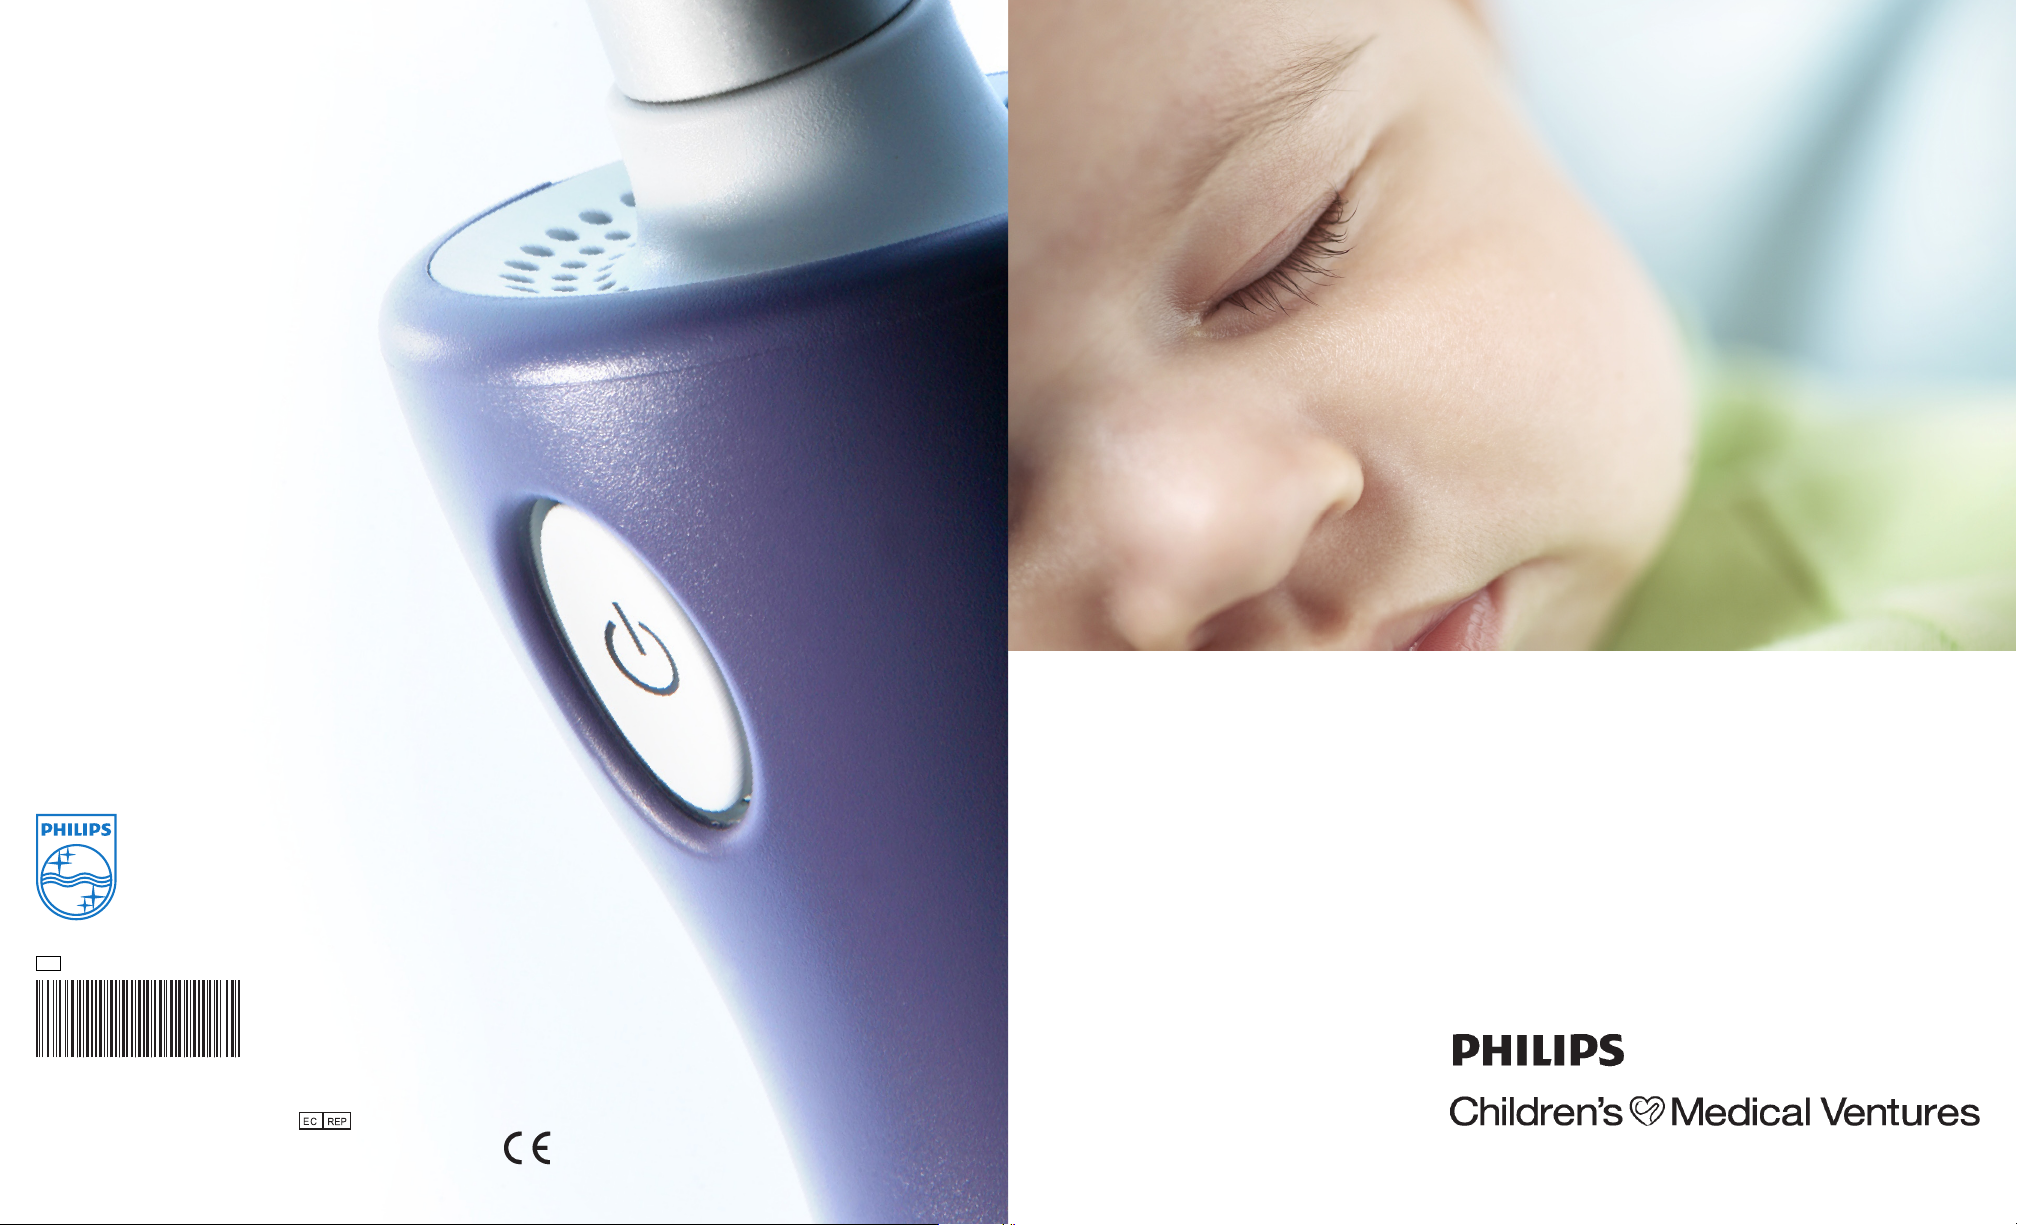
BiliTx
Parents’ Manual
Manufactured for
Philips Children’s Medical Ventures
191 Wyngate Drive
Monroeville, PA 15146
Respironics Deutschland
Gewerbestrasse 17
82211 Herrsching, Germany
1075310
HM 5/18/10
Page 2

Warranty
© 2010 Koninkljike Philips Electronics N.V. All rights reserved.
Page 3

BiliTx
parents’ manual
Table of Contents
1. Overview ..................................................................................................................................................... 3
Intended Use ......................................................................................................................................... 3
What is the BiliTx Phototherapy System? .................................................................................... 3
Components of the BiliTx System .................................................................................................. 4
2. Warnings, Cautions, and Symbols ...................................................................................................... 5
Warnings ................................................................................................................................................. 5
Cautions .................................................................................................................................................. 6
Symbols ................................................................................................................................................... 7
3. Setup ........................................................................................................................................................... 9
Setup - Wrap-Around Panel ............................................................................................................. 10
Setup - Flat Neonatal Panel .............................................................................................................. 11
4. Cleaning ...................................................................................................................................................... 13
Cleaning the Illuminator Device and Fiber Optic Panel ................................................................. 13
Customer Service Information ........................................................................................................ 14
5. Troubleshooting ....................................................................................................................................... 15
6. Specications ............................................................................................................................................ 17
Environmental ...................................................................................................................................... 17
Physical .................................................................................................................................................... 17
Illuminator ..................................................................................................................................... 17
Fiber Optic Panel ......................................................................................................................... 17
Light Source ........................................................................................................................................... 18
Irradiance Level ............................................................................................................................ 18
Intensity Ratio .............................................................................................................................. 18
Audible Noise ........................................................................................................................................ 18
Standards Compliance ....................................................................................................................... 18
Electrical Requirements ..................................................................................................................... 18
Disposal ................................................................................................................................................... 18
Appendix A: EMC Information ................................................................................................................. 19
BiliTx Warranty ............................................................................................................................................... 23
Page 4

2
BiliTx Parents’ Manual
Page 5

BiliTx
parents’ manual
1. Overview
This chapter explains how the BiliTx Phototherapy System is used to treat infant jaundice and it lists
the components of the BiliTx system.
Intended Use
The BiliTx is intended to treat hyperbilirubinemia through phototherapy.
What is the BiliTx Phototherapy System?
The BiliTx phototherapy system uses blue light emitting diodes (LEDs) to convert bilirubin to waste
products that are mostly excreted through urine and stool, thus reducing the bilirubin level in the
baby’s blood.
The Illuminator device sends light out of the ber optic cable to the entire area of the panel.
The panel is inserted into a protective cover. This wrap is soft and comfortable and allows the
therapeutic light to be emitted towards the baby. With this use of the BiliTx system, the baby
can be held and fed and enjoy the healing comfort of parents while treatment is administered.
Additionally, when the BiliTx system is properly used with the ber optic panel the baby’s eyes do
not need to be protected as with conventional phototherapy.
Page 6
4
1
2
3
4
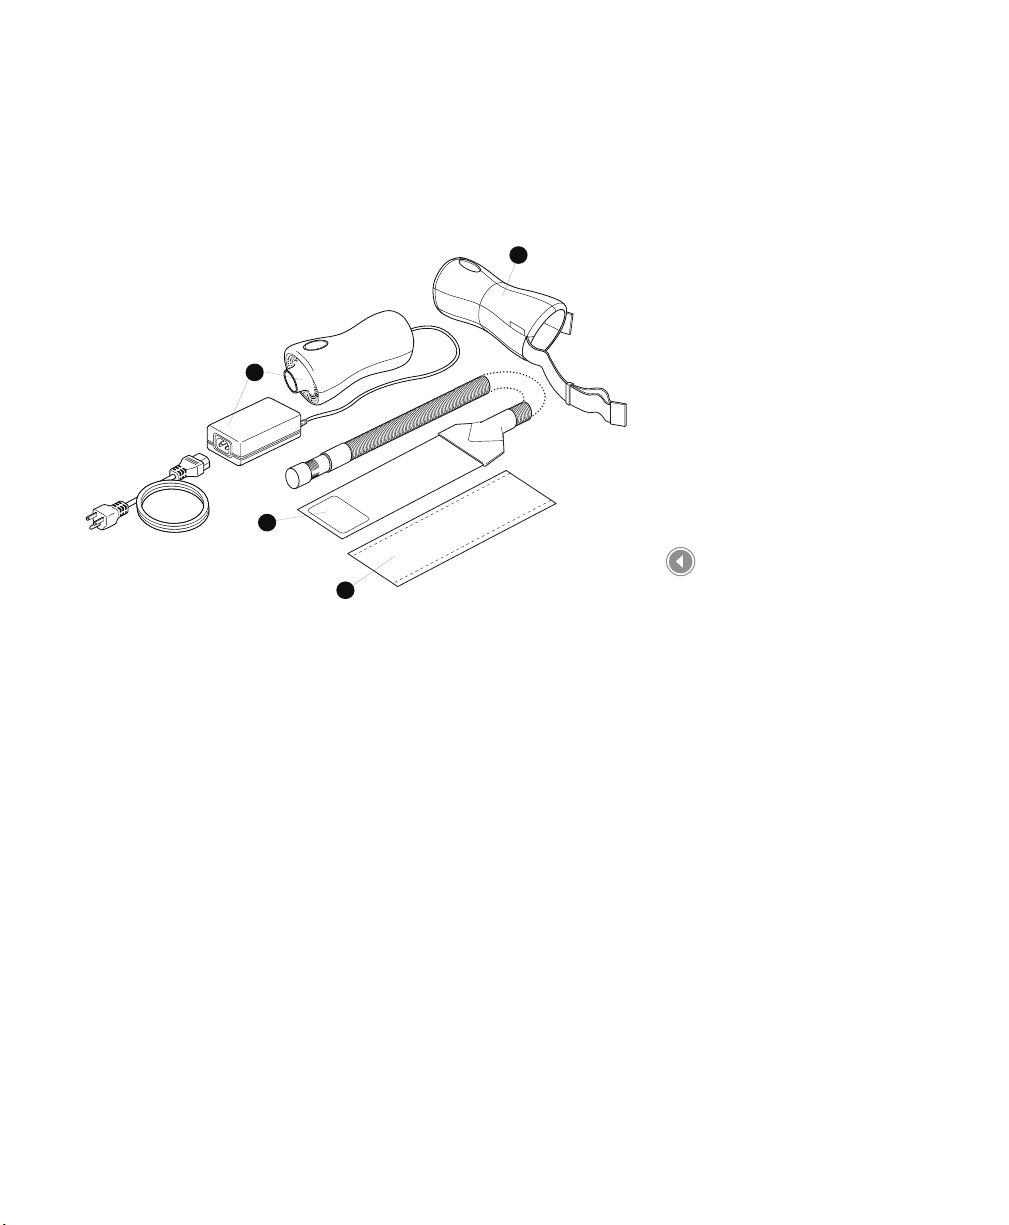
Components of the BiliTx System
The BiliTx system may include the following components. Note that
some components may vary from those shown below or may be
optional accessories that are not packaged with your device .
Fiber Optic Light Panel
Conguration
1. Illuminator Device with
AC Power Cord
2. Fiber Optic Panel
3. Disposable Cover
4. Illuminator Device
Carrying Case
5. System Carrying Case
(optional) (not shown)
6. Parents’ Manual (not
shown)
7. Quick Start Guide (not
shown)
Fiber Optic Light Panel
Conguration Contents
BiliTx Parents’ Manual
Page 7

BiliTx
parents’ manual
2. Warnings, Cautions, and Symbols
Caution! US federal law restricts this device to sale by or on the order of a
physician.
Warnings
Use the Bili • Tx only for its intended use as described in this
manual.
Bilirubin photoisomers may cause toxic eects. •
Do not leave the Illuminator device on when the ber •
optic panel is not around the baby.
Always turn o and unplug the Illuminator device during •
cleaning or servicing.
Do not use the Bili • Tx system in the presence of ammable
substances such as anesthetics, cleaning agents, or gases
that support combustion (e.g. oxygen, nitrous oxide).
Do not use while bathing the baby. •
Do not place or store the Bili • Tx system where it can fall or
be pulled into a tub or sink.
If the Illuminator device falls into water or if uid is spilled •
on the device do not reach for it without rst unplugging
the cord. Discontinue use of the device and contact your
home care provider.
Never operate the Illuminator device if it has a damaged •
plug or damaged or frayed power cord or wires. Do not
insert anything into the end of the plug.
Do not use an extension cord. •
Always connect the device to a properly grounded outlet. •
WARNING
A warning indicates the
possibility of injury to the user or
operator.
Page 8

6
If therapy is interrupted for any reason, resume therapy as •
soon as possible and contact your home care provider.
Carefully place the panel cable to avoid entanglement. •
Position the Illuminator device on a stable surface, •
preferably lower than the infant. When the BiliTx system is
used with the ber optic panel conguration and carrying
case, the device can hang on the outside of a crib or
treatment area.
Do not place the Illuminator device, power supply, or •
carrying case in an incubator or infant warmer.
Do not place a temperature sensor for the infant warmer or •
incubator under the ber optic panel.
Do not place the Illuminator device, power supply, or •
carrying case in a crib or other treatment area next to the
baby.
Never block the air vents of the unit or place it on a soft •
surface such as a bed, crib, carpeted oor, or couch where
the air vents may be blocked.
During phototherapy, the the baby’s water balance may •
become disturbed. Before and during phototherapy, make
sure the baby is properly hydrated and that his or her body
temperature is maintained.
After treatment has begun, the baby’s bilirubin level should •
be measured to make sure therapy is eective.
The ber optic panel must not be covered by anything •
except with the cover provided. Any other type of cover will
cause a reduction in light intensity. The setup instructions
must be followed exactly.
Cautions
Keep the unit away from any heated surface. •
Do not scratch, damage, or soil the ferrule end of the panel. •
Also, do not place sharp or heavy items on the panel, this
can damage the panel and aect its light output.
Do not dry the ber optic panel with articial heat. •
If the device is dropped, contact your home care provider. •
BiliTx Parents’ Manual
CAUTION
A caution indicates the
possibility of damage to the
device.
Page 9

Symbols
0086
The following symbols appear on the BiliTx system.
Symbol Explanation
Therapy On/O
Consult accompanying instructions for use
Type BF applied part
AC Power
European Declaration of Conformity
Canadian/US Safety Certication. Conforms to ANSI/UL STD. 2601.
Certied to CAN/CSA C22.2 STD. NO. 601.1.
3158805
Lock and Unlock
7
Chapter 2 Warnings, Cautions, and Symbols
Page 10

8
BiliTx Parents’ Manual
Page 11

BiliTx
parents’ manual
3. Setup
Setting Up the BiliTx System
1. Place the appropriate cover on the panel and position the baby
and panel as described later in this chapter. (See Setup-Wrap
Around Panel or Flat Neonatal Panel.)
2. Place the Illuminator device on a hard, at surface or using
the carrying case, hang the unit on the outside of a crib or the
treatment area, away from any heat source. Make sure it is no
more than four feet from where the baby will be positioned.
3. Insert the metal end of the light panel cable, called the
ferrule, with the metal post facing up, into the opening on
the Illuminator unit. Push the ferrule in and rotate it counterclockwise to lock into place. The light will not come on if the
panel is not inserted in the Illuminator device.
WARNING
After treatment has begun, the
baby’s bilirubin level should be
measured to make sure therapy
is eective.
CAUTION
Do not block any of the air vents
on the Illuminator device.
4. Plug the Illuminator device into an electrical outlet. The power
button will ash green.
CAUTION
If the power cord or wires need repair or replacement, do not connect the device.
5. Press the Therapy On/O button to turn the Illuminator device
on and begin phototherapy. The Therapy button will illuminate
green.
6. To turn o the device when therapy is complete, press and hold
the Therapy On/O button for 3 seconds.
Connecting the light panel
cable to the illuminator
device
Turning on the illuminator
device
Page 12

10
Setup - Wrap-Around Panel
This section explains how to prepare your baby for a phototherapy
treatment using the wrap-around ber optic light panel.
The ber optic panel must NOT be covered by anything except with
the cover provided. Any other type of cover could cause a reduction
in light intensity. The setup instructions must be followed exactly.
This panel provides full coverage around the baby’s torso.
1. Place a disposable or reusable cover onto the panel with the
light emitting side of the panel facing the sheer side of the cover.
hook and loop tabs
2. Place the covered panel under the baby’s torso, positioning it so
it is under the baby’s armpits.
3. Wrap the panel around the baby. Use the tape or hook and loop
tabs to secure the panel around the baby.
4. If the disposable cover becomes soiled, discard it and replace
with a clean one. The cloth cover may be washed with mild soap
and water.
NOTES
For a larger or more active baby, you may want to tape the panel to the baby’s
diaper.
To be sure the panel is not wrapped too tightly, insert your nger between the
panel and the baby’s body. Your nger should t easily.
You may wrap the baby in a blanket or put the baby in a sleeper.
Wrap-around panel with
disposable cover
Positioning the ber optic
panel
WARNING
If using tape to secure the panel, do not adhere the tape to the baby’s skin.
BiliTx Parents’ Manual
Wrapping and securing the
panel
Page 13

Setup - Flat Neonatal Panel
This section explains how to prepare a baby for a phototherapy
treatment using the at neonatal ber optic light panel.
The ber optic panel must NOT be covered by anything except with
the disposable cover provided. Any other type of cover could cause a
reduction in light intensity. The setup instructions must be followed
exactly.
This panel is ideal for preemie or underweight infants; it may also be
used on full-term infants.
1. The protective cover for the neonatal panel is a T-vest. Slide the
vertical section of the T, with the light facing the sheer side of the
cover, onto the panel.
hook and loop tabs
11
Neonatal panel with t-vest
2. Lay the covered panel on a at surface. Be sure the light
emitting side is facing up.
3. Position the baby’s chest or back directly on the panel. The cable
connected to the panel should be between the baby’s legs.
4. Secure the T-vest to the baby by rst wrapping the side without
the tape or hook and loop tab around the baby’s midsection.
Then, wrap the side with the tape or hook and loop tab over the
infant. If using tape, peel o the protective cover on the tab, and
secure it. Be sure the vest is snug.
Positioning the baby on the
panel
Chapter 3 Setup
Page 14

12
5. If your cover has the hook and loop tabs, you can secure the
cover by pulling the hook and loop tab on the bottom corner of
the cover up and accross the cover, tightening the cover around
the cable between the baby’s legs.
6. If the T-vest becomes soiled, discard it and replace it with a new
one.
NOTES
For a larger or more active baby, you may want to tape the panel to the baby’s
diaper.
To be sure the panel is not wrapped too tightly, insert your nger between the
panel and the baby’s body. Your nger should t easily.
You may wrap the baby in a blanket or put the baby in a sleeper.
WARNING
If using tape to secure the panel, do not adhere the tape to the baby’s skin.
Using the In-Use Carrying Case
Wrapping and securing the
T-vest
An optional, in-use carrying case is available for use with the
Illuminator device. The carrying case allows for easy mobility
during phototherapy treatment. To place the carrying case on the
Illuminator device, simply slide it over the device and adjust the
position so that the Start/Stop button is visible. The shoulder strap
should be located at the same end as the power cord. You can adjust
the shoulder strap as necessary using the hook and loop tabs.
Therapy On/O
Button
Shoulder Strap
BiliTx Parents’ Manual
Page 15

4. Cleaning
BiliTx
parents’ manual
This section explains how to clean the BiliTx system.
Cleaning the Illuminator Device and Fiber
Optic Panel
Follow the instructions in this section any time the Illuminator device
or ber optic panel is dirty.
1. Use soapy water, a 10% bleach solution or full strength ammonia.
2. Use a soft sponge or cloth to apply the cleaner.
3. Apply the cleaning solution to the sponge or cloth and wipe
down the ber optic panel and Illuminator.
4. Allow the equipment to air dry. DO NOT DRY WITH ANY MEANS
OF ARTIFICIAL HEAT.
5. Wipe the Illuminator device and panel with a dry cloth.
If the in-use carrying case becomes soiled, it can be wiped with a
damp cloth.
CAUTION
Be sure the Illuminator device
is turned o and is unplugged
before cleaning. Do not immerse
any part of the equipment in
any liquid.
CAUTION
Keep the ber optic panel away
from sharp objects that could
scratch or puncture the cover.
WARNING
When cleaning, DO NOT USE:
• Phenolic compound based
germicide cleaner/disinfectant
• Gluteraldhyde disinfectant/
sterilants
• Regular commercial cleaners or
laundry detergents
• Iodine solutions, strong acids or
strong alkali solutions
These solutions could leave
residue on the surfaces, and /
or be abrasive or harmful to the
infant.
Page 16

14
Customer Service Information
If you need to contact Philips Children’s Medical Ventures directly, call
the Philips Children’s Medical Ventures Customer Service department
at 1-800-345-6443 or 1-724-387-4000.
You can also use the following address:
Children’s Medical Ventures, LLC
191 Wyngate Drive
Monroeville, Pennsylvania
15146 USA
HELPFUL TIP
Visit Philips Children’s Medical
Ventures web site at
www.philips.com/childmed.
BiliTx Parents’ Manual
Page 17

BiliTx
parents’ manual
5. Troubleshooting
The following is a list of problems that may occur while using the BiliTx system. For additional
information, contact your home care provider or contact Philips Children’s Medical Ventures Customer
Service at 1-800-345-6443 or 724-387-4000.
WARNING
If therapy is interrupted for one hour or longer, resume therapy as soon as possible and contact your home care provider.
Problem Reason/Action
Therapy On/O button is not
green
Check to make sure power cord is properly attached and
plugged into an active electrical outlet.
Ensure the device is turned on.
Therapy On/O button is not
ashing green
Light is not being emitted from
ber optic panel
Yellow LED is ashing Ensure the panel or circuit support adapter is securely locked
Loss of power or light source
failure
Device will not turn o when
the Therapy On/O button is
pressed
If the power cord is properly attached and plugged into an
active electric outlet and the Therapy On/O button is not
ashing green, but the device will turn on, continue to use the
device for therapy.
Check to make sure panel is securely locked into Illuminator
device.
into place. If light continues to ash, contact your home care
provider.
Contact your home care provider.
Press and hold the Therapy On/O button for 3 seconds.
Page 18

16
BiliTx Parents’ Manual
Page 19

BiliTx
parents’ manual
6. Specications
Environmental
Storage Operating
Temperature -4 to 122° F (-20 to +50° C) 59 to 95° F (15 to 35° C)
Relative Humidity 15-95% Non-condensing 15-95% Non-condensing
Physical
Illuminator
Size: 6.34 in. x 2.92 in. (16.10 cm x 7.40 cm)
Weight: <2.50 lb. (1.13 kg)
Fiber Optic Panel
Model: EG-2000 (Wrap Around Panel)
Overall Pad Size-Standard: 4.00” x 15.00” (10.16 cm x 38.10 cm)
Illuminated Area-Standard: 3.00” x 14.00” (7.62 cm x 35.56 cm)
Model: EG-2000N (Flat Neonatal Panel)
Overall Pad Size-Neonatal: 5.00” x 7.00” (12.70 cm x 17.78 cm)
Illuminated Area-Neonatal: 4.00” x 6.00” (10.16 cm x 15.24 cm)
Page 20

18
Light Source
Irradiance Level
Standard Panel-Light: 30µW/cm2/nm
Neonatal Panel-Light: 55µW/cm2/nm
Intensity Ratio
Standard Panel and Neonatal Panel : > .4 (minimum to maximum)
Audible Noise
< 60 dB(A). Measured in accordance with IEC 60601-2-50.
Standards Compliance
This device is designed to conform to the following standards:
IEC 60601-1 General Requirements for Safety of Medical Electrical Equipment •
IEC 60601-2-50 Requirements for the Safety of Infant Phototherapy Equipment •
Electromagnetic Compatibility: EN 60601-1-2, 2nd edition. •
Electrical Requirements
AC Power 100-240 VAC, 50/60 Hz, 1.0 A
Type of Protection Against Electrical Shock Class I Equipment
Degree of Protection Against Electrical Shock Type BF Applied Part
Degree of Protection Against Ingress of Water Ordinary Protection, IPX0
Mode of Operation Continuous
Disposal
Dispose of this device in accordance with local regulations.
BiliTx Parents’ Manual
Page 21

BiliTx
parents’ manual
Appendix A: EMC Information
Guidance and Manufacturer’s Declaration - Electromagnetic
Emissions
This device is intended for use in the electromagnetic environment specied below. The user of this
device should make sure it is used in such an environment.
Emissions Test Compliance Electromagnetic Environment - Guidance
RF emissions
CISPR 11
RF emissions
CISPR 11
Harmonic emissions
IEC 61000-3-2
Voltage uctuations/Flicker
emissions
IEC 61000-3-3
Group 1 The device uses RF energy only for its internal function.
Therefore, its RF emissions are very low and are not
likely to cause any interference in nearby electronic
equipment.
Class B The device is suitable for use in all establishments,
including domestic establishments and those directly
Class A
Complies
connected to the public low-voltage power supply
network.
Appendix A: EMC Information
Page 22

20
Guidance and Manufacturer’s Declaration - Electromagnetic
Immunity
This device is intended for use in the electromagnetic environment specied below. The user of this
device should make sure it is used in such an environment.
Immunity Test IEC 60601 Test
Level
Electrostatic Discharge
(ESD)
IEC 61000-4-2
Electrical Fast Transient/
Burst
IEC 61000-4-4
Surge
IEC 61000-4-5
Voltage dips, short
interruptions and voltage
variations on power
supply input lines
IEC 61000-4-11
Power frequency (50/60
Hz) magnetic eld
IEC 61000-4-8
NOTE: UT is the a.c. mains voltage prior to application of the test level.
±6 kV contact
±8 kV air
±2 kV for power supply
lines
±1 kV for input-output
lines
±1 kV dierential mode
±2 kV common mode
<5% U
T
(>95% dip in UT) for 0.5
cycle
40% U
T
(60% dip in UT) for 5
cycles
70% UT
(30% dip in UT) for 25
cycles
<5% UT
(>95% dip in UT) for 5 sec
3 A/m 3 A/m Power frequency magnetic elds
±6 kV contact
±8 kV air
±2 kV for supply mains
±1 kV for input/output
lines
±1 kV dierential mode
±2 kV for common mode
<5% U
(>95% dip in UT) for 0.5
cycle
40% U
(50% dip in UT) for 5
cycles
70% UT
(30% dip in UT) for 25
cycles
<5% UT
(>95% dip in UT) for 5 sec
Compliance Level Electromagnetic Environment -
Guidance
Floors should be wood, concrete
or ceramic tile. If oors are covered
with synthetic material, the relative
humidity should be at least 30%.
Mains power quality should be
that of a typical home or hospital
environment.
Mains power quality should be
that of a typical home or hospital
environment.
T
T
Mains power quality should be
that of a typical home or hospital
environment.
should be at levels characteristic of a
typical location in a typical hospital
or home environment.
BiliTx Parents’ Manual
Page 23

Guidance and Manufacturer’s Declaration - Electromagnetic
Immunity
This device is intended for use in the electromagnetic environment specied below. The user of this
device should make sure it is used in such an environment.
Immunity Test IEC 60601 Test
Conducted RF
IEC 61000-4-6
Radiated RF
IEC 61000-4-3
3 Vrms
150 kHz to 80 MHz
3 V/m
80 MHz to 2.5 GHz
Level
Compliance
Level
3 Vrms
3 V/m
Electromagnetic Environment - Guidance
Portable and mobile RF communications equipment
should be used no closer to any part of the device,
including cables, than the recommended separation
distance calculated from the equation applicable to
the frequency of the transmitter.
Recommended separation distance:
d = 1.2 150 kHz to 80 MHz
d = 1.2 80 MHz to 800 MHz
d = 2.3 800 MHz to 2.5 GHz
Where P is the maximum output power rating of the
transmitter in watts (W) according to the transmitter
manufacturer and d is the recommended separation
distance in meters (m).
Field strengths from xed RF transmitters, as
determined by an electromagnetic site survey a,
should be less than the compliance level in each
frequency range b.
Interference may occur in the vicinity of equipment
marked with the following symbol:
21
NOTE 1: At 80 MHz and 800 MHz, the higher frequency range applies.
NOTE 2: These guidelines may not apply in all situations. Electromagnetic propagation is aected by absorption and reection from
structures, objects, and people.
a: Field strengths from xed transmitters, such as base stations for radio (cellular/cordless) telephones and land mobile radios, amateur
radio, AM and FM radio broadcast and TV broadcast cannot be predicted theoretically with accuracy. To assess the electromagnetic
environment due to xed RF transmitters, an electromagnetic site survey should be considered. If the measured eld strength in the
location in which the device is used exceeds the applicable RF compliance level above, the device should be observed to verify normal
operation. If abnormal performance is observed, additional measures may be necessary, such as re-orienting or relocating the device.
b: Over the frequency range 150 kHz to 80 MHz, the eld strengths should be less than 3 V/m.
Appendix A: EMC Information
Page 24

22
Recommended Separation Distances between Portable and Mobile
RF Communications Equipment and this Device
The device is intended for use in an electromagnetic environment in which radiated RF
disturbances are controlled. The customer or the user of this device can help prevent
electromagnetic interference by maintaining a minimum distance between portable and mobile RF
communications equipment (transmitters) and this device as recommended below, according to
the maximum output power of the communications equipment.
Rated Maximum Power
Output of Transmitter
(W)
0.01 0.12 0.12 0.23
0.1 0.38 0.38 0.73
1 1.2 1.2 2.3
10 3.8 3.8 7.3
100 12 12 23
For transmitters rated at a maximum output power not listed above, the recommended separation distance d in meters (m) can be
estimated using the equation applicable to the frequency of the transmitter, where P is the maximum output power rating of the
transmitter in watts (W) according to the transmitter manufacturer.
Note 1: At 80 MHz and 800 MHz, the separation distance for the higher frequency range applies.
Note 2: These guidelines may not apply in all situations. Electromagnetic propagation is aected by absorption and reection from
structures, objects, and people.
150 kHz to 80 MHz
Separation Distance According to Frequency of Transmitter
(m)
80 MHz to 800 MHz
d = 1.2
d = 1.2
800 MHz to 2.5 GHz
d = 2.3
BiliTx Parents’ Manual
Page 25

BiliTx
parents’ manual
BiliTx Warranty
Children’s Medical Ventures, LLC warrants your BiliTx Phototherapy System against defects in
material and workmanship of the Illuminator device and the ber optic panels, EG-2000 and
EG-2000N, for a period of one (1) year from the date of purchase. In addition, Philips Children’s
Medical Ventures warrants the LED light engine for 20,000 hours. This warranty does not cover
any damage to the illuminating device or the ber optic panel caused by accident, misuse,
tampering, or negligence such as failure to follow the instructions provided in this guide. In
the event your phototherapy illumination unit fails to give satisfactory performance within
the warranty period and conditions, Philips Children’s Medical Ventures will repair or replace
your illuminating device at no charge for parts or labor. The foregoing warranties are in lieu of
all other warranties expressed or implied, including without limitation any implied warranty of
merchantability or tness for a particular purpose.
23
To exercise your rights under this warranty, contact your local authorized Philips Children’s
Medical Ventures dealer or contact Philips Children’s Medical Ventures at:
191 Wyngate Drive
Monroeville, PA 15146 USA
1-800-345-6443
Page 26

24
 Loading...