

Philips G4, 0910L2S, 1012L2S, 1314L2S User Manual
Installation Manual
Contact Information:
Other World Computing 1004 Courtaulds Drive Woodstock, IL 60098
Sales: 800.275.4576
International: 815.338.8658
Customer Service: 800-275-4576
Tech Support: 815-338-8685
24hr Fax: 815.338.4332
For support via email submit your question here:
http://eshop.macsales.com/Service/Tech.cfm
Sales & Technical Support Hours (CST)
8:30AM-8PM Monday - Friday
10AM-4PM - Saturday
Customer Service Hours (CST)
8:30am-5:30pm Monday - Friday
OWC Mercury Extreme G4
FCC Statement
NOTE: Other World Computing declares that this processor upgrade
has been tested and found to comply with the limitations of a Class B
digital device, pursuant to Part 15 of the FCC Rules & Regulations. These
limits are designed to provide reasonable protection against harmful
interference in a residential installation. This equipment generates,
uses and can radiate radio frequency energy and, if not installed in
accordance with these instructions, may cause harmful interference to
radio communications. However, there is no guarantee that interference
will not occur in any one particular installation, If this equipment does
cause harmful interference to radio or television reception, this can be
determined by turning the equipment this upgrade is installed into on and
off. If this is determined to be the cause of harmful interference, the end
user is encouraged to attempt to correct the interference by one or more
of the following procedures:
• Connect the equipment to another electrical outlet, or use a line fi ltering
device between the outlet and the computer
• Move the location of the receiving device and the computer
• Reorient the receiving antenna
• Increase the distance separating the receiver and the computer
Entire contents copyright ® 2004 Other World Computing.
OWC product warranties are non-transferrable
OWCMANMEG4
Troubleshooting Tips:
Boot Issues:
• Make certain you updated the fi rmware to version 4.2.8. If you did not,
you will have to reinstall your original processor and boot into Mac OS 9
to perform this task.
• Press the reset button marked “S1” on the logic board. This is located
on the corner of the logic board near the PCI slots on most machines.
You will need to reset your date & time settings as well as any AppleTalk
settings after doing this.
• Reset the PRAM on your computer by pressing and holding the
command - option - P and R keys at startup until the machine chimes
3 times. You will need to reset your date & time settings as well as any
AppleTalk settings after doing this.
Final Cut Pro 3 and 4 Issues / Full Switch Setting Chart:
• Final Cut Pro requires a valid speed to be reported correctly by Apple
System Profi ler. For detailed instructions about this issue, please visit our
tech center at: http://eshop.macsales.com/tech_center/index.cfm
This page also includes a full switch setting chart for your convenience.
Sleep Issues:
• The OWC Mercury Extreme G4 supports hard disk and display sleep in
all confi gurations. With some system confi gurations, deep sleep may not
be supported.
9. Remove Processor
Place your fi ngers gently underneath the edge of the
processor daughtercard, and with your fi ngertips, pull straight
up. Do not pull at an angle, you risk breaking the processor
socket if you don’t pull straight up.
11. Insert Processor - All Systems
Installation of the processor daughtercard is the same on all
systems, simply align the 3 screw holes in the card and gently place over the logic board. Gently but fi rmly press straight
down on the two rearmost screwholes until you feel the card
“click” into place. Insert the included screwdriver and tighten
the encapsulated 3 Phillips screws into the 3 screw holes.
You’re all done - Enjoy your new processor!
10. Remove Protective Cover
Remove the protective cap from the OWC Mercury Extreme
G4 processor upgrade. The cap is located on the bottom of
the card, between the screw holes. Place the cap onto the
processor card you just removed.
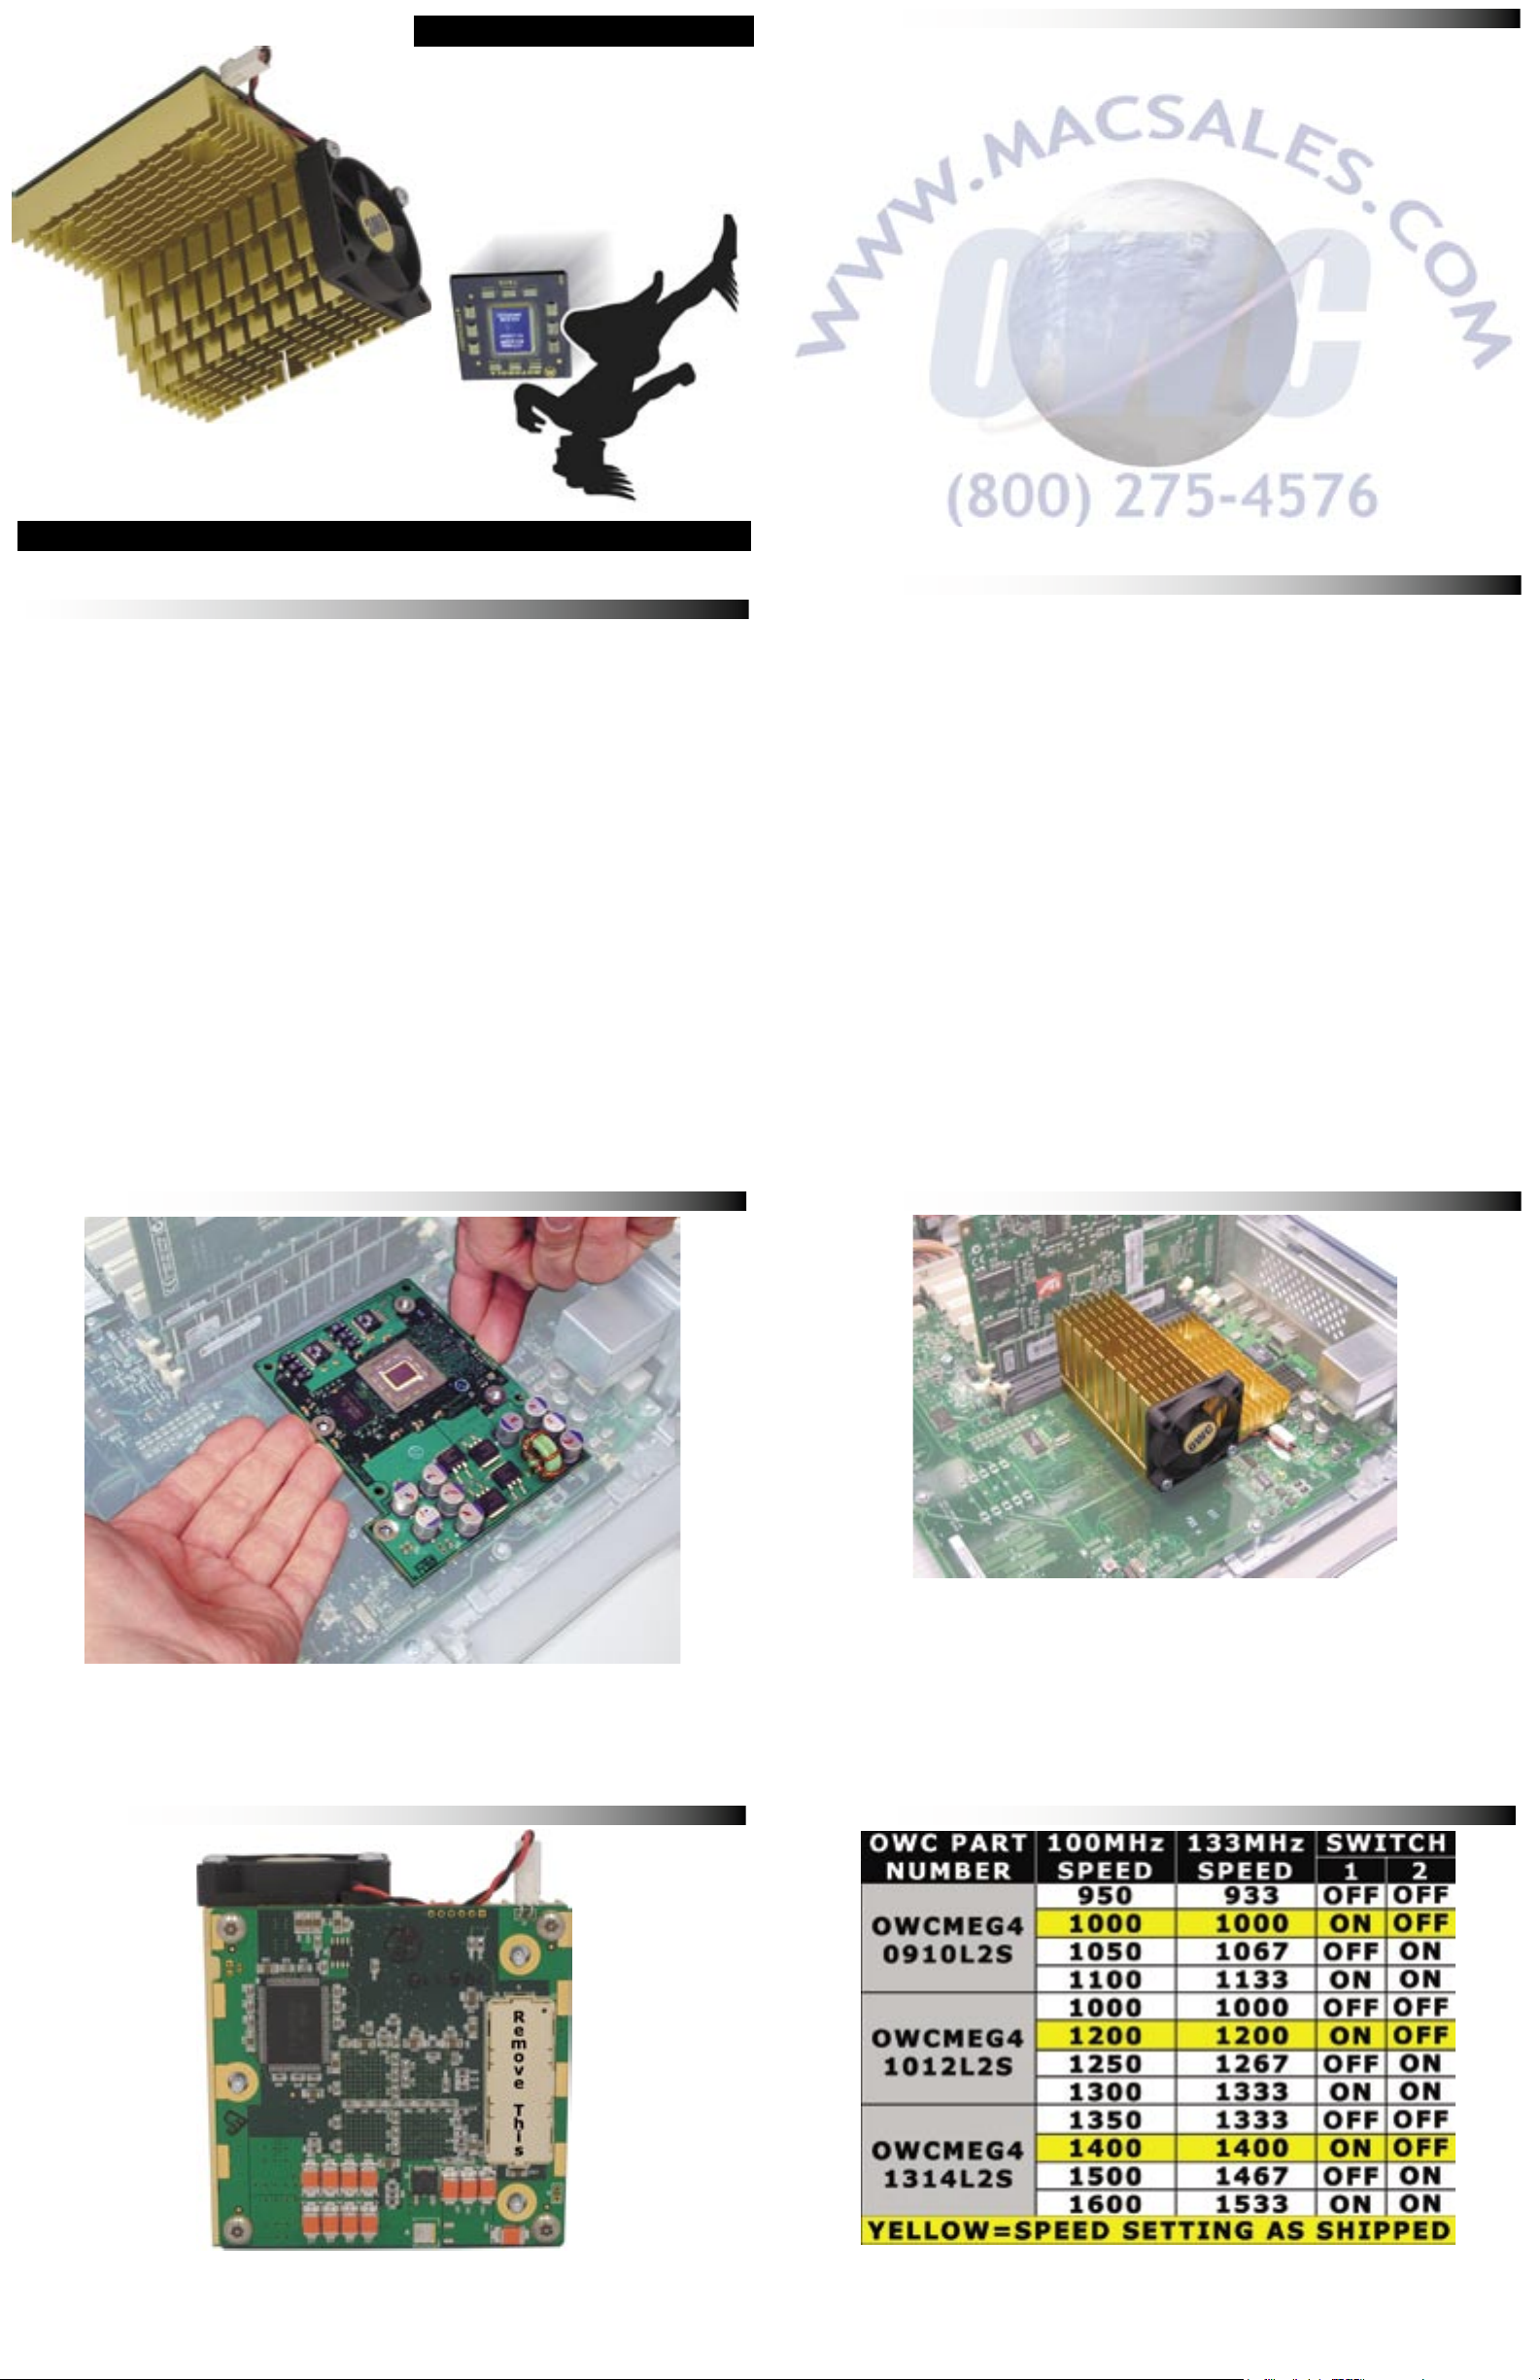
Optional - Jumper Settings - Adjustment NOT necessary!
There is no need to modify the settings on the accelerator as
they are preset for maximum performance from the factory.
If you wish to adjust, please follow this chart.
NOTE: See Troubleshooting section for Final Cut Pro issues.

1. Items Needed:
Thank you for purchasing your new OWC Mercury Extreme
G4 AGP processor upgrade! Please read through this entire
installation manual before proceeding with the upgrade to
familiarize yourself with the process. Before installing any
hardware component, it is recommended that you back up
any important data from your hard drive. If you are planning
on performing multiple upgrades, it is highly recommended
that you complete one upgrade at a time before proceeding
with the next.
ATTENTION! While performing these upgrade procedures,
static safe conditions must be met. Do not walk around,
hold all components by their edges, and do not touch the
connector contacts.
Items needed to perform this upgrade
• #1 Phillips Screwdriver (Included!)
• Needle Nose Pliers (to remove heatsink clips)
• Internet Access (to update fi rmware, if needed)
5. QuickSilver & QuickSilver 2002 - Fan Removal
Unscrew these two screws from the rear port panel on
your system. This will release the fan from behind the
heatsink and allow you to unhook the rear heatsink clips in
the next step. You will not be reinstalling this fan.
2. System Requirements:
The OWC Mercury Extreme G4 processor is compatible with
any Power Macintosh G4/AGP Graphics, Gigabit Ethernet,
Digital Audio, QuickSilver or QuickSilver 2002 model. To determine which system you have, please refer to this online
Apple document.
http://docs.info.apple.com/article.html?artnum=58418
The OWC Mercury Extreme G4 processor is compatible with
Mac OS 9.2.1 and later, including all versions of Mac OS X.
3. Firmware Upgrade
6. Remove Heatsink (Digital Audio & QuickSilver)
Remove the heatsink from your logic board. Use the needle
nose pliers to unhook the clips from the processor card. If
your system includes a processor fan or cover, unplug it and
then remove by unclipping it and pulling straight up and out.
You will not be reinstalling this heatsink, fan or shroud.
Skip to step 8 to remove the processor card.
7. Remove Processor Card (AGP, Gigabit & Digital Audio)
ATTENTION! If your computer is a Power Macintosh AGP
Graphics, Gigabit Ethernet or Digital Audio model, you
must upgrade it’s fi rmware to version 4.2.8. This cannot be
performed using Mac OS X, you must boot into Mac OS 9
to upgrade the fi rmware. Please refer to this online Apple
document:
http://docs.info.apple.com/article.html?artnum=120068
To verify which revision of fi rmware your system is running,
boot into OS 9 and open the Apple System Profi ler from under
the Apple Menu. The last drop down tab is “Production Information”, and the second item listed is the Boot ROM Version.
Your system must be at $004.28f1 or later to proceed.
Remove the 3 circled screws from the processor
daughtercard and set them aside, you do not reuse them.
Skip to step 10 to install your new processor.
4. Remove Heatsink (AGP Graphics & Gigabit Ethernet)
Remove the heatsink from your logic board. Use the needle
nose pliers to unhook the clips from the processor card.
Skip to step 7 to remove the processor card.
8. Remove Processor Card (QuickSilver & QuickSilver 2002)
Remove the 4 circled screws from the processor daughtercard
and set them aside, you do not reuse them.
 Loading...