

Page 1
55
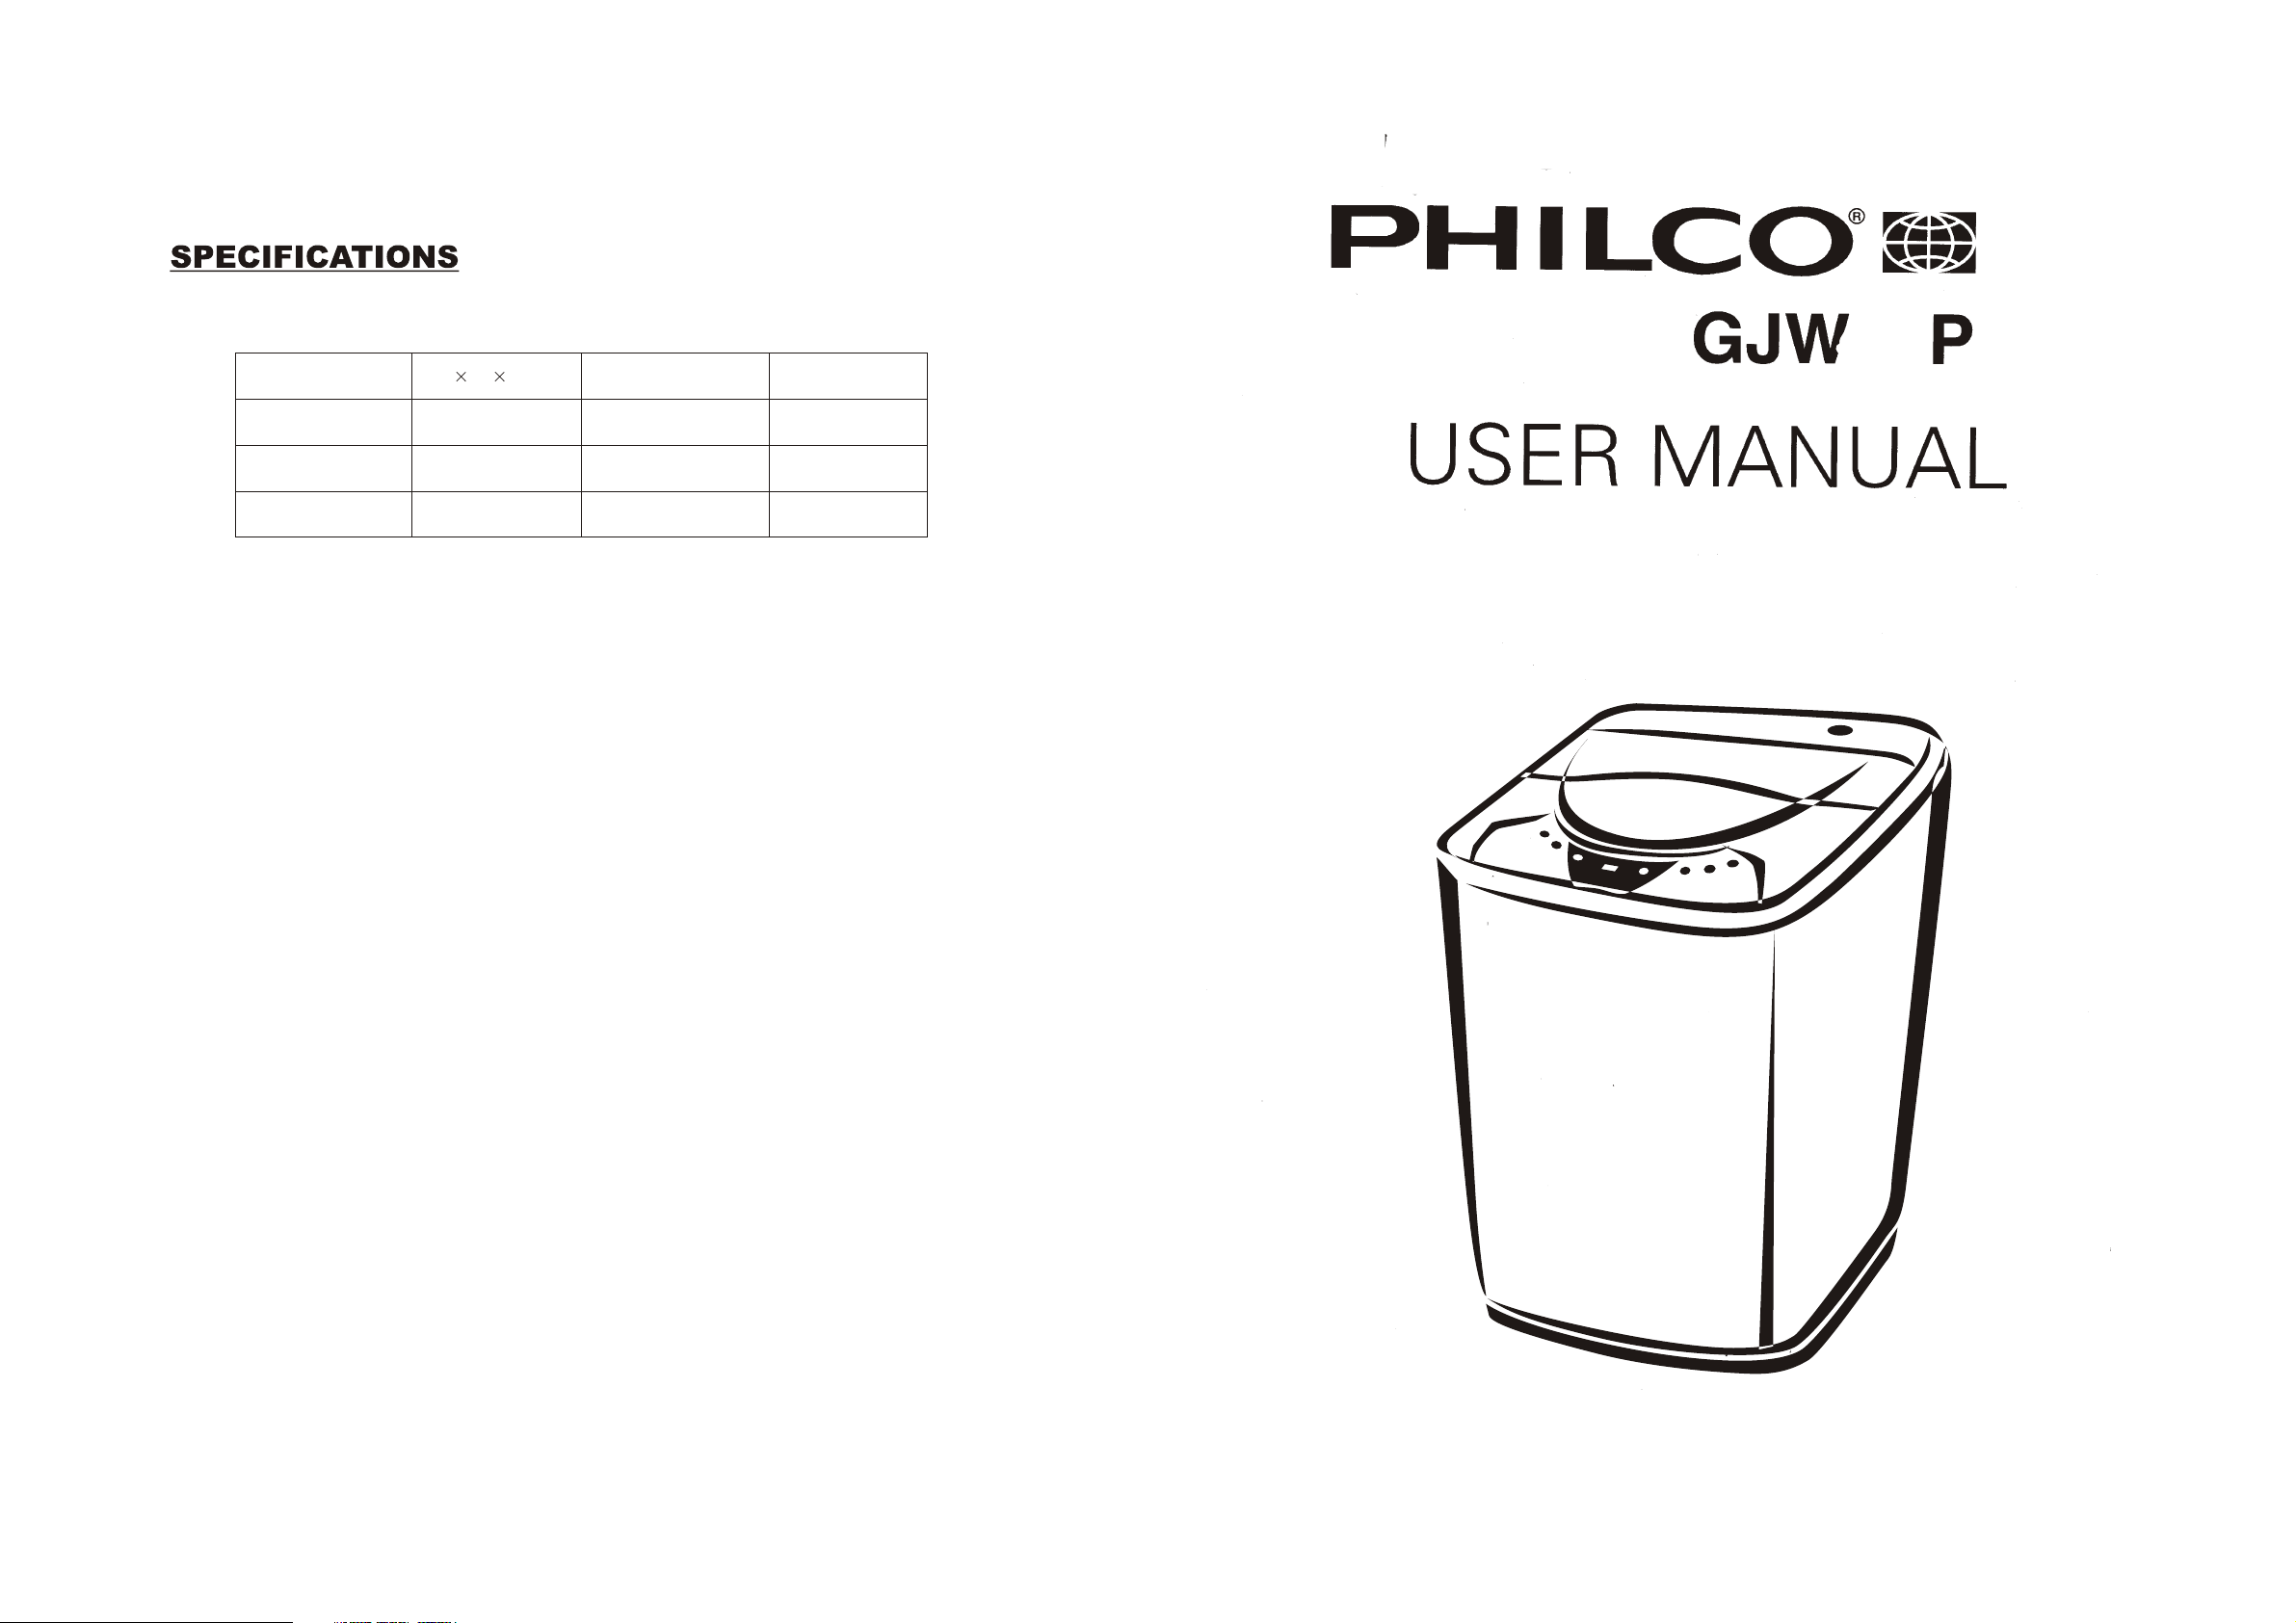
Size
526 536 927(mm)
Weight of the product
32.5Kg
Rated input power
Rated voltage
Rated frequency
400W
220V~
50Hz
Rate volume of wash
and spinning
Maximum water pressure
permitted in the water inlet
Minimum water pressure
permitted in the water inlet
5.5Kg(dry clothes)
0.6MPa
0.1MPa
Page 2

INDEX
Names of parts------------------------------------------------------------------------------3
Volume of washing and detergent------------------------------------------------------4
Functions of buttons -----------------------------------------------------------------------5
Way of use -----------------------------------------------------------------------------------7
Preparations before using ---------------------------------------------------------7
Full automatic program-------------------------------------------------------------8
Self program---------------------------------------------------------------------------9
Preset program-----------------------------------------------------------------------9
Soak washing-------------------------------------------------------------------------11
Wash of blanket ---------------------------------------------------------------------11
Use of fabric softener --------------------------------------------------------------11
Wash of bulk clothes---------------------------------------------------------------11
Pre-wash of the dirty clothes-----------------------------------------------------11
Installation----------------------------------------------------------------------------12
Placement of the washing machine----------------------------------------------12
Installation of water inlet hose---------------------------------------------------13
Installation of drain hose----------------------------------------------------------14
Power source and grounding-----------------------------------------------------15
Installation of the base cover-----------------------------------------------------15
Precautions---------------------------------------------------------------------------------16
Trouble shooting --------------------------------------------------------------------------17
Method of maintenance------------------------------------------------------------------18
Specifications--------------------------------------------------------------------back cover
2
Page 3
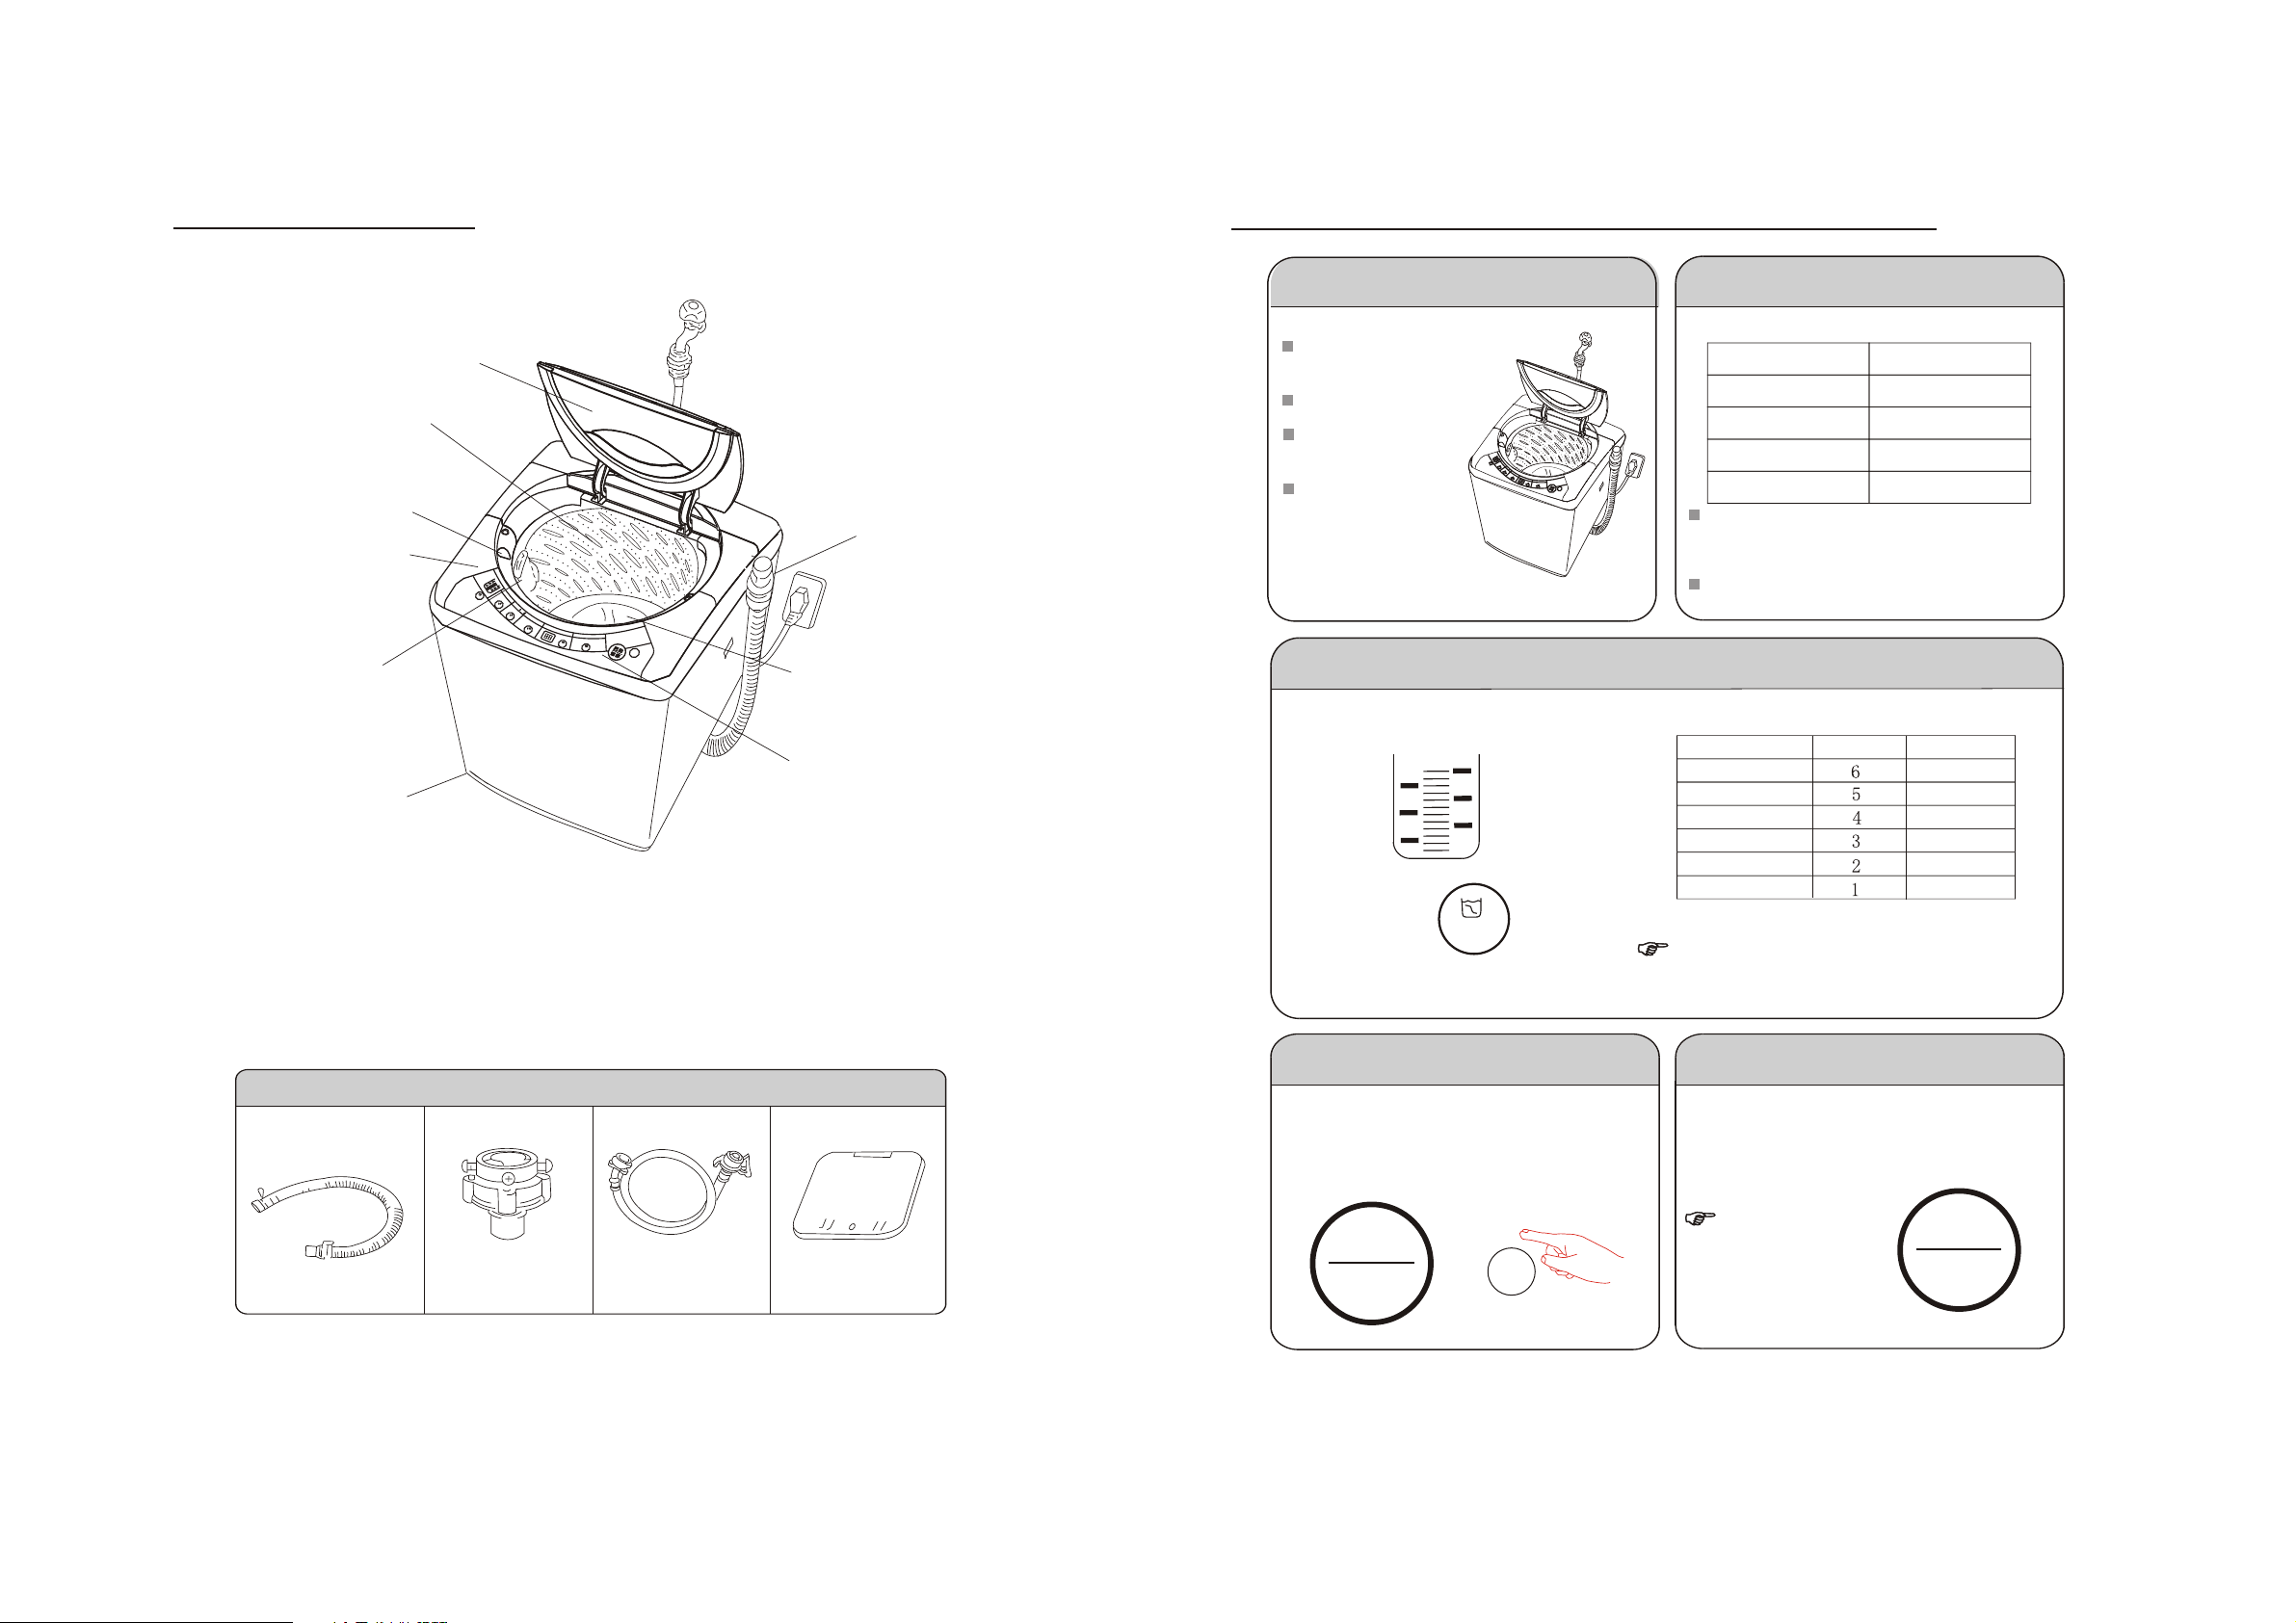
NAMES OF PARTS
VOLUME OF WASHINGS AND DETERGENT
1
2
3
9
4
5
8
7
6
1. Top lid 2. Washing tub 3. Gradienter 4. Top frame 5. lint filter 6. Adjustable foot
7. Operation panel 8. Pulsator 9. Drain hose
1. Check
Whether the drain hose
is through
Whether the tap is open
Whether the power
socket is plugged in
Take out the coins and
other sundries from the
pockets and shake off
the mud or sand on the
clothes
2. Washing put in and detergent
Dosage of common low foam washing powder
Washing Capacity
3.6-6.0kg 80g
2.5-3.6kg 70g
1.5-2.5kg 60g
<1.5kg 50g
Low foam and medium foam washing powder are
recommended, and the washing powder had better
be dissolved by warm water and be poured into the
tub.
Please refer to the manual of the washing powder
about the dosage.
Dosage of the
washing powder
3. Determine water level, move the knob and align the dot to the selected water level
Washing capacity and comparison with the water level
5
3
1
Water level
Washing capacity
6
4
2
4.5-6.0kg
3.5-4.5kg
3.0-3.5kg
2.5-3.0kg
1.5-2.5kg
<1.5kg
During washing, you can press the button to change
water level in any time.
Notice: when the volume of the clothes is small, the
water level can't be too high, otherwise it will waste
the washing powder and water will splash out.
Water level
Water volume
About 52L
About 45L
About 38L
About 32L
About 25L
About 19L
Drain hose (1)
Accessories
Universal connector
Water inlet hose assembly(1)
3
Base cover (1)
Self-tapping screw (1)
4. Cover the lid and press the power switch
After power on, all lights flash, and buzzer, showing
washing machine on and at default setting, normal
program; 6 water level, wash 12 minutes, rinse 2 times
and spin for 5 minutes.
Start
Pause
Power
5. Press "Start/ Pause"button, start the washing machine
The 1-4 steps of the full process program and selfprogramming processes are the same, and as for the
use from step 5, please see page 7~12 for details.
Notices:
The washing machine
starts after pressing
"Start/Pause"button,
and pauses when press
again.
Start
Pause
4
Page 4

FUNCTIONS OF BUTTONS
Water level
You can set water level freely, "speedy"
1-4 level, "wool" 1-6 level, the others
1-6 level.
The program can supply water automatically in
washing or rinsing, when the water level is short.
Preset
Press the button to preset the
time. When indicator digit is
within 24, each press the
button the digit will add 1
hour. When the digit is more
than 24, each press the button
the digit will add 4 hour. When
the digit get to 48,the digit
will go to original. When press
continually, the indicator digit
will change automatically.
Program
"Normal" "Rapid" "Wool" "Children s
clothes", "Heavy Wash" programs are
available.
The indicator lights move in turn at each
press on the button to set the program.
Every program has a default wash rinse
spin time, see follow sheet, you can set
self program, see the page 9 the details.
Start / Pause
After program selection,
press the button to start.
Press the button to pause in
the course of operation, and
the program continues at
another press.
selection of function
"Soak", "Single wash", "Wash/Rinse" "Rinse/Spin" and "Single spin"
processes are available.
The indicator light moves in turn at each press on the button to set the
process.
Indication of function
The flashing light indicates the status of the running program. When
setting water level below level 6 (not including level 6) the water
level for rinse increase one level automatically.
Y
A
L
E
D
The default parameter for all programs
Water level
Normal
Rapid
Wool
Child's clothes
Heavy wash
In order to protect controller, the interval of switching on and off power
!
r
should be more than 30 seconds.
6
3
6
6
6
Wash(mins)
12
6
6
12
soak wash
Rinse(times)
2
1
2
Injection rinse
2
Spin(mins)
5
2
Delicate
5
5
6
Page 5

WAY OF USE
Preparations before using
1. Lay down the drain hose
2. Connect the water inlet hose. The loading and unloading method of the water inlet
hose can be seen in page 13.
3. Put the power plug into the socket.
4. Take out the coins and other sundries and shake off the mud and sand on the clothes.
Program
Normal
program
Rapid
program
Features and usage
Powerful in washing and
applicable for washing the whole
clothes of a family of 3-4 persons
changed in spring, autumn and
winter.
Applicable for small volume of
washing and the degree of stain
of the clothes is light, especially
for Rapid wash of the clothes
daily changed by a family for
once.
Step5: press "Program"button, select the
wanted program, and the corresponding light
to the selected program will be turned on.
Child s clothes
Way of use
Normal
Speedy
Wool
Heavy wash
Washing "Wash"
light flashes
Washing for 12 minutes
Washing for 6 minutes
Water injection
Fully automatic program
There are four fully automatic programs that can automatically complete the whole courses
of "Wash","Rinse","Spin", and features and usage of each process and the method of use are
as below: (preparations before use are the same as the above-mentioned preparations).
Rinse for the first time
Spinning for 3
minutes and 30
seconds.
Spinning for 2
minutes and 30
seconds.
Drain
Rinse "Rinse"light flashes
Rinse for the second time
Washing for
3 minutes.
Water injection
Washing for
1 minutes and
30 seconds.
drain
Spinning for
3 minutes.
Note: Injection water rinsing is
that injection water in the course
of low speed spinning to rinse the
detergent.
Water injection
Washing for
3 minutes
Spinning
"Spinning" light flashes
Spinning for
5 minutes and 30 seconds
Spinning for 2 minutes
and 30 seconds
Total
time
About 39
minutes
About 18
minutes
Wool
program
Child s clothes
program
Heavy wash
program
Suitable for washing woollen
sweater and various fine fibre
fabrics (the neutral detergent is
recommended).
The washing time is short, the
times for Rinse is much, and
the water level is high, So it
can rinse the clothes clearly.
Avoiding the remaining
detergent in the clothes hurts
the skin of children.
Powerful in washing, applicable
for seriously stained clothes
such as dirty union suit, jeans
and etc. and applicable for
washing blanket, wool towel,
slipcover and other items.
PROGRAM
Step6: The washing machine will start at the
press on the "Start/Pause" button, and the
washing machine will pause at the press on
the button in the course of operation.
Start
Pause
Washing for 6 minutes
Washing for 12 minutes
Dynamic soak for 20 minutes
Washing for 12 minutes
Spinning for 2
minutes and 30
seconds.
Spinning for 2
minutes and 30
seconds.
Water injection
Drain
Washing for
2 minutes
Injection rinse 2 times
Injection rinse is that injection water in the course
of rinse and increase rinse time.
Water injection
Spinning for
3 minutes and
30 seconds.
Spinning with low
speed for 1 minute
and 50 seconds.
Drain
Spinning for
3 minutes.
Water injection
Washing for
2 minutes
Washing for
3 minutes.
Drain
Spinning for 1 minutes
and 30 seconds
Spinning for 5 minutes
and 30 seconds
Spinning for 5 minutes
and 30 seconds
Notice: The total time needed by all programs has something to do with the pressure of the tap water, and the time may
prolong in case of low water pressure.
About 26
minutes
About 43
minutes
About 59
minutes
7
8
Page 6

WAY OF USE
Self program
1. Press wash button, the indicator light move in turns, and select wash 12 minutes, soak wash, wash 6 minutes, wash 9 minutes, all lights turning off means no washing course, the details of soak wash program see page 11.
2. Press the rinse button the indicator light move in turn, and corresponding to select rinse to times, injection rinse, rinse one times, all lights turning off means no rinsing course.
3. Press the spin button the indicator light move in turn, and corresponding to select to spin 5 minutes, gentle spin, spin 2minutes, all lights turning off means no spinning course .
The user can press the wash rinse spin button to compound program freely, the following is some common self programs.
Functions
Soak
Wash
Single
wash
Wash
Rinse
Rinse
Rinse
spin
Features and usage of the programs
The time and flows for soak, wash, rinse and
spin are different from each other, it is
applicable when the water temperature is very
low in winter and the clothes are very dirty.
The time and flows for single wash of the 5
programs are different from each other, and it
does not drain after the end of wash, it is
applicable when the cleansing solution is used
for two times.
The flows, washing time, rinse times of 5 wash
and rinse programs are different from each other
and it does not drain after the end of rinse,
applicable for the case of clothes need not
spinning.
Rinse time and number of rinse will be different
between the 5 rinse programs. This program is
applicable for clothes that requires deep rinse
but not applicable for spinning.
The rinse times and the spinning time of 5 rinse
spin programs are different from each other,
applicable for pre-washing seriously stained
clothes.
Way of use
Step1-step4 are the same as those of the full
automatic programs
Step5: Press "wash" button one time, the soak
wash light is on.
Step6: Press program to select the program
which needed.
Step7: Press start/pause button, the washing
machine will start, press this button again in the
operation, the washing machine will pause.
Step5: Press rinse button 3 times, and the
rinse light is off, press spin button the spin
light is off. The other steps are same as top
step.
Step5: Press the spin button 3 times, the
spin light is off. The others steps are same
as the top steps.
Step5: Press the wash 4 times, and the wash
light is off, press the spin button 3 times, and
the spin light is off. The others steps are
same as the top steps.
Step5: Press the wash button 4 times, and
the wash light is off. The others steps are
same as the top steps.
Function indication
The corresponding lights and design to the process "Soak"
"Wash" "Rinse" "Spinning" are all turned on, and the light
corresponding to "Soak" will flash after the start.
The light and design corresponding to "Wash" will be turned on,
and it will flash after the start.
The light and desgin corresponding to "Wash" and "Rinse" will
be turned on, and the light corresponding to "wash" will flash
after the start.
The light and design corresponding to "Rinse" will be turned on,
and the light corresponding to "Rinse" will flash after the start.
The light design corresponding to "Rinse" and "Spin" will be
turned on, and the light corresponding to "Rinse" will flash after
the start.
Soak
Water injection
Soak
Wash
Water injectionWater injection
Rinse for the first time
Drain
Wash
Wash
Drain
Wash
Spin
Drain
Spin
Drain
Spin
Rinse
Spin
Rinse for the second time
Water injection
Drain Drain Drain
Rinse
Water injection
Rinse
Water injection
Drain
Rinse
Water injection
SpinSpin
Spin
Spin
Spin
Water injection
Drain Drain
Rinse
Water injection
Rinse
Water injection
Rinse
Water injection
RinseRinse
Spin
Spin
The spin time of 5 programs are different from
Spin
each other, applicable for drain the residual
water or only for spinning the wet clothes.
Preset program
Preset time means the starting time of washing.
1. Switch on the power.
2. Open the tap and lay down the drain hose.
3. Put into the washing and detergent.
4. Select the proper water level according to the quantity of clothes.
5. Select the functions and programs.
6. Press "Preset" button to select the starting time of washing.
7. Press "Start/Pause" button and close the lid.
9
Step 5: Press the wash button 4 times, and the
wash light is off, press the rinse button 3 times,
and the rinse light is off. The others steps are
same as the top steps.
Method of use of "preset" button
The light will move in turn as per press.
Preset
The light and design corresponding to "Spin" will be turned on, and
the light corresponding to "Spinning" will flash after the start.
Confirmation of the preset
After the preset starting, the corresponding light will be turned on, the display digit shows the washing
machine starting time.
After starting preset, you can press the preset button continuously to check the preset status, then loose the
preset button, the program returns to preset status, if you open the lid now, the washing machine will alarm.
Drain
Spin
10
Page 7

WAY OF USE
INSTALLATION
Soak wash
1. Switch on the power.
2. Open the tap and lay down the drain hose.
3. Put in clothes and detergent.
4. Select proper water level according to the weight of clothes.
5. Select the "Function" and "Program".
6. Press the "Function" button, the lights of "Soak" "Wash""Rinse""Spin" will turn on.
7. Press "Start/Pause" button and close the lid.
Confirmation of soak:
After pressing on the "Start/Pause" button, the icon "Soak" will flitter.
Wash of blanket
The weight of the blanket should be less than 3kg, and please select the heavy program to wash and it had better use
particular mesh bag for the heavy washing and the method is as follows:
1. After the detergent is dissolved with proper amount of warm water (below 50 ), pour it into the tub of the washing
machine.
2. Fold up the blanket and put it into the washing tub.
3. Switch on the power and press the "Program" button to select the "Heavy wash" program and "Level 6" or "Level 5"
water level.
4. Press the "Start/Pause" button, and close the lid.
5. After ending of washing, dry in the ventilated place with sunshine.
6. Only the blanket with marks "Hand wash" can be washed.
Use of fabric softener
Placement of the washing machine
The washing machine should be placed inside the room with a flat floor, which is convenient for water
supply and drain, has low moisture and no direct sunshine, and does not freeze in winter. All foam packing
(including the fixing frame on the base foam) should be taken off, otherwise the washing machine will not
work.
Please adjust the washing machine according to the instructions below to make the washing machine run
steadily.
1. Loose the fixing pole on the adjusting foot, screw in or screw out the adjusting foot to make the four
braces placed even on the floor. (the adjusting foot is on the left front bottom of the cabinet).
2. When the floor is slanting or uneven, it is not easy to make even only by the adjusting foot. Then the
rubber band can be added to the unflat place.
3. Open the cover lid and watch gradienter, when the air bladder move to the red circle mark in the
gradienter, or see the hole of the top frame and the washing tub are found to be basically in alignment,
that is to show that the washing machine is placed flat, just like followed figure.
4. After the adjustment the fixing pole should be screwed back and tight.
Notices:
If the washing machine is not placed flat (the inclination angle is over 2 ), it may cause great vibration or
automatic check and rectification or other abnormal circumstances will often take place in the course of
spinning.
o
Fill softener into the injection mouth for fabric softener (at the tub mouth).
Wash of bulk clothes
Please put the bulk clothes into mesh bag in time of washing, and then add washing powder and select the full process
program to wash them.
Pre-wash of the dirty clothes
As for seriously stained dirty clothes with mud, one of the "Rinse-spin" program can be selected to perform pre-washing,
and then add washing powder and select the fully automatic program to wash them.
11
Loose
Fixing pole
Tight
Adjustable foot
Screw in
Screw out
Base foam Fixing frame
Air bladder
The mark of gradienter
12
Page 8
INSTALLATION
INSTALLATION
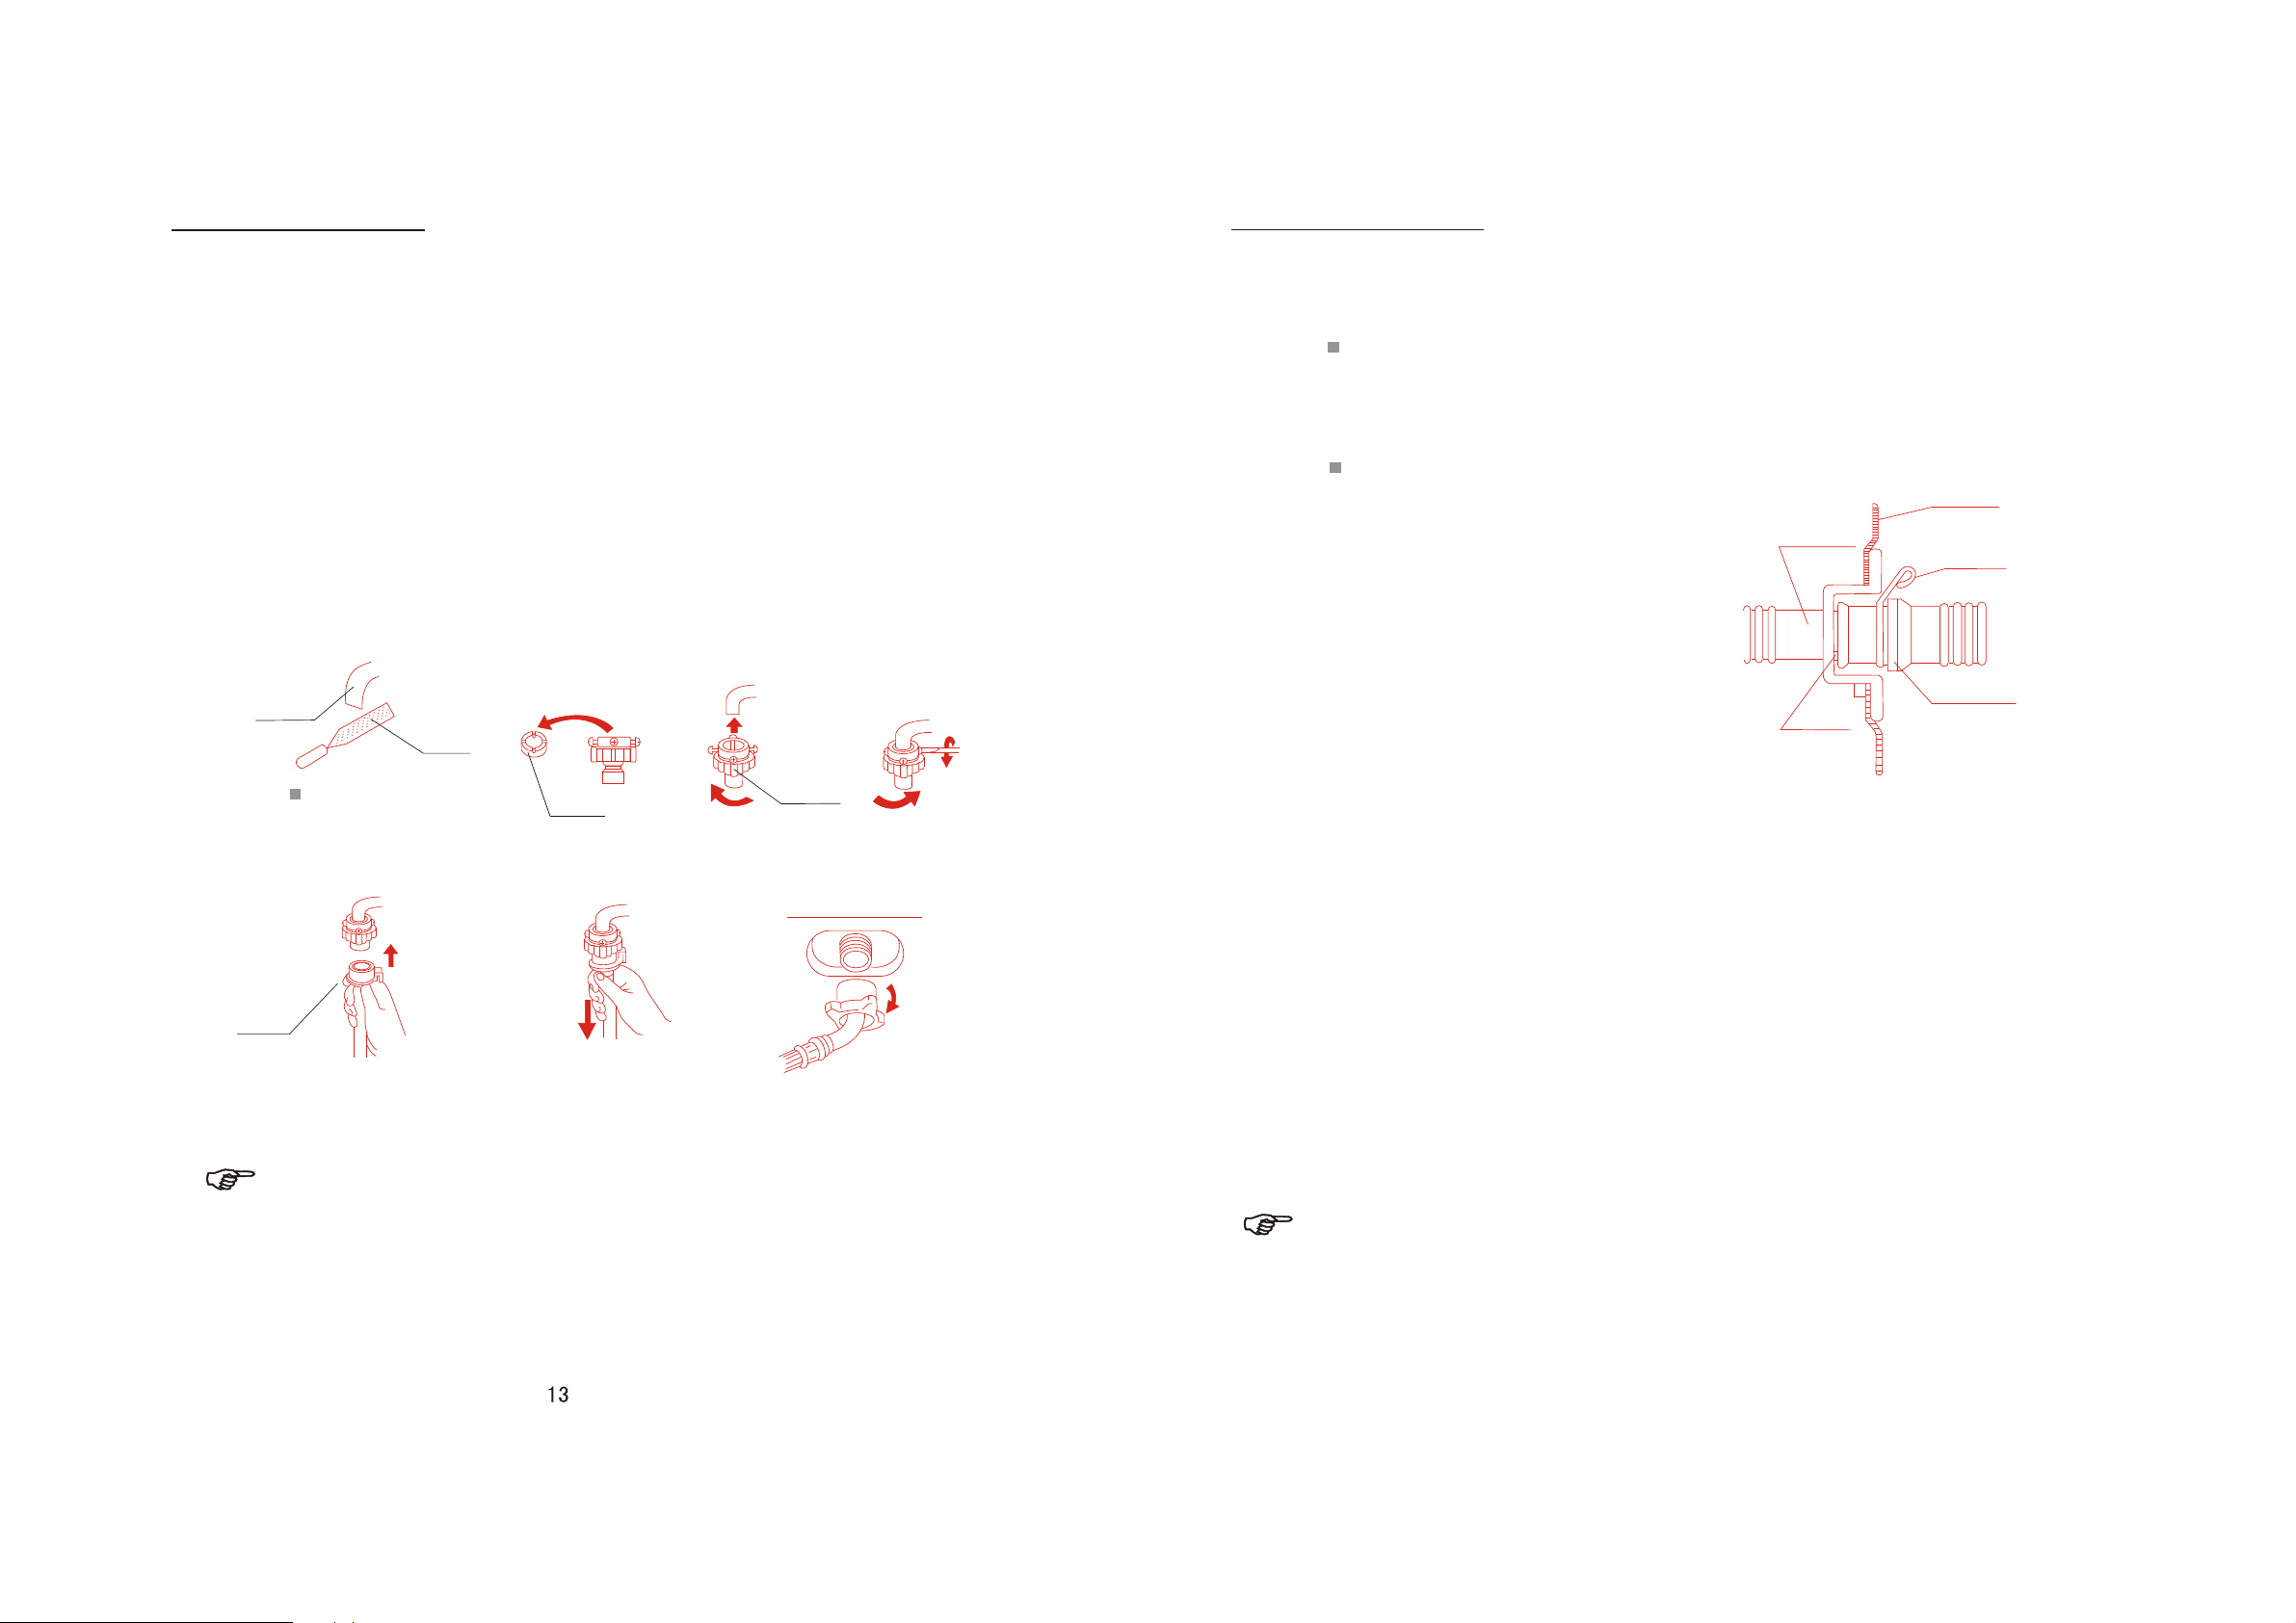
Installation of the water inlet hose
1. Check the tap mouth. If it is not even, it can be filed even.
2. Screw loose the locking ring, but do not let the locking ring drop off. Screw the four screws at the same
distance.
3. Put the universal connector into the tap and stick to the tap mouth at the most and then screw in the screws.
4. Screw tight the locking ring to the right.
5. Pull the skirt of one end of the water inlet hose downwards, and then plug in the universal connector. A sound of
KA-TA" means proper connection.
"
6. Grasp the water inlet hose by hand and pull it downward to see whether it is secured
7. Screw the nut on the other end of the water inlet hose into the water inlet of the washing machine to the most.
Tap
File
If the calibre of the tap
is big, the connecting
ring can be taken off.
Connecting ring
Locking ring
Installation of the drain hose
Nip the fixing ring with hand to make it loose and engaged on the drain hose and put the drain hose into the
leading skirt of drain hose in the bottom of the washing machine to the end at the most (soak the head of the drain
hose in warm water, it will make the engagement easy), and loose the fixing ring to let it clasp the drain hose.
It had better put the outlet of the drain hose into the
nearby drainage permanently, which can save the trouble
that the drain hose has to be connected each time before
use. If the drainage is far from the washing machine, it
can be solved by connection of the drain hoses head with
end to extend.
Inner hose
Leading ring
Cabinet
Fixing ring
Drain hose
Skirt
Notices:
After installation, do not start the washing machine in haste. First open the tap to let the water press into
the water inlet hose to check whether there is any leakage in the connectors on the both ends. Sometimes it is
difficult to fix the water inlet hose due to the problem of the tap, you can ask an experienced man for help or
contact the local customer service department. When the pressure is too high, please shut the tap a little to avoid
water leakage.
Notices: drain faults will be caused when the drain hose is blocked or after the extension of the hose, it is above the
water outlet.
14
Page 9
INSTALLATION
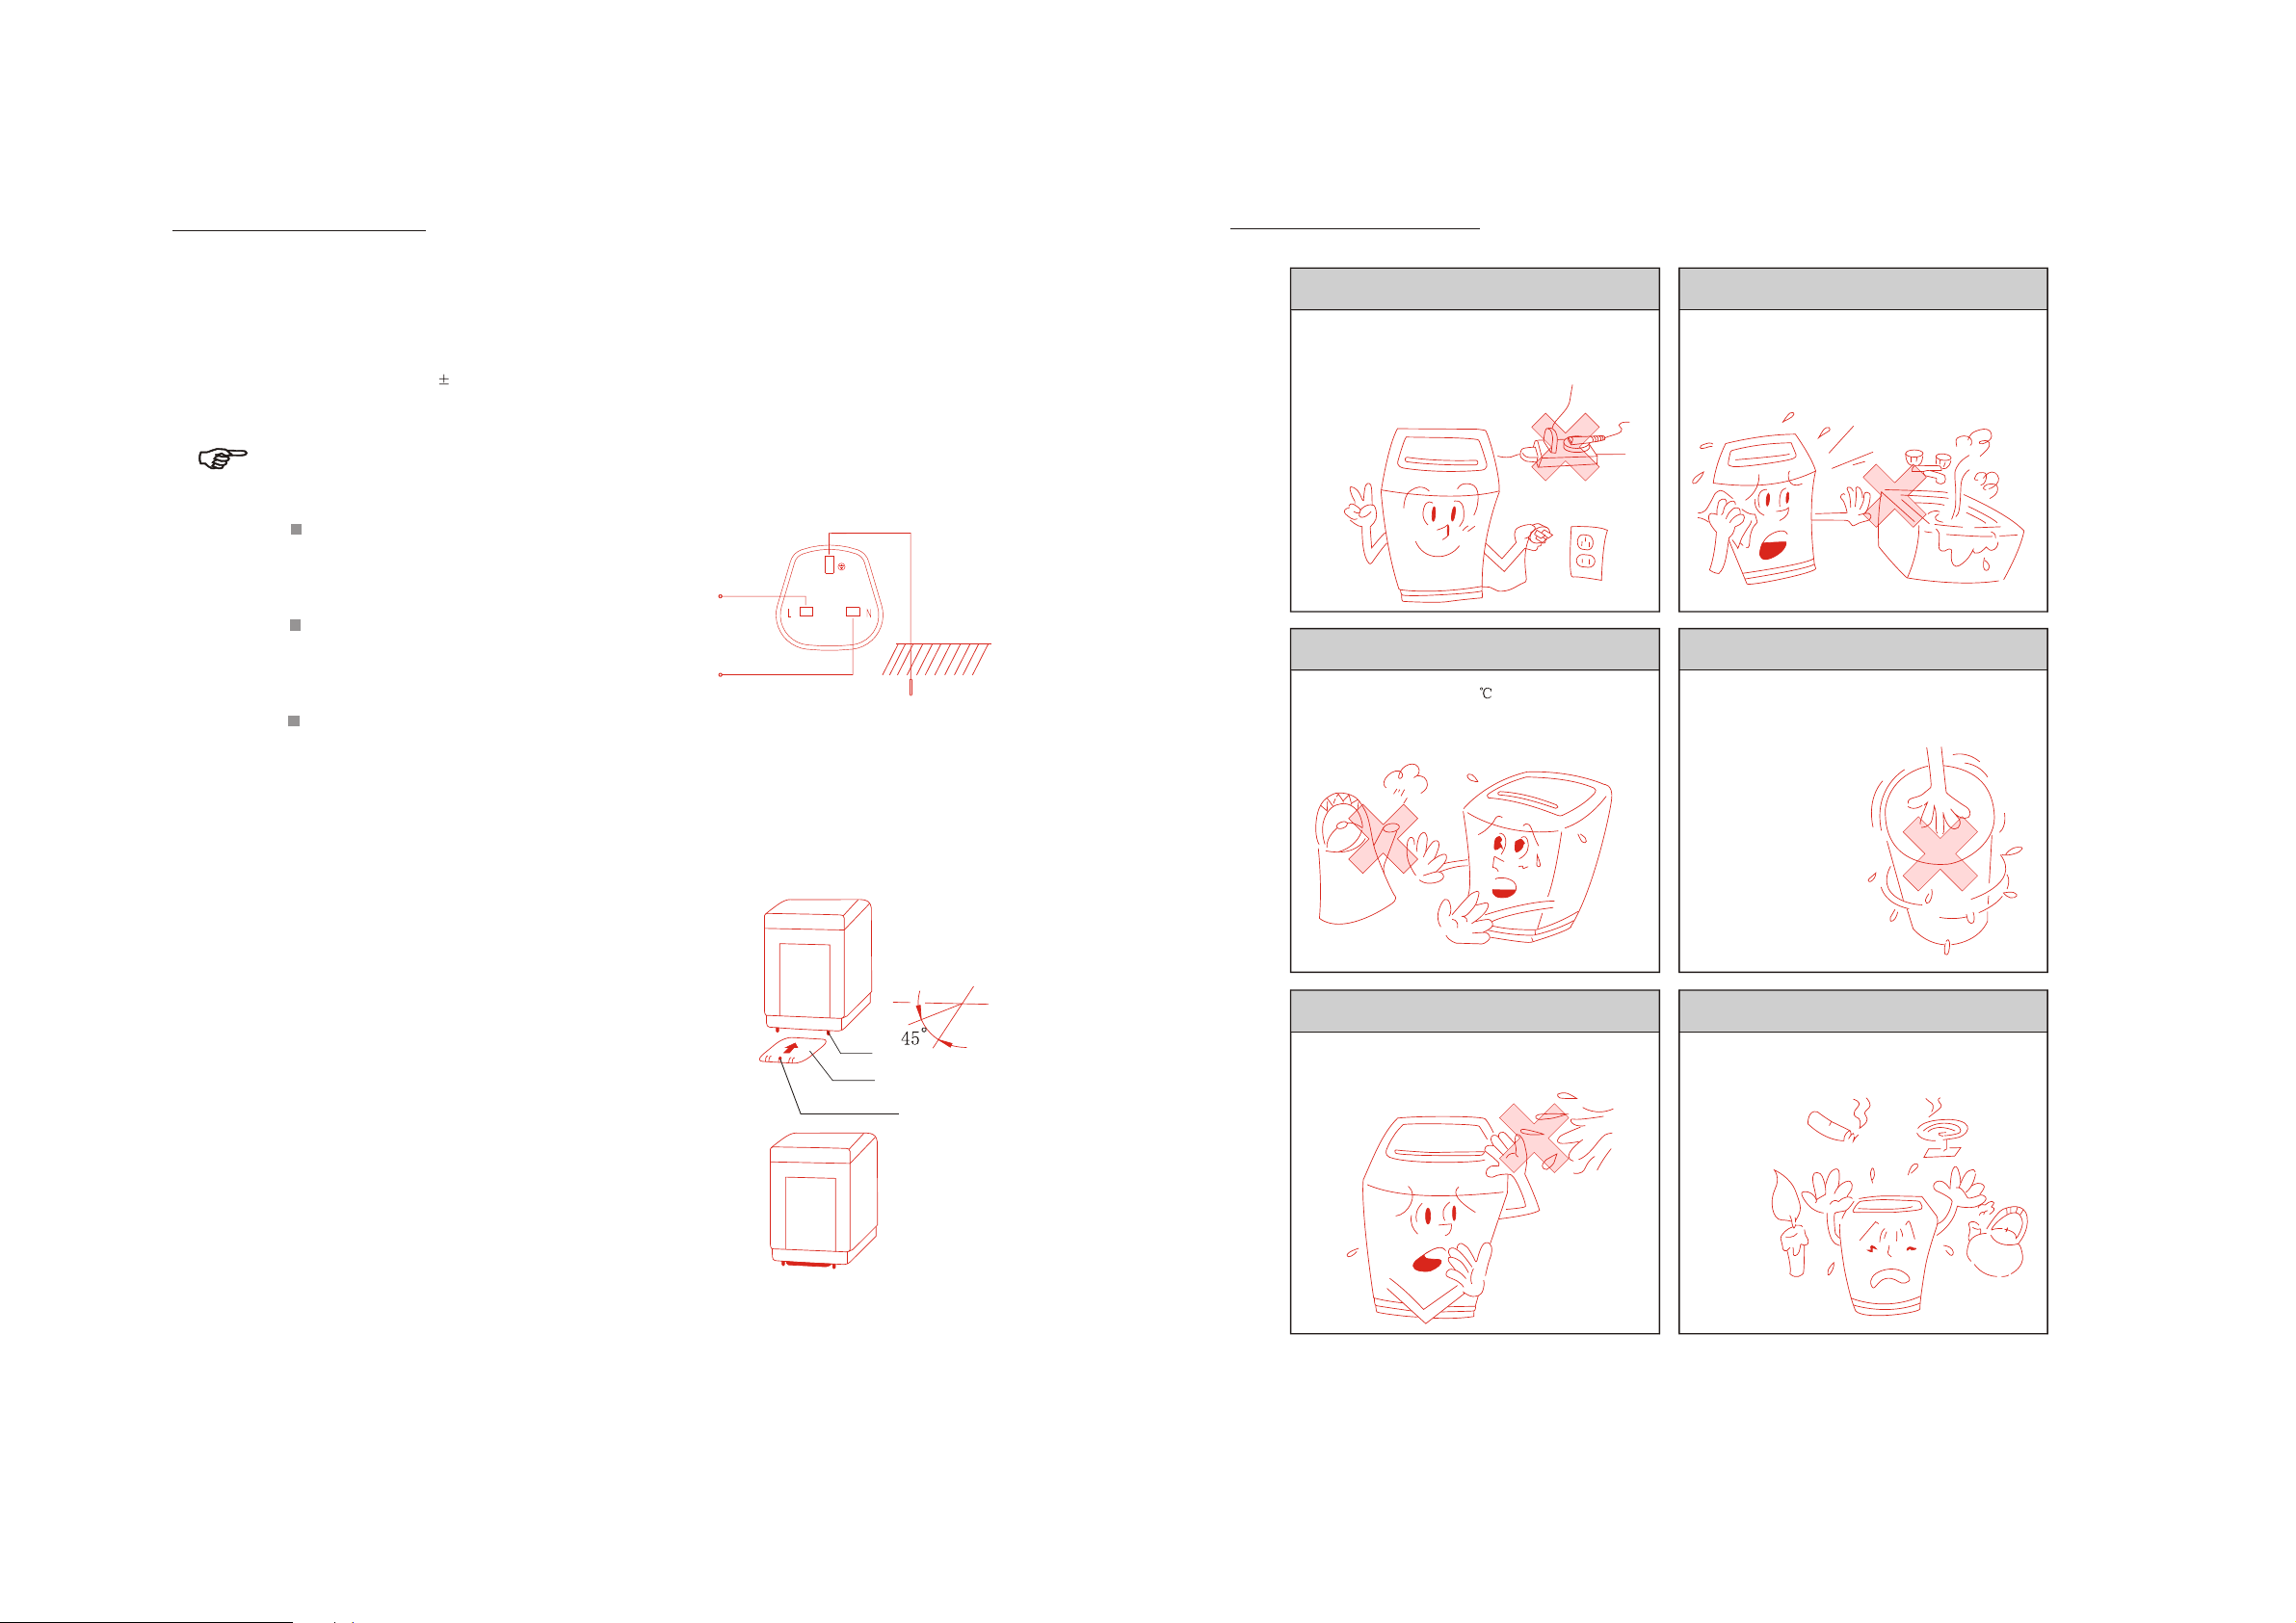
PRECAUTIONS
Power source and grounding
The washing machine employs alternative current with the rated voltage and frequency . When the
voltage fluctuates between 10% of rated voltage, the washing machine can work normally. A special power
socket for the washing machine had better be set beside the washing machine for convenience and safety. The
method of connection of the socket is as the figure below.
Notices:
The socket and the grounding wire must be installed by an
electrician to prevent incorrect installation or use of the socket,
and to guarantee the safety of use of electricity.
The power wire of the washing machine employs Y
connection and the replacement of the power wire should be
carried out by professionals
No connection of the grounding wire with the neutral wire,
otherwise the cabinet will be charged, which is likely to cause
the danger of electric shock.
Rated
voltage ~
Grounding wire
Safe use of power
Please put the power plug into the special rated
voltage socket to avoid fire accidents. The plug-in
and plug-out of the wire should go on with the plug
held with hand.
Don't use hot water
Don't use hot water over 50 to avoid deformation of
the plastics.
Avoid damp
Don't place the washing machine in the environment
with extreme damp, for the extreme damp will low the
functions of the insulation of the machine, which may
cause electric shock or faults.
Don't open the lid in time of spinning
If the lid is open in time of spinning, the washing
machine will arrest at once, which will shorten the
service life. Please avoid opening the lid in the
course of operation, don't
put hands into the tub,
it is very dangerous
that the clothes wind
the hand despite of low
speed of rotation.
Installation of the base cover
1. Slant the washing machine with angle of 45 in the direction of
the arrows showed in the figure, put the side with the clasper to the
washing machine and the other side to the ground, insert back lid
along the direction of the upper slot of the base from the back side
of the washing machine.
2. Put the base cover straight to the point and then press the back lid
upward till there is a sound of "Gaba" and then screw in a self-
tapping screw.
o
15 16
Slot
Base cover
Hole for Self-tapping screw
Avoid spray of water
Don't let water spray onto the places for operation
switches. That these places sprayed with water will
cause electric shock and faults.
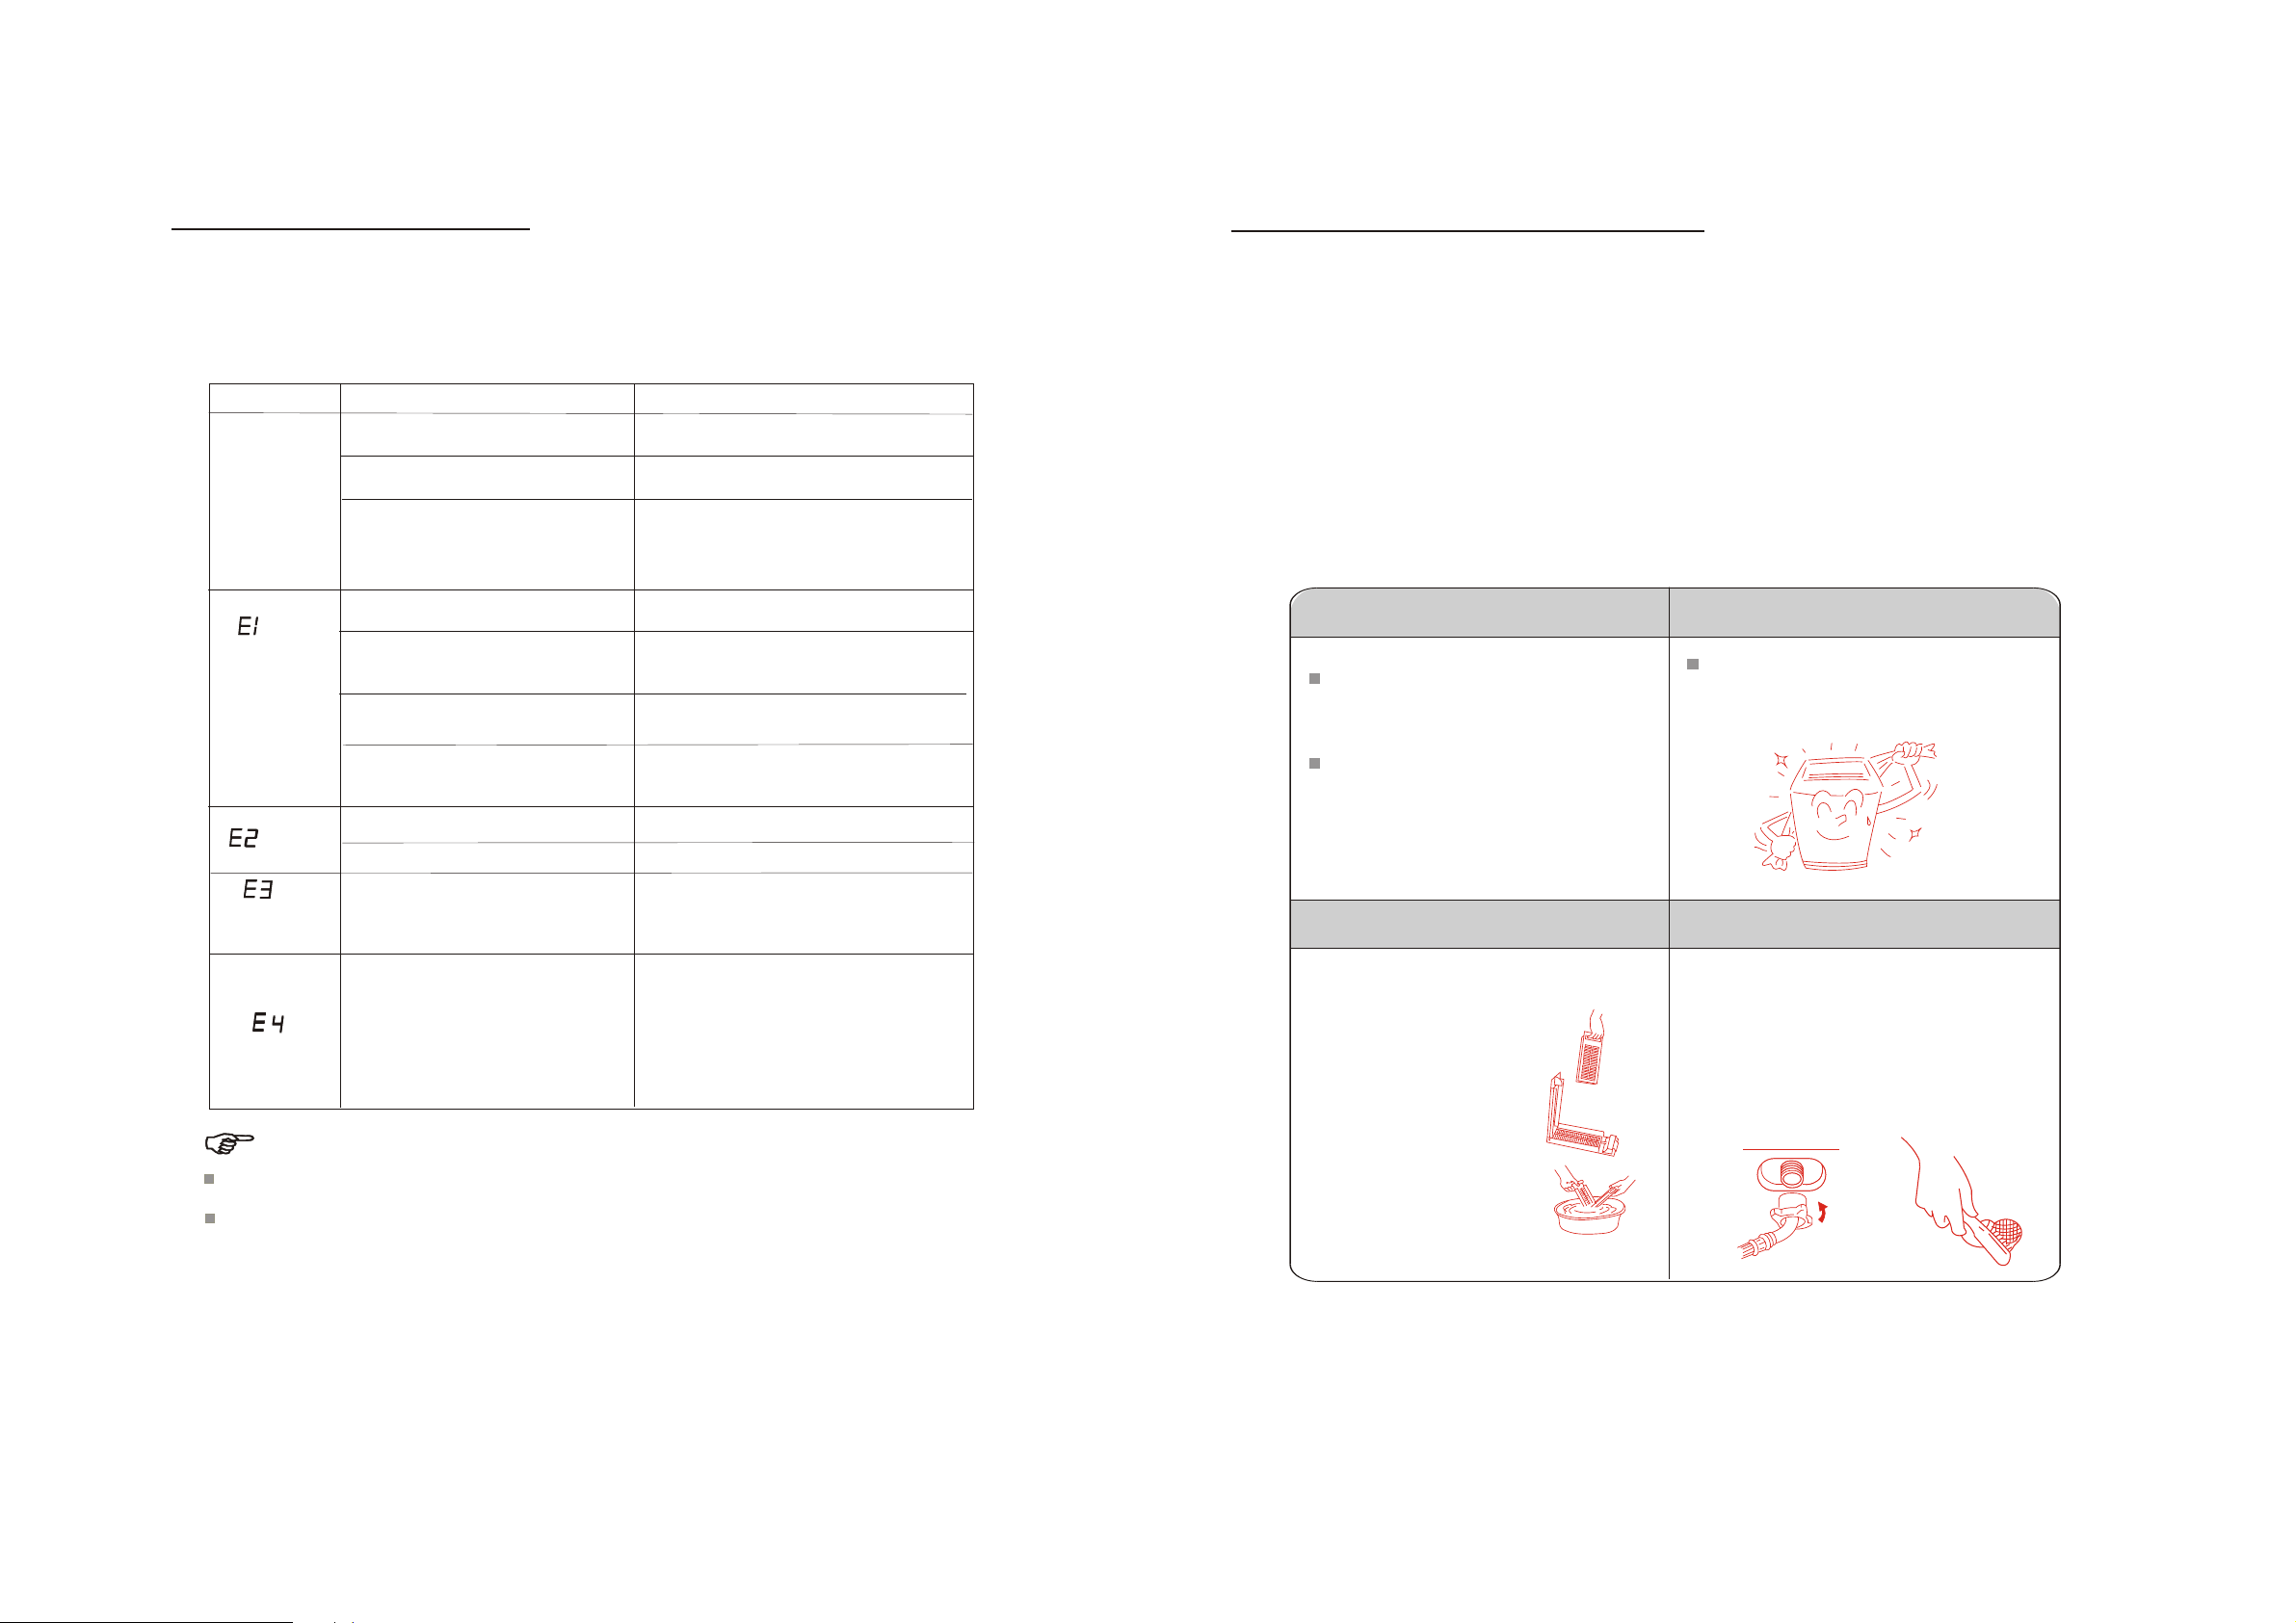
Keep away from smoke and fire
Don't place lighted candles, cigarettes, mosquitorepellent incense and thermos bottles nearby to avoid
fire accidents
or deformation
of the plastics.
Page 10
TROUBLE SHOOTING
METHOD OF MAINTENANCE
Diagnosis of faults
The washing machine is able to automatically judge some faults by sending out buzzing sound to alarm and indicate the cause
of faults with several indicator light flittering.
Symptom
Does not
work completely
(Affusion
trouble)
(Door open
warning)
If plug is not plugged tight, or the
power switch is not switched on.
If no electricity in the socket or the fuse is
broken
If no water in water tap
If the net of water inlet valve
is stopped up
If the washer is leakaged
If open the cover lid before spinning
If open the cover lid after preset start
Cause
If the power is cut off
If the water tap not open
Solution
Using agin after the power on
Plug the power plug tight and switch
on the power switch.
Send for electrician to check and repair the
socket or the fuse (see the circuit diagram)
Power off the washer until
water come to use
Open the cover lid and open
the water tap and close the cover lid
Open the cover lid and clean up
the net then close the cover lid
Power off washer, take off the plug and
make the machine be repaired
Close the cover lid
Close the cover lid
The following cases are not faults
1.There is the phenomenon of incoming water in time of wash or rinse, which is due to that the water level switch checks the
water level and it supplies water automatically due to the water level drop.
2.There is the phenomenon of intermittent spinning in the beginning of spinning, which is performed to achieve better spinning
effects.
3. In time of rinse with water injection, there may be no drain in the drain hose, which is caused by that the water level does not
reach the overflow mouth due to low water pressure or the low water level set.
4. In the course of spinning, there is a phenomenon of rinsing, which is caused by that the automatic rectification of the
lopsideness of the clothes due to unbalance produced in the course of spinning.
Method Of Maintenance
After end of the program
The washing machine will send off the sound of
"DOU-DOU" after end of any program operation
to remind you to take out the washings or operate
it again.
Please shut off the tap, pull out the plug in time of
not in use to avoid water leakage.
Use soft cloth to wipe off the water and dirt on the
surface each time after use of the washing machine.
Detergent, propellant and other chemicals are not
allowed to use to avoid the damages on the surface.
Maintenance of shell
(Scuff the shell
in time of spin)
(Drain trouble)
If the clothes uneven heavily
If the drain hose is blocked or the mouth of
drain is too high
Open the cover lid and distribute
the clothes even, and then close the lid
Open the cover lid, eliminate the trouble and
close the cover lid.
Notices:
If the machine is not drain when startup drainage because of air pressure, please lay down the drain hose then put it in the
normal position.
"A washing machine stops the spinning automatically. After it is changed into water
utomatic rectification" is that the
injection, the pulsator will frequently mix the washing clockwise and couterclockwise (which equals to rinse). That the
weight of the washing is too much or too little, or that the washing machine is not placed evenly will cause the unbalance
in time of spinning and is likely to switch into the automatic rectification and increase the times of rinse. If there is still
abnormal circumstances after checking the above-mentioned points, please pull out the power plug and contact with the
local customer service department . Don't repair it by yourself.
17
Cleaning of the lint filter
After using the washing
machine for a period, please
clean according the following
steps:
1. Take out the lint filter.
2. Turn the mesh bag outside
and wash it clean in the water.
3. Restore it and refix it.
Cleaning of the water inlet
After long time use, the water inlet mesh bag may be
blocked with crud, and please clean it according to the
following steps:
1. Shut off the tap and switch on the power.
2. Start the washing machine and continue for 5 seconds
(let the water flow in the water inlet hose run into the tub).
3. Load off the water inlet hose, take out the water inlet
mesh bag from the water inlet valve, clean the mesh bag,
then assemble the mesh bag in the valve and load the
water inlet hose.
18
 Loading...