

Page 1

Page i
TABLE OF CONTENTS
SECTION 1: Important Safety Instructions .....................................4
SECTION 2: Summary of Features...................................................5
SECTION 3: Installation & Map Downloading................................7
3.1 Ostia Application Installation...............................................................................7
3.2 Installing & Viewing Maps – The MapFinder Utility...........................................8
3.2.1 MapFinder – Usage Tips...............................................................................9
3.3 Selecting Maps to be Downloaded or Viewed....................................................13
3.3.1 Select Maps by Double Clicking With Your mouse....................................13
3.3.2 Select Maps by Entering a City, County or Zip Code; ..............................17
3.3.3 Select Maps by Creating a Selection Rectangle ..........................................23
3.4 Choosing a Destination for Maps to be Downloaded or Viewed .......................27
3.4.1 Copy Selected Map(s) to a CF or SD Card Inserted in Your PC.................27
3.4.2 Copy Selected Map(s) to Storage Resource on Your Pocket PC.................31
3.4.3 Extract Selected Map(s), or the Current Map to Your PC Hard Drive ........ 34
3.4.4 Extract All Maps to Your PC Hard Drive...................................................36
Page 2

Page ii
3.5 Viewing a Map on Your PC................................................................................38
3.6 MapF in der Utilities.............................................................................................39
3.6.1 Delete All Maps on Your PC Hard Drive....................................................39
3.6.2 Delete Current Map From Your PC Hard Drive..........................................41
SECTION 4: Uninstall Ostia Software ............................................42
SECTION 5: Using Ostia ..................................................................42
5.1 Ostia Menus........................................................................................................45
5.1.1 File..............................................................................................................46
5.1.2 Find.............................................................................................................48
5.1.3 View............................................................................................................55
Note: Destination, Origin and Full Route functions are valid only if “Enable GPS” is
not checked......................................................................................................57
5.1.4 GPS.............................................................................................................58
5.1.5 Setup................................................................................................................61
5.2 View Controls .....................................................................................................64
SECTION 6: Tips on Getting Started..............................................65
SECTION 7: GPS (optional).............................................................65
Page 3

Page iii
7.1 Requir e d Components .........................................................................................66
7.2 Installing GPS .....................................................................................................66
7.3 Using GPS..........................................................................................................72
iGPS-CF™ User’s Tips......................................................................73
SECTION 8: Troubleshooting..........................................................74
SECTION 9: Technical Support.......................................................74
SECTION 10: System Requirements...............................................74
10.1 Pocket PC/Handheld PC Requirements ...........................................................74
10.2 Desktop/Laptop Requirements.........................................................................75
Page 4

P age 4
SECTION 1: Important Safety Instructions
For the safety of yourself and others, please observe the
For the safety of yourself and others, please observe the For the safety of yourself and others, please observe the
For the safety of yourself and others, please observe the
following safety requirements:
following safety requirements:following safety requirements:
following safety requirements:
! Do not attempt to operate any Pharos GPS navigation and
routing system in a vehicle while the vehicle is in motion,
or in any way that interferes with safe driving.
! Secure your Pharos GPS receiver and Pocket PC to the
vehicle in such a way as to not endanger the driver or
passengers during driving or operation.
! Do not use the Pocket PC and Ostia in any area (country,
state, city, etc.) that prohibits the use of electronic displays
in motor vehicles.
! Navigation maps may contain errors and omissions or may
be out-of-date with recent road changes or road conditions.
Please be attentive to roadway sig nag e, all posted roadw ay
information, and the condition of the roads you are
traveling.
! Routes generated by Ostia are only recommendations and
are for personal and non-commercial use.
Page 5

P age 5
! Ostia software and the iGPS receiver may not be used for
any purpose in which failure of the products could lead to
personal injury, physical, or environmental damage.
! Pharos and its suppliers specifically disclaim any
warranties, either express or implied, for their products’
fitness for use in any high-risk activities.
SECTION 2: Summary of Features
# Compatible with NMEA-0183 compliant receivers
# Detailed street level mapping data.
# Mapping features include: location by address,
intersection, location of area points of interest,
longitude/latitude or Pocket Outlook contact saved by
user previously.
# Calculating route from one location to another, or
selection of a street location on the map.
# Up to 10 maps open at a time.
# Driving directions and route guidance.
# Tap street on the map to show the street name.
# Zoom in and zoom out with stylus.
# Creating a user waypoint database using Pocket
Outlook contact capability.
Page 6

P age 6
# GPS status indicators.
# Simulating car navigation.
# When navigating with the iGPS receiver:
− Choose from one of three routing methods: Fastest;
Shortest; Avoid freeways.
− Display the street name of the next turn at the
bottom of screen.
− Show the distance to and direction of the next turn.
− Show the distance to your final destination
− Voice prompt for reliable route guidance.
− Second prompt before a turn or highway
entrance/exit.
− Auto zoom-in before the turn or highway
entrance/exit and zoom-out after.
− Breadcrumb record of the route you traveled.
− Ability to navigate in compass mode.
− Use of the iGPS receiver position as the point of
origin.
− A one-touch Re-route button.
− Navigation data such as speed, longitude, latitude,
local time and direction of travel.
Page 7

P age 7
− Auto re-route option.
− Moving map while navigating with the iGPS
receiver.
− Selectable “North Up” or “Heading Up” for map
display.
− Selectable “on” or “off” for voice prompt.
−
Satellite constellation display.
SECTION 3: Installation & Map Downloading
3.1 Ostia Application Instal l ation
Installation of Ostia software requires that Microsoft ActiveSync
(Windows CE Services) be installed on your desktop computer.
If not, please follow the instructions in the section called
"Installing Windows CE Services to Communicate with a
Desktop Computer" in your Pocket PC’s user guide.
Note: ActiveSync is not
included with the Ostia software.
To install Ostia sof t ware:
Page 8
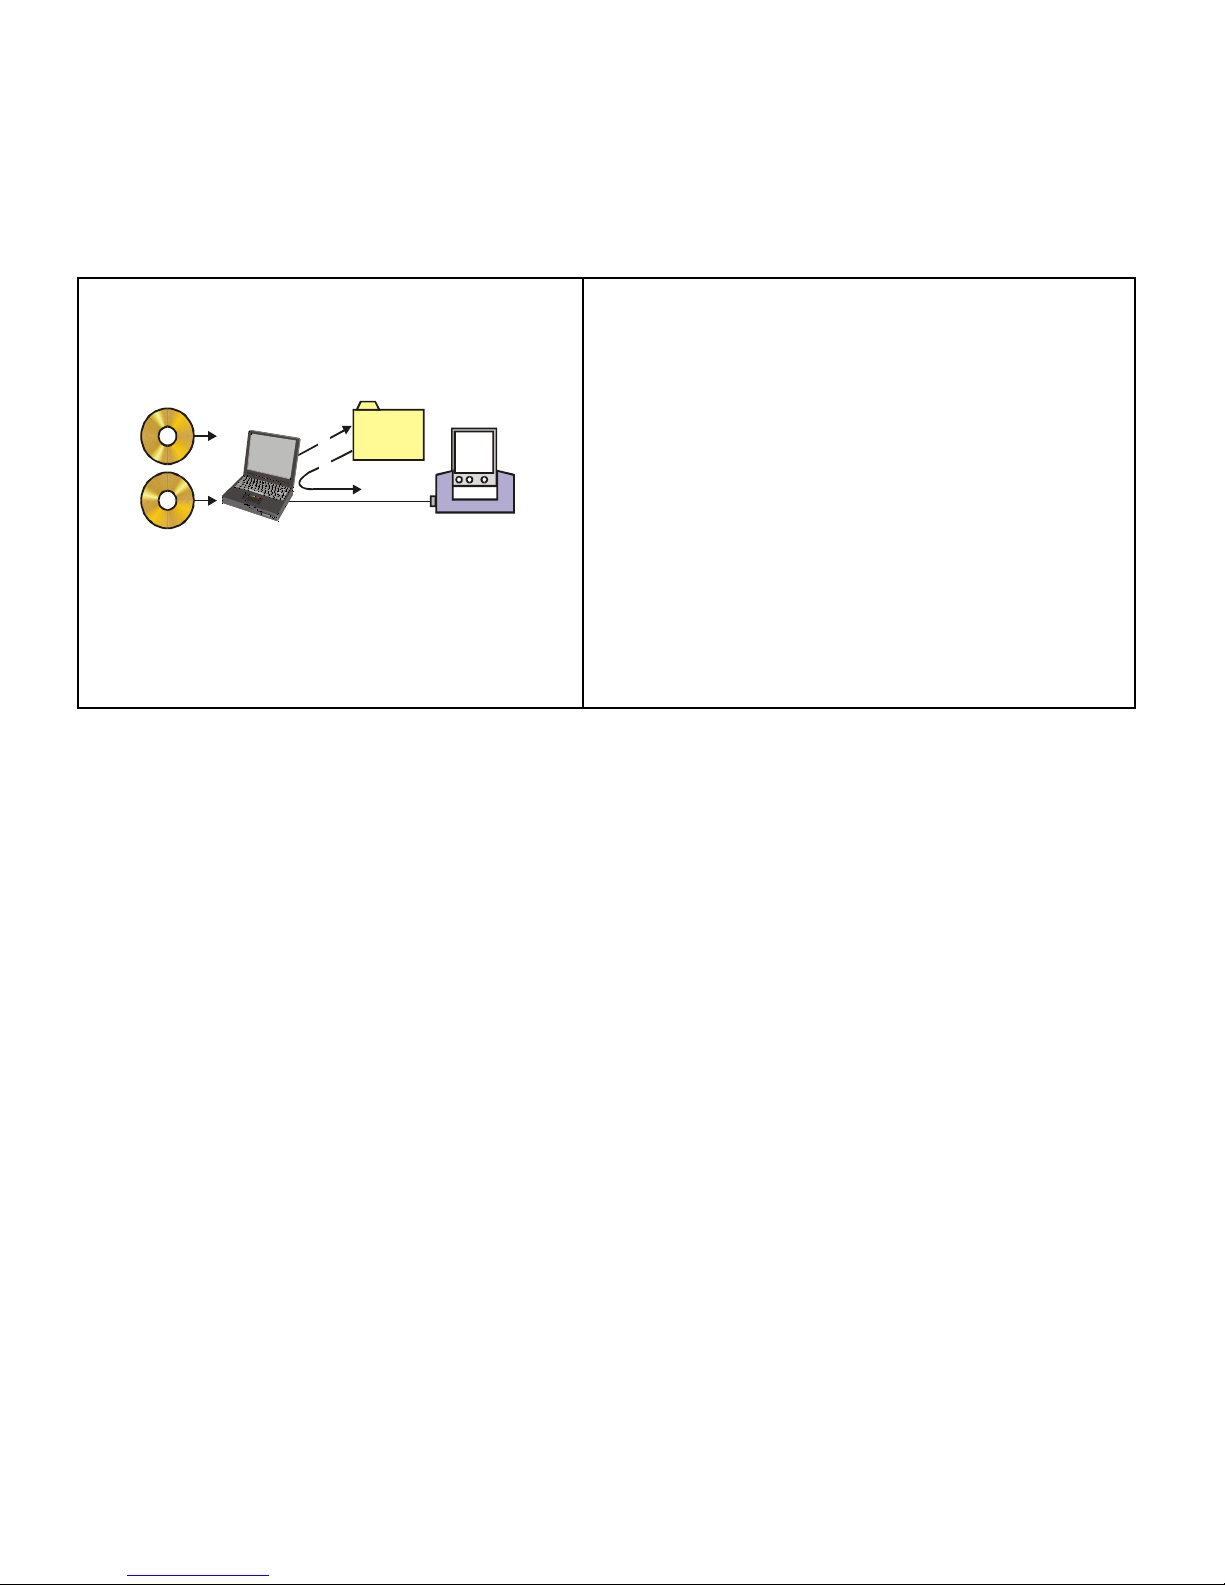
P age 8
Ostia
CD-ROM
Your
Computer
Storage
card folder
PDA
Docking Station
Serial Cable
1
2
Desktop
Softwa re fo r
Window CE
Figure 1
1. Insert the CD-ROM.
2. If Aut o Start is enabl ed for your CDROM, the Setup program will run
automati cally. If not , run the Setup
program on the CD-ROM.
3. Follow the on-screen ins tructions.
4. Once Ostia i nstallation has
completed, you will need to install
maps before you may begin using
the software.
3.2 Installing & Viewing Maps – The MapFinder Utility
Overview – MapFinder is an all-in-one utility that allows you to
search for maps anywhere in the country, select the m ap or g roup
of maps you wish to download, then download the selected maps
to your PC, Pocket PC or any storage media attached in either
device.
MapFinder allows you to select from a visual map, or select
maps by entering city, county or zip code. MapFinder also
allows you to view a map before you download it, and check to
see if a specific address, point of interest, street, or intersection is
contained within the selected map.
Page 9

P age 9
The MapFinder’s capabilities can be divided into four categories:
# Selecting maps – Gives you the ability to specify the
map or maps that you wish to download or view;
# Downloading maps – Gives you the ability to download
maps to your PC, Pocket PC or storage card;
# Viewing maps – Allows you to view a map on your PC;
# Utilities – Tools that allow you to manage your map
files.
This section will contain step-by-step directions for the major
functions within all four areas. Before starting to download
maps, however, it is recommended that you review the “Usage
Tips” section below.
3.2.1 MapFinder – Usage Tips
QUICK TIP!
The fastest, most efficient way to download a map to your
Pocket PC:
Use MapFinder to copy it to a CF or SD card inserted into your
PC, then remove the card and insert into your Pocket PC.
Page 10

Page 10
Follow Steps 3.3.1 & 3.4.1
Using this chapter of the user guide:
To download maps, use:
# Section 3.3 to select the maps to be downloaded, then
use
# Section 3.4 to pick the destination for the downloaded
maps
# Other key features are:
# Section 3.5 tells you how to view maps on your PC
# Section 3.6 tells you how to use some MapFinder
utilities.
Multiple Map Downloading Methodologies:
You can download
maps onto your PC, onto storage media within your PC, directly
from the Pharos CD-ROMs onto your Pocket PC or directly from
CD-ROMs onto storage media inserted into your Pocket PC.
Each method has its advantages:
1)
Downloading maps onto storage media inserted into
your PC – This is the fastest method to get maps from
Page 11

Page 11
the Pharos CD-ROMs onto your Pocket PC. This
involves simply copying the maps from the CD-ROMs
onto a CompactFlash (CF) or Secure Digital (SD) card,
removing the card from your PC and inserting it into
your Pocket PC.
2)
Downloading maps directly to your Pocket PC internal
memory or onto storage media inserted into your Pocket
PC – This is the simplest method to get maps onto your
Pocket PC, but there are two issues to keep in mind.
First, most Pocket PCs come with limited internal
memory, so you may want to monitor this resource
carefully. Secondly, because of the connection speed
between your Pocket PC and your PC, it can take quite a
few minutes to download maps onto any storage
resource located on your Pocket PC.
3)
Downloading (or extracting) maps onto your PC – Gives
you maximum flexibility using the MapFinder utility
when you are trying to find cities, download single or
groups of maps to your Pocket PC, or view maps
without having to stop and insert the Pharos map CDROMs. Some users choose to download the entire map
Page 12
Page 12
database to their PC; this function can be completed in
one easy step.
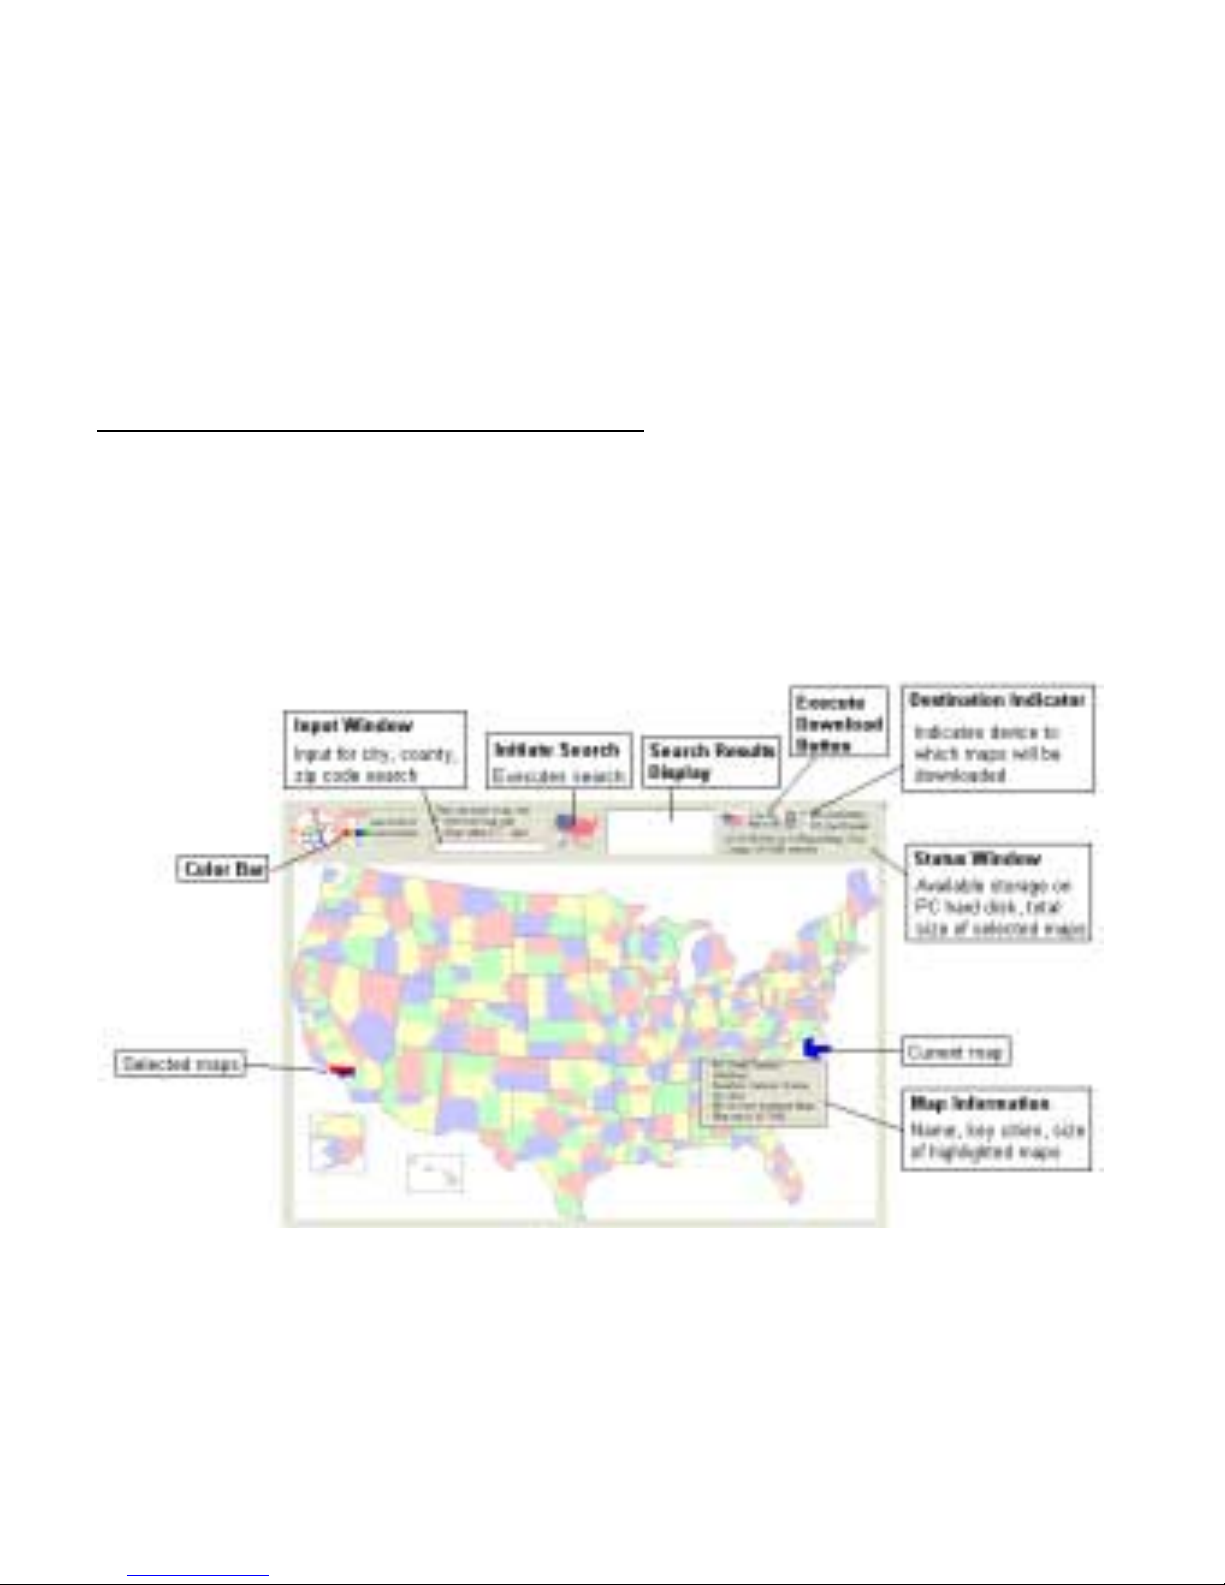
Navigating the MapFinder display
: The MapFinder display
allows you to easily use the full function of the program by
simply pointing and clicking your mouse. Pharos provides stepby-step instructions on using the key functions later in this
manual, but the diagram below provides an explanation of the
screen layout:
MapFinder Screen Layout
Page 13
Page 13
Exiting MapFinder
: Click the right mouse button and scroll
down to “Exit.”
3.3 Selecting Maps to be Downl oaded or Viewed
In this section, you will learn several methods for selecting maps
to be downloaded. To complete a download, you need to select a
destination, using the steps detailed in section 3.4.
3.3.1 Select Maps by Double Clicki ng Wi th Your mouse
1. Insert map CD into CD-ROM, CD should auto-run
and open the MapFinder. The maps contained upon
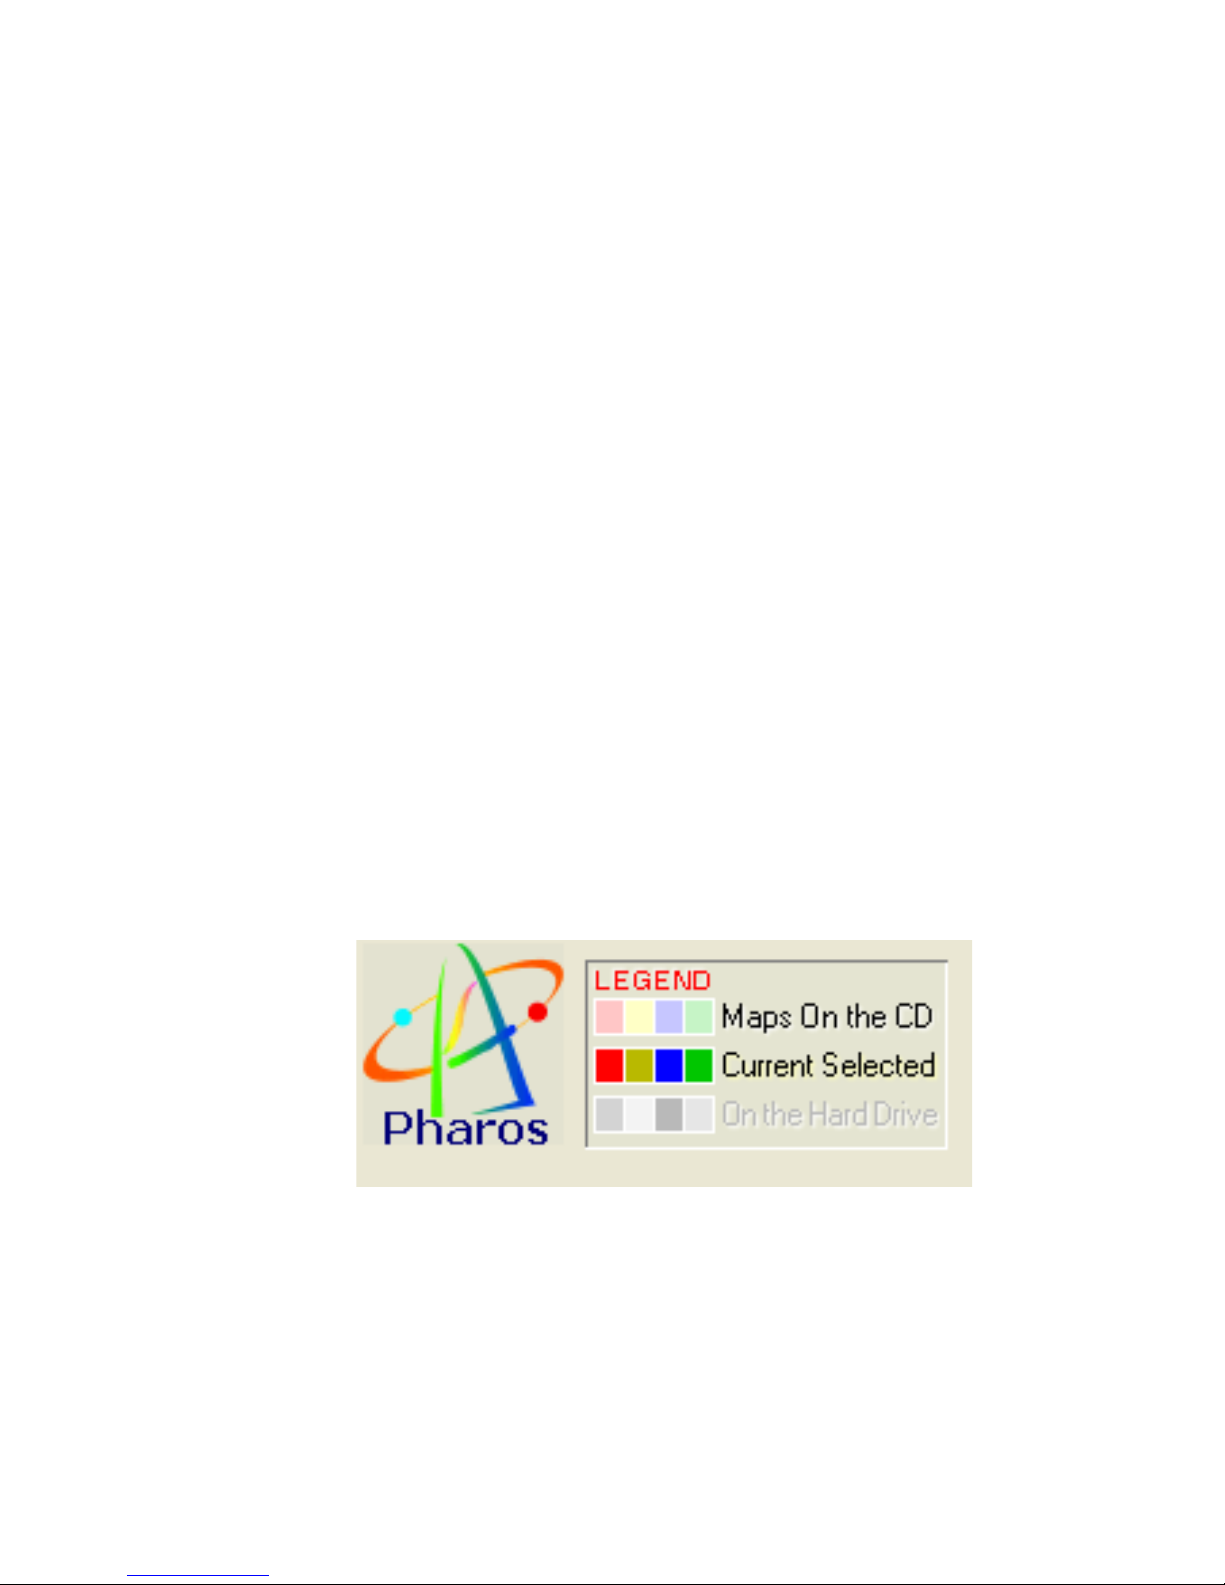
the inserted CD will be highlighted using the colors
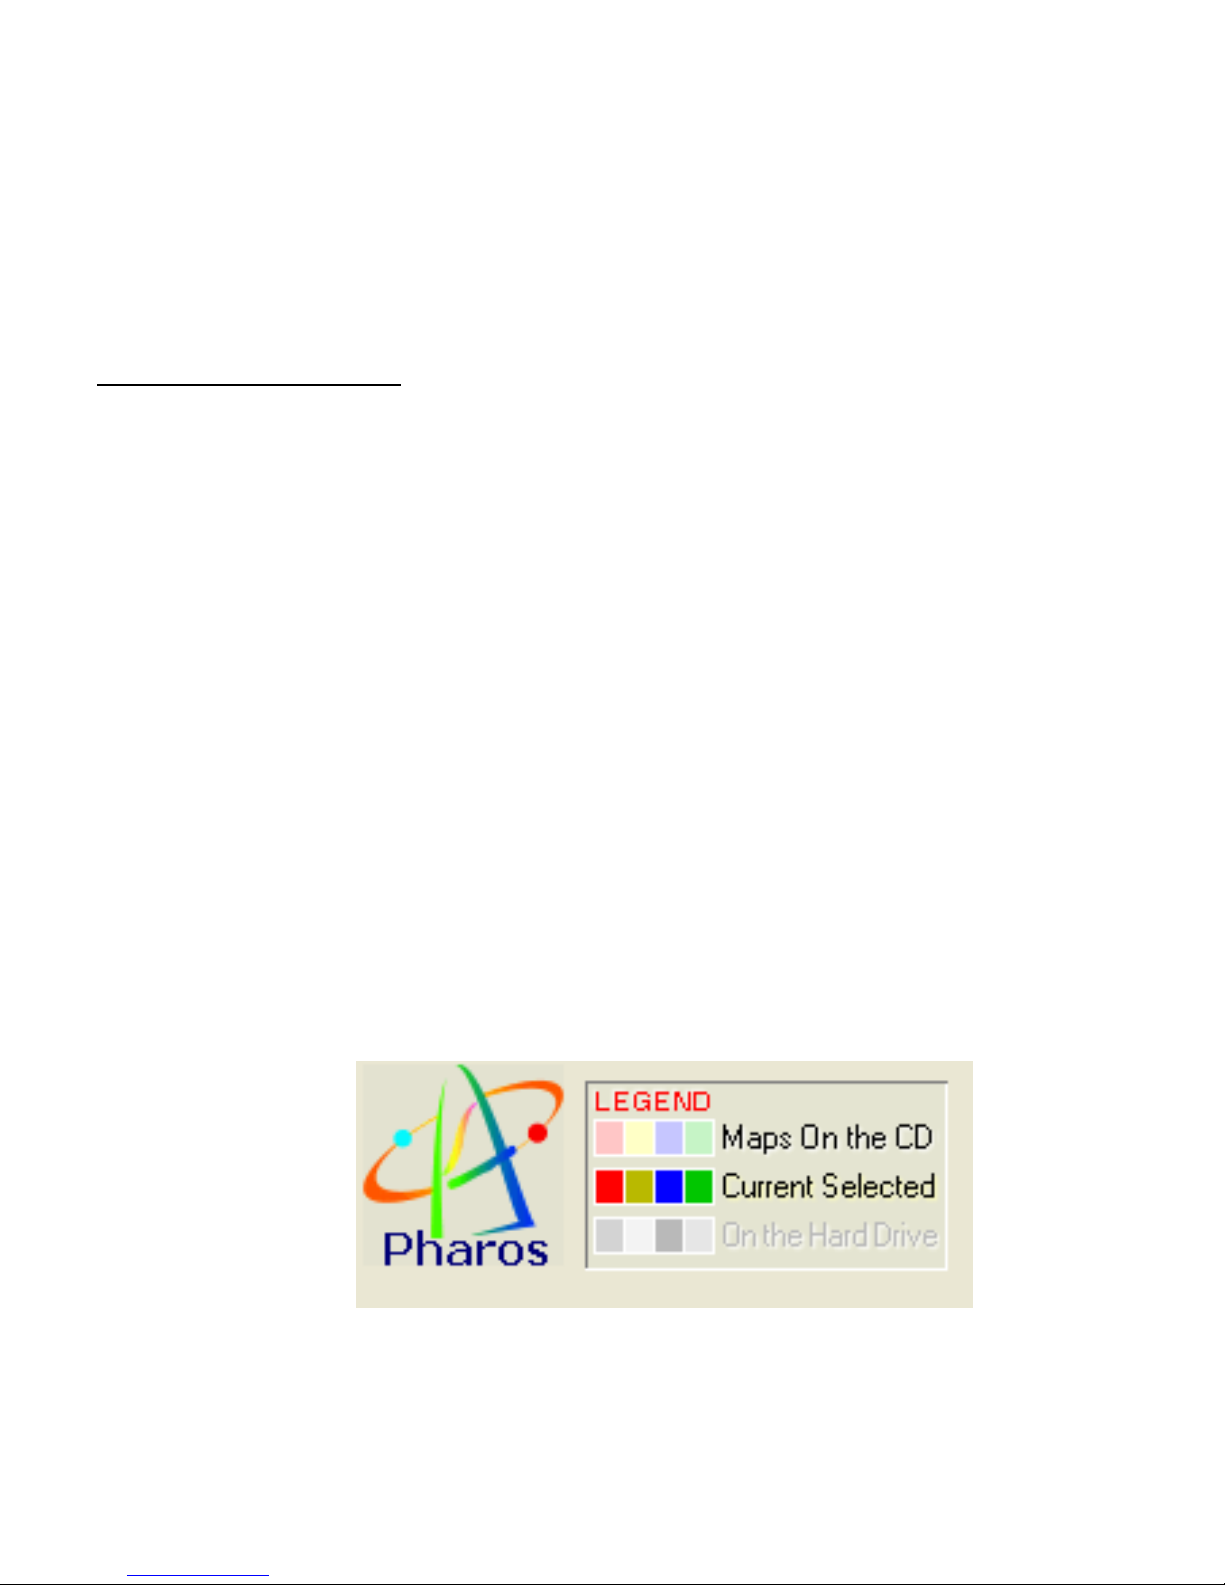
displayed in the Color Bar:
Page 14
Page 14
Color Bar – Upper left portion of screen
If CD does not auto-run, double click “My
Computer” > D:\. If you only want to select maps
that you have previously downloaded onto your PC
hard drive, start the MapFinder program by clicking
the MapFinder icon on your PC desktop.
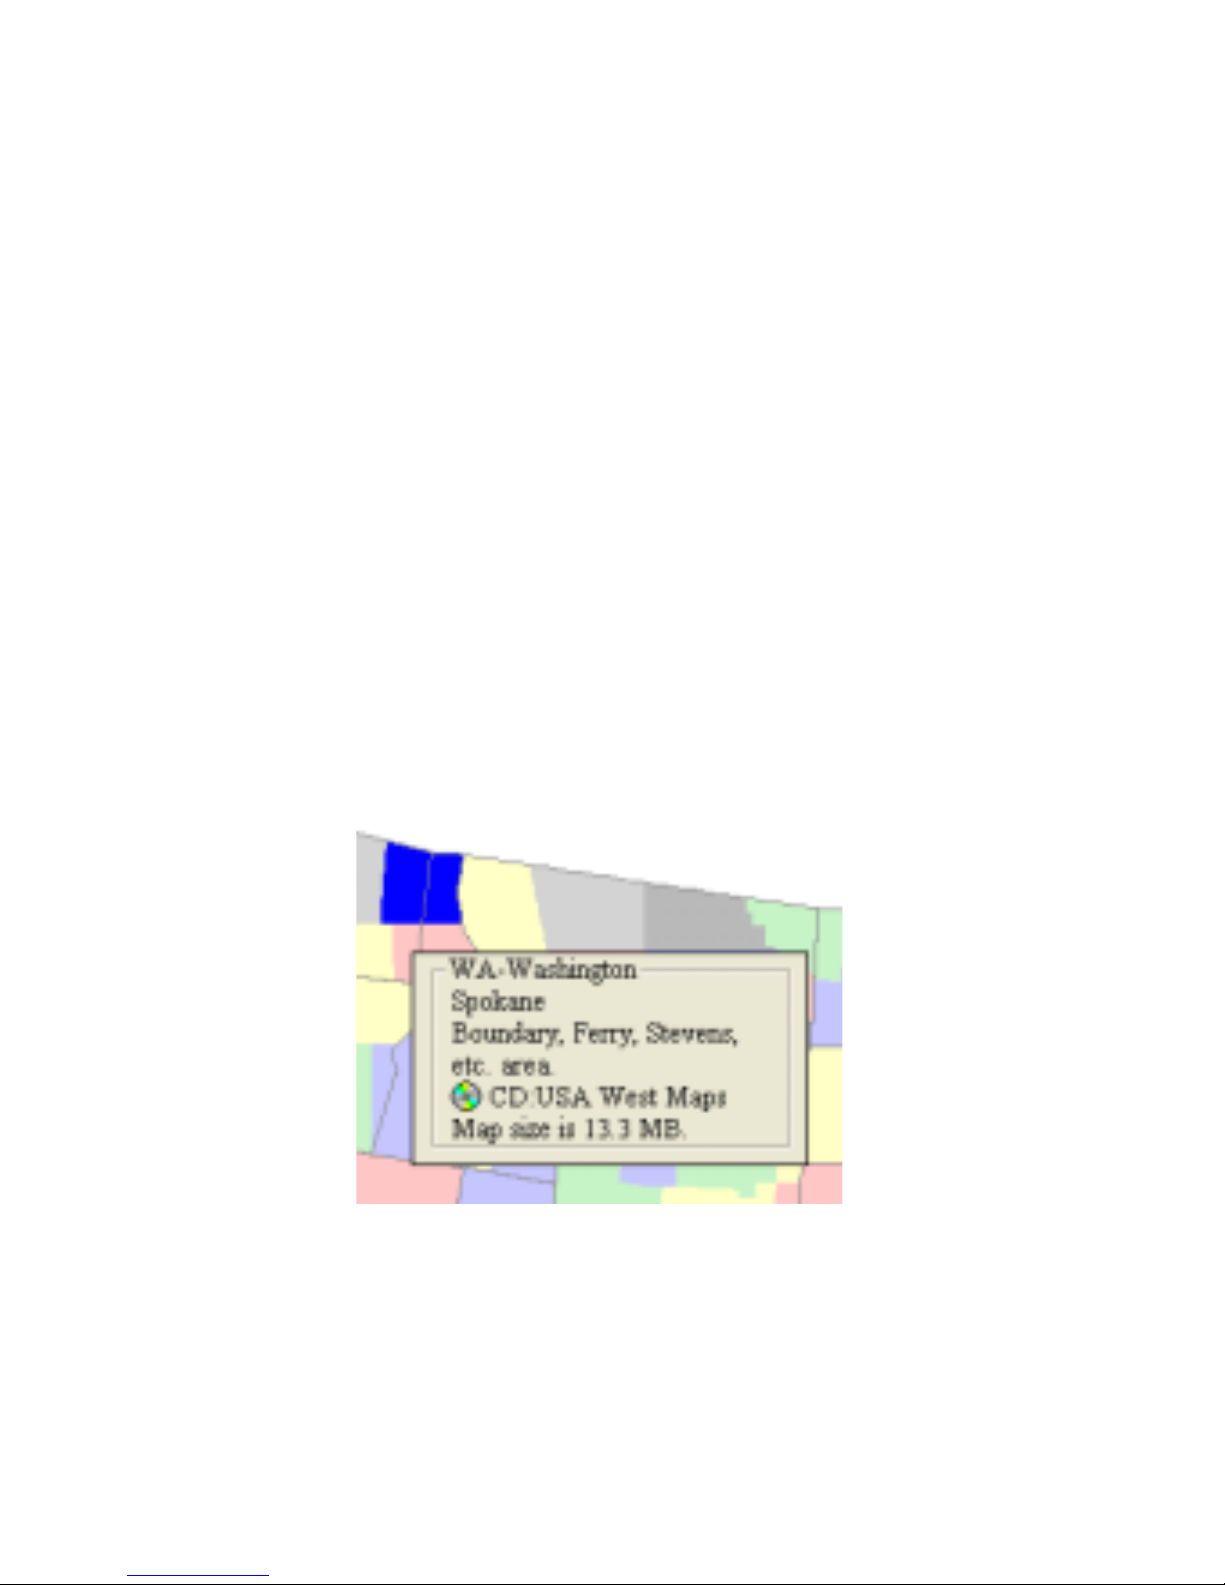
2. Without pressing any mouse buttons, roll the mouse
over the U.S. Each map will highlight and display an
information pop up as displayed below:
Spokane WA map highlighted
Page 15
Page 15
The name of the map, key cities and counties within
the map, and the map size is displayed.
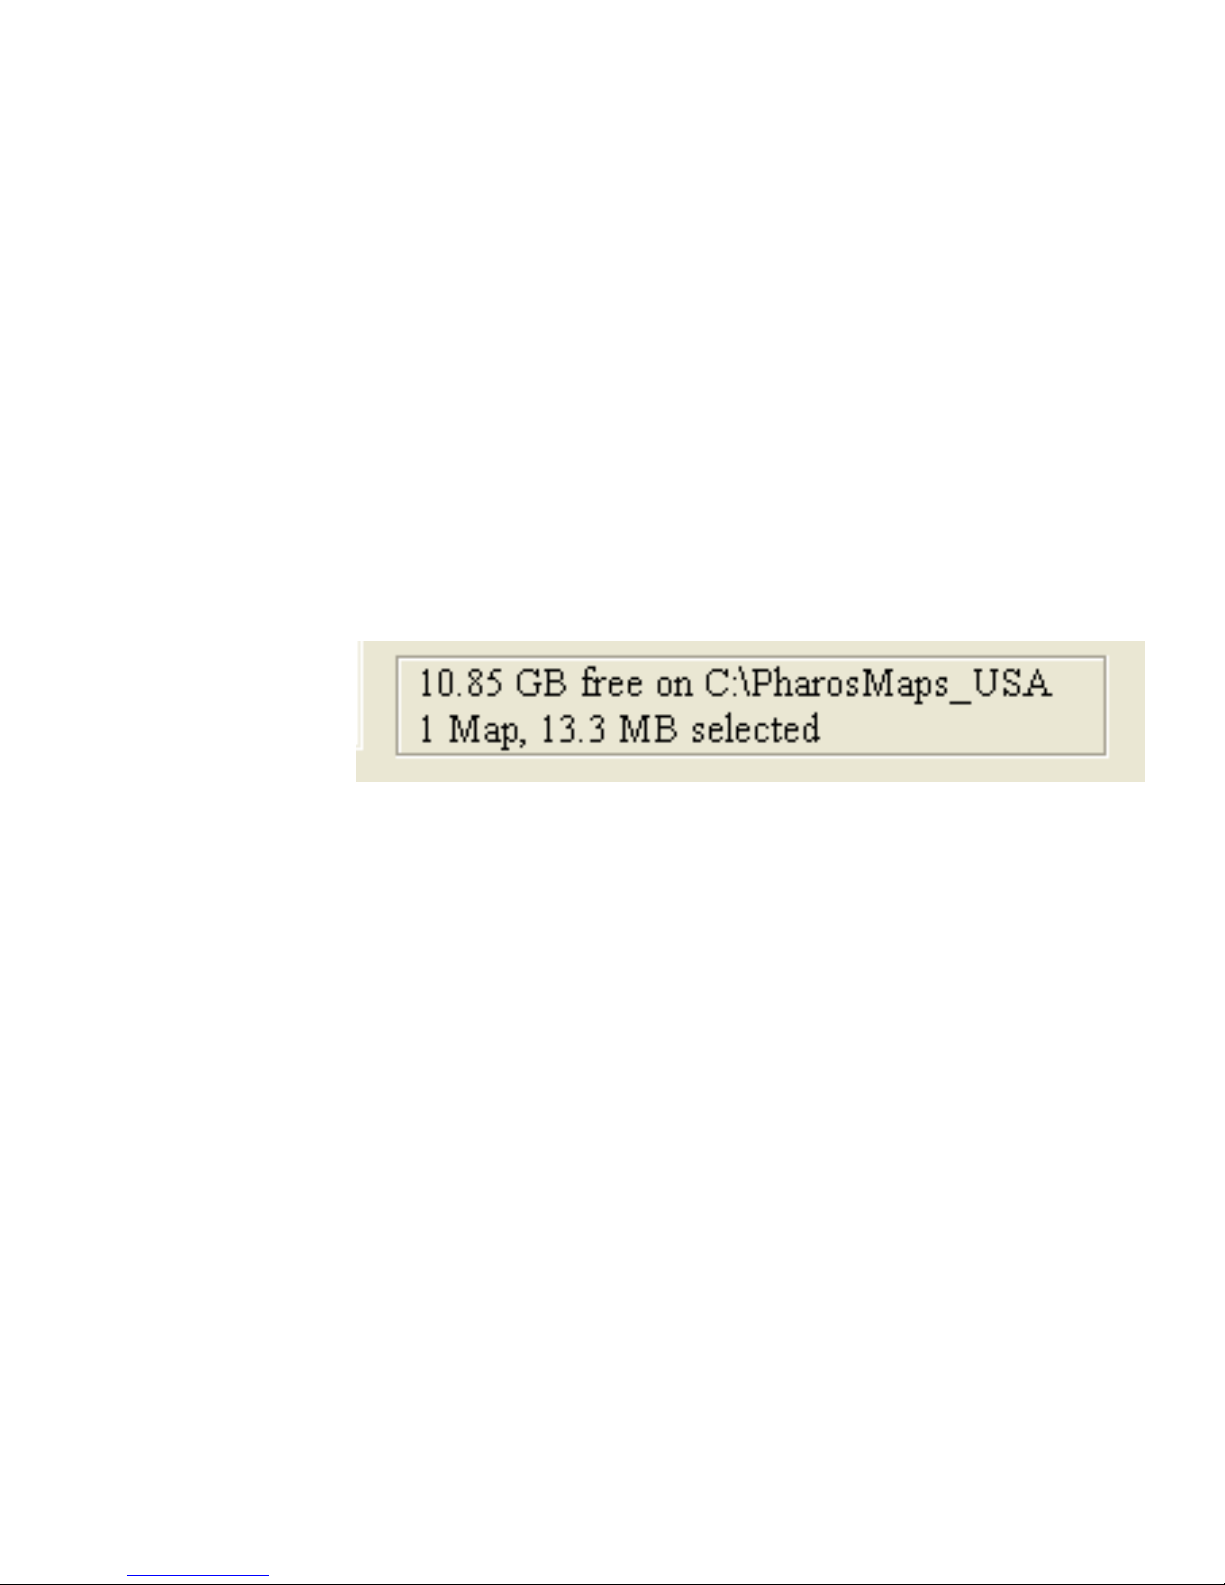
3. When you’ve found the proper map, double click the
left mouse button. The status window on the upper
right portion of the screen will display the total size
of all the maps you have selected as displayed
below:
Status Window – Upper right portion of screen
If you select a map that is neither on the current CDROM nor on your hard disk, you will be prompted to
insert the proper CD.
4. Continue selecting maps until finished. The status
window will total the amount of data to be
downloaded.
Page 16

Page 16
If you wish to deselect maps that you have selected,
you can:
# Double click again on the map you wish to
deselect; or
# Deselect all the maps you selected by single
clicking the right mouse button and scrolling
down to “Un-Select All Maps.”
When you have finished selecting maps using this map
selection method, you may:
# Select more maps using one of the other selection
methods;
# Download maps for use on your Pocket PC (See
Section 3.4);
# View the last map selected (See Section 3.5).
To exit MapFinder, single click the right mouse
button, and scroll down to “Exit.”
Page 17
Page 17
3.3.2 Select Maps by Entering a Cit y, County or
Zip Code;
Optionally, Select All Maps Up to 300 Miles
of the Specified City, County or Zip Code
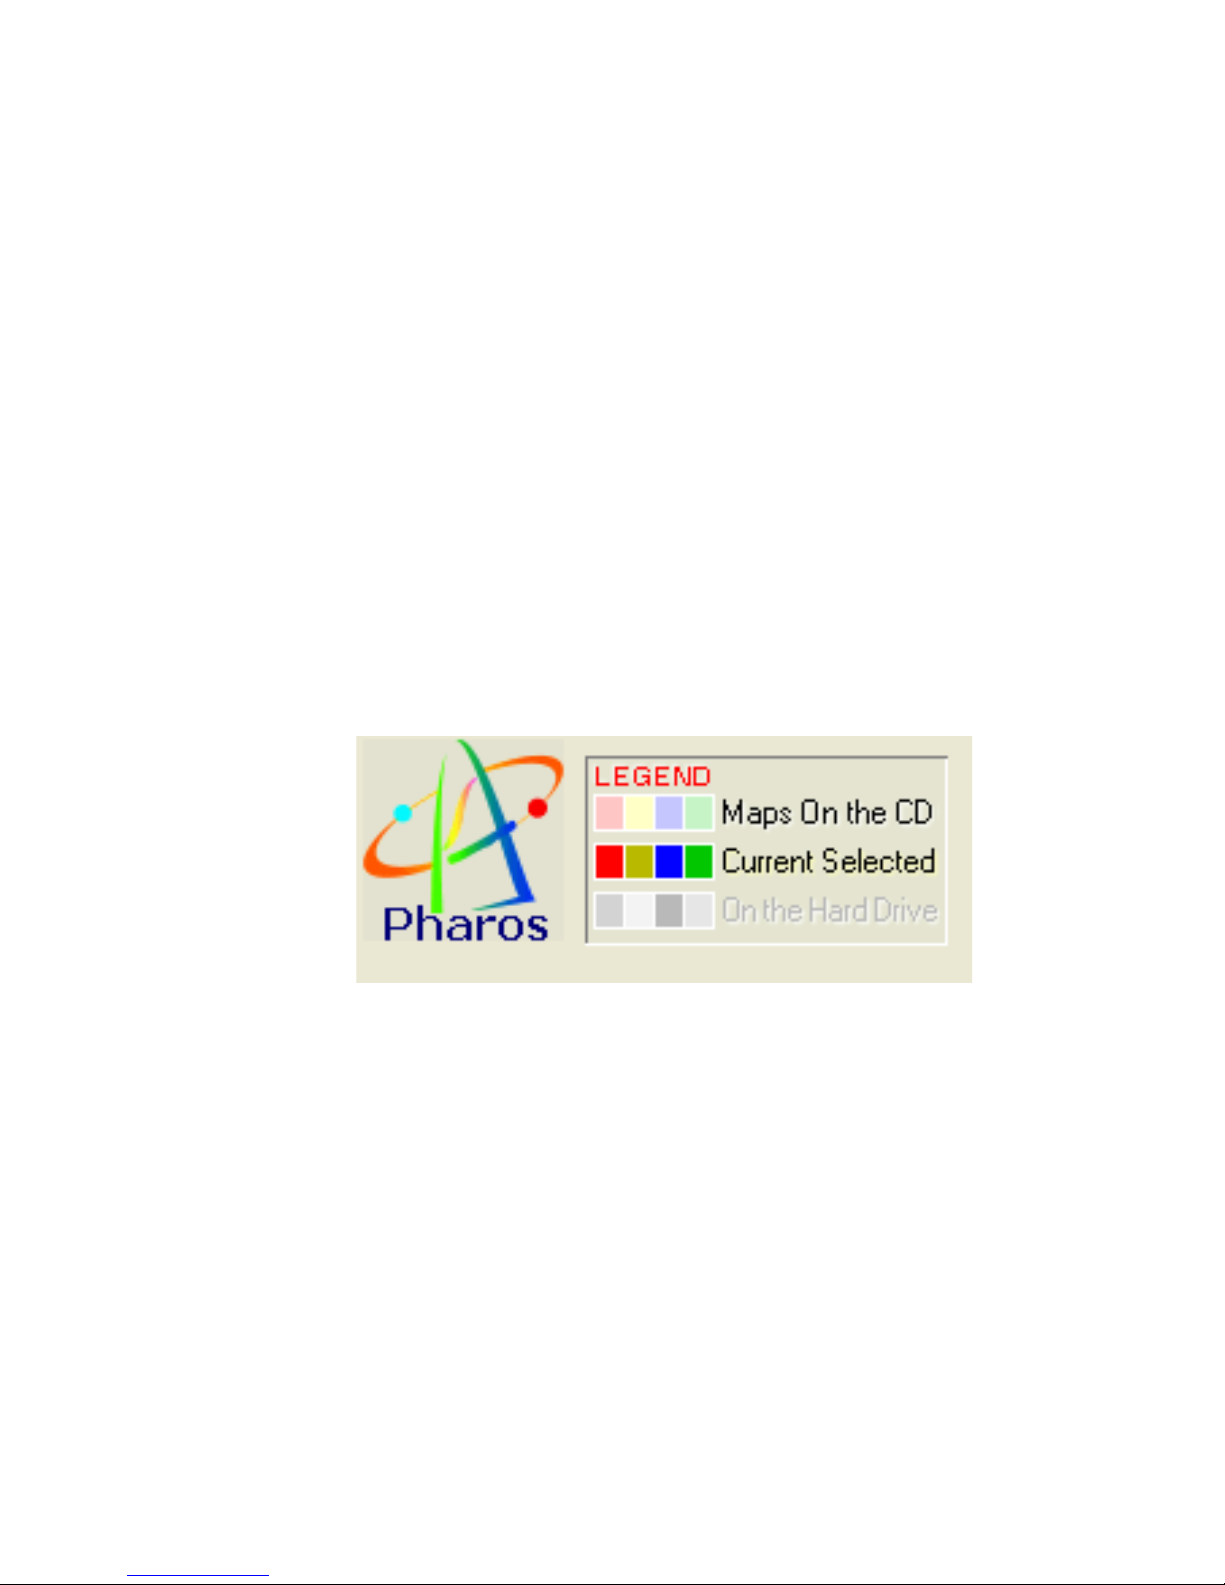
1. Insert map CD into CD-ROM, CD should auto-run and
open the MapFinder. The maps contained upon the
inserted CD will be highlighted using the colors
displayed in the Color Bar:
Color Bar – Upper left portion of screen
If CD does not auto-run, double click “My Computer” >
D:\ . If you only want to select maps that you have
previously downloaded to your PC hard drive, start the
MapFinder program by clicking on the MapFinder icon
on your PC desktop.
Page 18
Page 18
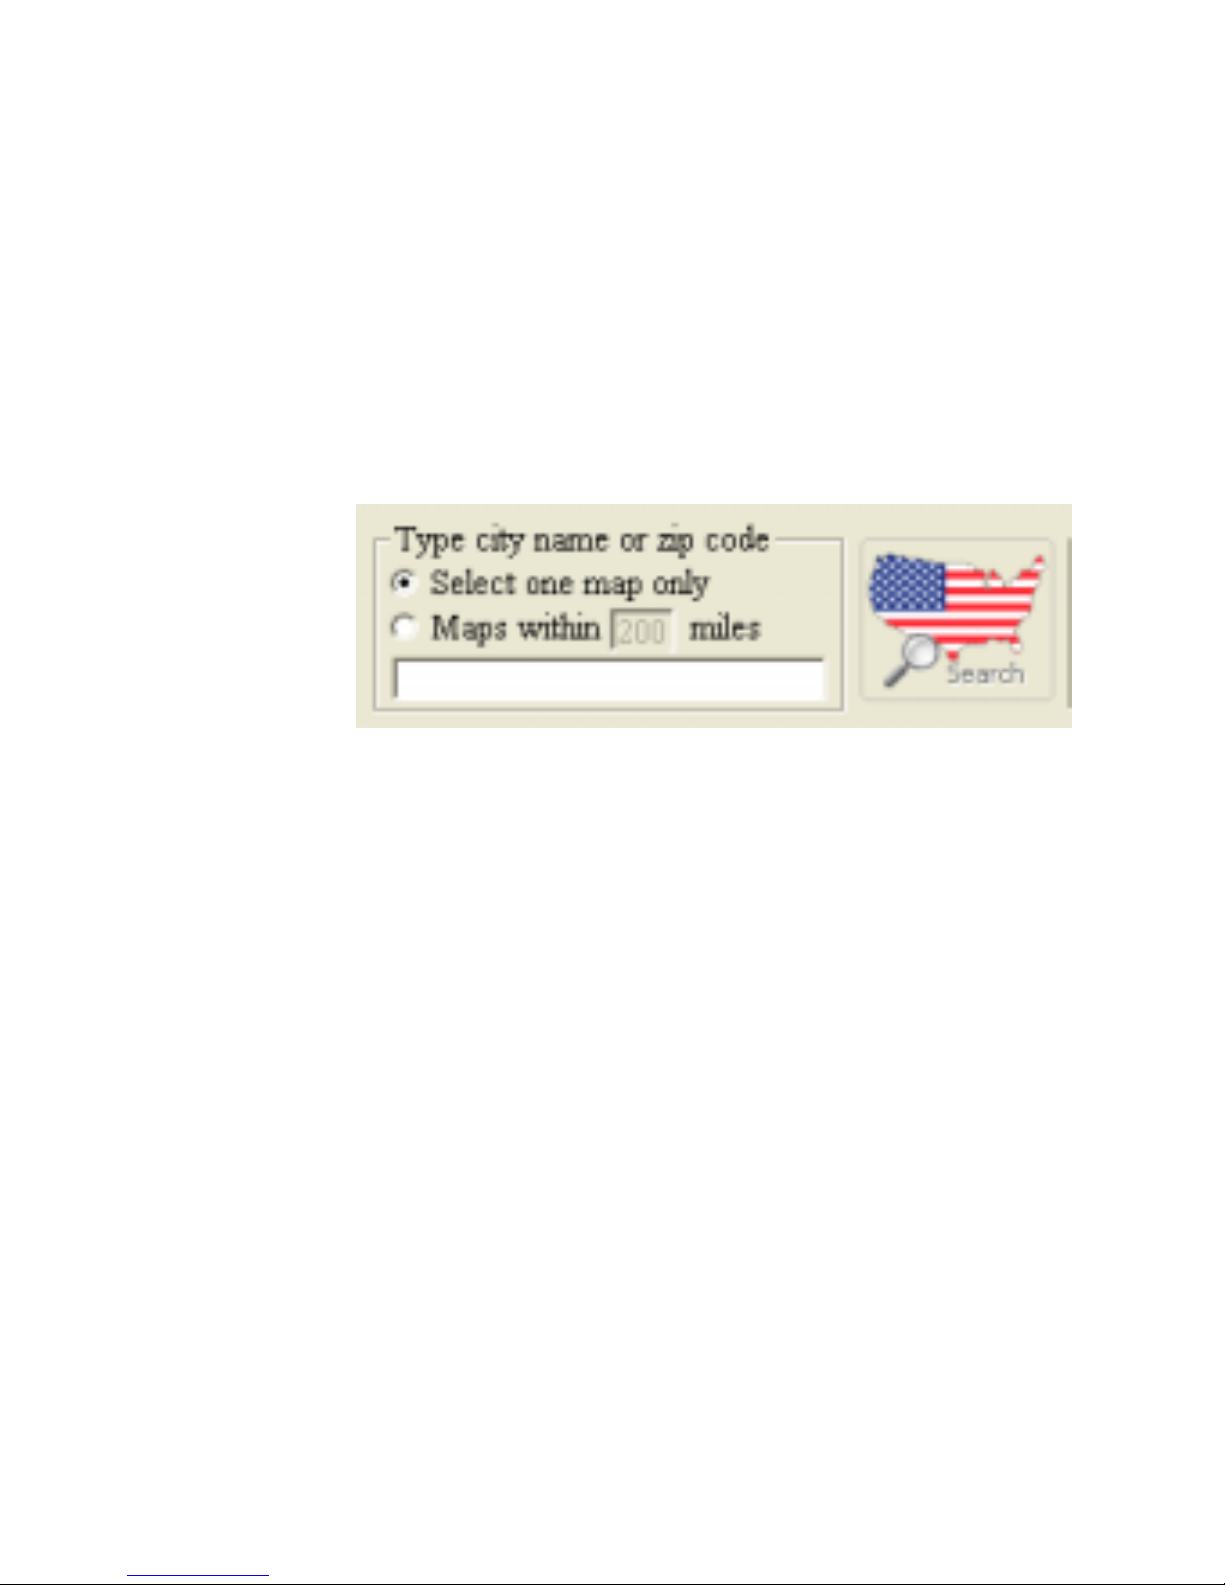
2. Locate the Input Window located in the upper mid
portion of the screen, and the Initiate Search icon
immediately to its right, as displayed below:
Input Window & Initiate Search – Upper middle
screen
To select one map, click the “Select one map only”
button. To select all maps completely encompassed by a
rectangle up to 300 square miles centered around the
midpoint of the specified map, click ‘Maps within xxx
miles.” The numeral within this selection will accept
values up to 300.
3. Key in a city or county name, or a five-digit zip code and
double click the Initiate Search icon. The results are
Page 19
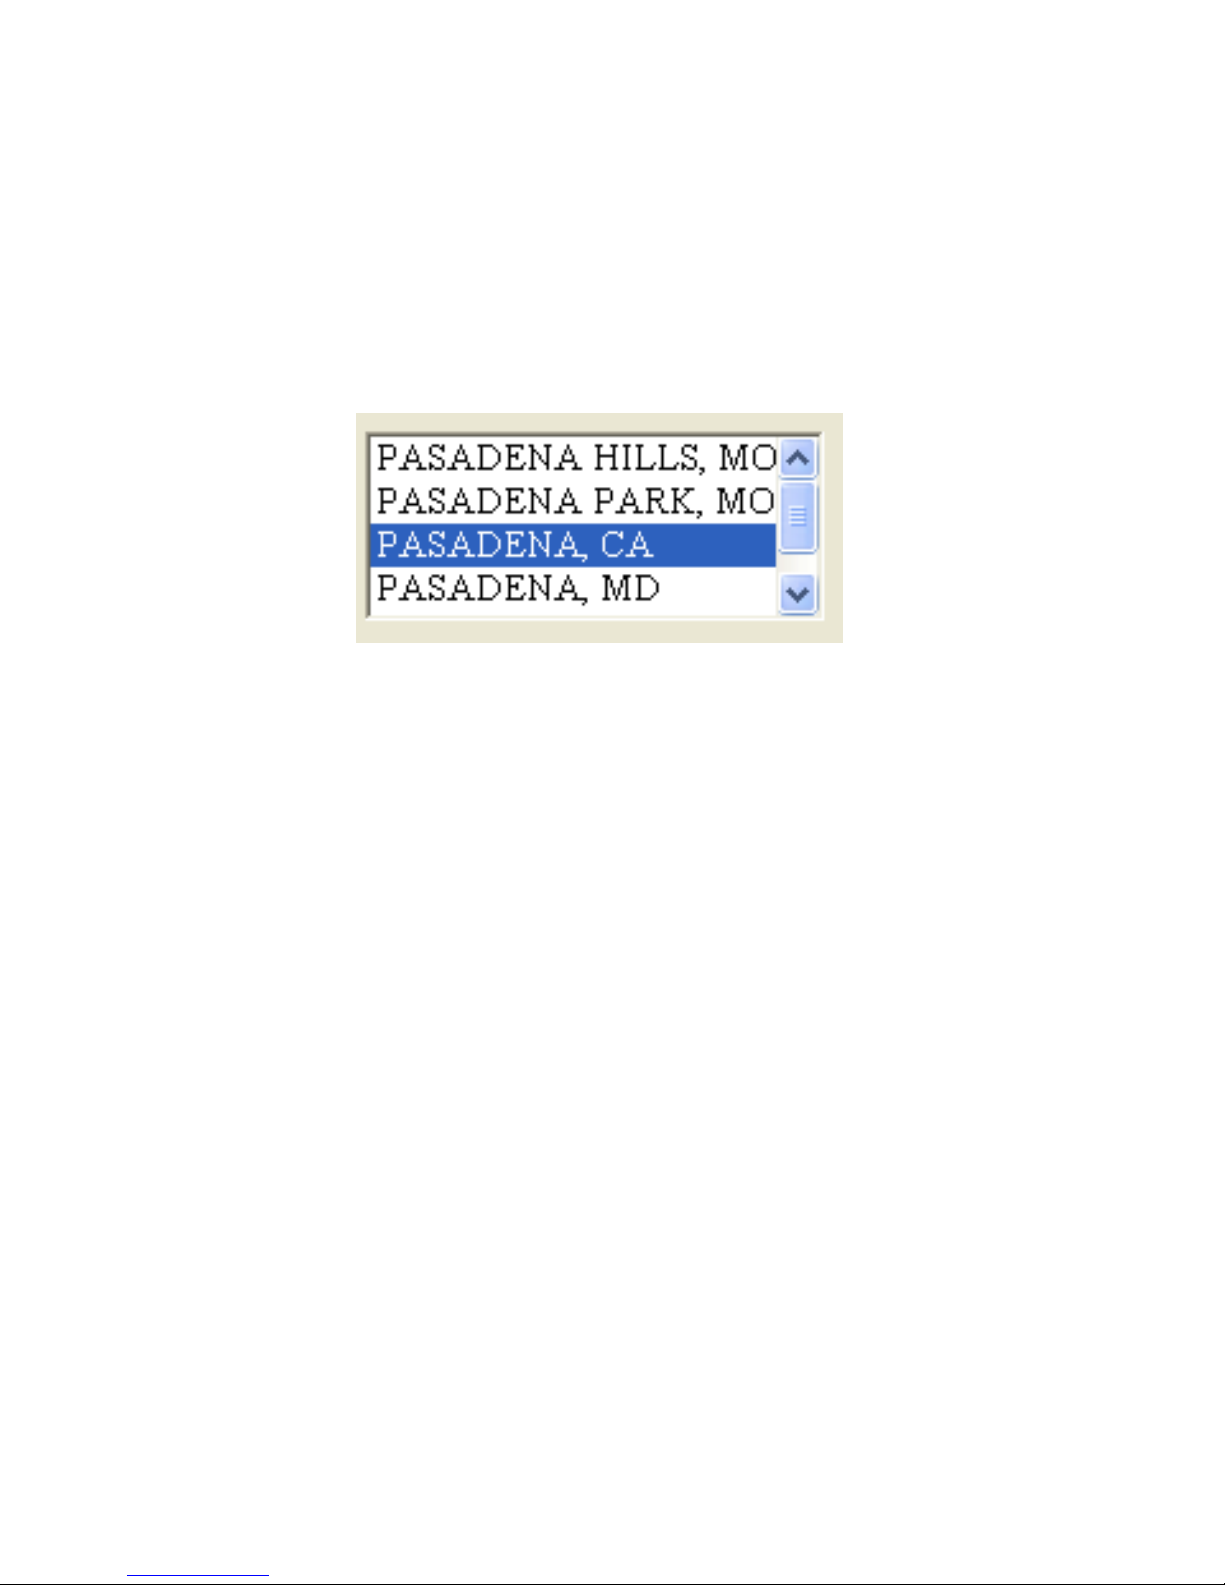
Page 19
displayed immediately to the right of the Initiate Search
icon as shown below:
Search Results Display
4. Single click upon the result that meets your needs. Using
Pasadena CA, as an example, two results are possible
depending upon the selection criterion you selected:
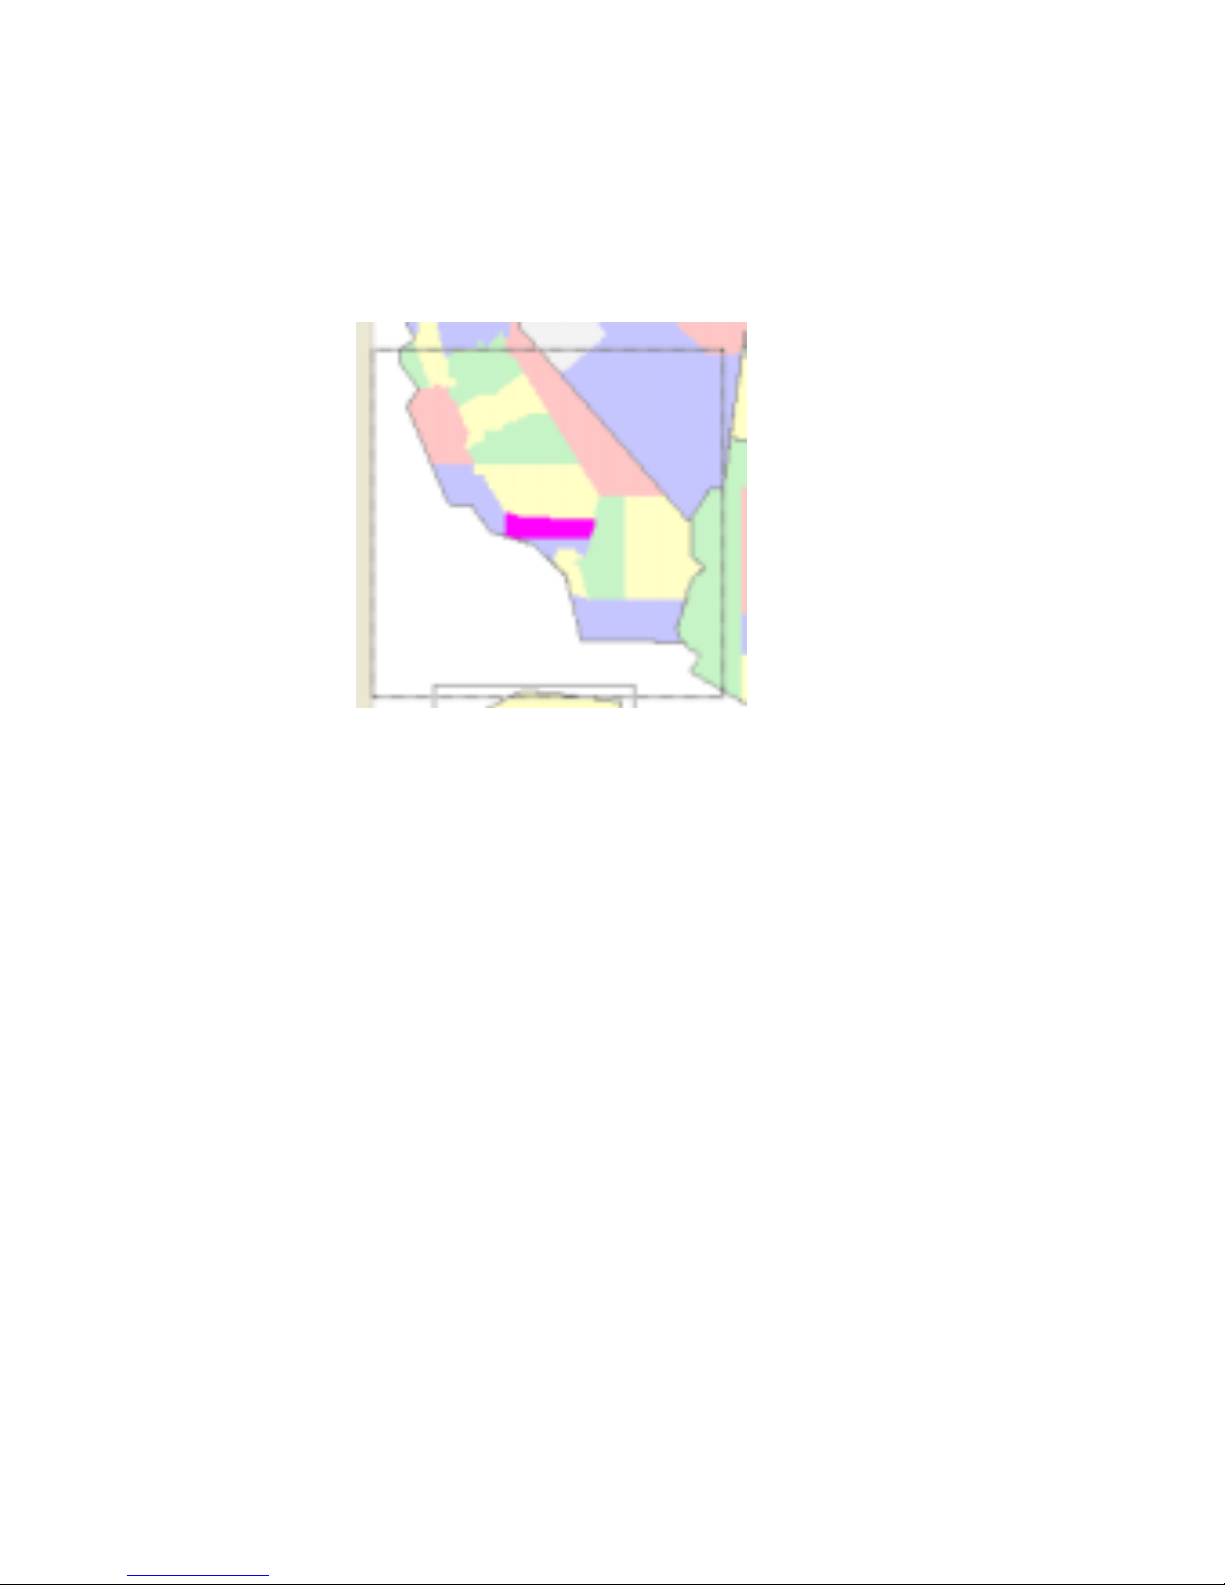
# If you chose, “Select one map only,” the North Los
Angeles map would be highlighted and its Map
Information pop up would be displayed;
# If you chose, “Maps within 300 miles,” the North
Los Angeles map would be highlighted and its Map
Information pop up would be displayed, as would a
rectangular box indicating maps within 300 miles
(displayed below):
Page 20
Page 20
5. To select the indicated maps, double click the entry in
the Search Results Window. Once again using the
example of Pasadena CA, the results from the two
options are detailed below:
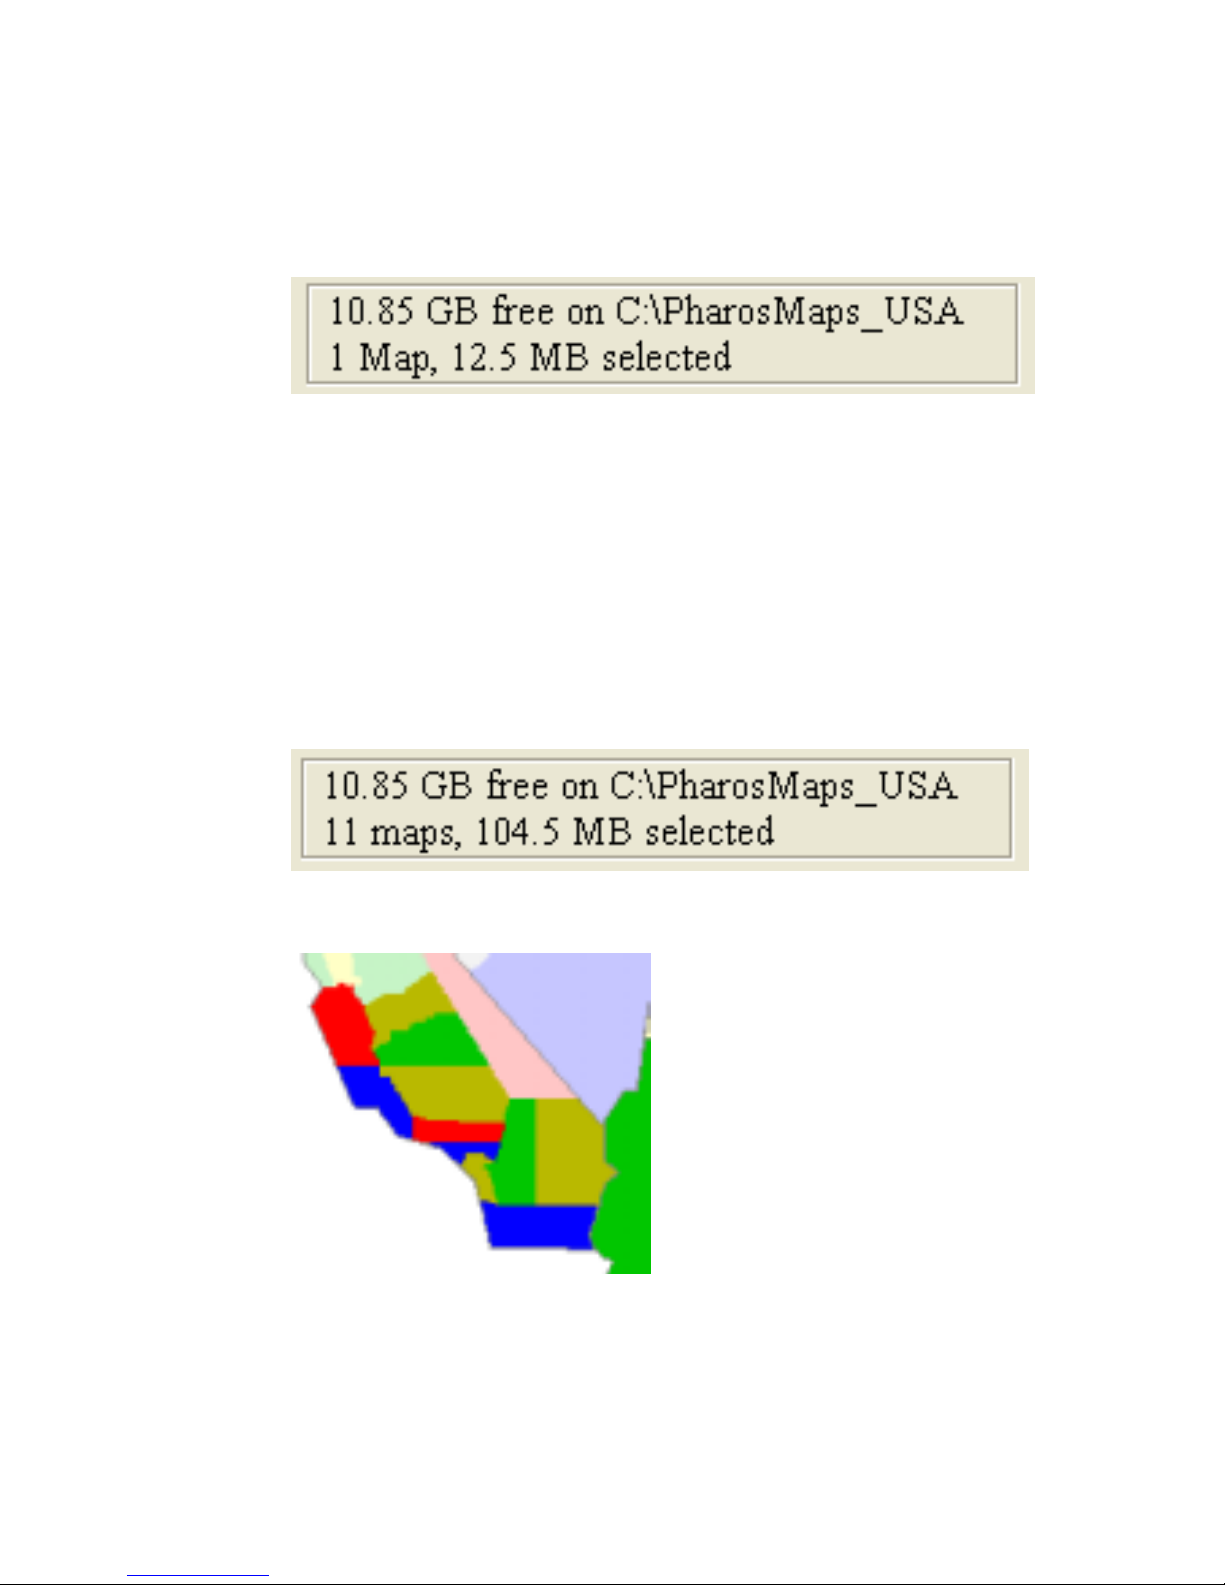
# “Select one map only” - The status window on the
upper right portion of the screen will display the
total size of the North Los Angeles map as displayed
below:
Page 21
Page 21
Status Window – Select one map only
# “Maps within 300 miles” – All of the maps whose
boundaries fit entirely within the rectangle displayed
in step 4 will be highlighted and the status window
will display the total of all of these highlighted
maps. Both displays are detailed below:
Status Window – Maps within 300 miles
Page 22

Page 22
Highlighted maps
6. Repeat steps 2 – 5 as many times as you wish. The
Status Window will total the amount of data to be
downloaded.
If you wish to deselect maps that you have selected,
you can:
# Double click again on the map you wish to
deselect; or
# Deselect all the maps you selected by single
clicking the right mouse button and scrolling
down to “Un-Select All Maps.”
When you have finished selecting maps using this map
selection method, you may:
# Select more maps using one of the other
selection methods;
# View the last map selected (See Section 3.5);
Page 23
Page 23
# Download maps for use on your Pocket PC (See
Section 3.4).
To exit MapFinder, single click the right mouse
button, and scroll down to “Exit.”
3.3.3 Select Maps by Creating a Select i on Rectangle
1. Insert map CD into CD-ROM, CD should auto-run and
open the MapFinder, as displayed above. The maps
contained upon the inserted CD will be high lig hted using
the colors displayed in the Color Bar:
Color Bar – Upper left portion of screen
Page 24

Page 24
If CD does not auto-run, double click “My Computer” >
D:\ . If you only want to select maps that you have
previously downloaded to your PC hard drive, start the
MapFinder program by clicking the MapFinder icon on
your PC desktop.
2. Position your mouse on the upper left corner of the
selection rectangle that you wish to create. Click and
hold the left mouse button. Drag the mouse until you
have created a rectangle encompassing the region in
which you want to trav el. When finished, release the left
mouse button. All of the maps that are completely
surrounded by the selection rectangle will be
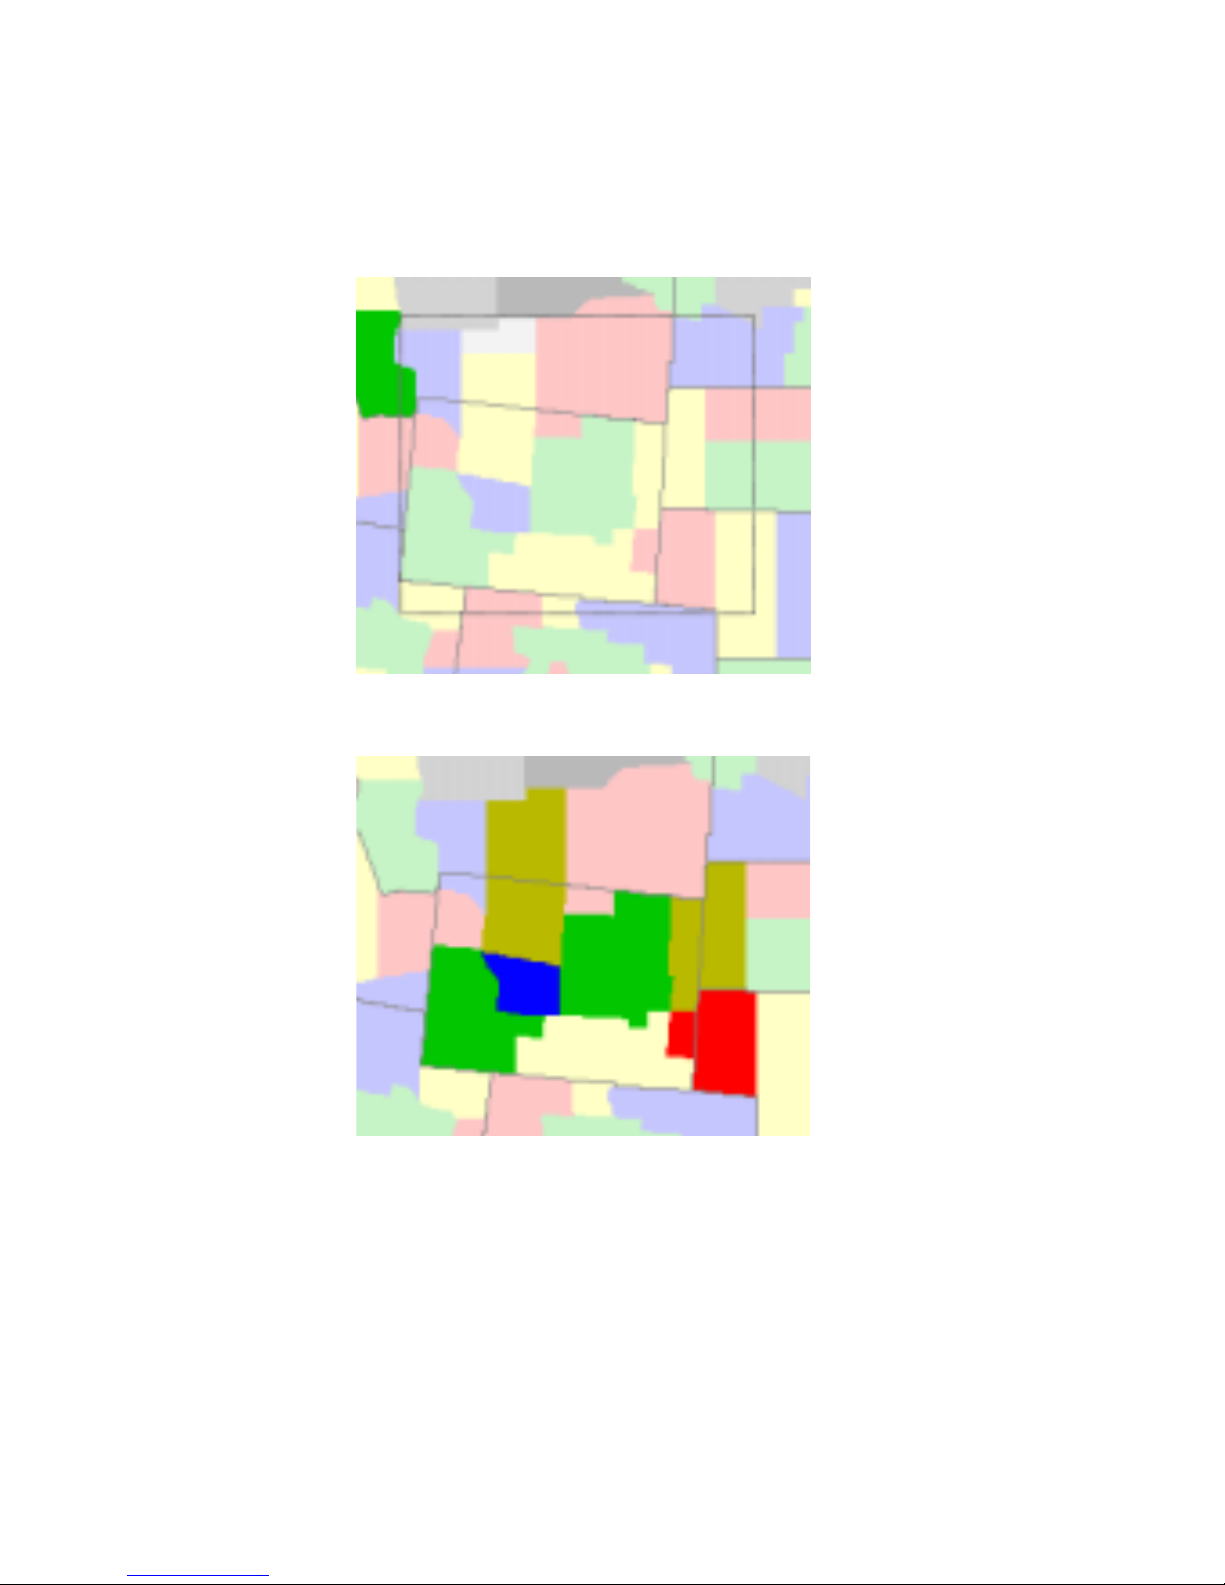
highlighted, as displayed below:
Page 25
Page 25
This selection rectangle . . .
. . . Selects these maps . . .
.
Page 26
Page 26
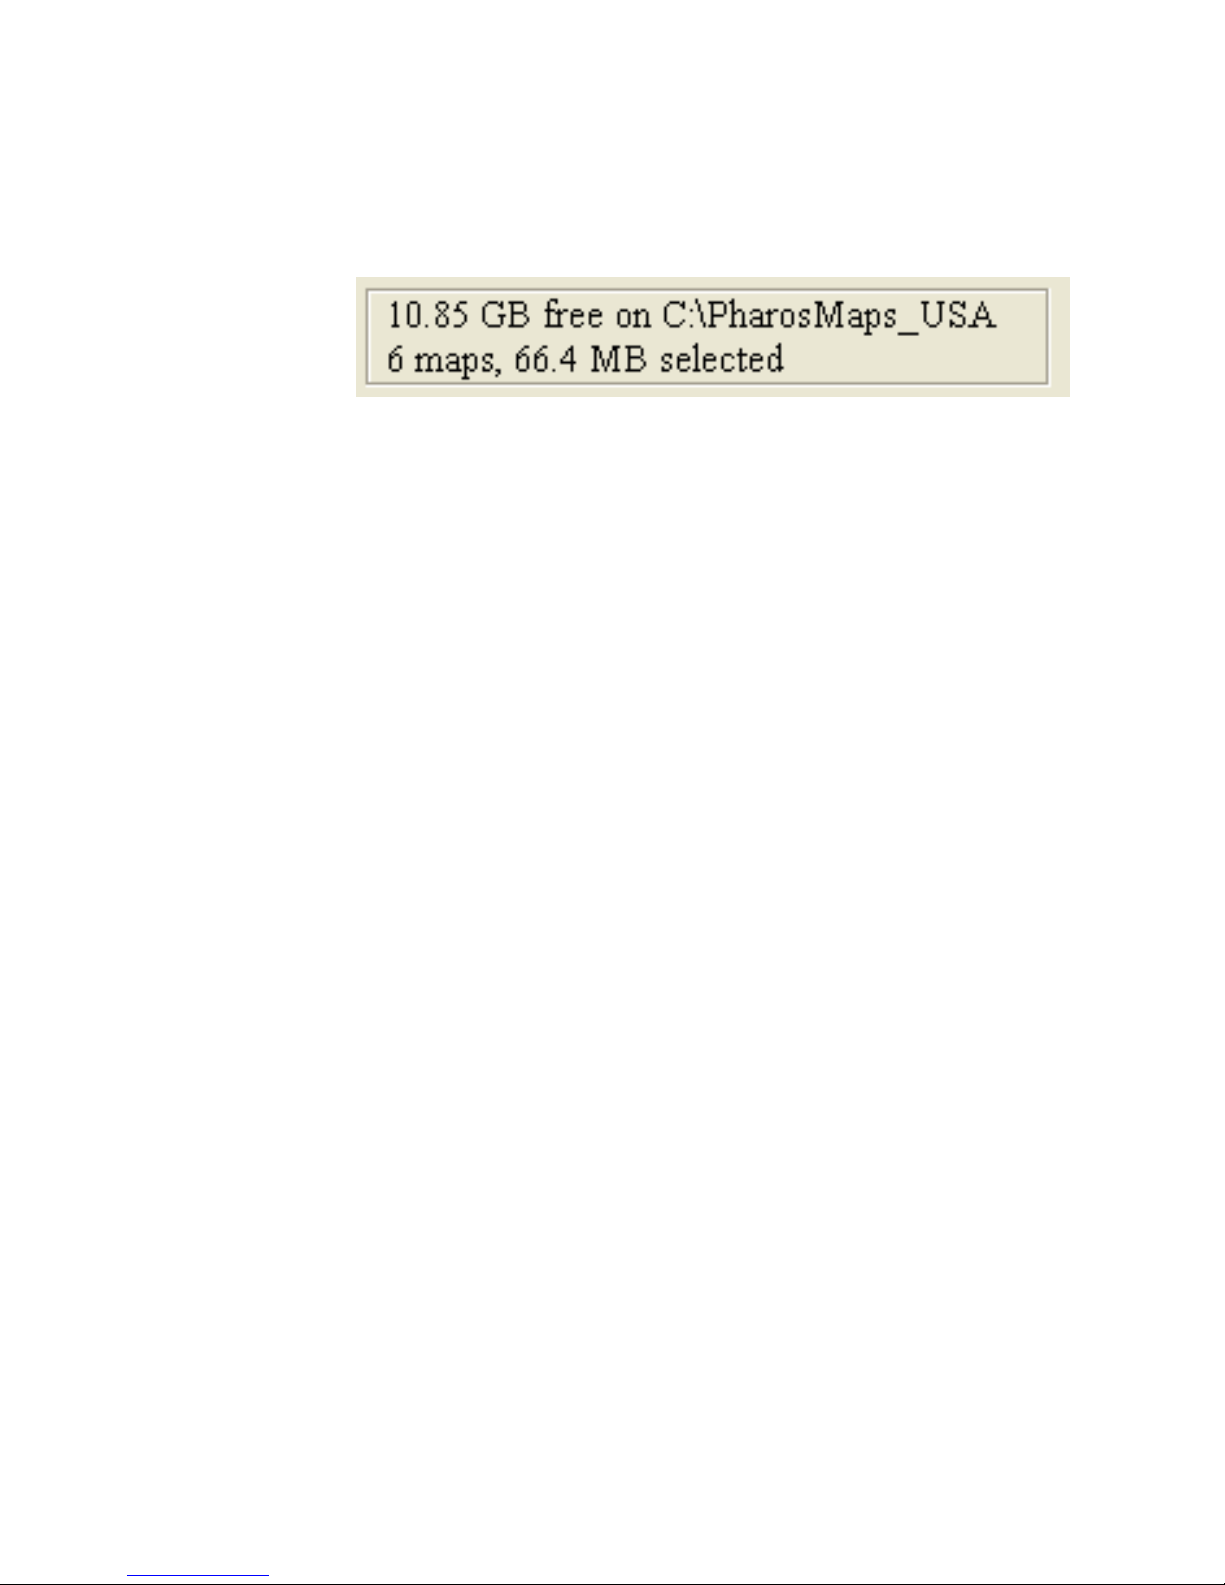
. . . And shows this Status Window.
If you mistakenly select a map that is neither on the
current CD-ROM nor on your hard disk, you will be
prompted to insert the proper CD.
3. Continue selecting maps until finished. The status
window will total the amount of data to be downloaded.
If you wish to deselect maps that you have selected,
you can:
# Double click again on the map you wish to
deselect; or
# Deselect all the maps you selected by single
clicking the right mouse button and scrolling
down to “Un-Select All Maps.”
When you have finished selecting maps using this map
selection method, you may:
Page 27

Page 27
# Select more maps using one of the other selection
methods;
# View the last map selected (See Section 3.5);
# Download maps for use on your Pocket PC (See
Section 3.4).
To exit MapFinder, single click the right mouse
button, and scroll down to “Exit.”
3.4 Choosing a Destination for Maps to be Downloaded or
Viewed
After selecting the maps to be downloaded in Section
3.3, you must choose one of the following steps to
indicate the ultimate destination of your
download/extraction operation.
3.4.1 Copy Selected Map(s) to a CF or SD Card
Inserted in Your PC
1. Follow any combination of steps 3.3.1, 3.3.2, or 3.3.3, to
select a map or group of maps.
Page 28
Page 28
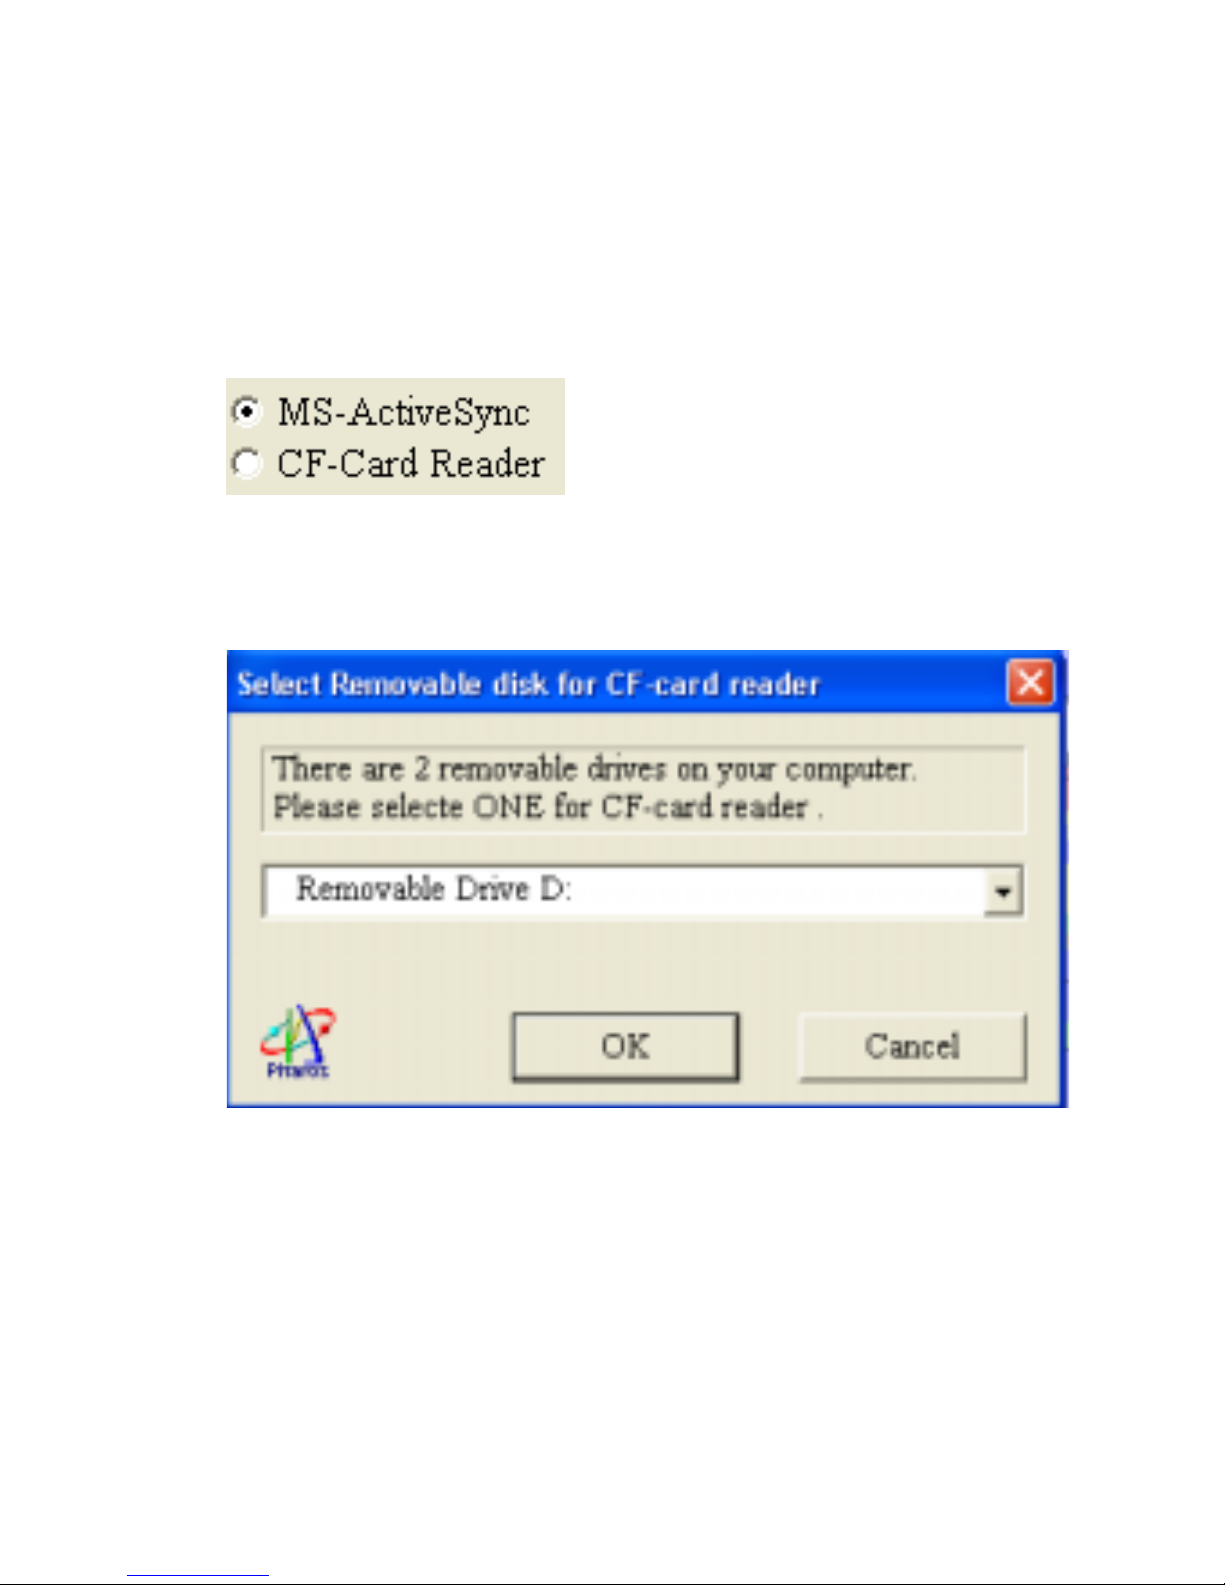
2. Locate the Destination Indicator in the upper right
portion of your screen as detailed below:
Select CF-Card Reader
3. The following dialog box will appear:
Drive Selection Dialog Box
MapFinder automatically searches your PC and lists all
drives that contain an eligible destination device. Scroll
Page 29
Page 29
down and select the drive number that corresponds to the
slot into which you have inserted a CF or SD card and
press “OK.”
Note: On many laptop or notebook PCs, the first drive
listed will be your removable hard disk.
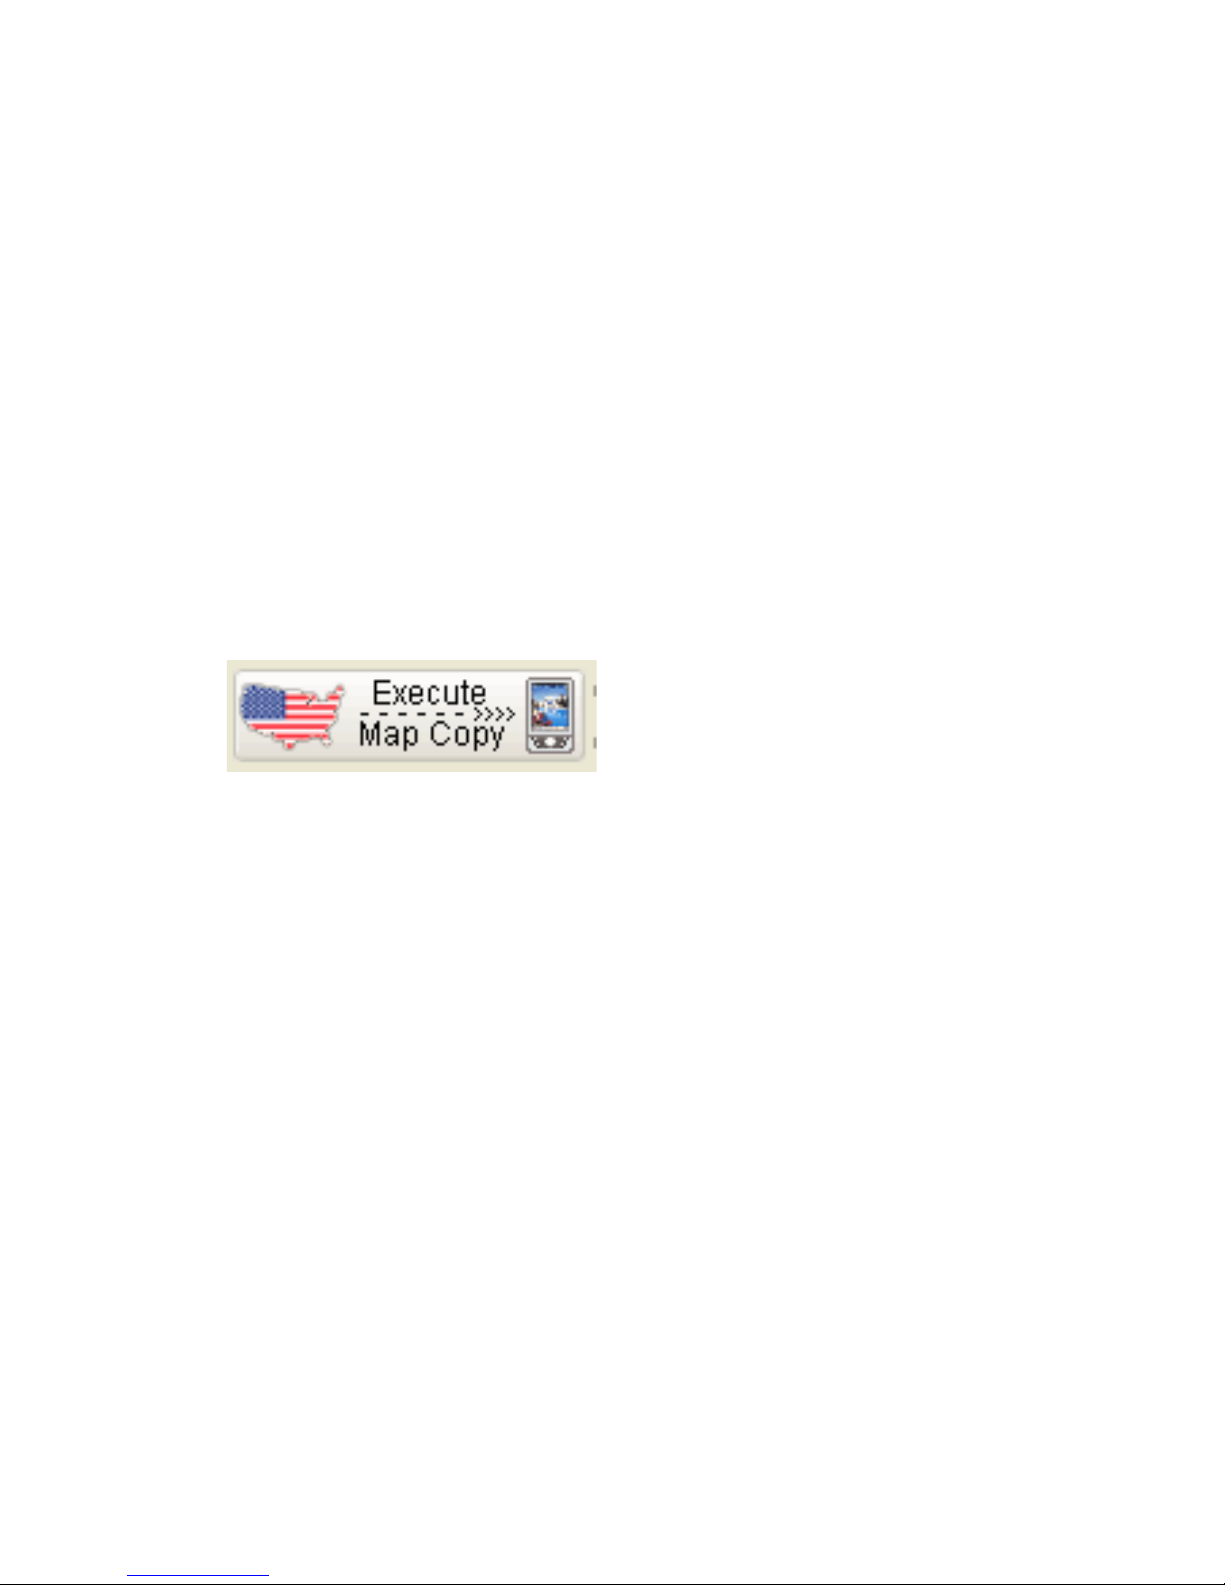
4. Locate the Execute Map Copy icon immediately to the
left of the Destination Indicator as displayed below:
Execute Map Copy Icon
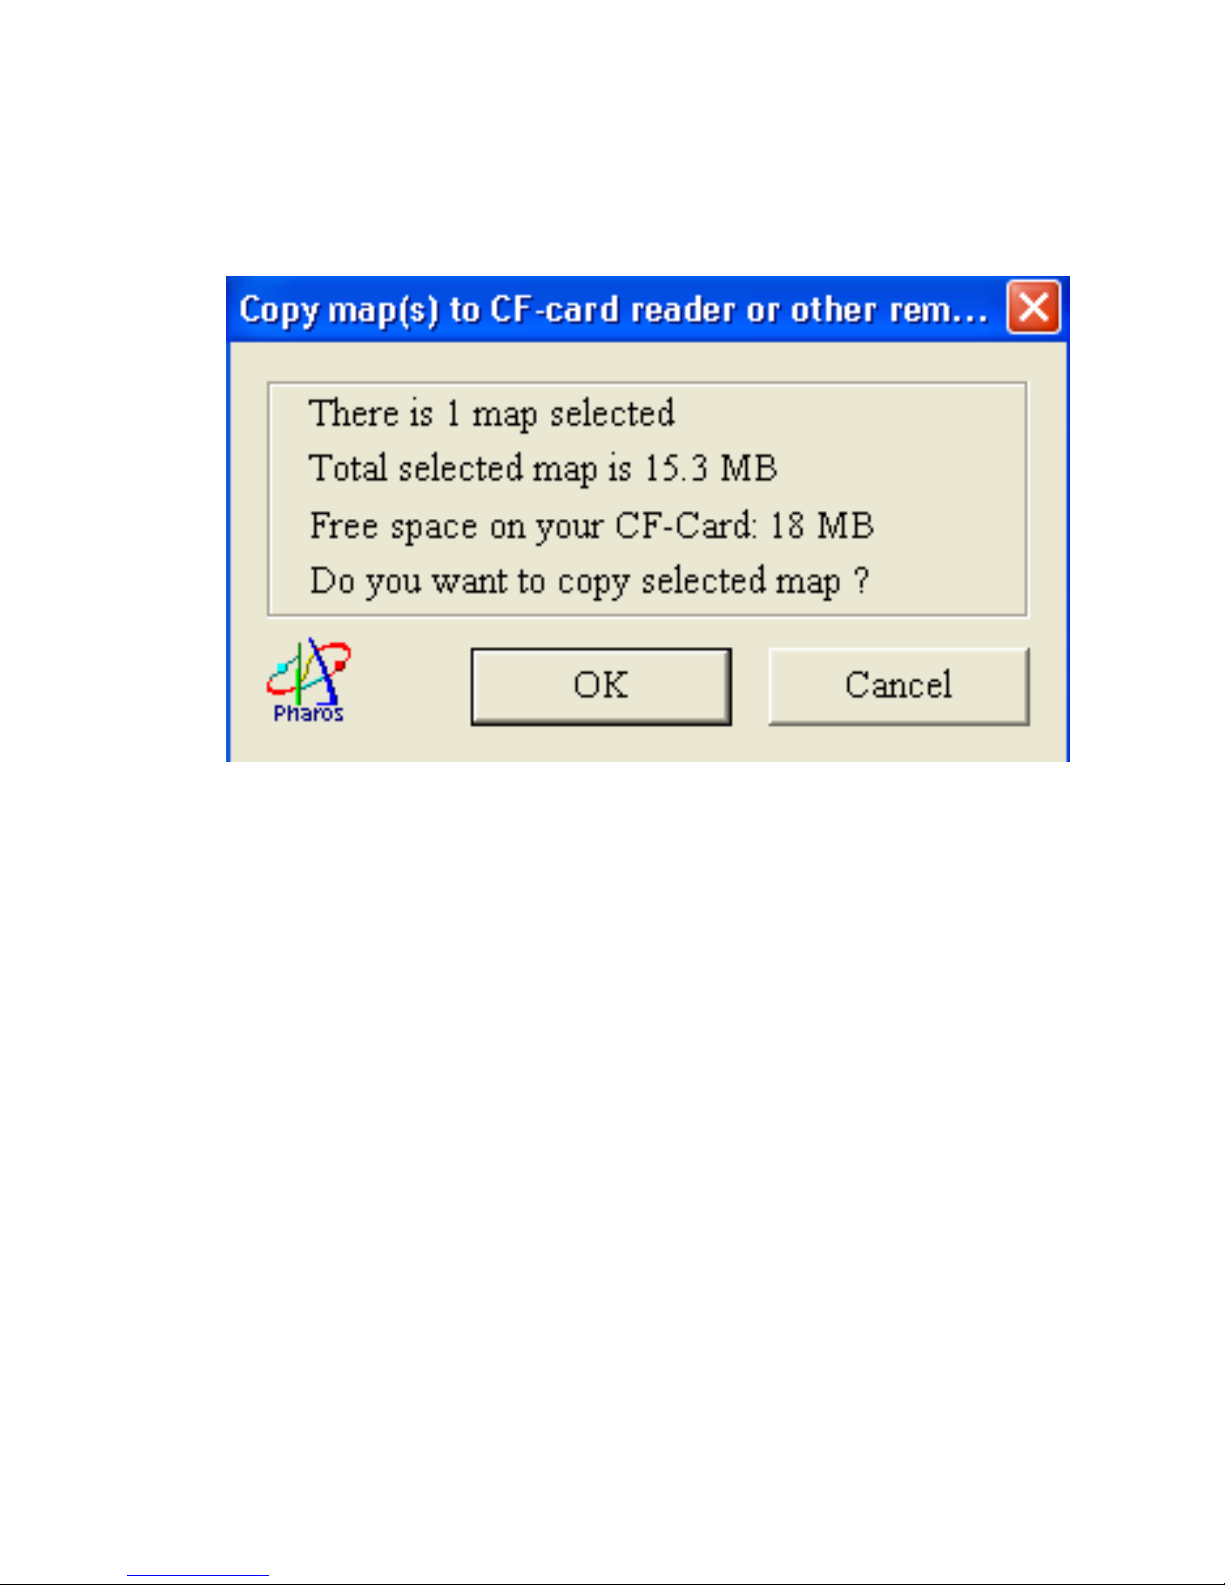
Press the Execute Map Copy icon. The following dialog
box will appear:
Page 30
Page 30
Download Confirmation Dialog Box
The Download Confirmation Dialog Box details the size
of the map(s) that you are downloading and the amount
of free space available on your destination device. Press
“OK” to continue.
5. Another dialog box will appear, asking if you’re sure
you want to continue. Press “Yes” to proceed. After
pressing “Yes,” a dialog box detailing the progress of the
download will display until it is complete.
Page 31
Page 31
You can now remove the CF or SD card from your
computer and insert it into your Pocket PC for use with
Ostia. Make sure you use your PC manufacturer’s
recommended procedure for removing your CF or SD
card from your computer.
To exit MapFinder, single click the right mouse
button, and scroll down to “Exit.”
3.4.2 Copy Selected Map(s) to St orage Resource on
Your Pocket PC
(Internal Memory, or Inserted CF or SD Card)
1. Follow any combination of steps 3.3.1, 3.3.2, or 3.3.3, to
select a map or group of maps.
2. Locate the Destination Indicator in the upper right
portion of your screen as detailed below:
Destination Indicator
Page 32
Page 32
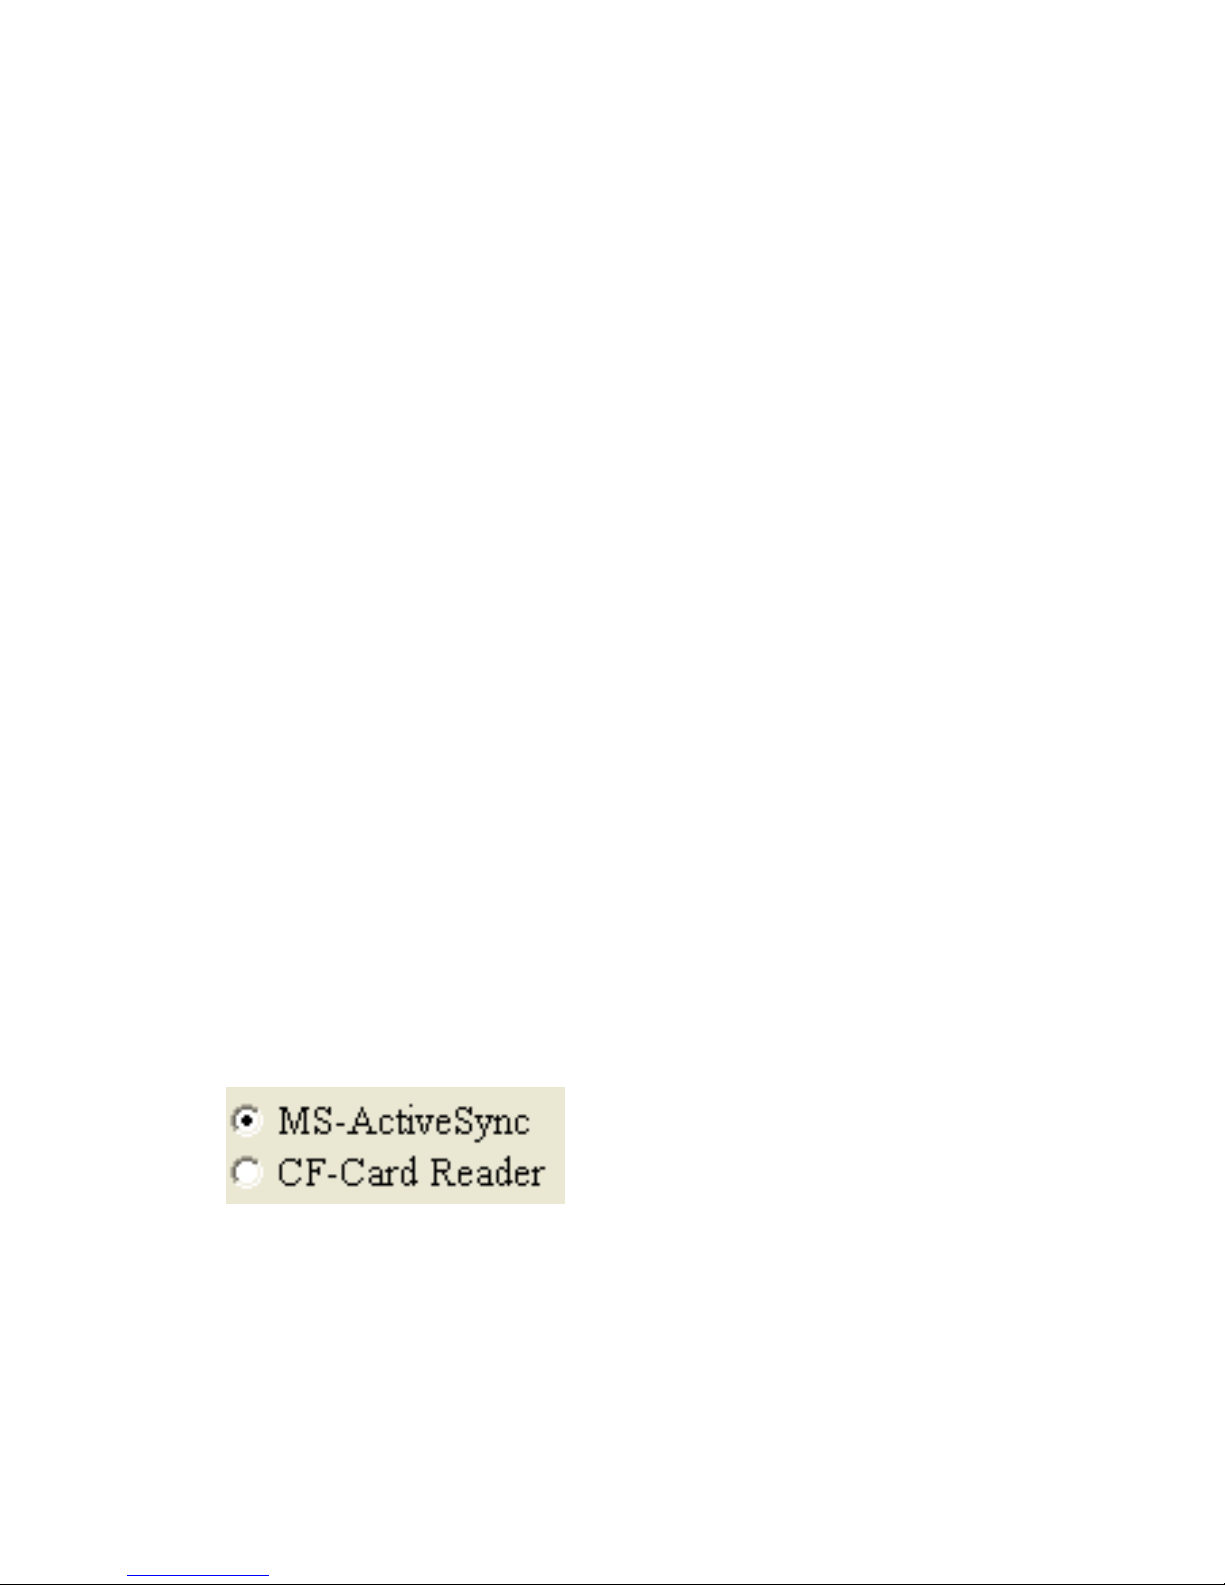
4. Select “MS-ActiveSync.”
5. Locate the Execute Map Copy icon immediately to the
left of the Destination Indicator as displayed below:
Execute Map Copy icon
Press the Execute Map Copy icon. A dialog box with the
message “Preparing to copy map file to your mobile
device . . .” will appear. When that process completes,
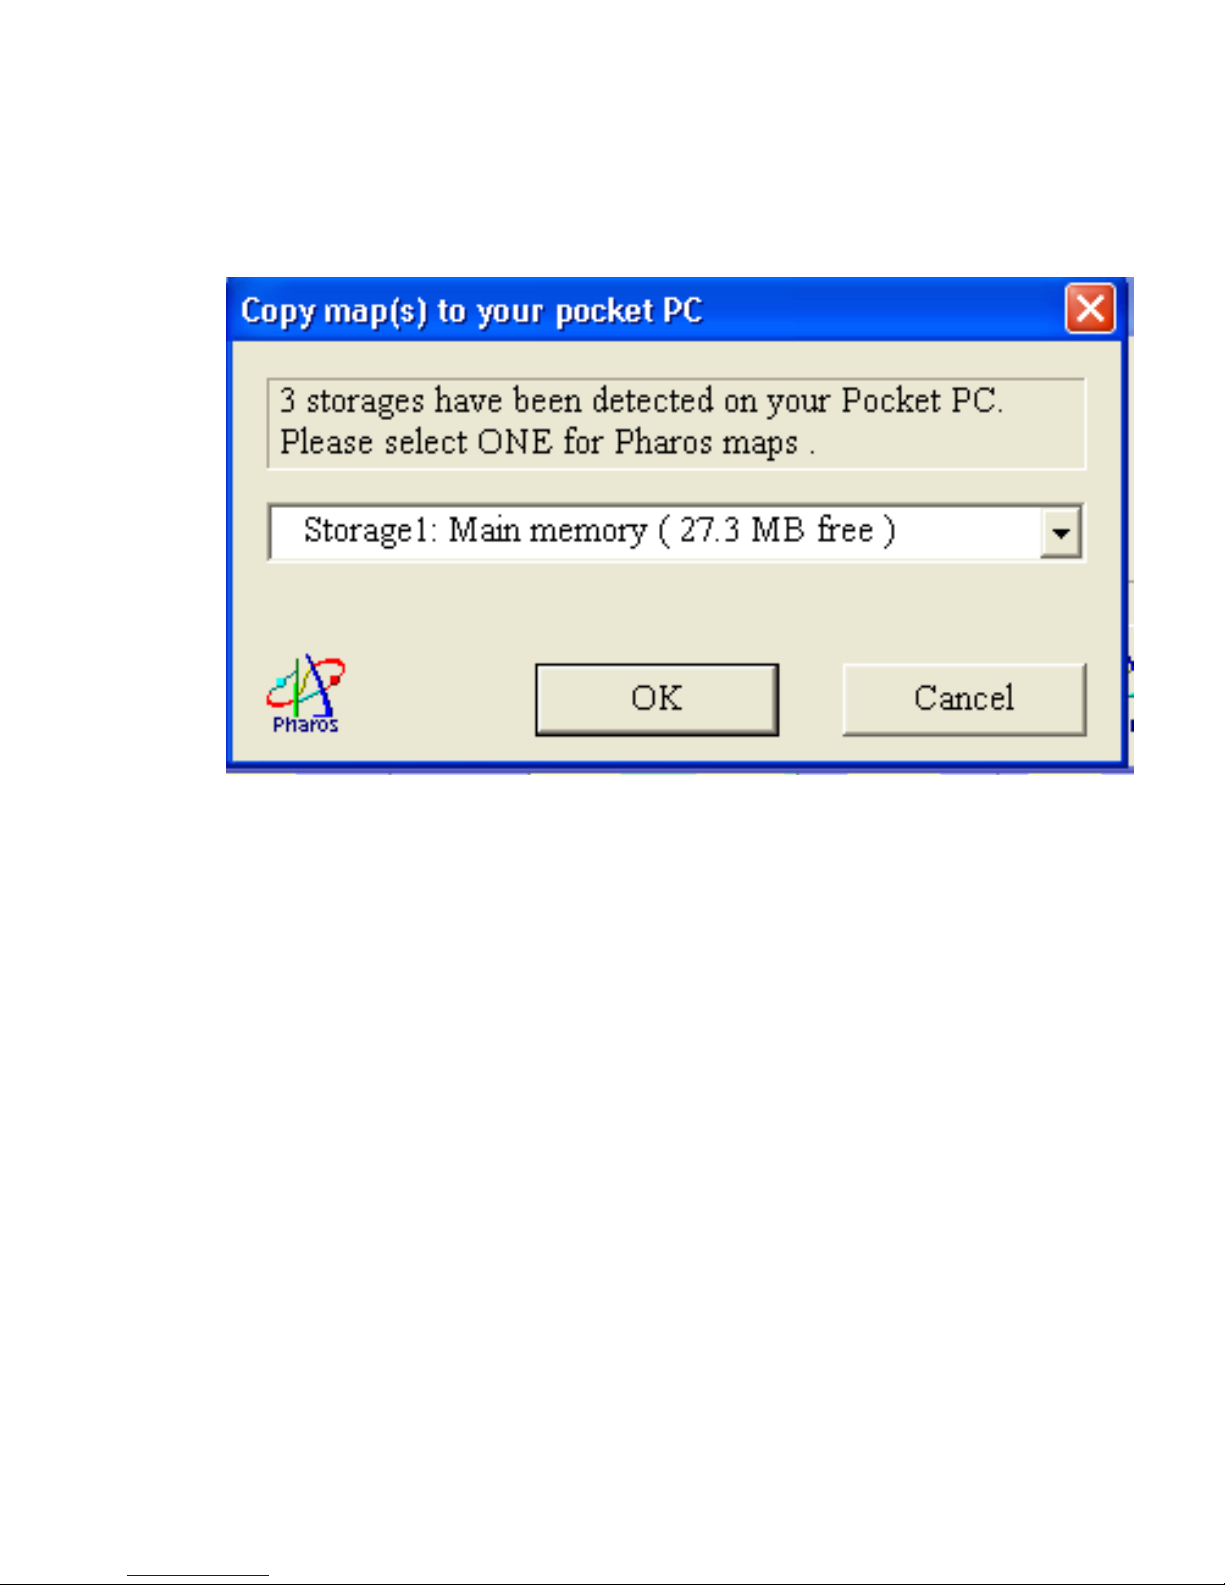
the following dialog box will appear:
Page 33
Page 33
Download Confirmation Dialog Box
Use the scroll arrow on the dialog box to review all of
the eligible storage devices on your Pocket PC.
MapFinder detects all of the eligible devices, and lists
the amount of internal memory available (free space on
CF and SD cards is not available for display). Single
click the storage device to which you want to download
maps and click “OK.”
6. Another dialog box will appear listing the number of,
and total size of the maps you wish to download. It also
Page 34

Page 34
lists the destination device on your Pocket PC. Click
“OK” to continue.
7. Another dialog box will appear, asking if you’re sure
you want to continue. Press “Yes” to proceed. After
pressing “Yes,” a dialog box detailing the progress of the
download will display until it is complete.
The selected maps are now stored on the indicated
destination on your Pocket PC and are ready for use with
Ostia.
To exit MapFinder, single click the right mouse
button, and scroll down to “Exit.”
3.4.3 Extract Sel ect ed M ap( s) , or the Current Map to
Your PC Hard Drive
1. Follow any combination of steps 3.3.1, 3.3.2, or 3.3.3, to
select a map or group of maps, or simply position your
mouse over the desired map to make it current.
Page 35
Page 35
2. Single click the right mouse button and scroll down to
one of the two following choices:
# “Extract Current Map to Hard Drive” if you made a
map current by simply positioning the mouse over it;
or
# “Extract Selected Map to Hard Drive” if you used
steps 3.3.1, 3.3.2, or 3.3.3 to select a map or group
of maps.
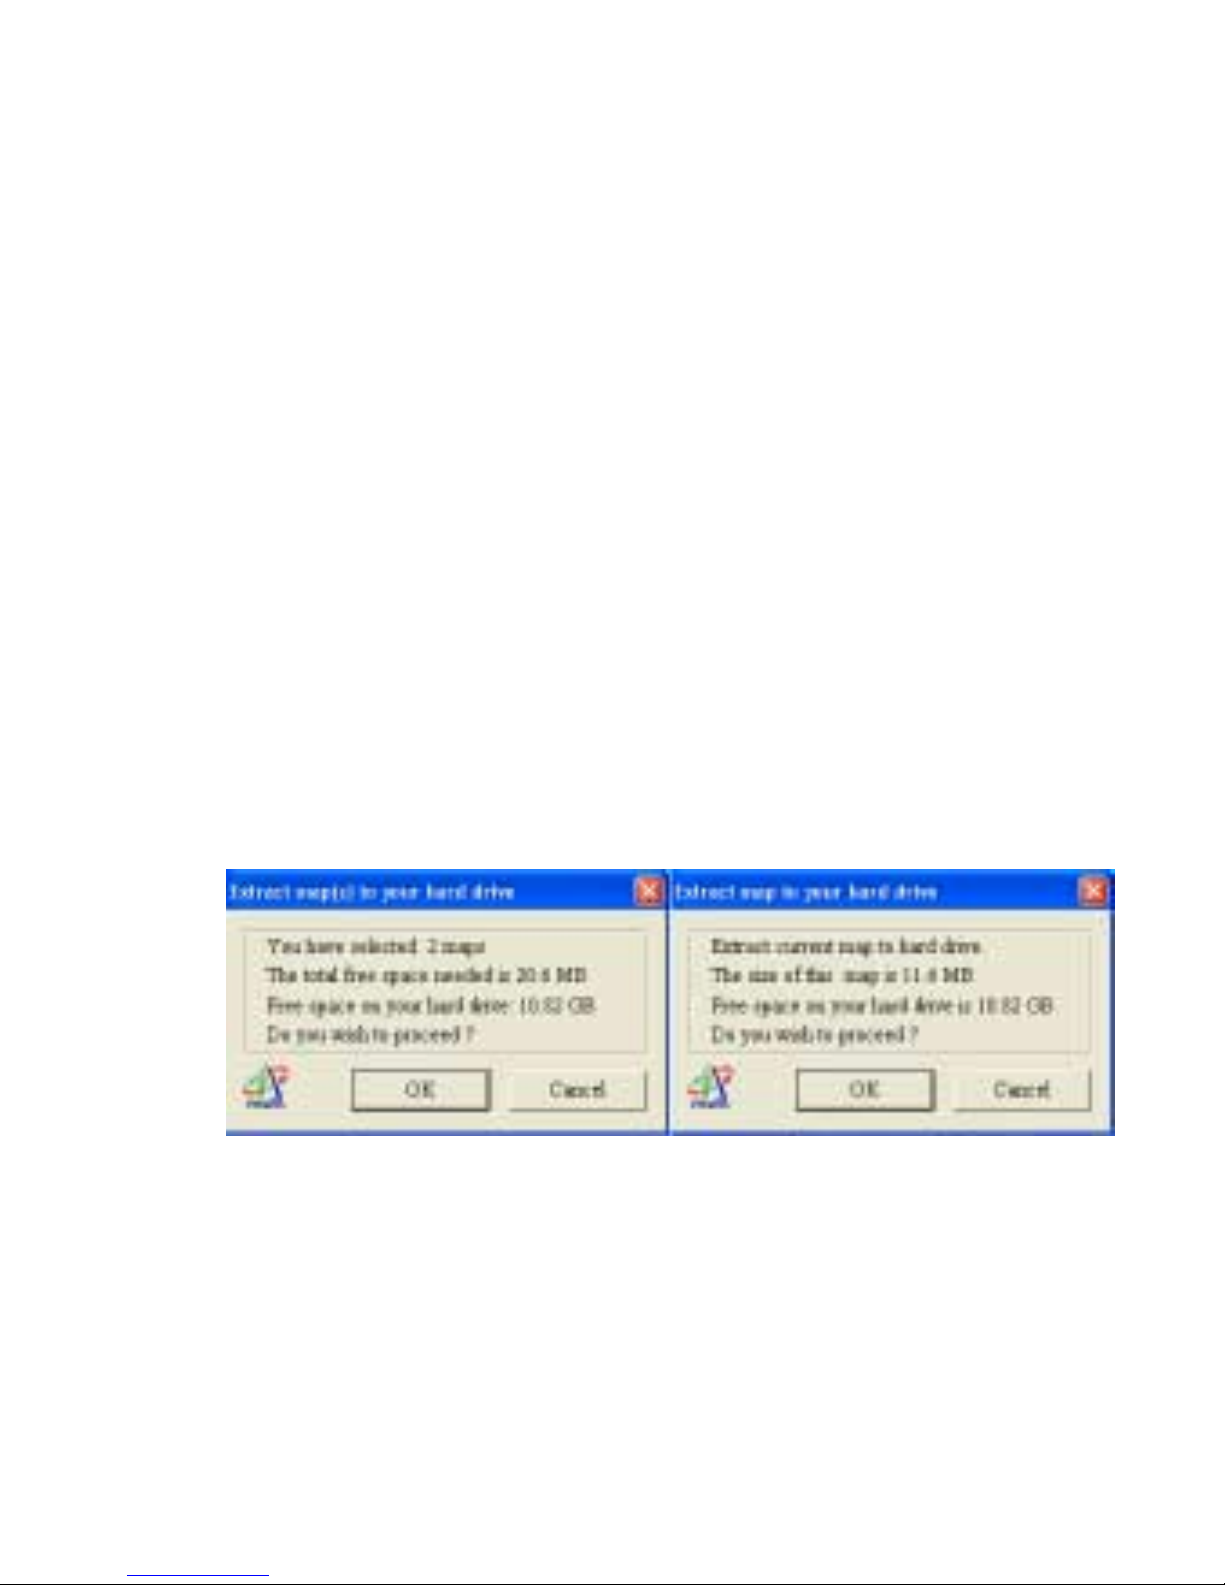
After making your selection, one of the following dialog
boxes will be displayed:
Dialog box for selected maps Dialog box for current map
Press “OK,” to continue, “Cancel” to end the operation.
Page 36

Page 36
3. Another dialog box will appear, asking if you’re sure
you want to continue. Press “Yes” to proceed. After
pressing “Yes,” a dialog box detailing the progress of the
extraction utility will display until extraction is
complete.
To exit MapFinder, single click the right mouse
button, and scroll down to “Exit.”
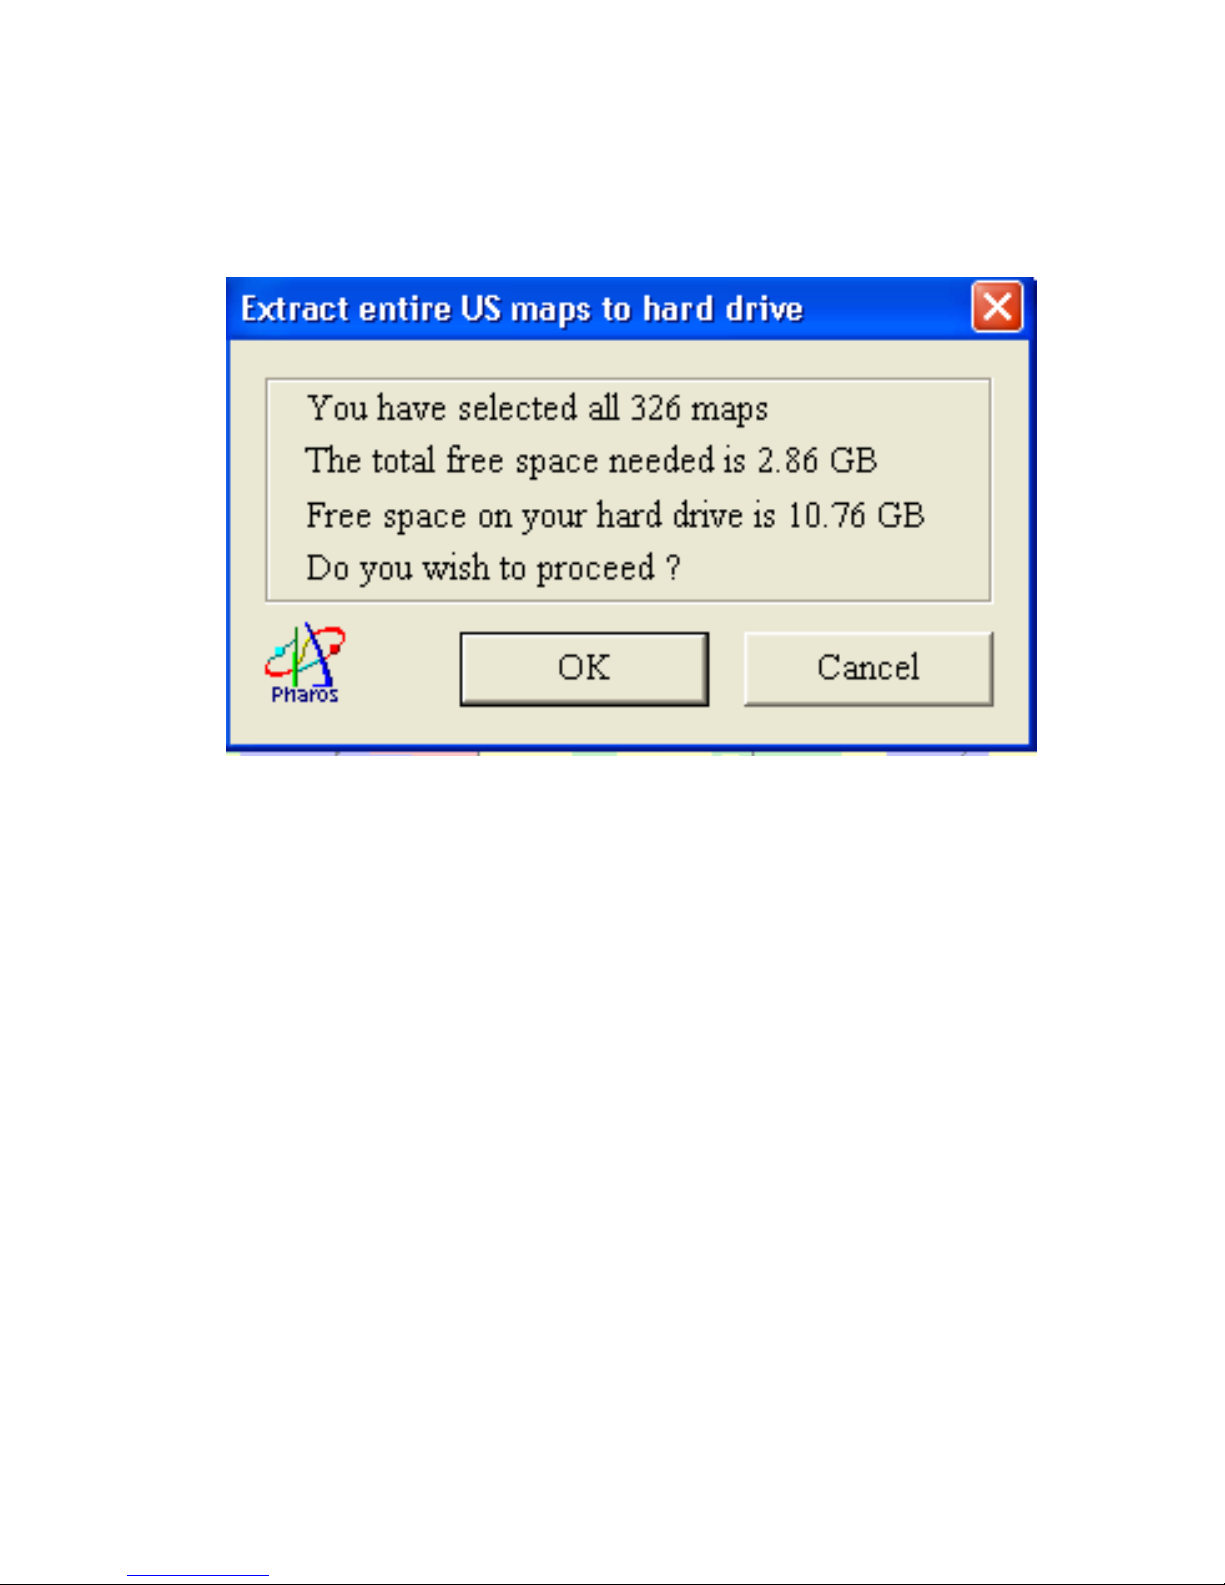
3.4.4 Extract All Maps to Your PC Hard Drive
1. Single click the right mouse button and scroll down to
“Extract US Maps to Hard Drive.” The following dialog
box will be displayed:
Page 37
Page 37
Extract All Maps Dialog Box
2. Click “OK.” Another dialog box will appear, asking if
you’re sure you want to continue. Press “Yes” to
proceed. After pressing “Yes,” a dialog box detailing
the progress of the extraction utility will display until
extraction is complete. You will be prompted to insert
map CDs as necessary.
To exit MapFinder, single click the right mouse
button, and scroll down to “Exit.”
Page 38
Page 38
3.5 Viewing a Map on Your PC
1. Follow any combination of steps 3.3.1, 3.3.2, or 3.3.3, to
select a map (if you used a group operation, the last map
selected will be viewed), or simply position your mouse
over the desired map.
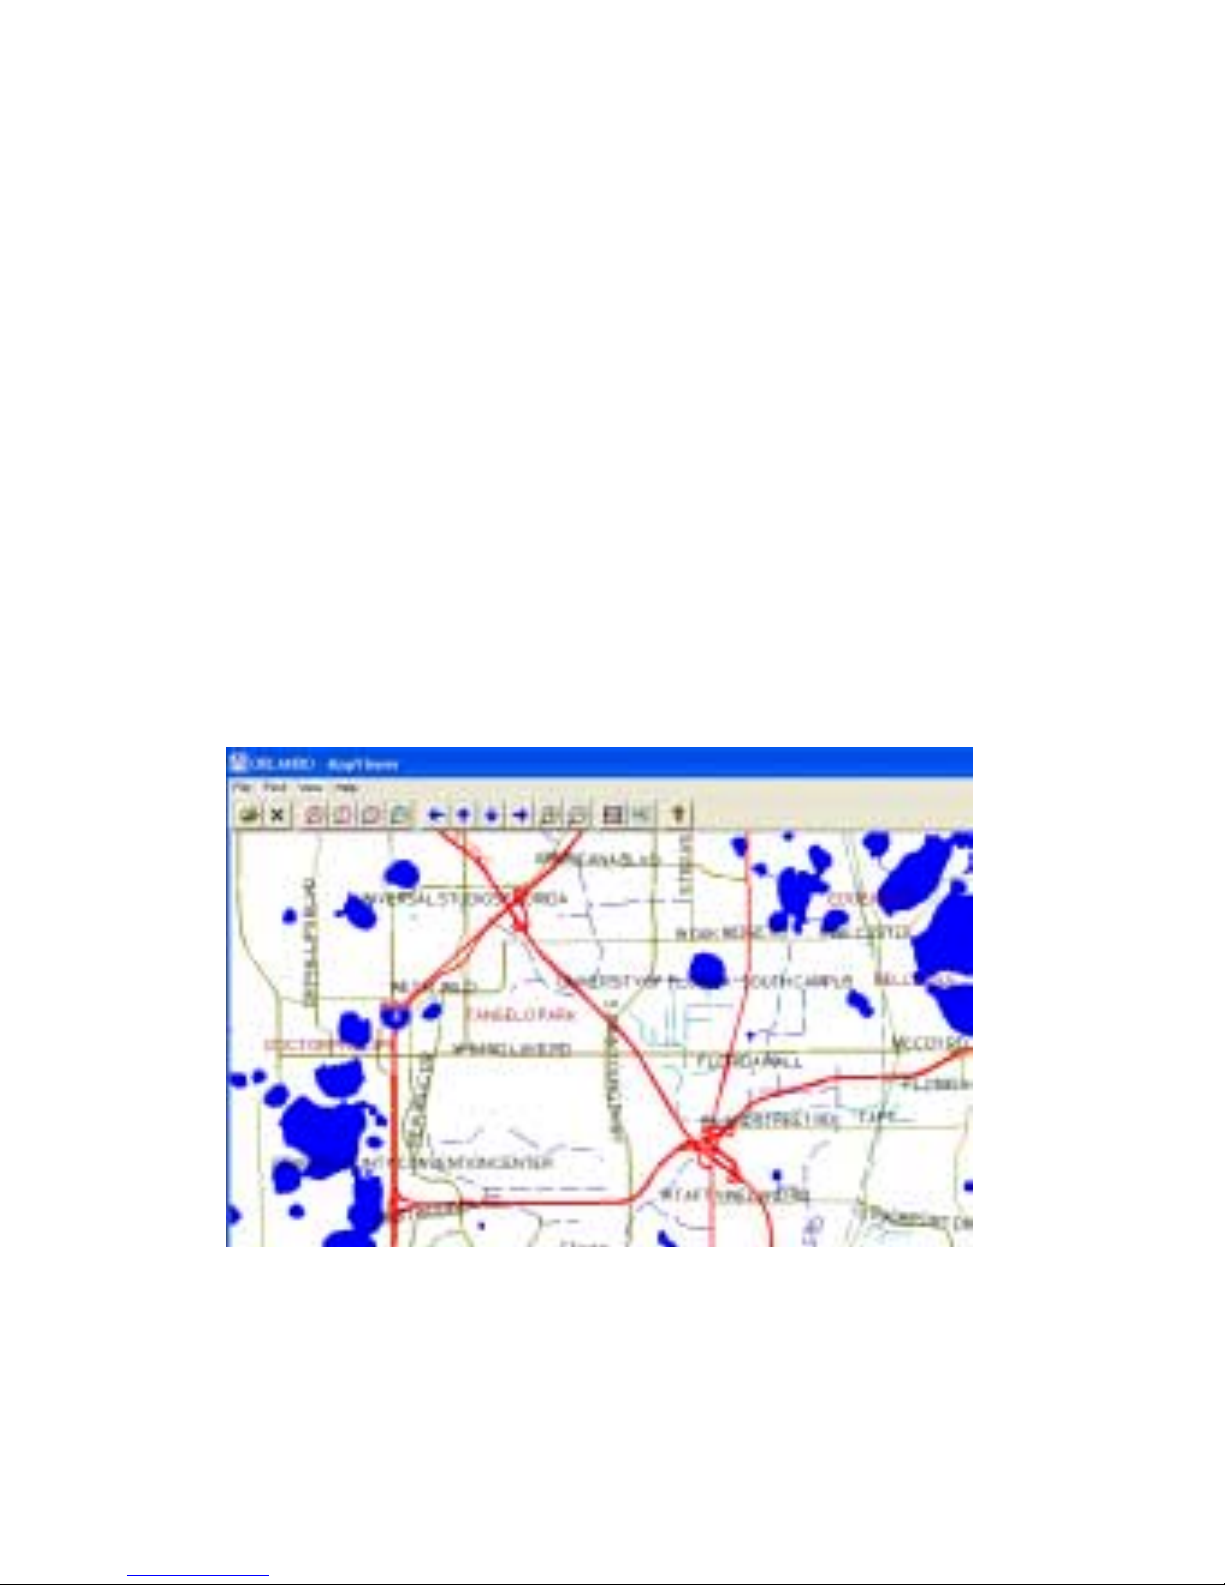
2. Single click the right mouse button and scroll down to
“View Current Map.” The following dialog box will be
displayed:
MapViewer Screen
Page 39

Page 39
3. Use the Tool Bar to navigate the m ap. From left to right,
tool bar functions are: open (new map), clear map, find
address, find intersection, find street, find point of
interest, move map left, move map up, move map down,
move map right, zoom in, zoom out, view full map, view
selected street. The pull down menus offer much the
same functionality as the tool bar. You may see the
name and city of a displayed street and by selecting it.
4. To exit the view capability, click on the “File” pull down
menu, scroll to “Exit” and click. You will be returned to
the primary MapFinder interface.
3.6 MapFinder Utilities
Use these Utilities to manage the maps that you have
extracted to your hard drive.
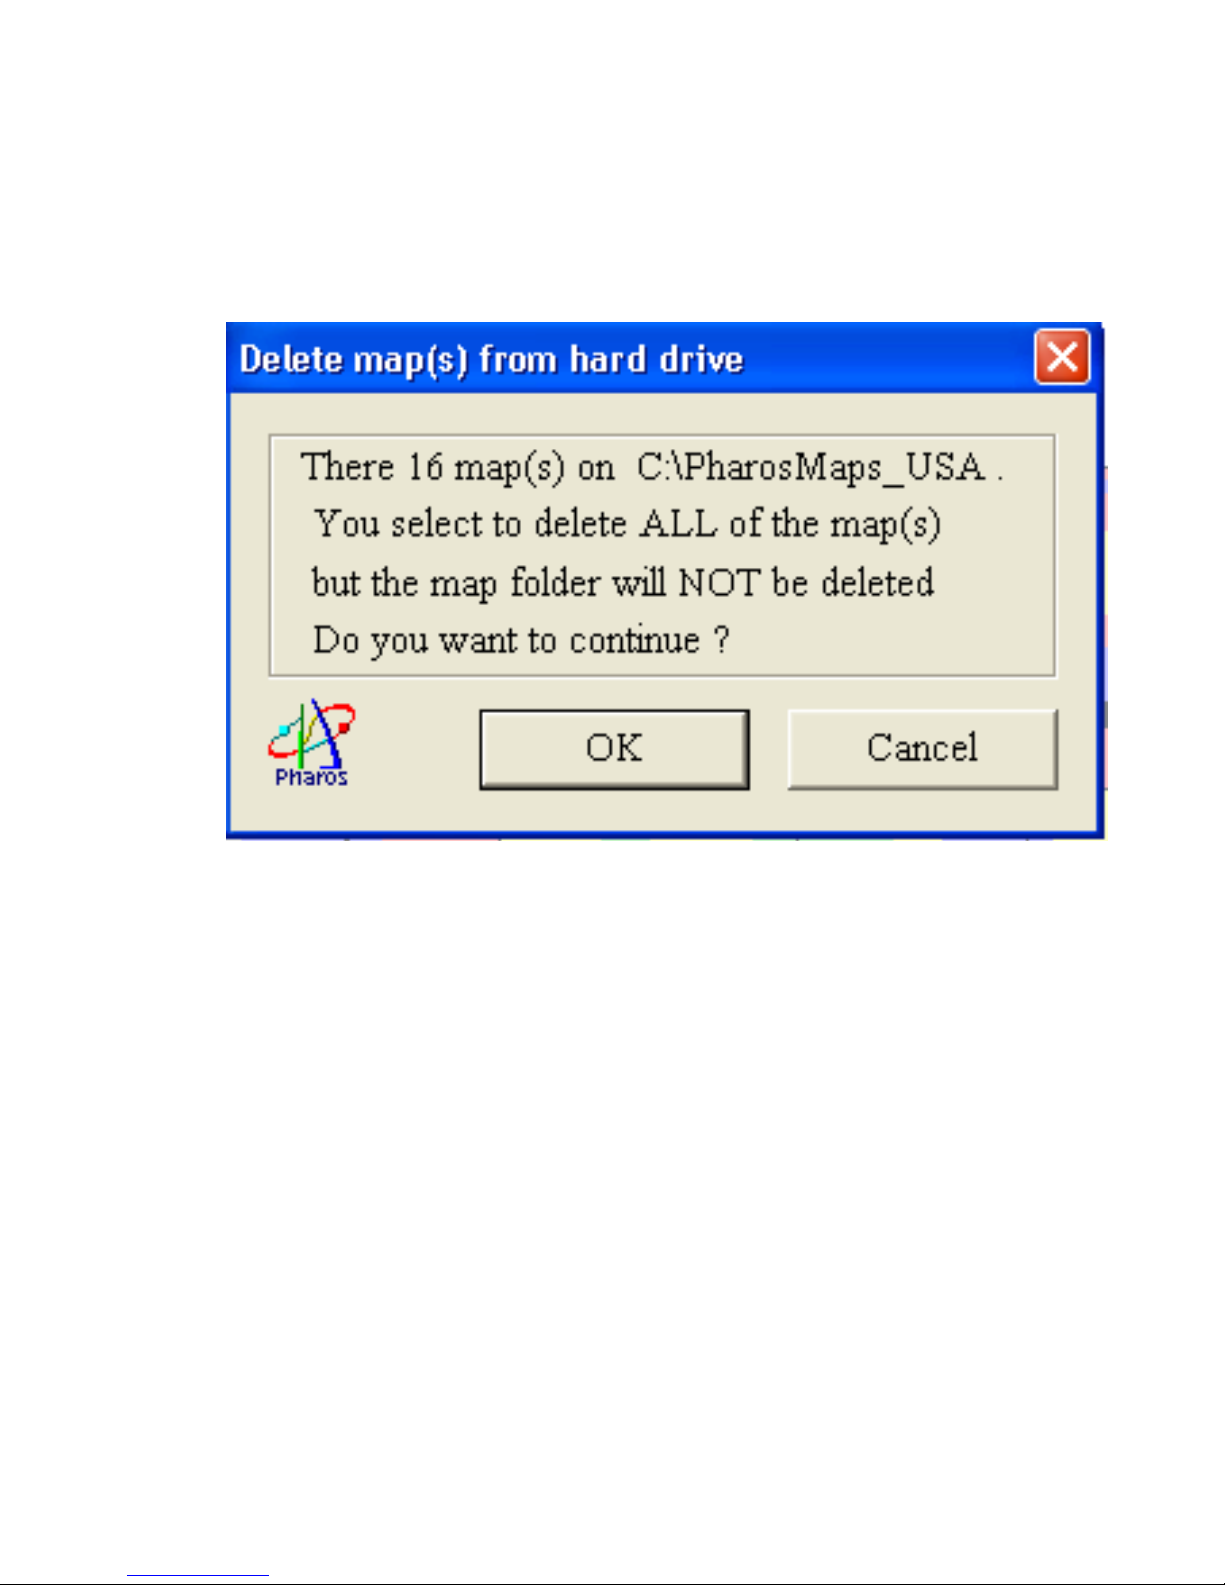
3.6.1 Delete All Maps on Your PC Hard Drive
1. Single click the right mouse button and scroll down to
“Delete All Maps on Hard Drive.” The following dialog
box will be displayed:
Page 40
Page 40
Delete All Maps Dialog Box
2. Click “OK.” Another dialog box will appear, asking if
you’re sure you want to continue. Press “Yes” to
proceed. After pressing “Yes,” the maps will be deleted.
To exit MapFinder, single click the right mouse button,
and scroll down to
“Exit.”
Page 41
Page 41
3.6.2 Delete Current M ap From Your PC Hard Dri ve
1. Without pressing any mouse buttons, roll the mouse over
a map that is loaded on your hard drive (check the Color
Bar to see which maps are on your drive). Single click
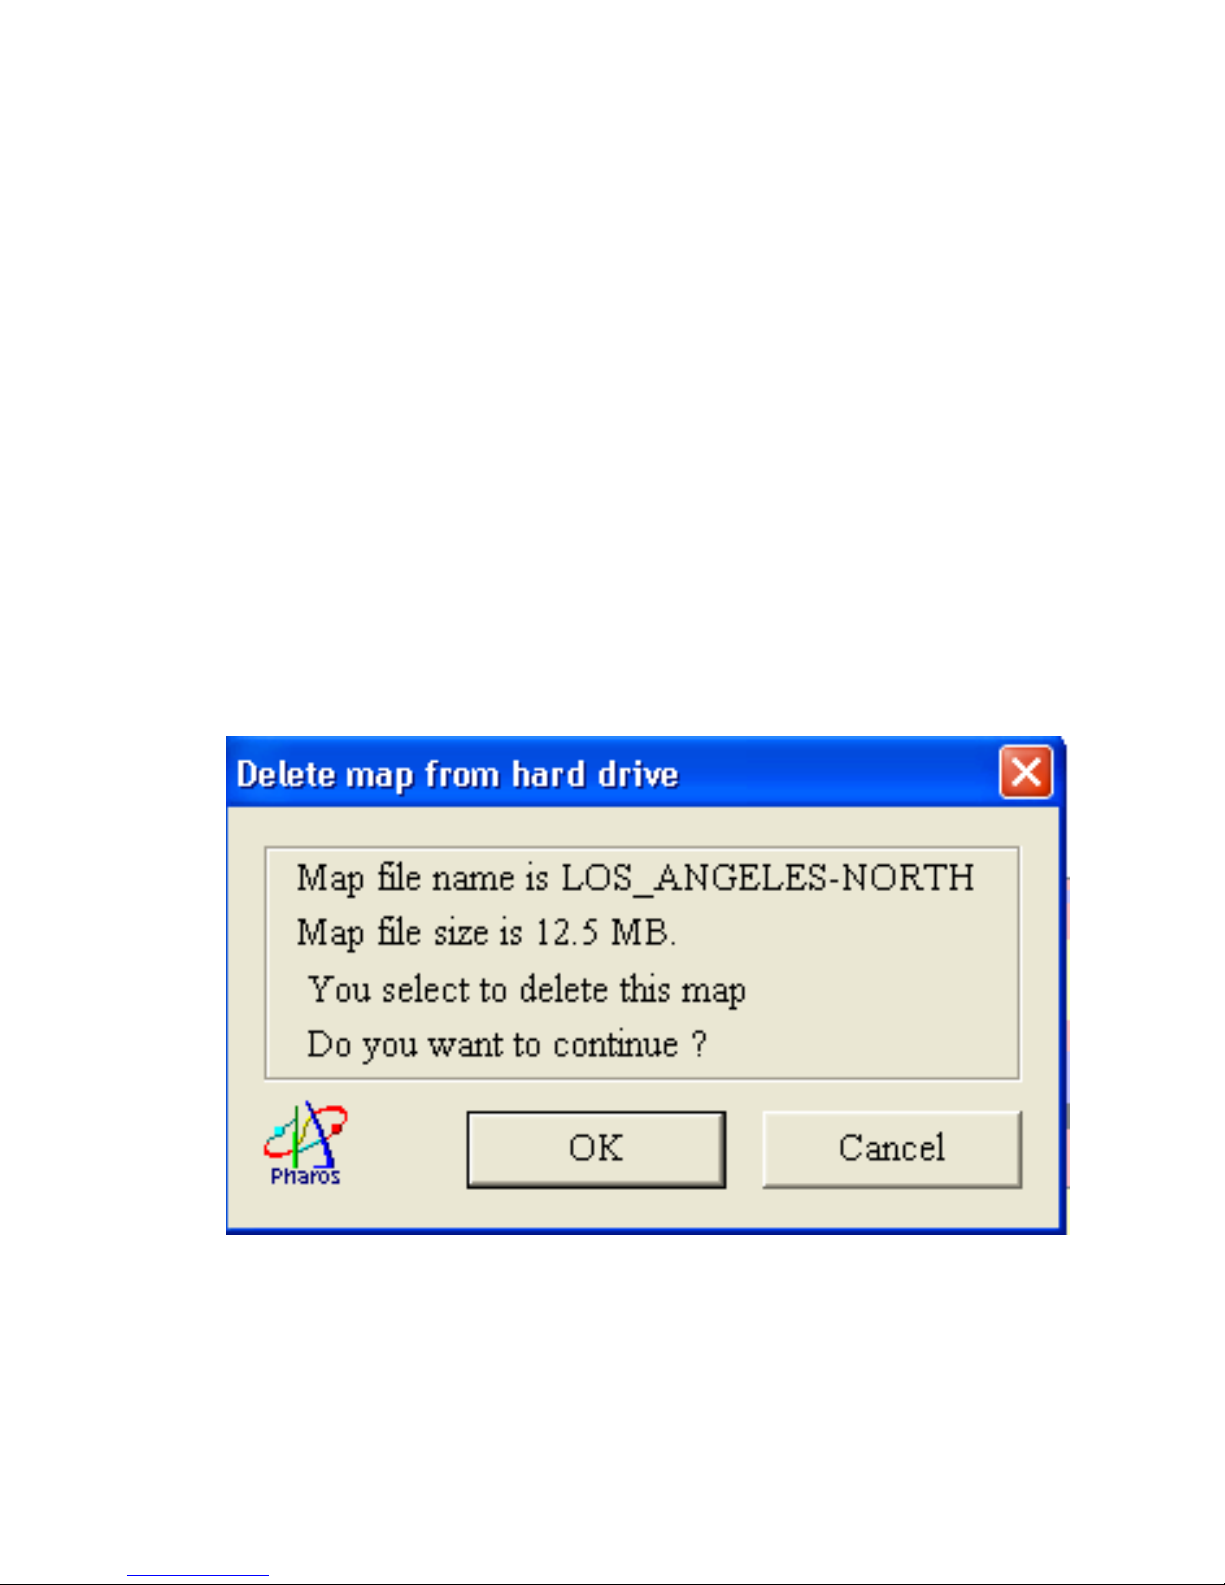
the right mouse button and scroll down to “Delete
Current Map on Hard Drive.” The following dialog box
is displayed:
Delete Current Map Dialog Box
Page 42

Page 42
2. Click “OK.” Another dialog box will appear, asking if
you’re sure you want to continue. Press “Yes” to
proceed. After pressing “Yes,” the map will be deleted.
To exit MapFinder, single click the right mouse button,
and scroll down to “Exit.”
SECTION 4: Uninstall Ostia Software
Ostia software cannot be uninstalled while Ostia is running. Use
Ctrl-Q or click File $ Exit to stop the Ostia program.
1. From the Windows CE Start menu, select Settings $
System.
2. Double click Remove Programs.
3. Select Ostia, then click remove.
SECTION 5: Using Ostia
To start the Ostia program, click the Start $ Programs $ Ostia.
Your Pocket PC may also provide additional methods of running
programs, such as a special menu window.
Information/instructions provided in this section can also be
Page 43
Page 43
found in your Pocket PC help menu after Ostia is started.
To read the help menu, please click the Start icon
on
your Pocket PC window, and then click
.
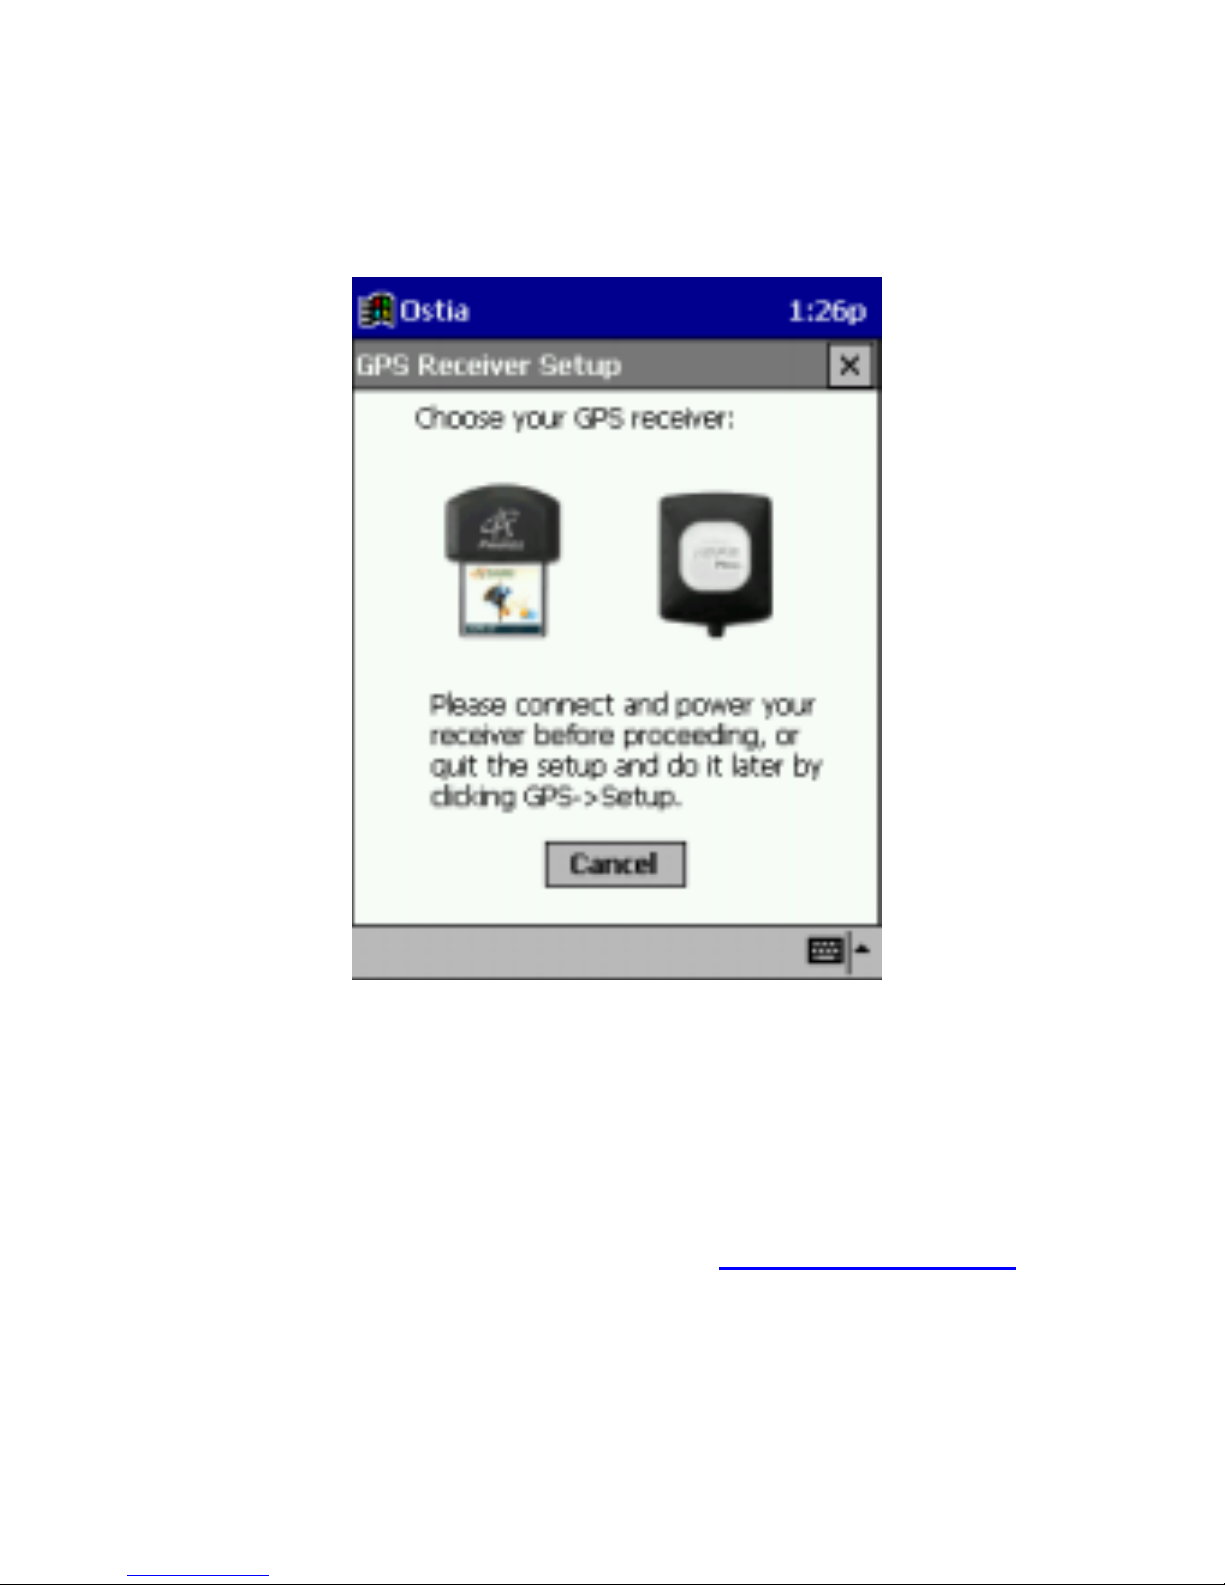
When the Ostia program is started for the first time, several startup screens will appear including the following:
Page 44
Page 44
This screen will allow you to choose which GPS receiver you will
be using and have the Ostia software automatically configure
itself to work with that GPS receiver.
Note: This screen will automatically appear only on the first time
Ostia is opened. If you need to view this screen again, it is
located in the GPS Menu under Setup. (See Section 5.14)
Page 45
Page 45
5.1 Ostia Menus
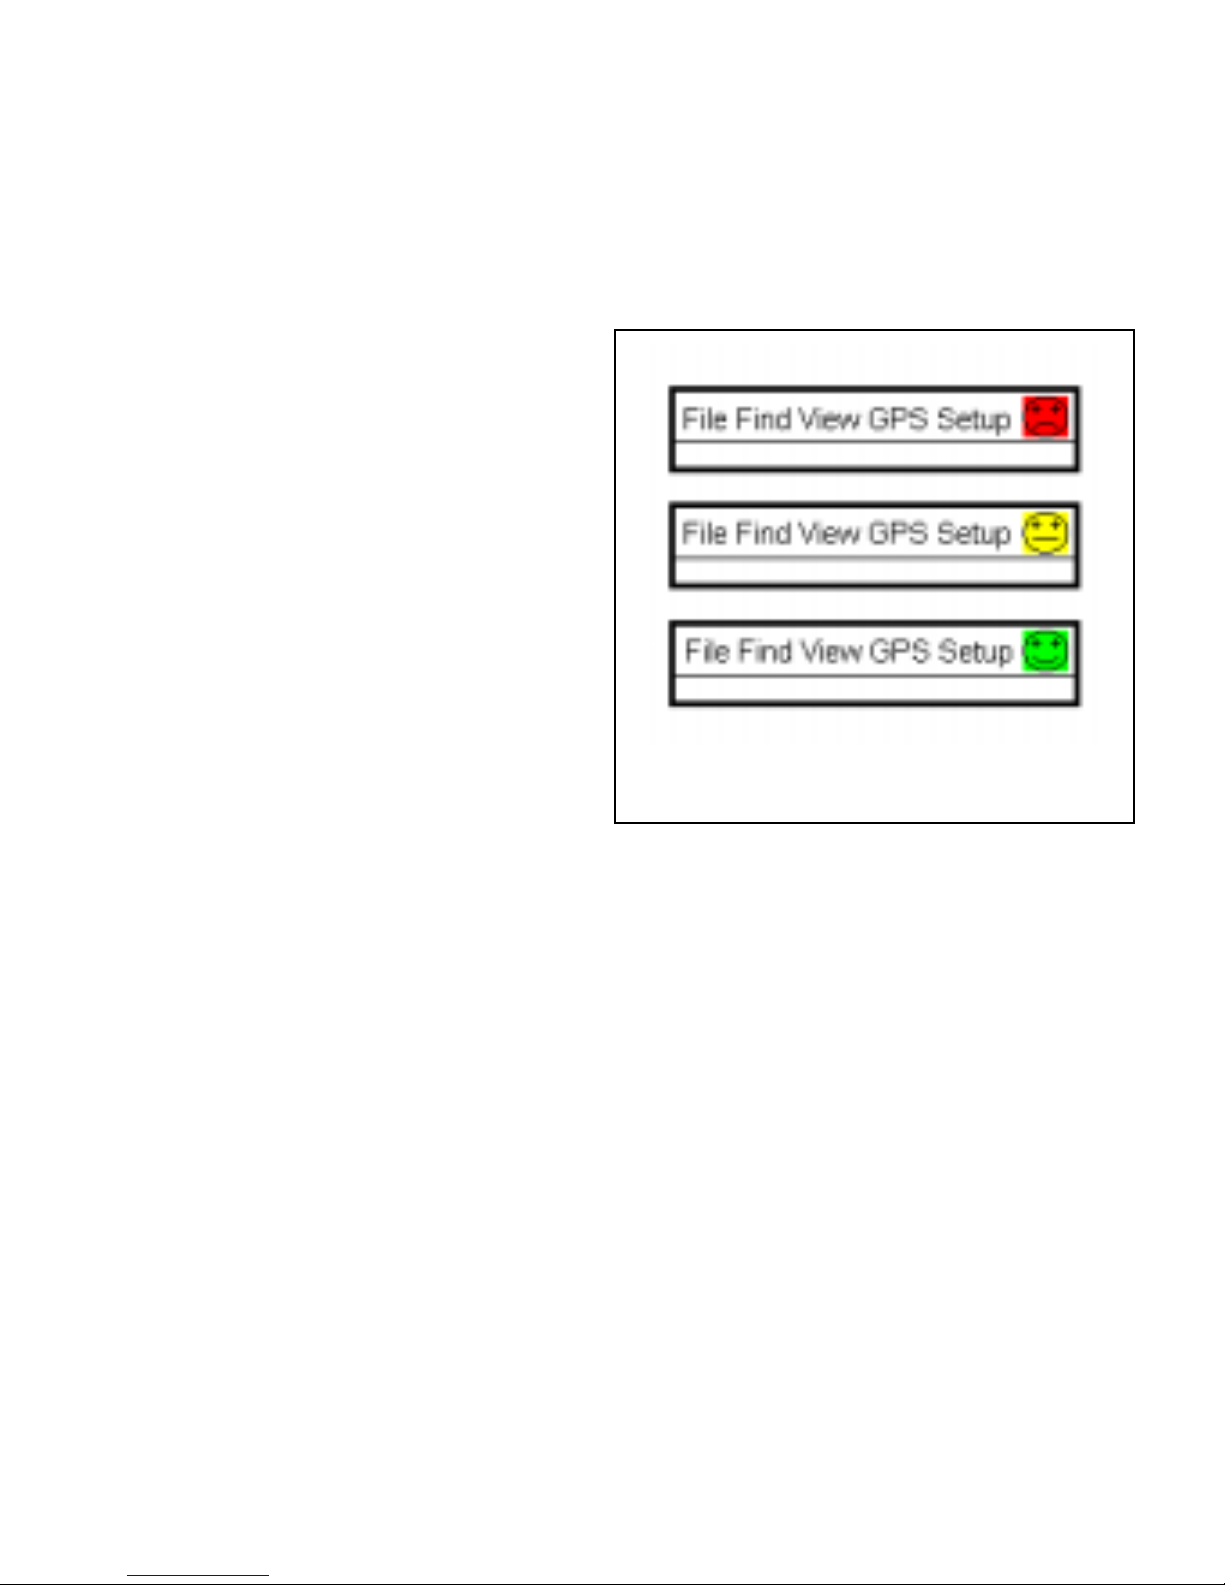
The Ostia menu bar consists of
several parts: The main menu (File,
Find, View, GPS and Setup), and the
GPS indicator. As shown in Figure 4.
The GPS indicator has three
changeable faces to indicate the
different operating status of the
receiver. By clicking the indicator
you can get more information.
Blue arrow keys on the map allow
you to shift the viewable portion of
map currently open.
Figure 4
The red sad-face of the indicator tells that the receiver is either
not powered properly or not enabled (top, Figure 4); the yellow
calm-face shows that the receiver is in the process of
determining your position (middle, Figure 4) and the green
happy-face shows that the receiver is successfully tracking the
position. (bottom, Figure 4). The menu items are described in
the following tables.
Page 46
Page 46
5.1.1 File
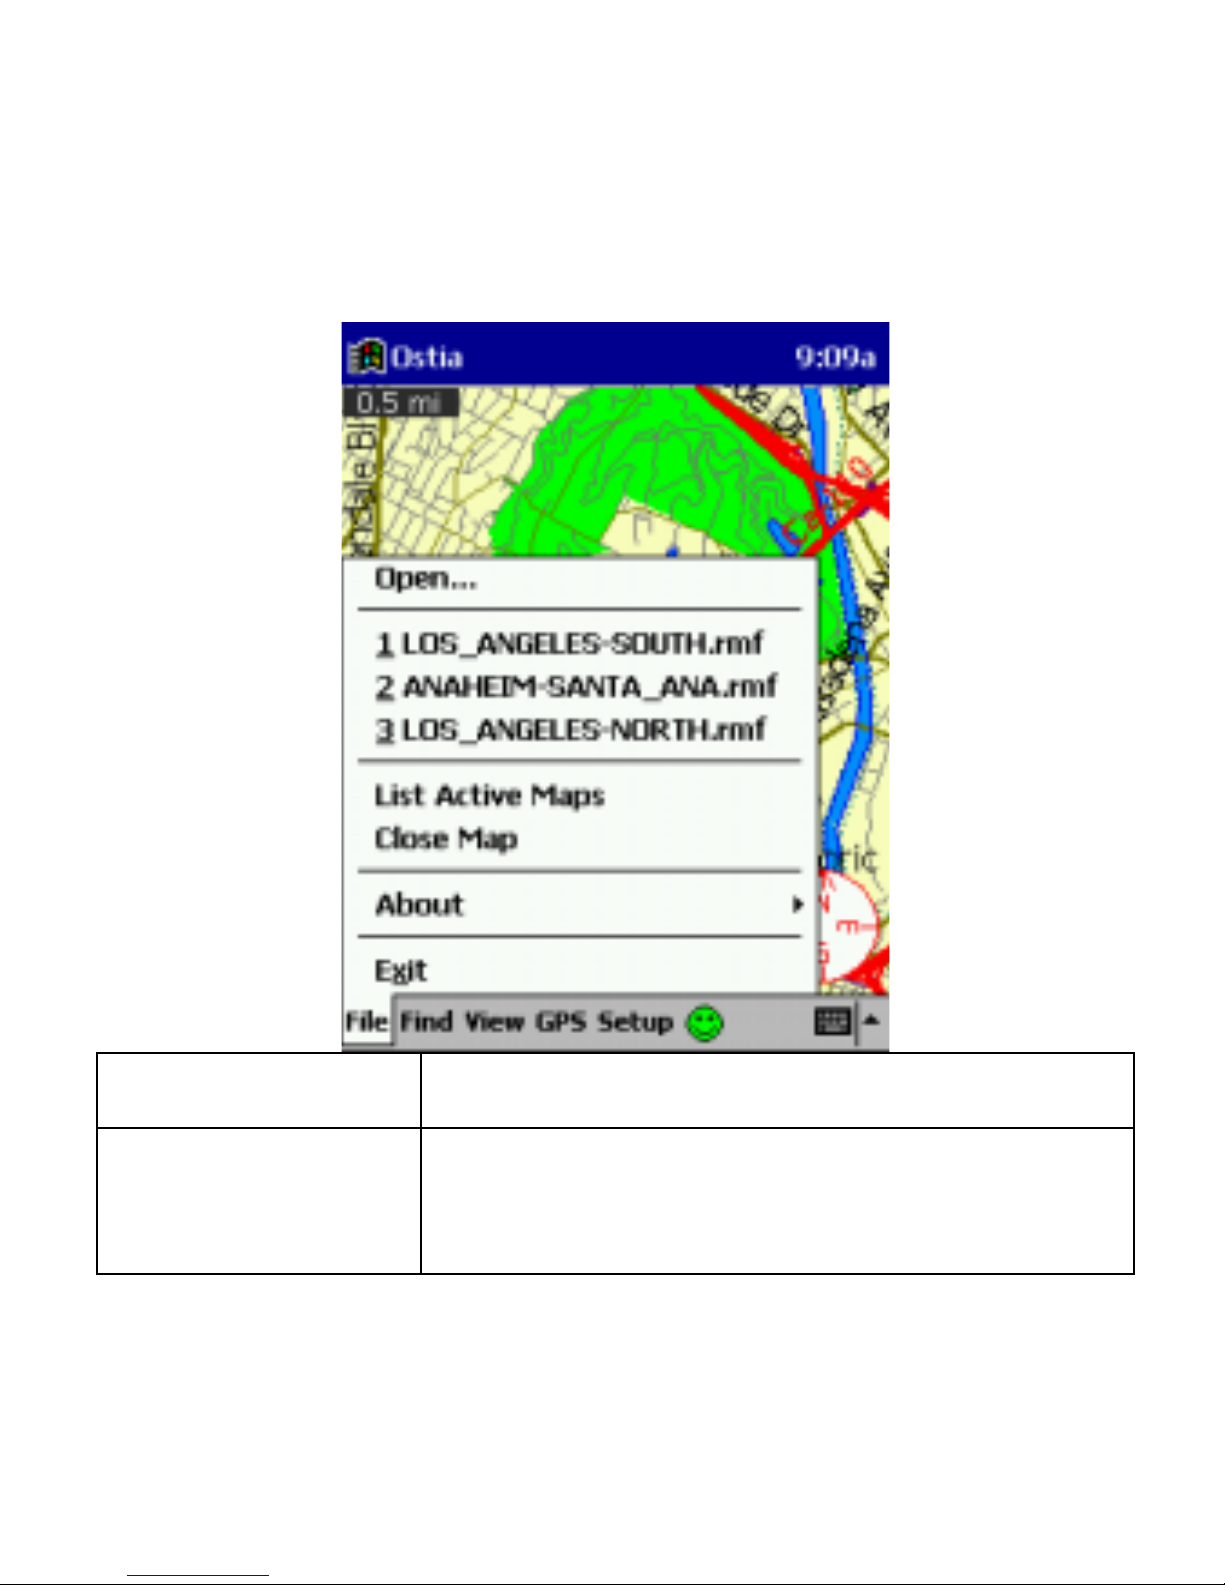
File Menu Items Description
Open
Select this item to open a map file. The
Open command displays a list of all available
maps.
Page 47

Page 47
Tap the file name that you want to open.
Repeat the same steps to open additional
maps. You can open up to ten maps at a time.
Below the “Open” menu item is listed the last 3
most recent maps that were opened.
Listing of up to 3
last used maps
Lists the last 3 maps that were used.
List Active Maps
Gives a list of all the maps currently open
and in use.
Close Map
Close opened map(s), clearing screen and
settings.
About
Displays a window showing the current
version of the Ostia software and/or maps
installed on your Pocket PC.
Exit
Quit Ostia. Note: tapping Ctrl-q will also Quit
Ostia.
Page 48
Page 48
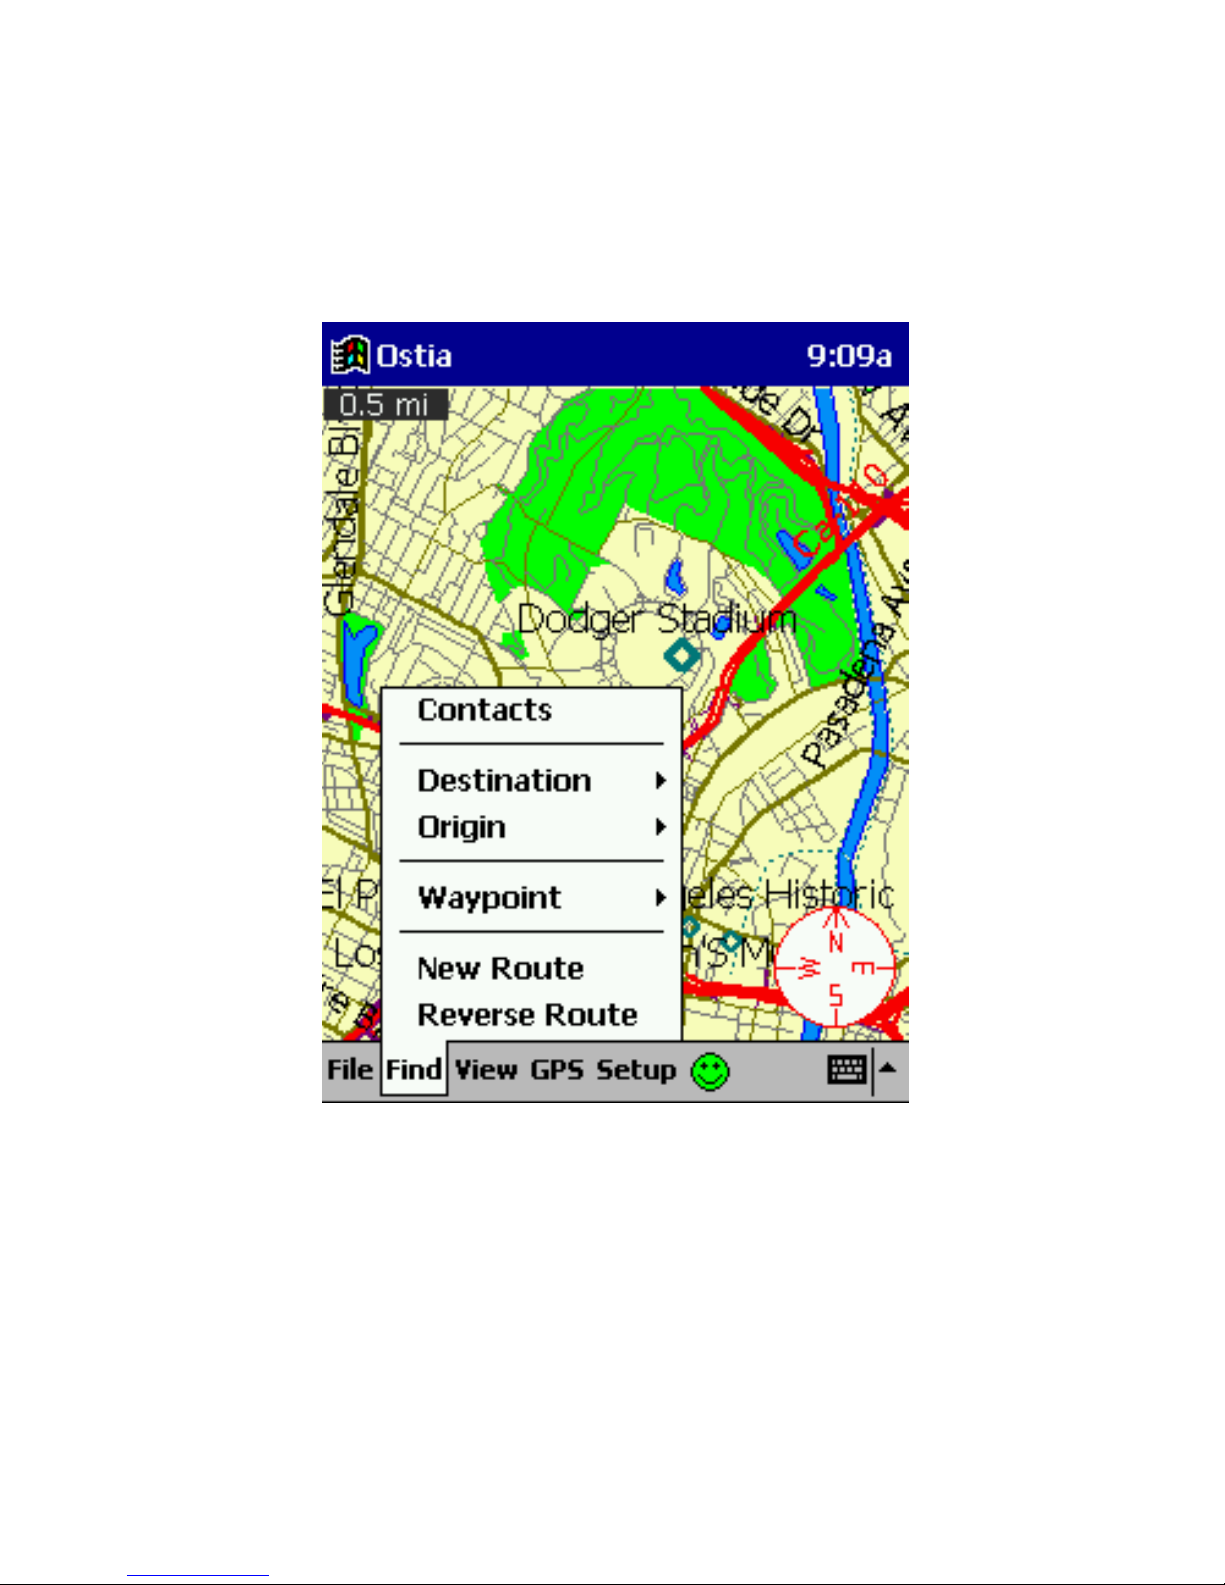
5.1.2 Find
Note: you must have a map file currently open to select this
menu item!
Page 49

Page 49
Find Menu Items Description
Contacts
Allows a search of the Pocket Outlook
Contacts database on the Pocket PC to find
a Destination or Origin.
Destination/ Origin
These items allow for the lookup of the
following for use as an Origin or
Destination of a route:
Contacts (same as above)
Addresses
Street Intersections
Points of Interest
Address
(Sub-Menu of
Origin or
Destination)
Select this menu item to locate a street
containing a specified address on the
currently opened map file.
Selecting an address is an easy 2 (two)-step
process.
1. On the Enter/Select Street Name
screen,
type in the address number in the first box
and then the street name in the second box.
The window below will display all of the
streets matching the street name that is
t
yp
ed in the field above. Select the correct
Page 50

Page 50
street and click Next to proceed to step 2.
5. On the Enter/Select City Name
screen,
select the desired city, county, township,
etc. You have the option to select a
specific zip code or just select the city
name. Press Next to proceed to step 3.
6. At prompt will appear on the screen
asking if you wish to save this point into
your Contacts list. If you click Yes, you
will be given the option to name this
contact and confirm the address. When
you are done confirming the contact
information click OK.
The selected street segment will be displayed
in Green if an origin or Red if a destination.
Note: To modify a previous selection, press
the Back button.
Intersection
(Sub-Menu of
Origin or
Destination)
Select this menu item to locate a street
intersection on the currently opened map.
Selecting an intersection is an easy 3 (three)-
step process.
1. On the Enter/Select Street Name
screen,
type the entire name or first several letters
Page 51

Page 51
and/or numbers of a desired street name. A
list of closely related street names will
appear in the scrollable window. Select the
desired street name, then press Next to
proceed to step 2.
2. Select a city, county, township, etc… from
the list of offered names. You have the
option to select a specific zip code or just
select the city name. Press Next to proceed
to step 3.
3. All possible street crossings are listed.
Make a selection and press Finish.
The selected intersection will be displayed in
Green if an origin or Red if a destination.
Note: To modify a previous selection, press
the Back button.
Point of Interest
(Sub-Menu of
Origin or
Destination)
Select this menu item to find a point of
interest on the currently opened map. Note,
many points of interest are not on a street, you
may have to use the closest intersection for
routing purposes.
Selecting a point of interest is an easy 2 (two)-
step process.
Page 52

Page 52
1. Select a category of point of interest from
the scrollable list, then press Next to
proceed to step 2.
2. Select the desired point of interest. Press
Finish.
The selected point of interest is marked and its
nearest road segment or intersection will be
displayed in Green if an origin or Red if a
destination.
Note: To modify a previous selection, press
the Back button.
Waypoint
Select this item to input a
Latitude/Longitude coordinate as a mark on
the map to navigate to.
Input
allows you to enter the coordinates you
wish to appear as a mark on the map or click
GPS to set your current GPS position as a
mark.
Note: There is a box labeled Save as
waypoint. This will allow for the Lat/Lon mark
to be saved for later use.
Select
allows you to choose from Lat/Lon
coordinates that
y
ou previously saved as
Page 53

Page 53
waypoints.
Delete
allows you to delete waypoint
coordinates from the database stored on the
Pocket PC.
New Route
Select this menu item to display a new
route starting at the origin and ending at the
destination. Before this menu item is active,
both the origin and destination must be
defined. When the iGPS receiver is connected
and “Enable GPS” is checked, the iGPS
position will be the point of origin.
1. The Origin is shown as a green line.
2. The Destination is shown as a red line.
3. The Route is shown as a blue path
between origin and destination.
You also can define the origin or the
destination by double clicking the street on the
map. The map scale is automatically adjusted
so that the origin, route, and path are all
visible.
Reverse Route
Select this menu item to switch the Origin
and Destination of a calculated route.
Page 54
Page 54
This will also recalculate the text turn-by-turn
directions in the Directions screen in the View
menu.
Note: The reverse route may be different than
the original route because of divided roads and
one-way streets.
Page 55
Page 55
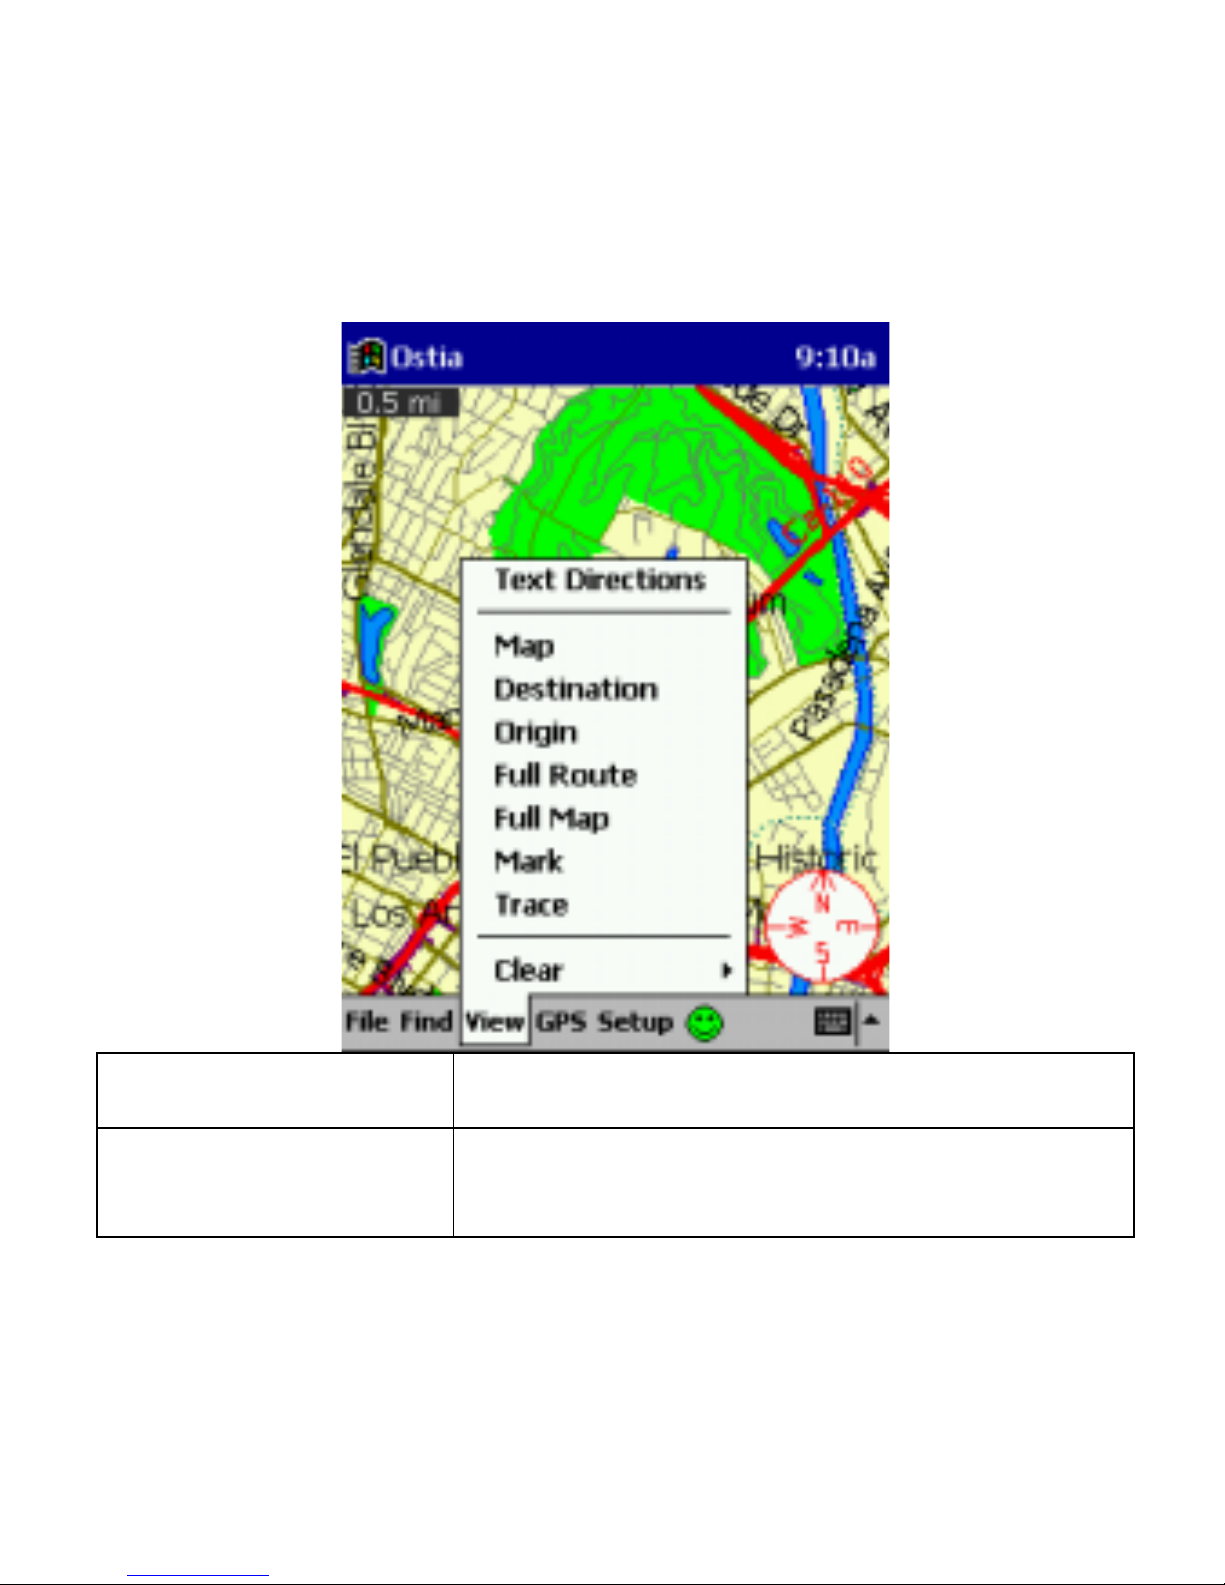
5.1.3 View
View Menu Items Description
Text Directions
Select this menu item to display turn-byturn driving directions in text format.
Page 56
Page 56
Map
Select this menu item to return to the
map view.
Destination
Select this menu item to display the
currently defined destination. Selecting
this function may change the map scale.
Origin
Select this menu item to display the
currently defined origin. Selecting this
function may change the map scale.
Full Route
Select this menu item to display the
currently defined full route. Selecting this
function may change the map scale.
Full Map
Select this menu item to view the entire
map currently open.
Mark
Select this menu item to view a Lat/Lon
coordinate mark that has been set on the
current map.
Trace
Select this menu item to view a saved
route.
Clear
Select this menu item to clear the map of
any of the following:
Page 57
Page 57
- Route
- Mark
- Trace
Note: Clearing the route also clears the
origin and destination.
Note: Destination, Origin and Full Route functions are v alid only
if “Enable GPS” is not checked.
Page 58
Page 58
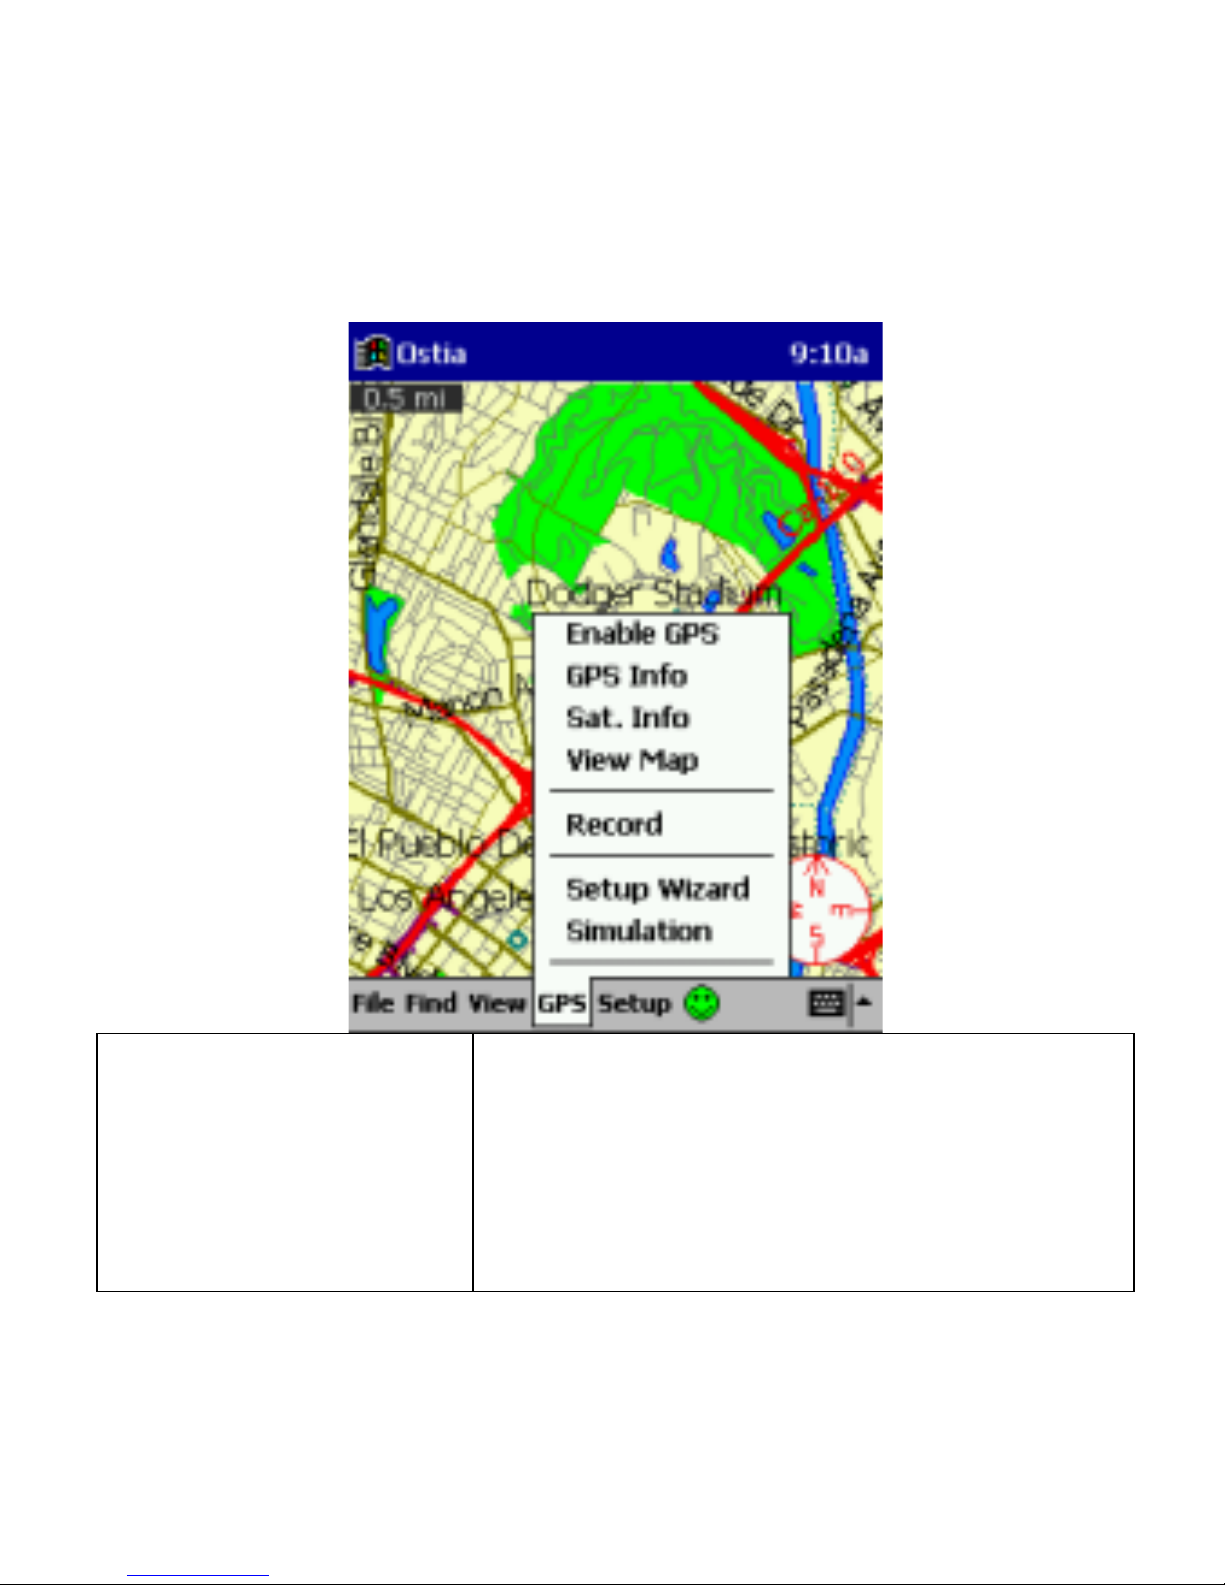
5.1.4 GPS
Enable GPS
Check this menu item to enable the GPS
receiver.
You should check it only when the iGPS
receiver is properly connected to your
Pocket PC. The GPS icon (a red arrow)
will be dis
play
ed on the map indicating
Page 59

Page 59
your current position. Uncheck Enable
GPS to disable the GPS tracking function.
GPS Info.
Select this menu item to display the
current direction, speed, longitude,
latitude, local time and “vision” (line of
sight) distance to the destination
according to the received GPS data.
Sat. Info.
Select this menu item to display the
locations of the GPS satellites serving
your area. The top portion of the display
shows a constellation view of nearby GPS
satellites. The center of the circle is the
zenith of your position. The bottom portion
of the display shows the signal quality for
each satellite.
View Map
Select this menu item to return to the
view of the map(s) that are currently
open.
Record
Select this menu item to record and
save a route that you are currently
traveling on.
Setup Wizard
Select this menu item to automatically
Page 60

Page 60
configure the software to use either the
iGPS-180 mobile receiver or the iGPSCF portable receiver.
Simulation
Simulating car navigation based on
given route.
Note: Before activating Simulation Mode,
verify that “Enable GPS” option is not
checked.
Page 61
Page 61
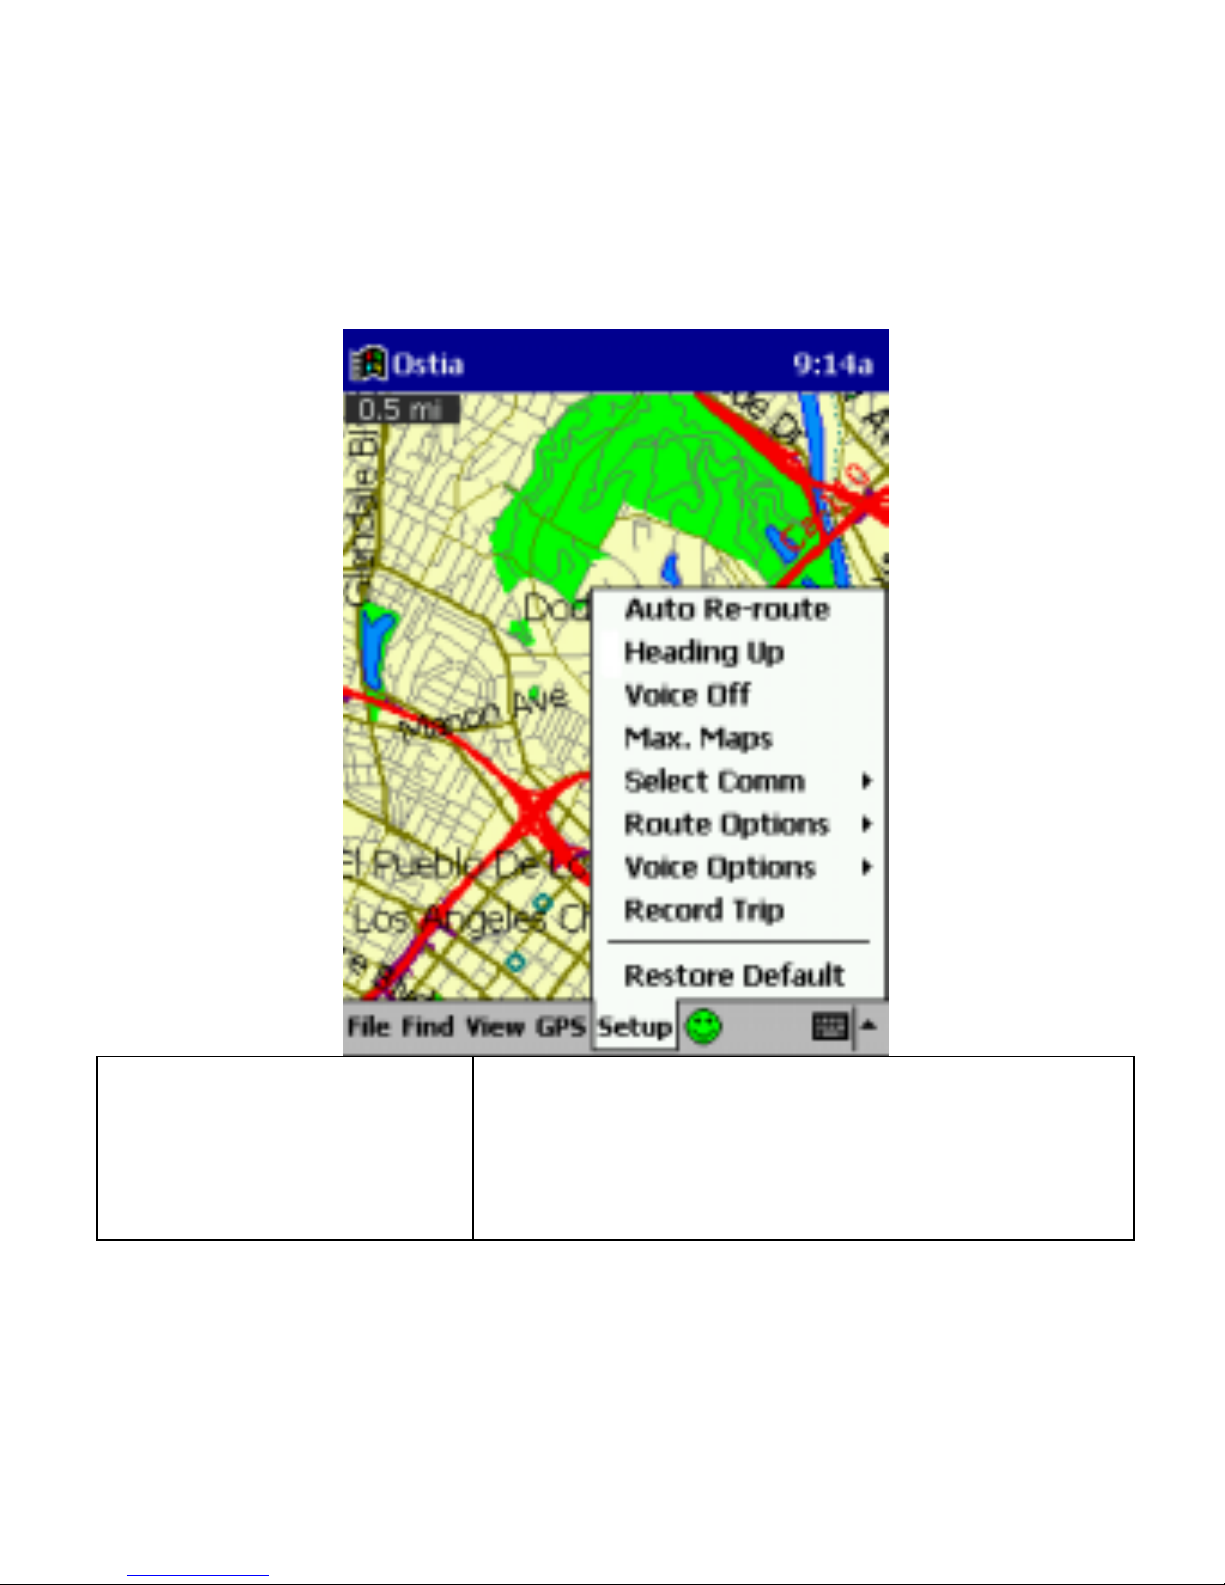
5.1.5 Setup
Auto Re-route
Select this menu item to have the
program automatically re-route you
when you travel off of the calculated
route.
Page 62

Page 62
Heading Up
Select this menu item to change the
orientation of the map. With Heading Up
selected, the map will be oriented so that in
general, your position indicator is moving
towards the top of the screen.
With Heading Up not selected, the map is
oriented to that North is always at the top
of the screen.
Voice Off
Select this menu item to turn the Voice
Prompt on/off.
Max. Maps
Select this menu item to set the
maximum amount of maps you can
open at the same time. A maximum of 10
maps can be set in this option. Depending
on your device the more maps that are
open may affect the processor speed.
Select Comm.
Select this menu item to manually set
the communication port the software is
to read the GPS receiver on.
Route Options
Select this menu item to choose the
method the program will calculate the
route:
Page 63

Page 63
• Fastest
This method will calculate a route
based on streets with the fastest
speed limits.
• Shortest
This method will calculate a route
based on streets along the most
direct route.
• No Highways
This method will exclude highways
from the route calculation.
Voice Options
Select this menu item to change the
style of voice prompts the program will
use to guide you on a route.
(Voice prompts will be available on the
Pharos we bsite www.pharosgps.com)
Record Trip
Select this menu item to set the
intervals to which the program will set a
record point when it is recording/saving
a route.
Restore Default
Select this menu item to restore the
GPS settings back to the original.
Page 64
Page 64
One Touch Re-Route: If you find yourself off-route (voice
prompts will let you know that you are off-route while you are
traveling), simply push the Action Button* on your Pocket PC
to calculate a new route from your current location to the
destination.
*Note: The Action Button may differ from one Pocket PC to
another.
5.2 View Controls
Here are some tips for controlling map viewing. You may find
other techniques unique to your Pocket PC that allows you to
change the current map view.
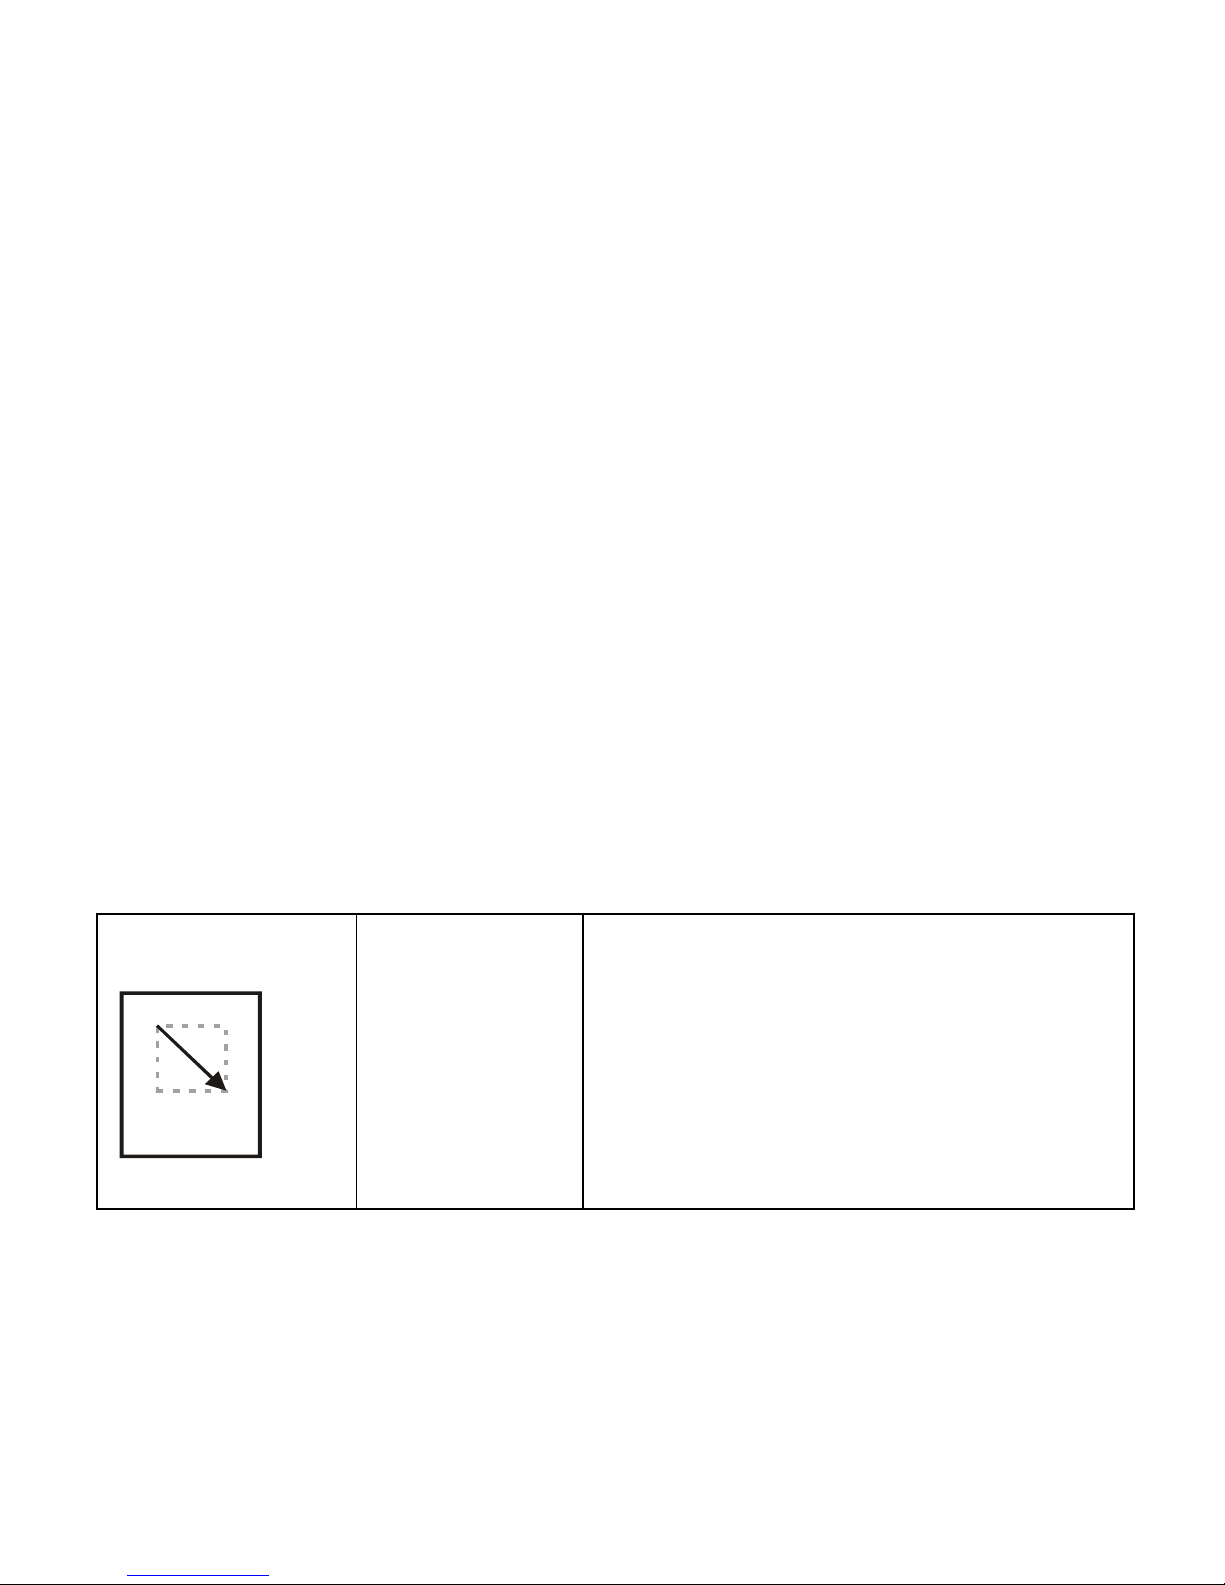
Zoom In
View a
smaller
section of
the map
with more
detail.
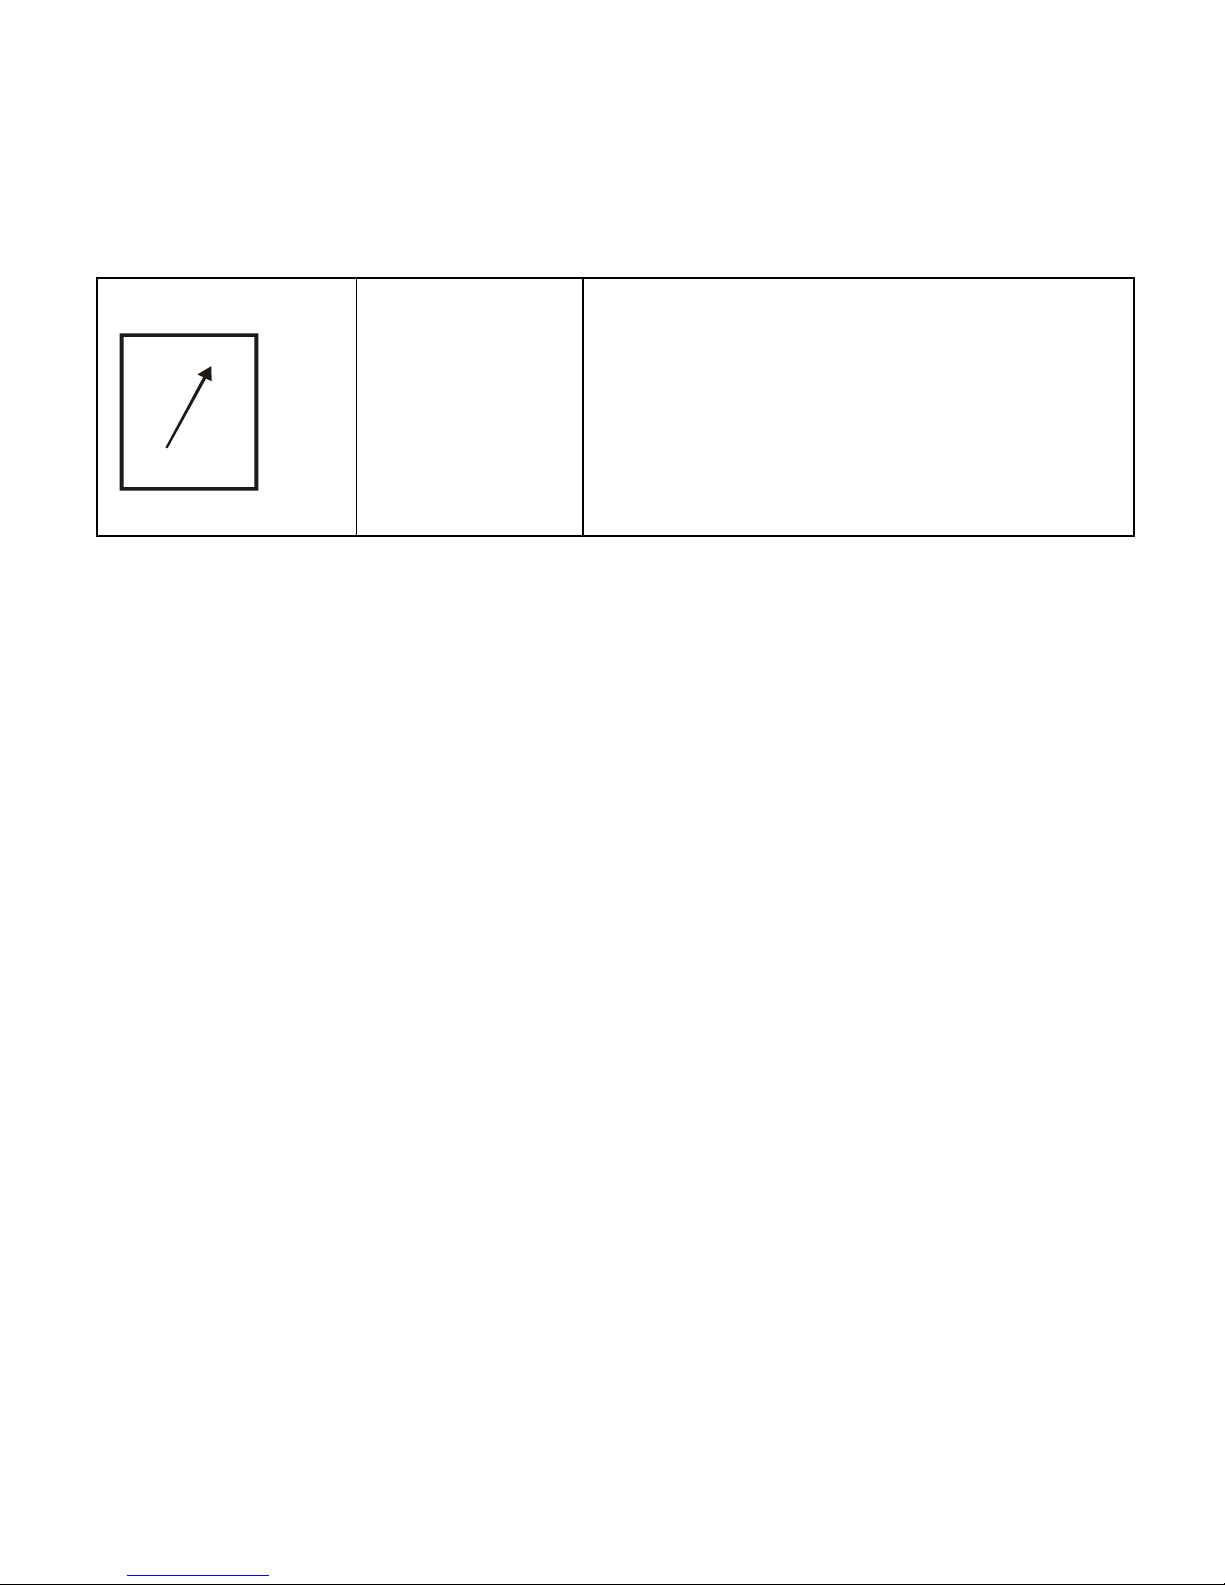
To zoom in for a more detailed
view, use your stylus to draw a
diagonal line from upper left to
lower right creating a small box. A
best-fit scale is used to display the
enclosed rectangular area on your
Pocket PC screen.
Page 65
Page 65
Zoom Out
View a
larger
section of
the map
with less
detail.
To zoom out, use your pointing
device to make a diagonal line from
lower left to upper right.
SECTION 6: Tips on Getting Started
Try the following exercise to develop and practice your map skills
• Set your home as a route origin.
• Set the nearest friend’s home as a route destination.
• Find the route between your home and friend’s home
• Enable Simulation Mode to experience car navigation
virtually.
SECTION 7: GPS (optional)
Two ultra compact, lightweight, integrated types of GPS receiver
(iGPS-180 and iGPS-CF) are available from Pharos as an
option. The iGPS receivers feature rapid positioning, instant
reacquisition, low power consumption, and a water resistant
enclosure.
Page 66

Page 66
7.1 Required Components
• Windows CE based Pocket PC or Handheld PC
• Ostia Software
• iGPS receiver *
*The iGPS receiver PocketPak and instructions are available
in kit form for most models of Windows CE based Pocket
PC’s. See your dealer or our website
(http://www.pharosgps.com) for details.
7.2 Installing GPS
iGPS-180
Page 67
Page 67
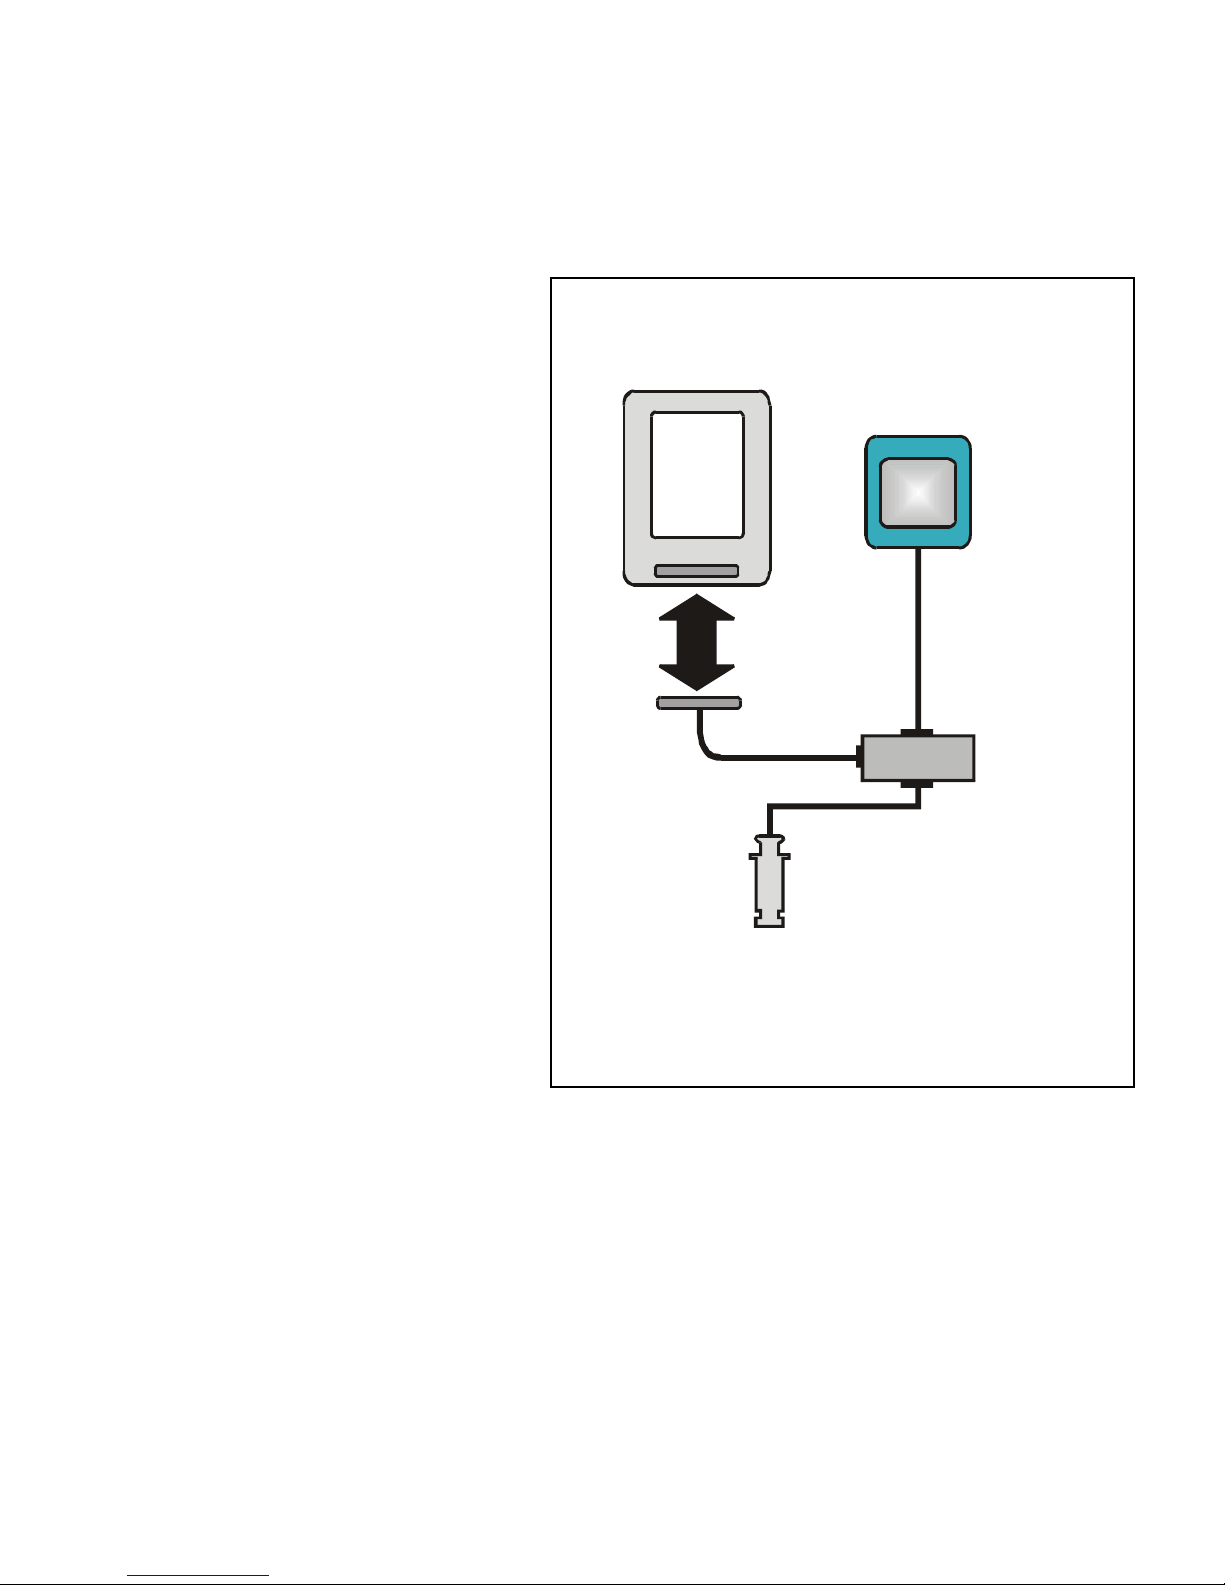
1. Place the iGPS-180
receiver on the
dashboard of the
vehicle close to the
windshield.
2. Plug the cigarette
lighter adaptor into the
lighter socket of your
vehicle.
3. Plug the serial adaptor
cable into the Pocket
PC’s serial port socket.
PD A
Serial
Adaptor
Cable
i GPS-180
Adaptor
Junction
Box
Cigarette
Lighter
Adaptor
Figure 5
Page 68
Page 68
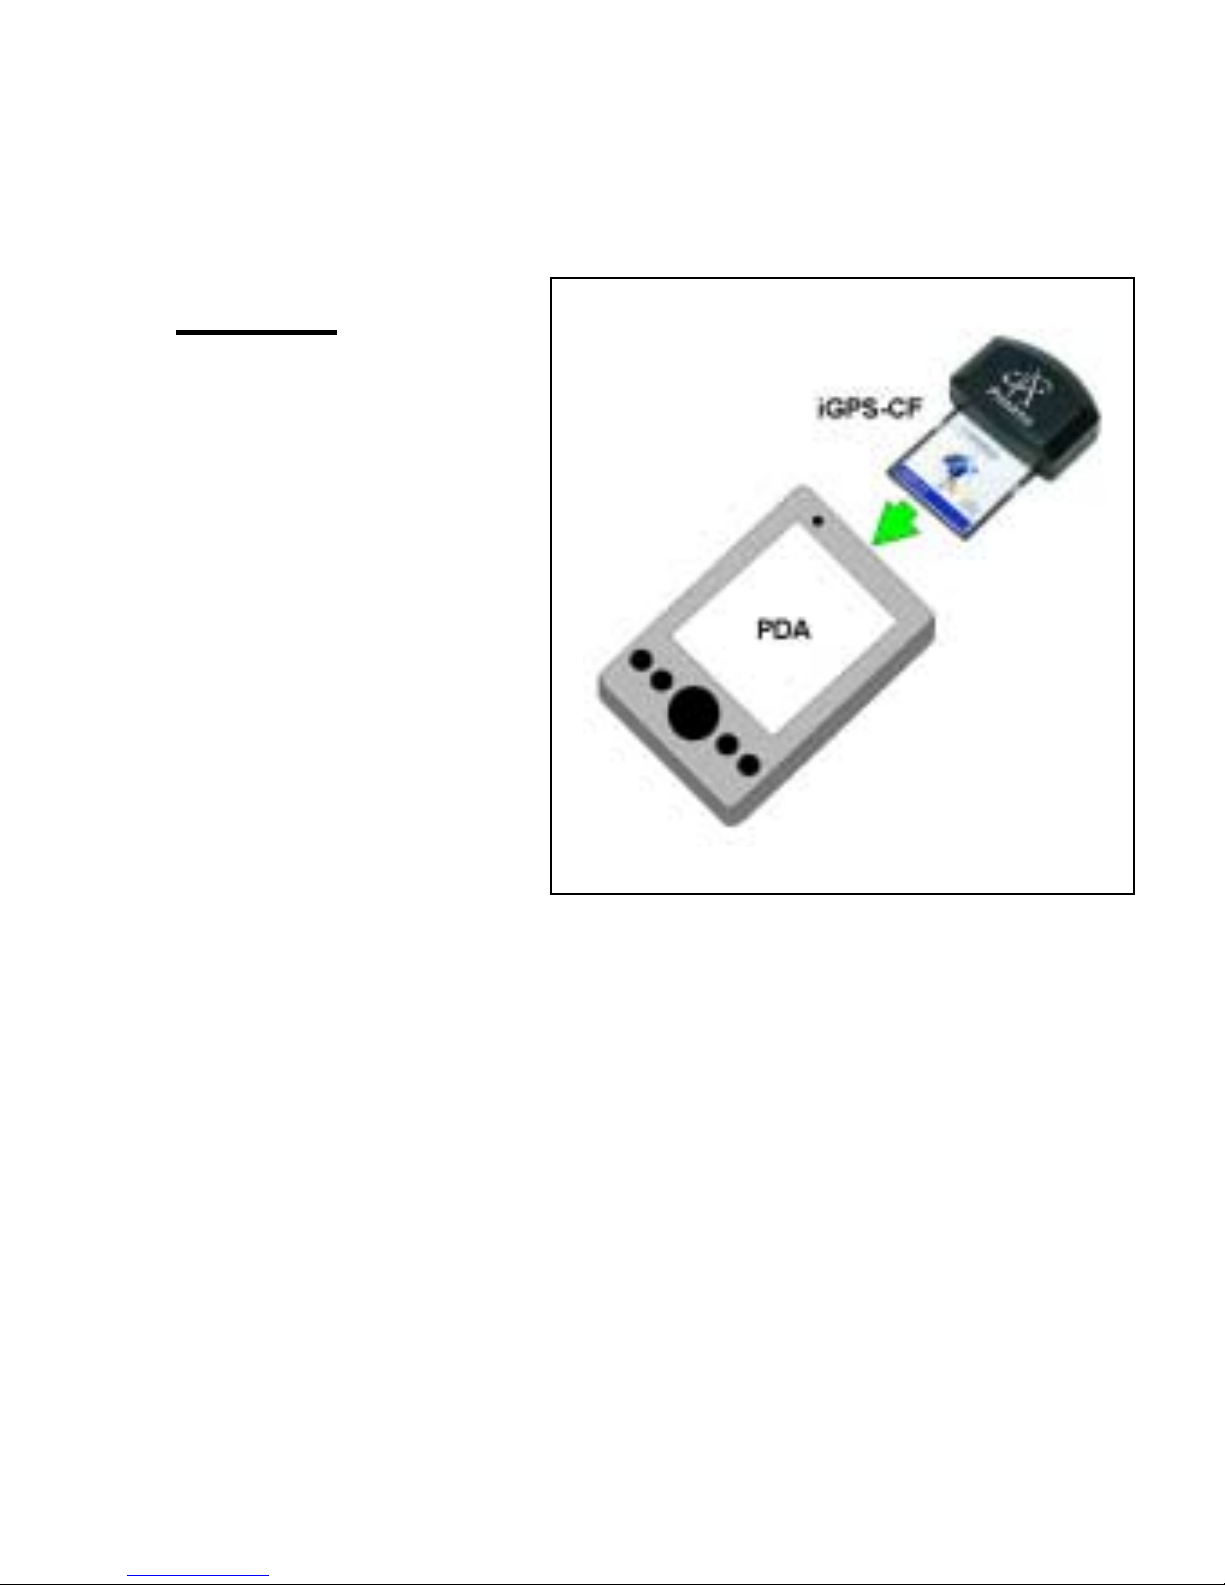
iGPS-CF
1.
Insert the iGPS-CF
into the CompactFlash
Card port of the
Pocket PC. If the
Pocket PC has a
PCMCIA port, attach
the PCMCIA adapter
to the iGPS-CF and
insert it into the port.
Page 69
Page 69
IGPS-280
There are 3 (three)
different set up
configurations that the
iGPS-280 can do.
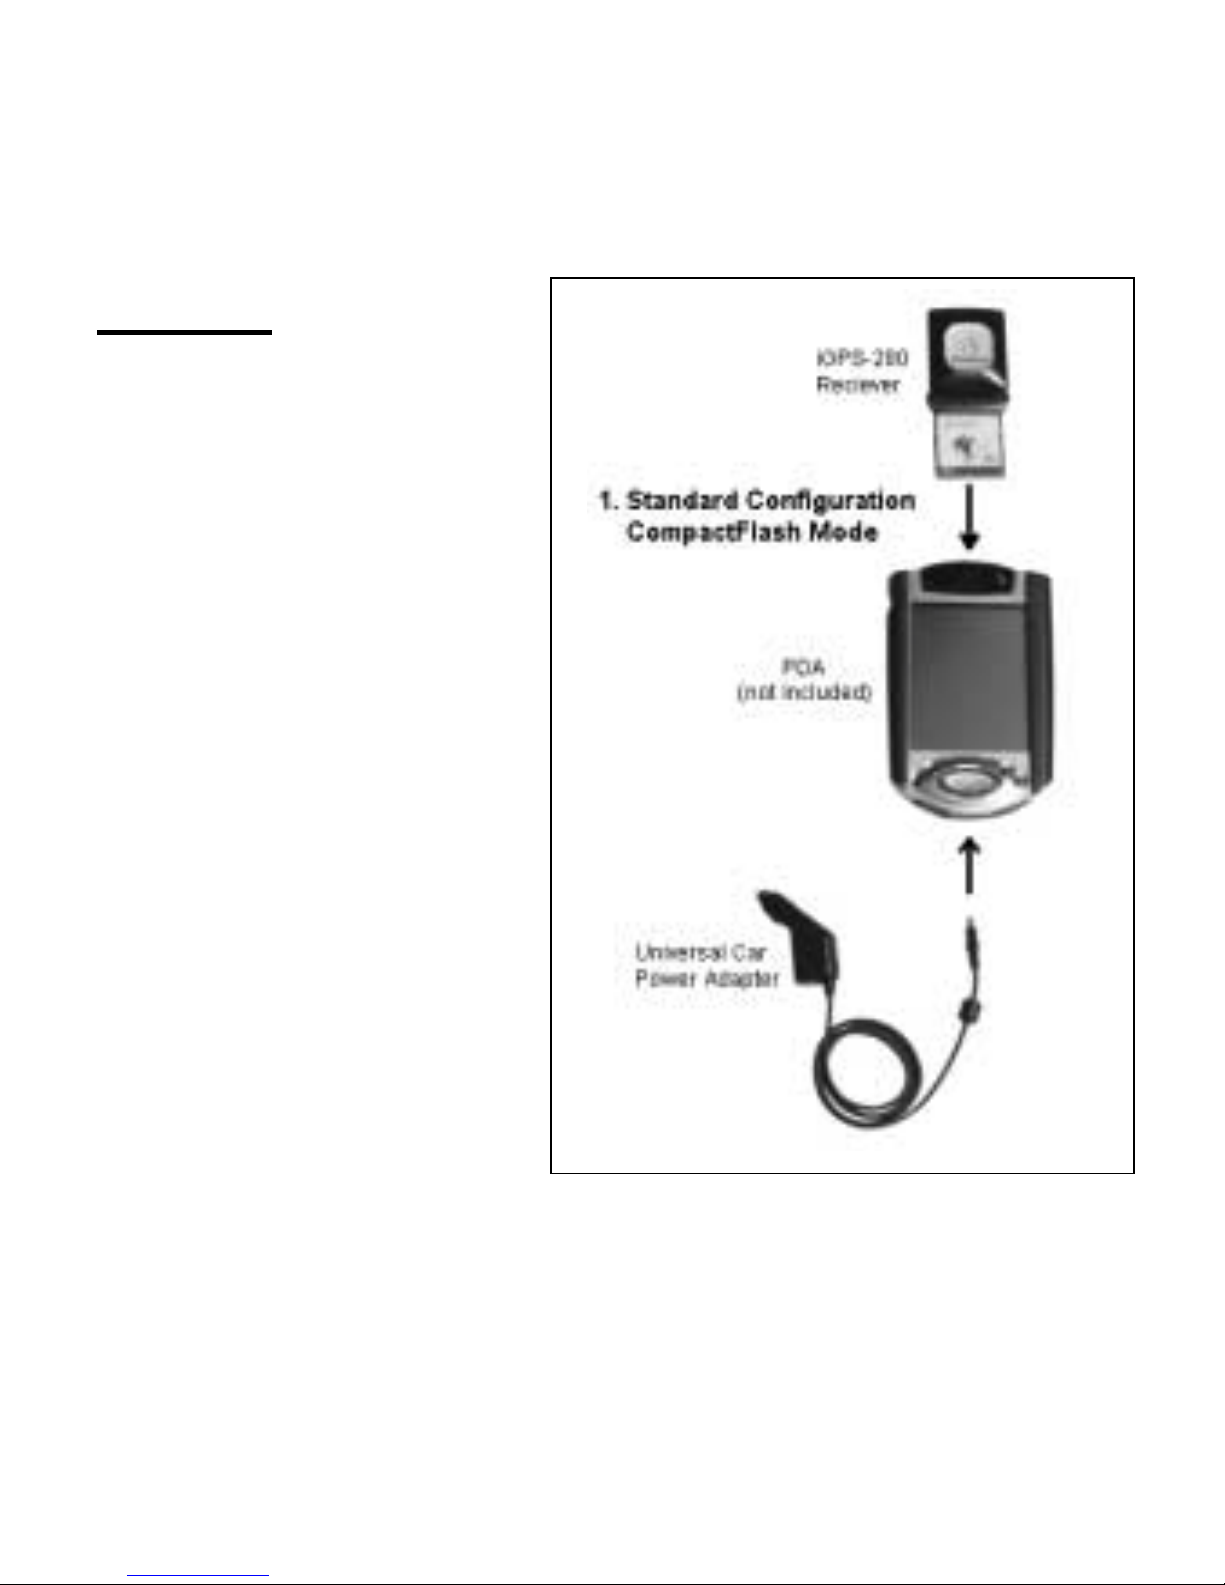
1) CompactFlash Mode
1. Insert the iGPS-280 into
the Compact Flash slot of
the Pocket PC.
2. The Universal Car
Power Adapter can also be
used while in a vehicle to
supply power to the Pocket
PC and GPS.
Page 70
Page 70
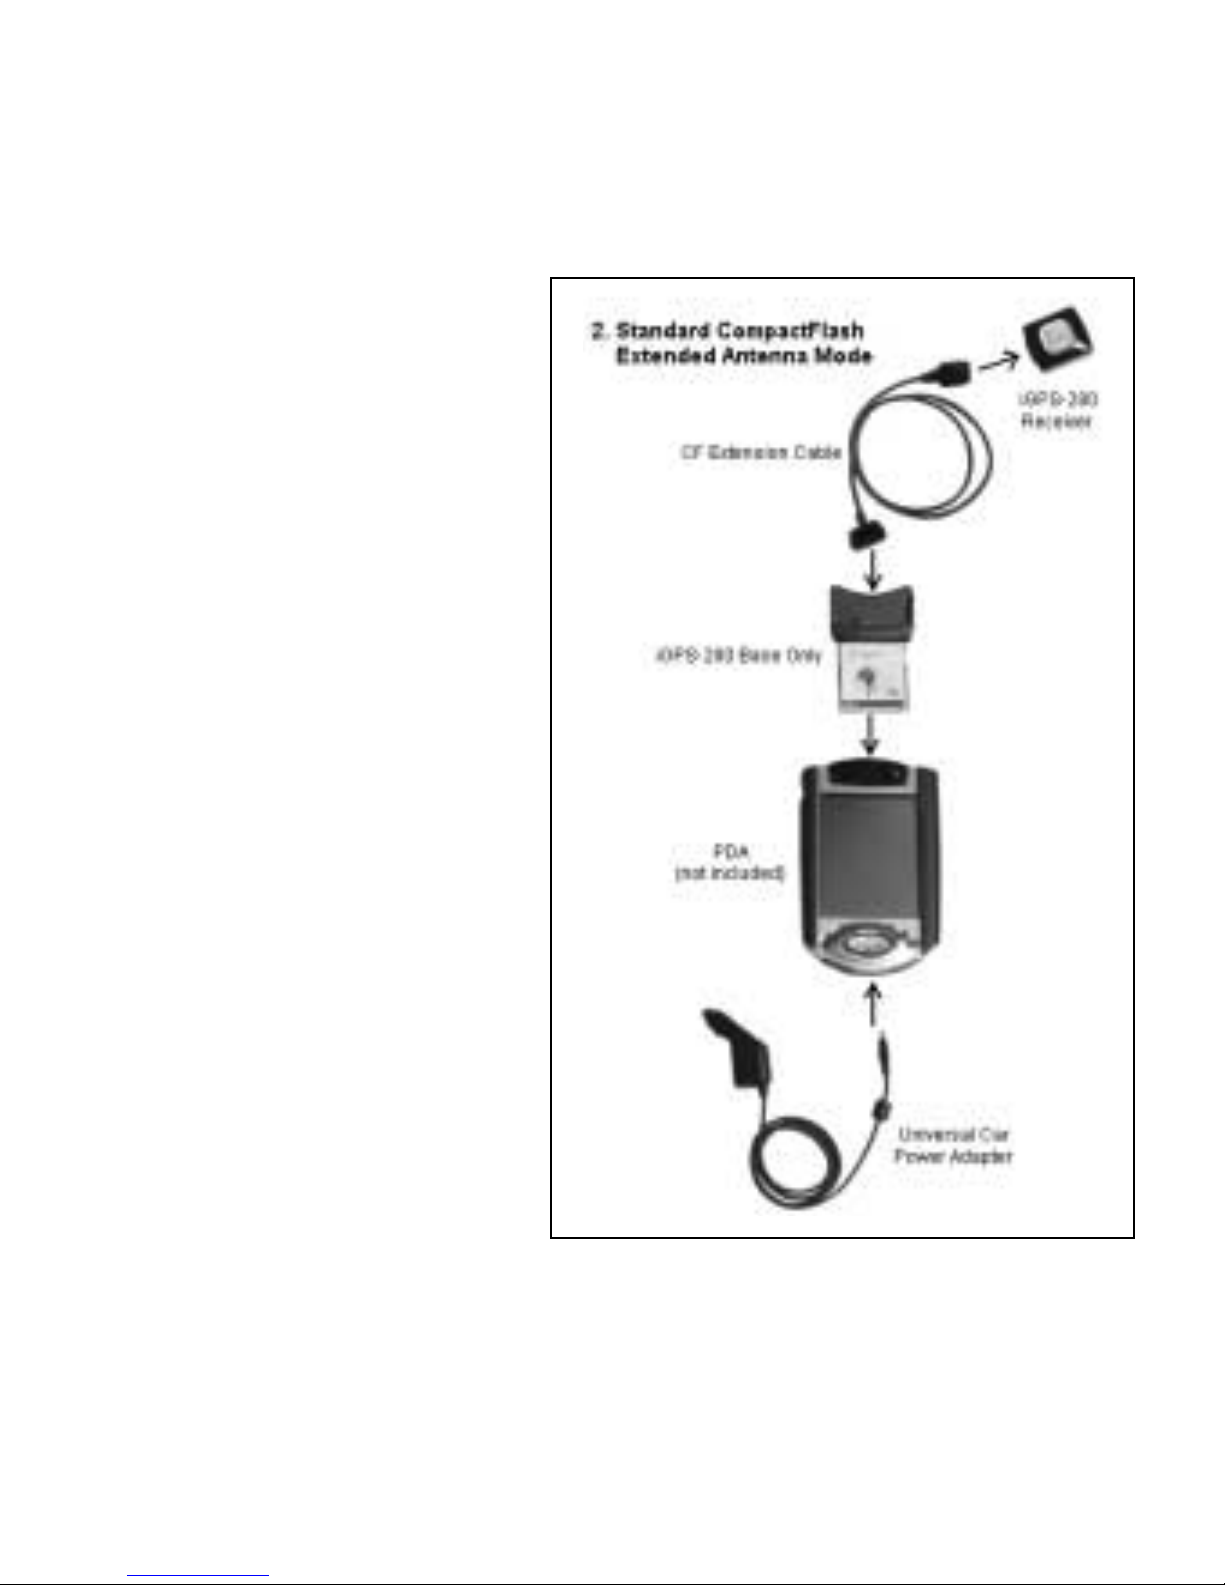
2) Compact Flash
Extended Antenna Mode
1. Detach the iGPS-280
receiver from the base.
2. Attach the CF extension
cable between the iGPS280 and the base.
3. Insert the iGPS-280
base into the Compact
Flash slot of the Pocket
PC.
4. The Universal Car
Power Adapter can also be
used while in a vehicle to
supply power to the Pocket
PC and GPS.
Page 71
Page 71
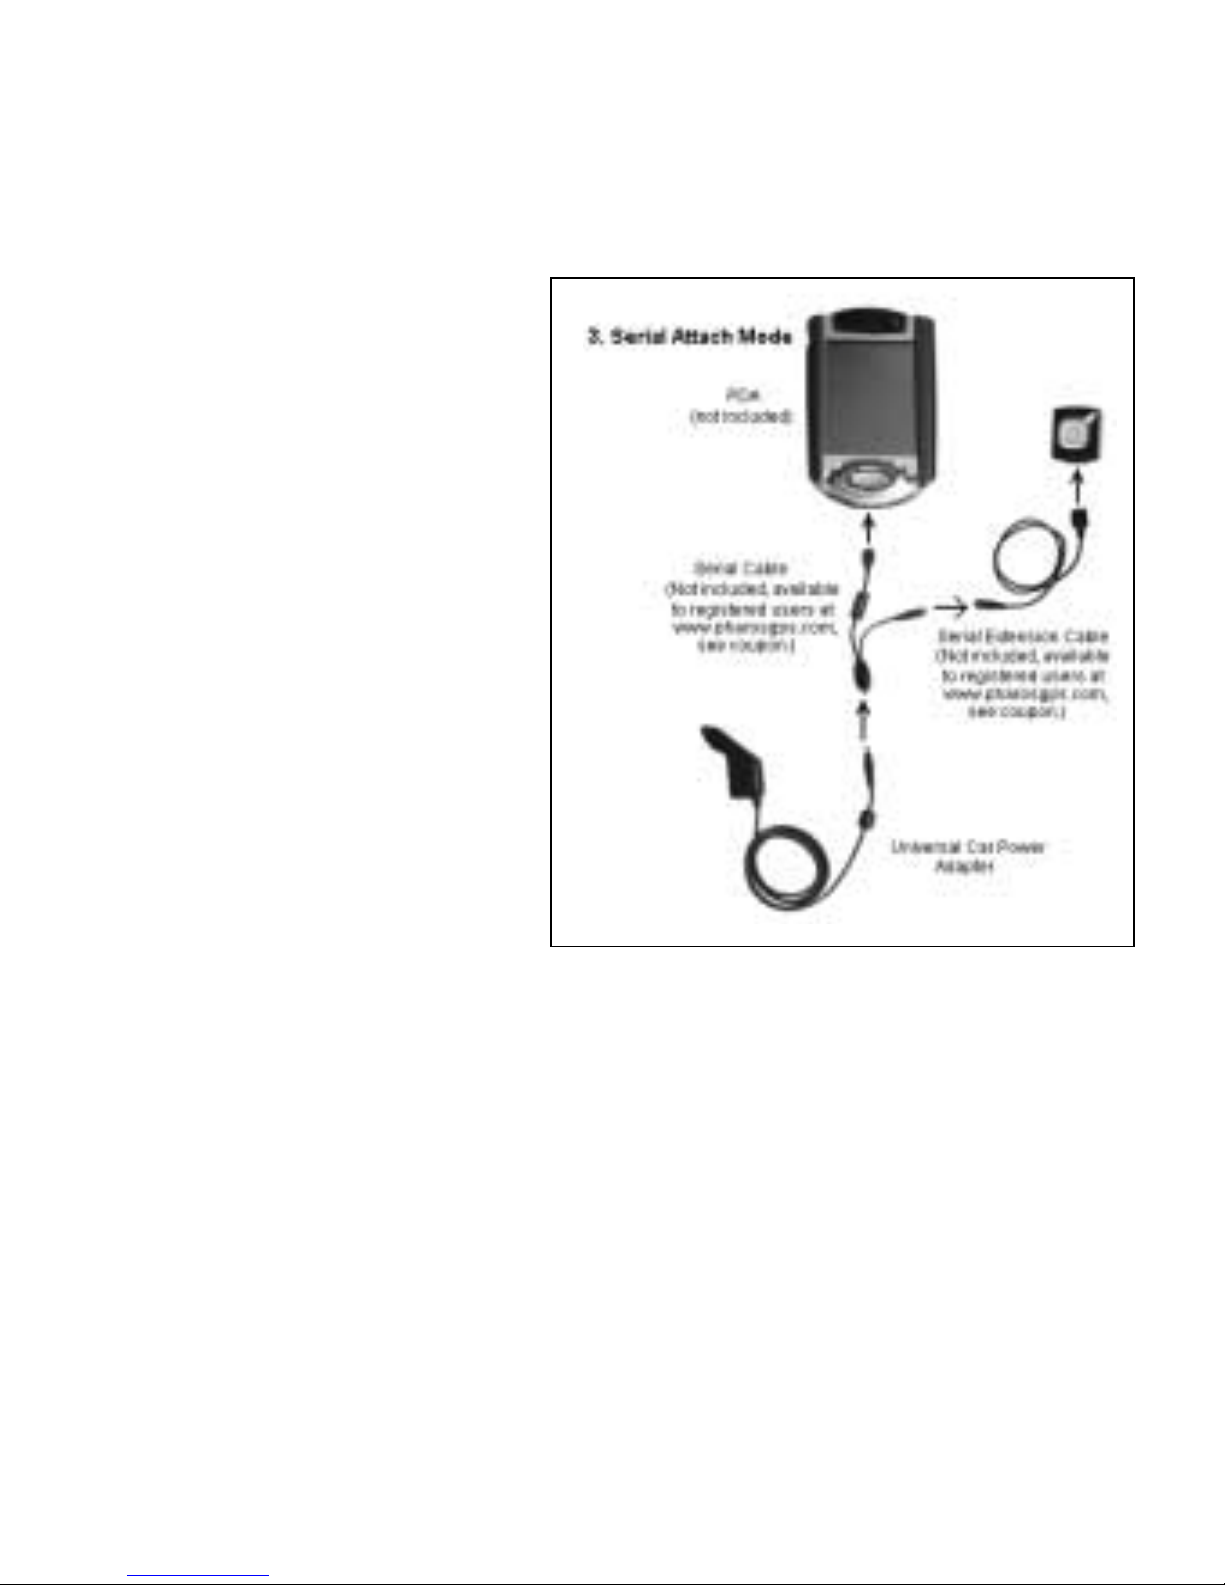
3) Serial Attach Mode
1. Detach the iGPS-280
receiver from the base.
2. Connect the Serial
Extension Cable to the
Serial Cable specifically for
your PDA.
3. Connect the Serial
Cable to your Pocket PC’s
serial port and connect the
Universal Car Power
Adapter.
Page 72
Page 72
7.3 Using GPS
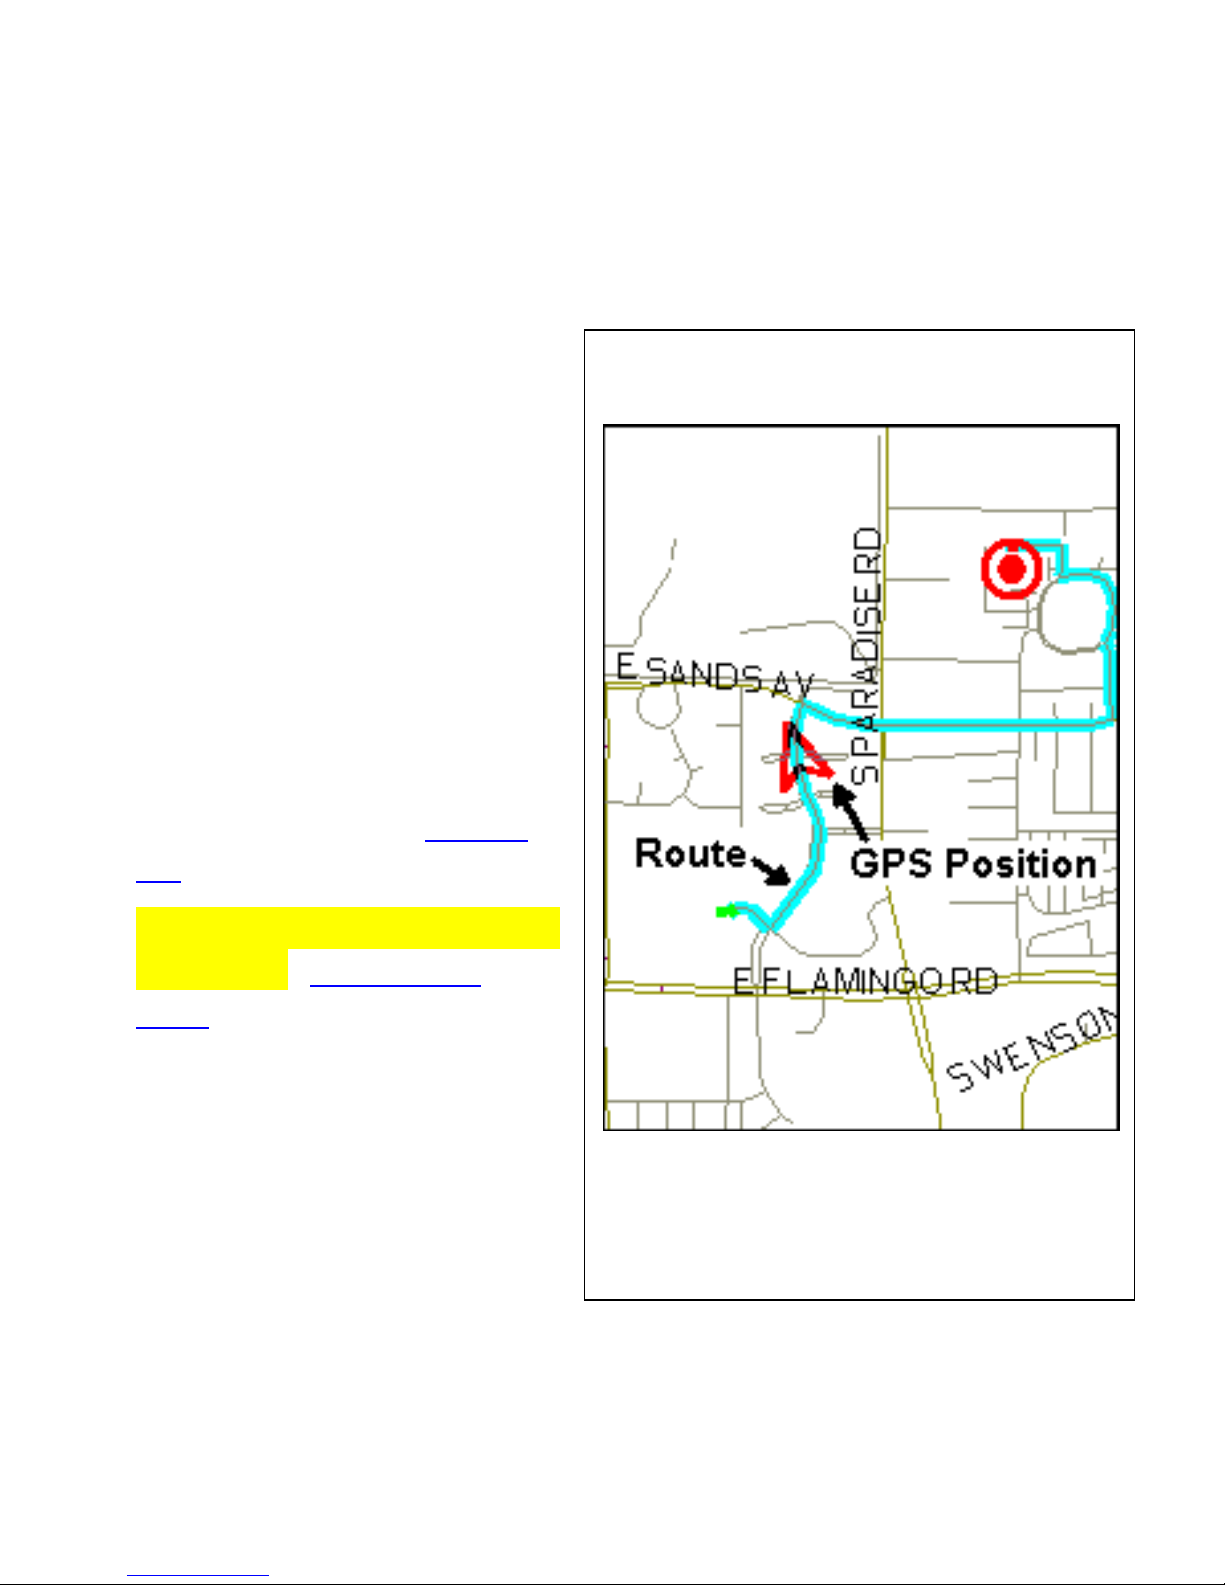
The map sample (Figure 6)
shows the driving route (blue
path) and the iGPS receiver
indicator (red arrow). The
arrowhead indicates the
direction of travel.
2 (two) steps are required to use
an iGPS receiver with Ostia
software.
1. Connect the iGPS receiver
to your Pocket PC using
the instructions in
section
7.2
.
2. Enable the iGPS receiver
function. (
See section
5.1.4
)
As you travel, the iGPS receiver
constantly monitors incoming
signals from the GPS satellites,
calculates your present position
and updates the GPS symbol on
your map.
Figure 6
Page 73

Page 73
iGPS-CF™ User’s Tips
1. Turn on your iGPS-CF™ in an open pl ace.
2. Stay still for approximately one minute for your iGPS- CF™ to
initially acquire enough satellites to give you an accurate position. It
may take longer if you are moving.
3. If the satellite signals cannot be found (for instance, in an urban area),
the following st eps are suggested:
a. If you are in a car, plug the external active antenna into
iGPS-CF™ and place th e antenna as close to the
windshield as possible or on the roof.
b. Move to an open space or point iGPS-CF™ toward an open
sky with less blockages.
4. iGPS-CF™ comes with a built-in battery for faster position
acquisition. The battery lasts about 4 days. Please recharge the
battery for about 4 hours regularly.
5. Pl ease have PDA recharged when ei ther the COM p ort or iGPS-CF™
is not recognized by the PDA due to low battery problem in PDA.
6. Handle the MMCX connector carefully (hold the metal part not the
cable) when plug or unplug the active antenna.
7. Do not leave the unit under the sun for a long period of time.
8. iGPS-CF™ receiver’s performance may be affected by:
a. Tinted metallic windows
b. Under high raised buildings, bridges, or in tunnels
c. Near high voltage cables, CB radios, or radio base stations
d. CD ROM player
Page 74

Page 74
e. Solar flare activities
SECTION 8: Troubleshooting
See the Pharos website (http: //www.pharosgps.com) for FAQ’s, tips,
troubleshooting and latest updates.
SECTION 9: Technical Support
Pharos Science and Applications, Inc.
http://www.pharosgps.com
411 Amapola Avenue, Torrance, CA 90501-1478, USA
Phone: 310-212-7088
Fax: 310-320-1808
Email: [email protected]
Telephone technical support is available Monday through Friday
between the hours of 9:00 AM to 5:00 PM Pacific Standard Time.
SECTION 10: System Requirements
10.1 Pocket PC/Handheld PC Requirements
Processor Type: MIPS, SH3, StrongArm & XScale
Operating System: Windows CE Version 3.0 or later (including
Pocket PC 2002)
Memory: 2.5 MB
Page 75

Page 75
CompactFlash card or Multimedia card memory: 32 MB minimum
10.2 Desktop/Laptop Requirements
CPU: Pentium class
Operating System: Windows 95/98/ME/NT/2000/XP
Available hard drive space: 24 M B minimum for map installation to
PDA. Ostia maps vary in size up to 22 MB for USA maps / 31 MB
for Canada maps. The Ostia maps are made up of 260 maps
segments for USA / 15 maps segments for Canada, separated
into geographical and municipality boundary divided sections.
 Loading...