


Pharos 565 Series
user manual

Copyright © 2010 Pharos All Rights Reserved.
No part of this manual, including the product and software
described in it, may be reproduced, transmitted, transcribed,
stored in a retrieval system, or translated into any language in
any form, by any means, without prior written permission from
Pharos.
Pharos provides this publication “as is” without warranty of any
kind. This information could include technical inaccuracies or
typographical errors.
Pharos may make improvements and/or changes in the product.
Information and specications contained in this document are
subject to change at any time without notice.
The information contained in this document does not affect or
change the product specications or warranties. Pharos is not
liable for any damages resulting from the use of this product.
Trademark Information
Microsoft, MS-DOS, Windows, Windows NT, Windows Server,
Windows Vista, Windows Mobile, ActiveSync, Excel, Internet
Explorer, Windows Live, Outlook, PowerPoint, and Word
are either registered trademarks or trademarks of Microsoft
Corporation in the United States and/or other countries.
All other trademarks are property of their respective owners.

This is only the beginning.
We are constantly enhancing and
improving our user experience.
For the latest information on what we’ve
added and how it works, visit us online:
http://www.pharosgps.com/

Safety Information
Please read the following information carefully before you start using the Pharos 565 to
avoid any damage caused by improper usage:
• The device is not charged when you take it out of the box. It is recommended that you fully
charge the battery before rst use. Do not remove the battery while charging.
• Do not service the product yourself. Service needed on components inside these
compartments should be done by an authorized service technician or provider.
• Do not use batteries which have not been specied by the manufacturer, as this may cause
leakage or rupture. Damage caused by using batteries not specied by the manufacturer is
not covered under warranty.
• Do not charge the battery with an AC Adapter other than the one supplied by the
manufacturer, as this may cause damage to both the device and the battery.
• When discarding the batteries, dispose of them in a proper manner, according to the battery
manufacturer’s instructions and your local laws.
• Do not open or tamper with the device cover, as this will void your warranty.
• Do not press hard on this product, as it may cause damage to the screen or the internal
components.
• Do not use the device at gas or refueling stations, chemical plants, and places containing
explosives or ammable materials. The product should be placed away from heat sources
such as radiators, stoves, or other products (including ampliers) that produce heat.
• Do not strike, shake, or heat the device in a way which may cause battery leakage or rupture
and damage to the device.
• Use only a manufacturer-specied stylus. Do not scratch the screen or otherwise bring it into
contact with any hard objects (e.g. loose change in your pocket).
• Do not clean the screen with chemical detergents. Only use cloths specically designed for
cleaning liquid-crystal displays. Unplug the product from the wall outlet before cleaning. Do
not use liquid cleaners or aerosol cleaners. Use a damp cloth for cleaning, but NEVER use
water to clean the LCD screen.
4

• Do not expose the device to prolonged direct sunlight, or leave the device in a humid
environment for extended periods of time, as this may cause damage to the device and
battery.
• Do not immerse the device in water. Never use the product in a wet location.
• The device may interfere with the navigation and/or communication systems on aircraft. The
use of the device on an aircraft is prohibited by laws in most countries.
• This product may cause medical equipment to malfunction. The use of this device is
forbidden in most hospitals and medical clinics.
• Always use hands-free devices, if you need to use the telephony services, while driving a
vehicle.
• Please turn down the volume before using headphones or other audio devices.
• Do not place the product on an unstable base.
• Do not push objects of any kind into cabinet slots or other openings in the device.
• The device should be operated from the type of power indicated on the marking label.
• If there are noticeable signs of overheating, unplug the device from the electrical outlet
immediately and refer servicing to an authorized service provider.
• WARNING: Do not remove or damage the warranty void label on the device, as this will void
your warranty.
• Nonionizing Radiation: This product should be operated only in the suggested typical
conditions to ensure good radiative performance and safety from interference. For safety
reasons, as with all other mobile radio-transmitting equipment, it is recommended that no
part of the human body be allowed to come too close to the antenna during operation of the
equipment.
• The antenna(s) used for this transmitter must not be co-located or operating in conjunction
with any other antenna or transmitter.
• The availability of particular features and applications for the device may vary by the
model that you purchased. Please check with your dealer for details.
5

Table of Contents
Chapter 1 | Overview 09
1.1 Introduction 10
1.2 Installing Battery and MicroSD Card 12
1.3 Battery Information 14
1.4 Turning On/Off the Device 16
1.5 Calibrating the Device 16
1.6 Resetting the Device 16
Chapter 2 | Getting Started 17
2.1 Today Screen 18
2.2 Start Menu 20
2.3 Programs 21
2.4 Settings 23
2.5 Input Methods 24
2.6 Clock & Alarms 28
2.7 Personalizing the Device 29
2.8 Replacing the Battery 30
Chapter 3 | Synchronizing Information 31
3.1 Installing and Setting up ActiveSync or WMDC 32
3.2 Synchronizing Information 33
3.3 Synchronizing with Exchange Server 35
3.4 Synchronizing via Bluetooth 36
3.5 Synchronizing via Infrared 37
6

Chapter 4 | Contacts and E-mails 38
4.1 Managing Contacts 39
4.2 Setting up E-mail Accounts 40
Chapter 5 | Basic Applications 45
5.1 Calendar 46
5.2 Notes 49
5.3 Tasks 51
5.4 Working with Ofce Mobile 53
Chapter 6 | Making Connections 55
6.1 Connection Center 56
6.2 Wi-Fi Data Connections 57
6.3 Bluetooth Connections 58
6.4 Infrared Connections 61
6.5 USB Connections 62
7

Chapter 7 | Other Applications 64
7.1 Browsing the Internet 65
7.2 Windows Live Messenger 67
7.3 Window Media 69
7.4 GPS 71
7.5 Adding or Removing a Program 72
7.6 Setting Password and Hint 73
7.7 Using Task Manager 73
7.8 Backup/Restore 74
Appendix 76
A.1 Specications 77
A.2 Regulatory Notices 77
8

Chapter 1 | Overview

1.1 Introduction
Hardware Overview
Notication LED1
Green: Wi-Fi on
Blue: Bluetooth on
Soft Key
Congurable Key *
Start
QWERTY Keypad
Notication LED2
Red: Charging
Green: Fully charged
Touch Screen
Soft Key
Congurable Key *
OK
Navigation Pad
Stylus
Speaker
Belt Holder 1
Back Cover Latch
Back Cover
Belt Holder 2
* You can assign a specic program to a congurable key. Tap Start > Settings > Personal > Buttons, select one of
these congurable keys, and then assign a program to the selected key.
10

Stylus
IrDA Port (PTL565E)
Barcode Scanner (PTL565S)
Scan Key (PTL565S)
Volume Up
Volume Down
Congurable Key *
Reset
NOTE The availability of particular features and applications for the device may vary by the model that you
Scan Key (PTL565S)
Power
Earphone Jack
MicroSD Slot
18pin IO Connector
purchased. Please check with your dealer for details.
11

Accessories
The product package includes:
• AC Adapter
• USB Cable
• Battery
• Stylus
• Getting Started Disc
• Quick Start Guide
• Warranty Card
• Microsoft License Card
1.2 Installing Battery and MicroSD Card
Installing Battery
1. Hold the back cover lock latch and
then slide the back cover as shown.
1
2
12
2. Align the gold contacts of the battery
with the corresponding conductors
on the device, and then push the
battery into place.
1
2

3. Push the battery latch on the back of the device upwards to lock the battery.
4. Close the cover making sure that it is securely in place.
5. After inserting/replacing a battery, press the Reset button to startup the device.
6. When the battery is completely drained, charge it for 15~20 minutes to be able to
startup the device.
13

Installing MicroSD Card
Use a certied MicroSD card in this slot to expand the device’s storage memory. To
install a MicroSD card, do the following:
1. Lift the cover of the MicroSD card slot on the side of the device.
2. Insert a compatible memory card in the MicroSD card slot. Make sure that the logo
side of the card is facing down.
3. Push the card in until it clicks and locks into place.
4. Close the cover and make sure that it is securely in place.
1.3 Battery Information
Battery performance depends on many factors, including your wireless service
provider’s network conguration, signal strength, the temperature of the environment
in which you are operating the device, the features and settings you select and use,
items attached to the device’s connecting ports, and your voice, data, and other program usage patterns. (Factors such as signal strength and voice usage patterns only
apply to devices equipped with phone capabilities.)
14

Charge time (average):
• Charge by AC adaptor: 4 hours
• Charge by USB port: 6 hours
Optimizing Power Performance
You can set your display and backlight settings to time out after a short time in order
to conserve the battery life.
• To change display settings, tap Start > Settings > Power > Advanced tab, and
then adjust the settings.
• To change backlight settings, Tap Start > Settings > System > Backlight. On the
Battery Power tab and/or the External Power tab, adjust the settings.
NOTE In addition to changing display and backlight settings, you can do the following to make the battery last
longer: (1) Turn off Wi-Fi. (2) Turn off Bluetooth.
Charging the Battery
1. To charge the battery, make sure the battery is sitting in the battery slot correctly.
2. Do one of the following steps:
• Connect the device to a power outlet using the AC adapter.
• Connect the device to a PC with the USB cable.
NOTE To charge the device with a USB cable, you must connect the device to a functioning USB port on a PC
that is powered on.
15

1.4 Turning On/Off the Device
• When the device is off: press and hold the Power key for ve seconds to turn on the device.
• When the device is turned on: press the Power key to switch the device into sleep mode.
• When the device is in sleep mode: press the Power key to wake up the device.
• To turn off the device completely, press and hold the Power key for a few seconds, and
then tap Yes to conrm turning off the device.
1.5 Calibrating the Device
Calibrating the device ensures that the screen will correctly respond to your stylus and
ngers. When you turn on the device for the rst time, you will be asked to calibrate the
device. If you would like to re-calibrate the device, follow the steps below:
1. Tap Start > Settings > System > Screen.
2. Tap the Align Screen button and then follow the on-screen instructions.
1.6 Resetting the Device
Soft Reset
If the device is not performing properly, such as running slower than normal, you can soft
reset it to shut down all active programs and restart the device.
To perform a soft reset, use the stylus tip to press the Reset button located at the side of
the device.
Factory Reset
It is suggested to perform a hard reset only if a soft reset does not work. The device will
be restored to its default settings after having a factory reset. To perform a hard reset,
tap Start > Settings > System > Factory Reset, and then follow the instructions on the
screen.
Please remember to backup any additional installed programs and user data before
performing a factory reset; otherwise, all of them on the device will be lost.
16

Chapter 2 | Getting Started

2.1 Today Screen
The Today screen is usually the rst screen that appears when you turn on the device
for the rst time each day. It displays a summary of relevant information, shows you
the system status and contains a list of shortcuts to programs.
Start Menu
Program Shortcuts
Changing Today Screen Items
To change the items shown in the Today screen, tap Start > Settings > Today >
Items tab, then select the check boxes next to the items that you want to show in the
Today screen. Tap Move Up or Move Down if you want to change their sequence.
Selecting Theme and Background Image
You can change the theme and background image for your Today screen display.
Notication Icons
Soft Key Labels
1. Tap Start > Settings > Today.
2. Select a preferred theme.
3. Select the Use this picture as the background check box and tap Browse to view
a list of your picture les.
18

4. In Folder, select the folder that contains the picture you want to use.
5. In Type, select the le type of the picture.
6. Tap the le name of the picture you want to use.
7. Tap OK when nished.
Locking the Device
Locking the device turns off the functionality of touch screen and hardware keys.
This is a helpful feature for preventing accidental key presses.
• To lock the device, tap Start and then tap Lock on the bottom bar.
Unlocking the Device
To unlock the device, do the following steps:
1. Tap Unlock on the bottom bar of the Today screen.
2. Press FN and * to unlock the device, or tap the Unlock button on the screen.
Status Bar
Softkeys
Notication Icons
Notication icons appear at the title bar on the screen. The following table lists
common status indicators and their meanings.
19

Battery full
Low battery
Battery alert Ringer in vibration mode
Extremely low battery Bluetooth
Battery charging
Alarm Wi-Fi connection in progress
Data Connection is active Synchronization in progress
Connection is not active Synchronization error
Ringer on
Ringer off
Bluetooth headset detected
2.2 Start Menu
The Start menu is accessible by tapping the Start icon at the top left of the screen or
pressing the hardware Start key on the device. You can open all applications on the
device from here.
To open a program, tap its icon; to view additional program icons, sweep the screen
upwards or downwards to scroll and view.
Status Bar
Softkeys
20

Moving a Program
On the Start menu, you can move your favorite programs, including programs in
submenus, to the top of the list. The selected program will be moved to the upper-left
position and existing item will be moved to the right one space.
1. Tap and hold the icon you want to move.
2. Tap Move to Top.
To return a program to its original location, tap and hold it and then tap Move Down.
2.3 Programs
The following table lists icons of programs that are already installed on the device.
Programs in the Start Menu
Tod ay
Tex t
E-mail Send and receive e-mails.
Contacts
Internet Explorer
Calendar
Settings
Pictures & Videos
Windows Medi a
Tap the icon to go to the Today screen.
Send and receive text messages. (Not all models of this device have text features,
please consult with your dealer.)
Keep track of contact information.
Browse a web page and download new programs and les from the Internet.
Create meeting requests and keep track of your appointments.
View available settings on the device. For more information on these settings, please
see the next section.
Organize and share picture and videos on the device or a storage card.
Play music and video.
21

Marketplace
Messenger
Microsoft My
Phone
MSN Weather
Windows Live
MSN Money
Calculator
Games
Notes
Tasks
Ofce Mobile
Use this to search, browse, and buy programs created for Windows phones directly
from the Web.
Send and receive instant messages with your Windows Live Messenger contacts.
Use this to back up and share your photos, videos, and contacts to a passwordprotected Web portal.
Provide access to climate content including recent weather searches, local conditions,
and intraday forecasts.
Access Windows Live services including Hotmail, Instant Messenger, and Spaces.
Use this to track stock information in the world.
Perform basic calculations such as addition, subtraction, multiplication and division.
Two games are installed on the device: Bubble Breaker and Solitaire.
Create notes, drawings, and voice recordings.
Create, edit, and synchronize tasks on the device and your PC.
Excel Mobile Create, edit, and view Microsoft® Excel® worksheets.
OneNote Mobile Create OneNote les on the device and then synchronize them
with your computer.
PowerPoint Mobile View Microsoft® PowerPoint® slides and presentations.
Word Mobile Create, edit, and view Microsoft® Word documents and text les.
22
File Explorer
ActiveSync
Backup Battery
Switch
Task Manager
Sear ch Phone
Help
Backup Manager
Sear ch Widget
Organize and manage the les and folders on the device.
Synchronize information between the device and a PC or an Exchange Server.
Use this to quickly replace the battery without turning off the device.
Use this to manage currently running programs.
Search contacts, les, data, and help information on the device.
Provide links guiding you to advice and answers to common questions.
Use this to backup and restore your data on the device.
Use this to search on the device using the Microsoft search engine.

2.4 Settings
You can change the device’s settings to suit the way you work. Tap Start > Settings
to view all available settings.
Power
Bluetooth
Clock & Alarms Set the time, date, and alarm.
Lock
Soun ds &
Notications
Tod ay
Connections
Personal
System
Adjust settings to save battery power.
Congure Bluetooth settings.
Set up a device lock to make your device securer.
Customize ring tones, reminders, and other notication alerts.
Select a background theme and image, and change the items that appear on the
Today screen.
Beam Set the device to receive incoming Bluetooth beams.
Connection Center Turn on/off wireless and Bluetooth. Enable/disable the device
functioning as a card reader.
Connections Set up different types of modem connections. Enable the device to
connect to the Internet or a private local network.
Domain Enroll Allows you to connect the device with company resources.
Wi-Fi Congure wireless networks and network adapters.
USB to PC Set a USB serial connection between your device and PC when there are
problems connecting ActiveSync.
Wi-Fi Network Display detailed information for a connected Wi-Fi Network.
Buttons Assign buttons to programs and controls.
Input Customize the on-screen keyboard.
Owner Information Enter and edit your personal information.
About Display information about the operating system and the hardware conguration.
Backlight Congure the display backlight of the device and adjust the brightness of
the display.
Certicates Manage networking certicates.
Close Button Cong Use this to shut down a running program by tapping or tapping
and holding the Exit button.
Customer Feedback Allow anonymous information about the device use to be sent to
Microsoft to help improve software.
23

Device Information Display information about device system, software, and hardware.
Encryption Set encryption for storage cards. You can encrypt les as they are added
to an optional storage card so that the les can only be read on the device.
Error Reporting Enable or disable error reporting.
External GPS Set the port that programs will use to obtain GPS data.
Factory Reset Reset all settings to the manufacturer defaults.
Managed Programs List programs that have been installed remotely by your system
administrator.
Memory View total, in-use, and free memory, and a list of currently running programs.
Regional Settings Customize language, date and time format, and currently information.
Remove Programs Remove programs that you have added to the device.
Screen Adjust screen orientation, alignment, and text size.
Task Manager Close running programs.
Microsoft My
Phone
Access, manage, and back up information on the device to a password-protected web
site (the My Phone web site).
2.5 Input Methods
The device provides four on-screen input methods: Keyboard, Letter Recognizer,
Block Recognizer and Transcriber. The input methods are only available on screens
where you can enter text.
Keyboard
You can enter text and numbers by tapping on the keyboard displayed on the screen.
1. In a program, tap the keyboard icon ( )at the bottom of the screen. If you see a
different input icon, tap the icon, tap the input selector arrow to the right side of the
input icon, and then tap Keyboard.
2. Enter text and numbers by tapping keys on the on-screen keyboard or do any of
the following:
24
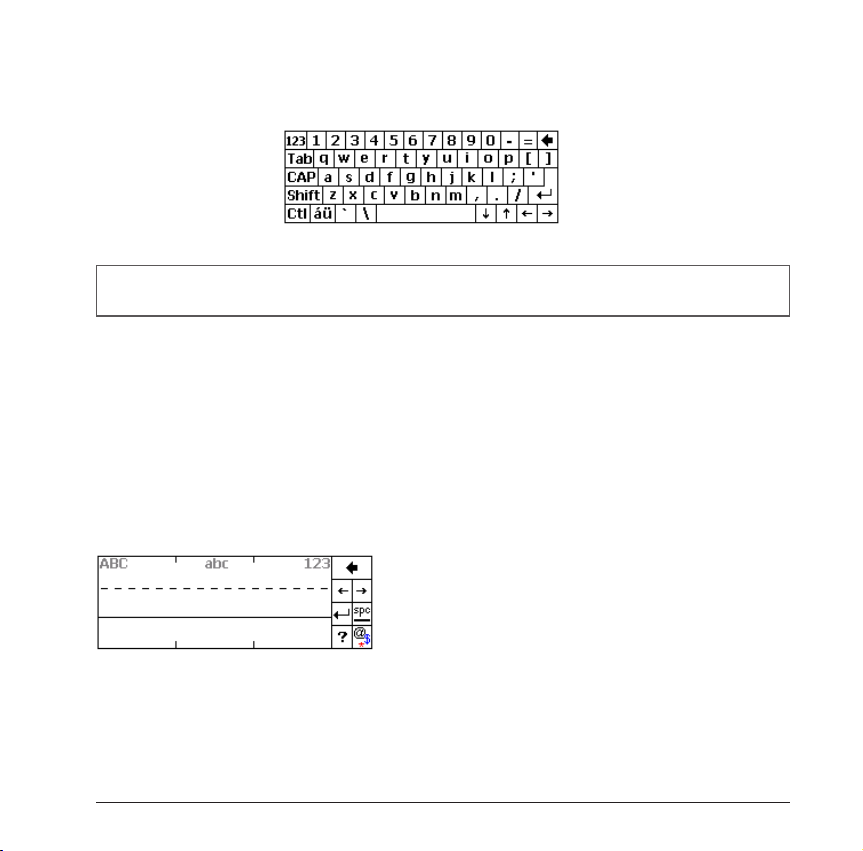
• Select “123” on the keyboard to enter symbols and numbers.
• Select “CAP” on the keyboard to enter capital letters constantly.
• Select “Shift” on the keyboard to enter a single capital letter.
NOTE To make the keys larger, tap the icon, tap the input selector arrow, and then tap Options. In the Input
method list, select Keyboard, and then tap Larger Keys.
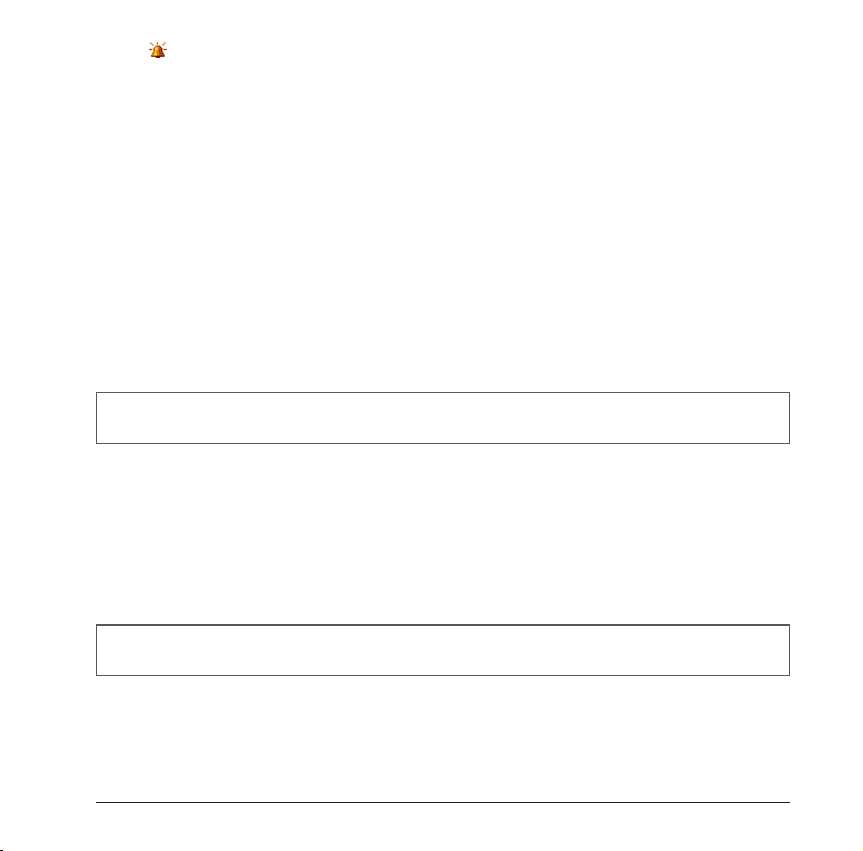
Letter Recognizer
Letter Recognizer recognizes one letter, number or symbol at a time. To launch Letter
Recognizer, tap the input selector arrow to the right side of the input icon, and then
tap Letter Recognizer.
• Write uppercase letters in the left recognition area (the ABC box).
• Write lowercase letters in the middle recognition area (the abc box).
• Write numbers and symbols in the right recognition area (the 123 box).
Block Recognizer
Block recognizer recognizes letters written in on stroke. To launch Block Recognizer,
tap the input selector arrow to the right side of the input icon, and then tap Block
25

Recognizer.
• Write letters in the text recognition area (the abc box on the left).
• Write numbers and symbols in the numeric recognition area (the 123 box on the right).
• To input symbols, tap any recognition area, text or numeric, once and write symbols.
Transcriber
Transcriber recognizes handwriting in cursive and/or print. It uses the full screen as its
recognition area. It interprets the movement of the stylus on the screen as you writer. To
launch Transcriber, tap the input method selector arrow (the up arrow next to the input
method icon) and select Transcriber. You can then write anywhere on the screen.
NOTE
The transcriber comes with detailed help pages. Tap ? if you need further assistance.
26

Hardware Keyboard
In addition to the on-screen input methods, the device is equipped with a QWERTY
keypad. Please see below for tips of using the QWERTY keypad.
Shift
Press the key once (showing on the
title bar) to capitalize the rst letter you
enter. Press the key twice ( ) to enter
uppercase letters.
to enter lowercase letters.
Function
Press the key to access the symbols and
numbers in orange on the keypad.
Press FN once (showing on the title
bar), the next character you enter will be a
symbol or number. Press FN twice to enter
numbers and symbols constantly. Press
the key again to return to enter letter.
Press the key again ( )
Backspace/Delete
Press the key to erase the letter to the left
of the cursor. Press FN (showing on the
title bar) and this key to delete the letter on
the right side of the cursor. Press and hold
FN and then press the key to delete letters
constantly.
Symbol
Use the key to input symbols and
accented letters.
Press a character and then press SYM
repeatedly (showing on the title bar),
you will see accent types of this character
being displayed in sequence cyclically.
Stop pressing SYM while the desired
accent type shows.
Please refer to the table below for available
symbols and accented letters.
27

Corresponding letters/symbols for each character:
à á â ä å æ ã ą ă
a
À Á Â Ä Å Æ Ã Ą Ă
A
ç ć ĉ ©
c
Ç Ć Ĉ ©
C
ð
d
Đ
D
è é ê ë ę
e
È É Ê Ë Ę
E
ì í î ï ĩ
i
Ì Í Î Ï Ĩ
I
ł
l
Ł
L
ñ
n
Ñ
N
ò ó ô õ ö ő ø œ
o
Ò Ó Ô Õ Ö Ő Ø Œ
O
þ 
p
Þ 
P
®
r
®
R
ß ş š
s
ß Ş Š
S
ţ
t
Ţ
T
ù ú û ü ű ũ µ
u
Ù Ú Û Ü Ű Ũ µ
U
ý
y
Ý
Y
ź ż
z
Ź Ż
Z
2.6 Clock & Alarms
Setting and Date and Time
1. Tap Start > Settings > Clock & Alarms.
2. On the Time tab, select the correct time zone and set the date and time.
Setting an Alarm
1. Tap Start > Settings > Clock & Alarms > Alarm tab.
2. Enable an alarm by selecting the check box in front of it.
3. Tap <Description> and then enter a name for this alarm.
28
4. Tap to specify the sound and the type for this alarm.
5. Tap the desired days(s) of the week for the alarm.
6. Tap the time to set the time for the alarm.
2.7 Personalizing the Device
Sound & Notications
You can enable sounds for events, notications, screen taps and hardware buttons
and specify the ring type and ring tone for an event.
1. Tap Start > Settings > Sounds & Notications.
2. On the Sound tab, select the item which you want to enable a sound for.
3. On the Notication tab, select an event ant then specify the ring type and ring tone
for it.
NOTE To conserve battery power, turn off sounds and the ashing light notications.
Owner Information
You can enter personal information and notes on the device.
1. Tap Start > Settings > Personal > Owner Information.
2. On the Identication tab, enter your personal information.
3. Tap OK.
NOTE If you can see owner information shown on the Today screen, you can open and edit the information
directly by tapping that section of the screen.
29

Changing Regional and Language Settings
1. Tap Start > Settings > System > Regional Settings.
2. On the Region tab, select your language and region. You can see the default style
for displaying numbers, currency, dates, and times are changed according to your
selection.
3. To change other settings, tap a tab and make the changes you want.
4. Tap OK.
2.8 Replacing the Battery
When the main battery is low, you can quickly replace it without turning off the device.
Please make sure that Wi-Fi and Bluetooth connections are turned off before replacing the battery.
1. Tap Start > Backup Battery Switch.
2. Tap Yes. The device will be turned into backup mode.
3. Remove the back cover and replace the battery. (Please re-install the battery within
5 minutes or unsaved data may be lost.)
4. Close the back cover, the device will be recovered to the previous state.
NOTE All wireless communications will be turned off in backup mode.
Please do not connect the device to a PC with a USB cable or charge the battery while the device is in
backup mode as this may cause loss of data.
An alarm set in the device will be turned off when the device is in backup mode.
It is recommeded to follow nomal power-off procedure before removing the battery.
30

Chapter 3 | Synchronizing Information

ActiveSync and Window Mobile Device Center (WMDC) synchronize information on
the device with information on you PC, Exchanger server, a mobile operator/Internet
service, or a Windows Live Hotmail account. (ActiveSync works on computers that
have the Windows XP operating systems while WMDC works on computers that
have Windows Vista or Windows 7.) With ActiveSync or WMDC, you can access your
music, photos, contacts, and e-mail no matter where you are.
3.1 Installing and Setting up ActiveSync or WMDC
Before you can sync, you have to install and set up the synchronization software on
your computer.
If you use Windows XP or earlier versions of Windows:
1. Install ActiveSync on your computer, as described on the Window MobileTM Getting
Started Disc that comes with the device.
2. After setup completes, connect the device to your computer through a USB cable,
the Synchronization Setup Wizard will automatically start.
3. Follow the instruction on the screen to complete the wizard.
4. If you have an Exchange Server e-mail account, enter your server address and
logon information. If you don’t have an Exchange account, the wizard will go
directly to the Synchronization Option page. (If you want to set up the account
later, see chapter 3.3)
5. On the Synchronization Option page, select the information that you want to sync,
and then click Next.
6. Click Finish.
If you use Windows Vista or Windows 7:
The Windows Vista and Windows 7 operating systems includ the basic WMDC
application partially installed, you can fully install WMDC on your computer from the
Getting Started Disc.
32

1. Follow the instruction on the Windows MobileTM Getting Started Disc to install
WMDC on your computer.
2. Connect the device to your computer through a USB cable, WMDC will start
automatically.
3. On your computer, click Set up your device.
4. Select the information that you want to sync, and then click Next.
5. Enter a name for the device, and clear the check box if you don’t want a shortcut
for WMDC on your computer.
6. Click Set up. WMDC will sync the selected information automatically.
NOTE To set up ActiveSync or WMDC to sync e-mail, contacts, and calendar information to your phone, you
need to have Microsoft Outlook 2002, Outlook 2003, or Ofce Outlook 2007 installed on your PC.
Outlook e-mail can only be synchronized to one Outlook prole on the PC or one Exchange Server
account.
3.2 Synchronizing Information
Starting and Stopping Synchronization Manually
NOTE You can start and stop synchronization only if the device already has a sync relationship with a PC or
Exchange Server.
From the device:
1. Tap Start > ActiveSync, and then tap Sync.
2. To stop synchronizing, tap Stop.
From your computer:
1. Connect the device to your computer, and then do one of the following:
• If you use Windows XP or earlier, ActiveSync will open on your computer
automatically. Click Sync on the ActiveSync screen.
33

• If you use Windows Vista or Windows 7, click Start > All Programs > Windows
Mobile Device Center, and then click Sync.
2. To stop synchronizing, click Stop.
Changing Default Sync Settings
ActiveSync and WMDC sync a limited amount of information by default to save
storage space on the device. You can change amount of information that is
synchronized by performing the following steps:
1. Disconnect the device from your computer before performing the following steps.
2. Tap Start > ActiveSync > Menu > Options.
3. Tap Menu > Options.
4. Do one or more of the following:
• Select the checkbox for the items that you want to sync. (If you cannot select a
checkbox, you might have to clear the checkbox for the same information type
elsewhere in the list.)
• Clear the check box for any items your want to exclude.
• To customize synchronization of a computer, select the computer name and then
click Settings.
• To customize synchronization of particular information, select the information
type and then click Settings.
• To stop synchronizing with one computer completely, select the computer name
and click Delete.
5. Tap OK (or Finish in the Exchange Server settings wizard).
NOTE Some items such as Favorites, Files and Media cannot be selected on the device. Please select or clear
them from WMDC or ActiveSync on your computer.
34

3.3 Synchronizing with Exchange Server
If you have a Microsoft Exchange account, you can set up the device to sync directly
with it and access e-mail, calendar, and contact information from the Exchange
Server. You will need to get the name of the server and the server domain name from
your service provider or system administrator. You must also know your Exchange
user name and password.
1. Disconnect the device from your computer, and then establish an Internet
connection on the device before performing the following steps.
2. Tap Start > ActiveSync > Menu > Add Server Source. (If you have already set
up a sync partnership with an Exchange Server, the option appears as Congure
Server instead of Add Server Source.)
3. Enter your e-mail address, select Attempt to detect Exchange Server Settings
automatically, and then tap Next.
4. Enter your user name, password and domain name, and then select Next. If you
want the device to save your password so that you will not need to enter it on each
connection, select the Save password checkbox.
5. If automatic conguration is successful, tap Next. If not, enter your Sever address,
and then tap Next. Select This server requires an encrypted (SSL) connection
if you want to receive personal information more securely, However, if you select
this option and your ISP does not support an SSL connection, you will be unable to
receive e-mail.
6. Select the check box(es) for any items you want to sync.
7. To change available synchronization settings, select the type of information and
then select Settings.
8. To change the rules for resolving synchronization conicts, select Menu > Advanced.
9. Tap Finish.
You can also use ActiveSync or WMDC to set up the device to sync remotely with the Exchange Server. The
NOTE
set up wizard is started when you connect the device to your PC after installing ActiveSync or WMDC.
35

Changing the Synchronization Schedule
You can minimize the amount of time that you use your data connection by setting up
a sync schedule for your e-mail.
1. Make sure that the device is disconnected from your computer.
2. Tap Start > ActiveSync > Menu > Schedule.
3. Select preferred time intervals.
4. Tap OK.
3.4 Synchronizing via Bluetooth
In addition to using a USB cable, you can connect and sync the device with your
computer using Bluetooth.
1. Make sure your computer is equipped with a suitable Bluetooth radio.
2. Follow the instruction in ActiveSync Help on your computer for conguring
Bluetooth on your computer to support ActiveSync.
3. On the device, tap Start > ActiveSync > Menu > Connect via Bluetooth.
4. Make sure the device and your computer are within close range. If this is the rst
time you have connected to your computer via Bluetooth, you must complete
the Bluetooth wizard on the device and set up a Bluetooth partnership with your
computer before synchronizing. This process will typically involve exchanging a
pass-key between the device and your computer. (Please refer to chapter 6.3 if you
need more information on this.)
5. When nished, tap Menu > Disconnect Bluetooth.
NOTE To
You can’t sync for the rst time by using Bluetooth.
36
conserve battery power, turn off Bluetooth after the synchronization is completed.

3.5 Synchronizing via Infrared
To synchronize using infrared, you have to set up your infrared-enabled PC to receive
an infrared beam.
1. Follow the instructions in ActiveSync or WMDC Help on your PC for setting up your
PC to receive infrared beams.
2. Align the infrared port on the top of the device with the infrared port on your PC.
Make sure they are unobstructed and within close range (no more than 1 meter apart).
3. On the device, tap Start > ActiveSync.
4. Tap Menu > Connect via IR. ActiveSync or WMDC will sync automatically when
the connection is established. If it does not start automatically, tap Sync.
5. Tap Menu > Disconnect to end the connection.
37

Chapter 4 | Contacts and E-mails

4.1 Managing Contacts
A contact is a person, place, or organization that you want to communicate with from
the device. You can store related information and assign a picture or a category to a
contact. After that, you can easily e-mail or manage a contact from the contacts list.
(If you set up Windows Live or Messenger on the device, your Messenger contacts
will be merged with the on-device contact list. )
NOTE
If you use Microsoft Outlook on your computer, you can sync contacts between the device and your
computer.
Adding a New Contact
1. Do any of the following:
• Tap Contacts at the bottom bar of the Today screen.
• Tap Start > Contacts.
2. Tap New.
3. Select Outlook Contact.
4. Enter the information for the new contact, and then tap OK.
Status Bar
Softkeys
39
Creating a Contact Group
After setting up contact groups, you can send many emails at a time by groups.
1. Tap Contact on the Today screen or tap Start > Contacts.
2. Tap New > E-mail Group.
3. Enter a group name, and then tap Add Member to add contacts to this group.
4. Tap OK.
Viewing or Editing Contact Information
1. Tap Start > Contacts or tap Contacts on the Today screen.
2. Scroll to and tap the contact you want to view or edit.
3. Tap Menu > Edit.
4. Make the changes that you want.
5. Tap OK when nished.
NOTE
If you have assigned a categories to your contacts, you can lter and display the contacts by category.
Deleting a Contact
1. Tap Start > Contacts or tap Contacts on the Today screen.
2. Scroll to the contact you want to delete.
3. Tap Menu > Delete Contact.
4. Tap Yes to conrm.
4.2 Setting up E-mail Accounts
The device can have multiple e-mail accounts at the same time. You have to set up
synchronization with existing e-mail accounts before sending and receiving e-mails on
the device.
NOTE
The device must have a Wi-Fi connection before setting up e-mail accounts.
40

Setting up Synchronization with Microsoft Outlook
To set up the account, you must obtain the names of the Exchange Server and the
server domain from your service provider or system administrator. You must also know
our Exchange user name and password.
1. Tap Start > E-mail > Setup E-mail.
2. Enter your e-mail address and password. Select Save password if you want, or you
can enter the password each time you send and receive e-mails. Tap Next.
3. To obtain e-mail server settings automatically, select Try to get email settings
automatically from the Internet, and then tap Next.
4. When Auto Setup has nished, tap Next. If Auto Setup did not nd the settings, go
to step 5. If Auto Setup found the settings and completed successfully, go to step 9.
5. In the Your e-mail provider eld, select Exchange server, and the tap Next.
6. Enter your name and then tap Next.
7. Enter your incoming mail server and Account type information, and then tap Next.
8. Enter your user name and password.
9. Select the check boxes for the types of information that you want to synchronize
with Exchange Server. Tap Menu > Advanced or Tap Settings if you want to change
more settings and options.
10. Tap Finish.
Setting up Synchronization with a Windows Live Hotmail Account
You can set up the device to send and receive e-mail from your Window Live Hotmail
account.
NOTE
The device must have a Wi-Fi connection before performing the following steps.
1. Tap Start > E-mail > Setup E-mail.
2. Enter your e-mail address and password, select Save password, and then tap Next.
3. When Auto Setup has nished, tap Next.
41

4. Tap Accept.
5. If you do not want Windows Live options to appear on the Today screen, clear the
Live Search bar and Window Live services check boxes, and then tap Next.
6. If you want to sync contacts and e-mails, select Store Windows Live contacts in
your mobile phone’s contact list and Sync e-mail. If you want your contacts to
show in your phone contact list, select Merge duplicate contact.
7. Tap Next. The device will try to sync with your Hotmail account.
8. Tap Done if needed.
Setting up Synchronization with an Internet Service Provider
If you have an e-mail account with an Internet Service Provider (such as Yahoo! Mail),
you can set up your phone to sync your e-mail with that account.
1. Tap Start > E-mail > Setup E-mail.
2. Enter your e-mail address and password, select Save password, and then tap Next.
3. To get e-mail server settings automatically, select Try to get e-mail settings
automatically from the Internet. Tap Next.
4. When Auto Setup has nished, tat Next.
5. If the device wasn’t able to detect your e-mail settings, you will need to enter this
information manually. In the Your e-mail provider drop-down list, select your e-mail
provider (Internet e-mail or custom domain). Tap Next.
6. If you selected Custom domain, enter the name of your e-mail address provider
(such as live.com or hotmail.com), and the tap Next.
7. In the Incoming mail server box, enter your incoming mail server name. In the
Account type list, select your account type, and then tap Next.
8. Enter your username and password, and then tap Next.
9. In the Outgoing (SMTP) mail server box, enter your outgoing mail server name, and
then tap Next. Select Outgoing server requires authentication if your e-mail server
requires authentication.
10. Select how often to sync your e-mail, and then tap Finish.
42

Composing and Sending an E-mail
1. Tap Start > E-mail.
2. Scroll to and tap to open an e-mail account.
3. Tap Menu > New. This will bring up a new e-mail form.
4. Enter recipient e-mail address in the To, Cc and/or Bcc elds as necessary. To
insert an e-mail address from your contacts, tap Menu > Add Recipient, then
select a name. Insert a semicolon (;) between multiple addresses.
Status Bar
Softkeys
5. In the Subject eld, type in a subject.
6. Scroll to or tap the message area and enter your message.
7. Tap Send. E-mail messages are stored in the Outbox and are sent to recipients the
next time you sync or connect to your e-mail server.
NOTE To change message settings such as its priority, tap Menu > Message Options in the message you
are editing. Select the type of option to change and then tap OK.
To cancel a message before you send it, tap Menu > Cancel Message.
43

Reading an E-mail Message
1. Tap Start > E-mail.
2. Scroll to and tap to open an e-mail account.
3. Make sure the folder drop-down menu says Inbox ▼. If it doesn’t, tap the
drop-down menu and select Inbox under this e-mail account.
4. In the e-mail list, tap the e-mail message you want to read.
44

Chapter 5 | Basic Applications

5.1 Calendar
You can use the Calendar program to schedule appointments, including meetings
and other events. You can also set the Calendar to remind you of appointments with a
sound or a ashing light. If you use Outlook on your PC, you can create appointments
in Outlook and sync them to the device.
Scheduling an Appointment
1. Tap Start > Calendar > Menu > New Appointment.
2. Enter information about the appointment.
3. To schedule an all-day event, in the All Day eld, tap Yes. Please notice the all-day
event will not occupy blocks of time in Calendar, it will appear in banners at the top
of the Calendar view instead.
4. Assign a category to the appointment or create a new one for it, if needed.
5. Tap OK to save the appointment.
NOTE
To update an appointment, open it and then tap Menu > Edit.
Deleting an Appointment
1. Tap Start > Calendar.
2. Scroll to the appointment, and then tap Menu > Delete Appointment.
3. If the appointment is recurring, tap All to delete the series, or tap One to delete only
the current occurrence.
NOTE
When you delete an appointment in Calendar on the device, it is also deleted on your PC the next
time you synchronize.
Changing the Calendar View
You can look at your appointment in Agenda, Day, Week, Month or Year view. To see
detailed appointment information in any view, tap the appointment. To see a list of
available actions for an appointment, tap and hold the appointment.
46

1. Tap Start > Calendar > Menu > View, and then select the view you want. You can
view your calendar in the following layout:
• Today’s agenda.
• Appointments for the week.
• Agenda for a specic date.
• Appointments for the month.
NOTE
You can also cycle through the view by tapping Agenda, Day, Week, Month or Year on the menu bar.
Moving around in the Calendar
1. Tap Start > Calendar.
2. Tap Day, Week, Month, Year, or Agenda.
3. Do any one or more of the following:
• Scroll right to left to move forward in time.
• Scroll left to right to move backward in time.
• Brush up and down to scroll through lists.
• To add an appointment, tap a time slot, and then tap Menu > New Appointment.
• To view an appointment, tap the item.
Responding to an Outlook Meeting Request
You can receive and respond to Microsoft Outlook meeting requests with the device
just like the way you work with Outlook meeting requests on your computer. The next
time you synchronize, the meeting will be added to your computer’s Outlook calendar.
1. Tap Start > E-mail > Outlook E-mail.
2. Tap the meeting request and do on of the following:
• Tap Accept to insert the meeting into your calendar.
• Tap Menu > Decline to decline the request.
• Tap Menu > Tentative to insert a tentative meeting into your calendar.
47

Changing the Default Calendar Settings
1. Tap Start > Calendar > Menu > Tools > Options. Do any of the following:
• In Start in, select the calendar view you prefer.
• To specify the rst day of the week, in 1st day of week, tap Sunday or Monday.
• To specify the number of days you want to appear in a week, in Week view, tap
5-day week, 6-day week, or 7-day week.
2. Tap OK to save settings.
48

5.2 Notes
The Notes program helps you to quickly capture thoughts, questions, reminders,
to-do lists and meeting notes. You can create handwritten and typed notes, record
voice notes, covert handwritten notes to text for easy readability, and send notes to
others.
Your notes and recordings are displayed in the note list. If you have a long list, tap the
sort list (labeled Name by default) and select the option you want. To open a note or
play a recording, tap it. To see a list of available actions for a note or recording, tap
and hold the note or recording.
Setting the Default Input Mode and Template for Notes
1. Tap Start > Notes > Menu > Options.
2. In Default mode, select Writing or Typing.
3. Select a template from Default template.
4. Tap OK to save your settings.
49

Creating a Note
1. Tap Start > Notes.
2. Tap New and enter text. If you want to change the input mode, tap Menu > Draw
to switch to a different mode.
3. Tap OK to save your note.
NOTE
Your note will be given a default name when you save it. To change the name, tap and hold the note
in the note list and then tap Rename.
Recording a Voice Note
1. Tap Start > Notes.
2. To record a voice note in a note, scroll to and tap the note. Skip this step if you
want to create a stand-alone voice recording.
3. If the recording toolbar is not shown, tap Menu > View Recording Toolbar.
4. Tap the RECORD button ( ) on the recording toolbar and speak into the
microphone to start a voice recording.
5. Tap the STOP button ( ) on the recording toolbar when nished. (The recording
will appear in the notes list. Tap it if you want to review it.)
6. Tap OK to return to the notes list.
NOTE
You can change the recording formats. In the note list, tap Menu > Options > Global Input Options
link > Option tab, and then select the desired format.
Deleting a Note
1. Tap Start > Notes.
2. Tap and hold the note, and then tap the Delete command.
3. Tap Yes to conrm deleting the selected note.
50

5.3 Tasks
You can use the Tasks program to keep track of things you need to do. A task can
occur once or repeatedly (recurring). You can set reminders for your tasks and
organize them by using categories.
Creating a Task
1. Tap Start > Tasks.
2. Do one of the following:
• To quickly add a new task, tap the box labeled Tap here to add a new task,
enter the task name, and then press Enter.
• Tap Menu > New Task and enter details about the new task.
3. Tap OK to save the task. You can see your tasks are displayed in a task list.
Overdue tasks are displayed in red.
NOTE
To mark a task as complete, check the box next to the task. Clear the check box if you want to
reopen it.
If you use Outlook on your computer, you can synchronize tasks between the device and your
computer to keep your task list up to date in both locations.
51

Updating a Task
1. Tap Start > Task.
2. Open the task and then tap Edit.
3. Tap OK when nished making changes.
Deleting a Task
1. Tap Start > Task.
2. Scroll to the task and then tap Menu > Delete Task.
3. Tap Yes to conrm.
Setting Tasks Options
1. Tap Start > Tasks > Menu > Options.
2. Select the options you prefer.
3. Tap OK when nished.
52

5.4 Working with Office Mobile
You can view Microsoft Ofce Word, Excel, and PowerPoint les on the device by
using the mobile versions of these applications. You can create notes containing
various types of content including voice recording and pictures. Moreover, you can
edit Word documents and Excel worksheets on the device.
Opening a File
1. Tap Start > Ofce Mobile.
2. Tap a program: Excel Mobile, OneNote Mobile, PowerPoint Mobile, or Word Mobile.
3. In the le list, tap the le that you want to open.
NOTE
You can have only one document, workbook, or note open at a time. When you open a second item
of the same type, the rst item is saved and closed automatically.
Creating a File
1. Tap Start > Ofce Mobile.
2. Tap a program. Tap New if it does not open a le automatically.
3. Enter text and data.
4. Tap OK to save the le. The le will be named automatically, if you want to rename
it, scroll to the le, and then tap Menu > Rename/Move.
Creating a Template
1. Tap Start > Ofce Mobile.
2. Open or create a le. Enter text or information that you want to use in a template.
3. Tap Menu > File > Save As.
53

4. Enter a name and select the correct type for the new template.
5. In Folder, select Templates.
6. In Location, select Main memory.
7. Tap Save.
NOTE
To create documents or workbooks by using a template, tap Menu > Options from the program list,
and then select the template. All new les will be established upon the template afterwards.
Finding or Replacing Text or Data
1. In a document or workbook, tap Menu > Edit > Find/Replace.
2. In Find what, enter the text you want to nd.
3. Select the appropriate search options.
4. Tap Find or Replace.
NOTE
In Excel les, you can limit your search by selecting specic cells before you nd or replace text.
54

Chapter 6 | Making Connections

The device can connect to the Internet, to your computer, and to other devices and
services. With an active connection on the device, you can browse the Web, download
e-mails or use Windows Live Messenger.
6.1 Connection Center
You can use Connection Center to quickly and easily turn your Bluetooth and Wi-Fi on
or off. Connection Center is useful when you need to reduce battery consumption or if
you use the device on an aircraft.
1. To open Connection Center, tap Start > Settings > Connections > Connection Center.
2. Do any one or combination of the following steps:
• Tap the Wi-Fi button to turn it on or off.
• Tap the Bluetooth button to turn it on or off.
• Tap the Flight Mode button to turn all wireless power off.
3. Tap Exit or OK when nished.
NOTE
After opening Connection Center, you can tap Menu to access Wi-Fi and Bluetooth settings.
56

6.2 Wi-Fi Data Connections
Wi-Fi wirelessly connects the device to the Internet through access points (also
known as “hotspots”) that can be up to 30 meters away. When the device encounters
a hotspot, it can then connect to the network wirelessly. While some hotspots are
free, most public Wi-Fi networks are provided by private internet service providers
(ISPs) or wireless carriers, and using these networks will typically require payment of a
connection fee.
The Wi-Fi connection is disabled when the device is synchronizing with a PC.
Turning Wi-Fi on or off
1. Tap Start > Settings > Connections > Wi-Fi.
2. Tap Search for Networks. The device will detect available Wi-Fi networks. You can
then tap the desired one.
3. Select the network you want to connect to.
4. In the Connects to list, select Internet or Work. If you select a secure network, you
may need to enter network key provided by the network administrator.
5. If the network is hidden, select This is a hidden network. If you want to connect
to another device instead of a network through an access point, select This is a
device-to-device (ad-hoc) connection. Tap Next.
6. Select your Network Authentication settings, then tap Next. (The default choices
are often appropriate.)
7. Tap Finish.
NOTE
If you want to switch to another Wi-Fi network, tap Start > Settings > Connections > Wi-Fi. Select
the network and then tap Connect.
Editing a Wi-Fi Connection
1. Refer to the previous section to turn on Wi-Fi.
2. Tap Start > Settings > Connections > Wi-Fi.
57

3. On Wireless tab, you can see currently available wireless networks. Select the
connection that you want to edit, tap Menu > Edit.
4. Make changes and then tap Finish to save your settings.
Creating a Wireless Connection
Some Wi-Fi networks are hidden. You might need to enter the network settings
manually. To set up a new Wi-Fi network, you will need to have your home router
settings or information from your administrator about joining the corporate Wi-Fi
network.
1. Tap Start > Settings > Connections > Wi-Fi.
2. Tap Menu > Add New.
3. Enter the Network name, select a Network type, select This is a hidden network,
and then tap Next. If you want to connect to another device instead of a network
through an access point, select This is a device-to-device (ad-hoc) connection.
4. Enter required information, and then tap Next.
5. Select or clear Use IEEE 802.1X network access control.
6. To use EAP (Extensible Authentication Protocol) or smart card authentication, make
the selections appropriate to your choice of authentication.
7. Tap Finish.
Deleting a Wi-Fi Connection
1. Tap Start > Settings > Connections > Wi-Fi.
2. Select the connections that you want to delete, tap Menu > Remove Settings.
6.3 Bluetooth Connections
Bluetooth is a short-range wireless communication technology. Device with Bluetooth
capabilities can exchange information over a distance of about 10 meters without
requiring a physical connection.
58

The device can connect to other Bluetooth-enabled devices such as computers,
mobile devices, and Bluetooth-enabled accessories such as headsets and car kits.
To use Bluetooth for beaming (exchanging) information, you have to turn on Bluetooth
and establish a Bluetooth partnership between the device and the other device.
Turning Bluetooth on or off
1. Tap Start > Settings > Bluetooth.
2. On the Mode tab, select or clear Turn on Bluetooth.
3. Tap OK.
NOTE
After you turn Bluetooth on, the device will remember this setting and turn it back on automatically
whenever the device is on. To save battery power, please turn off Bluetooth after beaming information.
Making the Device Visible to Other Devices
After you turn Bluetooth on, the device can detect other devices that use Bluetooth,
but they will be unable to detect the device unless you have made the device visible.
For improved security, set the device visible only when you are establishing new
partnerships.
1. Tap Start > Settings > Bluetooth.
2. On the Mode tab, select Turn on Bluetooth, and then select Make this device
visible to other devices.
3. Tap OK.
Creating a Bluetooth Partnership
1. Make sure both Bluetooth devices are set to Visible and
are within range.
2. Tap Start > Settings > Bluetooth.
3. On the Devices tab, tap Add new device. The device
will search for and list other Bluetooth-enabled devices
within range.
Status Bar
Softkeys
59

4. Select the device that you want to add and tap Next. If the device you are looking
for does not appear in the list, tap Refresh.
5. In Passcode, enter an alphanumeric passcode between 1 and 16 characters, and
then tap Next. Otherwise, leave the passcode blank. For security reasons, it is
strongly recommended that you use a passcode.
6. Enter the same passcode on the other device (there will be a prompt to do so).
7. Select the service to use from the partner device, tap Finish.
Receiving a File
1. Refer to the previous section to establish a Bluetooth partnership.
2. Tap Start > Settings > Connections > Beam.
3. Select Receive all incoming beams, and then tap OK.
4. Tap Start > Settings > Bluetooth.
5. On the Mode tab, tap Make this device visible for other devices.
6. On your PC (or other Bluetooth-enabled devices), locate the le or item you want to
send. For example, on your PC, you would use Windows Explorer to locate the le.
7. In the example above, right-click the le and select the destination device under “to
Bluetooth”.
8. Tap Yes when the device prompts about receiving a le.
9. After the transmission process is nished, the le should be saved in My
Documents on the device.
Beaming an Item
Once you create a partnership, the two partnership Bluetooth-enabled devices don’t
need to be discoverable to communicate. You can beam les and information such as
contacts, pictures, tasks, appointments, voice notes, and les to other devices using
Bluetooth.
1. Tap Start > Settings > Bluetooth.
2. On the Mode tab, select Turn on Bluetooth.
3. Select an item you want to beam. For example, open a task in Tasks.
4. Tap Menu > Beam.
60

5. Tap the destination device. If the target device does not appear in the list, ensure
that the device is turned on, discoverable, and within close range of the device.
6. Tap OK after the transfer is done.
Setting up the Device as a Bluetooth Modem
When the device is connected to your PC by using Bluetooth, You can connect your
PC to the Internet by using the device’s networking capability.
1. Establish a Bluetooth partnership between the device and your PC (refer to the
section “Creating a Bluetooth Partnership” in this chapter) and turn on Bluetooth on
the device and your PC.
2. Tap Start > Internet Sharing.
3. In PC Connection, select Bluetooth PAN.
4. In Network Connection, select the connection that you want to use.
5. Tap Connect on the device.
6. Set up a Bluetooth PAN (Personal Area Network) on your PC.
7. Tap Connect on the device.
6.4 Infrared Connections
An infrared connection enables you to share information wirelessly with other infraredenabled devices over a distance of a meter. You can easily share your appointments,
contacts, pictures, and other information with another infrared-enabled device via
infrared.
Set up the Device to Receive Incoming Beams
You have to set up your device to receive beams before receiving or beaming a le.
1. Tap Start > Settings > Connections > Beam.
2. Select Receive incoming beams.
3. Tap OK.
NOTE
Once you select Receive incoming beams, the device automatically receives beams until you clear this
checkbox.
61

Beaming an Item
1. Refer to the previous section, set up the device to receive beams.
2. In Calendar, Contacts, Notes, Task, or Pictures, select an item that you want to
beam. (In Calendar, for example, rst open the appointment in Agenda view.)
3. Tap Menu > Beam.
4. Align the infrared ports at close range (no more than 1 meter apart). Wait until the
device name appears on the list, scroll to it, and then tap it.
5. Tap Yes at the conrmation prompt.
Receiving a File
1. Refer to the previous section, set up the device to receive beams.
2. Align the infrared port on the top of the device with the infrared port on your PC or
other infrared-enabled device. Make sure they are unobstructed and within close
range.
3. After your PC detects a new infrared connection, select a le to send to your device
and click the Send button.
4. Tap Yes at the prompt to conrm receiving the le.
5. After the transmission process is nished, the le should appear on the device
under My Documents in the File Explorer.
6.5 USB Connections
A USB connection is a wired connection that lets you connect the device to your
computer for synchronizing data. With a USB connection, you can connect your PC
to the Internet by using the device’s networking capability and copy or move les
between your PC and your device.
You have to install ActiveSync or WMDC (see chapter three for more information) on
your PC in order to use a USB connection.
62

Transferring Files
1. Connect the device to your PC with a USB cable.
2. On your PC, right-click Start, click Explorer, and then open the folder to or from
which you want to copy or move a le.
3. Right-click the le that you want to copy or move, then click Copy or Cut.
4. Scroll to and then click Mobile Device, open the folder to or from which you want
to copy or move a le. Right-click in the folder that you want to move it to, and then
click Copy, Cut or Paste.
5. Click OK when the File Conversion dialog box appears.
Changing USB-to-PC Connection Type
In some cases, you may nd ActiveSync or WMDC do not recognize the device when
it is connected to your PC with a USB cable, or you may nd your PC disconnects
the connections with the device when your PC is connected to the Internet or a local
network. If this happens, try the following to resolve sync connection problems.
1. Tap Start > Settings > Connections > USB to PC.
2. Select or clear Enable advanced network functionality.
3. Tap OK.
63

Chapter 7 | Other Applications

7.1 Browsing the Internet
You can use Internet Explorer Mobile to browse the Internet once the device has
connected to a Wi-Fi Network.
To establish a Wi-Fi connection:
1. Tap Start > Settings > Connection > Connection Center.
2. Tap the Wi-Fi button (unless it already says “On”). The device will detect available
Wi-Fi networks.
3. Select the network you want to connect to, and then tap OK.
4. If required, select Internet or Work and then tap Connect. If you select a secure
network, you will need to enter network key provided by the network administrator.
5. Follow the prompts to nish related settings.
To browse a Web page:
1. Tap Start > Internet Explorer.
2. Enter a Web address in the address bar, then tap the go icon ( ).
Keyboard
Favorites
Back
NOTE
You can tap the screen to change to reading mode, in which a maximized view of the Web page
with the address bar and the menu bar hidden from view. To return to overview mode, tap the
restore icon in the lower right.
You can use touch gestures to move around the Web page.
Zoom
Menu
65

Changing the Size of Text on Web Pages
1. Tap Start > Internet Explorer.
2. Tap Menu > View > Text Size, then select the size you want.
Showing or Hiding Pictures on Web Pages
1. Tap Start > Internet Explorer.
2. Tap Menu > Tools > Options > Other, then select Show Pictures. Images on the
Web pages that you visit will be downloaded. Un-check this item if you do not want
Internet Explorer to show pictures.
Changing Web Page Display Options
1. Tap Start > Internet Explorer.
2. Tap Menu > View, then select one of the following:
• Mobile: arranges the content into one column that is as wide as the screen. This
means that you will rarely have to scroll horizontally.
• Desktop: maintains a layout similar to what you see on a desktop computer, but
makes items smaller.
Sending a Link by E-mail
1. Tap Start > Internet Explorer.
2. Go to the page you want to send.
3. Tap Menu > Tools > Send Link.
4. The Messaging account list will appear. Tap an account.
5. A new message will be created with the page address inserted in the message
body. Choose a recipient, enter any accompanying message and then tap Send.
Clearing History, Cookies, or Temporary Files
1. Tap Start > Internet Explorer.
2. Tap Menu > Tools > Options.
3. Tap Browsing History.
4. Select an item (Temporary Files, Cookies or History) and then select Clear.
5. Tap Done when nished.
66

Managing the Favorites List
1. Tap Start > Internet Explorer.
2. Go to the page you want to add, then tap Favorites ( ) on the menu bar.
3. Do any one or combination of the following steps:
• Tap to add the web page.
• Tap to create a new folder.
• Tap to rename a folder or edit a favorite.
• Tap to delete a folder or a favorite.
7.2 Windows Live Messenger
You can send instant messages over the Internet with Windows Live Messenger.
NOTE
The device must be connected to the Internet before you can start using Windows Live Messen-
ger. To connect to the Internet, refer to chapter 6 for details. You must have a valid Microsoft.NET
Passport or Hotmail account before you can sign in to Windows Live Messenger.
Singing In to Windows Live Messenger
1. Tap Start > Messenger.
2. In Sign in as, choose a display status (e.g. Online or Busy), and then tap Sign in.
3. Before using Windows Live Messenger for the rst time, you have to accept the
Windows Live Terms of Use and Privacy Statement. Tap Accept to continue.
4. Enter your Windows ID and password and tap Next.
5. Select whether to show Window Live on the Today screen or not. Tap Next.
6. Choose from the Sync options and then tap Next.
7. Window Live Messenger will sign you in online.
NOTE
To sign out of Windows Live Messenger, tap Menu > Sign out.
67

Adding/Deleting a Window Live Messenger Contact
1. Sign in to Windows Live Messenger.
2. Do any of the fowllowing steps:
• To add a contact, tap Menu > Add New Contact and then follow the on-screen
instructions.
• To delete a contact, tap and hold the contact name in the Window Live contact
list, tap View contact’s info > Menu > Delete Contact.
Sending and Instant Messege
1. Sign in to Window Live Messenger.
2. Select the contacts’s name and then tap Send IM.
3. Enter a message, tap Send.
4. To close the chat window, tap Menu > End conversation.
Changing Windows Live Messenger Settings
1. Sign in to Windows Live Messenger.
2. Tap Menu > Options.
3. Select from the available options and then tap Done.
Deleting or Changing the Windows Live Account
1. Sign in to Windows Live Messenger.
2. Tap Menu > Window Live.
3. Tap Menu > Account options.
4. Tap Swtich Windows Live ID. This will delete all settings, including contacts and
e-mails, associated with the Windows Live Account.
5. Tap Yes to confrim.
68

7.3 Window Media
The device comes with Windows Media Player pre-loaded, which allows you to play
digital audio and video les stored locally or on a network.
Transferring Music and Videos to the Device
If you want to store the media les to a storage card, insert a MicroSD card in the
device before connecting the device to a PC.
1. On your computer, open Windows Media Player.
2. Connect the device to your computer using a USB cable.
3. In Windows Media Player on your computer, click Sync.
4. Drag each item you want to sync to the device pane of the Windows Media Player
window.
5. Click Start Sync. This will start the synchronization process.
6. After transferring your media les, update your mobile device Media Library:
a. Tap Start > Windows Media.
b. Tap Menu > Library > My Device.
69

c. Tap Library > Storage Card if the les are stored in the MicroSD card.
Otherwise, skip this step.
d. Tap Menu > Update Library.
e. Tap Done when update is completed.
Playing Media Files on the Device
1. Tap Start > Window Media.
2. Tap Menu > Library to open the Library screen.
3. Tap a category (e.g. My Music > All Music).
4. Select an item and then tap Play.
Saving a New Playlist
1. Tap Start > Windows Media.
2. Tap Menu > Library.
3. Select a category (e.g. My Music > All Music).
4. Select an item, tap Menu > Queue Up. Selected item will be added to the Now
Playing list immediately.
5. Tap Menu > Now Playing.
6. Tap Menu > Save Playlist.
7. Enter a name for the playlist and then select Done.
NOTE
On the Window Media playback screen, you can tap Menu > Options to change playback settings.
70

7.4 GPS
A GPS (Global Positioning System) signal receiver is built in the device. You have
to install mapping software such as Pharos Smart Navigator on the device to start
navigating. Please follow the instructions of your mapping software to install it and
use the navigation functions. You may need to specify the GPS hardware port when
installing the mapping software. Select the following value if requested.
• GPS hardware port: COM4
• Baud rate: 57600
Some mapping or GPS navigation software may not be compatible with the device, please consult
with the software provider before installing the software.
Receiving Better Satellite Signals
GPS positioning is limited by bad weather (e.g. rainy or cloudy days) and usage
location (e.g. tall buildings, tunnels, underpasses, trees, bridges…etc). Typically, GPS
does not work indoors, nor can GPS signals penetrate buildings, car sun shades and
heat reective lm with metallic content.
It can take several minutes the rst time you establish a GPS connection. If you nd
the device cannot detect the satellite signal, try the following:
• Move the device to an open space without tall buildings or trees around it.
• Make sure there are no wireless communication products (e.g. radar-detecting
devices and mobile phones) nearby since these products may cause unstable
signal reception.
• Connect an external Bluetooth GPS receiver (not included in the package) to the
device in order to enhance the reception.
Important Notice about Using GPS
• The GPS is built and operated by the US Defense Department. The accuracy of
location data may be affected by changes made by the Department.
71

• GPS should not be used for precise location measurement. It can only be used as a
navigation aid.
• Do not turn on the car engine when the device is connected to the car charger (not
included in the package) as this may damage the device.
• Make sure the DC voltage provided by your car and the electric current supplied
from your car charger are compatible with the device before using them.
• Using the GPS may drain the battery faster than usual.
7.5 Adding or Removing a Program
Choose one of the following methods to download a program. Make sure that
the program you are going to download is compatible with the device before you
purchase it.
• Open the Internet Explorer, go to the web site that has the program you want to
download, and then follow the instructions to download and install the program to
the device.
• Download the program to your PC and then copy the le to the Program Files folder
using WMDC or ActiveSync on the device. Tap the le and follow the instructions
on the screen to install the program.
To remove a program, do the following steps:
1. Tap Start > Settings > System > Remove Programs.
2. From Programs in storage memory, select the program that you want to remove,
and then tap Remove.
3. Tap Yes.
4. If you want to keep existing data les on the device, tap Yes; otherwise, tap No.
72

7.6 Setting Password and Hint
You can set a password to protect the device data. Once the password is set, the
device will require it to turn on and to wake up from a predetermined amount of idle
time.
1. Tap Start > Settings > Lock. (If there is an existing device lock and you want to
change it, enter the device lock password and then tap Unlock.)
2. Select Prompt if device unused for, then select the idle time before the device
requires a password.
3. In password type, select Simple PIN or Strong alphanumeric. It is suggested to
use an alphanumeric password if the device is congured to connect to a network.
4. Enter the password and then conrm it.
5. On the Hint tab, enter a phrase that will remind you what the password it. This hint
will be displayed if you enter a wrong password ve times.
6. Tap OK when nished.
7.7 Using Task Manager
You can view, switch, or end running programs by using Task Manager.
1. Tap Start > Task Manager. You can see information about programs and
processes running on the device.
2. Do any of the following:
• To switch to a running program, scroll to the program and then tap Menu >
Switch To.
• To end a program, scroll to the program and then tap End Task.
• To end all programs, tap Menu > End All Tasks and then tap Yes to conrm.
73

7.8 Backup/Restore
It is advisable to make backups for your device data regularly in case important data
is accidentally lost or damaged. You can backup the device’s data and les to the
device storage or compatible memory card, and then restore your data from those
backup copies as needed.
Backing up Data
1. Tap Start > Backup Manager.
2. Tap the Backup icon in the left.
3. You can see a tree view of the data and les on the device. Select the check box(es)
of the item(s) that you want to backup. Tap Next.
4. Rename the backup le and add description for it if needed. In Storage Location,
select from the drop-down list. Tap Next.
5. Select whether to compress or/and encrypt the le, set a password for the le, and
then tap Next.
6. Tap Next. If the available space in the device is not large enough, you will need to
re-select your backup items.
7. Tap Start to start saving the backup le.
8. Tap OK when it is done.
Scheduling the Backup
You can set the device to backup automatically at specied times.
1. Tap Start > Backup Manager.
2. Tap the Schedule Backup icon in the middle.
3. Select Enable schedule backup. Specify days and times, and then tap Next.
4. Select the check box(es) of the item(s) that you want to backup. Tap Next.
5. Rename the backup le and add description for it if needed. In Storage Location,
select from the drop-down list. Tap Next.
6. Select whether to compress or/and encrypt the le, set a password for the le, and
then tap OK when nished.
74

Restoring Data
1. Tap Start > Backup Manager.
2. Tap the Restore icon in the right.
3. Select the le that you want to restore to the device. Tap Next.
4. Select whether to overwrite the data, and then tap Start.
5. Tap OK to continue.
6. Tap OK again when nished.
75

Appendix

A.1 Specifications
Processor
Operation System
Memory
Dimension
Weight
Display
GPS
Connectivity
Battery
Expansion Slot
Marvell PXA310 624MHz
Windows Mobile® 6.5 Classic
ROM: 512MB
RAM: 256MB
145.5mm(L)x79mm(W)x26.1mm(H)
300g with battery
3.5" TFT LCD screen with 240x320 resolution
Ultra-sensitive GPS receiver
Bluetooth (2.0 compliant EDR)
Wi-Fi (802.11 a/b/g compliant)
USB (2.0 client)
Rechargeable Li-lon Polymer 3.7V battery
Capacity: 1880mAh
Operating time: 4 hours
microSD™ memory card, supported SD / SDHC
A.2 Regulatory Notices
Regulatory Agency IDs
For regulatory identification purpose, your product is assigned a model number of PTL565.
The Battery Pack has been assigned a model number of PTL565.
This product is intended for use with a certified Class 2 Limited Power Source, rated 5
Volts DC, maximum 1 Amp power supply unit.
European Union Notice
Products with CE marking comply with the R&TTE Directive (99/5/EC), the EMC
Directive (89/336/EEC), and the Low Voltage Directive (73/23/EEC) issued by the
Commission of the European Community.
77
Compliance with these directives implies conformity to the following European Norms
0678
(in parentheses are the equivalent international standards).
• EN 300 328 V1.7.1
• EN 300 440-1 V1.4.1/ -2 V1.2.1
• EN 301489-1 V1.8.1/ -3 V1.4.1/ -17 V1.3.2
• EN 55022:2006 Class B+A1:2007; EN 55024:1998/A1:2001/A2:2003
• EN 60950-1:2006
• EN 301 893 V1.5.1
• EN 50360:2001/ EN 62209-1:2006
List of National Codes
Country
Austria
Belgium
Cyprus
Czech Republic
Denmark
Estonia
Finland
France
Germany
Greece
Hungary
Ireland
Italy
ISO 3166
2 letter code
AT
BE
CY
CZ
DK
EE
FI
FR
DE
GR
HU
IE
IT
Country
Malta
Netherlands
Poland
Portugal
Slovakia
Slovenia
Spian
Sweden
United Kingdom
Iceland
Liechtenstein
Norway
Switzerland
ISO 3166
2 letter code
MT
NT
PL
PT
SK
SI
ES
SE
GB
IS
LI
NO
CH
78

Latvia
Lithuania
Luxembourg
LV
LT
LU
Bulgaria
Rmonnia
Turkey
BG
RO
TR
Federal Communications Commission (FCC) Statement
15.21
You are cautioned that changes or modications not expressly approved by the part
responsible for compliance could void the user’s authority to operate the equipment.
15.105(b)
This equipment has been tested and found to comply with the limits for a Class B
digital device, pursuant to part 15 of the FCC rules. These limits are designed to
provide reasonable protection against harmful interference in a residential installation.
This equipment generates, uses and can radiate radio frequency energy and, if not
installed and used in accordance with the instructions, may cause harmful interference
to radio communications. However, there is no guarantee that interference will not
occur in a particular installation. If this equipment does cause harmful interference to
radio or television reception, which can be determined by turning the equipment off
and on, the user is encouraged to try to correct the interference by one or more of the
following measures:
• Reorient or relocate the receiving antenna.
• Increase the separation between the equipment and receiver.
• Connect the equipment into an outlet on a circuit different from that to which the
receiver is connected.
• Consult the dealer or an experienced radio/TV technician for help.
79

This device complies with Part 15 of the FCC Rules.Operation is subject to the
Following two conditions:
1) this device may not cause harmful interference and
2) this device must accept any interference, including interference that may cause
undesired operation of the device.
FCC RF Radiation Exposure Statement:
For body worn operation, this phone has been tested and meets FCC RF exposure
guidelines when used with an accessory that contains no metal and that positions
the handset a minimum of 1.5 cm from the body. Use of other accessories may not
ensure compliance with FCC RF exposure guidelines.
WEEE Notice
The Waste Electrical and Electronic Equipment (WEEE) Directive is designed to
encourage and regulate the collection, re-use, recycling and recovery of waste
electrical and electronic equipment, which entered into force as European law on
13th February 2003. The Directive aims to improve the level of recycling of electrical
and electronic equipment (EEE) and encourages designers to develop products with
recycling efciency in mind; it also aims to improve our environment and reduce risks
to human health through the proper treatment of discarded goods.
The WEEE logo ( ) on the product and its accessories or on its box indicates
that this product must not be disposed of or dumped with your other household
waste. You are liable to dispose of all your electronic or electrical waste equipment
by relocating over to the specied collection point for recycling of such hazardous
waste. Isolated collection and proper recovery of your electronic and electrical waste
equipment at the time of disposal will allow us to help conserve natural resources and
reduce harm to the environment and human health.
For more information about electronic and electrical waste equipment disposal,
recovery and collection points, please contact your local government ofce,
household waste disposal service, the retailer from where you purchased the
equipment, or the manufacturer of the equipment.
80

RoHS Compliance
This product is in compliance with Directive 2002/95/EC of the European Parliament
and of the Council of 27 January 2003, on the restriction of the use of certain
hazardous substances in electrical and electronic equipment (RoHS) and its
amendment.
Warning!
DANGER OF EXPLOSION IF BATTERY IS INCORRECTLY REPLACED. TO REDUCE
RISK OF FIRE OR BURNS, DO NOT DISASSEMBLE, CRUSH, PUNCTURE, SHORT
EXTERNAL CONTACTS, EXPOSE TO TEMPERATURE ABOVE 60.C (140.F), OR
DISPOSE OF IN FIRE OR WATER. REPLACE ONLY WITH SPECIFIED BATTERIES.
RECYCLE OR DISPOSE OF USED BATTERIES ACCORDING TO THE LOCAL
REGULATIONS OR REFERENCE GUIDE SUPPLIED WITH YOUR PRODUCT.
81

Products with 2.4–GHz Wireless LAN Devices France
L'utilisation de cet equipement (2.4GHz wireless LAN) est soumise à certaines
restrictions: cet equipement peut être utilisé à l'interieur d'un batiment en utilisant
toutes les frequences de 2400 a 2483.5MHz (Chaine 1–13). Pour une utilisation en
environement exterieur, les frequences comprises entre 2400-2454 MHz (Chaîne 1-9)
peuvent être utilisé. Pour les dernières restrictions, voir http://www.art-telecom.fr.
For 2.4–GHz wireless LAN operation of this product, certain restrictions apply. This
equipment may use the entire–2400–MHz to 2483.5–MHz frequency band (channels 1
through 13) for indoor applications. For outdoor use, only 2400-2454 MHz frequency
band (channels 1-9) may be used. For the latest requirements, see http://www.
art-telecom.fr.
Wireless LAN Module’s Maximum EIRP
Frequency Ranges (MHz) Indoors Outdoors
2400 MHz ~ 2446.5 MHz 10mW Not Permitted
2446.5 MHz ~ 2483.5
MHz
100mW 100mWon private property
with Ministry of Defense
approval.
This device have been tested to comply with the Sound Pressure Level requirement
laid down in the applicable EN 50332-1and/or EN 50332-2 standards. Permanent
hearing loss may occur if earphones or headphones are used at high volume for
prolonged periods of time.
Logo
Warning statement:
A pleine puissance, l’écoute prolongée du baladeur peut endommager l’oreille de l’utilisateur.
82
 Loading...