

Page 1
GLAC IER G2080
FOUNDERS EDITION
PH-GB2080FE_BK01/CR01
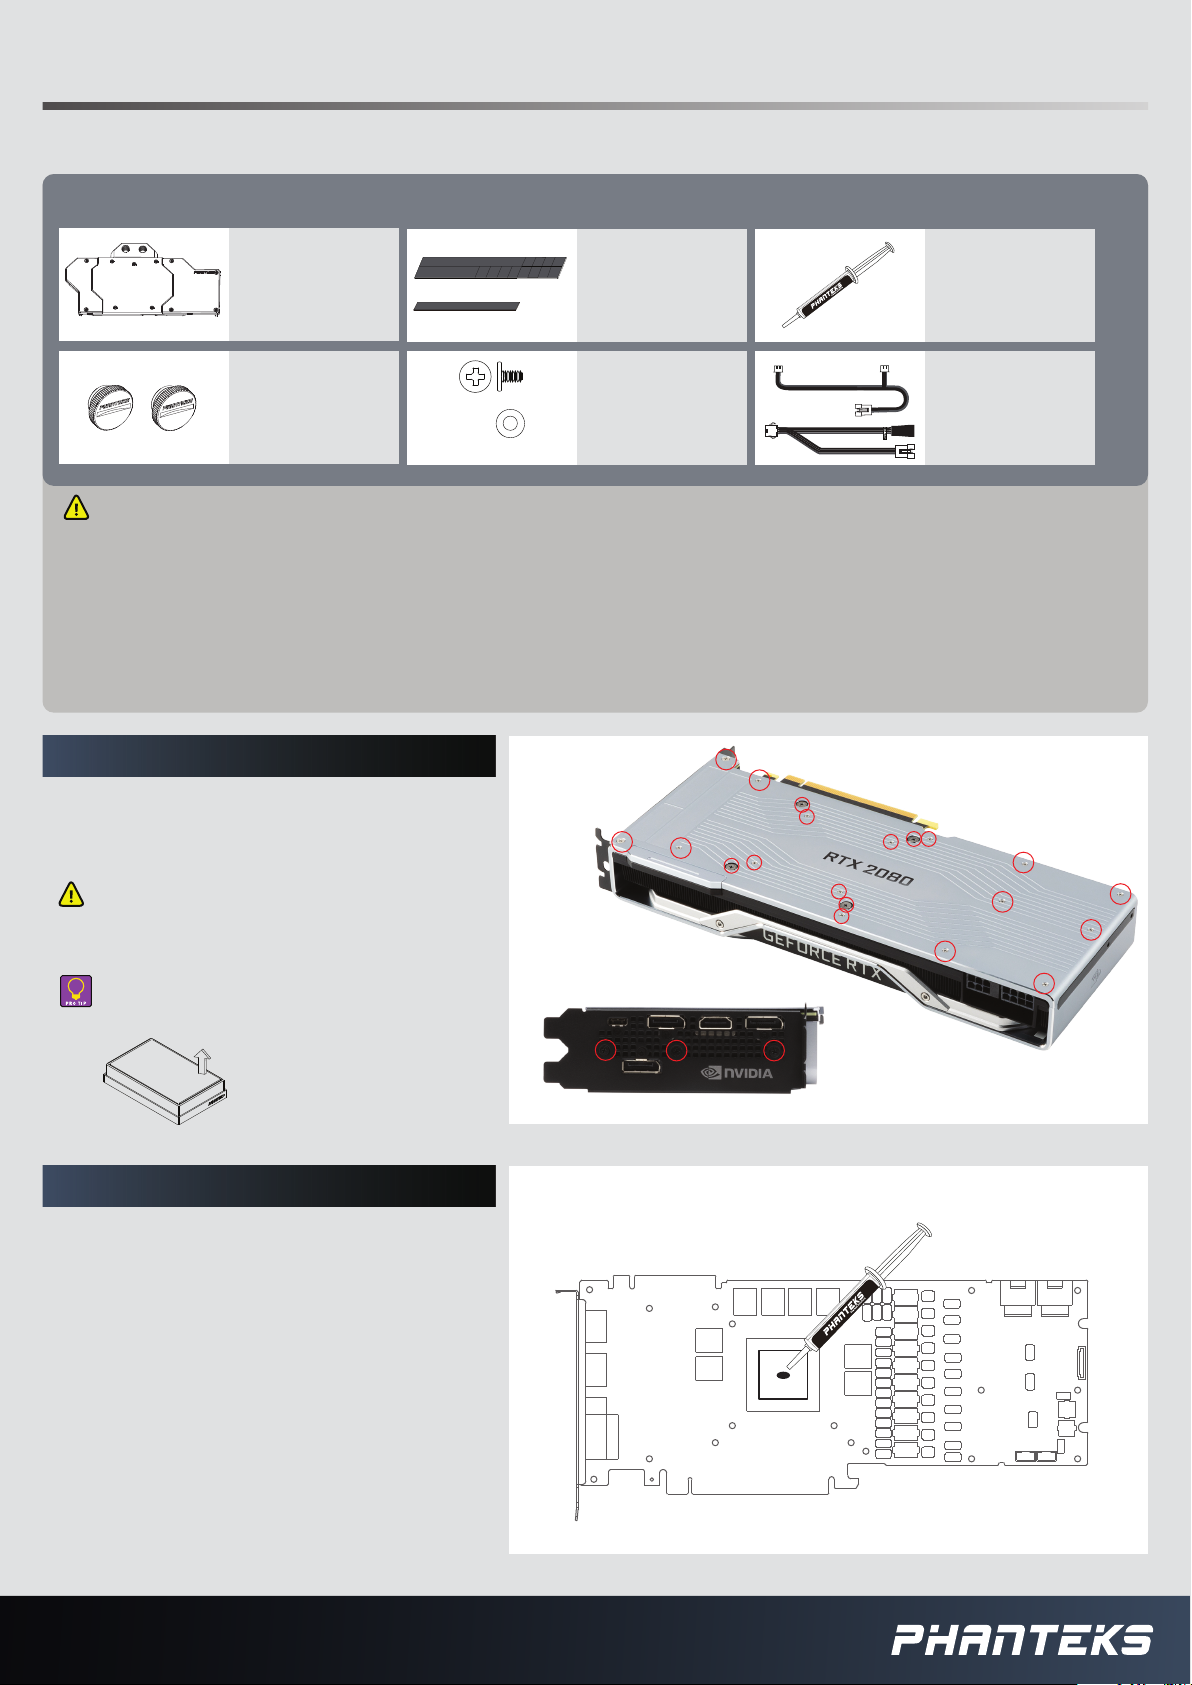
PACKAGE CONTENTS
GLACIER GB2080FE
QTY: 1
GLACIER Stop Fitting
QTY: 2
Thermal Pads
QTY: 2
M2,5x5 Screws
QTY: 15
Washers
QTY: 15
INSTALLATION GUIDE V1.0
For latest version check www.Phanteks.com
Thermal Compound
PH-NDC-01
QTY: 1
Phanteks RGB Cable
QTY: 1
RGB Motherboard
Adapter
QTY: 1
WARNING - This product is intended for advanced users. Improper installation may result in damage to your equipment. While all eorts
have been made to provide the most comprehensive information possible, Phanteks assumes no liability expressed or implied for any damage(s)
occurring to your components as a result of using Phanteks cooling products, either due to mistake or omission on our part in the below
instructions, or due to failure or defect in the Phanteks cooling products. Do not disassemble the water block. Warranty will be voided.
Turn o the power to your system and discharge your body’s static electric charge before proceeding with the installation procedure. If you do not
feel comfortable with performing the installation procedure, consult a qualied computer technician.
STEP 1. REMOVING STOCK COOLER
Unscrew all highlighted screws to remove
the backplate and stock cooler.
Make sure to unplug the LED and Fan
cables when you remove the stock cooler.
Use the EVA-Foam from the box to use
as a base for your installation process.
STEP 2. APPLYING THERMAL COMPOUND
Clean o the original thermal compound.
We recommend using isopropanol alcohol.
Apply a drop of the Phanteks Thermal
Compound to the center of the GPU chip.
Page 2
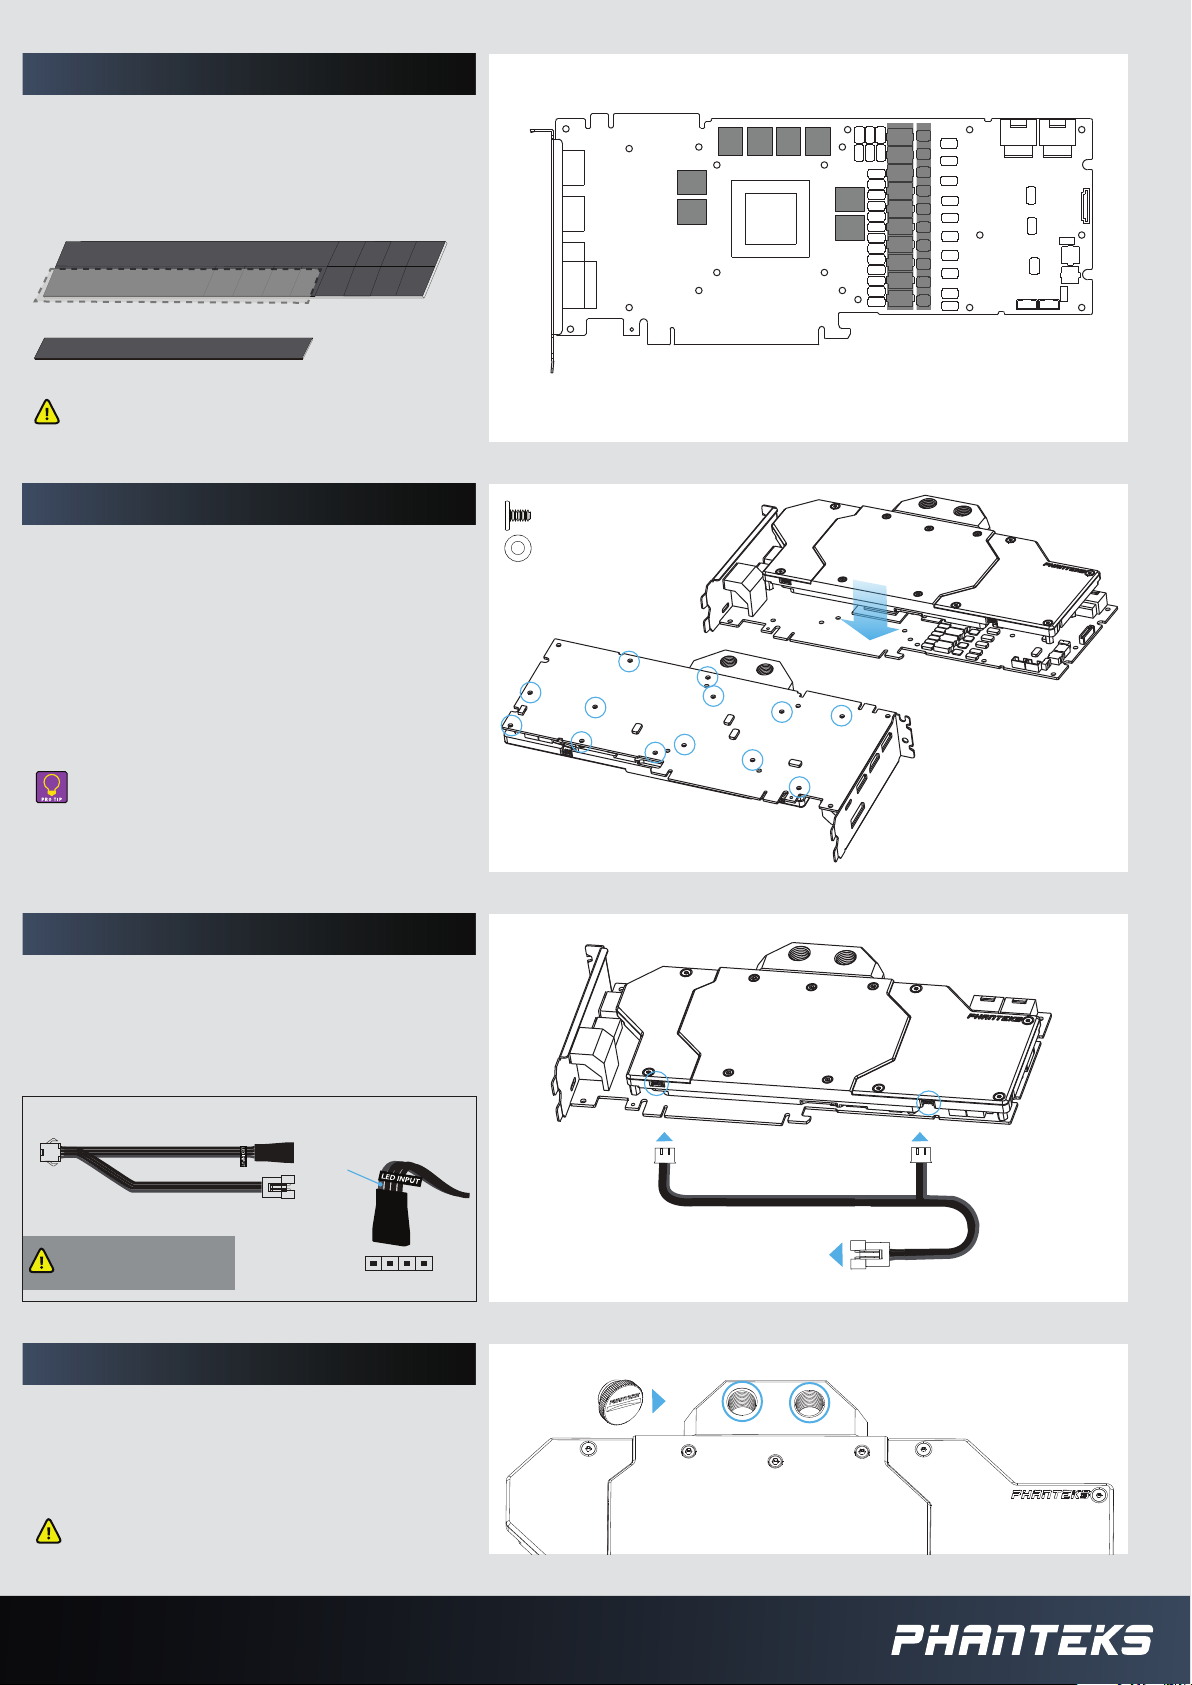
STEP 3. APPLYING THERMAL PADS
Remove the protective lm and place the
the thermal pads on correct position on
the PCB.
1
NOT NEEDED
3 3 3 3
3 3 3 3
2
Make sure to remove the protective lm on
both sides of the thermal pads.
STEP 4. MOUNT THE WATER BLOCK
Carefully position the water block onto the
graphics card. Align the mounting holes on
the PCB with the holes on the water block.
Secure the water block with 13 M2,5x5mm
screws and washers to the PCB.
13x
13x
3 3 3 3
3
3
3
1 2
3
Make sure to lay the GPU with the water
block at down without resting on the
PCI bracket.
STEP 5. CONNECT RGB LIGHTING
Connect the RGB cable to the 2 RGB strips
in the water block.
Connect to RGB-equipped motherboard:
12V
Make sure the 12V pin (grey cable) is
connected to the 12V pin on the
motherboard header.
MOTHERBOARD
RGB HEADER
12V G R B
Connect to
Phanteks Case / Motherboard RGB adapter
STEP 6. INSTALLING FITTINGS
Install G1/4 threaded male ttings and
close the remaining ports with the two
included Stop Fittings.
Always perform a leak test before providing
power to any system components.
 Loading...