

Page 1
GLACIER R160/R220 MANUAL V1.2
PH-R160_BK01/PH-R220_BK01
PACKAGE CONTENTS
3x
R160 or R220
Fan Bracket
160/220 LED strip
4x
2x
2x
DISCLAIMER - This product is intended for advanced users.
Please consult with a qualied technician for installation. Phanteks
assumes no liability for any damages occurring as a result of using
Phanteks cooling products.
INSTALLATION
FILL PORT
GLACIER R160
GLACIER R220
Stop Fitting
(pre-installed)
M4x30 Pump Screws
M4x10 Bracket Screws
M4x6 LED-strip Screws
WARNING - Power down the system before installation.
- Do not disassemble the reservoir. Warranty will be voided.
- Perform a leak test before turning on the system.
- Check our website for the latest installation guide.
4x
Fan Screws
3mm Allen Key
RGB cable
RGB Motherboard cable
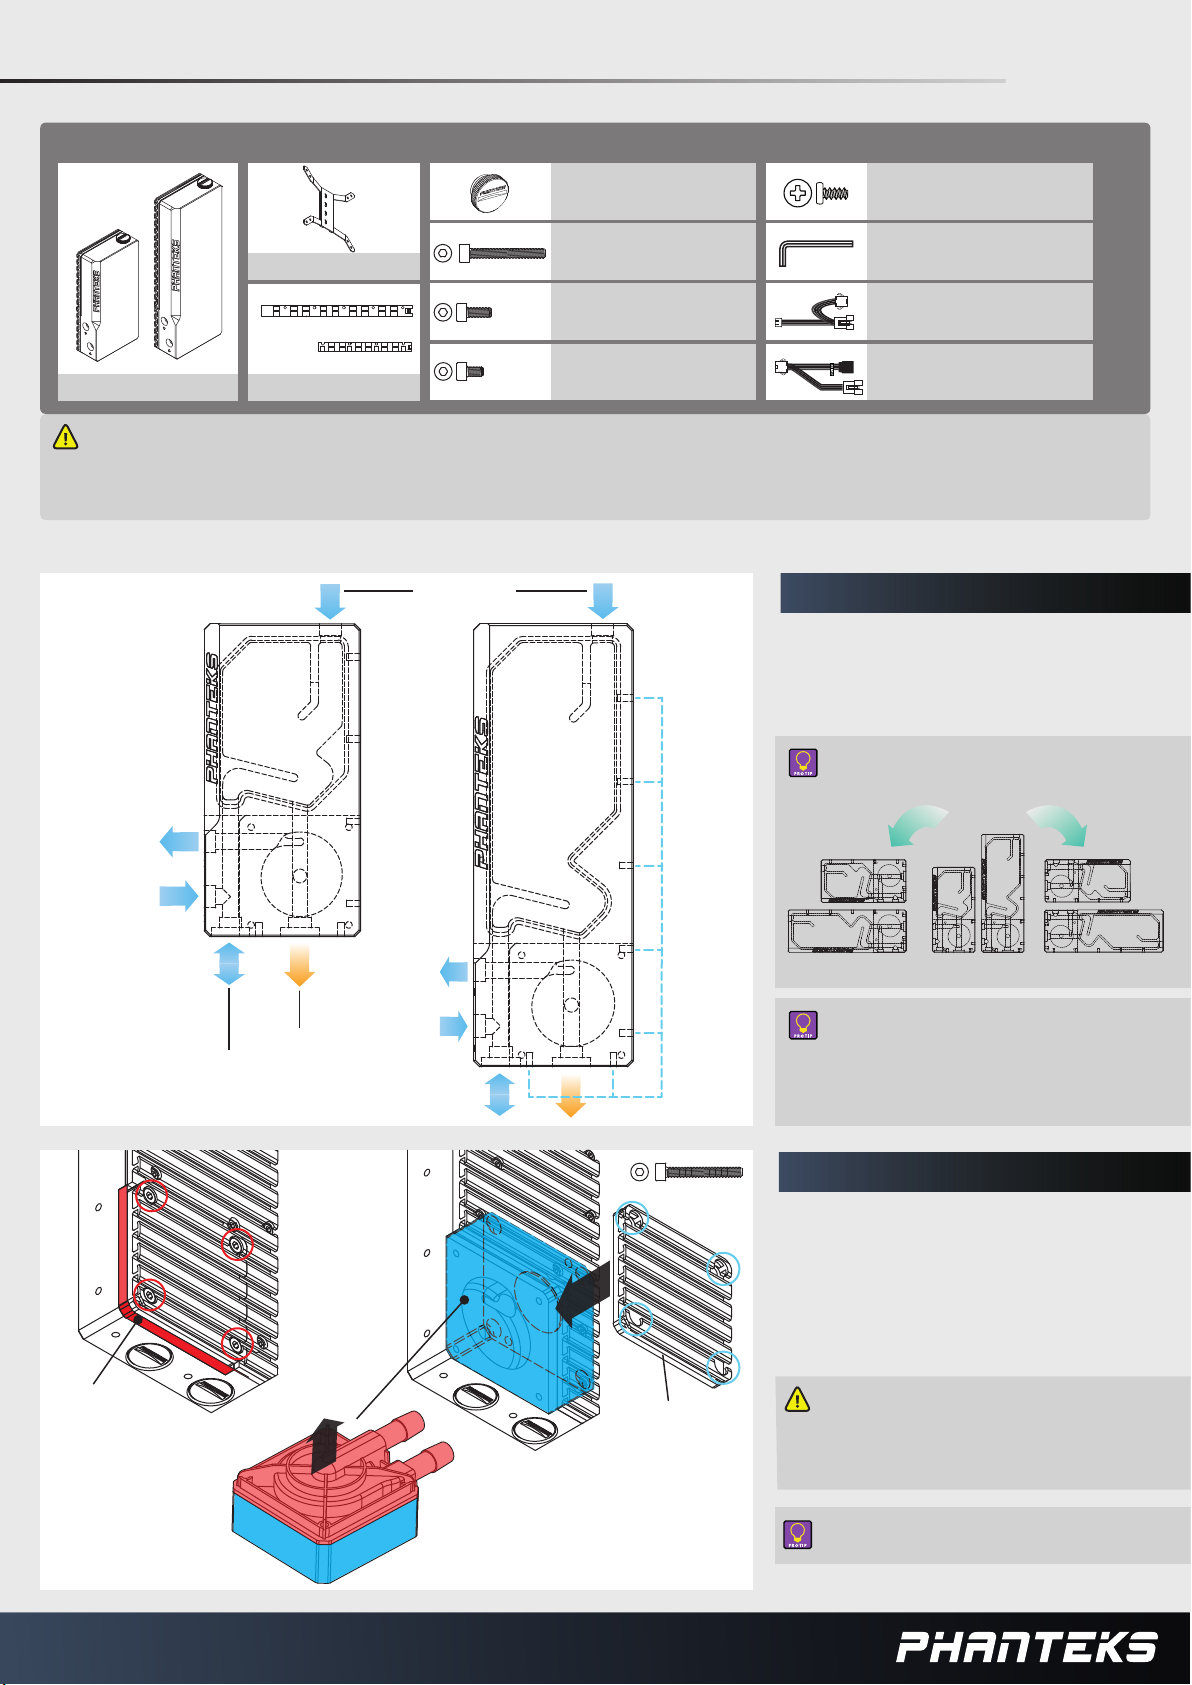
STEP 1. OVERVIEW
The R160/R220 is equipped with multiple ports to
allow for more exibility. Please plan your water
loop before proceeding with installation.
The R160/R220 can be used in 3 orientations:
OUTLET
INLET
SENSOR PORT-
A.
Acetal spacer
INLET-
DRAIN PORT-
B.
-DRAIN PORT
-SENSOR PORT
C.
42mm pitch mounting holes
4x
M4x30mm
Pump heatsink
Out of the box the R160/R220 can be used
as a stand-alone reservoir by connecting an
external pump. Optionally, you can intstall a DDCpump as an integrated “Pump/Reservoir” combo
solution.
STEP 2. INSTALL DDC PUMP (optional)
An optional DDC pump can be integrated:
A. Remove the Acetal spacer and pumpheatsink by removing 4 screws and store away.
B. Remove the original DDC pump top.
C. Install the DDC pump together with th pump
heatsink using the M4x30mm screws.
Make sure the DDC pump is mounted
correctly and no cables are pinched.
The integrated DDC pump can only be
installed with the Pump heatsink.
DDC pump
Use the VITON o-ring that was preinstalled in the Acetal spacer.
Page 2
GLACIER R160/R220 MANUAL V1.2
12V G R B
2x
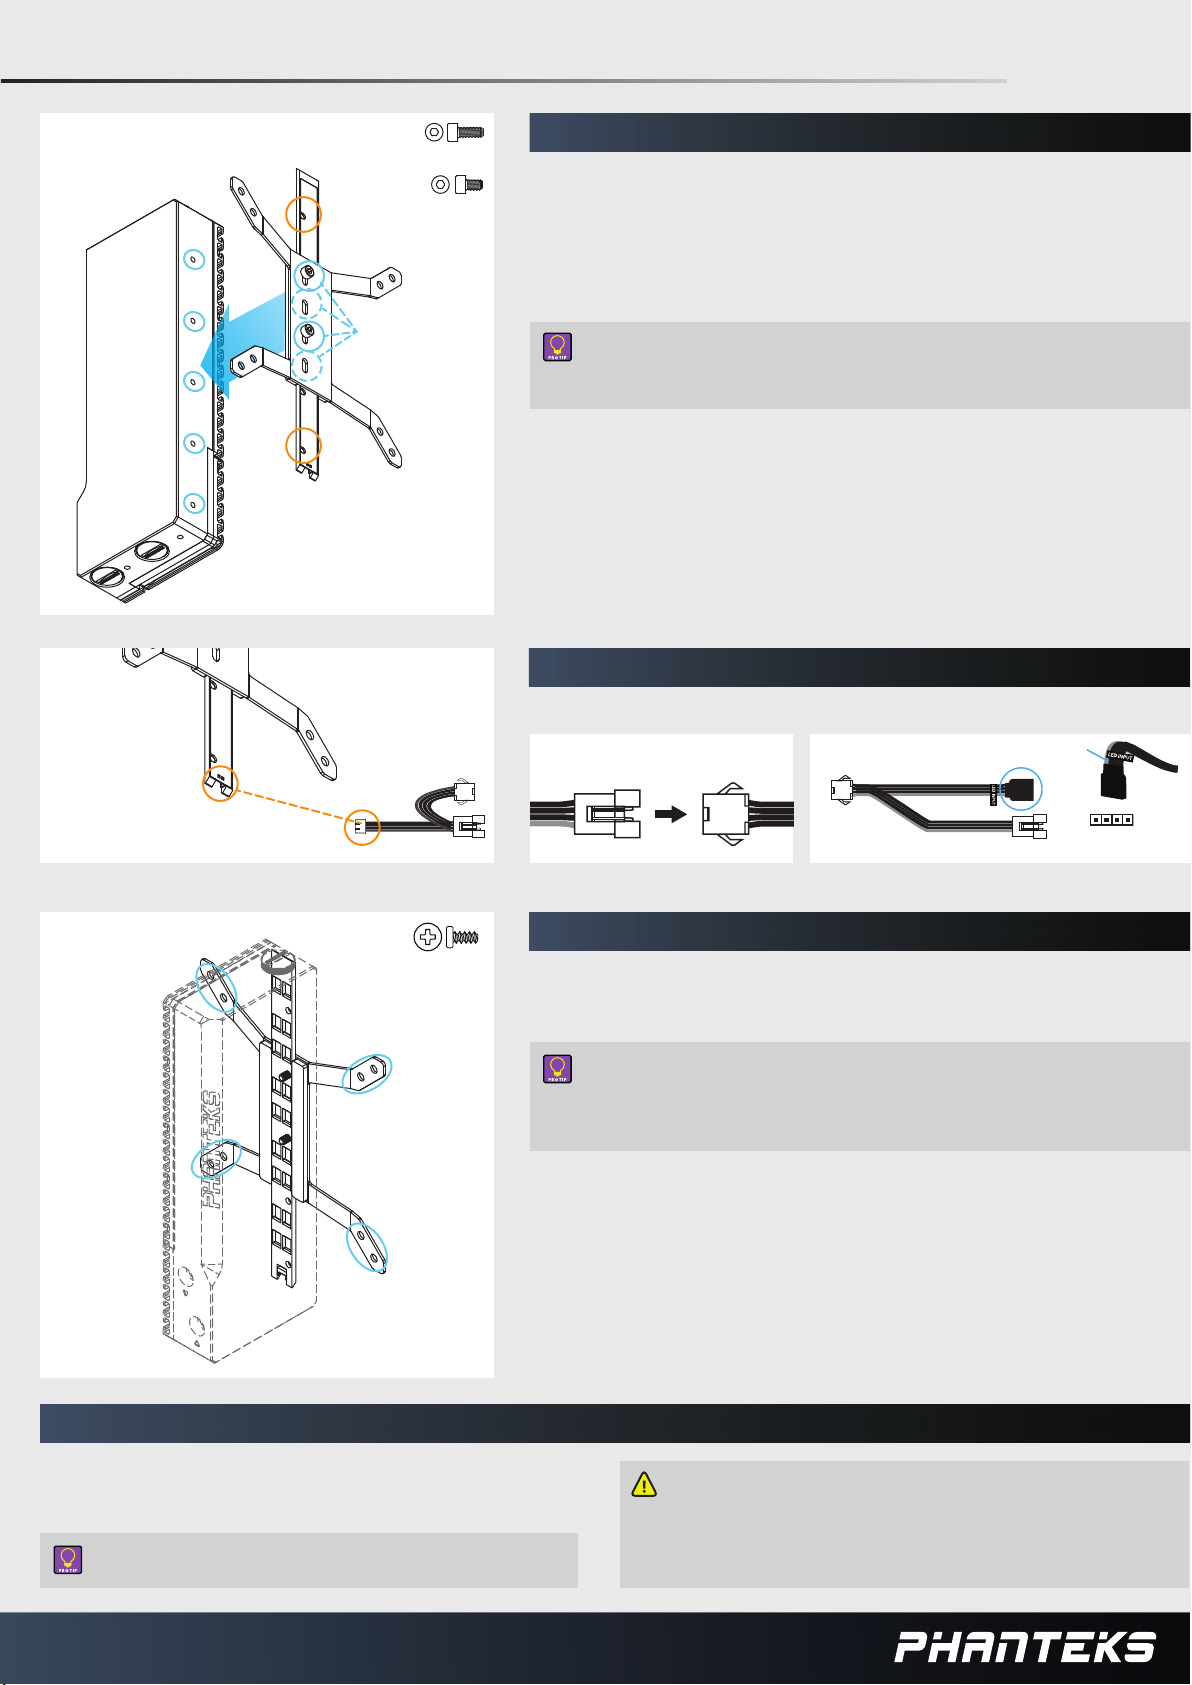
STEP 3. INSTALL LED-STRIP AND BRACKET
M4x10mm
2x
M4x6mm
1. Choose the desired mounting alignment on your reservoir.
2. Place the LED-strip on the bracket with the LED’s facing the reservoir.
3. Use two M4x10 Bracket screws to secure the bracket to the reservoir.
1
2
M4x10mm
4. Optional: use two M4x6mm screws to secure the LED-strip.
Adjust the vertical position of the bracket to nd the perfect
position in your system. Both the bracket and the reservoir has
3
multiple mounting holes to move the position up and down.
4
5
STEP 4. CONNECT RGB LIGHTING
Connect RGB LED-strip to RGB motherboard and Phanteks RGB products:
Connect RGB cable:
4x
Daisy chain Phanteks RGB products
RGB Motherboard Cable
To Phan te ks RGB LED
Strip ( expa nsion)
To RGB Mo therboa rd
To RGB c onne c tor
MOTHERBOARD
RGB H EADER
STEP 5. MOUNT ON FAN
The bracket can be mounted directly to a 120 or 140mm fan with four
included Fan Screws.
Thanks to the 42mm pitch mounting holes you can install the
reservoir on many pump brackets such as the “Universal
Pump Bracket” from Phanteks. It is included with many Phanteks
cases and available separately.
STEP 6. POWER ON
- Make sure all connectors and ttings are tightened.
- Connect the pump to a power source.
- Fill the reservoir and let the pump run until all air is released.
Let the pump run for multiple hours. Tilting the system
can help to release air bubbles.
For optimal performance please check the following:
- Make sure the pump never runs dry.
- Close any unused ports with Stop Fittings.
- Always perform a leak test before turning on the system.
 Loading...