

Page 1
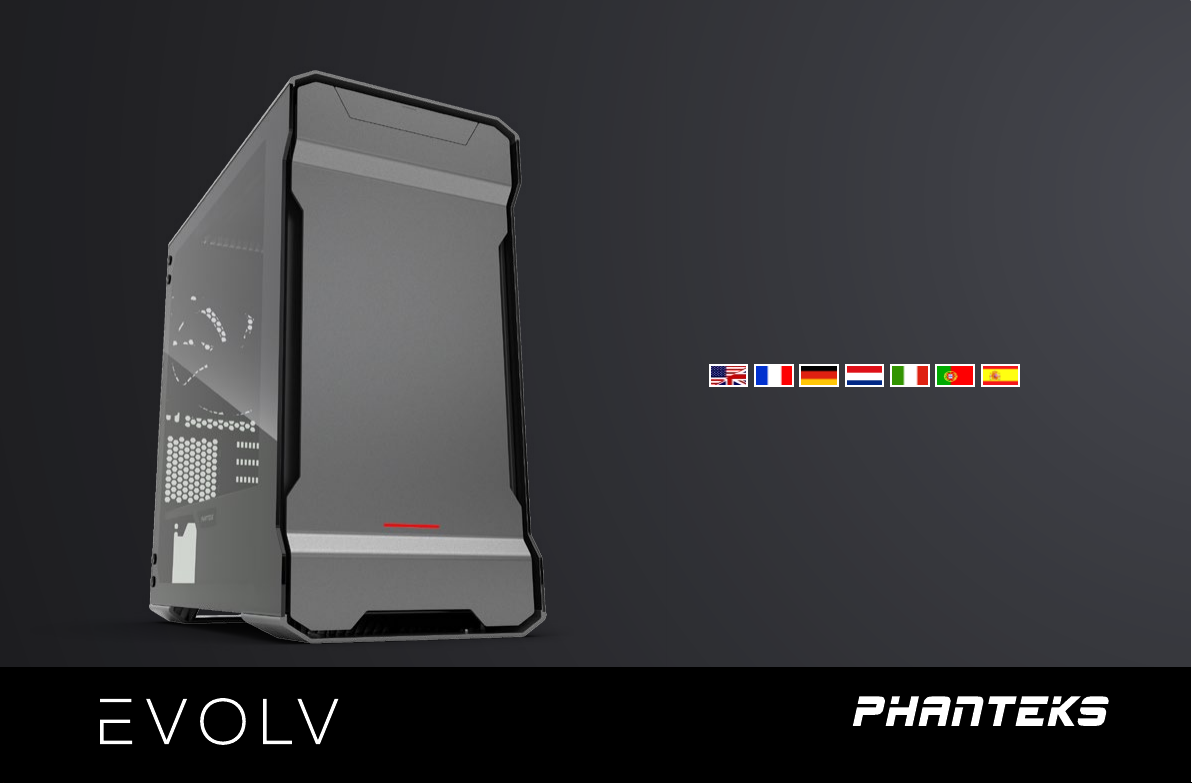
MATX
USER’S MANUAL
DESIGNED IN THE NETHERLANDS
Page 2

Page 3
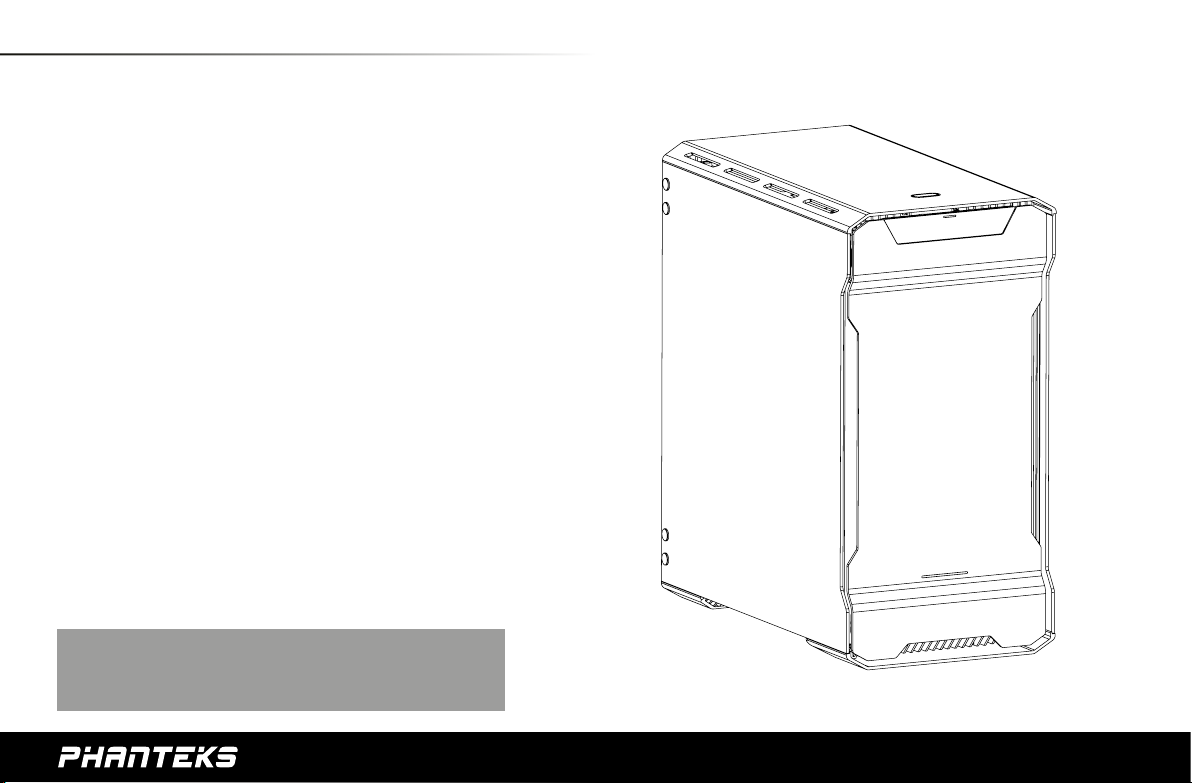
INTRODUCTION
Congratulations on your purchase of the Phanteks
Evolv MATX case and welcome to the User’s Guide.
Phanteks believes that meaningful designs are created
through the fusion of form and function.
The EVOLV MATX is the successor of the very rst Evolv
case and combines 3mm anodized aluminum with
dual tempered glass side panels. System builders and
watercooling enthusiasts can now present their build
with a premium touch. The EVOLV MATX is equipped
with innovative features, amazing (water) cooling
potential, and RGB illumination.
Caution
Please take a moment to carefully go through the installation guide. Phanteks
will not take responsibility for any damages incurred due to incorrect installation
and incorrect usage of this product. Thank you.
3
Page 4

TABLE OF CONTENTS
1. SPECIFICATIONS ................................................................................................................................................................................................................. 5
2. EXPLODED VIEW ................................................................................................................................................................................................................ 6
3. ACCESSORIES & BRACKETS ............................................................................................................................................................................................ 8
4. FRONT I/O ............................................................................................................................................................................................................................. 9
5. CONNECTIONS ................................................................................................................................................................................................................... 10
6. PANELS REMOVAL ............................................................................................................................................................................................................. 11
7. MOTHERBOARD INSTALLATION ................................................................................................................................................................................... 13
8. FILTERS REMOVAL ............................................................................................................................................................................................................ 14
9. HARD DRIVE INSTALLATION ........................................................................................................................................................................................... 15
10. DROP-N-LOCK SSD BRACKET ........................................................................................................................................................................................ 16
11. POWER SUPPLY INSTALLATION ................................................................................................................................................................................... 17
12. FANS COMPATIBILITY ..................................................................................................................................................................................................... 18
13. WATERCOOLING INSTALLATION ................................................................................................................................................................................... 19
14. HARD DRIVE CAGE REMOVAL ...................................................................................................................................................................................... 21
15. PUMP BRACKET INSTALLATION ................................................................................................................................................................................... 22
16. UPGRADE & EXPAND ........................................................................................................................................................................................................ 23
17. SUPPORT AND SERVICES ................................................................................................................................................................................................. 25
4
Page 5

1. SPECIFICATIONS
CASE SPECIFICATIONS
Dimension 230 mm x 453 mm x 400 mm (W x H x D)
9.1 x 17.8 x 15.7 in
Form Factor Fuc
Material(s) Aluminum, Tempered Glass,
Steel chassis
Motherboard support Micro ATX, Mini ITX
Front I/O USB 3.0, Mic, Headphone, RGB LED control
Side window Yes, Tempered Glass Panels (left and Right)
Micro Tower
EXPANSION & DRIVE BAYS
Expansion slots 4
Internal 3.5” 2x
Internal 2.5” (dedicated) 2x
COOLING 120 mm 140 mm
Front 3x 2x (1 included)
Top 2x 2x
Rear 1x 1x (1 included)
LIQUID COOLING 120 mm radiator 140 mm radiator
Front Up to 360 * Up to 280
Top Up to 240 Up to 280
Rear 120 140
*3.5” HDD brackets needs to be removed for 360 radiators.
(up to 126 mm wide)
CLEARANCE
Graphic card 319 mm (12.5in)
CPU cooler 192 mm (7.5 in)
Cable Management 26 mm (1.0 in)
PSU (including cable) 216 mm
Model PH-ES314ETG
Net Weight 9 kg (19.8 lbs)
Gross Weight 10 kg (22.0 lbs)
5
Page 6
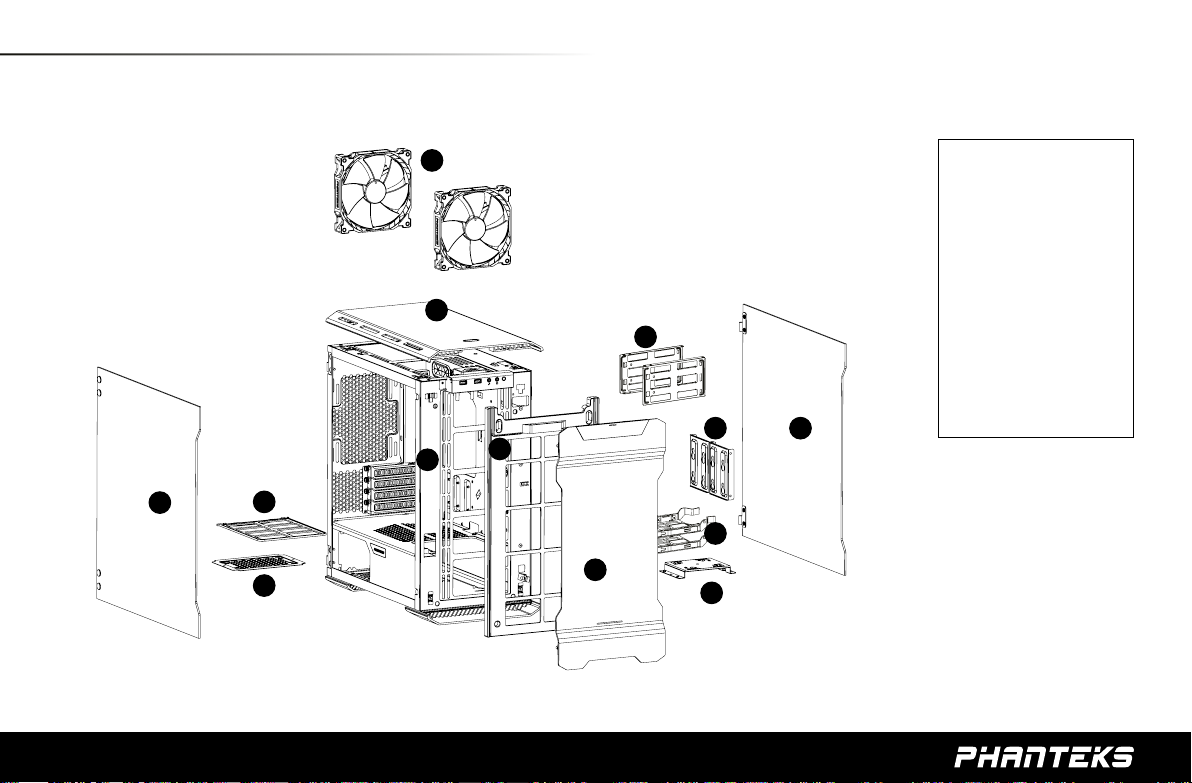
2. EXPLODED VIEW
4
1. Chassis
2. Top Panel
3. SSD Bracket
4. Fans
5. Right Side Panel
6. Front Panel
7. HDD Tray
2
8
8. Hard Drive Cage
9. Front Mesh cover
10. Left Side Panel
11. Mid-plate
12. Rear Dust Filter
13. Pump bracket
3
1
10
12
11
9
7
6
13
5
6
Page 7

1. Châssis
2. Filtres de poussière inférieurs
3. Support SSD
4. PH-F140SP
5. Panneau latéral droit
6. Panneau frontal
7. Bacs HDD
8. Enclos du disque dur
9. Couvercle de grille du
panneau frontal
10. Panneau latéral gauche
11. Plaque centrale multifonctions
12. Panneau supérieur
13. Support de pompe
1. Telaio
2. Filtri antipolvere inferiori
3. Staa SSD
4. PH-F140SP
5. Pannello laterale destro
6. Pannello frontale
7. Vassoi per disco rigido
8. Cage disco rigido
9. Copertura di rete frontale
10. Pannello laterale sinistro
11. Piastra centrale multifunzione
12. Pannello superiore
13. Staa della pompa
1. Chassi
2. Painel Superior
3. Suporte do SSD
4. PH-F140SP
5. Painel Lateral Direito
6. Painel frontal
7. Tabuleiros de HDD
8. Berço do Disco Rígido
9. Tampa de malha frontal
10. Painel Lateral Esquerdo
11. Placa média multifuncional
12. Filtros de Pó Inferiores
13. Suporte da Bomba
1. Chasis
2. Panel superior
4. Soporte de unidad de estado sólido
5. Panel lateral derecho
6. Panel frontal
7. Bandejas de unidad de disco duro
8. Compartimento de disco duro
9. Cubierta de malla frontal
10. Panel lateral izquierdo
11. Placa central multifuncional
12. Filtros de polvo inferiores
13. Soporte de bomba
1. Gehäuse
2. Untere Staublter
4. SSD-Halterung
5. Rechte Seitenblende
6. Frontblende
7. Festplatteneinsätze
8. Festplattenkäg
9. Vordere Gitterabdeckung
10. Linke Seitenblende
11. Multifunktionale Platte in der Mitte
12. Untere Staublter
13. Pumpenhalterung
1. Behuizing
2. Toppaneel
4. SSD beugel
5. Rechter zijpaneel
6. Voorpaneel
7. Harde schijf houder
8. Harde schijf kooi
9. Voorzijde mesh deksel
10. Linker zijpaneel
11. Multifunctional mid-plate
12. Bodem stolter
13. Pomp beugel
7
Page 8
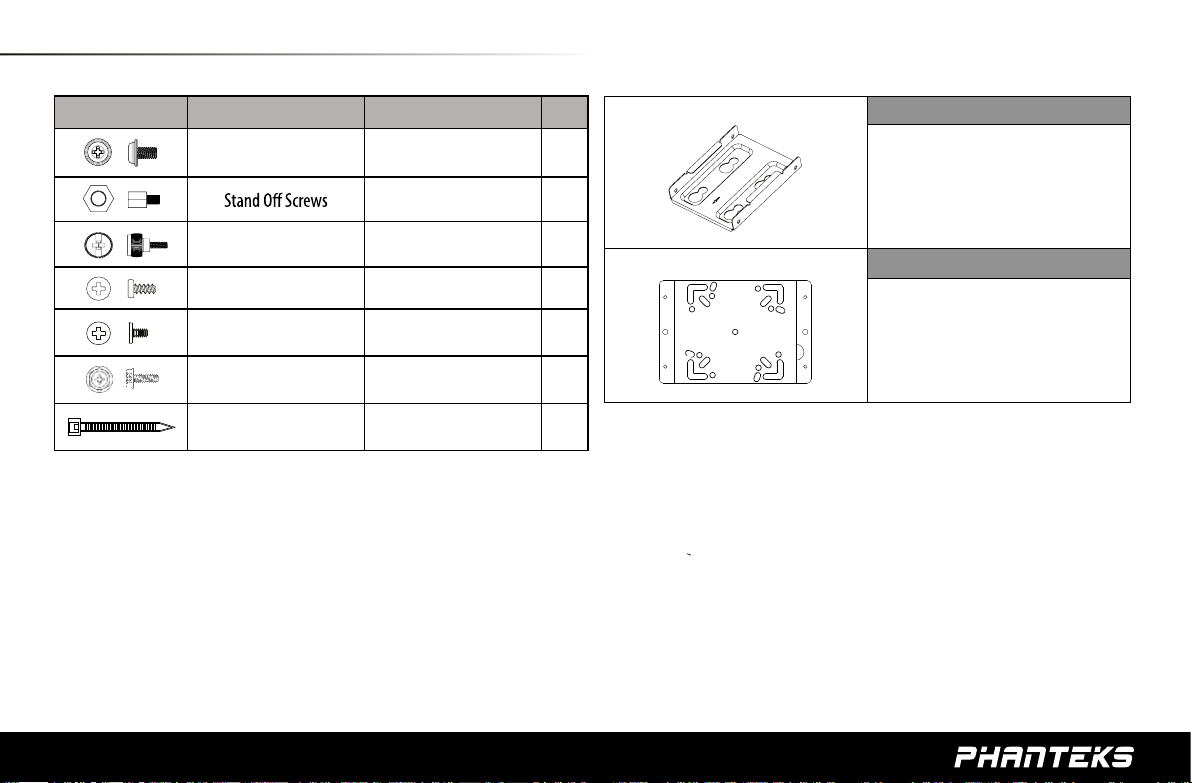
3. ACCESSORIES & BRACKETS
ITEM DESCRIPTION USE QTY
Screw M3 x 5mm Motherboard/SSD
Motherboard
Thumb Screws 9*20mm HDD Bracket, Side Panel
KB4.8*10 Fan Screws
CM6 #5 Pump Bracket
Screw 6-32 x 6mm PSU
150mm Zip Tie Cable management
17
1
2
12
5
5
6
SSD Bracket (2x)
Support SSD (2x)
SSD-Halterung (2x)
Staa SSD (2x)
Suporte do SSD (2x)
Soporte de unidad de estado solido (2x)
SSD beugel (2x)
Pump Bracket
Support de pompe
Pumpenhalterung
Staa della pompa
Suporte da Bomba
Soporte de Bomga
Pomp beugel
8
Page 9

4. FRONT I/O
5
4
3
2
1
RGB LED Control (4) Instructions:
HOLD
Long Press: On/O
<1 sec
Short Press (<1sec): Choose LED Color (10 colors)
2 Sec Press: Choose Mode
2 sec
Mode 1: Static Mode 2: Breathing Mode 3: Color Cycle
1. USB 3.0
2. Microphone
3. Headphone
4. LED Switch
5. Power Button
1. USB 3.0
2. Microfone
3. Fone de ouvido
4. Chave de LED
5. Botão de Alimentação
1. USB 3.0
2. Microfoon
3. Hoofdtelefoon
4. LED bediening
5. Power knop
1. USB 3.0
2. Microphone
3. Casque
4. Interrupteur LED
5. Bouton d’alimentation
1. USB 3.0
2. Microfono
3. Cue
4. Interruttore LED
5. Tasto d’alimentazione
1. USB 3.0
2. Micrófono
3. Cascos
4. Interruptor LED
5. Botón de alimentación.
1. USB 3.0
2. Mikrofon
3. Kopfhörer
4.
LED-Schalter
5. Ein-/Austaste
9
Page 10

5. CONNECTIONS
TO MOTHERBOARD
Power SW
H.D.D LED
HD
AUDIO
USB 3.0
10
TO PSU
12V SATA input
TO PHANTEKS
RGB LEDSTRIPS
RGB LED STRIP
RGB connector
(expansion)
Connects Phanteks’ mulicolor LED strip for
interior lighting.
Page 11

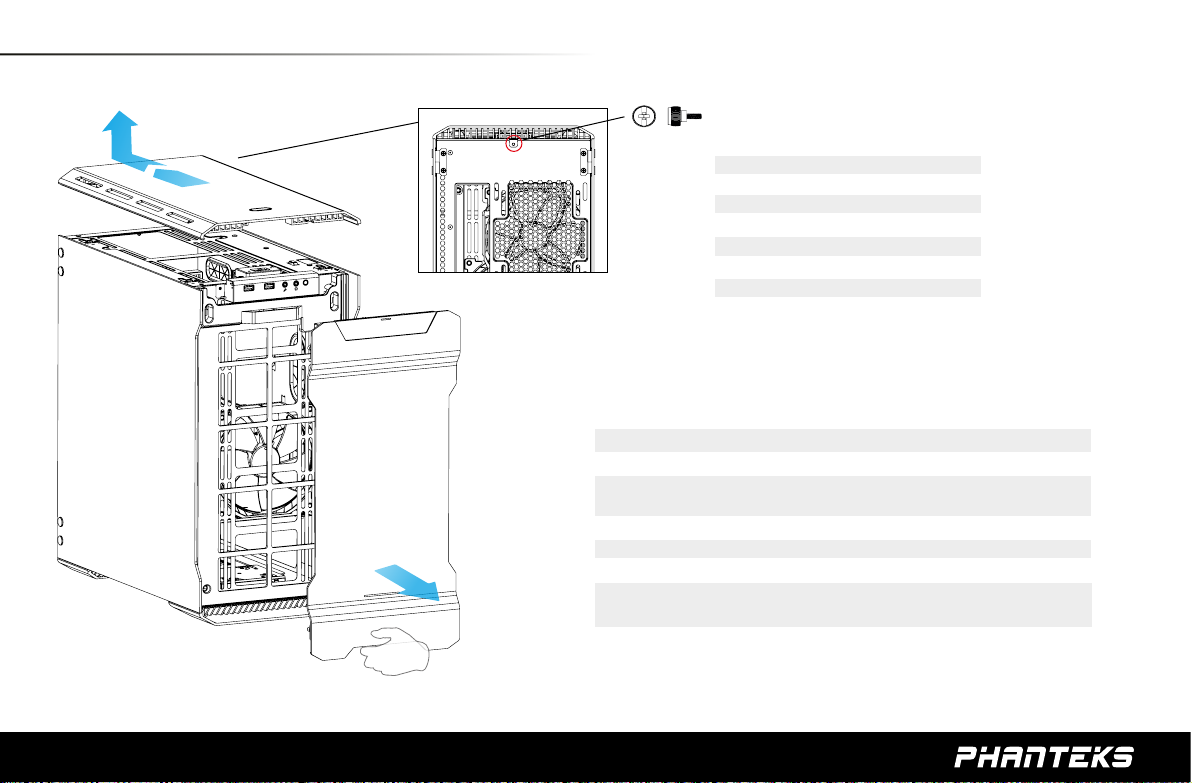
6. PANELS REMOVAL
Pull from the front and fully swing the panel out.
Tirez depuis l’avant et faites tourner le panneau complètement pour le sortir.
Von vorne ziehen und die Blende vollständig ausschwenken.
Tirare la parte frontale e far scivolare fuori completamente il pannello.
Puxe pela frente e retire o painel.
Tire de la parte frontal y desplace completamente el panel hacia afuera.
Trek het zij paneel los vanuit de voorzijde en zwaai het volledig open tot de achterzijde.
Caution when moving the case around, glass panels can automatically open.
11
Page 12
6. PANELS REMOVAL
2
1
Remove / Retirer / Entfernen / Remover /
Quitar / Rimuovere / Verwijderen
Pull up to remove the top panel.
Tirez vers le haut pour enlever le panneau supérieur.
Deckblende zum Entfernen nach oben ziehen.
Sollevare per rimuovere il pannello superiore.
Puxe para cima para remover o painel superior.
Tire del panel superior hacia arriba para retirarlo.
Trek naar boven om de toppaneel te verwijderen
For the front panel, place your hands on the area shown and pull outward.
Pour le panneau avant, placez vos mains sur la zone achée, et tirez vers l’extérieur.
Positionieren Sie auch bei der Frontblende Ihre Hände an der angezeigten Stelle und ziehen
Sie sie dann nach außen.
Per il pannello anteriore, posizionare le mani sull’area mostrata e tirare verso l’esterno.
Para o painel frontal, coloque as mãos na área ilustrada e puxe para fora.
Para sacar el panel frontal, coloque las manos en el área indicada y tire hacia afuera.
Voor het verwijderen van het voorpaneel, trek het paneel naar u toe zoals aangegeven op
de tekening.
12
Page 13

7. MOTHERBOARD INSTALLATION
Stando screws are pre-installed.
Les vis du support sont préinstallées.
Abstandhalterschrauben sind vorinstalliert.
Le viti dei distanziatori sono installate precedentemente.
Os parafusos separadores estão pré-instalados.
Los tornillos separadores vienen preinstalados.
Afstandschroeven zijn vooraf geïnstalleerd
13
Page 14

8. FILTERS REMOVAL
To clean the dust lters, run slow moving water through the lters. Dry lters before reinstalling.
Pour nettoyer les ltres à poussière, faites couler de l’eau sur les ltres.
Séchez les ltres avant de réinstaller.
Reinigen Sie die Staublter, indem Sie sie unter langsam ießendem Wasser abspülen.
Filter vor Wiedereinbau trocknen.
Per pulire i ltri antipolvere, far correre lentamente l’acqua attraverso i ltri.
Asciugare i ltri prima di installarli di nuovo.
Para limpar os ltros de poeiras, passe água em movimento lento através dos ltros.
Seque os ltros antes de reinstalar.
Para limpiar los ltros de polvo, deje que caiga agua corriente lentamente sobre los ltros.
Seque los ltros antes de volverlos a colocar.
Laat langzaam stromend water door de lter lopen voor het reinigen van de lters. Droog de lters
voordat u het weer bevestigd.
To remove the bottom and front lter pull out. Mesh cover on top panel can also be
cleaned.
Pour retirer les ltres en bas et à l'avant, tirez dessus. La grille du panneau avant peut aussi être
nettoyée.
Ziehen Sie den unteren und vorderen Filter heraus. Die Gitterabdeckung an der oberen Blende kann
ebenfalls gereinigt werden.
Tirare verso l'esterno per rimuovere il ltro inferiore e anteriore. È possibile lavare anche la copertura a rete sul pannello superiore.
Puxe para remover o ltro inferior e frontal. A tampa de rede do painel superior também pode ser
limpa.
Para sacar el ltro inferior/frontal tire de él hacia afuera. La cubierta de malla del panel superior
también se puede limpiar.
Voor het verwijderen van de stolter bodem en voor, trek deze uit via de handvat. Mesh lter op het
bovenpaneel kunnen ook schoongemaakt worden.
14
Page 15

9. HARD DRIVE INSTALLATION
3.5” INSTALLATION 2.5” INSTALLATION
Place hard drive into tray and push in the arms to lock.
Placez le disque dur dans le logement et poussez les bras pour le verrouiller.
Bringen Sie die Festplatten im Fach an und drücken die Arme zum Verriegeln hinein.
Collocare disco rigido nel cassetto e spingere i bracci verso l’interno per bloccare.
Coloque o disco rígido na bandeja e empurre os braços para travar.
Coloque el disco duro en la bandeja y pulse sobre los brazos para que quede sujeto.
Plaatst de harde schijf in de lade en duw de armen in voor vergrendeling.
Align the SSD onto the mounting holes and screw in.
Aligner le SSD avec les trous de montage et vissez.
Richten Sie die SSD an den Montagelöchern aus und befestigen die Schrauben.
Allineare l’unità ssd su i fori di installazione e ssare le viti.
Alinhe o SSD nos orifícios de xação e parafuse.
Alinee la unidad de estado sólido con los agujeros de montaje y atorníllela.
Lijn de SSD uit op de bevestigingsgaten en schroef de schroeven in.
15
Page 16

10. DROP-N-LOCK SSD BRACKET
SSD INSTALLATION
Slide in the SSD and screw in from the side to lock in place.
Faites coulisser le disque SSD et vissez-le depuis le côté pour le
verrouiller dans son emplacement.
Schieben Sie die SSD ein und xieren Sie diese seitlich mit Schrauben.
Far scorre l’unità SSD e ssare le viti dal lato per bloccarla in posizione.
Deslize para dentro do SSD e parafuse do lado para travar no local.
Deslice la unidad de estado sólido hacia adentro y atorníllela desde el
lateral para bloquearla en su lugar.
Schuif de SSD in en monteer de schroeven via de zijkant om deze te
vergrendelen.
DROP N LOCK
Align the bracket to the rubber and drop down to lock.
Alignez le coin du support avec le guide et baissez-le pour verrouiller.
Richten Sie die Ecke der Halterung an der Führung aus und lassen
sie einrasten.
Allineare l’angolo della staa alla guida e calarla per bloccare.
Alinhe o canto do suporte ao guia e empurre para baixo para travar.
Alinee la esquina del soporte con la guía y empuje hacia abajo para
que quede sujeta.
Plaats de beugel langs de uitlijning en druk richting de pijl om te
bevestigen.
16
Page 17

11. POWER SUPPLY INSTALLATION
REAR VIEW
(4x)
Use the provided screws to secure the PSU in place.
Utilisez les vis fournies pour xer le bloc d’alimentation en place.
Befestigen Sie das Netzteil mit den mitgelieferten Schrauben.
Utilizzare le viti fornite per ssare la PSU in sito.
Use os parafusos para xar a Unidade de Proteção e de Comutação.
Utilice los tornillos suministrados para jar la fuente de alimentación en su posición.
Gebruik de meegeleverde schroeven om de voeding vast te zetten.
17
Page 18

12. FAN COMPATIBILITY
FAN COMPATIBILITY TABLE
140mm 120mm
Top
2 2
Front
Rear
18
2 3
1 1
Page 19

13. WATERCOOLING INSTALLATION
WATERCOOLING RADIATOR COMPATIBILITY
140mm 120mm
120mm, 140mm
240mm
*Radiator Bracket required
120mm, 140mm
240mm
280mm, 360mm
*Midplate bracket needs to be removed
19
Page 20

13. WATERCOOLING INSTALLATION
120 MM FORM FACTOR RADIATORS
Radiator Size
Taille de radiateur
Kühlkörpergröße
Dimensioni del radiatore
Tamanho do radiador
Tamaño del radiador
Radiator lengte
120mm
240mm
360mm
140 MM FORM FACTOR RADIATORS
Radiator Size
Taille de radiateur
Kühlkörpergröße
Dimensioni del radiatore
Tamanho do radiador
Tamaño del radiador
Radiator lengte
140mm
280mm
Front
Avant
Vorderseite
Parte frontale
Frente
Frontal
Voorkant
Front
Avant
Vorderseite
Parte frontale
Frente
Frontal
Voorkant
Rear
Arrière
Rückseite
Parte posteriore
Traseira
Posterior
Achterkant
Rear
Arrière
Rückseite
Parte posteriore
Traseira
Posterior
Achterkant
Top
Dessus
Oberseite
Parte superiore
Top o
Superior
Bovenkant
Top
Dessus
Oberseite
Parte superiore
Top o
Superior
Bovenkant
*Caution: Supported Radiator size and thickness varies depending on your setup.
*Avertissement : Les tailles de radiateur et les épaisseurs supportées varient en fonction de votre
conguration.
*Achtung: Unterstützte Kühlkörpergröße und -dicke variieren je nach Aufbau.
* Attenzione: Le dimensioni e lo spessore supportati per il radiatore dipendono dalla congurazione.
*Atenção: O tamanho e espessura do Suporte do Radiador variam dependendo da conguração.
*Precaución: el grosor y el tamaño del radiador compatibles varían según la instalación que realice.
*Let op : Ondersteunde radiator grootte en dikte varieert afhankelijk van de opstelling.
20
Page 21

14. HARD DRIVE CAGE
HDD BRACKET REMOVAL
To remove, unscrew the 4x screws on the midplate and the 4x screws on the bottom of the case.
Para remover, solte os 4x parafusos na placa do meio e os 4x parafusos na parte inferior do gabinete.
Zur Abnahme lösen Sie die 4 Schrauben an der mittleren Platte und die 4 Schrauben an der Unterseite
des Gehäuses.
Per la rimozione, svitare le 4 viti sulla piastra intermedia e le 4 viti sulla parte inferiore del case.
Para remover, solte os 4x parafusos na placa do meio e os 4x parafusos na parte inferior do gabinete.
Para realizar la extracción, desatornille los 4 tornillos situados en la placa central y los 4 tornillos
situados en la parte inferior de la carcasa.
Om te verwijderen, verwijder 4x schroeven op de middenplaat en 4x schroeven op de bodemplaat
van de behuizing.
Bottom view of case
21
Page 22

15. PUMP BRACKET INSTALLATION
PUMP INSTALLATION
Location1
Pump bracket with universal mounting allows for multiple pumps to be installed.
Support de pompe avec montage universel permettant d’installer plusieurs pompes.
Pumpenhalterung mit Universalmontage ermöglicht die Installation mehrerer Pumpen.
La staa della pompa con collegamento universale permette di installare varie pompe.
Suporte da Bomba com suporte universal permite que múltiplas bombas sejam instaladas.
El soporte de bomba con montaje universal le permite instalar varias bombas.
Pompbeugel met universele schroefgaten geeft ondersteuning voor meerdere type pompen.
Phanteks’ pump bracket can also be 1) mounted on a 120mm fan mount
location or 2) onto a 120mm fan. This can be very useful for positioning
pump/reservoir combo solutions.
Location 2
Bottom view of case
22
Page 23

16. UPGRADE & EXPAND
The RGB controller in the Evolv MATX supports up to 5 meters of LED strips. This allows
you to expand your LED lighting throughout the entire case as well as outside the case.
We provide the following LED products:
PHanteks RGB-LED strips feature:
- Quality 3M adhesive
- Integrated magnets
- Durable silicon housing
STARTER RGBCOMBO SET
- 2x 40cm magnetic RGB-LED strip
- Extension cable
- Motherboard RGB adapter
- High quality 3M adhesive
40CM MAGNETIC RGBLED STRIP
- Easy installation thanks to magnets
- High quality 3M adhesive included
100CM MAGNETIC RGBLED STRIP
- Easy installation thanks to magnets
- High quality 3M adhesive included
200CM MAGNETIC RGBLED STRIP
- Easy installation thanks to magnets
- High quality 3M adhesive included
RGBLED ADAPTER
- Also functions as an extension cable
- Allows you to synchronize with other RGB
products using the industry standard connector
23
Page 24

16. UPGRADE & EXPAND
PWM HUB PH-PWHUB_01
-Up to 6x fan connection
-PWM functionality
-Cable management
PHANTEKS PH-F140MP
- High static pressure
- Silent operation
- 120mm and 140mm sizes
- Available in Black or White
RGB M/B ADAPTER PH-CB-RGB4P
-RGB Synchronization to M/B
-Easy plug and play
-Long cable length
-Sync Phanteks cases, LED
strips, and motherboard’s
software.
CABLE EXTENSION SET PH-CBCMBO
- Available in multiple colors
- Includes clear cable combes
- Also available as seperate cables
Included cables:
- Motherboard 24-pin
- CPU 4+4-pin
- 2x GPU 6+2-pin
24
24
Page 25

17. SERVICES AND SUPPORT
As a Phanteks customer, you are priority number one. We have a dedicated team of employees across the
globe working hard every day to make sure we deliver the superior experience you deserve. We are here
for you. If you have a question or a concern about our products, we have numerous ways you can reach
us. Please choose one most convenient for you to connect with our team.
CUSTOMER CARE
RMA and Technical Support
Hours : Monday-Friday 9:00-5:00 PST
Phone number : +1(909)598-2115
Email us : support@phanteksusa.com (US)
Email us : support@phanteks.com (International)
2525
Page 26

DESIGNED IN THE NETHERLANDS
 Loading...