

Page 1
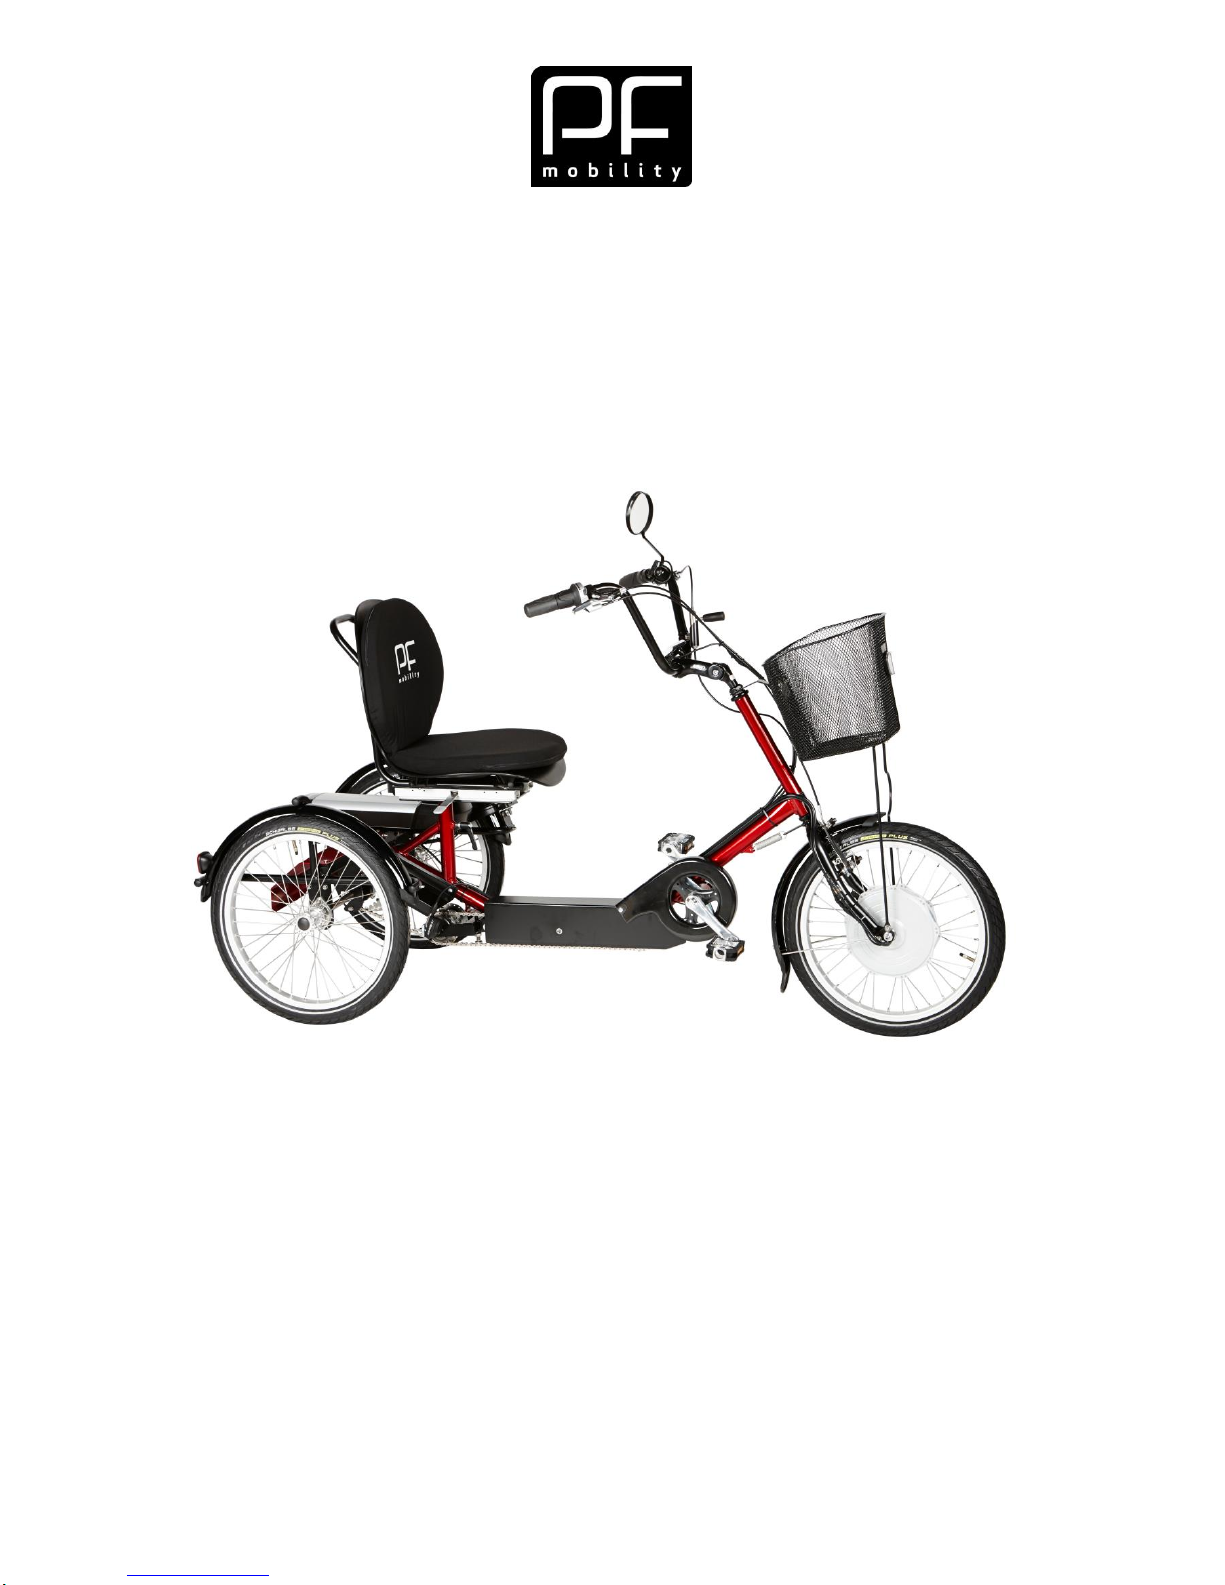
USER MANUALDISCO ver. 002.16 1
USER MANUAL
DISCO/ DISCO E-BIKE/ DISCO PEDELEC
Page 2

USER MANUALDISCO ver. 002.16 2
TABLE OF CONTENTS
1 Foreword: ..................................................................................................................... 4
2 Introductory information: ............................................................................................... 6
2.1 Use ................................ ................................ ......................................................... 6
2.2 Accessibility ............................................................................................................ 6
2.3 Adjustments ............................................................................................................ 6
2.4 Equipment .............................................................................................................. 6
2.5 Transportation ................................................................................................ 6
2.6 Cleaning and maintenance ..................................................................................... 7
2.7 Auxiliary electric motor .................................................................................... 7
2.8 Technical specifications .......................................................................................... 7
3 Before using the bicycle for the first time: ..................................................................... 8
3.1 Statutory provisions ................................................................................................ 8
3.2 Preparing the bicycle .............................................................................................. 8
4 Riding your PF bicycle .................................................................................................. 9
4.1 Riding instructions .................................................................................................. 9
4.2 Before taking your bicycle out for a ride ................................................................ 10
5 Safety instructions ...................................................................................................... 10
5.1 Wear and tear of wheels and tyres ................................ ................................ ....... 10
5.2 Warnings .............................................................................................................. 10
6 Settings and adjustment: ............................................................................................ 11
6.1 Handlebars: .......................................................................................................... 11
6.2 Seat: ..................................................................................................................... 11
6.3 Brakes .................................................................................................................. 12
6.4 Gear ...................................................................................................................... 12
6.5 Adjustment of chains ............................................................................................ 13
7 Electrical system and motor ................................................................................ 14
7.1 Electric bicycle, Pedelec or E-bike? ...................................................................... 14
7.2 Safety instruction ........................................................................................... 14
7.3 Hazards for special user groups ........................................................................... 15
7.4 Battery ........................................................................................................... 15
7.5 Charging the battery ...................................................................................... 16
7.6 Using the electric bicycle ...................................................................................... 17
8 Accessories ................................................................................................................ 21
Page 3

USER MANUALDISCO ver. 002.16 3
9 Maintaining your bicycle ............................................................................................. 22
9.1 Important ....................................................................................................... 22
9.2 Daily check ........................................................................................................... 23
9.3 Periodic maintenance – and first service check! ................................................... 24
9.4 Cleaning ........................................................................................................ 25
9.5 Lubrication ............................................................................................................ 25
9.6 Tightening of bolts, etc. ......................................................................................... 25
9.7 Repair and replacement ....................................................................................... 26
10 Disposal ............................................................................................................ 26
11 Warranty and obligations ......................................................................................... 27
12 Error codes and troubleshooting ...................................................................... 27
13 EC Declaration of Conformity ................................................................................... 31
Page 4

USER MANUALDISCO ver. 002.16 4
1 FOREWORD:
Congratulations on your new PF bicycle. We hope that you will enjoy riding it for many
years to come! Please read carefully this User and Operating Manual. To be able to take
maximum advantage of your bicycle, it is important that you adjust it properly and that you
follow the advice we have for you in this User and Operating Manual. Take particular note
of Section 4.
Page 5
USER MANUALDISCO ver. 002.16 5
Riding your PF bicycle
IMPORTANT: For safety reasons, it is important that the bicycle be serviced at all times by
a person with professional training and insight into bicycle technology and function. Take
particular note of Section 9 Maintaining your bicycle.
PF mobility has an extensive range of accessories that can contribute to improving the use
and experience of your PF bicycle. Our accessories are listed on our website, but a
selection of them is also presented under Section 8 Accessories.
If you have any further questions about the use of your PF bicycle or this Manual, you are
more than welcome to contact us at:
PF mobility ApS
Bjerregårdvej 15, Timring
DK – 7480 Vildbjerg
Tel.: +45 99 92 06 00
Fax: +45 99 92 06 05
Mail: [email protected]
www.pfmobility.dk
With reservations for misprints and changes to this User Manual.
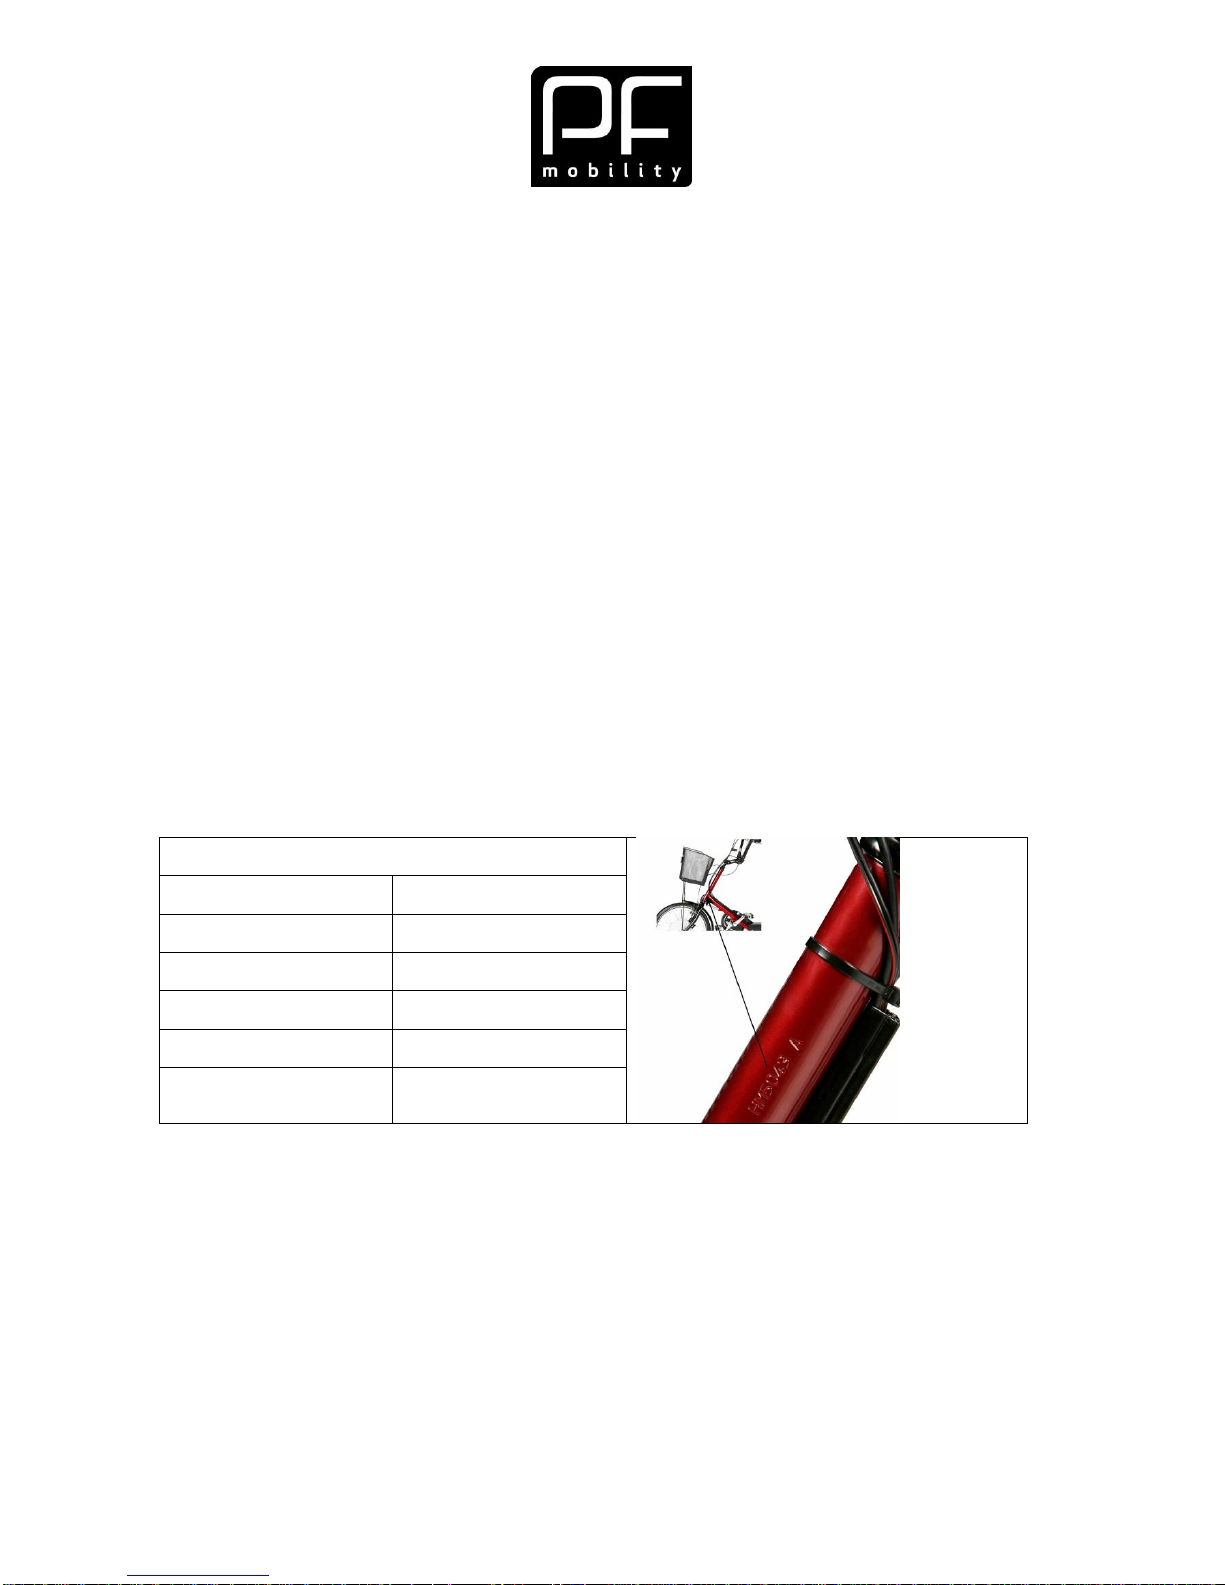
Product details:
HMI - Number
Frame number
Lock number
Controller keys
Battery number
Delivered on
Fill in this table as per the specifications in your invoice.
The frame number is also the bicycle's unique ID number. The frame number is placed on
the side of the stem – see image.
Page 6
USER MANUALDISCO ver. 002.16 6
2 INTRODUCTORY INFORMATION:
2.1 Use
Your PF bicycle has been designed for people with functional disabilities – whether
physical or mental.
These include problems with balance, in the muscular system, etc.
The bicycle is designed for use on the common public roads and bicycle paths. Always
ride the bicycle on an even solid surface and adapt your speed to the conditions at hand.
Comply with the provisions of the Danish Road Traffic Act. PF mobility may not be held
liable for accidents resulting from improper use or for damage resulting from lack of
maintenance.
2.2 Accessibility
We recommend that people with cognitive functional disabilities, visual
impairments or reading disabilities, who cannot read and understand
this Manual, turn to the dealer where they bought their PF bicycle. The
dealer will review the manual and reply to any questions they may
have.
2.3 Adjustments
To benefit fully from your new PF bicycle, we ask you to carefully peruse this Manual.
Take note of the sections regarding settings and adjustments. Your dealer will help you
with any questions about specific settings. Even if the bicycle is made of quality
components, it still needs maintenance. You can easily make many of the minor
adjustments yourself. This will both extend the service life of the bicycle and make the
bicycle ride true enjoyment.
2.4 Equipment
There is a large range of accessories designed for your bicycle. See Section 8 regarding
accessories or visit our website.
2.5 Transportation
Fasten the bicycle securely if you need to transport it in a car or in a trailer. When you use
hose clamps and similar, make sure that they do not jam any chains, wires and cables.
During transportation, your bicycle may be exposed to moisture, dirt and other aggressive
substances. This can affect the electrical system, which is why you must cover the bicycle
with plastic or tarpaulin when you transport it in an open trailer.
During transportation in a car or trailer:
Remove the battery and store it in a cool and dry place.
In humid weather, protect the bicycle by covering it with plastic or
tarpaulin.
Note: Do NOT ship the Li-Ion battery as an ordinary package. Li-Ion batteries
are considered hazardous goods and should be marked in accordance with the
instructions in the ADR convention (UN3840).
Page 7
USER MANUALDISCO ver. 002.16 7
2.6 Cleaning and maintenance
Your bicycle needs day-to-day maintenance.
We recommend that you have an annual maintenance check performed by a bicycle
professional or PF mobility. A review of maintenance checkpoints and methods of cleaning
is available under Section 9 Maintaining your bicycle.
2.7 Auxiliary electric motor
For bicycles equipped with an electric motor, kindly refer to the E-Bike and Pedelec
section.
Sections containing important information for you as an owner of an e-bike are marked in
the heading with
These sections contain warnings you should have a special focus on. Make sure you
abide by these.
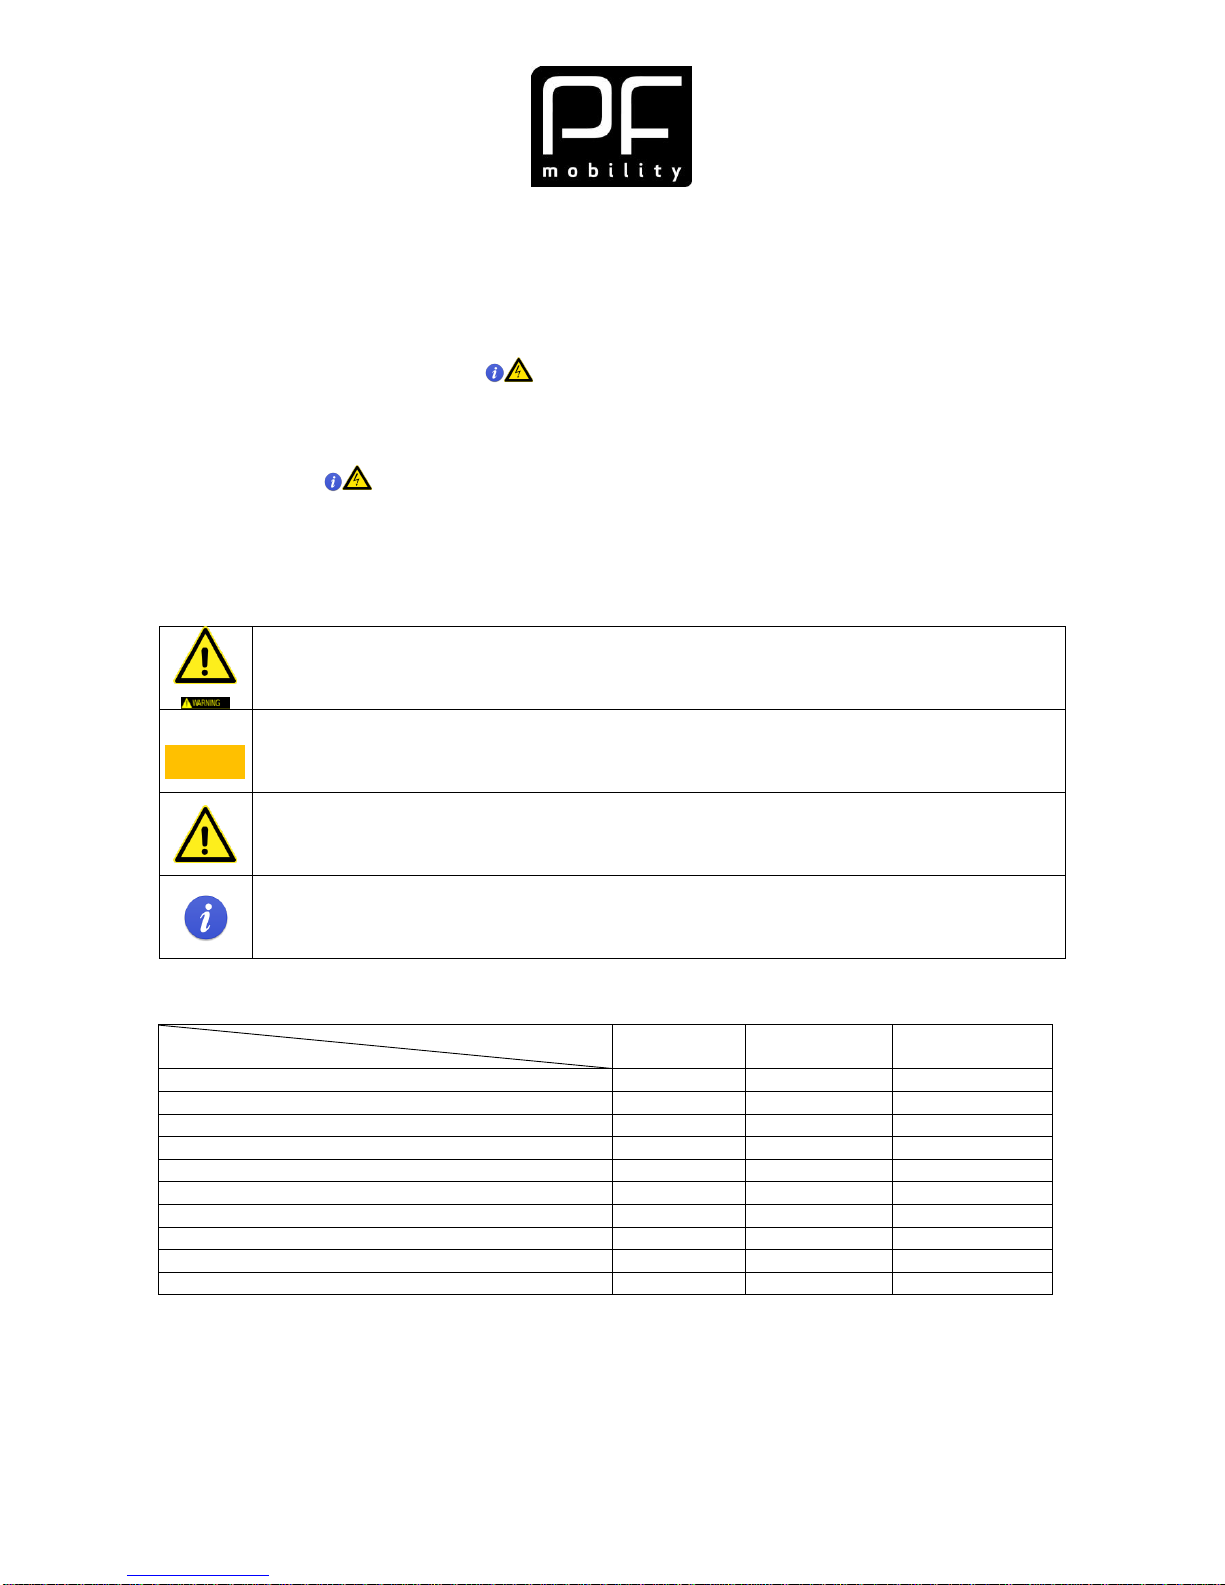
The following symbols are used in this Manual:
Warning:
This symbol warns about a hazard to your health and points at a potential risk
of injuries.
Note:
Indicates possible material damage
Important:
Contains general instructions for safe use and special technical features or
directions.
Information:
This symbol refers to tips or special information.
2.8 Technical specifications
Model
Data
DISCO
DISCO MEDI
DISCO SMALL
Lenght cm
185
171
154
Width cm
75
68
68
Weight (w/o accessories)
Ca. 44
Ca. 29
Ca. 28
Extra weight E-Bike/ Pedelec
Ca. 11
Ca. 11
Ca. 11
Maximum user weight kg
125
125
125 kg
Maximum load kg
150
150
150 kg
Inside leg (Min)
55
45
40 cm
Mounting/Dismounting height
26
25
20 cm
Wheel size
20
16
16
Max speed motor km/t E-bike / Pedelec
15/ 25
15/ 25
15/ 25
NOTE
Page 8
USER MANUALDISCO ver. 002.16 8
EPAC and Pedelec models
Steering
Operating voltage
36V
Max amperage
Depending on version and use, 10 to 30A
Motor
Nominal voltage
22.8 V
Motor output
250W (DIN EN 60034-1)
Nominal/Peak momentum
11.8 Nm / up to 60 Nm
Battery
Type
Lithium-Ion battery
Nominal voltage
36 V
Capacity
11 Ah, 400 Wh (Rear Rack – standard)
14 Ah, 500 Wh (Downtube – option)
Charging period
Approx. 6 hours at charging current of 2 A (Rear
Rack)
Approx. 7 hours at charging current of 2 A
(Downtube)
Temperature limitations
Normal operation
-10 to 45 C
Charging
10 to 35 C
Storage
-10 to 45 C
3 BEFORE USING THE BICYCLE FOR THE FIRST TIME:
3.1 Statutory provisions
The bicycle is equipped from the factory with statutory equipment pursuant to the Danish
Executive Order regarding Design and Equipment, etc. of Bicycles:
We recommend that the bicycle is always fitted with lights as per the applicable legislation.
Consult PF mobility or your dealer.
Even if riding with a bicycle helmet is not compulsory by law, we strongly recommend that
you always wear a helmet.
It is your responsibility to make sure that defective parts are replaced so that the bicycle
remains in lawful condition and thereby safe to ride at all times. PF mobility recommends
that you only use original spare parts that ensure that the bicycle meets the applicable
legislation.
3.2 Preparing the bicycle
The bicycle is delivered assembled from the factory. If the bicycle has been received from
a carrier/forwarding agent, it may be necessary to adjust and fasten properly the
handlebars and the seat. See Section 2.3 Adjustments.
If your bicycle has been delivered by a consultant from PF mobility, they will review all
necessary adjustments together with you. You are subsequently always welcome to
contact your dealer or PF mobility for any additional help or instructions.
Page 9

USER MANUALDISCO ver. 002.16 9
4 RIDING YOUR PF BICYCLE
To get as much riding joy and benefit as much as possible from your PF bicycle for many
years, it is important that you use the bicycle properly.
You can ride the bicycle on different surfaces. PF mobility recommends that
you ride on even solid surfaces (preferably asphalt or slabs).
The bicycle is not designed for riding in rough terrain or on a soft surface as
this can overload the structure and the frame or the electrical system.
4.1 Riding instructions
Avoid:
engaging the brakes at a high speed as this involves a risk of skidding and
overturning;
passing over holes and tracks as this can cause you to lose your balance and
overturn with the bicycle;
forcing kerbs – use the ramps instead. If this, nevertheless, is necessary, get off the
bicycle and pull the bicycle up or down over the edge. If you have a bicycle with
Direct Power, you can use the auxiliary motor's help function. See section 7.6.4
Start and help function.
Adapt your speed:
when riding in rough terrain. The bicycle will behave differently in such conditions,
which is why you should adjust your speed to avoid unpleasant and outright
dangerous situations;
in bends. If you go around a bend at too high a speed, you risk overturning;
to the weather and other conditions. Riding on wet and slippery roads poses a
particularly high risk, which is why you should ride carefully and at a reduced speed
– in particular in curves and bends as well as when riding downhill.
Note that:
the bicycle is wide – watch out for kerbstones, roadsides, chicanes, people and
other obstacles;
the bicycle can make undesired movements while you mount or dismount it.
ALWAYS use the parking brake when you park the bicycle and, in particular, when
you mount or dismount the bicycle.
If you are also carrying luggage / wheelchair / walker, make sure that it is securely
fastened. You can find the right accessory to ensure secure transportation and fastening of
your bicycle in the section about accessories.
Page 10
USER MANUALDISCO ver. 002.16 10
4.2 Before taking your bicycle out for a ride
Check daily, before each ride:
That the bicycle is in a perfect condition;
The tyre pressure;
That the light and statutory reflectors are installed.
The following brakes: Handbrake in front, handbrake at the
back as well as foot brake (assuming the model has a foot
brake);
Parking brake
That the handlebars are properly fastened;
That the seat is properly fastened;
That there is no gap in the wheels;
That the chains are lubricated and adjusted;
That the bicycle is fitted with the statutory reflectors;
That the bicycle is fully charged (if it is an E-Bike / Pedelec).
5 SAFETY INSTRUCTIONS
5.1 Wear and tear of wheels and tyres
You should perform regular (weekly) checks of the bicycle's tyres. If you see any hair
cracks starting to form on the side of the tyre, replace the tyre. New tyres can be ordered
from PF mobility or your dealer. We recommend that you always use puncture-proof tyres.
The bicycle is delivered by default with tyres with high puncture protection and reflective
edges.
Also check the wheel rims for cracks or ruptures. Bicycles that ride on very rough / uneven
terrain are more receptive to wear and tear.
Defective wheel rims can lead to accidents and should therefore be replaced
immediately!!!
5.2 Warnings
Take off any loosely hanging clothes and put on something that fits snugly and cannot get
caught in rotating parts such as wheels and chains before you mount your PF bicycle.
Do not use your PF bicycle if any of its safety guards, e.g. wheel guards, chain guards or
the guard over the rear axle are defective or missing.
Take extra care when adjusting the seat or armrests as inattention may cause you to jam
your fingers. Only make adjustments when the bicycle is completely still.
Page 11
USER MANUALDISCO ver. 002.16 11
6 SETTINGS AND ADJUSTMENT:
The following pages contain instructions for the daily adjustment options of the PF bicycle.
Wherever you need to use tools, it is important after the adjustment to tighten all bolts, etc.
you have loosened.
6.1 Handlebars:
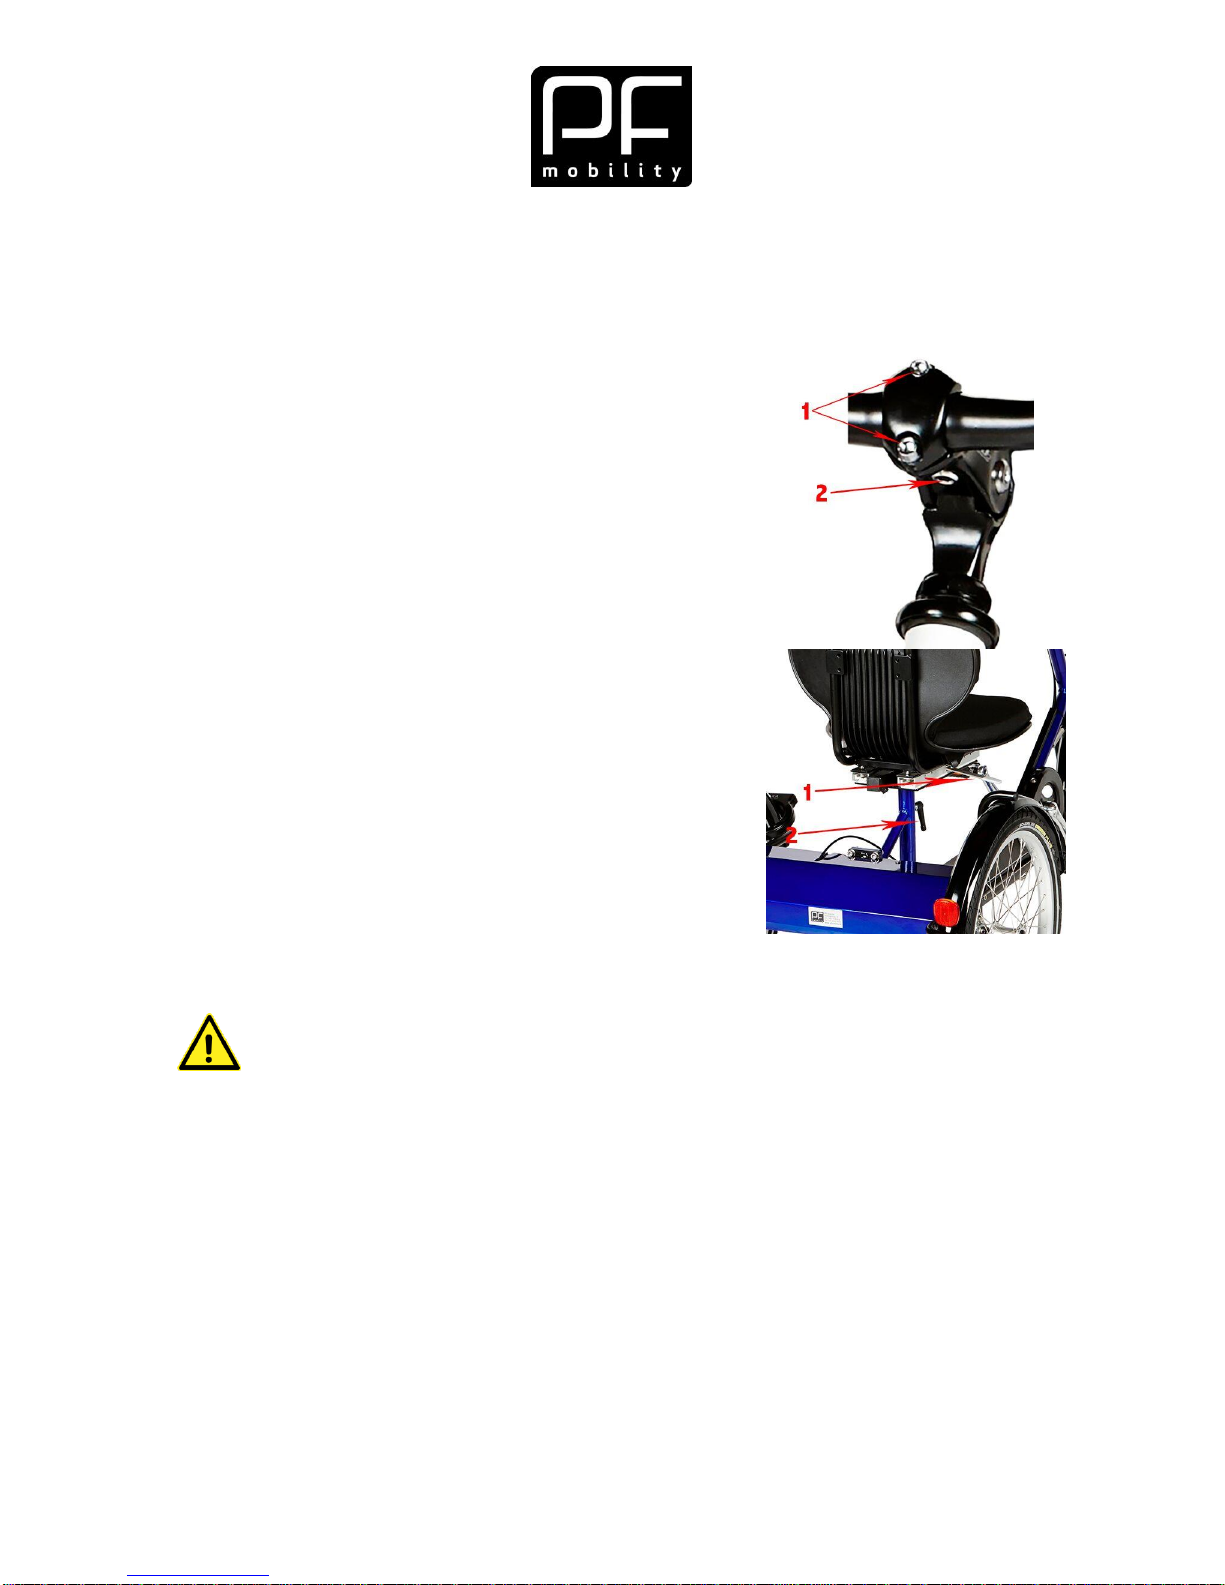
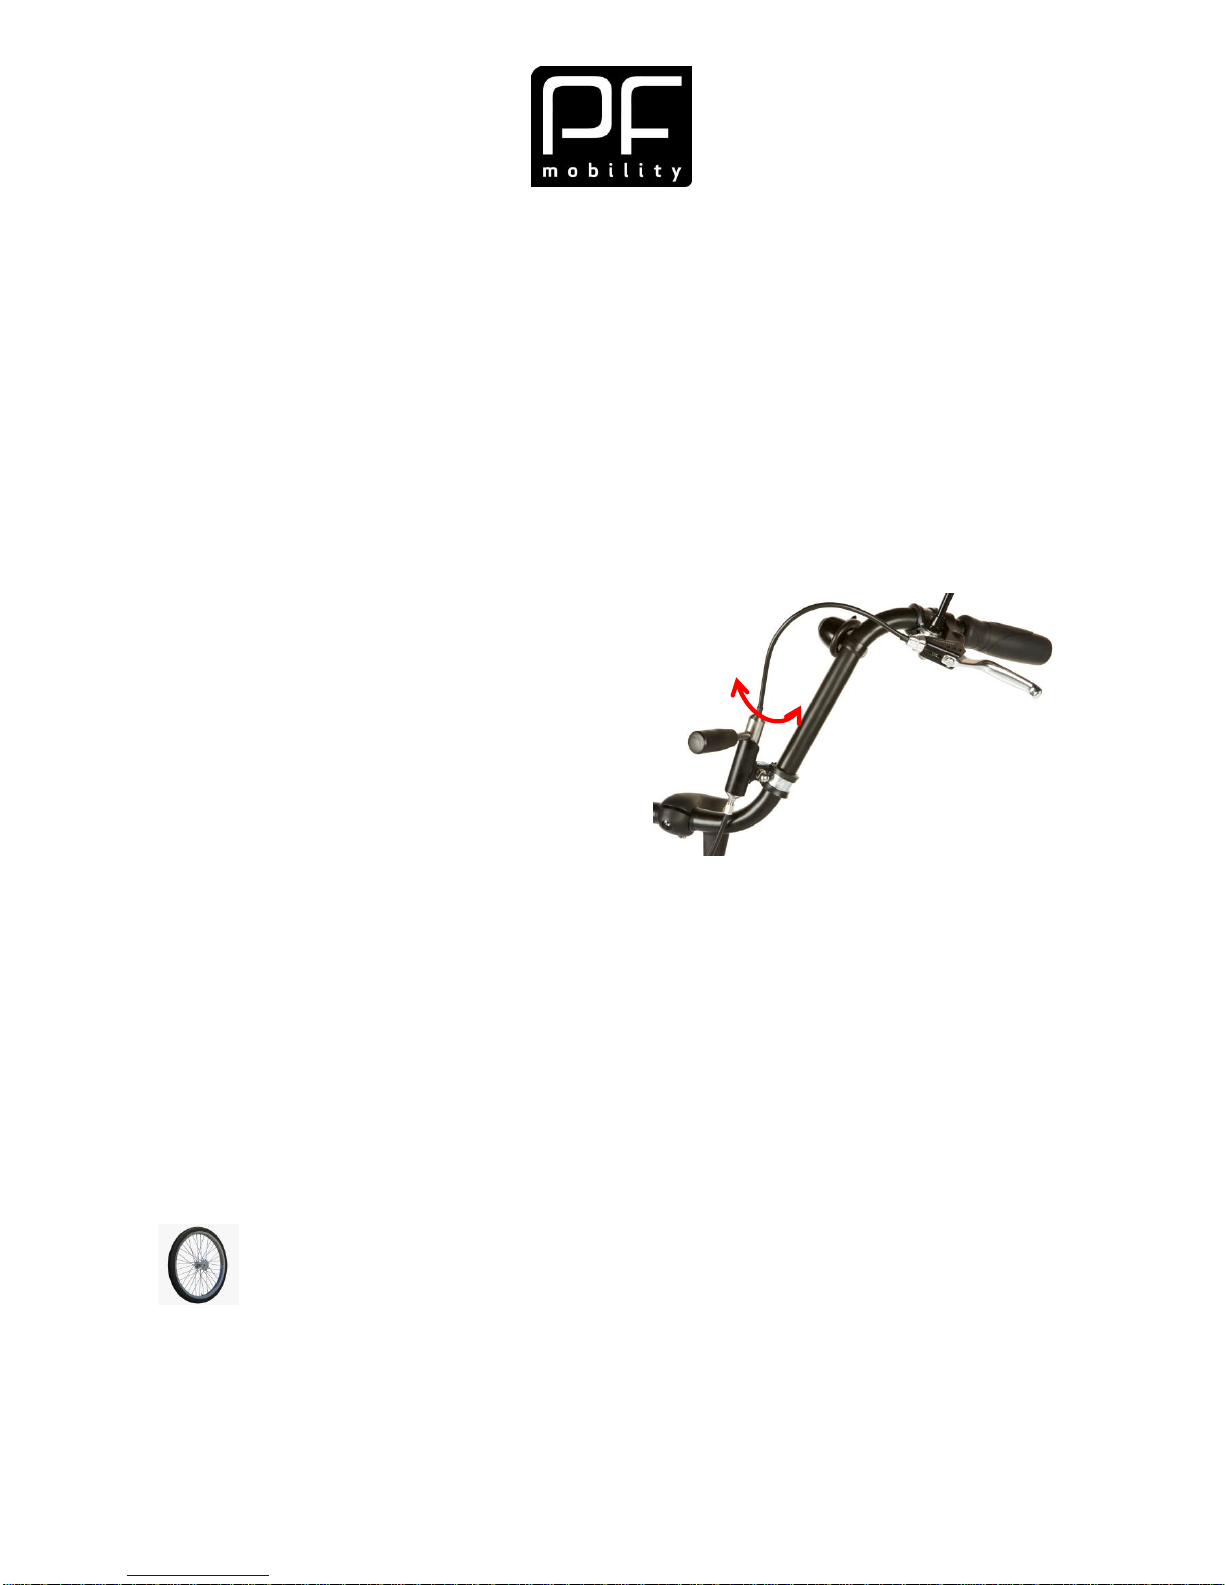
Adjust the angle of the handlebars by loosening bolts "1"
and then place the handlebars in the desired position.
Tighten up bolts "1" with a torque of 10 N.m.
Adjust the height of the handlebars by loosening bolt "2"
until the little plate lets loose of the cogs.
Then you can change the height. Tighten back the bolt
until the plate locks into the cogs.
6.2 Seat:
You can regulate the distance from the seat to the pedals.
by lifting release arm "1" underneath the seat frame.
You will need to loosen the clamping lever "2" if you need
to dismantle or adjust the seat vertically. When raising the
seat height, you MUST fit the original spacer pipe to
ensure that the seat remains at the required height
(optional equipment).
There is a screw on the opposite side of the release arm
that makes sure that the seat cannot slide off the rails.
Check regularly that this screw is tight.
Do not raise the seat above the marking.
use special spacer / extension pipe for the seat if you need to raise the
seat (optional equipment – see list).
Page 12
USER MANUALDISCO ver. 002.16 12
6.3 Brakes
All of our bicycles are fitted with at least 2 brakes.
The left handbrake handle operates the V-brake on the front wheel,
whereas the right handbrake handle operates the brake disc fitted to
the differential gear on the rear side of the bicycle. The bicycle can
also be fitted with a foot brake (gear hub) or a freewheel wherever a
foot brake is not an option.
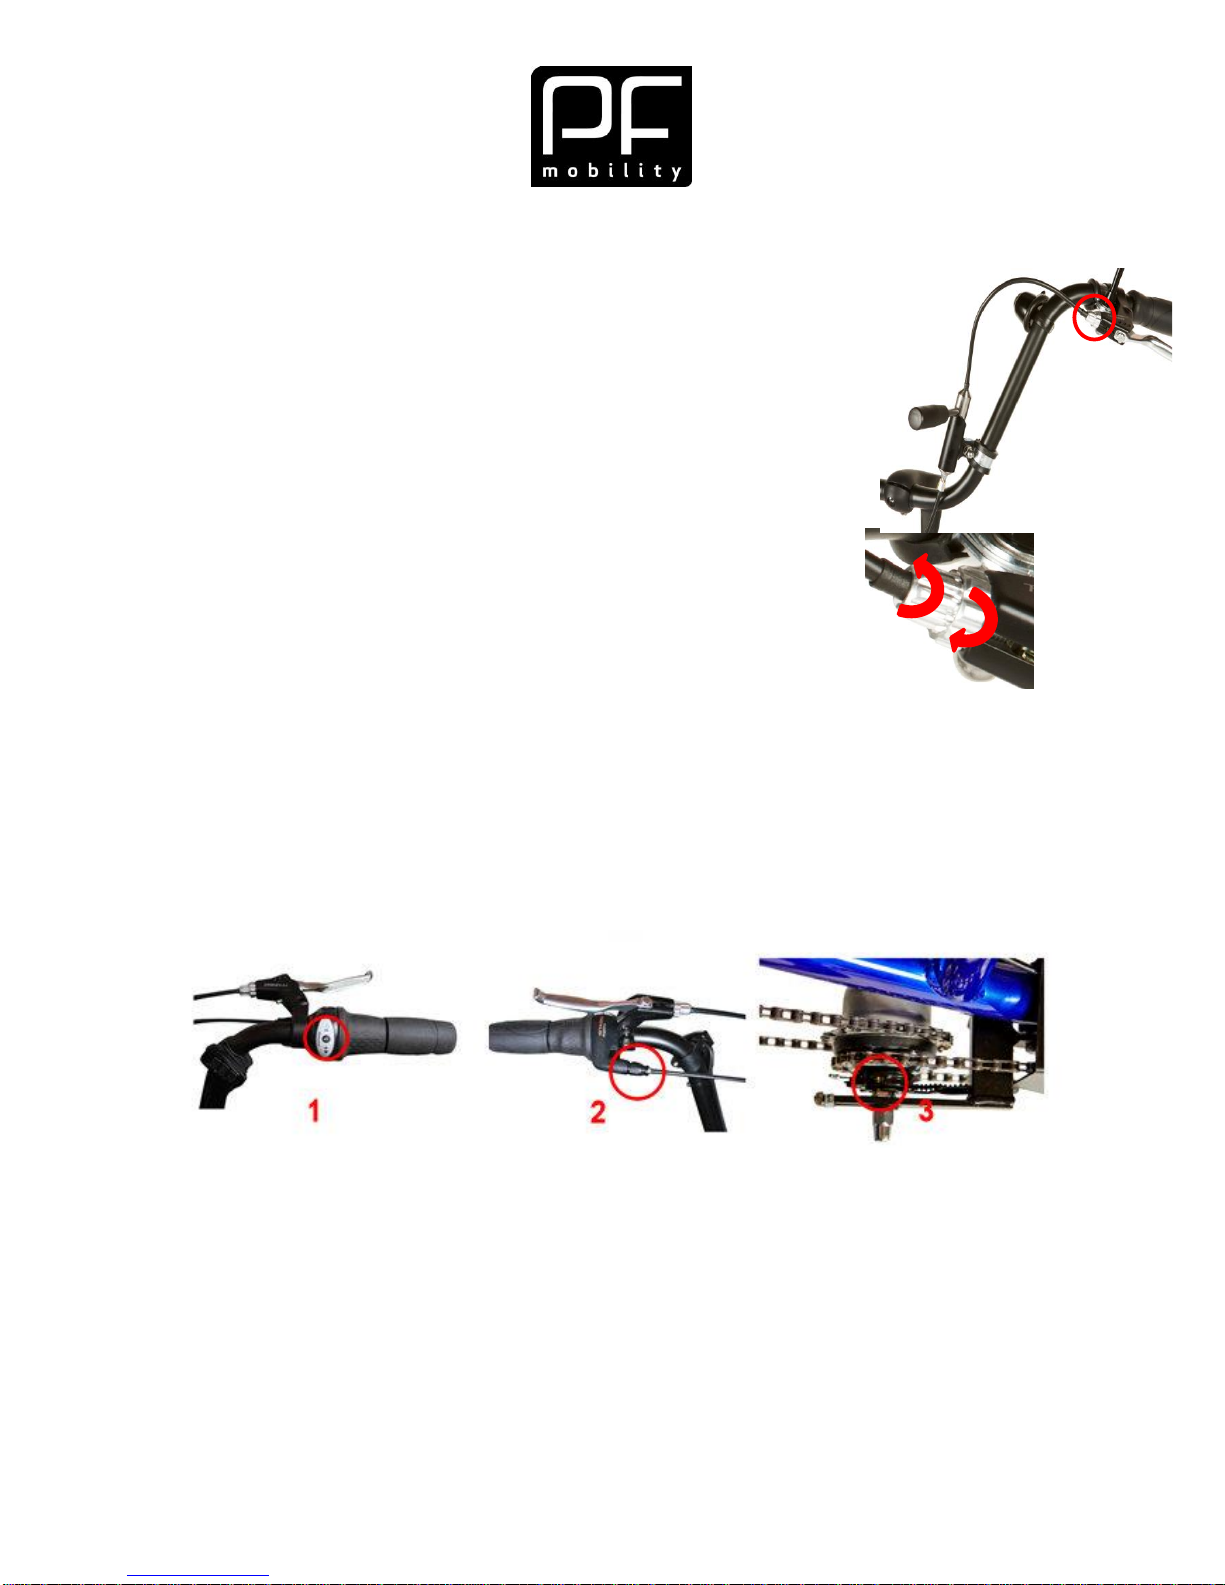
The parking brake is fitted to the handlebars. Turn it up to activate the
brake. To disengage the brake, give the handle a gentle pull until the
lever falls down the low mark.
The brakes are in need of continuous adjustments. Turn the long
adjusting screw marked in the picture counter-clockwise and fix the
check nut farthest in towards the brake handle. Extensive
adjustments of the V-brake should only be conducted by a
professional.
6.4 Gear
Your PF bicycle is delivered by default with 7 gears made by Shimano.
Twist the rotating handle "1" with the thumb and index finger to switch gear.
Keep the pedals still when you change gear while riding.
It is necessary to make subsequent adjustments of the gear. You can do this, as follows:
set the rotating handle "1" to gear 4. Then adjust the gear with the adjusting screw "2" until
the yellow dots "3" on the gear hub are parallel.
Page 13
USER MANUALDISCO ver. 002.16 13
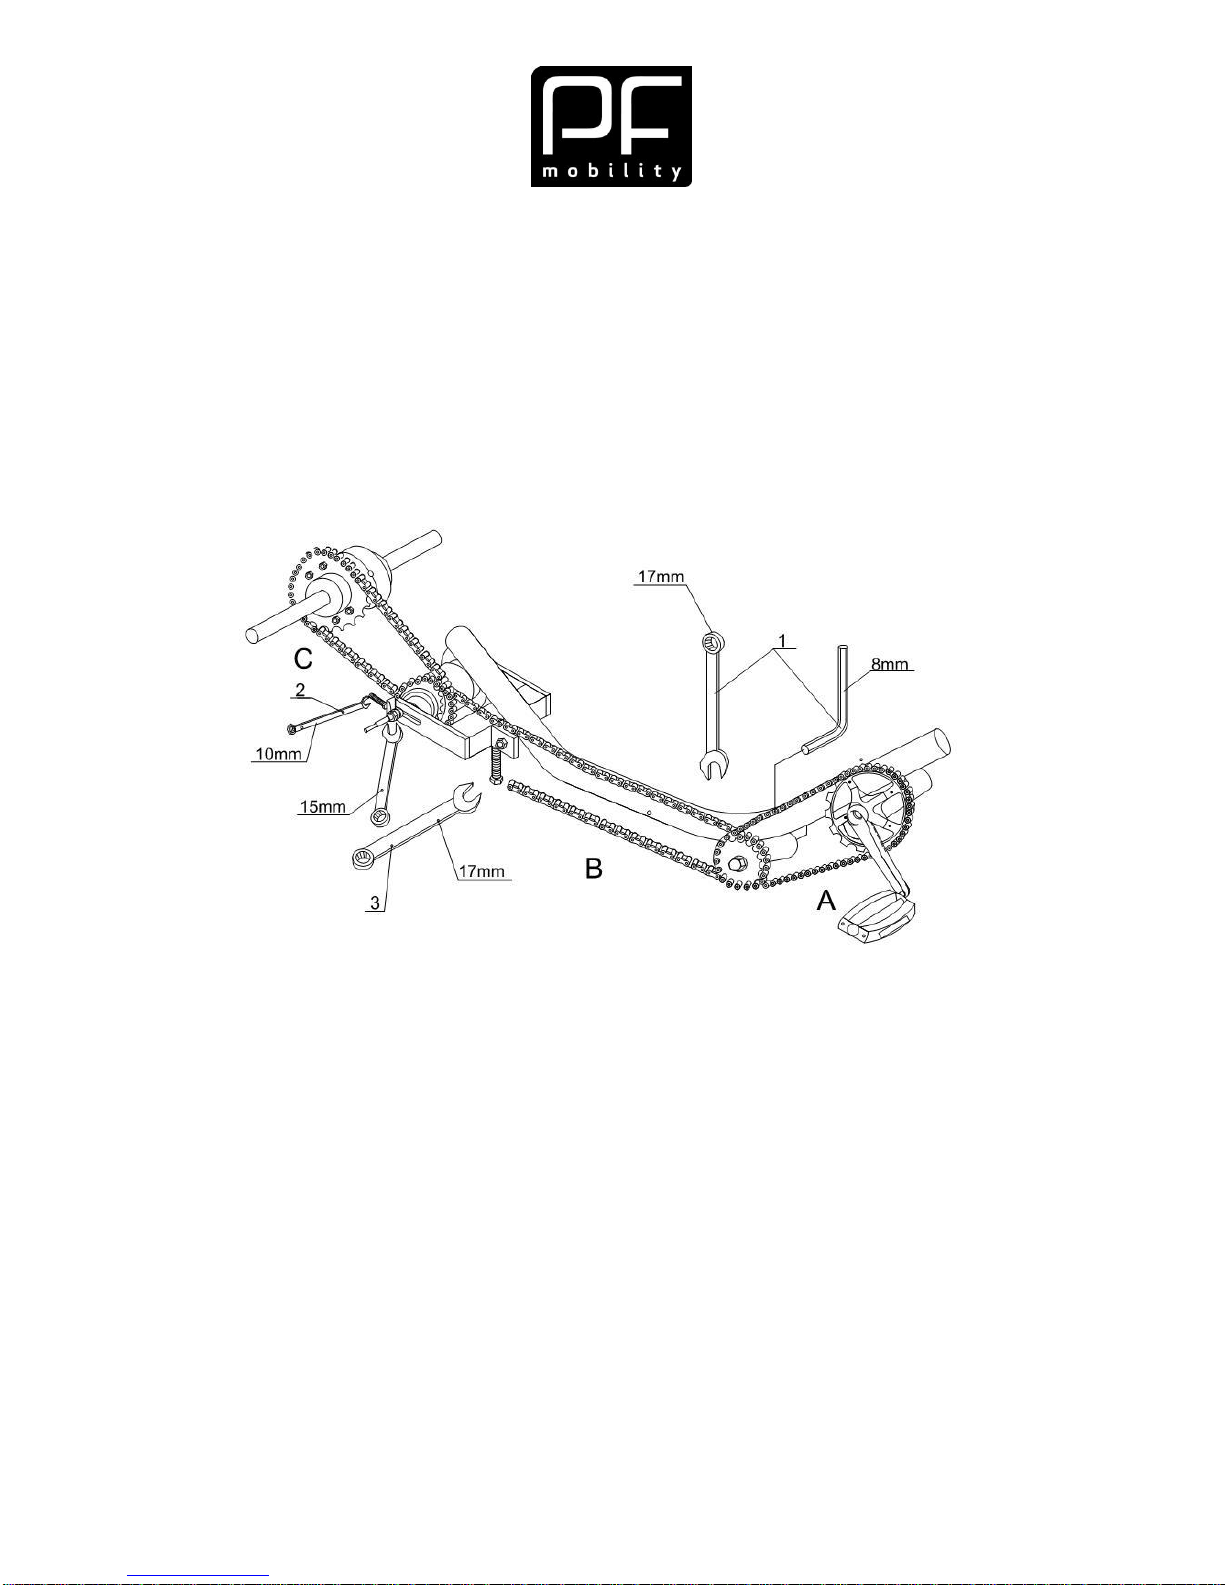
6.5 Adjustment of chains
Front chain (A): Loosen the hex bolt on the left side with the 8-mm hex key (1). Turn the
double gearwheel clockwise with the 17-mm combination wrench (1) to tighten the chain.
Hold the bolt of the double gearwheel in position with the 17-mm combination wrench (1)
to adjust the chain and then tighten the bolt securely to (1).
Middle chain (B) and back chain (C): Loosen the hub nuts and the brake lever’s nut and
screw. Loosen the counter nut of the adjusting screw using the 17-mm fork spanner (3).
You can now adjust the medium and back chain with the adjusting screw and the chain
adjusters.
Remember to tighten well after each adjustment!!!
Page 14
USER MANUALDISCO ver. 002.16 14
7 ELECTRICAL SYSTEM AND MOTOR
Peruse this chapter carefully if your bicycle is equipped with an auxiliary electric motor.
Save these instructions and remember to bring them if you take the bicycles to other
repairmen.
Non-compliance with these instructions can lead to personal injuries or damage to the
bicycle or its components.
PF mobility may not be held liable for any damage or loss resulting from failure to comply
with these instructions.
7.1 Electric bicycle, Pedelec or E-bike?
Electric bicycle is a common designation that is used for both a Pedelec and an E-bike.
The auxiliary electric motor of a Pedelec is only activated when you are pushing the
pedals. The bicycle's auxiliary motor is only active at speeds of up to 25 km per hour.
Nevertheless, the bicycle can be set to cut out the auxiliary motor at a lower speed – see
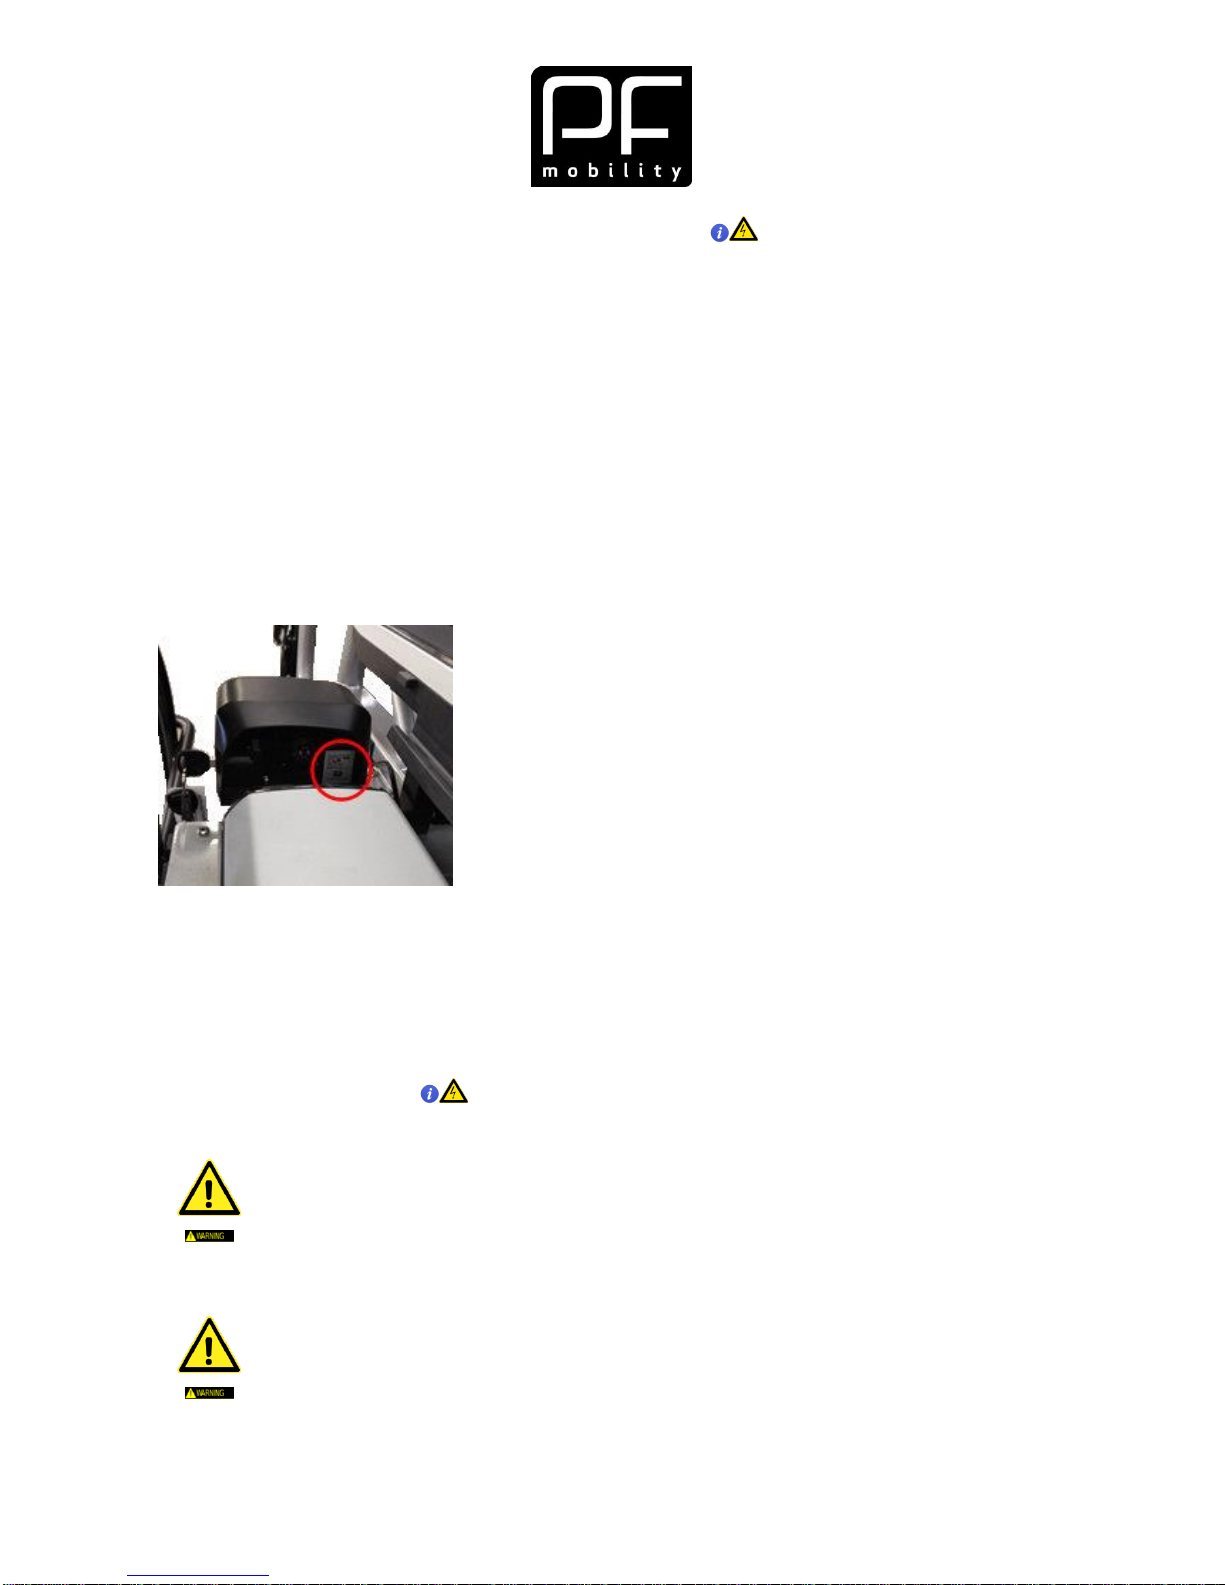
your order confirmation. The programmed "max" speed is also stated on the programming
label of the bicycle that you will find on the steering behind the battery.
An E-bike's auxiliary motor can be activating even if you are not pushing the pedals. The
bicycle is fitted with a throttle that determines the motor's output – however, only up to a
speed of max. 15 km per hour, when the motor is cuts out. Things can be different – see
the same label as above.
Both models have a starting aid of up to 6 km per hour.
7.2 Safety instruction
Risk of breakdown of load-bearing parts.
A defective motor can cause damage to load-bearing parts and bearings.
In turn, this can cause you to crash or fall.
Stop using the bicycle at once and contact without delay PF mobility or
a bicycle expert in order to replace the defective motor.
Hazard of fault or fire
Defective electrical connections or cables can cause short circuits. This can
cause electric faults or, in the worst case scenario, fire!
Replace any ruined or defective electrical connections and
components.
Page 15
USER MANUALDISCO ver. 002.16 15
Hazard of unintended operation of the motor and other rotating parts
The motor can be activated inadvertently if the electrical system remains "on"
while your bicycle is undergoing maintenance. Clothes can get caught into the
rotating parts and cause personal injuries.
Always remove the battery from the bicycle before you start any work
on the bicycle.
7.3 Hazards for special user groups
Children and adolescents are allowed to use electric bicycles on the public road network,
but only under the supervision of an adult.
The bicycle should be parked out of the reach of children or persons who are not capable
of handling the specified risks.
Riding an electric bicycle is different than riding an ordinary bicycle. This is why we
recommend that you practise in a place without traffic before you
ride in traffic.
7.4 Battery
A Li-Ion battery combines a low weight with a very high current
capacity. This makes it rather compact and contributes to keeping
the weight of the bicycle low.
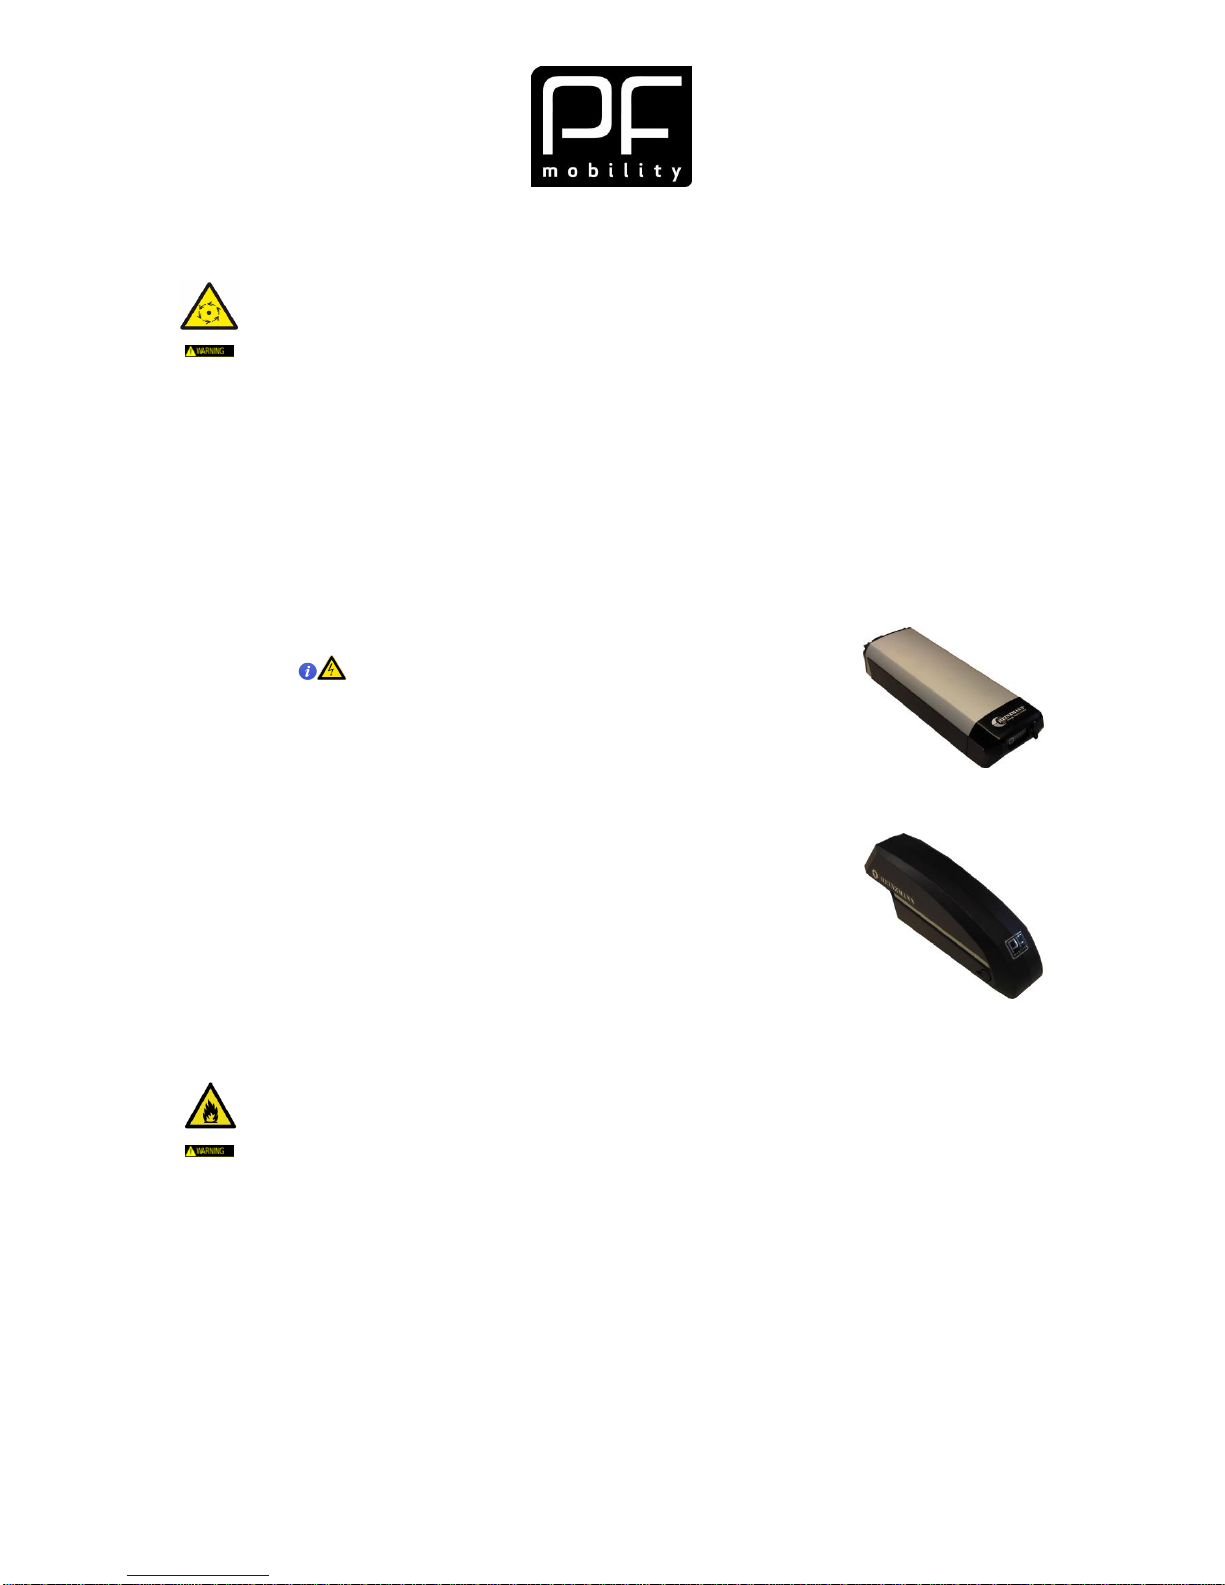
Your PF bicycle is delivered by default with a "Rear Rack" battery,
but it can also be delivered with a "Downtube" battery (optional
equipment) that has extra battery capacity.
Li-Ion batteries may only be charged with a special charging
system. You can significantly increase the service life of the battery
by ensuring proper recharging and preventing the battery from
discharging completely. To prevent this and help you as owner of
the bicycle, we have taken these factors into account in the
enclosed charger. For the same reason, you may only use the
charger to charge the battery of your bicycle.
Fire hazard
Incorrect recharging of the Li-Ion battery may cause the battery or charger to
heat substantially. This can cause a fire!
Always use the accompanying charger when recharging the battery.
The charger is NOT suited for outdoor use.
Before you connect your charger to the mains, you must ensure that
the mains voltage corresponds to the permitted voltage of the charger.
The voltage is stated on the rating plate of the charger.
Only charge the Li-Ion battery in a dry, non-flammable environment.
Mechanical damage to the Li-Ion battery or the charger can cause malfunction
and short-circuit. In turn, this can cause fire.
Any form of manipulation of the battery or charger is strictly forbidden.
"Rear Rack"
”Downtube”
Page 16
USER MANUALDISCO ver. 002.16 16
Immediately replace the battery if ruined and dispose of it safely, e.g.
by handing it over to a municipal receiving station.
Risk of electric shock
Chargers with defective cords or connectors can cause an electric shock.
Never plug defective connectors or cables to the mains.
Immediately replace any defective components and cables.
Protect the charger against penetration of water and moisture. If water
has penetrated into the charger, pull out the connector and have the
charger inspected by a professional.
Condensation can form if the charger has been exposed to a sudden
temperature increase. If this happens, you must wait until the charger
has the same temperature as its surroundings before you connect the
charger to the mains. Always store the charger wherever it is used.
Only use the charger to charge the supplied Li-Ion battery. Other use is
not permitted.
7.5 Charging the battery
Be sure to fully charge the battery before you use your bicycle for the first time. The
battery can be charged while it is installed to the bicycle. The battery can also be detached
and charged in a more appropriate location.
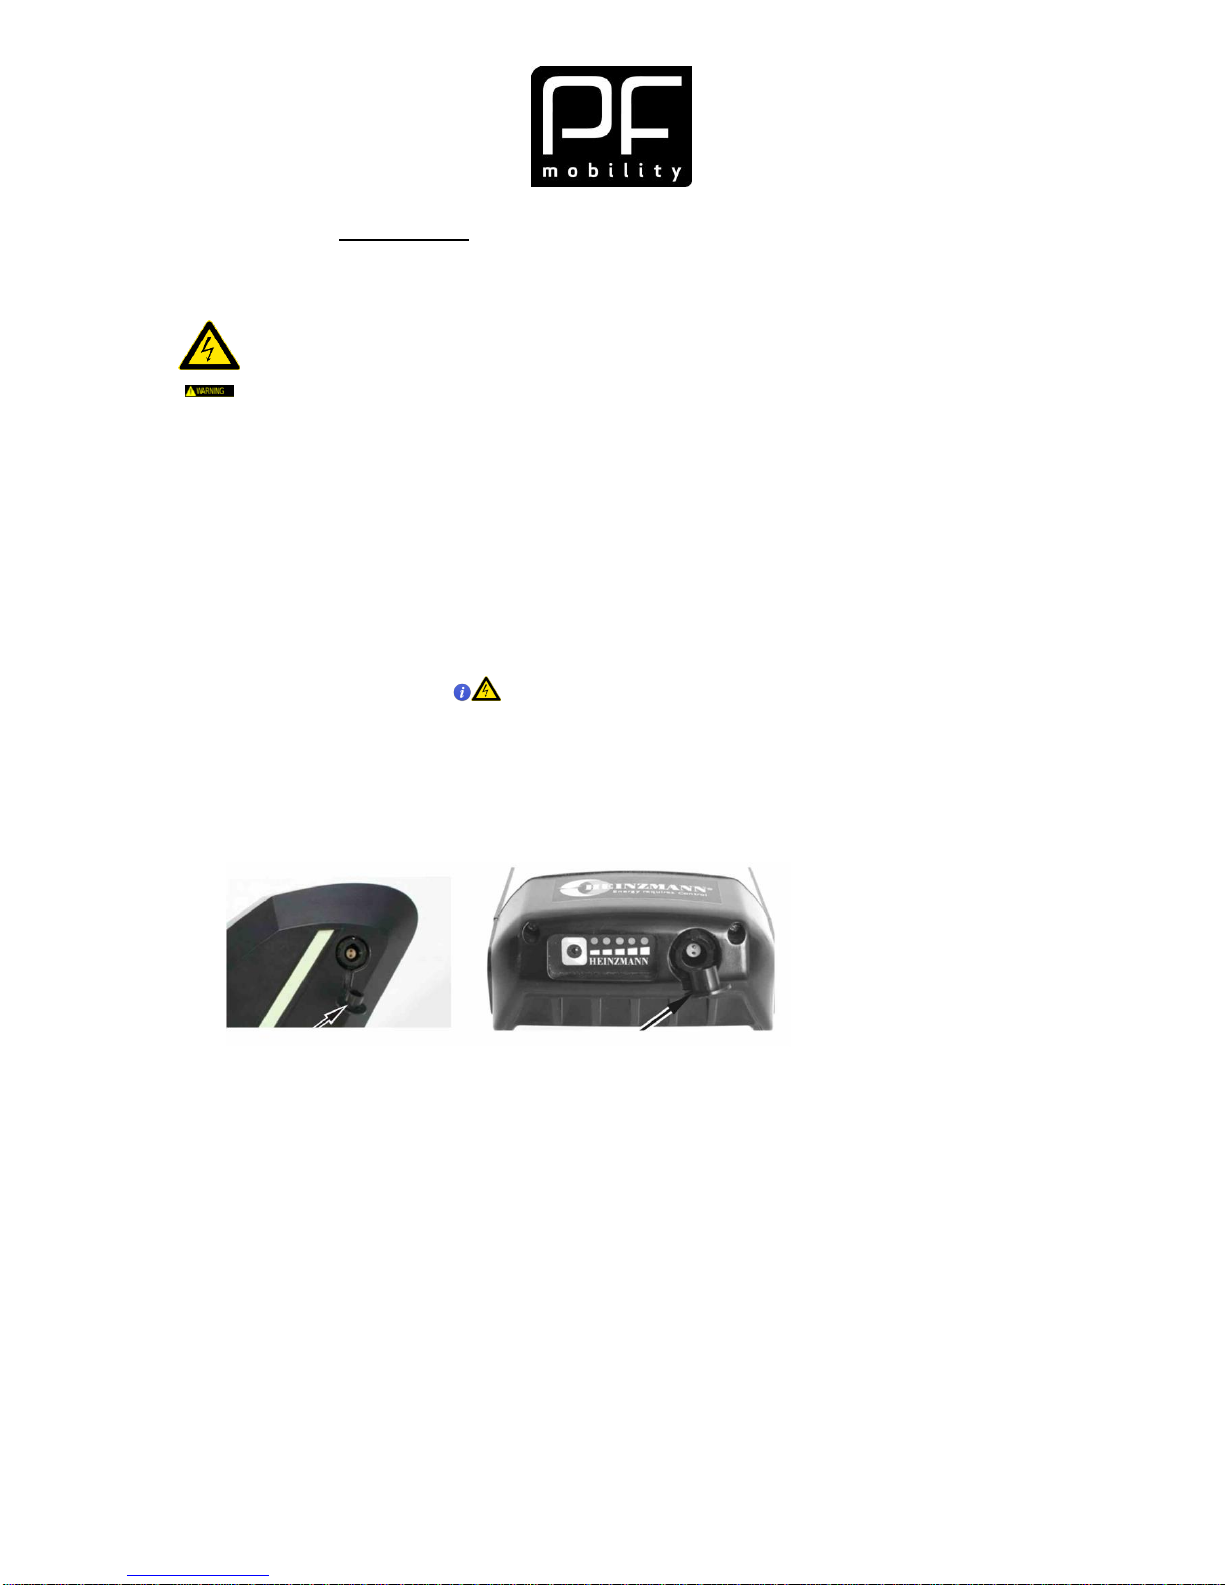
1. Open the dust cap and insert the charging plug.
To ensure proper connection, the connection between the charger and the battery
is designed with a groove and a protrusion. These are marked with an arrow on
both the battery and the charger. Make sure that you have positioned the charging
plug correctly – do not apply force.
2. Connect the charger to a power socket.
3. Once the battery is charged, the red indicator on the charger will light and the green
indicators on the battery will flash (only Rear Rack).
4. When the charger's indicator lights permanent green, the battery will be charged,
and you can disconnect the power.
Støvhætte – Downtube Støvhætte – Rear rack
Page 17
USER MANUALDISCO ver. 002.16 17
The charging time is approx. 6 hours for full charging of the Rear Rack battery
and approx. 7 hours for the Downtube battery. The charger then switches to
maintenance charging, which ensures that the battery does not discharge. If
the battery is not fully charged, the bicycle's range will be reduced.
Do not charge the battery at temperatures below 10 C or over 35C, in direct
sunlight, next to radiators and similar. When the temperature outside is below
0C, we recommend that you charge your battery in a heated room.
If you do not use the bicycle for long periods of time, you should remove and
store the battery in a dry, frost-proof place. Make sure to fully charge the
battery before storage and again before you are about to use the bicycle.
Every time you install the battery on the bicycle, make sure that the casing is
locked.
7.6 Using the electric bicycle
7.6.1 Instructions for use
Risk of hot surfaces
The battery and the motor can heat after long and demanding rides.
Do not touch the battery or the motor after very demanding rides.
7.6.2 Operation of the electric bicycle
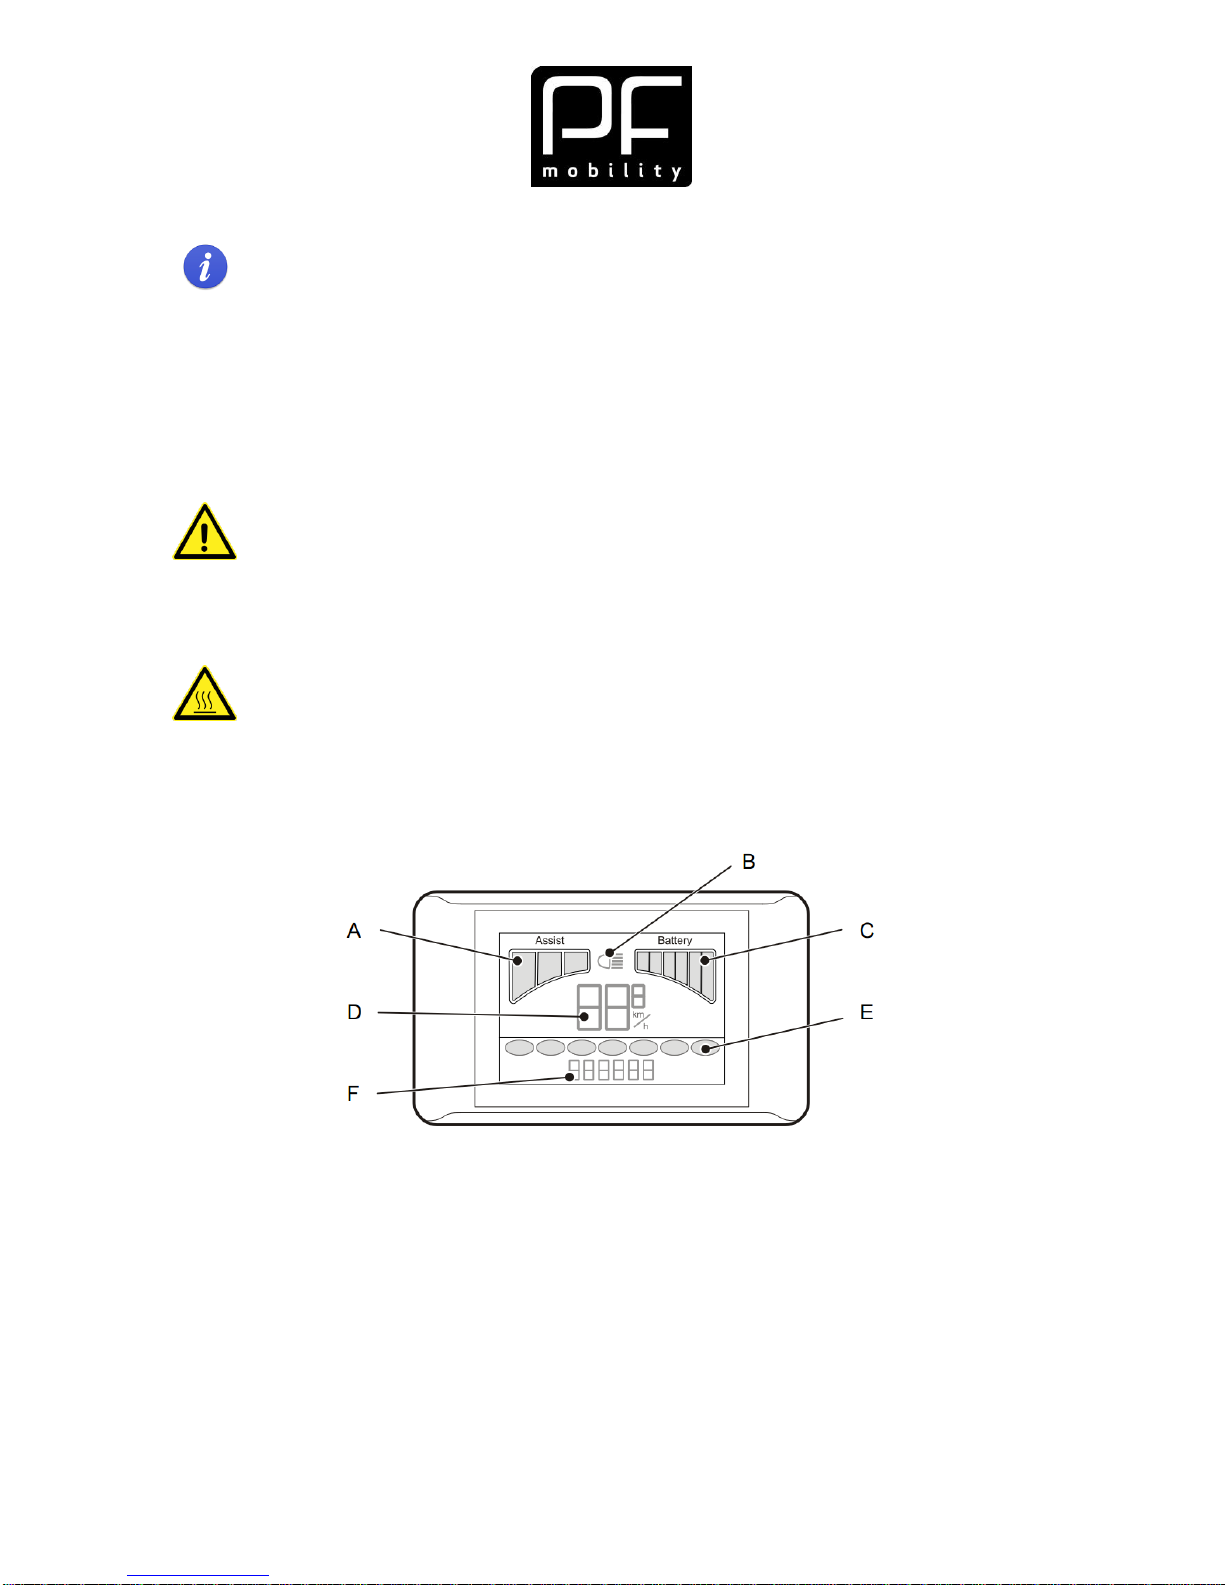
Your electric bicycle is equipped with a displayed and an operating switch.
A. Assist / output level – determines the performance of the electric motor.
B. Bicycle light indicator – lights when the light of the bicycle is on (optional
equipment).
C. Battery level – how much power there is left.
D. Speedometer showing your current speed – as well as error codes (see section 12).
E. Function display for different functions (see Section 7.6.7)
F. Display line – displays the value of the individual functions selected in "E" as well as
"Error" (see Section 12).
Page 18
USER MANUALDISCO ver. 002.16 18
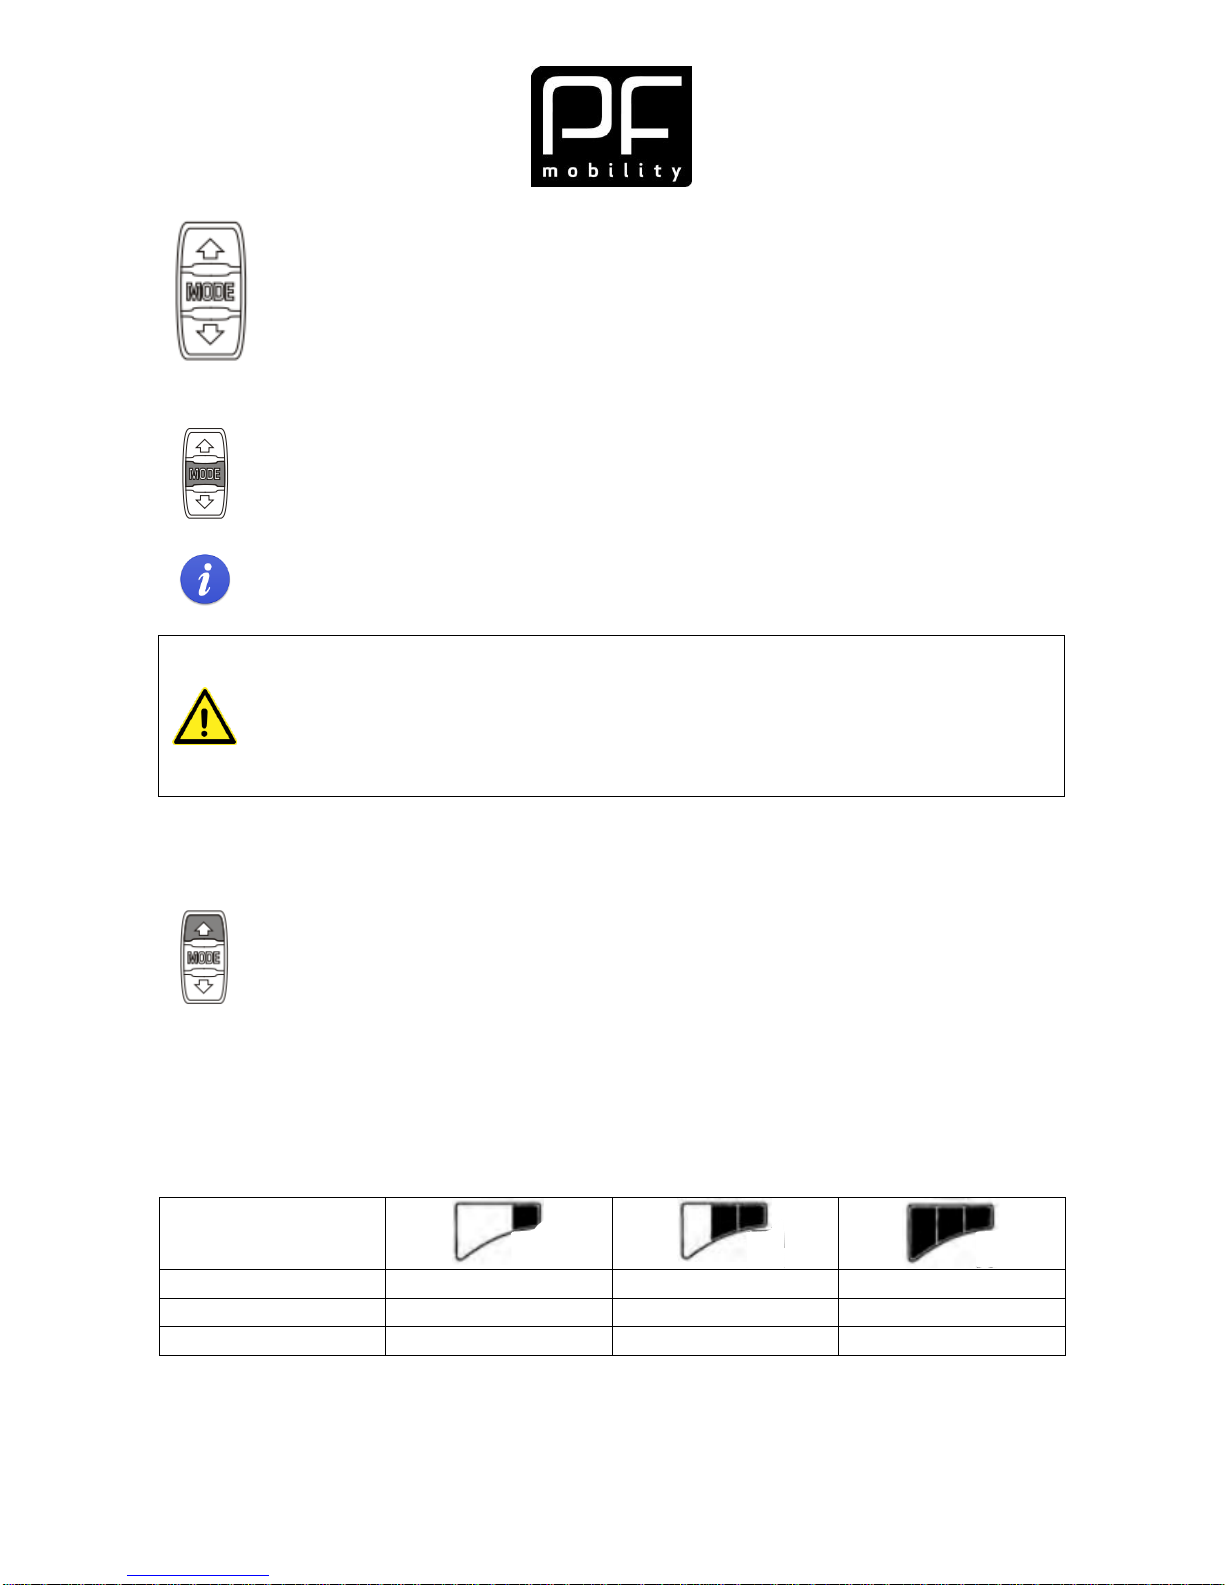
There is an operating switch with three buttons on the handlebars: MODE,
"Up" and "Down" arrow.
All functions are operated via these buttons.
7.6.3 Turning the bicycle on and off
Press and hold the "MODE" button for three seconds until the display lights.
To turn off the system, press and hold the "MODE" button for 2 seconds.
The bicycle's system turns off automatically when the bicycle has stood still for
10 minutes.
WARNING:
Do not place your feet on the pedals when you turn on the bicycle as you risk
to inadvertently set the bicycle in motion or to generate a system error.
Mount the bicycle, but keep your feet on the ground.
Turn on the bicycle's electrical system.
Place your feet on the pedals and ride.
7.6.4 Start and help function
Start is a function that activates the motor in order to help you get going if you cannot do it
yourself with the pedals. This function will help you achieve a speed of up to 6 km/h. The
function can also be used for help with towage when you are pushing the bicycle yourself.
To activate the start help, push the "Up" button for approx. 1 second and then
hold it in for as long as it is necessary.
The start help will cut out once you release the button.
For models with a throttle, e.g. an E-bike, the start help is activated by turning the throttle.
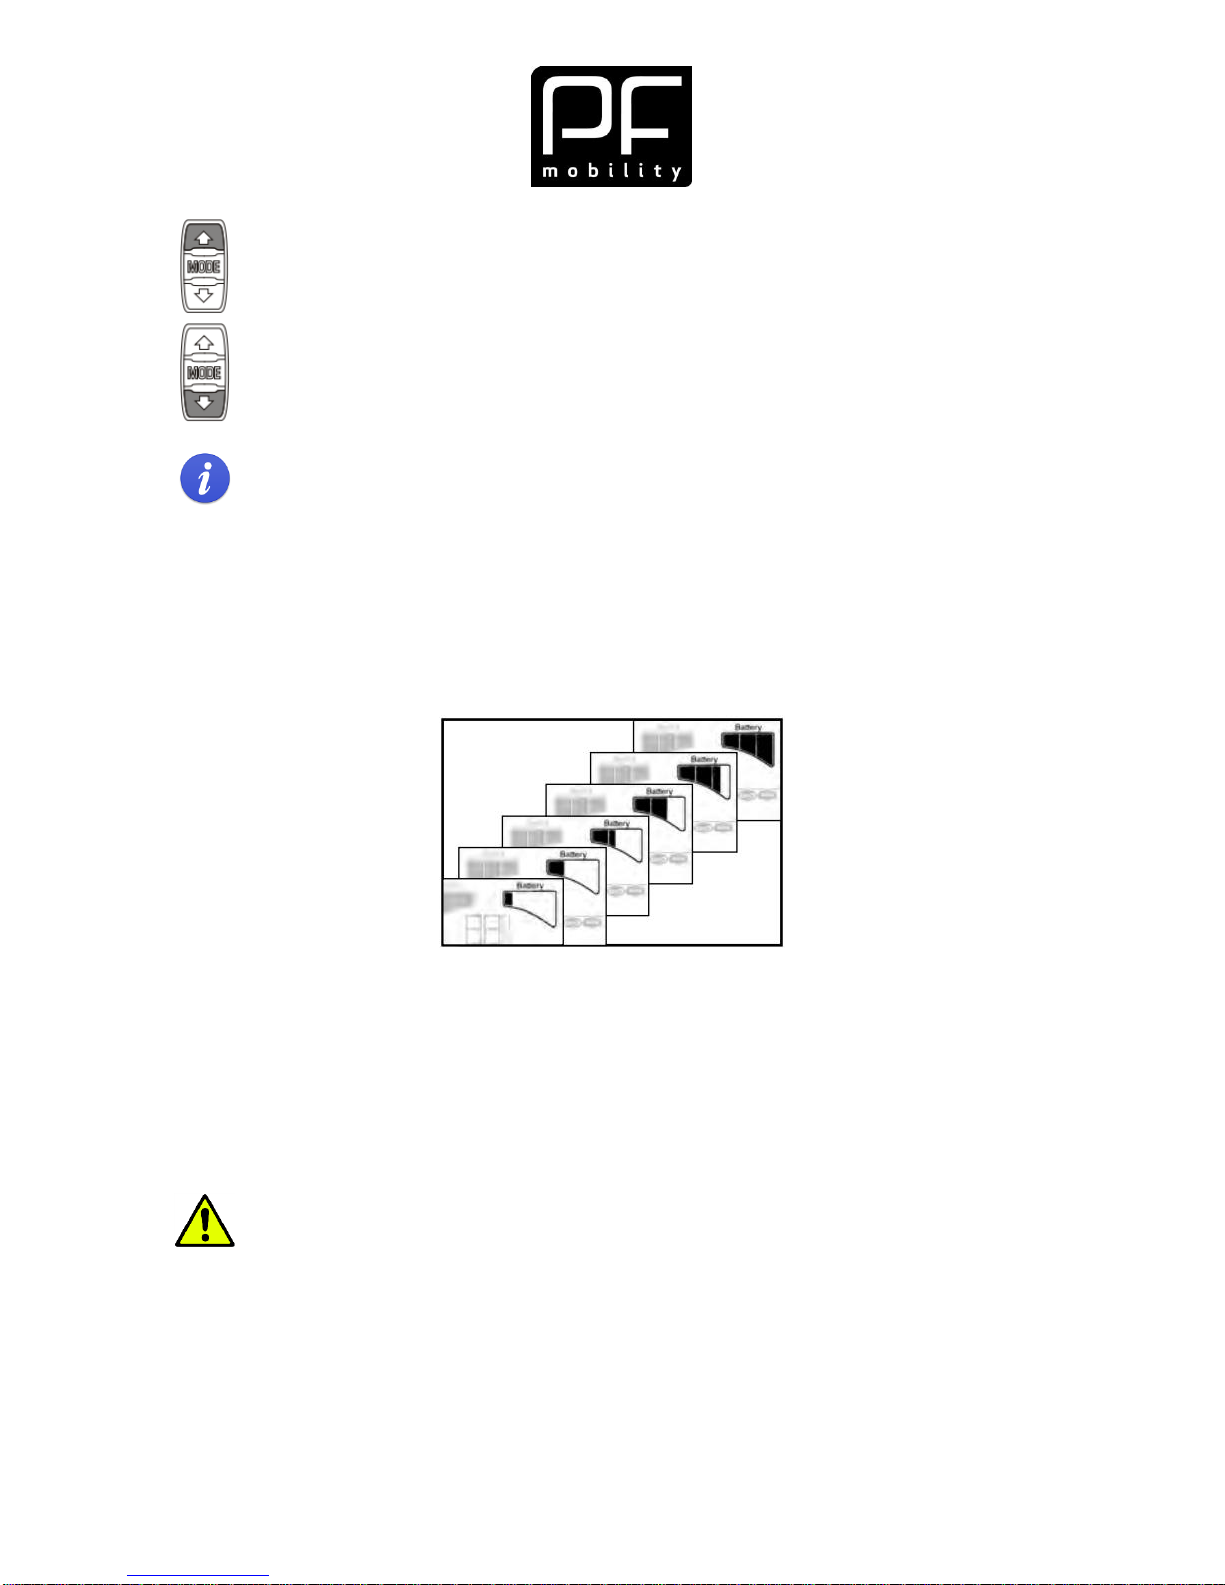
7.6.5 Adjustment of Assist level
The electrical system can be adjusted and set to three different assist / output levels. The
higher output level you opt for, the greater the motor's output. The selected and relevant
output level is visible in the top right corner of the display.
Assist /
output level
Motor output
30-35 %
65%
100 %
Start help
Range
Page 19
USER MANUALDISCO ver. 002.16 19
To select a higher assist / output level, give the "Up" button one short push.
To select a lower assist / output level, give the "Down" button one short push.
Irrespective of which assist / output level you choose, the auxiliary motor's preprogrammed max speed will remain the same – See Section 7.1 Electric
bicycle, Pedelec or E-bike?.
7.6.6 Power level
You can always see how much power there is in the battery in the top right corner of the
display under "Battery". The display indicates the power level with 0 to 6 bars where 6 bars
(solid coloured) indicates that the battery is fully charged and a single flashing bar
indicates that the battery is almost dead.
If there are no bars in the display, the battery is empty, and the system will shut down
before long. After that you will not be able to use any of the electric functions of the
bicycle.
It will first be possible to use the electric functions of the bicycle once the battery is
charged again.
If you charge the battery while it is installed on your bicycle, you will also be able to read
off the charging status of the battery in the display.
WARNING:
Make sure that the battery is charged enough so that you have enough juice
for the return trip.
7.6.7 Functions
The display has different display functions you can use while you are riding your bicycle.
These are:
Dist:
Displays the overall number of km you have ridden.
Page 20
USER MANUALDISCO ver. 002.16 20
Trip:
Trip counter displaying the number of km ridden since last
reset.
Time:
Journey time:
AVG:
Average speed.
EstT:
Displays how long you can expect to ride at the current
battery level, use and terrain – the value is only indicative!
EstD:
Displays the distance you can expect to cover at the current
battery level, use and terrain – the value is only indicative!
PIN:
Not active for this model.
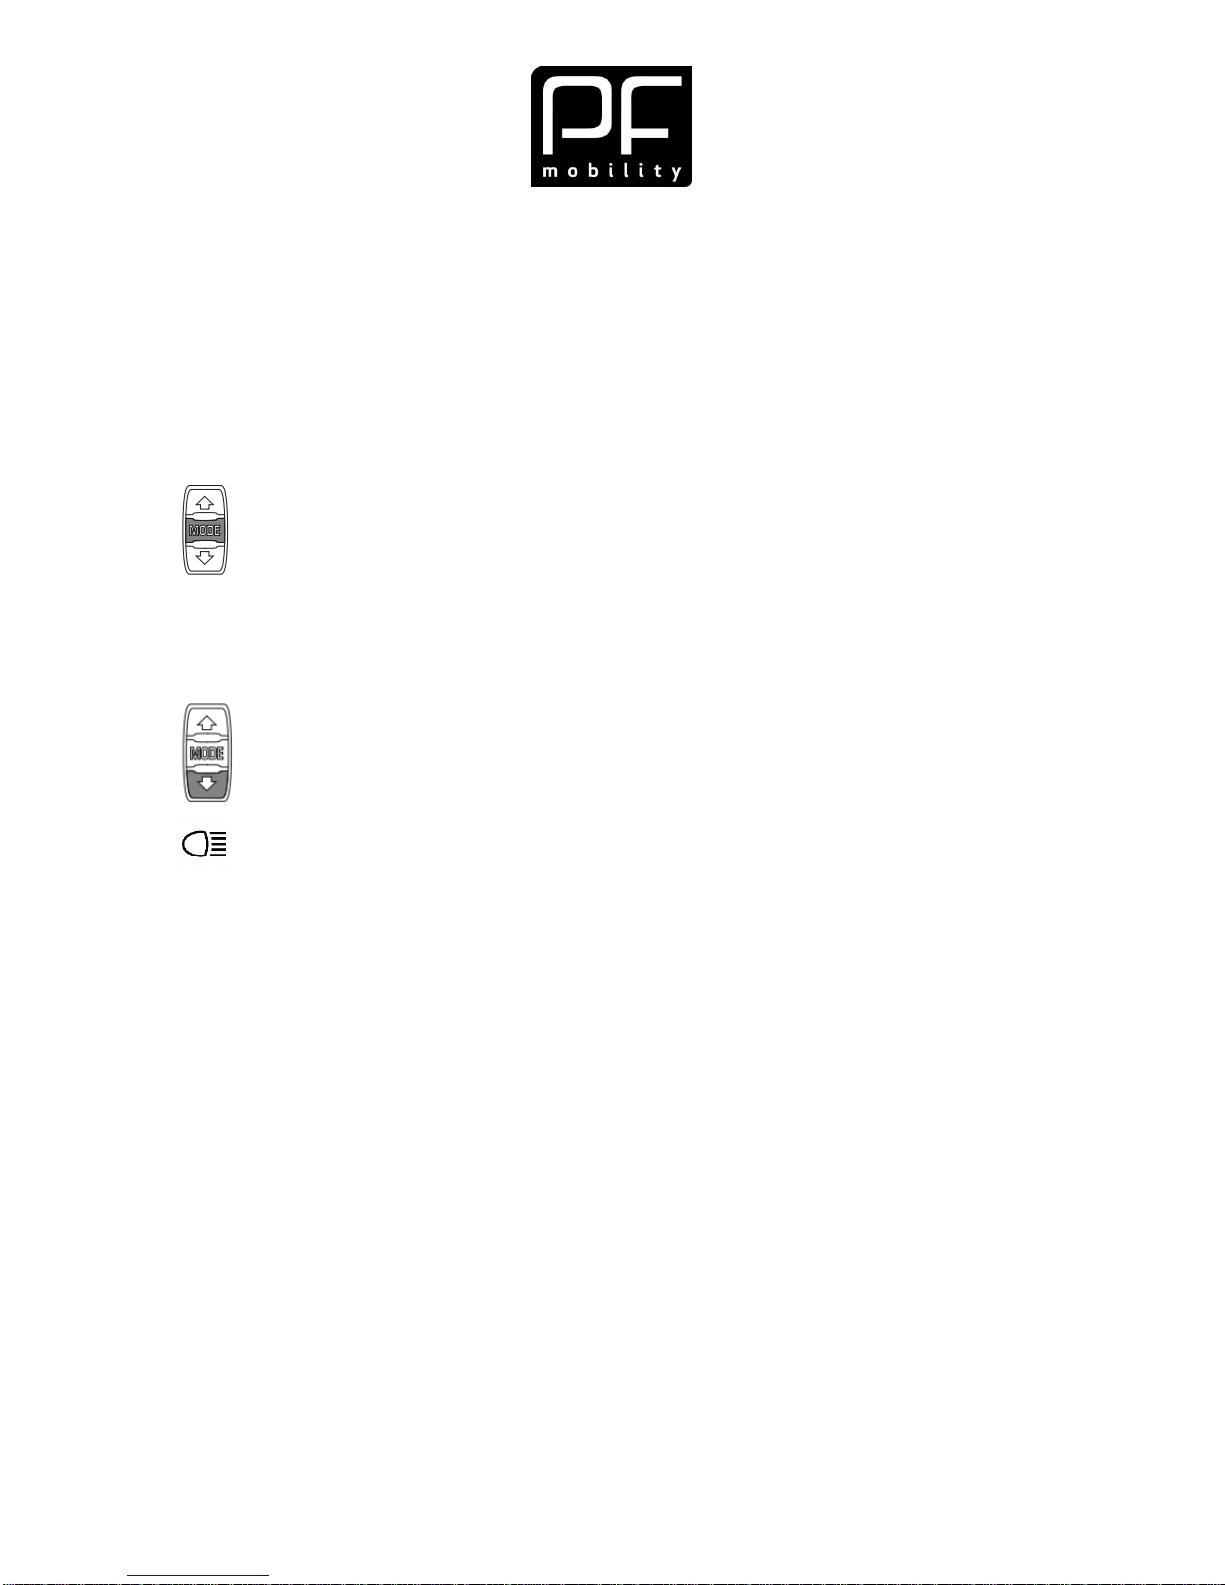
You can switch among individual display functions by pressing the "MODE"
button several times. Each push switches over to the next display function.
7.6.8 Light
Your electric bicycle can be equipped with a light operated via the bicycle's electrical
system (optional equipment).
If you have purchased an optional light connected to the electric bicycle's
electrical system, you can turn it on by pressing the "Down" button for 2
seconds.
To turn off the light, press the "Down" button again for 2 seconds.
When the light is on, you will see a "Light" symbol at the top of the display.
Page 21
USER MANUALDISCO ver. 002.16 21
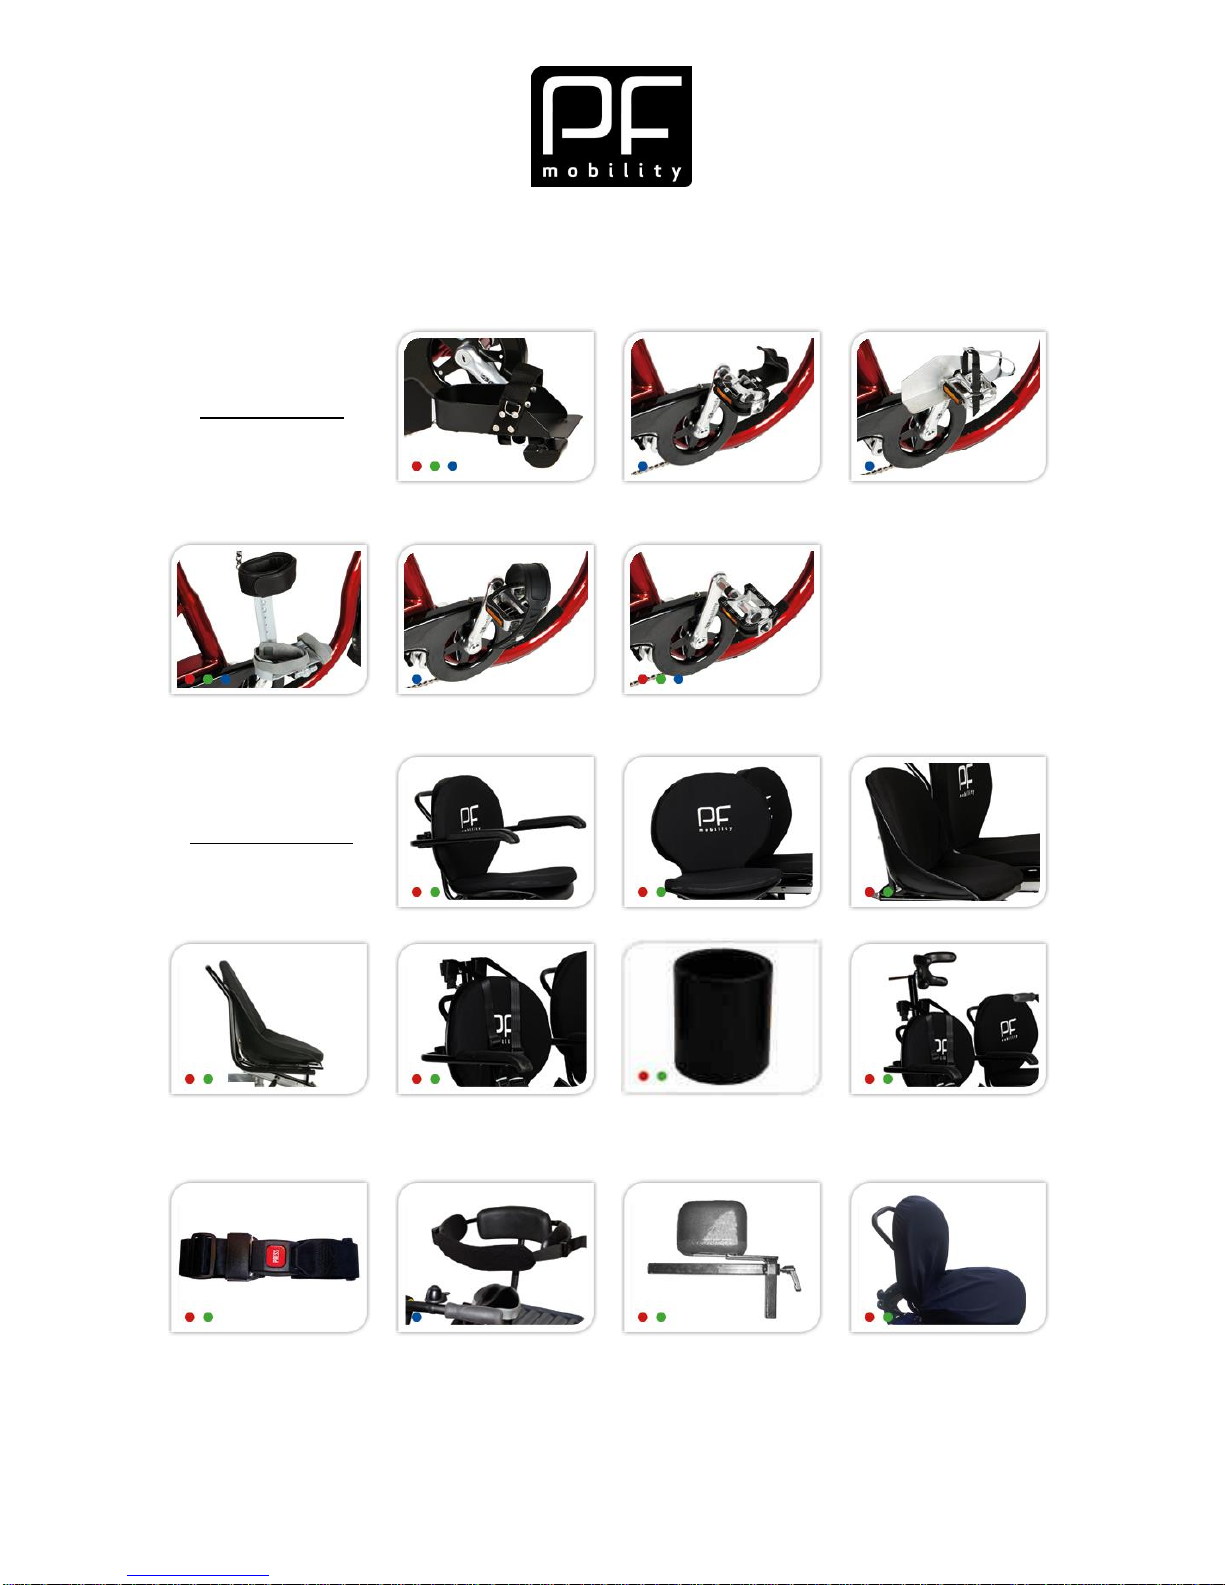
8 ACCESSORIES
You can buy additional accessories and equipment for your PF bicycle. Get in touch with
your dealer or PF mobility if you want to know more about your options.
Foot supports:
Footplate 5 sizes.
Pedal wirh toe clip
Pedal wirh toe clip
and side support
Footplate whit calf
support
Training pedal
Pedal extender
Saddels & belts:
Armrest
Swivel seat
Junior seat
Seat console for
junior seat
H-harness with
holder
Extension pipe
H-harness with
holder and head
support
Harness
Back support with
harness
Abduction block
Seat cover
Page 22
USER MANUALDISCO ver. 002.16 22
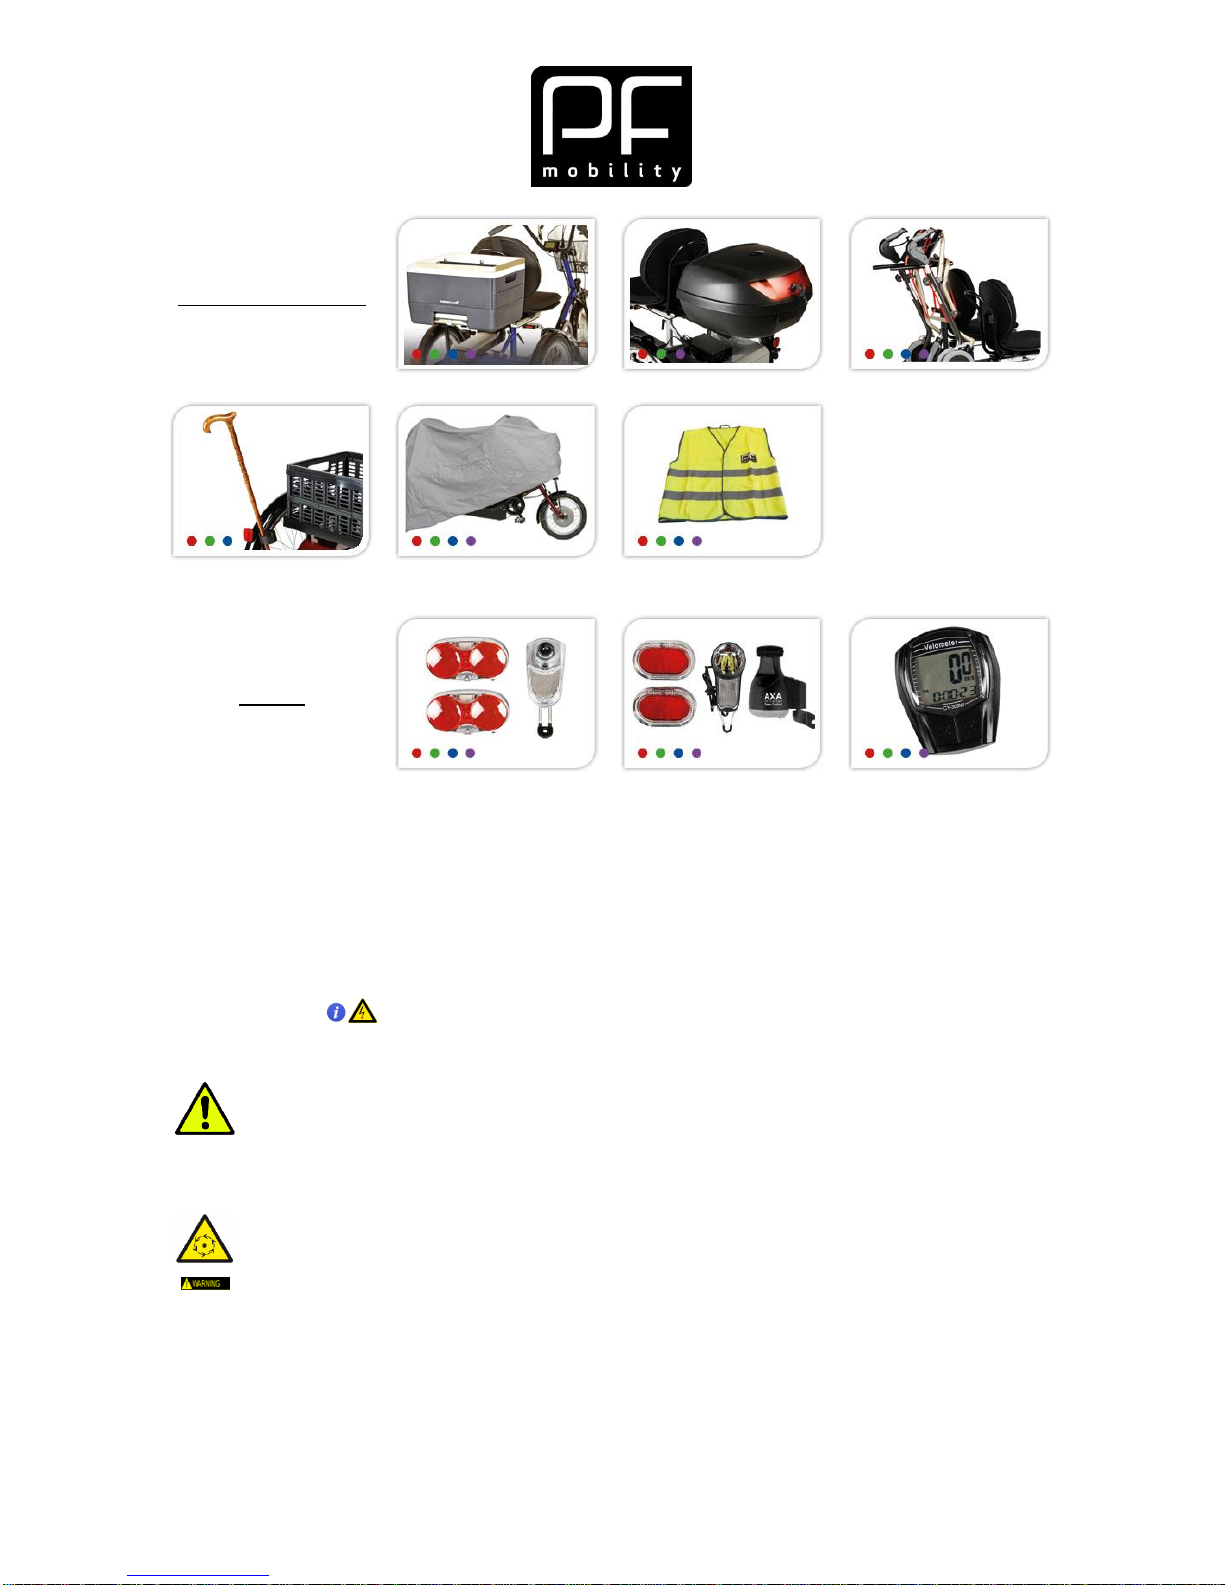
Other accessories:
Basket
Topbox
Holder for walker
Holder for walking
stick
Bike cover
Safety vest
Lights:
Battery light
Dynamo light set
Bike computer
Fits for:
● Disco
● Duo
● Stabilo
● PF Duo
9 MAINTAINING YOUR BICYCLE
9.1 Important
WARNING – Risk of malfunction in the event of incorrect or missing
maintenance.
Incorrect or missing maintenance of an electrically operated bicycle can cause
faults and damage to electrical and mechanical components! In this worst case
scenario, this can cause you to crash and suffer a personal injury.
The electrical system may only be maintained by a professional.
Hazard of unintended operation of the motor and other rotating parts
The motor can be activated inadvertently if the electrical system remains "on"
while your bicycle is undergoing maintenance. Clothes, etc. can get caught into
the rotating parts and cause personal injuries.
Always remove the battery from the bicycle before you start any work on
the bicycle.
Provided that they are both used as described and intended in this Manual, the electric
motor and the battery are maintenance-free.
Page 23
USER MANUALDISCO ver. 002.16 23
Have a professional conduct a safety check of the following items every 1,000 km:
Intact and secure fastening of cables and components
Review and testing of the complete electrical system.
Safe use of the battery
9.2 Daily check
As mentioned above in Section 4.2 Before taking your bicycle out for a ride, you should
check:
Brakes and parking brake
Chains
Tyres and wheel rims
Light and reflectors
Battery condition
Your bicycle is equipped with a parking brake
that is designed to prevent the bicycle from
making any undesired movements during
parking. This is particularly important when you
mount or dismount the bicycle. You should test
the parking brake and make sure that it
operates adequately every day. We
recommend that you always use the parking
brake when you get off the bicycle. Adjust the
brake when it does not operate adequately or
as intended. For adjustments, see Section 2.3 Adjustments.
Test the foot brake and handbrakes daily to ensure that you can bring the bicycle to a
halt quickly and safely.
Note that you can experience longer braking distance in humid weather.
Chain
To be able to use your bicycle safely and without any risk, you must check that the chain is
properly adjusted and lubricated.
For the proper adjustment of brakes or chains, refer to a professional – see also Section
2.3 Adjustments.
Tyres and wheel rims
We recommend that you check daily – or at least weekly – that the tyres are
properly inflated and not worn. The correct tyre pressure is 4-5 bar.
Since the bicycle uses rim brakes, you should also check the wheel rim of the
front wheel for wear and tear and cracks. For more information, refer to Section
5.1.
Light and reflectors
Page 24

USER MANUALDISCO ver. 002.16 24
Check that the bicycle's reflectors are whole and clean and that all statutory reflectors are
fitted to the bicycle. White in front, red at the back, yellow on the pedals and white again
on the tyres (standard equipment) or yellow on the spokes.
If you ride the bicycle at night, before you mount, you must check that the light of your
bicycle works.
Before you leave home, you must also check that the battery is charged – see
Section 7.5
9.3 Periodic maintenance – and first service check!
In order to be in a good and safe mechanical condition, your bicycle is in need
of periodic maintenance. The maintenance inspection should cover, as a
minimum:
Brakes
Tyres and wheel rims
All moving parts and bearings, crank, pedals, etc. (clearance and mobility)
Chain
Gear
Electrical system and battery
Frame
Tightening of bolts, screws and nuts
The inspection should be conducted by a professional. We recommend a maintenance
inspection every 1,000 km or at least once a year. You can buy an inspection from PF
mobility through your sales consultant.
Page 25
USER MANUALDISCO ver. 002.16 25
Service check
A service check must be carried out two months after the purchase of
each new bicycle, cf. Section 9.3.
The gear, wires, bolts, chains, spokes, etc. of each new bicycle need some time
to "settle", which is why it is necessary to check carefully and tighten / adjust
individual parts.
This inspection must be conducted by a professional!
Lack of maintenance / service inspection can cause hazardous incidents and
void the warranty.
9.4 Cleaning
Important information for electric bicycles.
Remove the battery before you start cleaning your bicycle.
You can clean the bicycle with a moist – but not wet – soft cloth and water with
a bit of detergent added, e.g. bicycle shampoo or similar.
Never use high-pressure cleaner or water jet.
Do not use a hot water or steam cleaner, a high-pressure cleaner or strong
water jet / spray to clean your bicycle. If water penetrates inside, it can ruin the
electrical components, motor bearings and other moving parts of your bicycle.
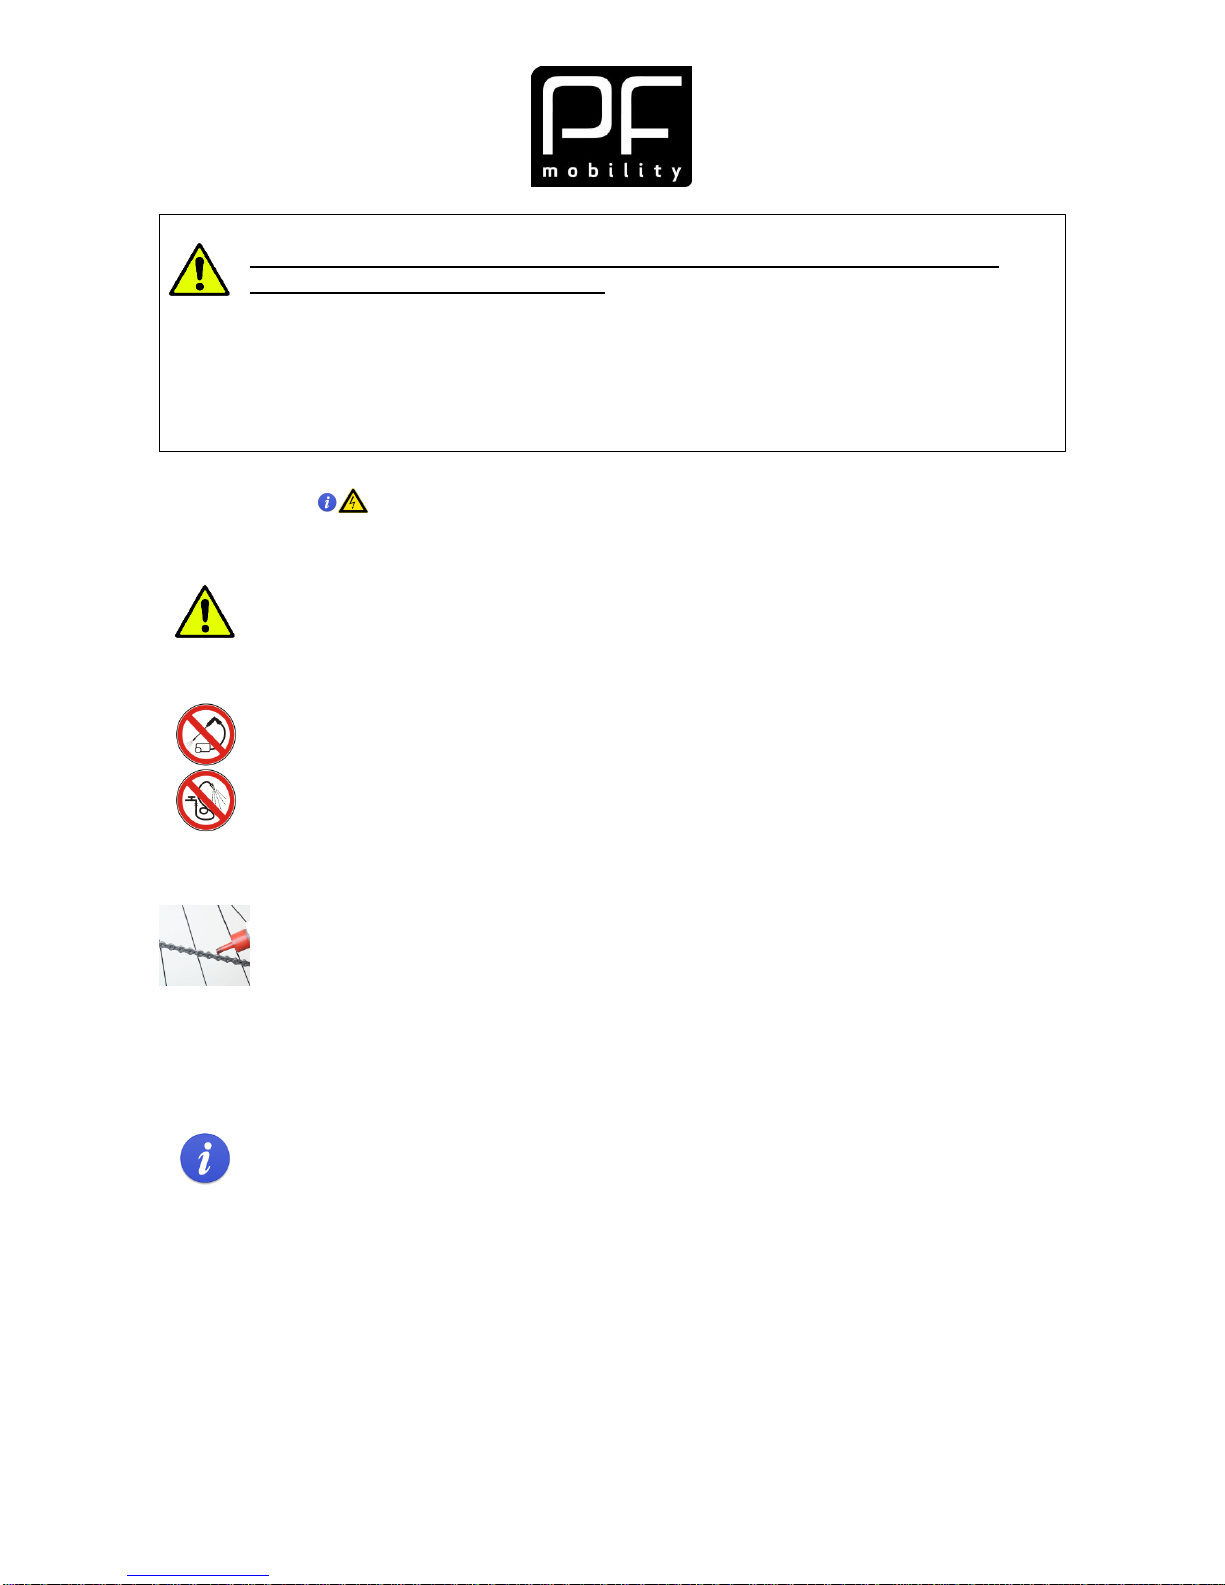
9.5 Lubrication
Clean and lubricate the chain of your bicycle, as needed. The more often you
use the bicycle, the more often the chain will be in need of lubrication. Riding in
humid and wet weather increases the need for lubrication. We recommend that
the chain be lubricated at least once a month and more often in the winter
season. You can buy a suitable detergent and lubricant from your bicycle professional.
As a rule, none of the other moving parts is in need of regular lubrication, but should only
be inspected periodically by a professional and lubricated, as needed.
9.6 Tightening of bolts, etc.
It is important to ensure that all critical components of the bicycle are attached
properly. These parts need to be tightened with the proper torque. The required
tightening force is stated in the following table:
Page 26
USER MANUALDISCO ver. 002.16 26
Component:
Torque (+/- 5 Nm)
Wheel nut, front
45 Nm
Wheel nut, back
45 Nm
Stem – height
Indicated on the stem
Exocentric disc
(front sprocket)
70 Nm
Rear beam
35 Nm
Rear axle –
bearing
20 Nm
Saddle
40 Nm
9.7 Repair and replacement
To guarantee your safety, PF mobility recommends that you only use original spare parts.
This will also allow you to benefit the most from the use of the bicycle. PF mobility has
spare parts on stock and can deliver parts from one day to another.
Contact your dealer or PF mobility for assistance and delivery of parts as well as
replacement, if relevant.
10 DISPOSAL
Do not dispose of electronic and electrical components as ordinary
household waste as this is prohibited by law. You as a user should therefore
make sure that all electronic and electrical components are disposed of via
an approved public waste management scheme, through a dealer or by PF
mobility.
By complying with this and recycling or using an approved return scheme,
you will contribute to making a real difference and help protect the
environment.
Dispose of electrical components in accordance with the applicable national
legislation.
For advice about disposal, you can contact the local authorities or your
dealer.
Page 27
USER MANUALDISCO ver. 002.16 27
11 WARRANTY AND OBLIGATIONS
All of PF's bicycles sold to individuals come with 2 years of warranty; cf. the provisions of
the Danish Sale of Goods Act. In addition, there is 5-year warranty for the frame provided
that the product has been used as described in this Manual.
Assuming ordinary use and periodic service, the expected service life of this bicycle is 5 to
10 years.
PF mobility may not be held liable for any damage to the bicycle itself or other objects or
for injuries to people:
caused by the abnormal use of the bicycle, e.g. in races or for riding in rugged
terrain, etc.;
if the user has disregarded or failed to comply with the instructions in this Manual;
caused by inadvertent use of the PF bicycle;
if there are any alterations to the structure of the bicycle without the producer's
written consent;
if the bicycle has been exposed to abnormal wear and tear or an overload;
if the bicycle is not maintained normally or is exposed to extreme corrosion.
12 ERROR CODES AND TROUBLESHOOTING
In case there are problems or faults in the electrical system of your Direct Power electric
bicycle, the display will show "E r r o r" along with an error number.
The different error codes are listed in the table below together with a description of
possible causes and an appropriate solution proposal.
Error number
Error description and solution proposal
Most errors can be solved by rebooting the system: Turn off the system,
wait a bit and then turn it on again.
If the error does not disappear after you have tried the proposed solution
or occurs periodically, you need to contact your dealer or PF mobility.
1
Error
Solution
Error Hardware Brake:
Cut out because of overvoltage
Remove the battery and check the connections. If the connections are in
order, insert the battery again and reboot the electrical system (turn off –
wait a bit – turn on again).
Contact your dealer if the battery or the connections are damaged.
2
Error
Solution
Error Hall
Signal between motor and steering interrupted.
Check the motor cable for connections and damage and reboot the
system.
Contact your dealer if the motor cable has suffered any visible damage.
Page 28

USER MANUALDISCO ver. 002.16 28
Error number
Error description and solution proposal
3 & 4
Error
Solution
Error Grip Offset
Throttle not in neutral position on system start.
Check that the throttle is in "neutral" position when you turn on your
bicycle.
Contact your dealer if the error does not disappear when the throttle is in
neutral position – this means that it is probably defective.
5
Error
Solution
Error Torque Offset
Torque sensor not installed properly or affected on system start.
Place your feet on the ground and reboot the system.
If the fault does not disappear when there is no load on the pedals, the
torque sensor is likely to be defective. Contact your dealer in order to get
a replacement.
6
Error
Solution
Error I Offset
Error in battery sensor, battery switch/connection is probably damaged.
Remove the battery and check the battery switches and connections.
If the switches are in order, fit back the battery and reboot the system.
Contact your dealer if any switches or connections are damaged.
7
Error
Solution
Error Fast Over Voltage
Temporary overvoltage because of too high a speed or damaged battery
switches or connections.
Remove the battery and check the battery switches and connections. If
a switch or a connection is defective or damaged, contact your dealer for
a replacement.
8
Error
Solution
Error Slow Over Voltage
Lasting overvoltage.
Reboot the electrical system of the bicycle.
9
Error
Solution
Error Fast Under Voltage
Lasting undervoltage. The battery is probably too weak or there are
battery switches or connections that are damaged.
Remove the battery and check the battery switches and connections.
If the switches are in order, fit back the battery and reboot the system.
Contact your dealer if any switches or connections are damaged.
10
Error
Solution
Error Slow Under Voltage
Lasting undervoltage. Battery is probably dead.
Recharge the battery and reboot the electrical system of the bicycle.
11
Error
Solution
Error Over Temp Motor
Motor overheated.
Let the motor cool off and reboot the electrical system of the bicycle.
Contact your dealer if the error does not disappear after 20 minutes.
12
Error
Solution
Error Over Temp Controller
Motor controller overheated.
Let the motor controller cool off and reboot the electrical system of the
bicycle.
Contact your dealer if the error does not disappear after 20 minutes.
Page 29

USER MANUALDISCO ver. 002.16 29
Error number
Error description and solution proposal
13
Error
Solution
Error Parameter
General error.
Reboot the electrical system of the bicycle.
14
Error
Solution
Error Under Temp Motor
Temperature too low for motor operation.
Bring the bicycle to room temperature – approx. 20C.
Contact your dealer if the error does not disappear after 1 hour.
15
Error
Solution
Error EEPROM
Memory error.
Reboot the electrical system of the bicycle.
16
Error
Solution
Error Parameter Property
Error in program management.
Reboot the electrical system of the bicycle.
17
Error
Solution
Error Akku Temp
Battery is either too hot or too cold.
If overheated, let the battery cool off, and if too cold, store the battery at
room temperature.
Reboot the electrical system of the bicycle.
Contact your dealer if the error does not disappear after approx. 1 hour.
18
Error
Solution
Error Undefined Bike Constellation
System error.
Reboot the electrical system of the bicycle.
19
Error
Solution
Error BMS
Battery error.
Remove the battery and recharge it. Reboot the electrical system of the
bicycle.
20
Error
Solution
Error BMS Version
Battery error.
Reboot the electrical system of the bicycle.
21
Error
Solution
Error Torque Signal
Torque sensor not installed properly, cables/connections damaged or
affected on system start.
Place your feet on the ground and reboot the system.
Check the cables and connections for damage, in particular, around the
pedals. Contact your dealer in case of visible damage
22
23
24
25
26
27
28
29
30
Error
Solution
Error BMS Faulty high power current offset
Error BMS Overcurrent discharge
Error BMS BQ Short circuit
Error BMS BQ Overload
Error BMS BQ Overvoltage
Error BMS BQ Undervoltage
Error BMS BQ Overtemp
Error BMS BQ Failled config
Error BMS Faulty low current offset
Battery error.
Reboot the electrical system of the bicycle.
Page 30
USER MANUALDISCO ver. 002.16 30
Error number
Error description and solution proposal
50
Error
Solution
Error Display Communication
Communication error between controller and display.
Check that the connector between the display and the cable is installed
properly and that the cable, connector or display is not damaged.
Reboot the electrical system of the bicycle.
Contact your dealer if there is any damage to the connector, display or
cable – or if the error does not disappear.
Page 31

USER MANUALDISCO ver. 002.16 31
13 EC DECLARATION OF CONFORMITY
Issued in accordance with EC Directive 93/42/EEC, as amended by Directive 2007/47/EC.
Manufacturer:
PF mobility aps, Bjerregårdvej 15, Timring, DK-7480 Vildbjerg
Tel. +45 99 92 06 00
CVR No. 25059026
Models:
Disco Junior
Disco Senior
Versions:
Electrically powered (250W) for all models:
Direct power 36V
Product description:
3-wheeled electrically assisted bicycles and 3-wheel pedaloperated bicycles for users with special needs and handicaps.
Directives used:
Directive 93/42/EEC concerning medical devices
and
Directive 2004/108/EC relating to electromagnetic compatibility
Equipment
classification:
Class I
Harmonised
standards used:
EN 12182 – Assistive products for persons with disability –
General requirements and test methods.
EN 15194 – Electrically power assisted cycles
EN 61000-3-2, EN 61000-3-3, EN 61000-4-3, EN 61000-4-8
Electromagnetic compatibility.
EN 55014-1 + -2: Electromagnetic compatibility
Date of issue:
20.11.2015
PF mobility aps hereby declares that the products above meet all relevant provisions of
Council Directive 93/43/EEC. The product is safe to use under conditions that can
reasonably be expected, as described in the instruction manual.
This declaration is considered void for products that have undergone any kind of alteration
without a prior written agreement with PF mobility aps.
PF mobility aps is obliged to set up procedures for continuous market monitoring and risk
management in order to ensure corrective actions in the event of undesired events and
risks.
Technical documentation for the products is kept by PF mobility aps at the address above.
Timring, 20.11.2015
Martin Søndergaard
CEO
 Loading...