

Page 1
EagleSoft Set-up Instructions for Schick USB Camera
Version: 10.0
Date Created: 8/29/03
Last Modified: 8/19/04 Filename: Schick USB Camera Setup
Required materials: Required EagleSoft modules: Install on the following computers:
• Schick Technologies Drivers
installed
• Schick USB Camera/Cable
THE SCHICK USB CAMERA MUST BE PLUGGED INTO THE COMPUTER'S USB PORT PRIOR
TO ENGAGING VIDEO CAPTURE
1. In EagleSoft, go to File\Preferences and click on the XRay tab
• Video Capture • Any operatory workstation using
the Schick USB camera
2. Under Template Defaults, set up a default template for Video Template.
3. The Video button will show the settings for the Video preferences
4. For Capture Card choose Standard Windows Driver Model Device
5. For Default Device choose Schick Technologies USBCam; Video
6. Choose an option for Schick USBCam button:
• Freeze/Unfreeze
• Freeze/Save
7. Click OK to save changes
8. Go to Lists\Image Templates and click New
Page 2
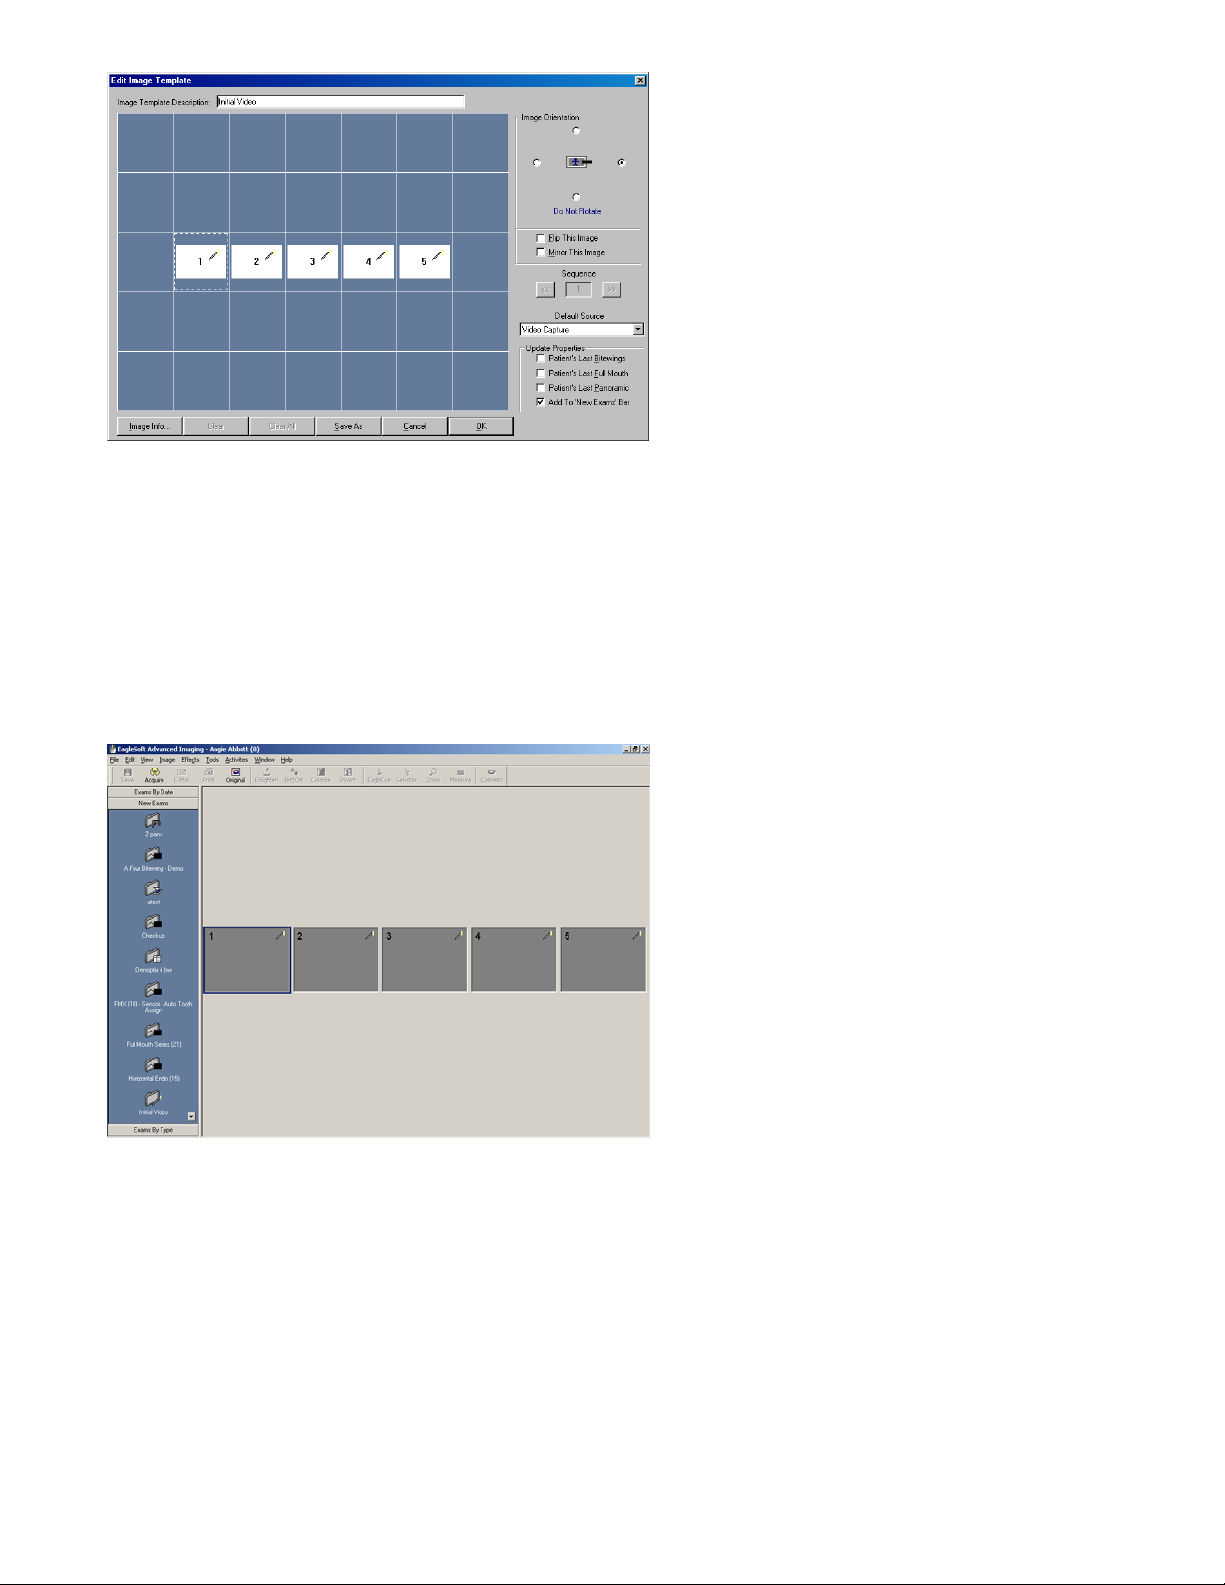
9. Give the new image template a name on the Image Template Description line
10. Make sure Default Source is set to Video Capture
11. Click on the Custom Setup button to switch to Standard Setup
12. In the grid, mark the appropriate number of boxes for the template. Each template position should show
a picture of a intraoral camera in the upper right-hand corner
13. Click OK to save.
14. To capture images, click on the IntraOral Camera on the Clinical virtual screen or go to
Activities\Images\New IntraOral Images
15. If a default video template has been setup under Clinical Preferences, you will be taken into the
Advanced Imaging screen.
16. To capture images, click Aquire to open the Video Exam screen.
Page 3
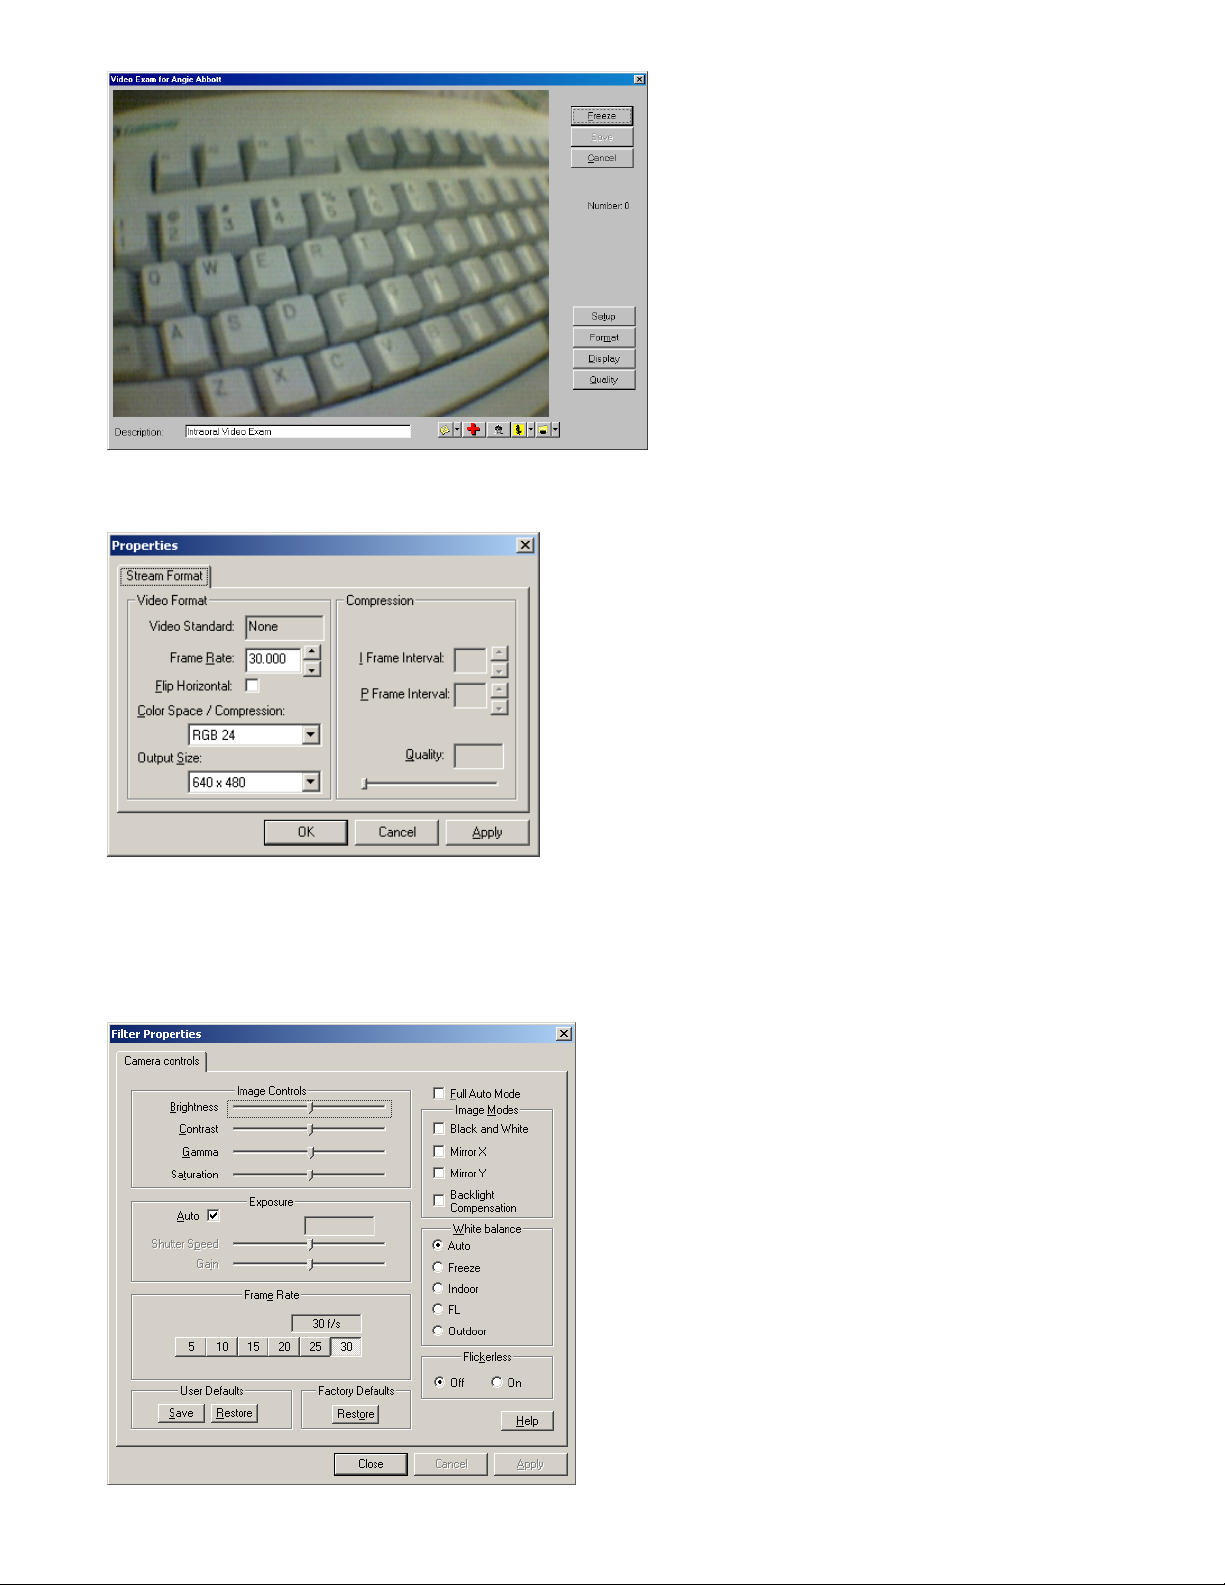
17. The Video Exam screen allows you to view the live streaming video.
18. Click on the Format button
19. Frame Rate is set to 30,000 by default
20. Set the Color Space/Compression to RGB 24
21. Set the Output Size to 640x480
22. Click OK to Save
23. The Display button allows additional settings for the camera:
Page 4

24. In the Display properties, adjusting the Brightness and Contrast will allow for a clearer image.
25. Hit Close to return to the live video.
26. To capture an image, click on Freeze. The Freeze button then changes to UnFreeze. To save the
image, click Save. To try again, click on UnFreeze.
**With version 9.10 and above, the Video preference under File\Preferences allows the second
click of the button on the camera to act as the Save or UnFreeze function.
27. After saving each image, the counter on the right hand side of the video screen increases.
28. When finished, click the Cancel button and the saved images will be pulled into the Advanced Imaging
screen.
 Loading...