

Page 1

Delfina Installation manual
Disclaimer
This sound board is manufactured with high standards and respect to CE regulations. Each card has
been verified to function properly prior to shipping. However, errors can not be totally avoided.
To avoid damaging the card, read the handling instructions on this manual before removing the
protecting wrapper around the card. We cannot be held responsible for damages resulting from
mishandle, including damaging static discharge or improper installing to computer.
If you find the board faulty, test it on another computer whenever possible to identify the source of fault.
Most common fault is inadequate power supply, which may need to be upgraded.
There’s a full 2-year warranty on the Delfina. It only covers the Delfina sound board and replacing a
faulty one with a new card or repairing the board with new or used parts. No warranties for any
accompanying software or fitness for a particular purpose are made. We are not responsible for any
other damages, including physical and economical.
To avoid EMC interference, only operate your computer when it is fully assembled. Operating a Delfina
sound board with the computer case opened may cause problems in radio programme receival. To
minimize radio noise emissions, assemble the computer cover with a complete metal shield
surrounding Delfina sound board.
© 2000 Petsoff Limited Partnership, Finland
Address:
P.O. Box 1009
FIN-53301 LPR
FINLAND
© 2003 individual Computers, Germany
Address:
Roermonder Str. 228
52072 Aachen
Germany
Handling
The card contains some sensitive circuitry, so you must follow these guidelines while handling your
Delfina soundboard.
Always ground yourself by touching some large metal object (such as radiator) before handling the
board. This way you minimize the risk for static discharge.
Hold the card by its edges, not touching the components.
Never install or remove Delfina while the computer is powered on.
When installing Delfina, check very carefully that the connector pins are aligned properly. Improper
installing may destroy both Delfina and your computer. Especially pay attention to the orientation of the
cable that connects the computer and the Delfina. This cable carries all signals, including power, and
improper alignment may result in power being routed to signal inputs of sensitive parts. Double-check
these connections, as a wrong connection can destroy both, Delfina and the computer.
Never install or remove any internal audio cables while the computer or the audio equipment is
powered on. This may result in peak loudness, destroying your amplifier or speakers.
Avoid installing or removing external audio cables while the computer is powered on. Cable installing
while your amplifier is on might damage your audio equipment.
We are not responsible for damages resulting from mishandling
Page 2
Introduction
Congratulations to purchasing your new Delfina sound card. The card merges crystal clear sound with
a powerful and freely programmable digital signal processor (DSP). We are certain you will discover its
power at home, in studio or in embedded applications. If you are a developer, you will soon notice how
easily Delfina can be utilized to achieve various effects requiring much processing power, even beyond
simple sound effects. The card is freely programmable for greatest possible versatility.
Please read this manual carefully before installing the card. The following chapter contains information
about how to handle your card in order to protect its circuits. Chapter Installing gives you the physical
installing instructions, chapter Software gives a clue in software installation, and chapter Insides
reveals some of Delfina’s inner workings.
Although this board has been re-developed from scratch, it’s very similar to the „classic“ Delfina cards.
All programs that have been written for the old Delfina (using delfina.library) will also work with this
board, because the library is nearly the same. However, using the new library with older cards is not
possible, because the new library requires the hardware improvements of the new card.
Installing
If your computer is powered on, turn it off. Open the Amiga case by removing the screws and lifting the
top cover and keyboard.
Ground yourself by touching a large metal object such as a radiator before taking the Delfina board in
your hands. Find a safe place inside your Amiga for the card. It is not physically mounted in a special
spot, so you have to take care of isolation against metal parts inside of your computer. Use a piece of
cardboard to cover the bottom of the board, and also protect all unused pin headers against shorts!
Pay special attention to aligning the cable to the clock port pins correctly. Some Amiga 1200 models
have clock slot connector wider than Delfina1200 connector; in that case be sure to use only the
rightmost pins of the clock port. You may have to cut off the other pins in order to make the cable fit.
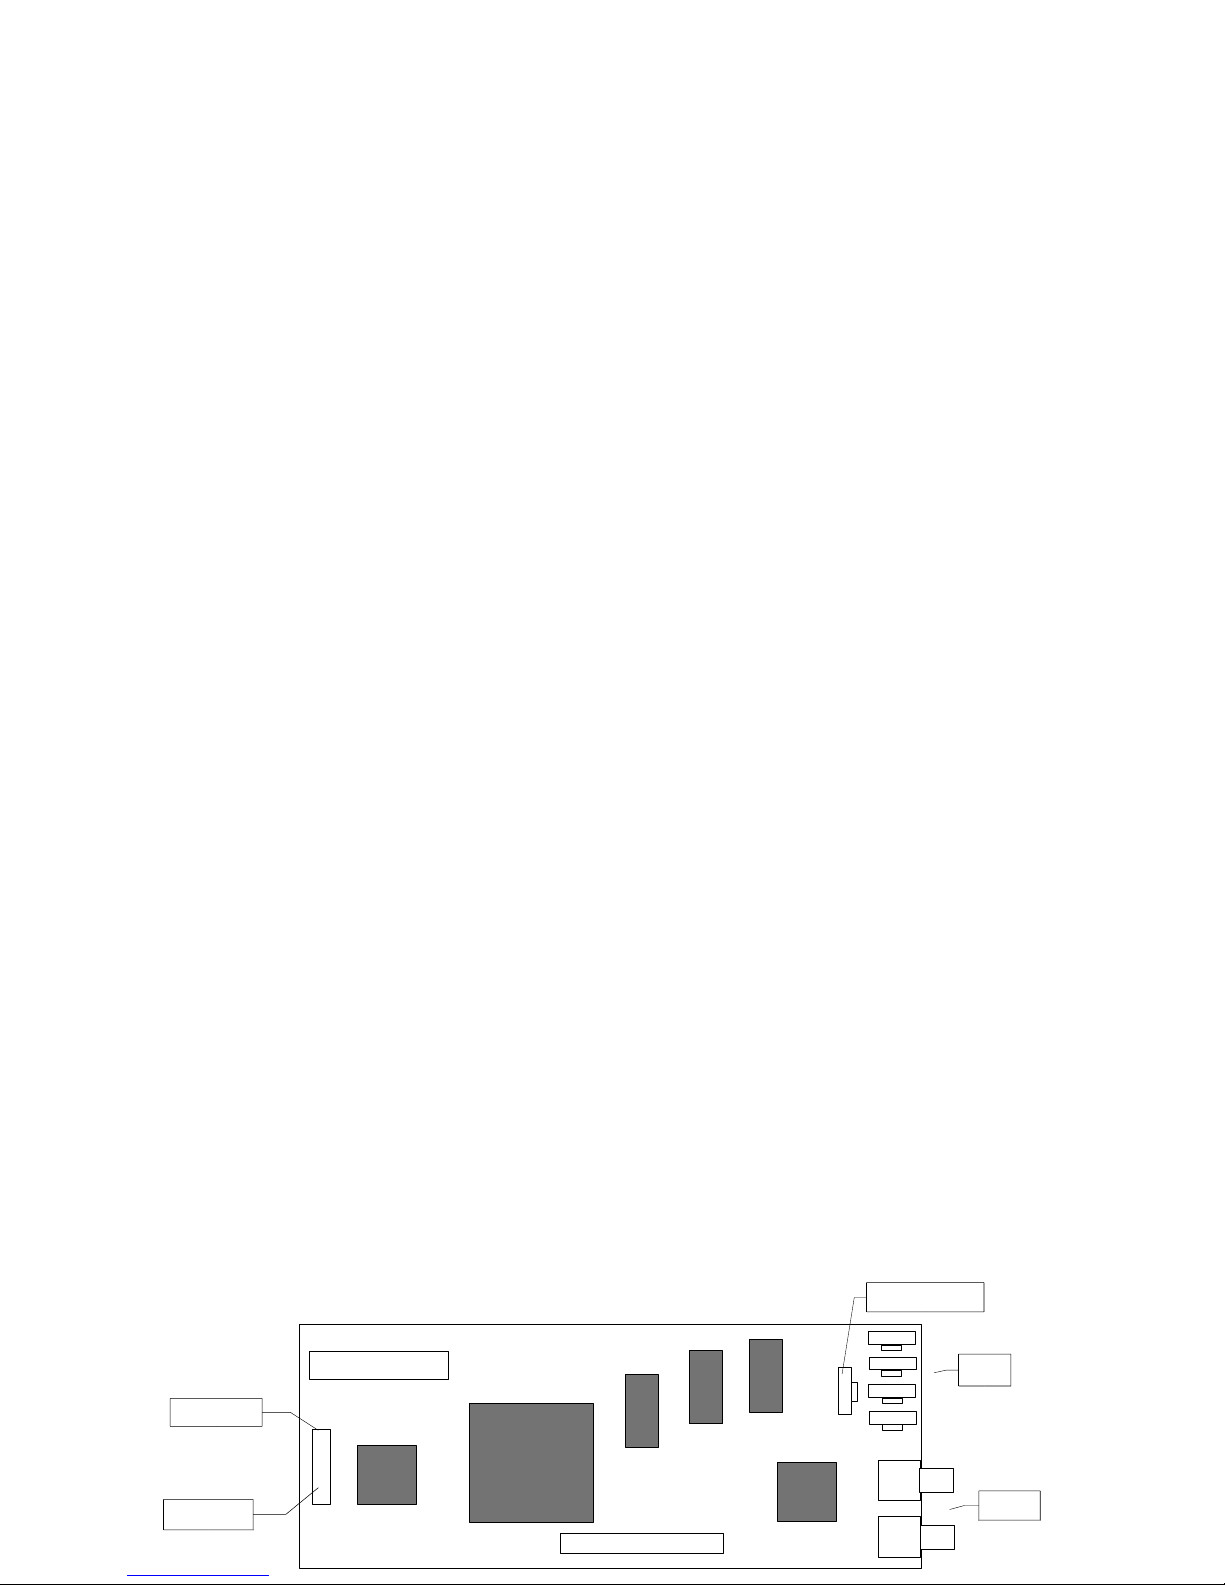
You won’t need the additional pins for anything. Consult the scheme for cable orientation, or check the
pictures in the online manual if you’re unsure which way round the connector must be placed.
Another common mistake is to only connect one of the two rows of the clock-port. This is as severe to
the Delfina as putting the cable the wrong way round, so double-check the connector before turning the
computer back on!
The red marker of the clockport cable must face towards the accelerator baord of the A1200 (away
from PCMCIA). On the Delfina, the red marker must face to the 26-pin connector (up, see diagram).
On an X-Surf Ethernet card, the red marker must face to the front of the computer. Same with the
Buddha Flash IDE controller and the VarIO interface board: The red marker of the clockport-cable
must face to the front of the computer.
Currently, the software does not support the 26-pin connector of the Delfina. Please consult the online
manual as soon as the new software is available - it will contain pictures that show the proper
connection. Special care must be taken with this cable, as it also carries 12V power, which could easily
harm the Delfina if it’s not connected properly.
Next connect the internal audio cables to Delfina if you have any (they are not included with the
board!). Internal audio cables and adapter cables are available in well-sorted PC shops. The Delfina
uses standard connectors, just like any modern CD drive or PC soundcard. Right and Left channel are
denoted on the board.
clock-port
red marker
outputs
inputs
internal output
Page 3

Software
Software installation is easy using the supplied installer. Delfina System Software includes a lot of
useful material in addition to the required libraries and Audio Hardware Interface driver. Please take
time to read the README files. On most occasions you can receive help with the HELP key.
Software includes the useful preferences/mixing program DelfPrefs, with which you may set volumes,
microphone amplifying etc. The most impressive program is DelFX, which can be used to record and
playback samples with versatile, impressive realtime effects that show off a small selection of the
Delfina’s capabilities.
Programs require MUI, which is included in the software package. You need to install it before using
any Delfina programs.
Delfina supports natively Amiga's Audio Hardware Interface (AHI), which is an API for audio
programming. Currently Delfina is the only sound card capable of producing multiple AHI program
outputs simultaneously.
Additional audio software support can be received with Delfina's toccata.library emulation. Note that
some older software uses undocumented functions of Toccata sound card and will not function
properly with Delfina1200.
Inside Delfina
Thanks to the Motorola 56002 DSP, Delfina really gives you more power in sound. The DSP is clocked
at 67,7MHz, resulting in up to more than 200 MOPS (million operations per second). For pure
calculation, the speed can be increased further, but sound input and output are inhibited during that
time (special development software required).
The Motorola DSP was choosed primarily for its unique programmability. Unlike many other DSP
circuits, which require expensive development tools, the 56002 is well suited for assembly
programming. Also the 24bit data bus is excellent for HI-FI audio applications.
The 56002 can access memory from 3 separate spaces: Program space (P), X data space (X) and Y
data space (Y). Each memory space can be at most 64 K-words, word length is 24 bits.
The 24bit zero wait state memory for DSP is provided with three SRAM chips, which all have capacity
of 32kB. The memory is divided to 2 equal size spaces, one of which can be addressed only in Y
space, the other being available to both P and X spaces. The division method or amount of total
memory is different with the different revisions of Delfina sound boards, so please use the supplied
library functions for determining the sizes and beginning addresses of free areas. For a quick view of
allocable memories in your Delfina sound card, try the DelfMem program at the command prompt.
Programming for the card can be done using the A56 compiler and the Delfina libraries supplied on the
Delfina System Software disks. Included are also programmer's help files and some example
programs in 56k assembly and C.
For more information, please refer to the DSP56002 User's Manual by Motorola and the help files.
Additional help can be found on Internet at Petsoff Limited Partnership's WWW page
http://www.petsoff.com
All technical support for the card is done by individual Computers, Jens Schönfeld. If you have any
questions, consult individual Computers first. It has been agreed between the cooperating parties that
the main part of the customer support is done by individual Computers, so please don’t cause us twice
the work by sending your requests to both companies at a time - thank you.
 Loading...