

Petsafe PIF00-15002, PIF00-15001 Operating Manual
Please read this entire guide before beginning
PIF00-15002
Free to Roam Wireless Fence
™
Wireless Collar
Operating Guide

1-800-732-26772
Thank you for choosing PetSafe® brand. You and your pet deserve
a companionship that includes memorable moments and a shared
understanding together. Our products provide you with the tools
and technologies to successfully train your pet. If you have any
questions about our products or training your pet, please visit our
website at www.petsafe.net or contact our Customer Care Center at
1-800-732-2677. To get the most protection out of your warranty, please
register your product within 30 days at www.petsafe.net. By registering
and keeping your receipt, you will enjoy the product’s full warranty
and should you ever need to call the Customer Care Center, we will
be able to help you faster. Most importantly, we will never give or sell
your valuable information to anyone. Complete warranty information is
available online at www.petsafe.net.
Fence installation and training help www.petsafe.net
Hereinafter Radio Systems Corporation, Radio Systems PetSafe Europe
Ltd., Radio Systems Australia Pty Ltd. and any other affiliate or Brand
of Radio Systems Corporation may be referred to collectively as
“We” or “Us”.
www.petsafe.net 3
Important Safety Information
Explanation of Attention Words and Symbols used in this guide
This is the safety alert symbol. It is used to alert you to potential
personal injury hazards. Obey all safety messages that follow
this symbol to avoid possible injury or death.
WARNING indicates a hazardous situation
which, if not avoided, could result in death or
serious injury.
CAUTION, used without the safety alert
symbol, indicates a hazardous situation which, if
not avoided, could result in harm to your pet.
NOTICE is used to address practices not
related to personal injury.
1-800-732-26774
• Not for use with aggressive dogs. Do not use this product if your dog
is prone to aggressive behavior. Aggressive dogs can cause severe
injury or death to their owners and others. If you are not sure that this
product is right for your dog, please talk to your veterinarian or a
certified trainer.
• Risk of explosion if battery is replaced by an incorrect type. Do not
short circuit, mix old and new batteries, dispose of in fire, or expose to
water. When batteries are stored or disposed, they must be protected
from shorting. Dispose of used batteries properly.
• This PetSafe® Free to Roam Wireless Fence™ system is NOT a solid
barrier. The system is designed to act as a deterrent to remind pets by
Static Correction to remain in the boundary established. It is important
that you reinforce training with your pet on a regular basis. Since
the tolerance level to Static Correction varies from pet to pet, Radio
Systems Corporation CANNOT guarantee that the system will, in all

www.petsafe.net 5
cases, keep a pet within the established boundary. Not all pets can
be trained to avoid crossing the boundary! Therefore, if you have
reason to believe that your pet may pose a danger to others or harm
himself if he is not kept from crossing the boundaries, you should NOT
rely solely upon the PetSafe Free to Roam Wireless Fence system to
confine your pet. Radio Systems Corporation shall NOT be liable
for any property damage, economic loss or any consequential
damages, sustained as a result of any animal crossing the boundary.
• Proper fit of the collar is important. A collar worn for too long or
made too tight on the pet’s neck may cause skin damage. Ranging
from redness to pressure ulcers; this condition is commonly known as
bed sores.
• Avoid leaving the collar on your pet for more than 12 hours per day.
• When possible reposition the collar on the pet’s neck every 1 to 2 hours.
• Check the fit to prevent excessive pressure; follow the instructions in
this manual.
• Never connect a lead to the electronic collar; it will cause excessive
pressure on the contacts.

1-800-732-26776
• When using a separate collar for a lead, don’t put pressure on the
electronic collar.
• Wash your pet’s neck area and the contacts of the collar weekly with
a damp cloth.
• Examine the contact area daily for signs of a rash or a sore.
• If a rash or sore is found, discontinue use of the collar until the skin
has healed.
• If the condition persists beyond 48 hours, see your veterinarian.
• For additional information on bed sores and pressure necrosis, please
visit our website.
• These steps will help keep your pet secure and comfortable. Millions
of pets are comfortable while they wear stainless steel contacts.
Some pets are sensitive to contact pressure. You may find after some
time that your pet is very tolerant of the collar. If so, you may relax
some of these precautions. It is important to continue daily checks of
the contact area. If redness or sores are found, discontinue use until
the skin has fully healed.

www.petsafe.net 7
• You may need to trim the hair in the area of the Contact Points. Never
shave your pet’s neck; this may lead to a rash or infection.
• Always remove your pet’s Receiver Collar before performing any
Transmitter testing.
• The Receiver Collar should not be on your pet when the system is
tested. Your pet may receive an unintended correction.
• The Boundary Zone must be tested whenever an adjustment is made
to the Transmitter setting to prevent unintended corrections to your pet.
• If you use a collar and leash for training, be sure the extra collar does
not put pressure on the contact points.
• To prevent an unintended correction, remove the Receiver Collar from
your pet when indoors.
• Never remove power from the system when the collar is on the pet.
This may activate the Receiver Collar.
• To prevent an unintended correction, after the Boundary Flags have
been placed, be sure to set the Static Correction on the Receiver
Collar back to Level 1 tone only.

1-800-732-26778
How the System Works
The PetSafe® Free to Roam Wireless Fence™ system has been proven safe,
comfortable, and effective for pets over 5 pounds. The system works by
transmitting a radio signal up to 90 feet in all directions. You temporarily
define the Pet Area with Boundary Flags for a visual aid in training your
pet. Your pet wears a Receiver Collar with Contact Points that touch his
neck, and, once trained, is allowed to roam freely in the Pet Area. When
your pet reaches the Boundary Zone, the Receiver Collar gives a warning
tone before delivering a safe Static Correction through the Contact Points
to get his attention until he returns to the Pet Area.
Key Definitions
Pet Area: Distance from the Transmitter where your pet can roam freely.
Boundary Zone: 2 to 3 foot wide area outside the Pet Area where
your pet’s Receiver Collar will begin to tone and then begin to deliver
a Static Correction. The correction will start in the Boundary Zone and
continue anywhere beyond the Pet Area.
Note: The Receiver Collar is equipped with a safety time-out feature that will
www.petsafe.net 9
stop correcting after 15 seconds if your pet remains outside the Pet Area.
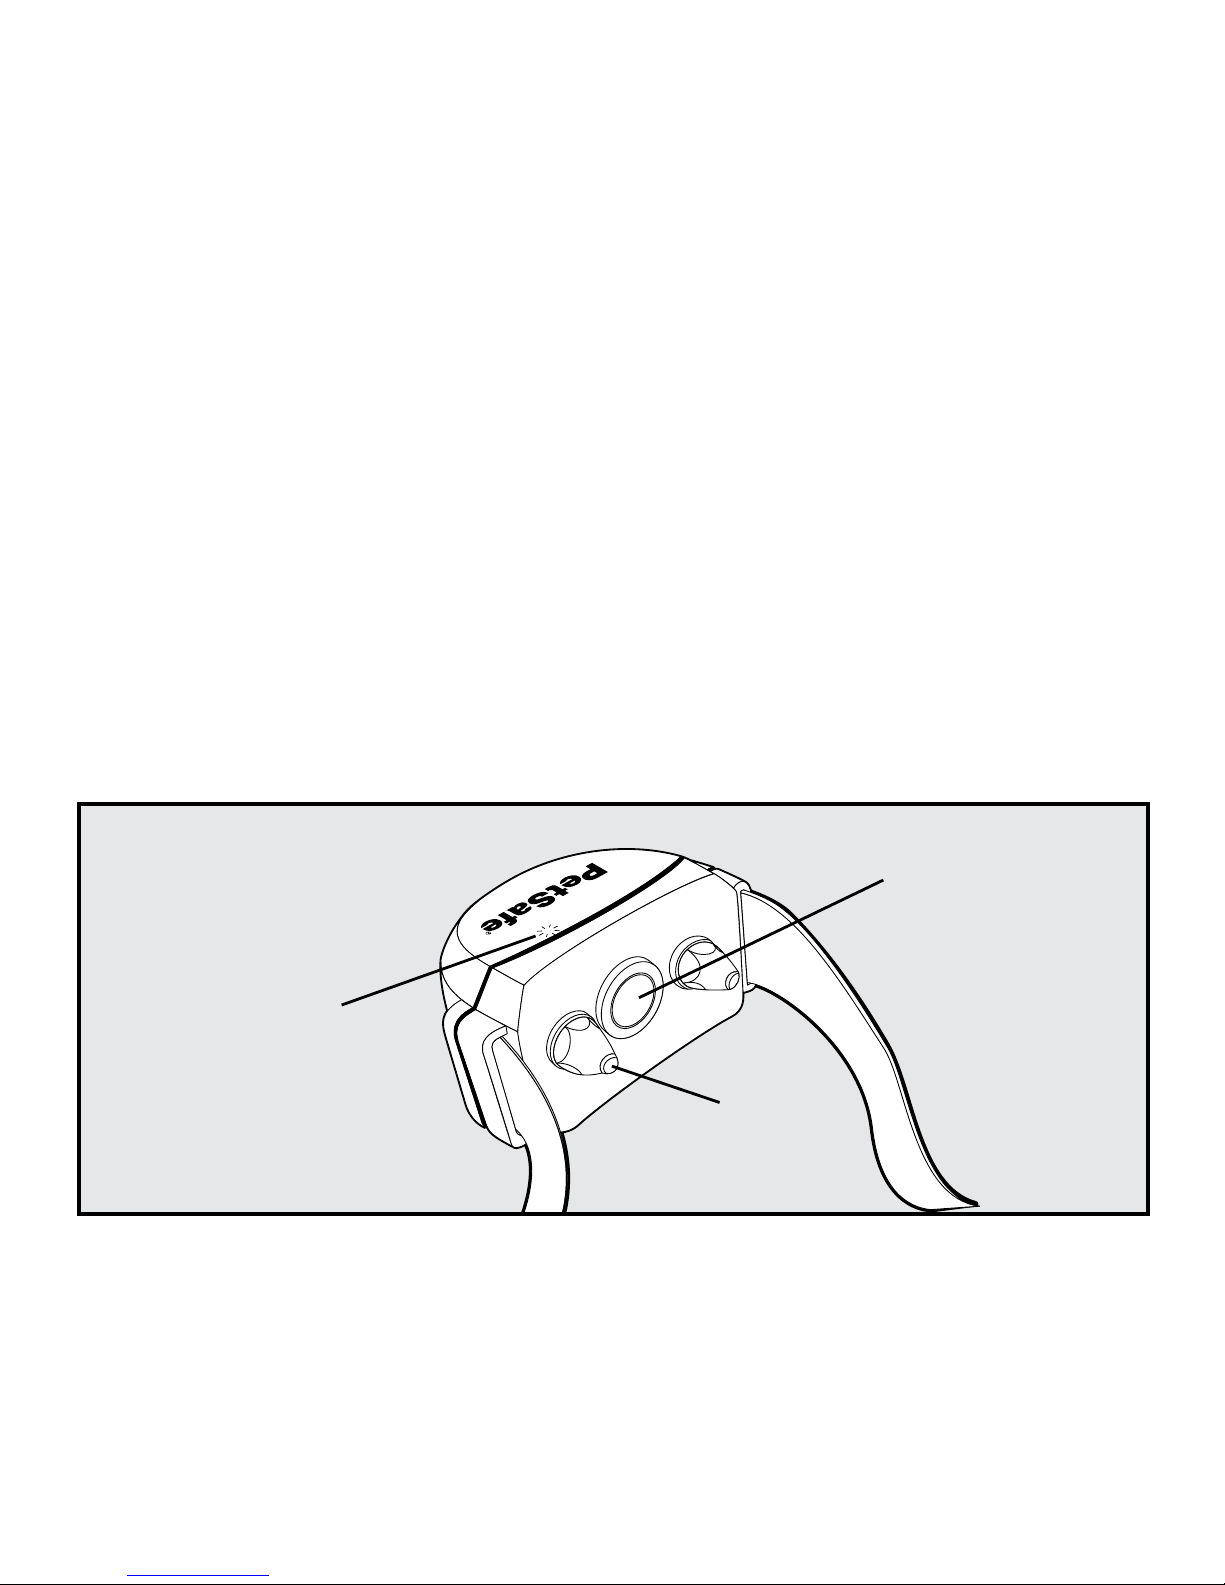
Receiver Collar: Receives the radio signal from the Transmitter.
Mode Button: Turns Receiver ON/OFF and adjusts the level of Static
Correction your pet receives outside the Pet Area.
Receiver Indicator Light: Indicates the level of correction at which
the Receiver Collar is set. This light also serves as a low battery indicator.
Contact Points: Deliver the safe Static Correction when your pet
moves into the Boundary Zone.
Contact
Point
Receiver
Indicator
Light
Mode
Button

1-800-732-267710
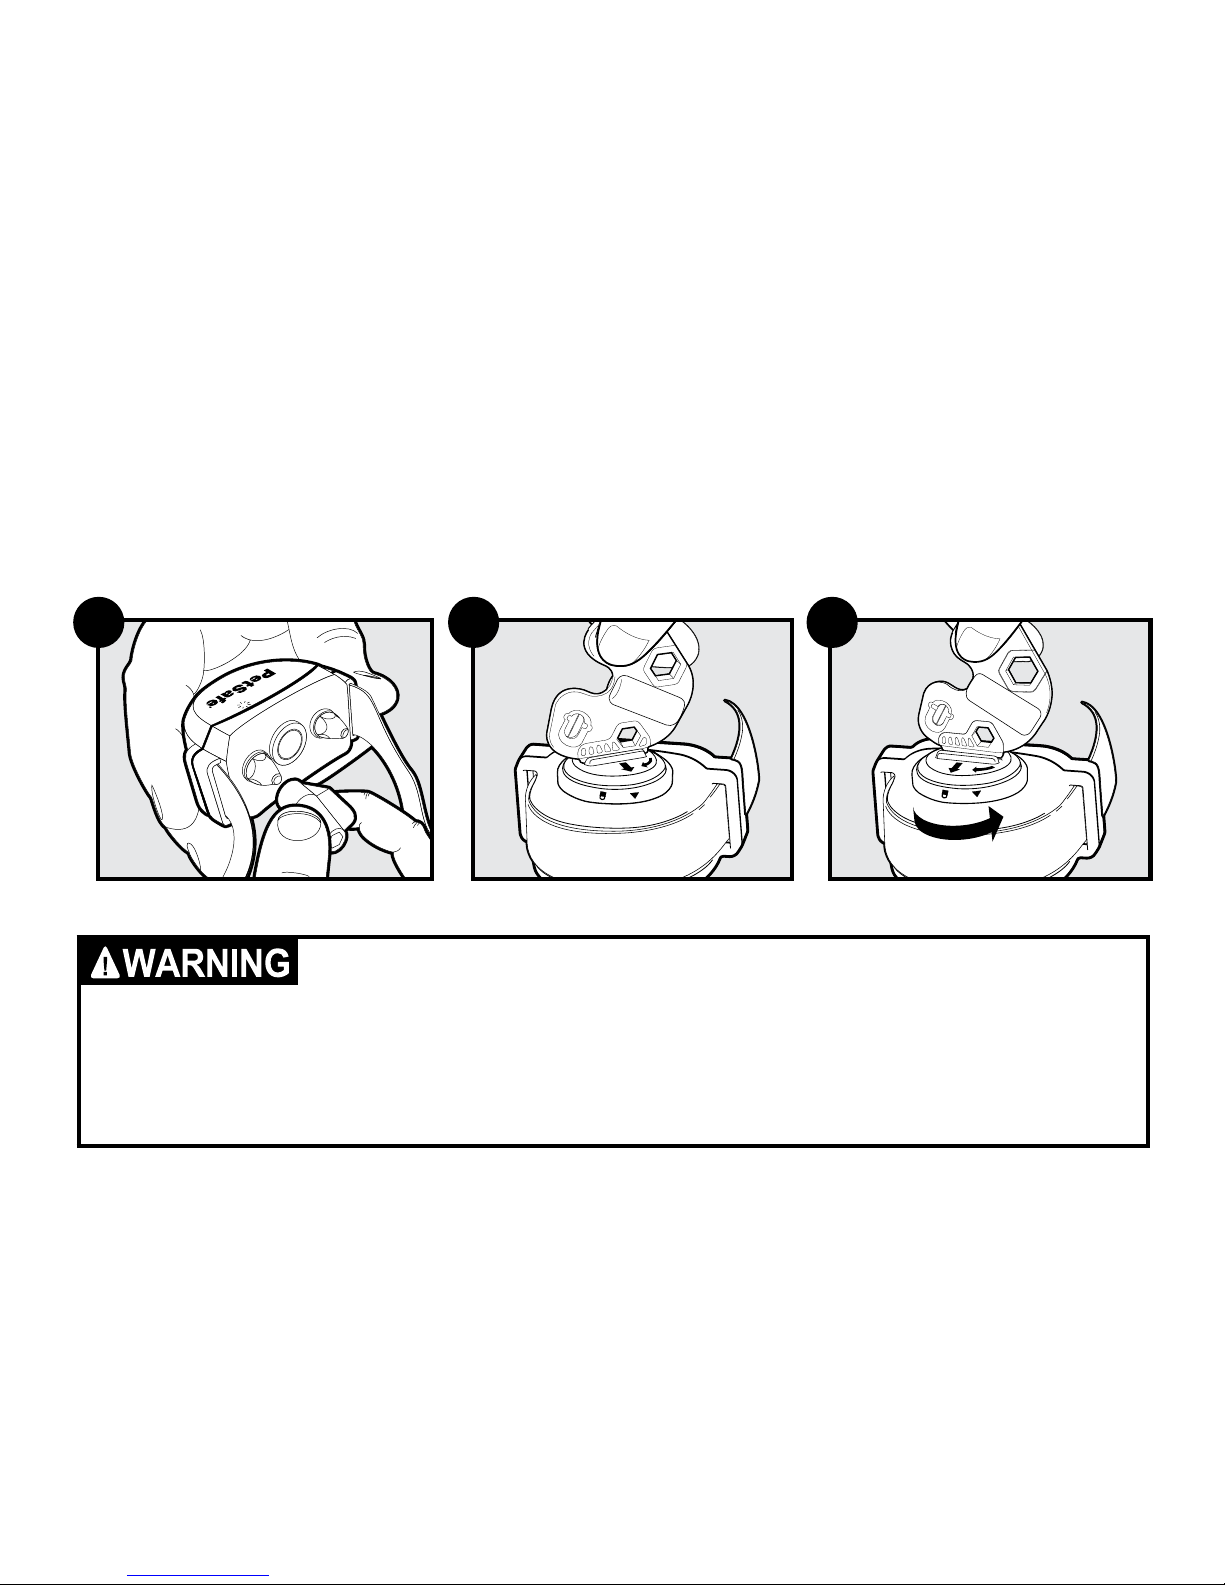
Step 1—Prepare the Receiver Collar
Your Receiver Collar comes with short Contact Points installed. Use the
Long Contact Points for pets with long or thick hair. Tighten the Contact
Points using the Contact Point Wrench (1A). Check tightness weekly.
Insert and Remove the Receiver Collar Battery
Note: Do not install the battery while the Receiver Collar is on your pet.
This Receiver Collar utilizes a replaceable PetSafe® battery (RFA-67).
This unique battery is designed to make battery replacement easier and
increase water protection. Once you insert the battery and turn it to the
lock position, the unit will be turned ON.
To insert the battery, align the symbols on the battery (arrow) and
Receiver Collar (triangle) (1B). Use the edge of the Test Light Tool (1B) to
turn the battery clockwise until the arrow lines up with the lock symbol on
the housing.
To remove the battery, turn the battery counter-clockwise using the edge
of the Test Light Tool (1C). DO NOT attempt to cut into or pry open the
battery. Be sure to discard the used battery properly.
www.petsafe.net 11
Note: Before replacing the battery, discharge all power by holding the
Mode Button at least 30 seconds until the LED is no longer illuminated.
A replacement PetSafe® battery (RFA-67) can be found at many retailers.
Contact the Customer Care Center at 1-800-732-2677 or visit our web
site at www.petsafe.net to locate a retailer near you.
Risk of explosion if batteries are replaced by an incorrect
type. Do not short circuit, mix old and new batteries,
dispose of in fire, or expose to water. When batteries are
stored or disposed, they must be protected from shorting.
Dispose of used batteries properly.
1A 1B 1C
1-800-732-267712
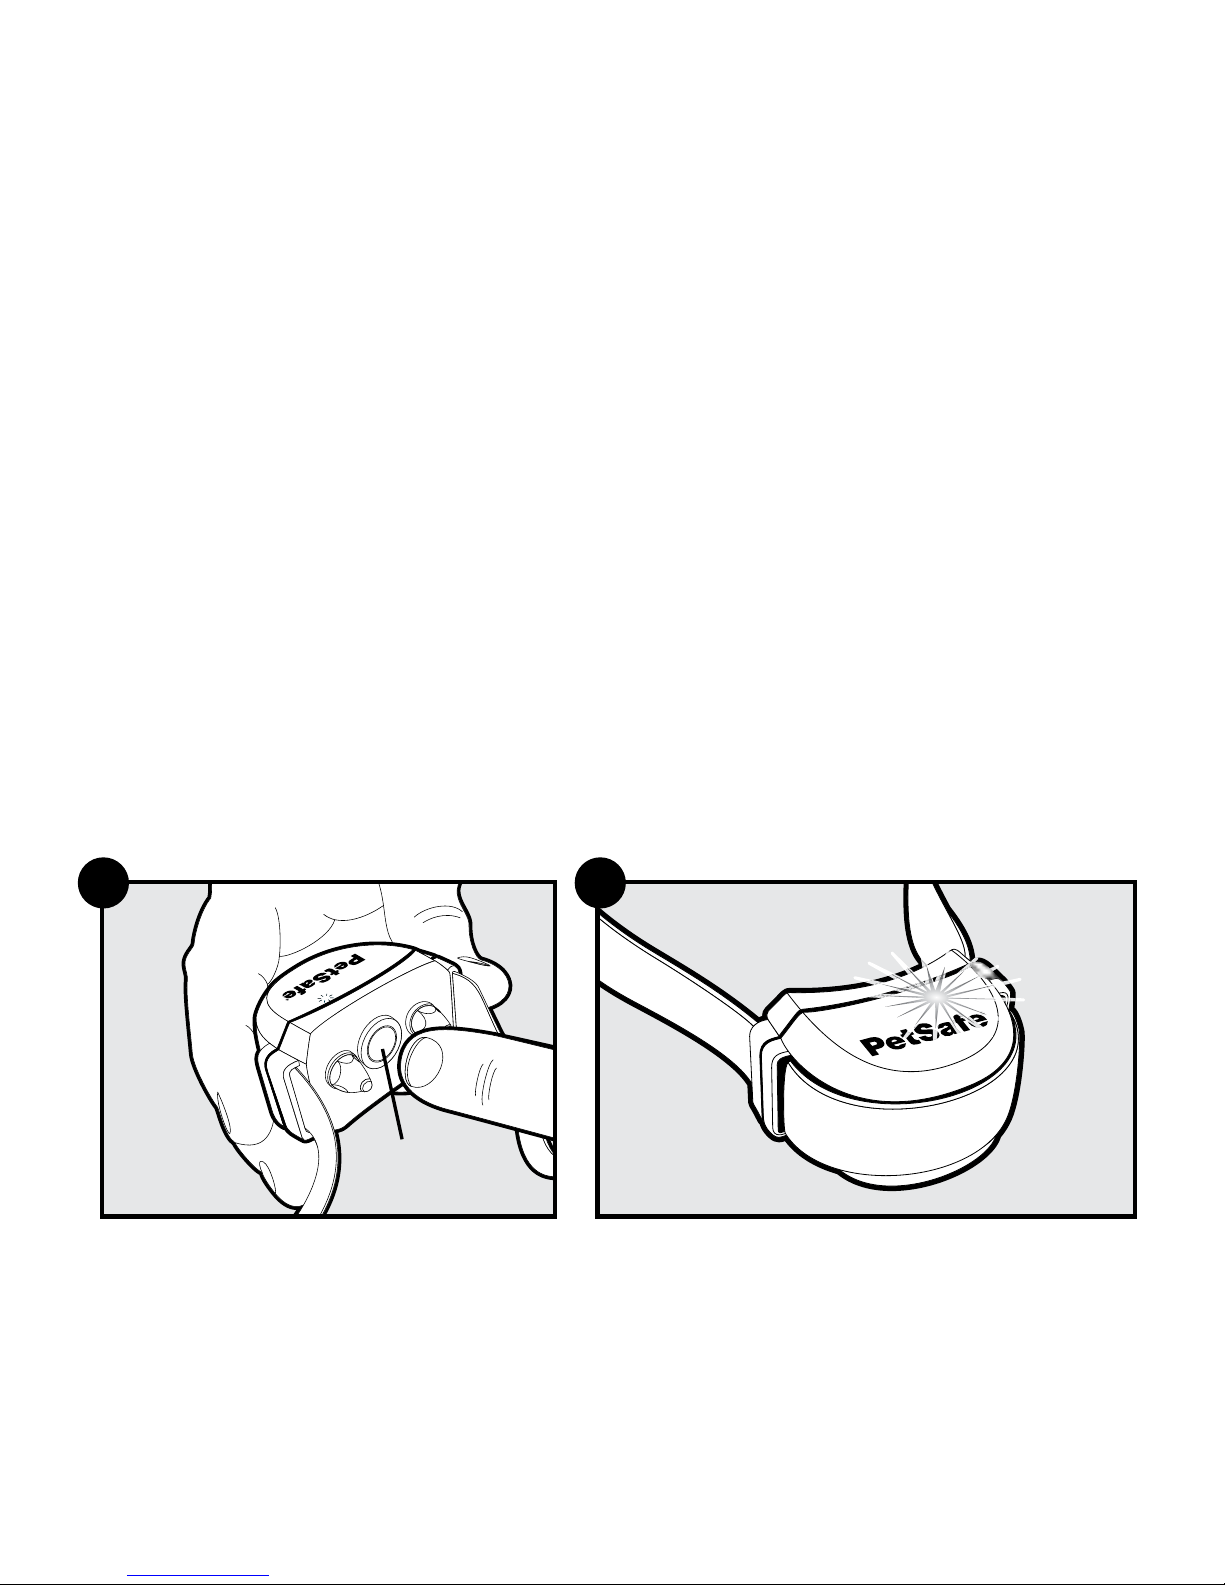
Turn the Receiver Collar ON
Press and hold the Mode Button continuously for 5 seconds (1D) The
green or red Receiver Indicator Light will turn ON for 5 seconds (1E)
to indicate battery status, followed by the red Receiver Indicator Light
flashing the Static Correction Level Settings.
Turn the Receiver Collar OFF
Press and hold the Mode Button continuously for 5 seconds. The red
Receiver Indicator Light will be ON during this time. The red Receiver
Indicator Light will then turn OFF and all Receiver Indicator Lights will stay
OFF indicating that the unit is turned OFF.
Mode
Button
1D 1E

www.petsafe.net 13
Set the Static Correction Level
Read all steps before attempting to set the Static Correction Level.
1. Press the Mode Button and release (1D) when the Receiver Indicator
Light illuminates Red (1E).
2. The Receiver Indicator Light will emit a series of red flashes
representing the Static Correction Level.
3. Increase the Static Correction Level by pressing and releasing the
Mode Button within 5 seconds of the previous series of flashes.
The Static Correction levels increase in strength from 1 to 6. Pushing
the Mode Button while the Receiver Collar is on Level 6 will cause the
Receiver Collar to revert to Level 1. Refer to the Function and Response
Table to choose the Static Correction level that best fits your pet.
1-800-732-267714
Receiver Collar Status Indicators
The Receiver Collar Status Indicator Light along with the Receiver Collar
Alarm Tone are used to determine the battery status, and the correction
type. Refer to the Receiver Collar Status Indicator Table below to
understand the status lights and tones for the Receiver Collar.
During normal operation, the Receiver Collar Indicator Light will flash for
the first 30 seconds after a battery is installed or the receiver is turned on
to indicate the battery status as shown in the table below.
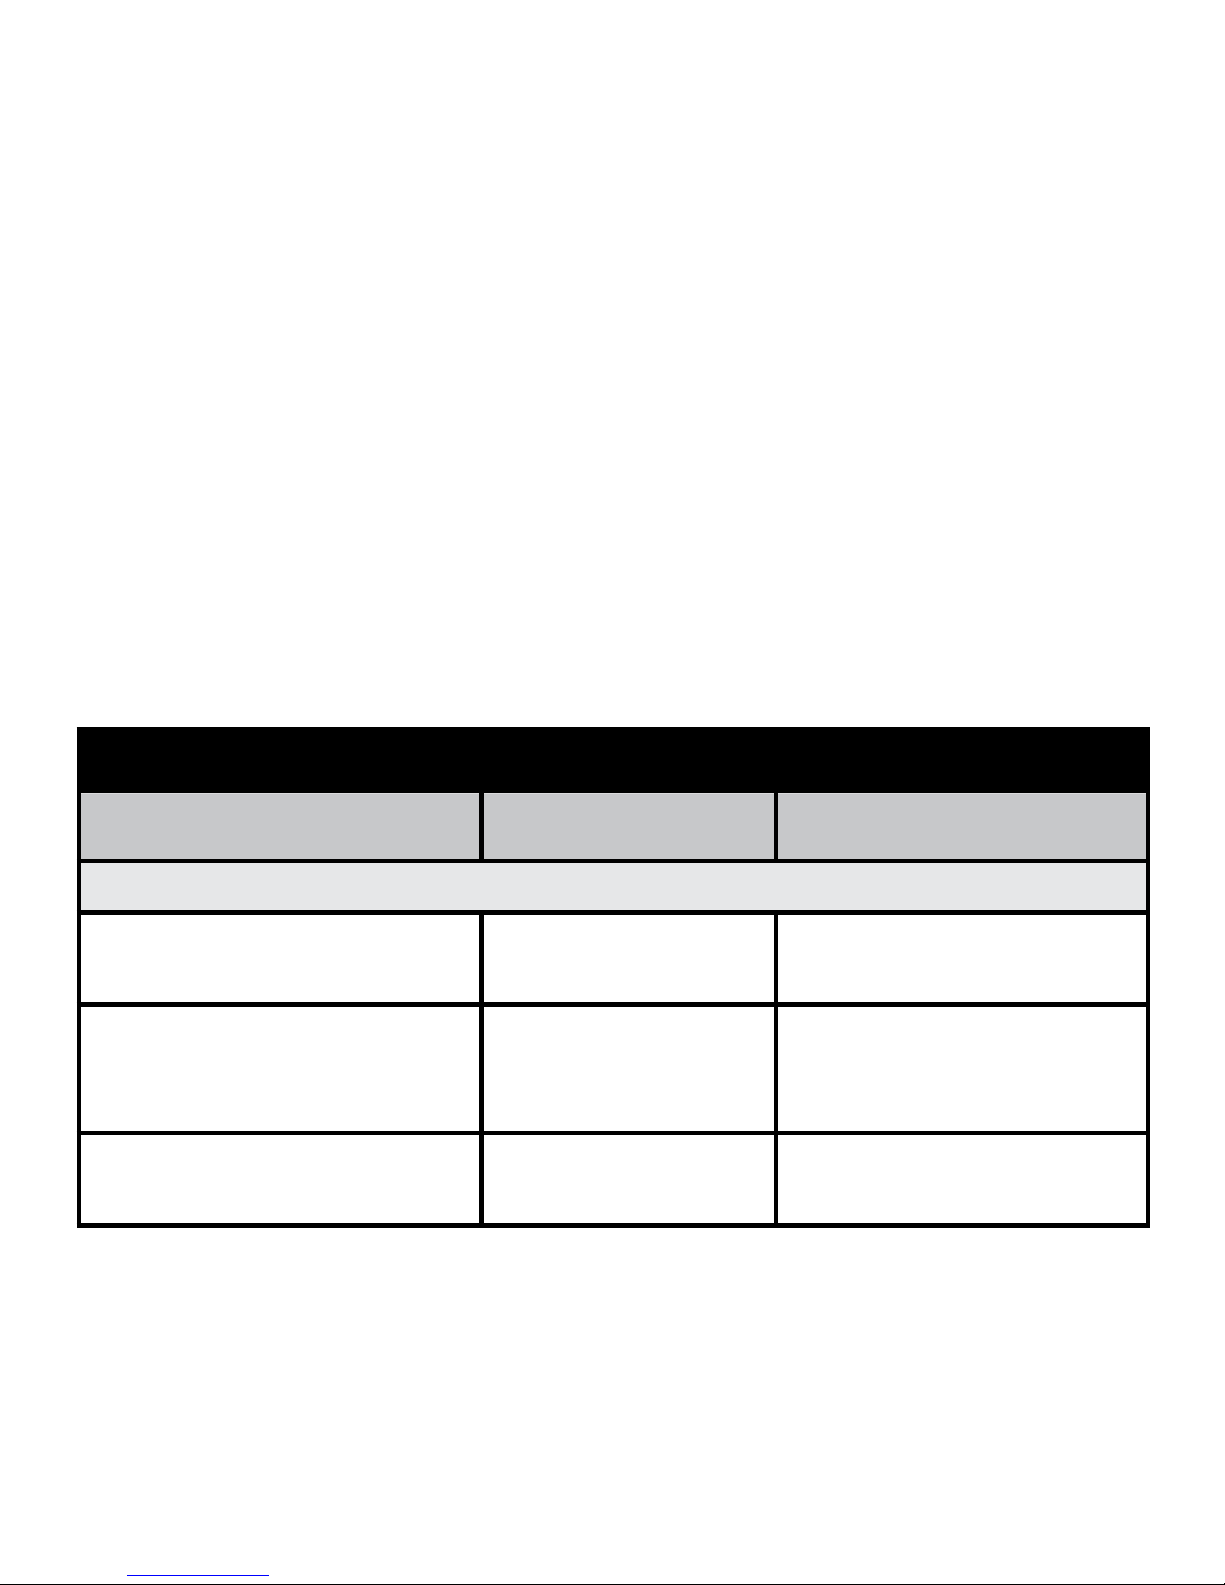
Receiver Collar Status Indicator Table
Status Light Alarm Tone Condition
Installing Battery and Turning Unit On
Continuous green or red
(5 seconds duration)
No Tone Indicates Battery Status
Slow blinking green every
4 to 5 seconds
(for the first 30 seconds)
No Tone Indicates Good Battery
Slow blinking red every
4 to 5 seconds
No Tone Indicates Low Battery
 Loading...