

Petsafe PDT19-16200 Operating Manual
PDT19-16200
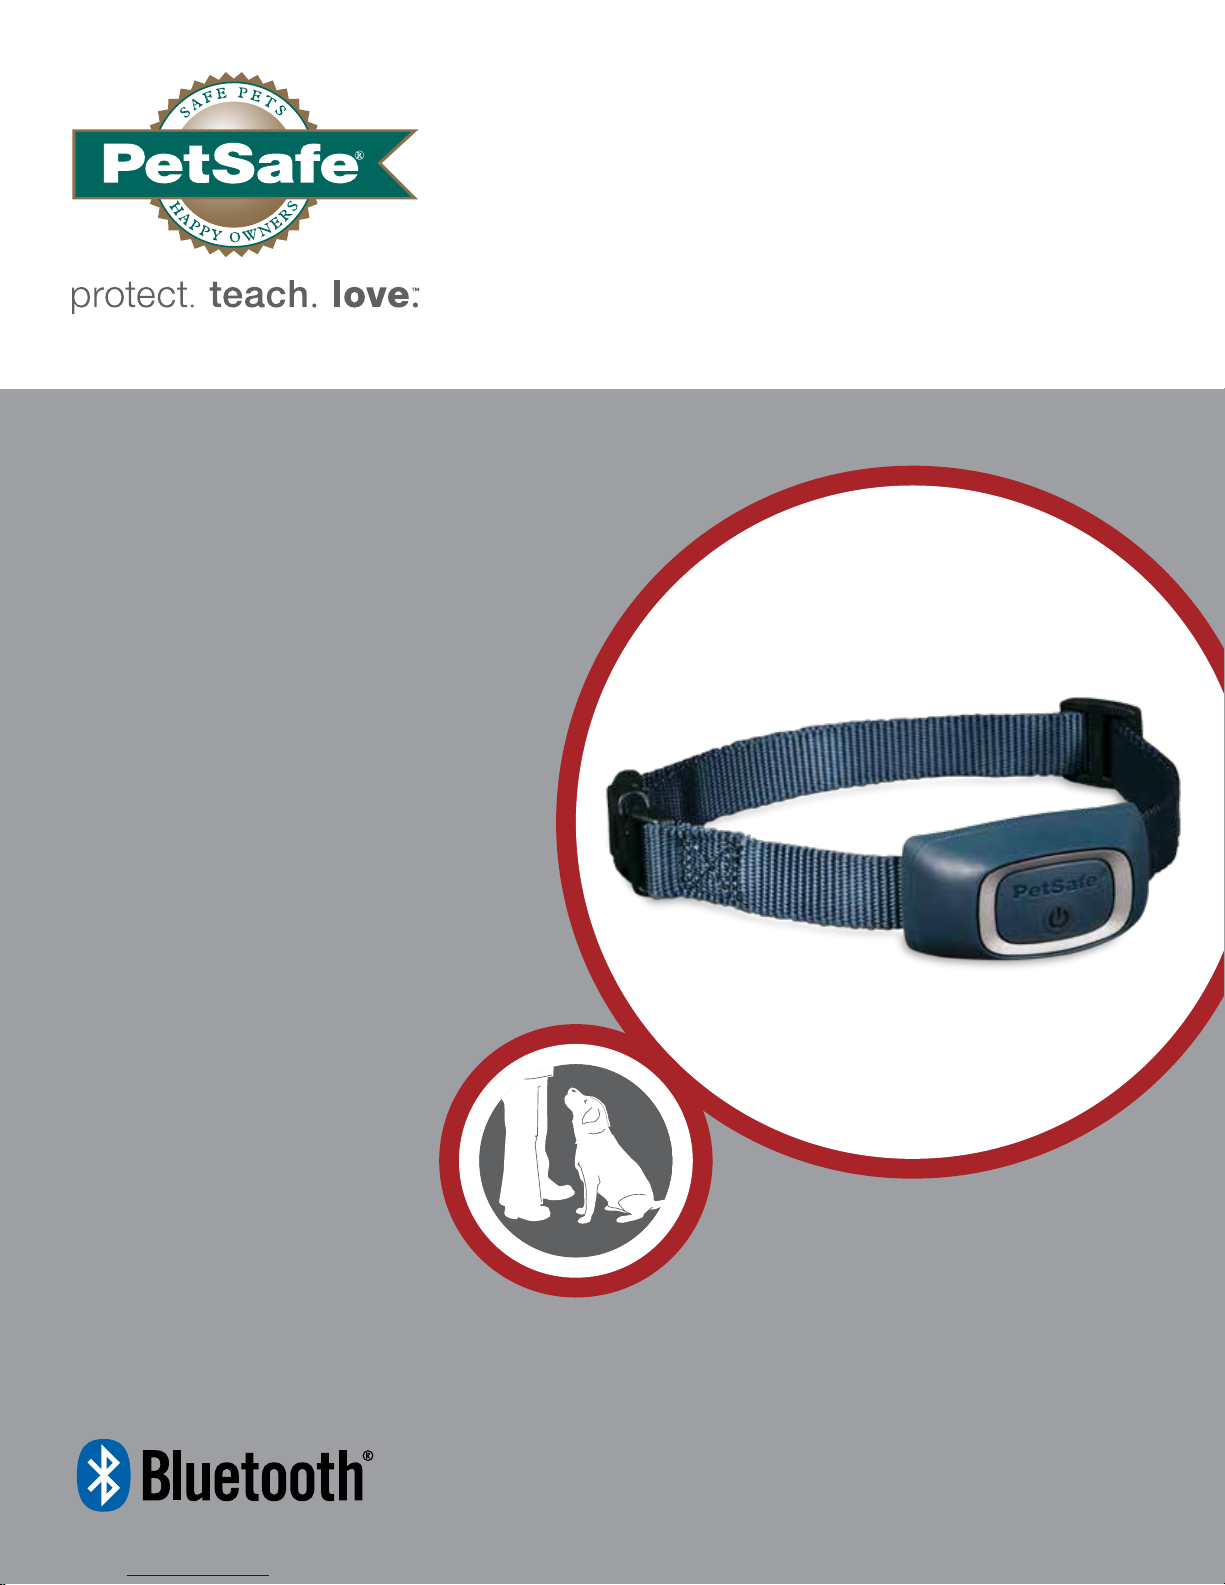
70 M SMART DOG™
Trainer
Operating Guide
Please read this entire guide before beginning
Hereinafter Radio Systems Corporation, Radio Systems PetSafe Europe Ltd., Radio Systems Australia Pty Ltd. and any other
affiliate or Brand of Radio Systems Corporation may be referred to collectively as “We” or “Us”.
Important Safety Information
Explanation of Attention Words and Symbols Used in this Guide
This is the safety alert symbol. It is used to alert you to potential personal injury hazards. Obey all safety
messages that follow this symbol to avoid possible injury or death.
WARNING indicates a hazardous situation which, if not avoided, could result in death or serious injury.
CAUTION, used with the safety alert symbol, indicates a hazardous situation which, if not avoided,
could result in minor or moderate injury.
CAUTION, used without the safety alert symbol, indicates a hazardous situation which, if not avoided,
could result in harm to your pet.
• Do not short circuit, dispose of in fire, or expose to water. When batteries are stored or disposed, they must be
protected from shorting. Dispose of used batteries properly.
• Not for use with aggressive dogs. Do not use this product if your dog is prone to aggressive behaviour. Aggressive
dogs can cause severe injury or death to their owners and others. If you are not sure that this product is right for your dog,
please talk to your veterinarian or a certified trainer.
• Safety during on-lead training: it is vitally important that you and your dog remain safe during on-lead training. Your
dog should be on a strong lead, long enough for him to attempt to chase an object, but short enough for him not to reach a
road or other unsafe area. You must also be physically strong enough to restrain your dog when he tries to chase.
• This pet training device is not a toy, keep away from children.
• Risk of skin damage: please read and follow the instructions in this guide. Proper fit of the collar is important. A collar
worn for too long or made too tight on the pet’s neck may cause skin damage. Ranging from redness to pressure ulcers; this
condition is commonly known as bed sores.
• Avoid leaving the collar on the dog for more than 12 hours per day.
• When possible, reposition the collar on the pet’s neck every 1 to 2 hours.
• Check the fit to prevent excessive pressure; follow the instructions in this guide.
• Never connect a lead to the electronic collar; it will cause excessive pressure on the contacts.
• When using a separate collar for a lead, do not put pressure on the electronic collar.
• Wash the dog’s neck area and the contacts of the collar weekly with a damp cloth.
• Examine the contact area daily for signs of a rash or a sore.
• If a rash or sore is found, discontinue use of the collar until the skin has healed.
• If the condition persists beyond 48 hours, see your veterinarian.
• For additional information on bed sores and pressure necrosis, please visit our website.
These steps will help keep your pet secure and comfortable. Millions of pets are comfortable while they wear stainless steel
contacts. Some pets are sensitive to contact pressure. You may find after some time that your pet is very tolerant of the collar. If
so, you may relax some of these precautions. It is important to continue daily checks of the contact area. If redness or sores are
found, discontinue use until the skin has fully healed.
The PetSafe
®
SMART DOG™ Trainer must be used only with healthy dogs. We recommend that you take your dog to a
veterinarian before using the product if he is not in good health.
Only let responsible family members use the SMART DOG
™
Trainer. It is not a toy.
www.petsafe.net2

Thank you for choosing the PetSafe® Brand. You and your pet deserve a companionship that includes memorable moments and
a shared understanding. Our products and training tools enhance the relationship between pets and their owners. If you have
any questions about our products or training your pet, please visit our website at www.petsafe.net or
contact our Customer Care Centre. For a listing of Customer Care Centre telephone numbers, visit our
website at www.petsafe.net.
To get the most protection out of your warranty, please register your product within 30 days at www.petsafe.net. By registering
and keeping your receipt, you will enjoy the product’s full warranty and should you ever need to call the Customer Care Centre,
we will be able to help you faster. Complete warranty information is available online at www.petsafe.net.
TABLE OF CONTENTS
COMPONENTS 4
OTHER ITEMS YOU MAY NEED 4
HOW THE SYSTEM WORKS 4
®
HOW BLUETOOTH
CONNECT THE TRAINING COLLAR WITH THE APP 5
APP ICON DEFINITIONS 5
FIT THE TRAINING COLLAR 6
WIRELESS TECHNOLOGY WORKS 4
CHARGE THE TRAINING COLLAR 6
STIMULATION METHODS 8
DOG TRAINING RECOMMENDATIONS 8
TRAINING GUIDE 8
MARKING POSITIVE BEHAVIOURS WITH TONE 9
FIND THE BEST STIMULATION LEVEL FOR YOUR PET 9
TEST THE TRAINING COLLAR 9
TEACHING BASIC OBEDIENCE 10
ELIMINATING UNWANTED BEHAVIOUR 11
FREQUENTLY ASKED QUESTIONS 13
RESETTING THE PIN 14
TEST LIGHT INSTRUCTIONS 14
BATTERY DISPOSAL 14
IMPORTANT RECYCLING ADVICE 15
COMPLIANCE 15
TERMS OF USE AND LIMITATION OF LIABILITY 15
WARRANTY 16
www.petsafe.net3
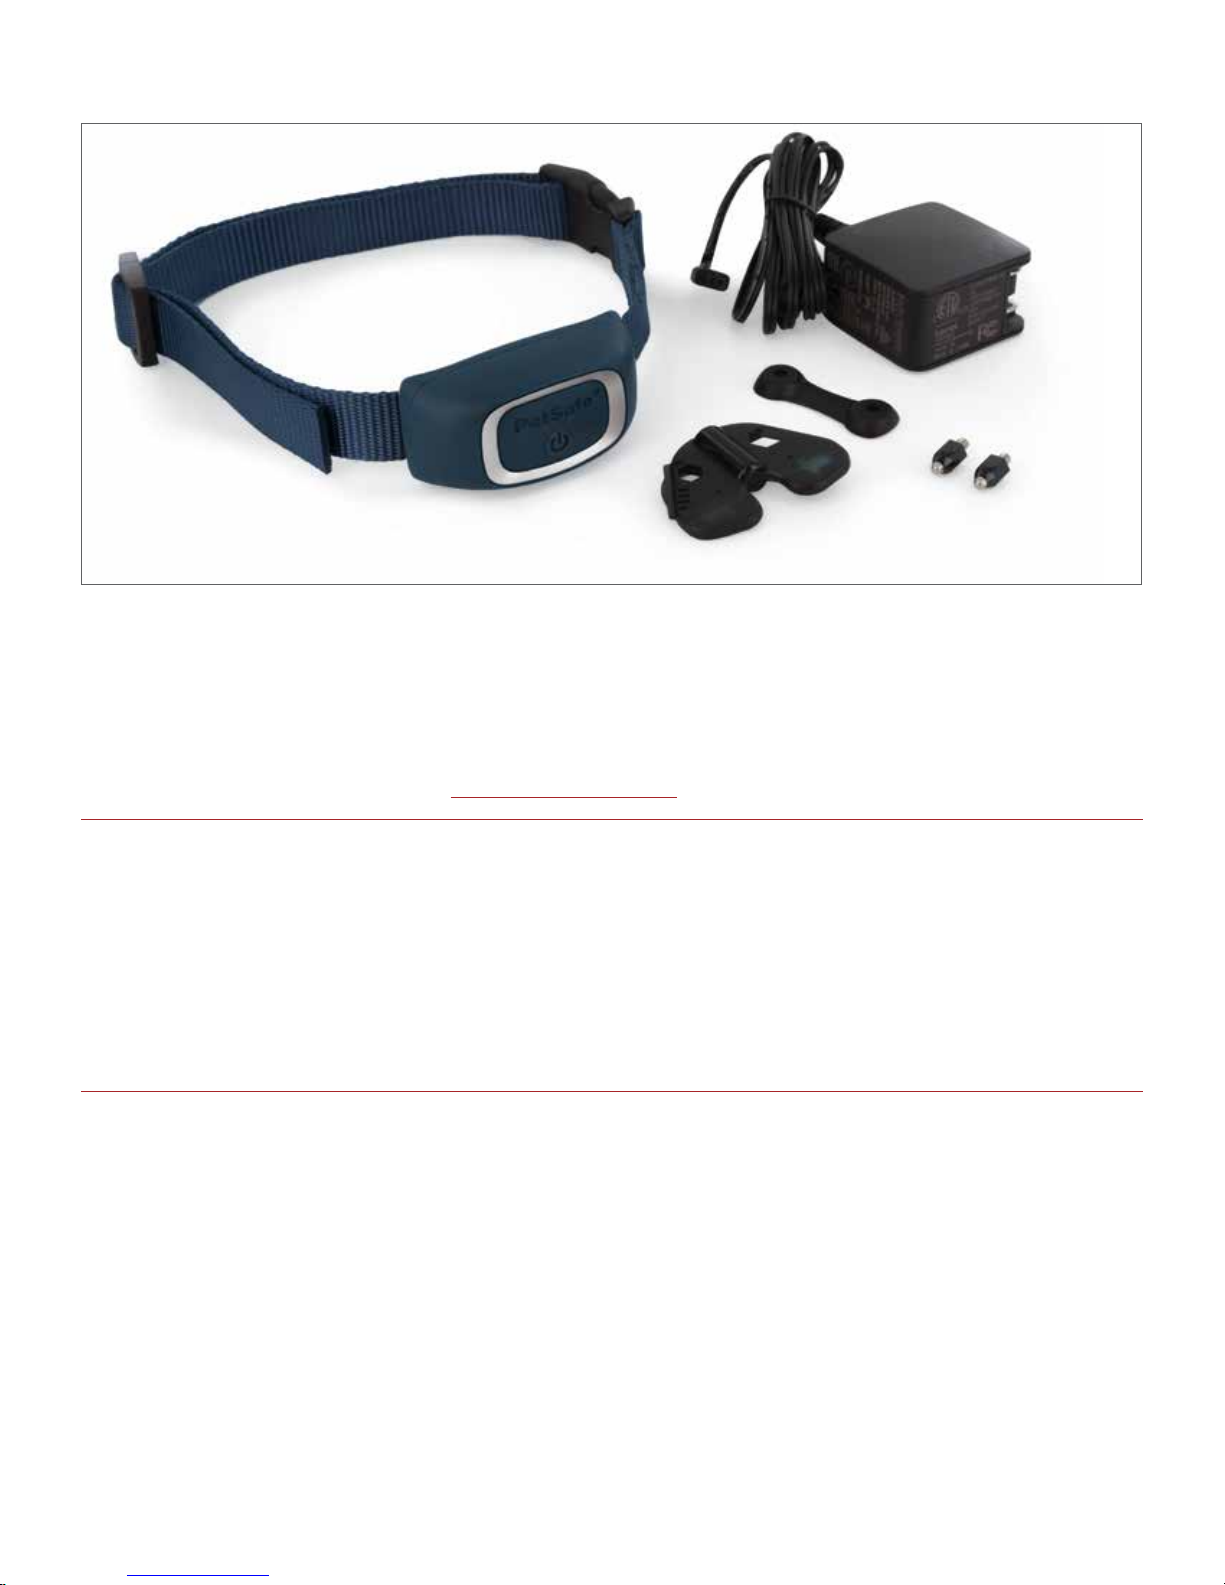
Components
Training Collar
with Short Contact Points
Test Light Tool
Other Items You May Need
• Bluetooth® 4.0 compatible phone with one of the following operating systems:
- iOS 8 or later
- Android
• Scissors to cut excess strap on the training collar
• Lighter to remove any frayed edges on the training collar
• Non-metallic collar and 3-metre lead for Teaching Basic Obedience
™
5 or later
Charging
Adaptor
Long Contact Points
How the System Works
The PetSafe® SMART DOG™ Trainer is the newest way to train your dog! The SMART DOG™ Trainer App turns your smartphone
into a remote, eliminating the need for the handheld remote used with most trainers. Using Bluetooth
your iPhone
®
or Android™ phone connects to the training collar and allows you to send a tone, vibration or static stimulation to
your dog from up to 70 metres away. This waterproof training collar is rechargeable so there is no need for buying batteries.
This training collar is the perfect match for pet parents who are in the process of training their dog and have a smartphone.
The SMART DOG
™
Trainer can be used to reinforce desirable behaviours and stop unwanted behaviours such as jumping,
digging, etc.
®
wireless technology,
How Bluetooth® Wireless Technology Works
The PetSafe SMART DOG™ Trainer uses Bluetooth® wireless technology to connect your smartphone to your SMART DOG™
training collar. With this combination, you have an easy, convenient way to communicate with your pet.
The SMART DOG
much longer range than standard Bluetooth
Ensure Bluetooth® Feature is Turned On:
Go to your smartphone settings and locate the settings for Bluetooth
™
Trainer uses low energy Bluetooth® technology. It is easy to use, and it does not use cellular data and has a
®
technology.
®
features and be sure it is turned on.
www.petsafe.net4
Connect the Training Collar with the App
1. Your training collar should be partially charged. You will want to fully Charge the Training Collar before beginning training.
Press and hold the on/off button to turn it on. You will hear a beep and the green LED will begin blinking. Your training collar
is now on.
2. Search for and download the free PetSafe
®
SMART DOG™ Trainer App, or use one of the links below.
3. Locate and open the app on your smartphone. Next, choose “Connect to a Collar” and the SMART DOG™ Trainer App will
locate your training collar. Press Connect.
4. Next, you will assign a PIN (personal identification number). This is a security feature to ensure that other devices will not
connect to your training collar. NOTE: The same PIN can be used on multiple phones in the same household. However, they
cannot be used simultaneously. The SMART DOG
5. Your SMART DOG
™
training collar and app are now ready to use. For easy access to your app, place it on the home screen
™
Trainer can only operate with one Bluetooth® connection.
of your smartphone.
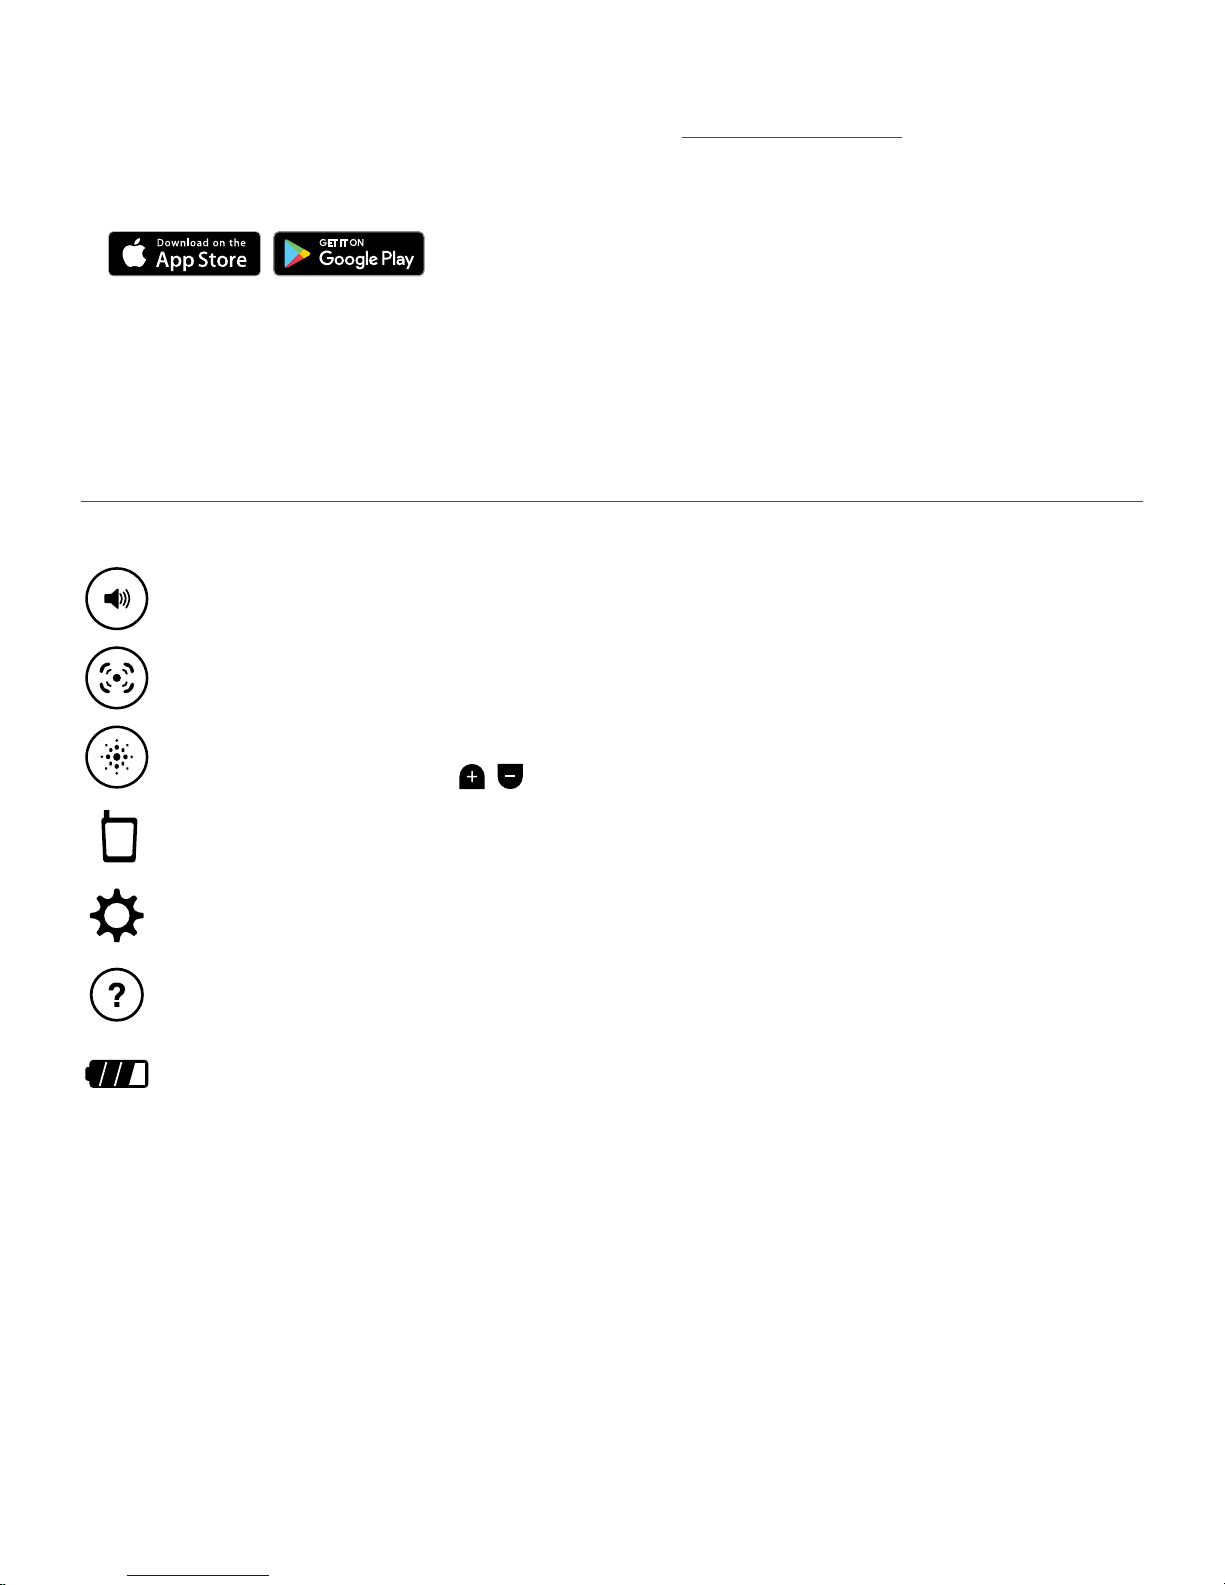
App Icon Definitions
Tone Button: Delivers a tone with non-adjustable volume to the training collar.
Vibration Button: Delivers 1 non-adjustable level of vibration stimulation to the training collar.
Static Button: Delivers 1–15 levels of static stimulation to the training collar that can be adjusted
with the Static Level Adjuster.
Remote Icon: The training buttons are displayed and ready to use. This icon also indicates that the app is connected
to the training collar.
Settings Icon: Allows you to change settings including button orientation and primary stimulation method.
Help Icon: Provides detailed SMART DOG™ Trainer App instructions, tips for training your dog and links to the
complete Operating Guide and training videos.
Training Collar Battery Indicator: Indicates the amount of battery life remaining in the training collar.
NOTE: To extend the battery life between charging cycles, turn the training collar off when it is not in use.
www.petsafe.net5
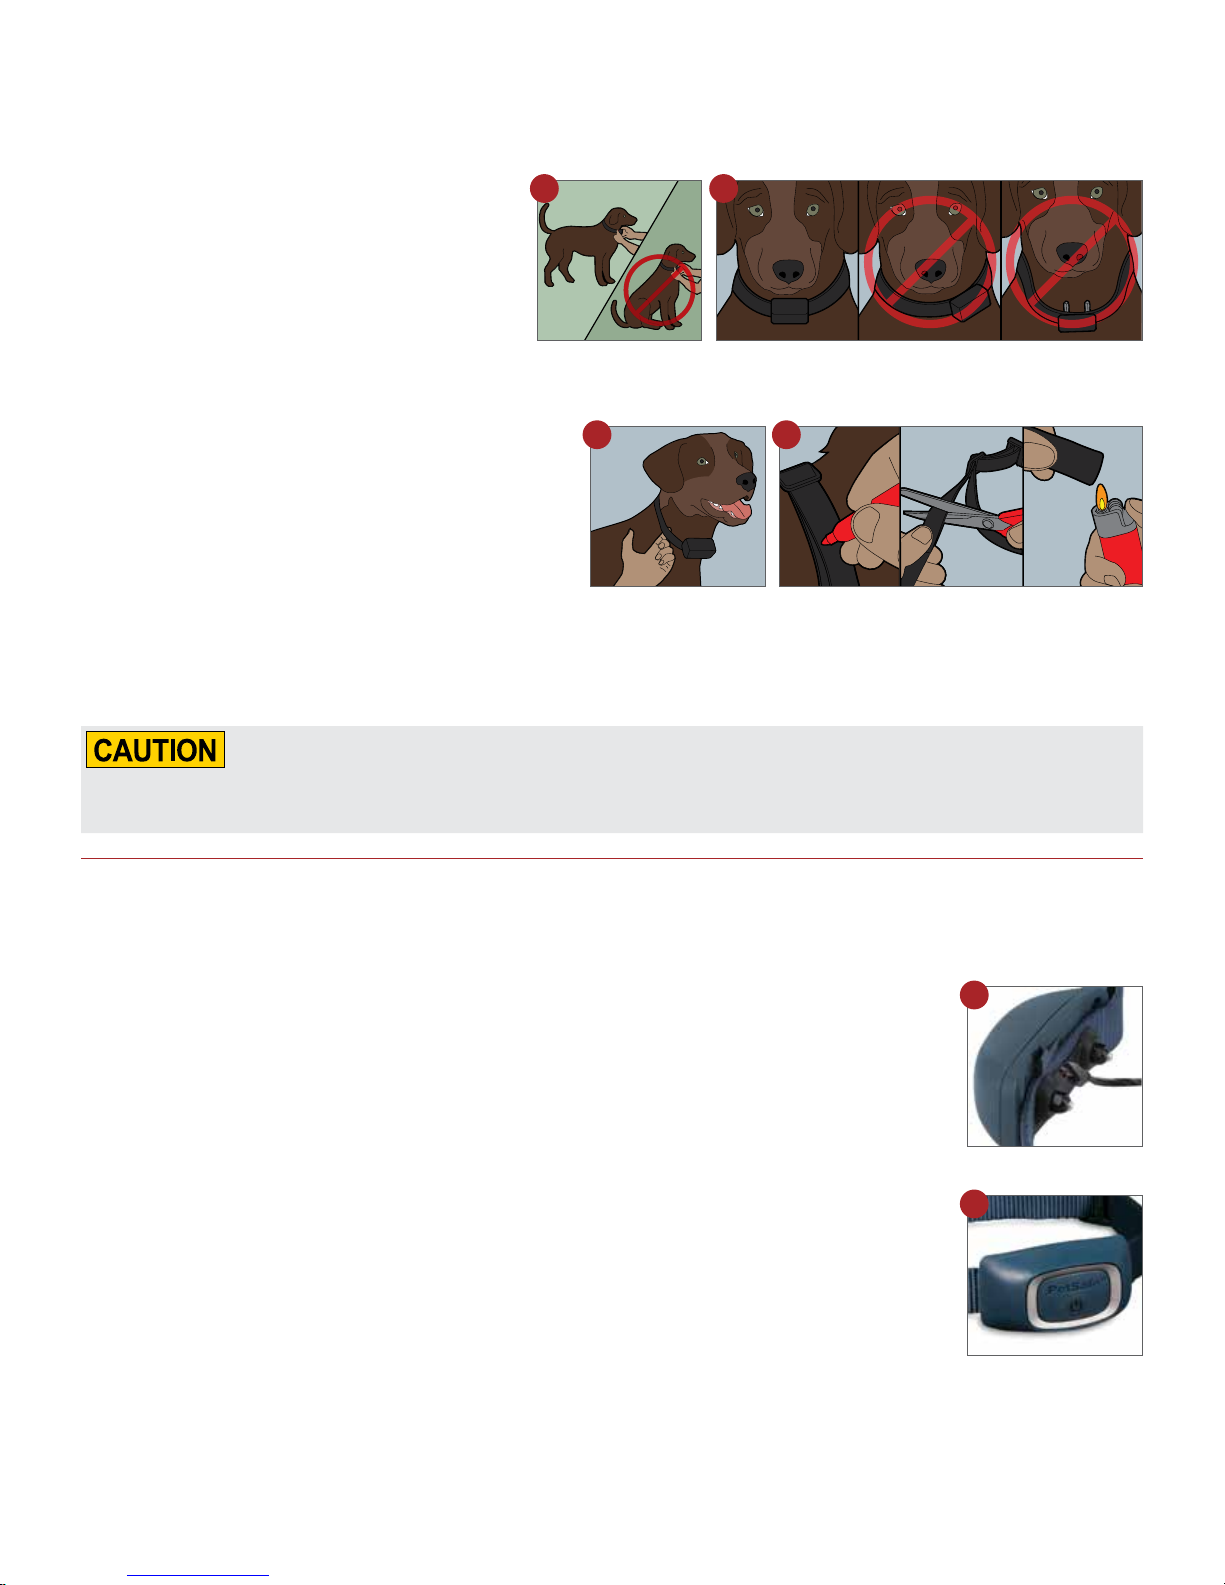
Fit the Training Collar
Important: The proper fit and placement of your training collar is important for effective operation.
The contact points must have direct contact with your dog’s skin on the underside of his neck.
To ensure a proper fit, please follow these steps:
1. Make sure that the training collar is turned off.
2. Start with your dog standing comfortably (A).
3. Place the training collar on your pet so that the
PetSafe
collar is directly under your dog’s chin. Centre the
contact points underneath your dog’s neck, touching the skin (B). NOTE: It is sometimes necessary to trim the hair around the
contact points to make sure that contact is consistent. We have also included longer contact points.
4. Check the tightness of the training collar by inserting
one finger between the end of a contact point and
your dog’s neck (C). The fit should be snug but
not constricting.
5. Allow your dog to wear the training collar for several
minutes, then recheck the fit. Check the fit again as your
dog becomes more comfortable with the training collar.
6. Trim the training collar as follows (D):
a. Mark the desired length of the training collar with a pen. Allow for growth if your pet is young or grows a thick winter coat.
b. Remove the training collar from your pet and cut off the excess and seal the edge of the cut collar by applying a flame
®
logo is right side up and the training
along the frayed edge.
A
C D
B
Do not shave the pet’s neck as this may increase the risk of skin irritation. The training collar should not be worn for more than
12 hours out of every 24-hour period. Leaving the training collar on too long could lead to skin irritation.
Charge the Training Collar
Excessive charging can shorten battery life. We do not recommend charging your training collar daily unless a low battery
indication is shown.
1. Lift the rubber cover protecting the training collar charging jack and connect the charger (E).
2. Plug the charger into a standard electrical wall outlet. The red LED will appear.
3. Recharges take no more than 5 hours. Although your training collar should be partially charged
upon purchase, you will want to fully charge it before beginning training. The green LED is solid after
charging is complete.
4. When the training collar is charged, replace the rubber cover.
To Turn the Training Collar On
1. Press and hold the on/off button (F) until you hear a low to high beep and the green LED appears,
and then release.
2. The green LED will flash once every 5 seconds. This indicates the training collar is on and ready to
receive a signal from your smartphone.
To Turn the Training Collar Off
1. Press and hold the on/off button until the training collar beeps high to low, and then release. The red
LED will be illuminated during the button press and will turn off when the training collar turns off.
E
F
Quick Tip: When you are not using the collar, you will want to turn it off. This will increase the battery life of your training collar.
www.petsafe.net6
 Loading...