

Petsafe PDBDT-300, 300 Series, PDLDT-300 Owner's Manual
Deluxe Remote Trainer
Owners Manual
Dresseur télécommandé de luxe
Mode d'emploi
Amaestrador a distancia de lujo
Manual del dueño
Deluxe Remote Trainer Owner’s Guide
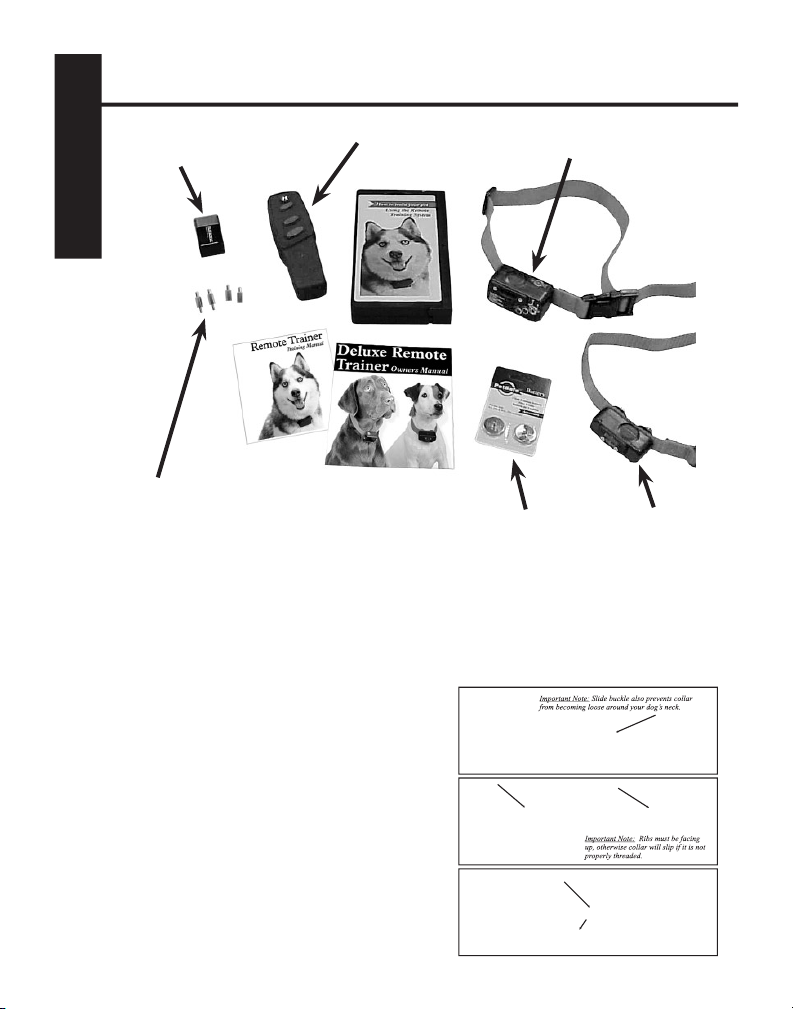
Identifying the Components
9V Alkaline
Battery (included)
Transmitter
Deluxe Big Dog Trainer
ENGLISH
Long and
Short Probes
Assemble Collar
To assemble the collar, first measure your pet’s neck, mark the appropriate
length, and cut off any excess material. Seal the edge of the cut by taking a
match or lighter and melt the frayed edge.
Note: When cutting off the excess collar, be sure to leave enough slack for
your dog’s growth.
Step 1: Thread slide buckle onto the
collar first. See Diagram 1.
3V Lithium
Batteries (included)
Deluxe Little
Dog Trainer
Diagram 1.
Step 2: Thread end of the collar up
through the buckle. See Diagram 2.
Diagram 2.
Step 3: Thread excess collar through the
slide buckle to hold it in place. This will
allow you to adjust your pet’s collar as he
2
grows. See Diagram 3.
Diagram 3.
When threading your collar through the clasp, loop it through the clasp
exactly as illustrated. Pull on the excess collar. If it slides at all, it was not
threaded correctly.
If your dog has long or thick hair, the longer probes might be more
effective in delivering the stimulation to your dog. If the dog still has trouble
feeling the stimulation even with the longer probes, the dog’s hair, in the
neck area, will need to be trimmed.
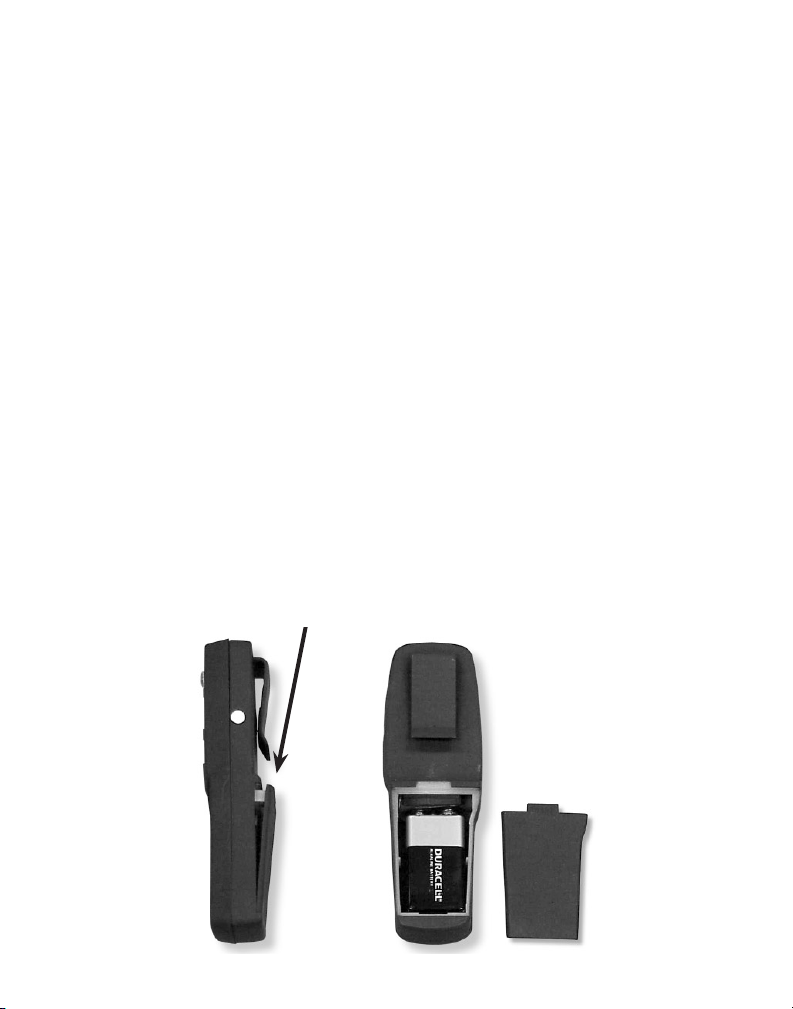
Install The Batteries in the Transmitter
The transmitter takes one (1) 9-Volt Alkaline battery. To install the
battery, follow the instructions listed below: (refer to figure 1)
• Place your finger on top of the "Pull" area of the battery door, located on
the backside of the transmitter.
• Remove the battery door by lifting up.
• Connect the battery and replace the battery door by placing the
bottom side of the battery door in first.
• To test battery, press any transmitter button. The light will glow red. If the
light does not glow or glows dimly, replace battery.
• You can expect a fresh battery to last about 4 months with average use.
“
Pull Area
up in order to insert the battery.
” Battery door must be lifted
figure 1
3
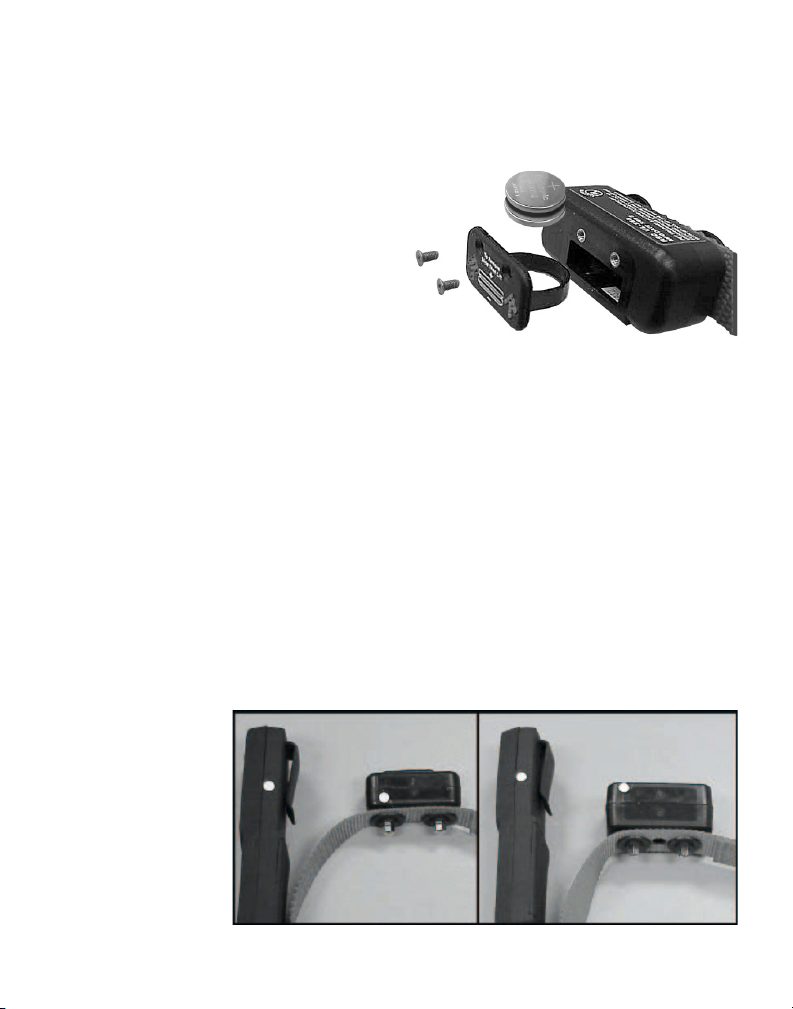
Install The Batteries in the Receiver
The receiver takes two (2) 3-Volt Lithium batteries (Model 2032).
To install, follow the instructions listed below:
• With a Philips screwdriver,
Positive “ +
” is up, negative
“ -
” is down.
remove the two screws located
on top of the receiver.
• Remove the battery door by sliding
the door up in the direction of the
arrows before sliding the door out.
Insert the two batteries into the battery
door as shown in the drawing.
• Insert battery door with batteries in
place by pushing the door in and then sliding it down in the opposite direction of
the arrows. Secure it with the two screws. Be sure to tighten the screws without
over tightening.
Turning the Deluxe Remote Trainer On/Off
To turn the receiver on, place the white dot on the transmitter unit against the white
dot of the receiver unit, hold them together for three (3) seconds, and separate. Upon
separating, the receiver will emit one short beep.
Note: If receiver does not beep, battery needs replacement. You can expect
a fresh battery to last about 4 months with average use.
Note: Once the receiver has been activated, the receiver must be manually
turned off by following the instructions shown below.
To turn the receiver off, place the white dot on the transmitter unit
against the white dot of the receiver unit, hold them together for three (3)
seconds, and
separate. Upon
separating, the
receiver will emit
a long beep
indicating the
unit has been
turned off.
4
Deluxe Little Dog Trainer
Deluxe Big Dog Trainer
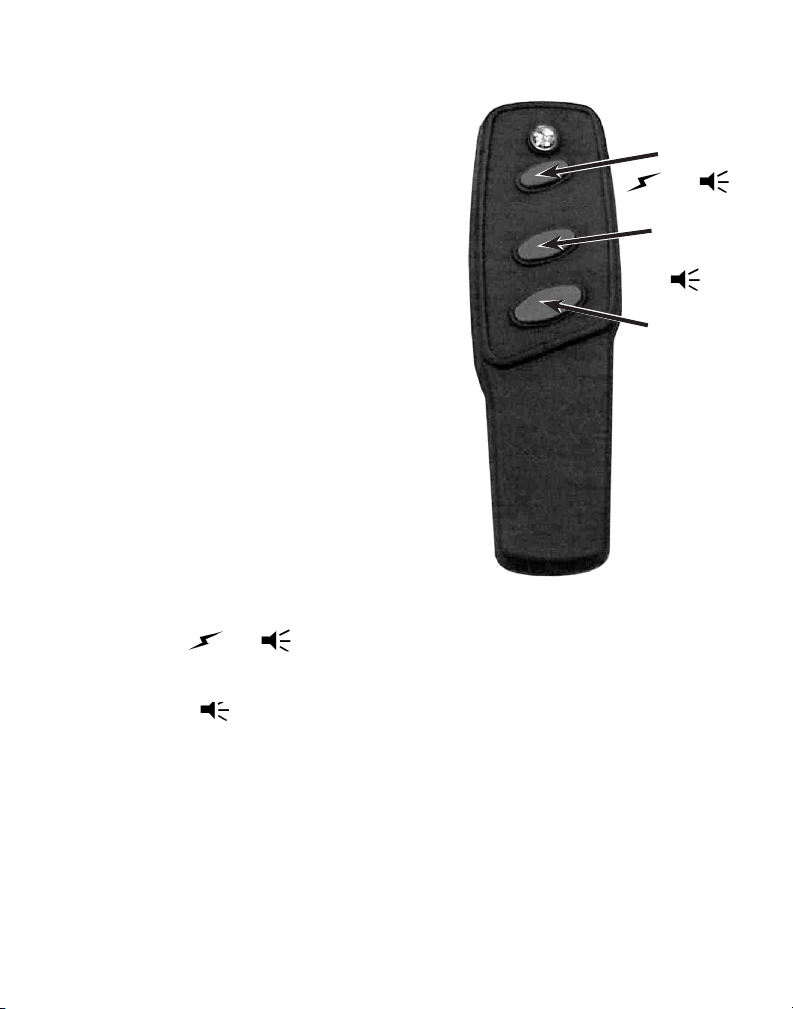
Setting the Stimulation Level and Using Your Trainer
To set the stimulation level, first turn on
the receiver, next, hold down the "Program"
button. After a few seconds, the receiver
will indicate the present stimulation level by
Stimulation
w/Tone
+
beeping one-to-eight times. For instance, for
level 1 (the lowest stimulation level) the
receiver will beep once. For level 8 (the
Warning
Tone Only
highest stimulation level) the receiver will
beep eight times.
Program
Continue to hold the "Program" button
down until the number of beeps equals the
Stimulation
Level
level of stimulation you want. After level 8,
the receiver will go back to level 1.
The receiver memory will hold the set
level whether the unit has been turned off or
when the batteries
are being replaced.
Once you have set the receiver to the desired stimulation level, you are
ready to begin training.
Press the "
+
" button to give your dog a stimulation along
with a warning tone.
Once your dog starts to associate the warning tone with the stimulation, you
can press the " " button to warn your dog that if the behavior does not
change, he will receive a stimulation. The tone, from pressing this button, is
exactly the same tone as pressing the "Stimulation w/Tone" button.
Note: Before you begin training with your new remote trainer, watch
the training video and read the training manual in its entirety.
Note: You can expect your deluxe trainer to operate within a range of
approximately 300 ft. Actual range may vary due to obstacles, terrain,
weather, etc. For best results your pet should be within voice range to
associate your commands with praise or stimulation.
5
 Loading...