

Petsafe Passport PPA19-20558 Operating Manual
Please read this entire guide after the Installation Guide
Veuillez lire l’intégralité de ce manuel après le guide d’installation
Lees deze handleiding helemaal door nadat u de montagehandleiding hebt gelezen
Lea esta guía en su totalidad después del Manual de instalación
Leggere attentamente la presente guida dopo il manuale di installazione
Lesen Sie die Gebrauchsanleitung vollständig nach der Montageanleitung
Operating Guide
Manuel d’utilisation
Gebruiksaanwijzing
Manual de adiestramiento
Guida all’uso
Betriebsanleitung
1000
Series
Série
Serie
Serie
Serie
Serie
Passport™ Intelligent Cat Flap
Passport
™
Chatière intelligente pour chat
Passport
™
intelligent kattenluik
Puerta inteligente para gatos Passport
™
Passport™ Porta intelligente per gatti
Passport
™
Intelligente Katzenklappe
PPA19-20558

ENES FRIT NLDE
2 www.petsafe.net
Table of Contents
PROGRAMMING PASSPORT™ INTELLIGENT CAT FLAP . . . . . . . . . . . . . . . . . . . . . . . . . . . . . . . . . . . . . . . . . . . . 3
Main Menu . . . . . . . . . . . . . . . . . . . . . . . . . . . . . . . . . . . . . . . . . . . . . . . . . . . . . . . . . . . . . . . . . . . . . . . 3
CAT FLAP SETTINGS . . . . . . . . . . . . . . . . . . . . . . . . . . . . . . . . . . . . . . . . . . . . . . . . . . . . . . . . . . . . . . . . . . 3
Flap Operational Modes . . . . . . . . . . . . . . . . . . . . . . . . . . . . . . . . . . . . . . . . . . . . . . . . . . . . . . . . . . . . . . . 3
Lock Keypad . . . . . . . . . . . . . . . . . . . . . . . . . . . . . . . . . . . . . . . . . . . . . . . . . . . . . . . . . . . . . . . . . . . . . . 4
Volume Control. . . . . . . . . . . . . . . . . . . . . . . . . . . . . . . . . . . . . . . . . . . . . . . . . . . . . . . . . . . . . . . . . . . . . 4
Date and Time . . . . . . . . . . . . . . . . . . . . . . . . . . . . . . . . . . . . . . . . . . . . . . . . . . . . . . . . . . . . . . . . . . . . . 4
Low Battery Mode . . . . . . . . . . . . . . . . . . . . . . . . . . . . . . . . . . . . . . . . . . . . . . . . . . . . . . . . . . . . . . . . . . . 5
Language . . . . . . . . . . . . . . . . . . . . . . . . . . . . . . . . . . . . . . . . . . . . . . . . . . . . . . . . . . . . . . . . . . . . . . . . 5
PET SETTINGS. . . . . . . . . . . . . . . . . . . . . . . . . . . . . . . . . . . . . . . . . . . . . . . . . . . . . . . . . . . . . . . . . . . . . . 5
Master Access . . . . . . . . . . . . . . . . . . . . . . . . . . . . . . . . . . . . . . . . . . . . . . . . . . . . . . . . . . . . . . . . . . . . . 5
Master Access Modes . . . . . . . . . . . . . . . . . . . . . . . . . . . . . . . . . . . . . . . . . . . . . . . . . . . . . . . . . . . . . . . . . 6
Timer Mode (Master Access) . . . . . . . . . . . . . . . . . . . . . . . . . . . . . . . . . . . . . . . . . . . . . . . . . . . . . . . . . . . . . 6
Re-latch Time (Master Access). . . . . . . . . . . . . . . . . . . . . . . . . . . . . . . . . . . . . . . . . . . . . . . . . . . . . . . . . . . . . 7
In-Tone & Out-Tone (Master Access) . . . . . . . . . . . . . . . . . . . . . . . . . . . . . . . . . . . . . . . . . . . . . . . . . . . . . . . . . 8
Add Pet . . . . . . . . . . . . . . . . . . . . . . . . . . . . . . . . . . . . . . . . . . . . . . . . . . . . . . . . . . . . . . . . . . . . . . . . . 8
INDIVIDUAL PET SETTINGS . . . . . . . . . . . . . . . . . . . . . . . . . . . . . . . . . . . . . . . . . . . . . . . . . . . . . . . . . . . . . 8
Pet Access (Individual Pet) . . . . . . . . . . . . . . . . . . . . . . . . . . . . . . . . . . . . . . . . . . . . . . . . . . . . . . . . . . . . . . . 9
Pet Access Mode (Individual Pet) . . . . . . . . . . . . . . . . . . . . . . . . . . . . . . . . . . . . . . . . . . . . . . . . . . . . . . . . . . . 9
Timer Mode (Individual Pet) . . . . . . . . . . . . . . . . . . . . . . . . . . . . . . . . . . . . . . . . . . . . . . . . . . . . . . . . . . . . . .10
Re-latch Time (Individual Pet) . . . . . . . . . . . . . . . . . . . . . . . . . . . . . . . . . . . . . . . . . . . . . . . . . . . . . . . . . . . . . 11
In-Tone & Out-Tone (Individual Pet) . . . . . . . . . . . . . . . . . . . . . . . . . . . . . . . . . . . . . . . . . . . . . . . . . . . . . . . . . . 11
Rename Pet . . . . . . . . . . . . . . . . . . . . . . . . . . . . . . . . . . . . . . . . . . . . . . . . . . . . . . . . . . . . . . . . . . . . . . . 11
Relearn Pet . . . . . . . . . . . . . . . . . . . . . . . . . . . . . . . . . . . . . . . . . . . . . . . . . . . . . . . . . . . . . . . . . . . . . . . 12
Remove Pet . . . . . . . . . . . . . . . . . . . . . . . . . . . . . . . . . . . . . . . . . . . . . . . . . . . . . . . . . . . . . . . . . . . . . . . 12
Pet Tracking . . . . . . . . . . . . . . . . . . . . . . . . . . . . . . . . . . . . . . . . . . . . . . . . . . . . . . . . . . . . . . . . . . . . . . .12
ASSISTANCE . . . . . . . . . . . . . . . . . . . . . . . . . . . . . . . . . . . . . . . . . . . . . . . . . . . . . . . . . . . . . . . . . . . . . . 13
Indicator Light. . . . . . . . . . . . . . . . . . . . . . . . . . . . . . . . . . . . . . . . . . . . . . . . . . . . . . . . . . . . . . . . . . . . . .13
Firmware Updates . . . . . . . . . . . . . . . . . . . . . . . . . . . . . . . . . . . . . . . . . . . . . . . . . . . . . . . . . . . . . . . . . . . 13
About . . . . . . . . . . . . . . . . . . . . . . . . . . . . . . . . . . . . . . . . . . . . . . . . . . . . . . . . . . . . . . . . . . . . . . . . . . 13
Serial Number . . . . . . . . . . . . . . . . . . . . . . . . . . . . . . . . . . . . . . . . . . . . . . . . . . . . . . . . . . . . . . . . . . . . . 13
Troubleshooting . . . . . . . . . . . . . . . . . . . . . . . . . . . . . . . . . . . . . . . . . . . . . . . . . . . . . . . . . . . . . . . . . . . . 14
Reset Button. . . . . . . . . . . . . . . . . . . . . . . . . . . . . . . . . . . . . . . . . . . . . . . . . . . . . . . . . . . . . . . . . . . . . . .15
Replacement Parts and Accessories . . . . . . . . . . . . . . . . . . . . . . . . . . . . . . . . . . . . . . . . . . . . . . . . . . . . . . . . . .15
Terms of Use and Limitation of Liability . . . . . . . . . . . . . . . . . . . . . . . . . . . . . . . . . . . . . . . . . . . . . . . . . . . . . . . . 15
Important Recycling Advice . . . . . . . . . . . . . . . . . . . . . . . . . . . . . . . . . . . . . . . . . . . . . . . . . . . . . . . . . . . . . .16
Battery Disposal . . . . . . . . . . . . . . . . . . . . . . . . . . . . . . . . . . . . . . . . . . . . . . . . . . . . . . . . . . . . . . . . . . . . 16
Compliance. . . . . . . . . . . . . . . . . . . . . . . . . . . . . . . . . . . . . . . . . . . . . . . . . . . . . . . . . . . . . . . . . . . . . . .16
Warranty . . . . . . . . . . . . . . . . . . . . . . . . . . . . . . . . . . . . . . . . . . . . . . . . . . . . . . . . . . . . . . . . . . . . . . . .16
DENL ITFR ESEN
www.petsafe.net 3
PROGRAMMING PASSPORT™ INTELLIGENT CAT FLAP
The default factory settings programmed for your Cat Flap can be customised to work for you and your pet(s). Programming the Cat Flap can
be done by using the Cat Flap Control Panel or the Computer Application. To use the Computer Application, please see “Connecting Cat Flap
toComputer”.
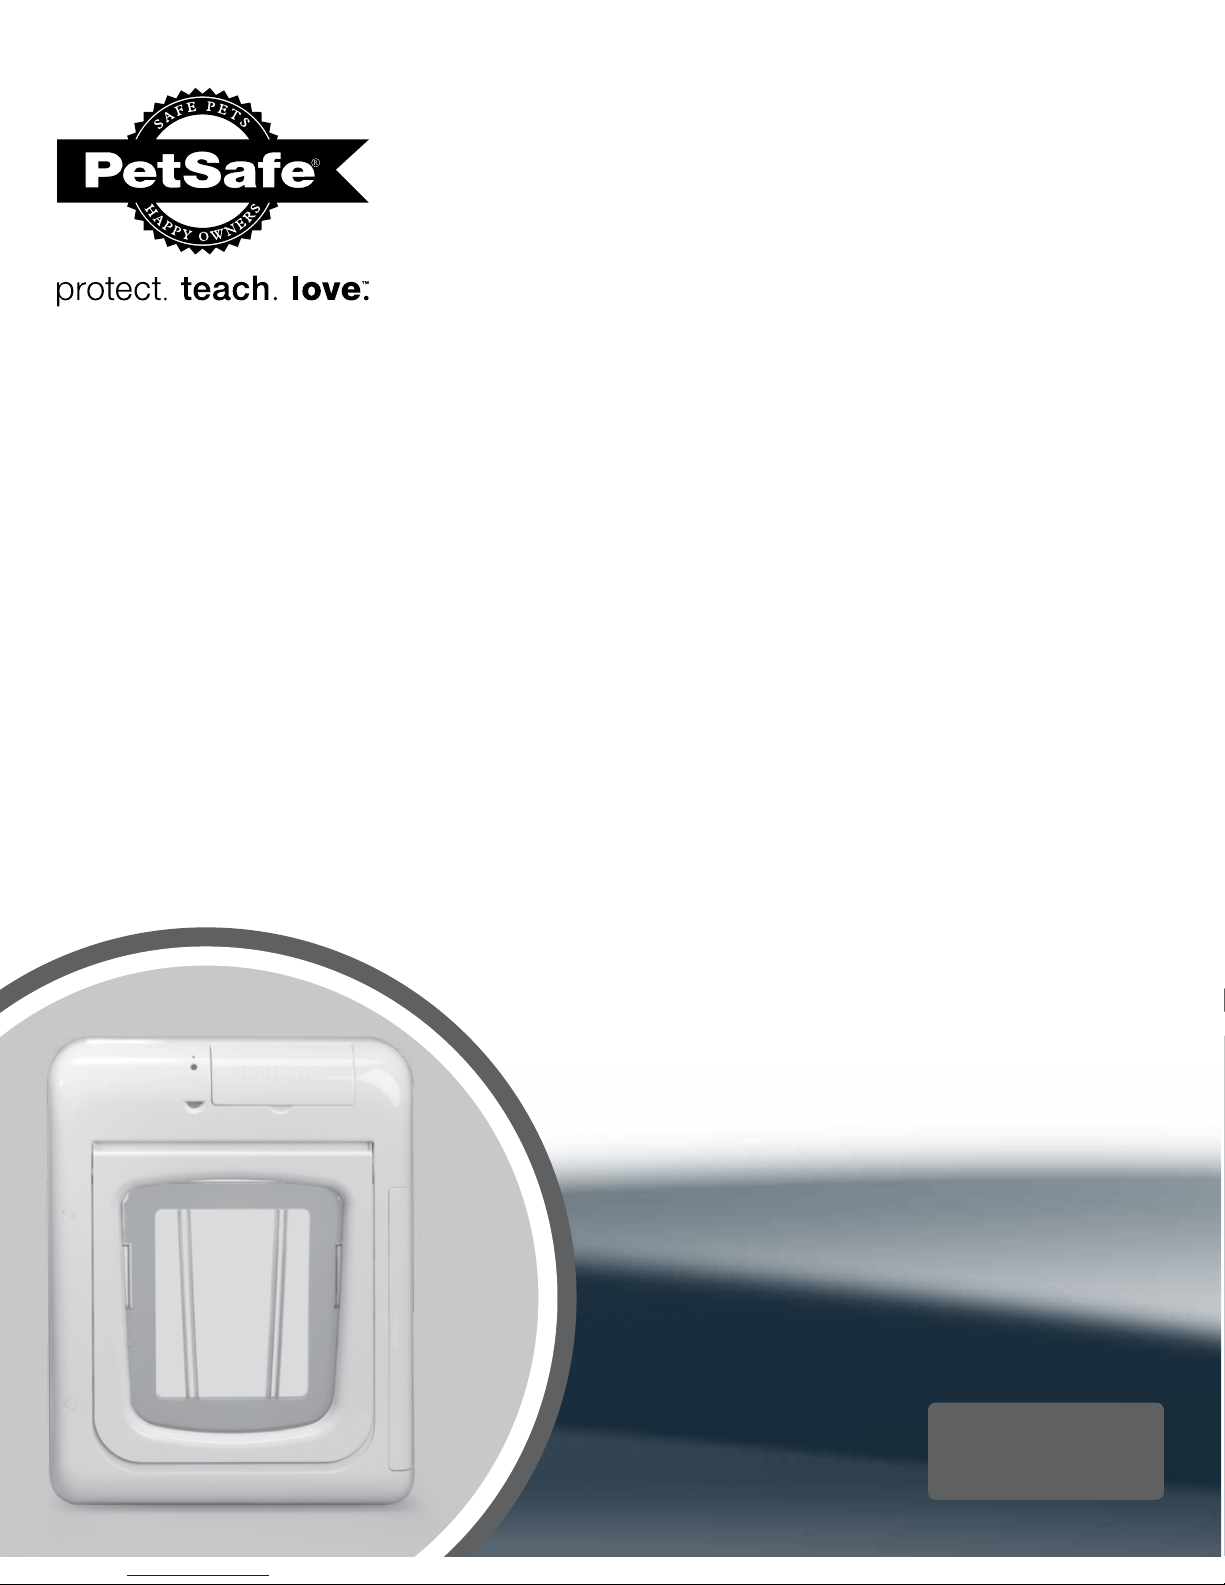
Main Menu
This is the default screen on the Cat Flap. Also if navigating a lower level menu, the screen will time out and return to Main Menu if there is no
activity after two minutes. After five minutes of no activity, the LCD Screen will go to sleep (like a mobile phone or computer). To wake the LCD
Screen and return to Main Menu, push any key on the 5-Button Navigation.
Setup: Allows you to change settings for the Cat Flap including flap operational mode, keypad lock, Volume,
date/time, Low Battery Mode, and language. Also allows changes to pet settings including pet access mode,
Re-latch Time, In-Tone/Out-Tone, adding a pet, removing a pet, renaming a pet, and relearning a pet.
Below Setup each of the successfully programmed pets are also displayed along with each pet’s location
(based on when the Cat Flap was last accessed while in Smart Mode). When a pet is selected from this list, a
history of the last 4 dates and times the pet accessed the Cat Flap while operating in Smart Mode is displayed.
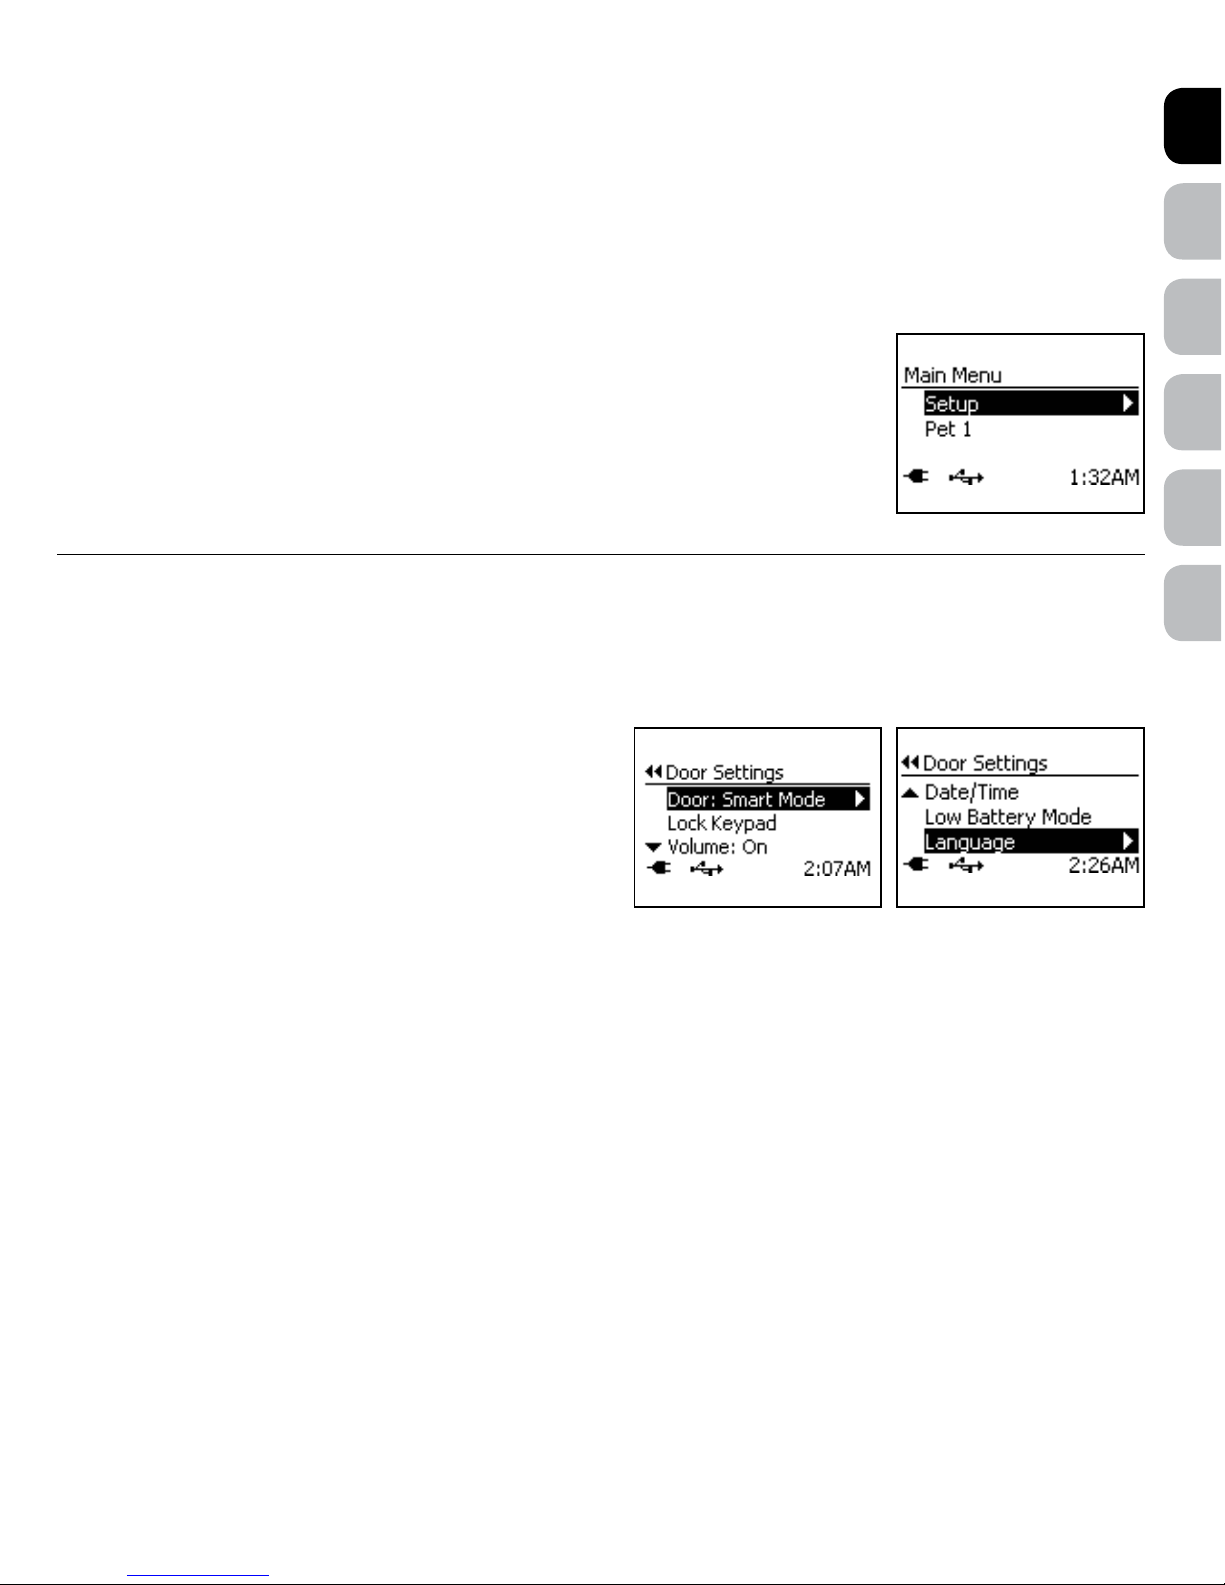
CAT FLAP SETTINGS
The Door Settings screen allows you to customise the flap operation and settings of the Passport™ Intelligent Cat Flap.
To open the Door Settings menu, from the Main Menu select Setup > Door Settings. The Door Settings screen displays the following options:
Door: Allows Cat Flap operational mode to be changed with three mode options: Smart Mode (default factory setting), Open, or Locked.
Lock Keypad: Allows the 5-Button Navigation to be disabled by setting a
4-digit PIN number.
Volume: Turns the Volume on or off for the audible beeps and sounds (such
as In-Tone and Out-Tone). Default factory setting for Volume is On.
Date/Time: Sets the date and time used by the Cat Flap.
Low Battery Mode: When powered by Passport
™
Rechargeable Battery,
allows the door flap to be set to the Open or Locked position when battery
runs low and flap shuts down with an optional audible beep. Default factory
setting is Off for beep and Locked for flap shut down position.
Language: Allows the current language to be changed. Default factory setting for language is English.
Flap Operational Modes
The Cat Flap has three operational modes: Smart Mode, Open, and Locked.
Smart Mode: Allows any cat with a programmed FDX-B microchip or Passport
™
Key to access the Cat Flap as programmed for that specific pet.
This is the default factory setting.
Open: Allows the flap system to remain unlocked so any pet or animal can enter or exit, even pets NOT programmed. The Cat Flap will function
like a traditional cat flap in this mode. Access Modes, In-Tone, Out-Tone, Pet Location, and Pet Tracking are disabled in Open Mode.
Locked: Shuts and locks the flap system so no pet can enter or exit, even if programmed to the flap.
To Change Flap Operational Mode:
1. From the Main Menu, select Setup > Door Settings then select Door.
2. Use right arrow key to scroll through options to select Smart Mode, Open, or Locked. Press left arrow/back key to return to Main Menu.
ENES FRIT NLDE
4 www.petsafe.net
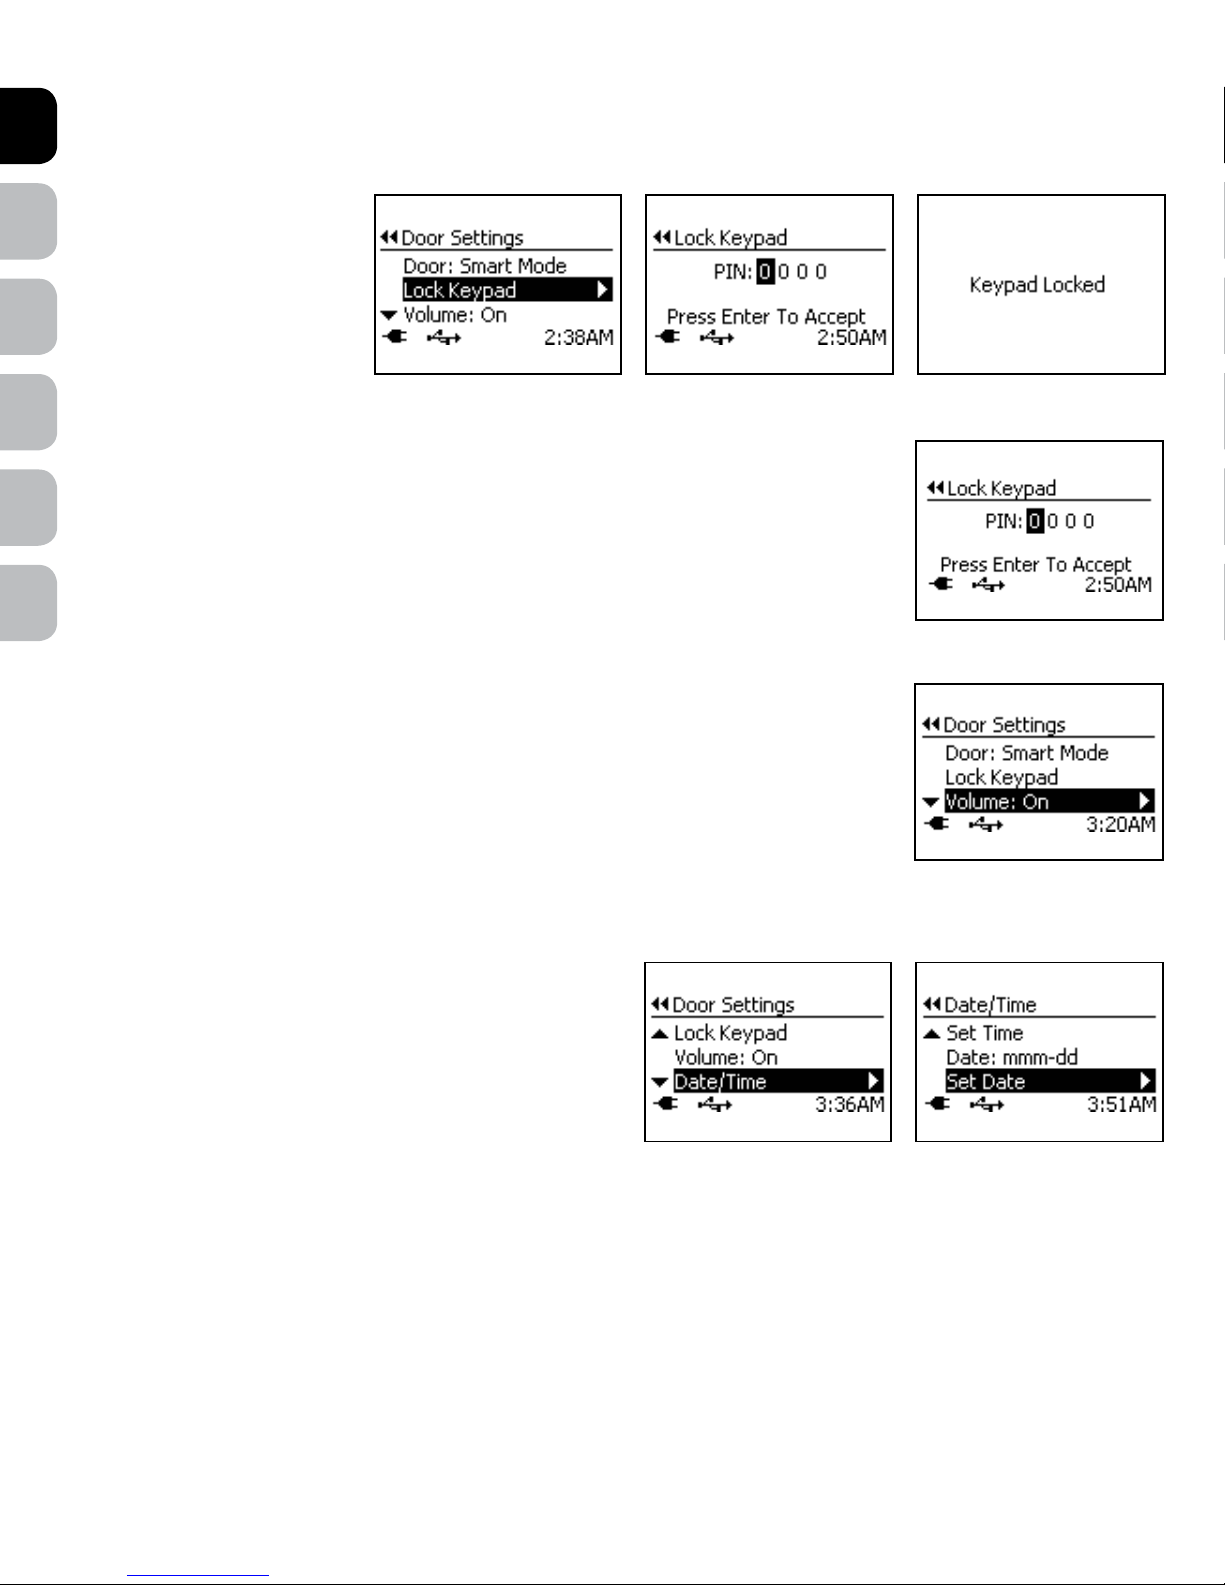
Lock Keypad
The Lock Keypad setting allows the 5-Button Navigation buttons to be disabled by setting a 4-digit PIN number. This is helpful to prevent a child
from changing the flap or pet settings.
To Lock Keypad:
1. From Main Menu, select Setup
> Door Settings. Use down
arrow key to highlight Lock
Keypad and right arrow to select.
2. Use up and down arrow keys to
select your 4-digit PIN number.
Use right and left arrow keys to
move between the fields.
3. Once last digit is selected, press enter key to accept. The LCD Screen will display Keypad Locked. You may want to write down your PIN
number and store it in a secret place for safe keeping.
To Unlock Keypad:
1. Press any button on the 5-Button Navigation and the Unlock Keypad screen will appear.
2. Use up and down arrow keys to enter 4-digit PIN number. Use right and left arrow keys to move between
the fields.
3. Press enter key to accept and unlock 5-Button Navigation buttons. If incorrect PIN number is entered, the
keypad will remain locked. If you cannot remember your PIN number, contact our Customer Care Centre.
Volume Control
The Cat Flap has several optional audible alerts such as Low Battery Mode, In-Tone and Out-Tone. The Volume for these audible alerts can be
turned off or on. The default factory setting for Volume is On.
To Change Volume:
1. From Main Menu select Setup > Door Settings. Use down arrow key to highlight Volume.
2. Use right arrow key to turn Volume off or on. Press left arrow/back key to return to Main Menu.
Date and Time
During the “Initial User Setup” steps, the Date and Time format and current date and time should be set. The Date and Time may need to be
changed if you move to a different time zone or during Daylight Saving Time.
To Change Date and Time:
1. From Main Menu select Setup > Door Settings use down arrow
key to highlight Date/Time. Press right arrow key to select.
2. Use down arrow key to highlight which setting to change. Use right
arrow key to change the setting. When setting Time or Date, use right
and left arrow keys to move between the fields and press enter key to
accept once last field is set.
DENL ITFR ESEN
www.petsafe.net 5
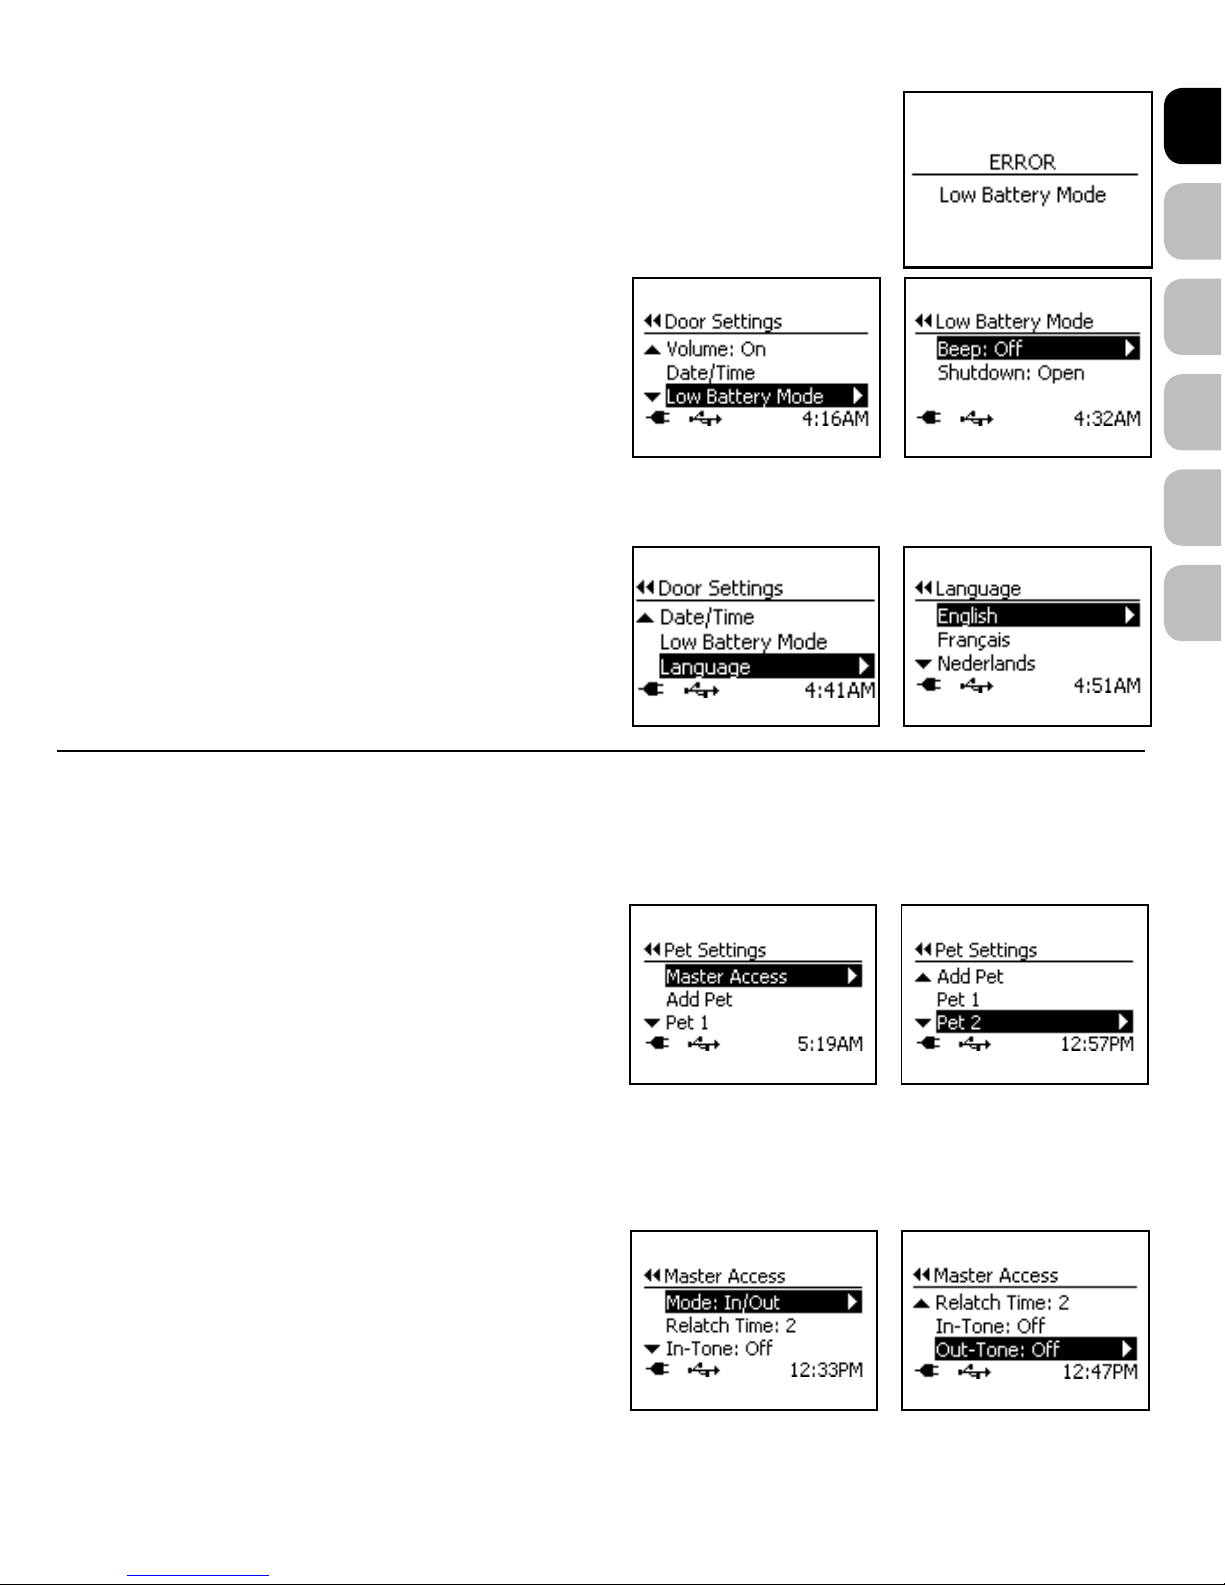
Low Battery Mode
When powered by the rechargeable battery, the Cat Flap enters Low Battery Mode before the battery becomes
too low to properly operate the flap. An alert will appear on the LCD Screen when the Cat Flap enters Low
Battery Mode. In Low Battery Mode, the flap shutdown position can be set to either Open or Locked. Also an
optional audible beep can be set to notify you when the battery is low. The factory settings for Low Battery
Mode are Locked for the flap shutdown position and Off for the audible beep.
To Change Low Battery Mode:
1. From Main Menu select Setup > Door Settings. Use down arrow
key to highlight Low Battery Mode. Press right arrow key to select.
2. Use down arrow key to highlight which setting to change. Use right
arrow key to change the setting. Press left arrow/back key to return to
Main Menu.
Language
The default language setting is English. The Language screen allows the language to be changed.
To Change Language:
1. From Main Menu select Setup > Door Settings. Use down arrow
key to highlight Language and right arrow key to select.
2. Use up and down arrow keys to highlight desired language. Press right
arrow key to change language. Press left arrow/back key to return to
Main Menu.
PET SETTINGS
The Cat Flap allows you to set the same access option and settings for all pets with the Master Access option or to set access and custom settings by
individual pet within the Pet Settings menu.
To open the Pet Settings menu, from the Main Menu select Setup > Pet Settings. The Pet Settings screen displays the following options:
Master Access: Easily allows the same pet access mode and pet settings
to be set for all pets. This is the default factory pet setting for all pets when
first programmed to the Cat Flap.
Add Pet: Allows additional pets to be programmed to the Cat Flap. Up to
20 pets can be programmed.
All pets that have been successfully programmed to the Cat Flap will also
show under Pet Settings menu below Add Pet.
Master Access
With Master Access, you can easily set the same access option and settings for all pets programmed without the need to individually program by
pet. Master Access is the default access setting when pets are first programmed. Flap operational mode must be set to Smart Mode for Master
Access setting to work (see “Flap Operational Modes”).
To open the Master Access menu from Main Menu select Setup > Pet
Settings > Master Access. Under the Master Access menu you will
find the following options:
Mode: Access mode for any pet set to Master Access. There are four
access modes: In/Out (which is default factory setting), In-Only, OutOnly, and Timer.
Re-latch Time: Amount of time the multi-point Locking U-Flap system
takes to re-latch and lock once a microchip/Passport
™
Key is no longer
detected for any pet set to Master Access.
ENES FRIT NLDE
6 www.petsafe.net
In-Tone: Optional audible tone that sounds when any pet set to Master Access comes in. Default factory setting is Off with 10 sound
optionsavailable.
Out-Tone: Optional audible tone that sounds when any pet set to Master Access goes out. Default factory setting is Off with 10 sound
optionsavailable.
Master Access Modes
There are 4 Master Access Modes: In/Out, In-Only, Out-Only, and Timer.
In/Out: The default access mode and allows any programmed pet to enter or exit as they please.
In-Only Mode: Allows programmed pet(s) to enter through the Cat Flap but pet(s) cannot exit. This is useful if you need to take your pet(s) to the
vet or if you want to keep your pet(s) in at night.
Out-Only Mode: Allows programmed pet(s) to exit through the Cat Flap but pet(s) cannot enter.
Timer Mode: Allows the other access modes (In/Out, In-Only, Out-Only) to be programmed at specific times of day for pet(s). Four
programmable time slots available with a minimum of two programmed times required.
To Change Master Access Mode:
1. To change the Master Access Mode, from Main Menu select Setup > Pet Settings > Master Access.
Use right arrow key to select. Mode will be displayed at top of Master Access Menu.
2. Use right arrow key to scroll through and select desired mode option (In/Out, In-Only, Out-Only, or Timer).
Press left arrow/back key to return to Main Menu.
Note: If Timer Mode is selected, Access Times must be set with a minimum of two programmed times required
(see “Timer Mode”).
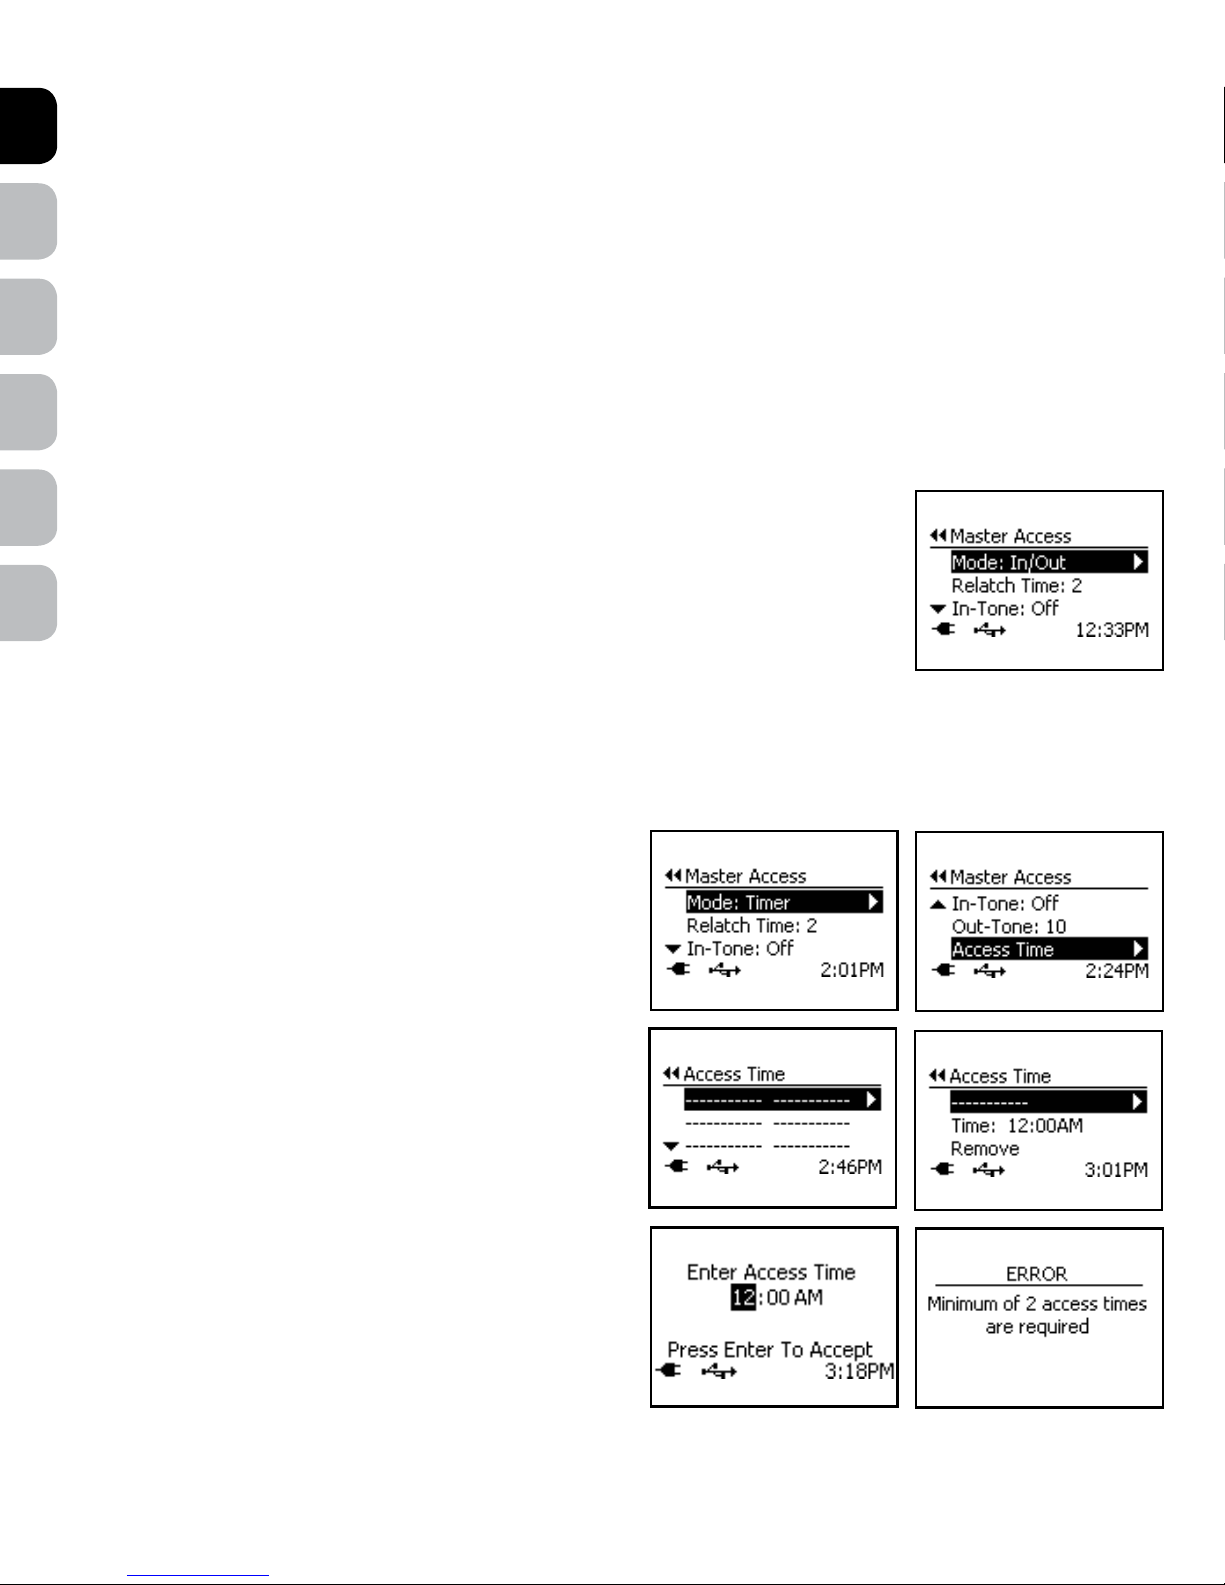
Timer Mode (Master Access)
Timer Mode under Master Access Mode allows you to easily set the Cat Flap to one of the other access options (In/Out, In-Only, or Out-Only) at
specific times of day for all programmed pets. This is useful if you want your pets to have a certain access during a specific time period (for example
at night). There are four programmable time slots available with a minimum of two programmed times required. The two times are required to
prevent your pet from accidentally being locked out or in.
To Set Timer Mode:
1. From Main Menu select Setup > Pet Settings > Master Access
> Mode.
2. Press right arrow key to scroll to Timer option to select.
3. Once Timer Mode has been selected, Access Time will appear at
bottom of Master Access Menu list. Use down arrow key to highlight
Access Time then right arrow key to select.
4. The Access Time screen will list four available time slots. Press right
arrow key to select first time slot.
5. The first line listed on Access Time menu is to select the pet access
mode. Use right arrow key to scroll through and select desired pet
access mode: In/Out, In-Only, or Out-Only.
6. Use down arrow key to highlight Time. Press right arrow key to enter
specific time for your pet(s) to have type of access you just selected
in step 5. After you use arrow keys to enter desired time, press enter
key to accept. Press left arrow/back key to return to Access Time
menuscreen.
7. Use down arrow key to highlight second time slot. Press right arrow key
to select. Repeat steps 5 & 6 to select pet access mode and scheduled
time for the access. Repeat steps for as many times as you want to
schedule. Remember a minimum of 2 programmed times are
required but up to 4 time slots are available. After you select and enter
desired access options and scheduled times, review the Access Time
menu screen to make sure what you entered is correct.
If 2 time slots have NOT been programmed, you will receive
an error screen. The Master Access Mode will then default
back to In/Out Mode.
 Loading...