


Petrainer PET916N User Manual
yo u pre ss “ ” or “ ” but ton and i f its i ndica tor l ight is n ot on e ither, t hen you
ca n shake t he r ec eiver o r le t your do g mo ve to a ct iv at e it. ( If y ou shake th e
receiver, you'll hear a rattling noise caused by the built-in vibration se nsor which
ind icates th at it is i n work ing statu s).
Step 5 Fit the collar-receiver
3A
3B
Importan t : The proper fit and pl acement of the collar-rece iver is essent ial for
effectiv e training. To assu re a prope r fit, please follow the se step s:
1. Ha ve you r pet stand ing co mfortab ly. (3A )
2. Ce ntre the Contac t Points un derneat h your pet's neck , touchin g the sk in. (3B)
3. The Coll ar sho uld fit snu gly, yet loos e enough to allow o ne fin ger to fit betwee n
the s trap and your pet 's nec k. (3C)
4. Allo w your pet to wear the col lar for sever al min utes then rec heck the fit. Check
the f it a ga in a s your pe t be co me s mo re comfortab le with t he C ol la r. If yo ur
pet's ne ck is l ess than 12” aro und , you w ill need to thre ad th e part of the coll ar
whi ch includ es the a ntenna th rough the buckl e. It wi ll be a ti ght fit.
LIMITED 90 DAYS WARRANTY
Pet ra ine r war ra nts t his pr odu ct to b e fr ee of de fe cts i n p ar ts, ma ter ia ls an d
wor km ans hi p f or a per io d o f 90 da ys, fr om da te o f pur ch a se .
Sho uld any repairs or servicing under thi s warranty be requi red, conta ct Customer
Ser vice by phone or email for ins truc tion s on how to pack and ship the product to
Pet rain er.
Petrainer CUSTO MER SERVIC E
Telepho ne: 1 -86 6-8 77-7949
Email : ser vic e@i pets-mall.c om
Hours : Weekda ys 9: 00 AM- 5 :00 P M EST
This wa rra nty giv es yo u speci fic l egal right s and y ou may al so ha ve othe r rig hts
which v ary f rom sta te to s tate.
3C
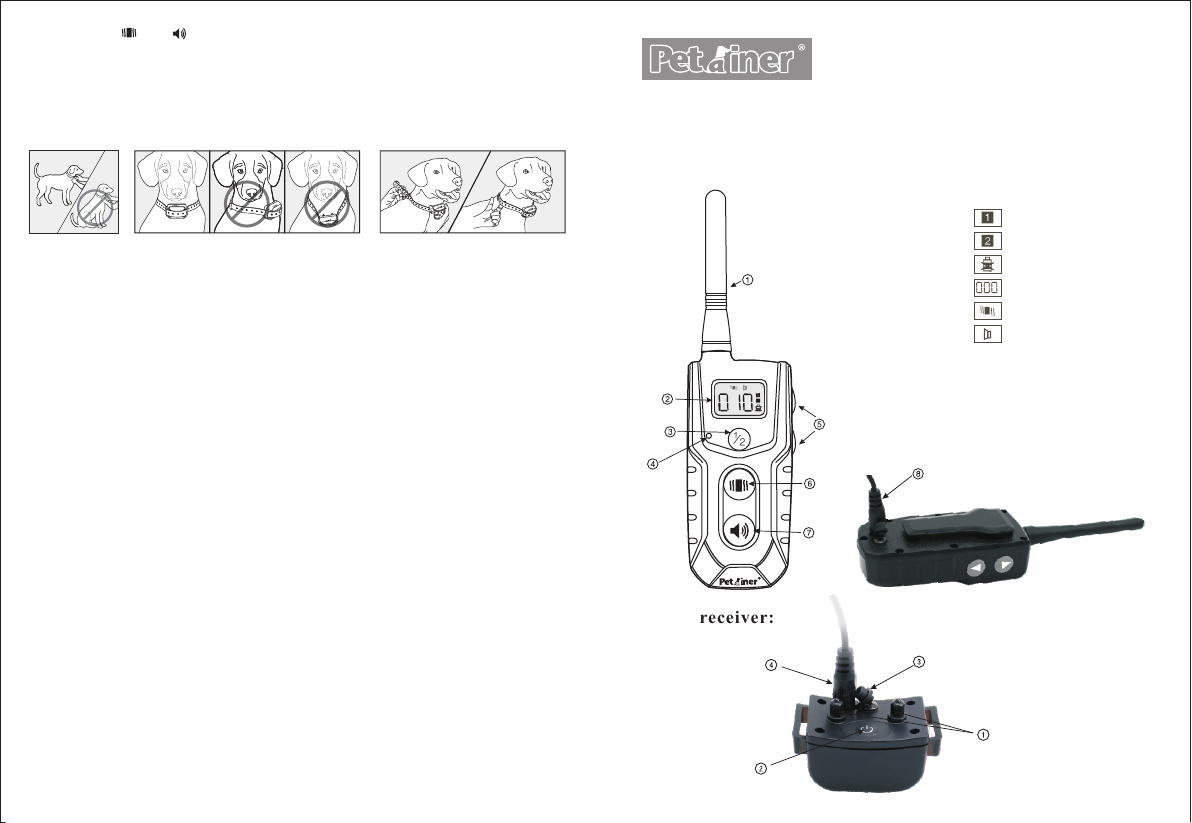
PET916N Training Collar System
Key Definition
Remote Transmitt er:
1. Ant enna
2. LC D Scree n
3. Ch annel b utton
4. LE D Indic ator
5. Up /down b utton
6.V ibratio n button
7.B eep but ton
8.C hargi ng hole
Collar rec eiver :
cha nnel 1
cha nnel 2
low b atter y indic ator
1-1 0 level
vib ratio n mode
bee p mode
4
1
Plastic Pro bes:
1.
ON/OFF/Encode Button: Turn on/off the collar-receiver; hold it for a few seconds
2.
to encode the receive r.
Rubber Cove r: After completion of cha rging, pleas e put the cover in place to
3.
safeguard the internal unit from dust and water.
Charging Ho le: For co llar-receiver charging.
4.
Deliver vibration.
Operating Guide
Step 1 Prepare th e remote tran smitter:
Ch ar ge t he r em ot e tr an sm itter
1. Co nn ec t the c ha rg er co nn ec to r to th e cha rg in g hole.
2. Pl ug t he ch ar ge r int o a stand ar d ou tlet.
3. The re d light i n the t ra ns mitter wi ll be o n, in di ca ti ng that c ha rg ing i s takin g
pla ce .
4. Ch ar ge t he tr an sm it ter a t le ast 6 h ours fo r first c ha rg e.
5. Wh en c ha rging i s com pl et e, the re d light w il l t ur n of f aut om at ic al ly.
No te: “ Lo w Batte ry I nd icato r” s ig nals th e need fo r rec ha rg in g.
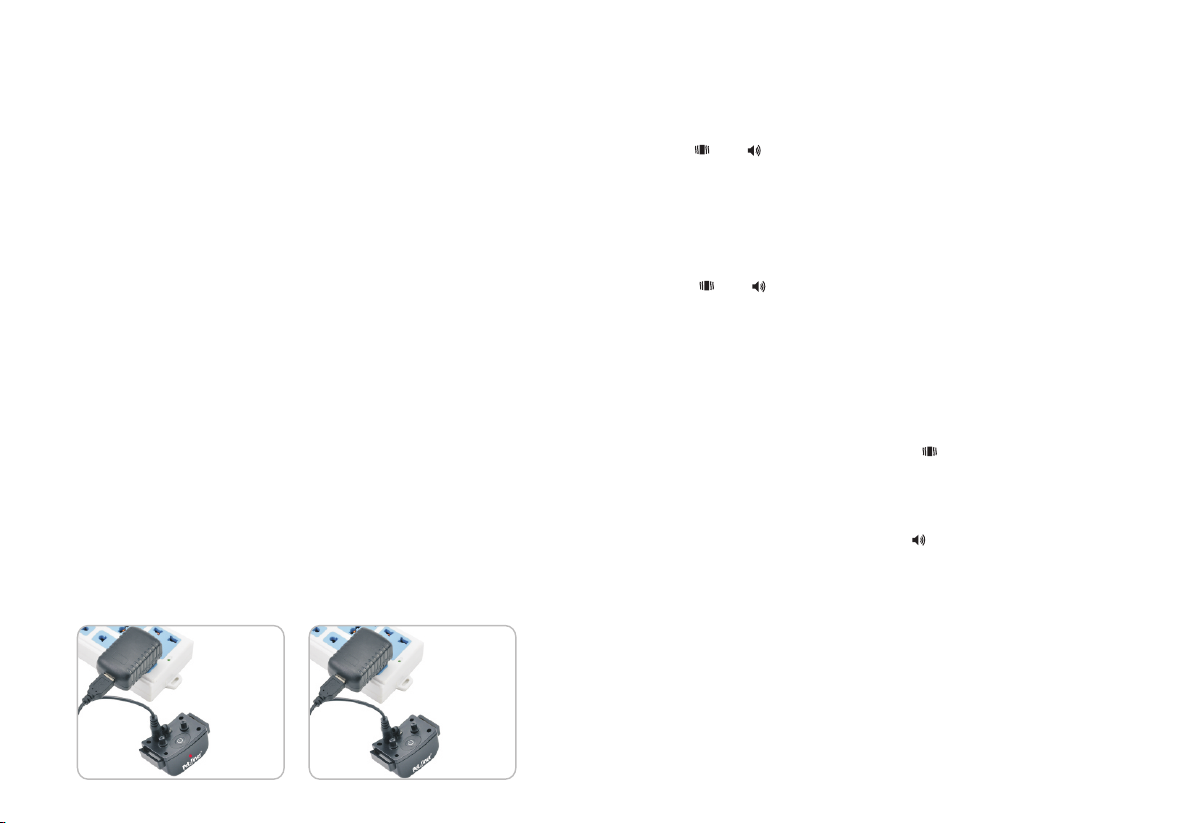
Step 2 Prepare th e Collar-re ceiver:
Ch ar ge t he c ol la r- receive r
1. To tu rn on the Rec eiver C ollar, p ress th e on /off bu tto n, a b eep wil l sound ; th e
re d LED lig ht w ill tur n on and fl as h eve ry 2 s econd s.
2. O pen the r ubber c ov er on the r eceiv er, a nd inse rt the ch argin g co nne ct or in to
th e charg ing hol e.
3. P lug the c harge r in to a stan dard wa ll o utl et.
4. The re d LED w il l app ear. (A)
5. C har ge the Re cei ver Col lar for a rou nd1 hou r whe n ch arg ing for t he fi rst tim e.
6. W hen t he unit i s fully c har ged, th e red L ED l igh t will di sap pear. (B )
7. P ut th e rubbe r cover b ack i nto pla ce to k eep cha rging j ack c lean.
A B
2
Step 3 Sync trans mitter with c ollar-recei ver:
1. Tur n o n the r em ote tr an sm itt er by p re ssi ng a ny bu tton on th e tra ns mi tt er.
2. S el ec t channel 1 or 2 b y pressin g th e ½ bu tt on .
3. P re ss t he O N/OFF but to n on t he c ol lar-r ec ei ver to p ower on the rec ei ve r.
Press a nd ho ld th e on/ off b utt on fo r 3 seconds, a b eep w ill s oun d and the LED
4.
li gh t wi ll b egin to flash .
5. P re ss “ ” o r “ ” button o n th e Re mo te Tr an smitter i mm ed iatel y.
6. A s ec ond bee p w il l s oun d f ro m th e R ec eive r C ol lar, i nd icat ing p airi ng is
su cc es sful.
7. Fo r a 2n d R ec eiv er Co lla r P ai rin g, re pea t s te ps 2 t o 5 , ple as e be s ure to
ch oo se a d iffer en t ch an nel from the fi rs t pa ir ing seque nc e.
NB: Accord ing to the factory d efau lt set tings, when the colla r-re ceiver has been
tur ned on , the sy ncing must be comp leted within 10 seconds,t hereby you have to
pre ss the “ ” or “ ” button in good time or pr ess it at leas t with in 10 se conds.
Ple ase DO N OT try to s ync th e tran smitter with the two collar-rec eivers (if any) at
the s ame ti me.
Step 4 Test th e training sy stem
Ple as e m ak e su re th at yo u ha ve co nne ct e d the t r an smi tt er an d co ll arrec ei ver b efor e t es tin g.
Test th e vi br ation functio n
Turn o n th e re mo te t ra ns mi tt er, p re ss the “ ” bu tt on a nd t he colla r- re ce iv er
wi ll v ib ra te , si gn if yi ng t he V IB RAT IO N fu nc ti on w or ks . Pl ea se m ak e sure the
vi br at io n le ve l is wel l above 0 w he n te st in g th e fu nc ti on .
Test th e be ep f un ction
Tur n on th e rem ote transmitt er, pr ess t he “ ” bu tton, the colla r-r ece ive r will
beep, s ign ify ing t he BEEP fu nct ion works.
NB :
1. T he s creen of the remo te t ra nsmitte r do es n ot d is play when :
a.
It is in STANDB Y mode: to save power, the tra nsmitte r will go into STANDBY
mode if there's no operation for 2 min ute s; yo u can p res s any b utt on ex cep t
fo r th e LE D LI GH T butto n to act iv ate it a nd t hen the scr ee n wi ll d is play.
b.
It is in DEE P SLEEP mod e: to s ave power, the tr ans mit ter w ill go into DEEP
SL EEP mod e if t he re's no o pe ratio n fo r 5 mi nutes ; yo u can press a nd h old
the MODE butt on fo r 1 sec ond to activate it an d the n the s cre en will display.
2.
The collar-re cei ver w ill g o int o DEE P SLEEP mode if there is no operation for
5 minutes. Any moveme nt wi ll ac tiv ate i t. If t he re cei ver h as no r esponse then
3