

Page 1
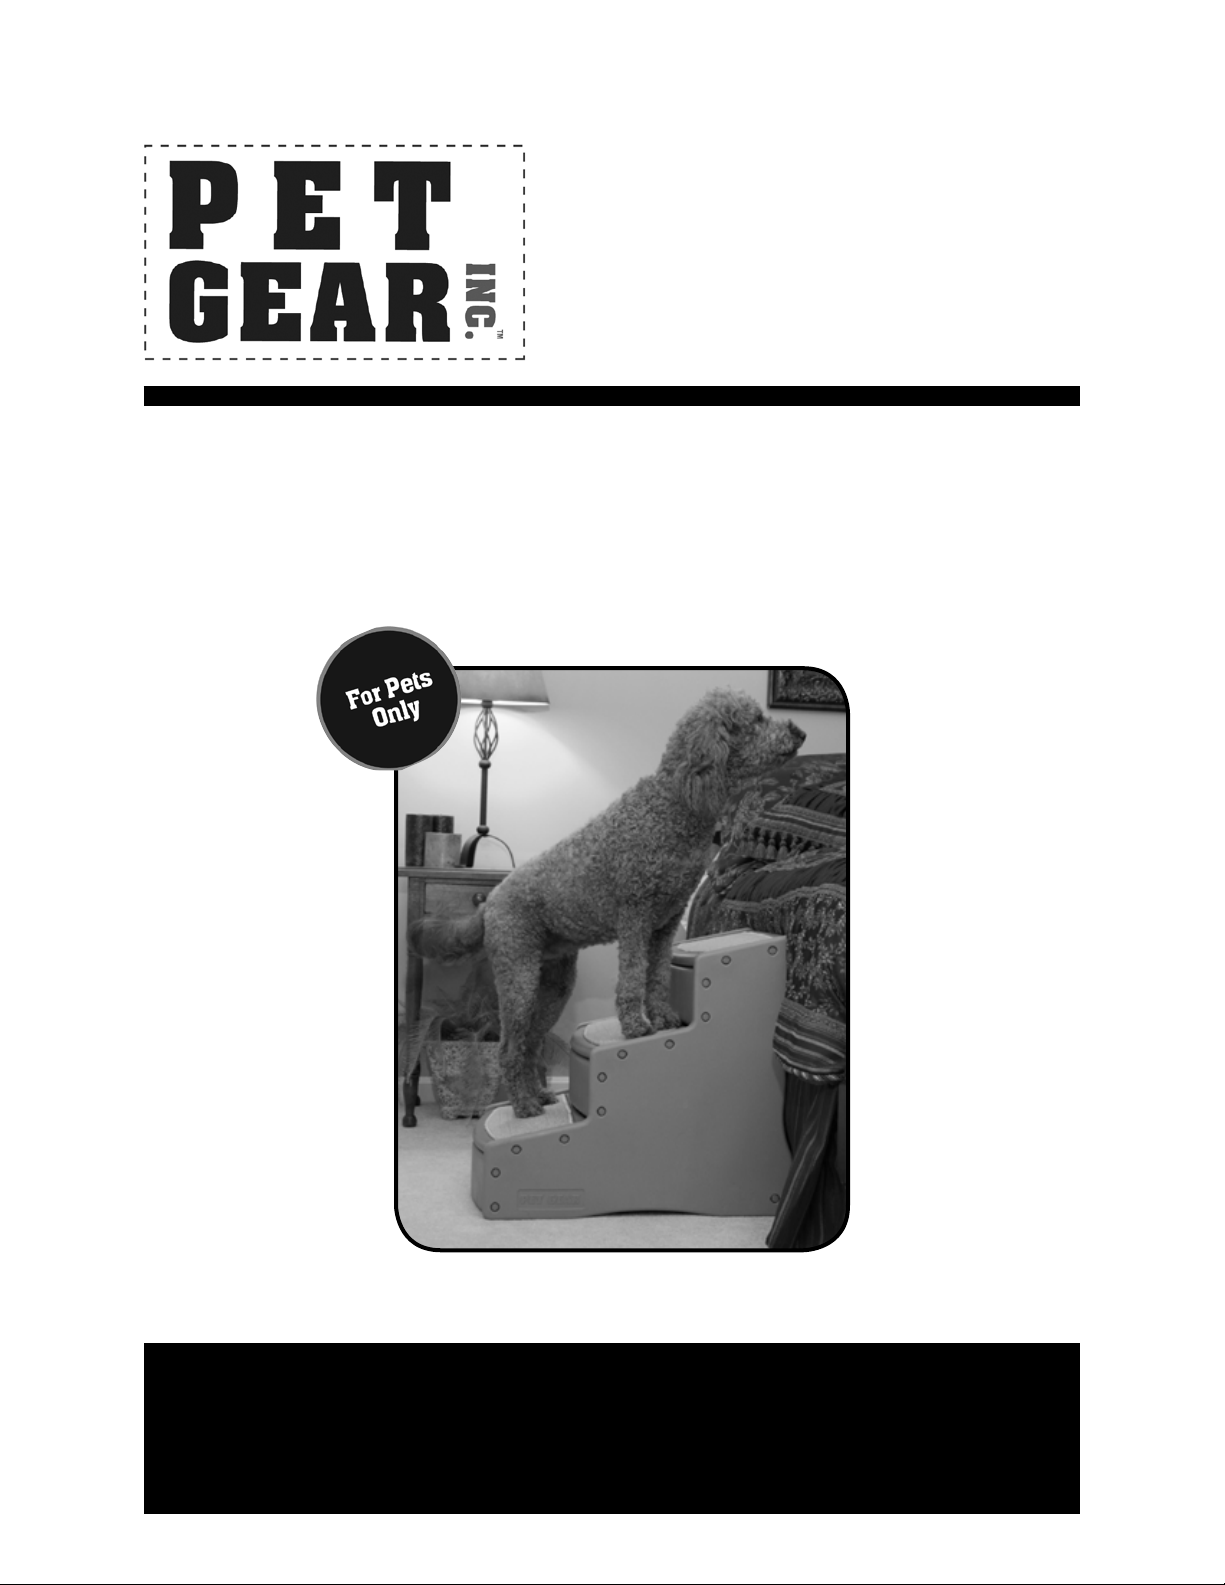
For The ON-THE-GO Pet
INSTRUCTION MANUAL
EASY STEP III EXTRA WIDE
PG9730XLCH/PG9730XLTN
™
To see our full line of products, visit us online at: www.petgearinc.com
CUSTOMER SERVICE HELP DESK
Toll-Free 877-752-9123 - Eastern Standard Time 8am-3pm, Monday through Friday
Page 2
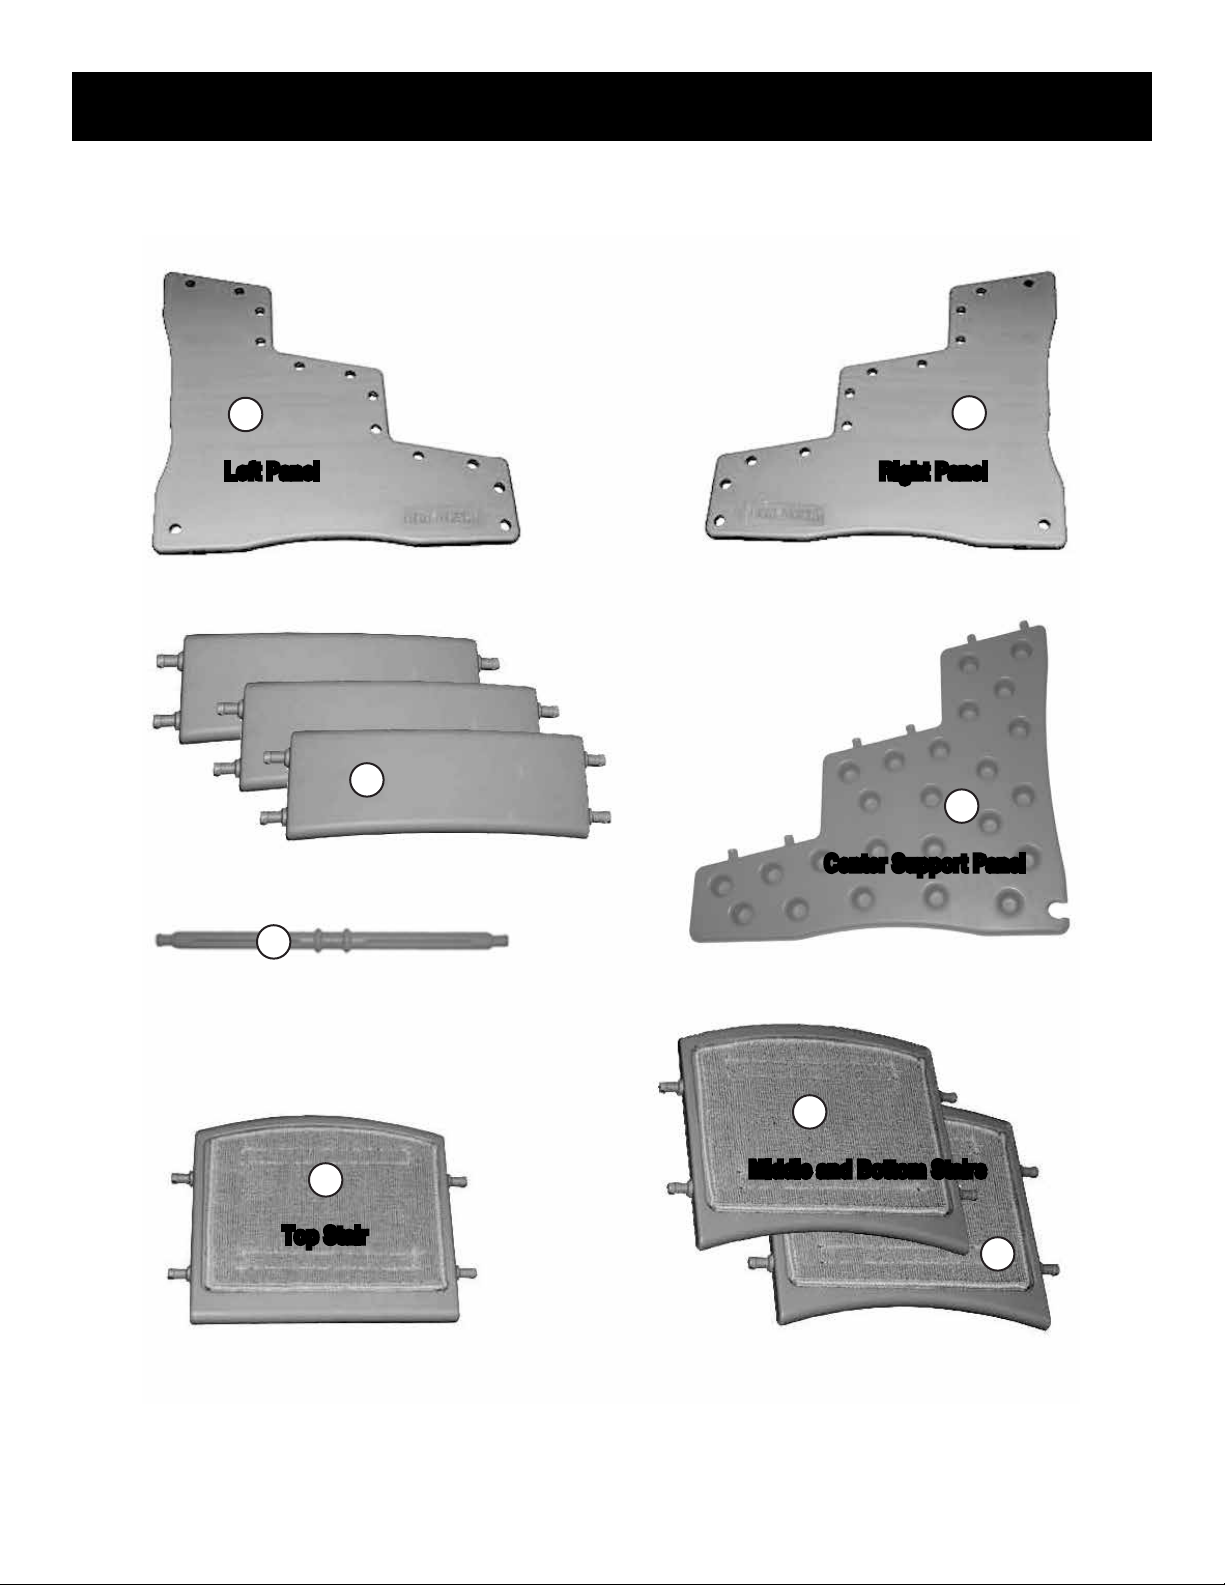
PARTS LIST
Check that you have all the parts shown BEFORE assembling your product.
If any parts are missing, call Customer Service.
A
Left Panel Right Panel
B
C
G
Risers
Center Support Panel
D
Dowel
F
E
Top Stair
Middle and Bottom Stairs
F
with Straight Side with Curved Side
2
EASY STEP 1I1 EXTRA WIDE • PG9730XL
Page 3
ASSEMBLY INSTRUCTIONS
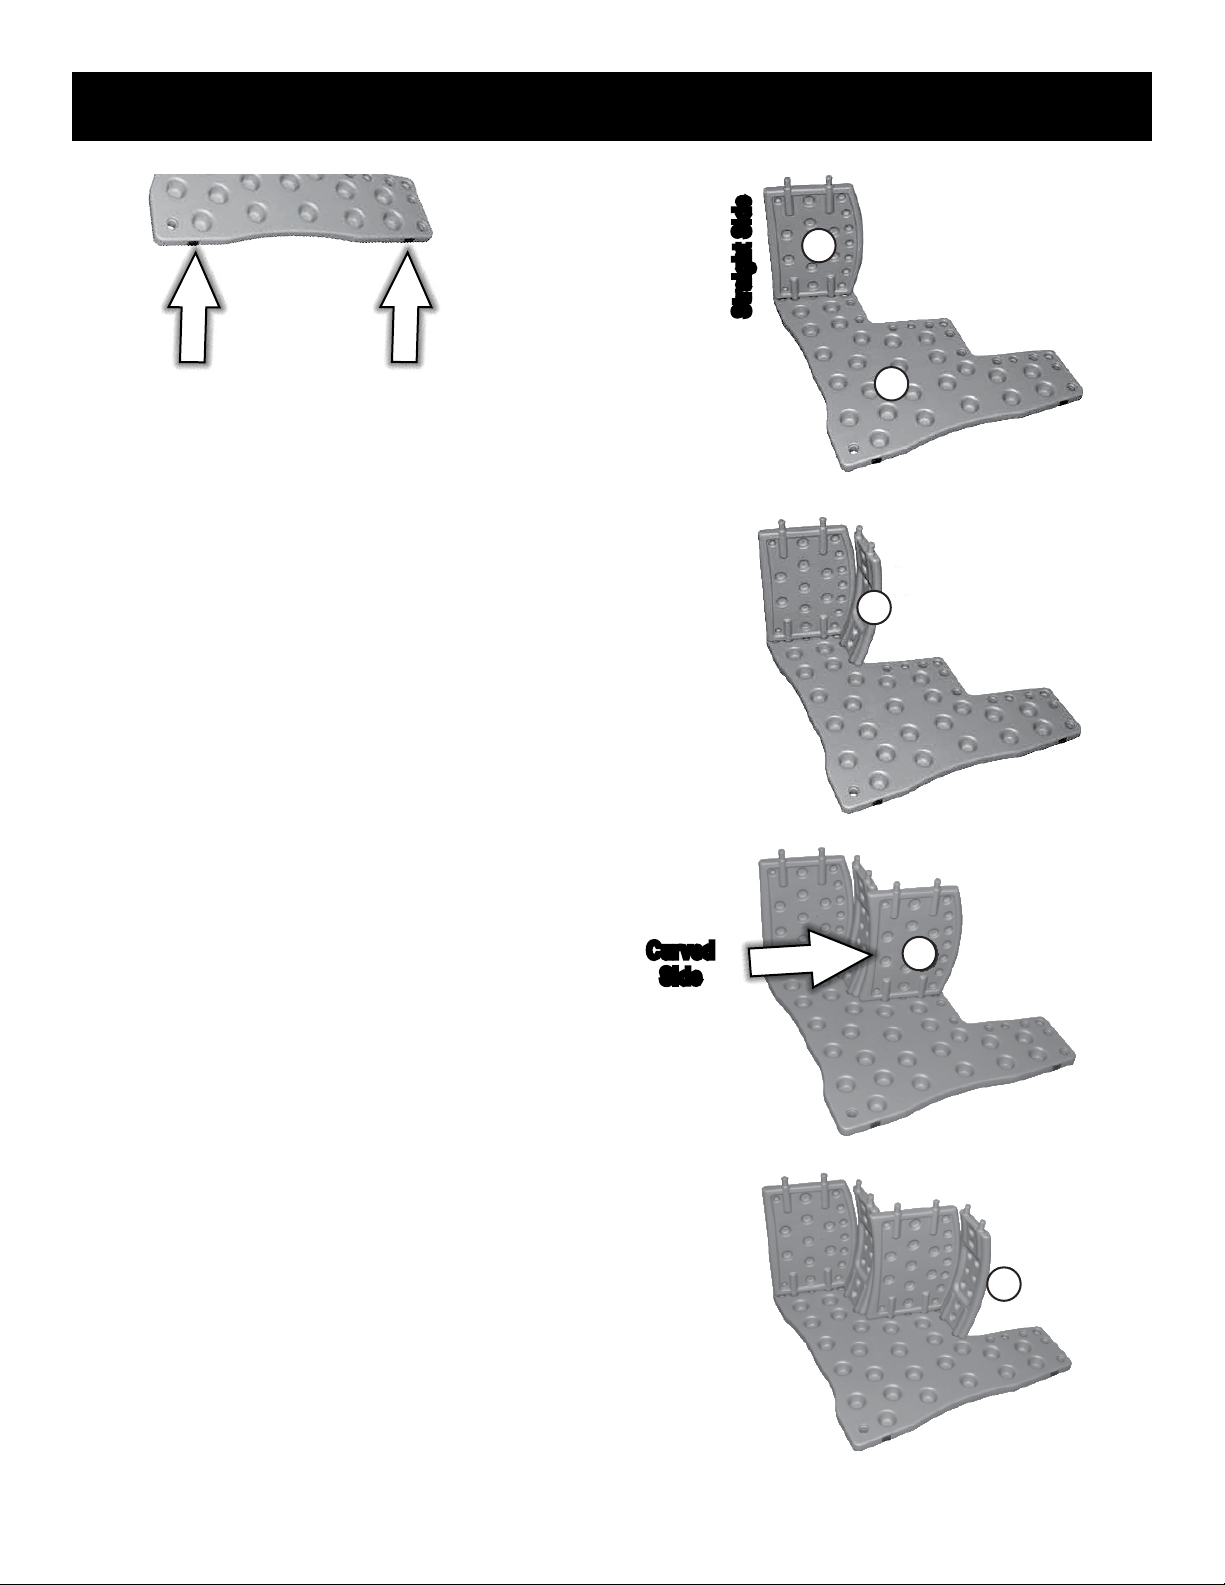
Make sure
rubber
grippers
are on the
bottom.
Step 1
With rubber grippers on the bottom, place right panel,
part (B) on oor with PET GEAR Logo facing the oor and
insert top stair, part (E).
E
Straight Side
B
Keep the STRAIGHT SIDE toward the back and rug facing
the top. Make sure there are no gaps between parts after
inserted. (If inserting part is difcult put a little dish soap
on doweled end before inserting.)
Step 2
Insert riser, part (C).
Make sure there are no gaps between parts after inserting.
Step 3
Insert middle stair, part (F). Note the CURVED SIDE
direction. Make sure there are no gaps between parts
after inserting.
Curved
Side
C
F
Step 4
Insert riser, part (C). Make sure there are no gaps
between parts after inserting.
EASY STEP 1I1 EXTRA WIDE • PG9730XL
C
3
Page 4
ASSEMBLY INSTRUCTIONS
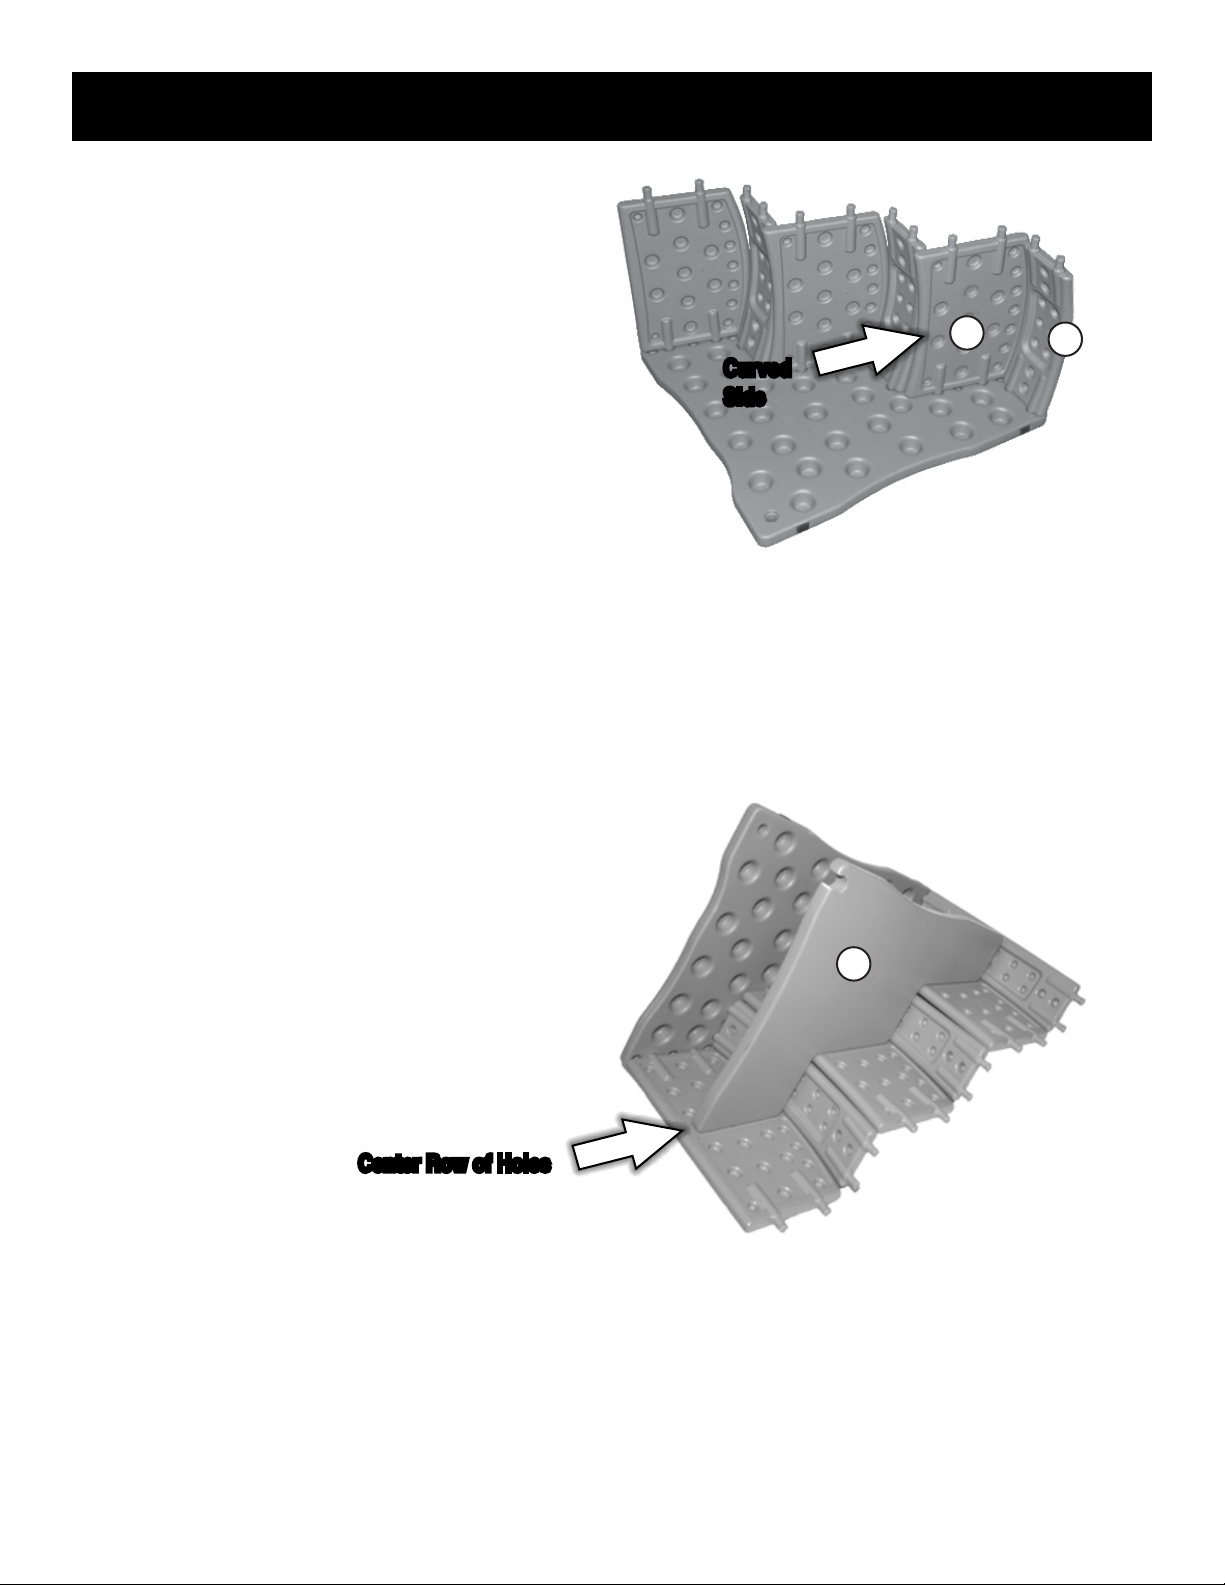
Step 5
Insert bottom stair, part (F). Note the CURVED SIDE
direction. Make sure there are no gaps between
parts after inserting.
Step 6
Insert riser, part (C). Make sure there are no gaps
between parts after inserting.
Step 7
Insert center support panel, part (G), in middle
row of holes. Make sure there are no gaps
between parts after inserting.
Curved
Side
F
C
G
Center Row of Holes
4
EASY STEP 1I1 EXTRA WIDE • PG9730XL
Page 5
ASSEMBLY INSTRUCTIONS
Step 8
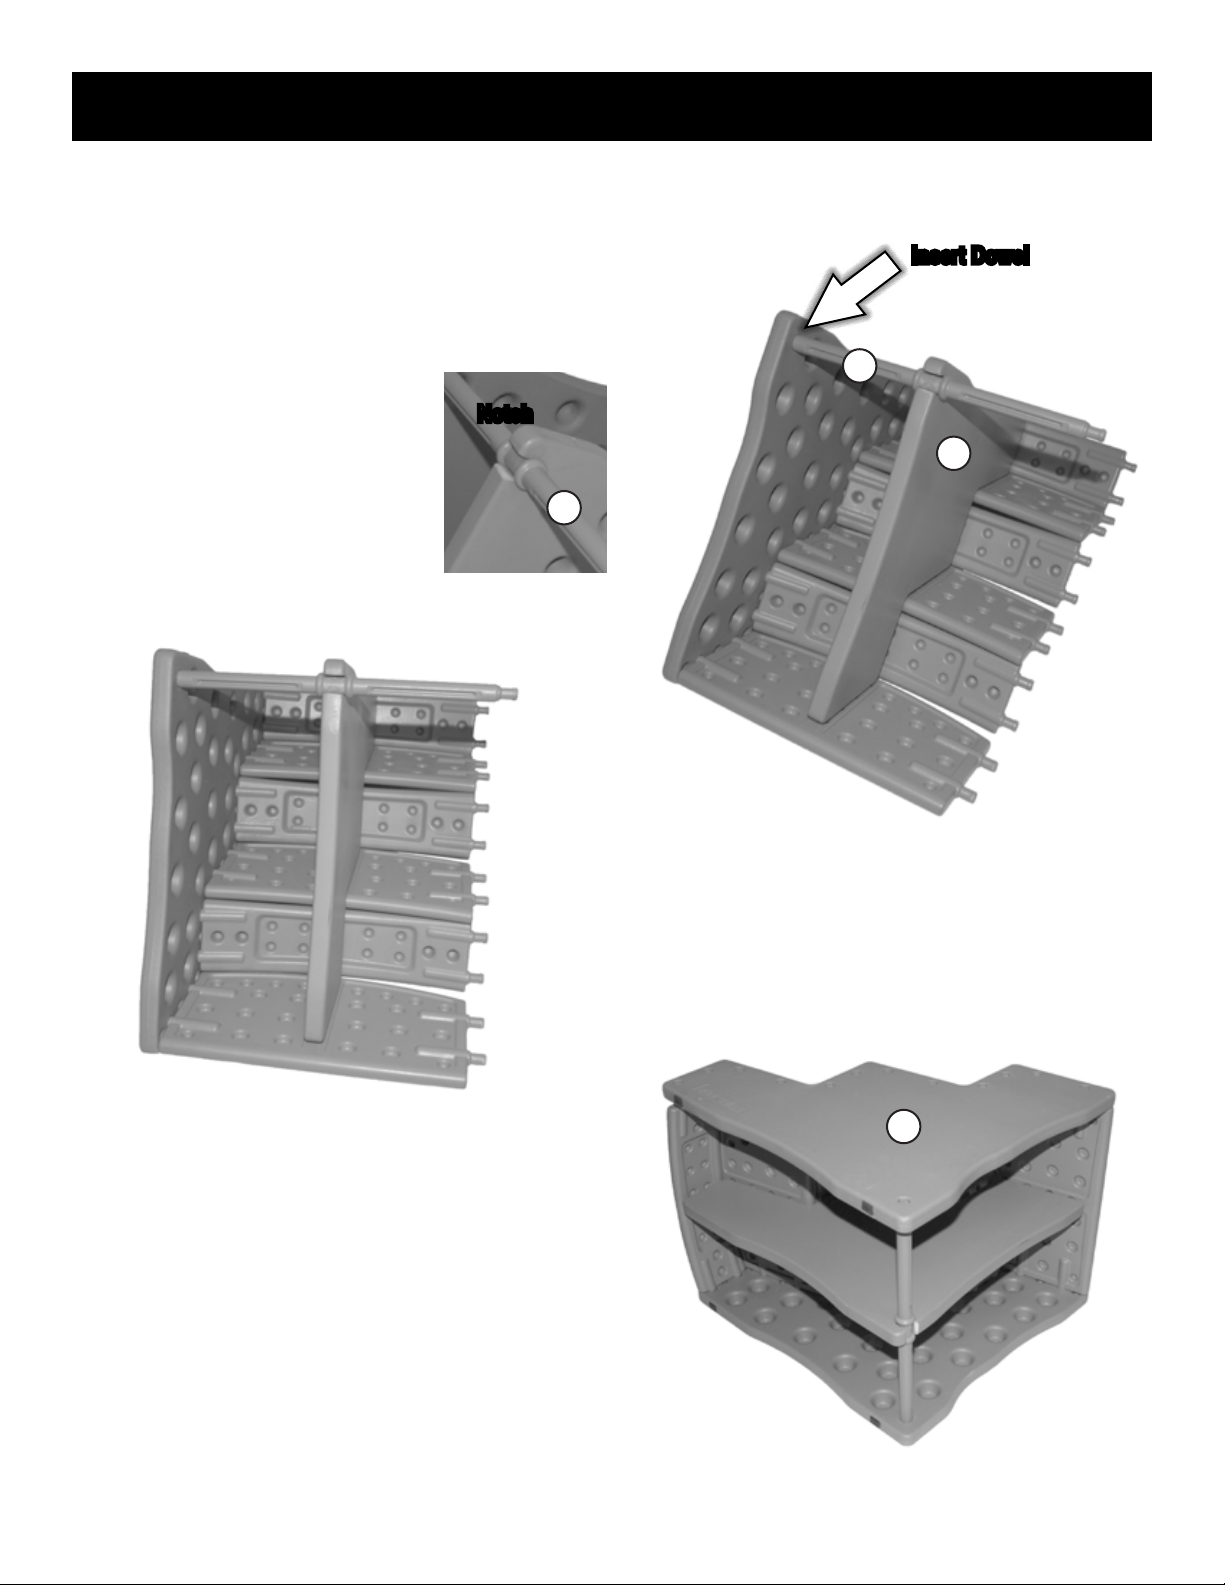
Insert dowel, part (D), into hole and slide into notch
on center support panel.
Notch
Insert Dowel
D
G
D
Step 9
Attach left panel, part (A). Align all holes before
pushing panel down.
Make sure there are no gaps between parts after
inserting.
EASY STEP 1I1 EXTRA WIDE • PG9730XL
A
5
Page 6
WARNING!
FOR PETS ONLY.
Not intended to be used as a restraining device for aggressive or dangerous animals that dig, chew or paw
aggressively. Do not leave your pet unattended. PET GEAR is not liable for any damage caused by aggressive,
destructive, immature or untrained animals. Do not use near an open or exposed ame. Failure to follow these
warnings and the instructions could result in serious injury or death.
REPLACEMENT PARTS
Use only PET GEAR replacement parts.
Please have your model number ready before calling.
You can also request parts: http://www.petgearinc.com/main.asp?sel=2
192 Sheldon Avenue∙West Rutland, VT∙05777∙877-752-9123∙www.petgearinc.com
6
EASY STEP 1I1 EXTRA WIDE • PG9730XL
 Loading...