

Page 1

BodyBeat Metronome Instruction Manual
Peterson Electro-Musical Products, Inc. © 2013
Page 2
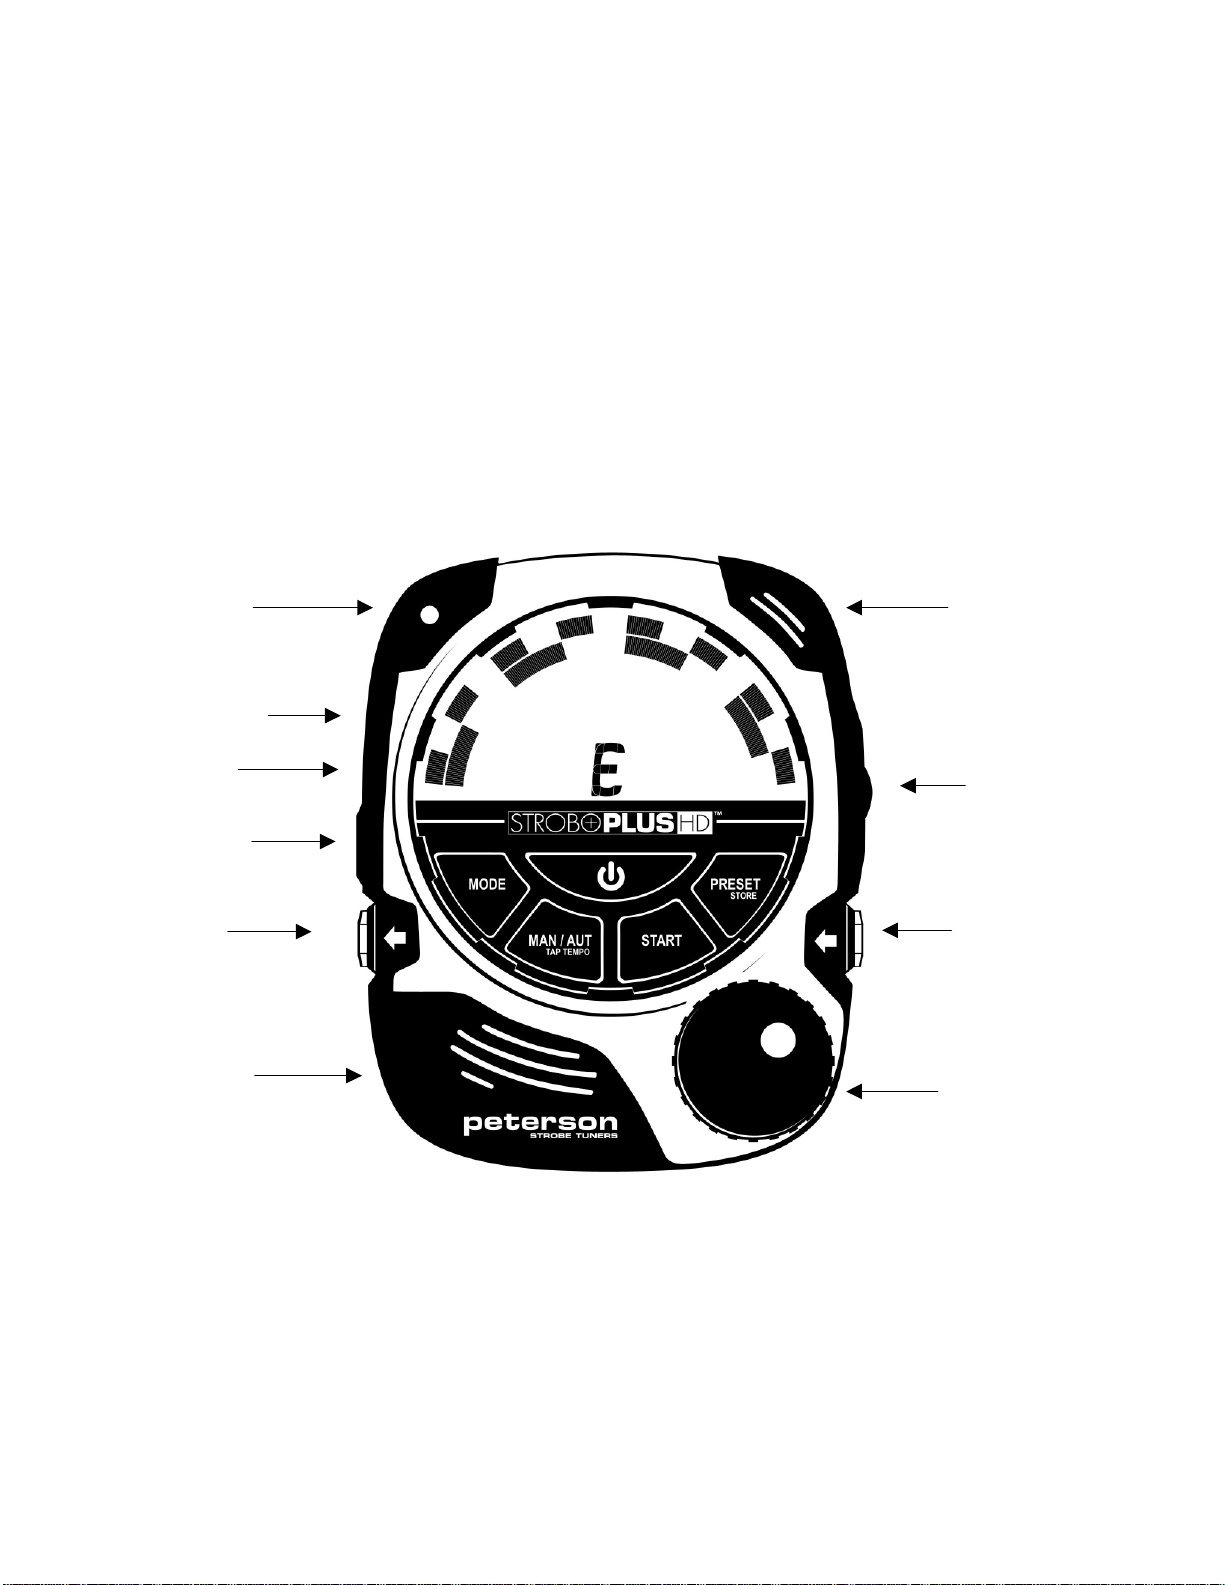
Power
THRU/
VOLUME
USB
VIBE CLIP
HEADPHONE
SELECT KNOB
(Press to select)
AUDIO INPUT
SPEAKER
INDICATOR
The StroboPlus™ contains a powerful internal rechargeable Lithium-Ion battery. Before initial use, we
recommend that this battery be charged fully using either a USB power adapter or by connecting the StroboPlus
to a computer USB port via the USB cable. The StroboPlus can run off of USB power alone. Charging time is
approximately 2 hours. To conserve battery life, the StroboPlus will power off after 10 minutes of inactivity if
not in use. In addition, the LCD backlight will turn off after 10 seconds of inactivity. If the battery voltage
becomes too low, the StroboPlus will power off to protect its Lithium Ion battery.
Tripod mount
The StroboPlus has a standard tripod screw mount on the back so that you can use a variety of connection
devices to mount it on an instrument, mic stand, music stand or other convenient place. See the Peterson
website to purchase appropriate holders such as the Peterson Pitch HolderTM.
CONNECTIONS
MICROPHONE
OUTPUT
Page 3
Headphone Output
The internal speaker will be shut off and the output will be sent to headphones or an external PA system from
the 3.5 mm jack when a plug is inserted.
Vibe Clip™ Output
The Vibe Clip allows metronome beat delivery via tactile pulses and is available through our Online Store.
USB/Power Socket
This socket can be used to power or recharge the StroboPlus internal battery from any standard 5V cell phonestyle charger with a micro USB connector or from the USB connection on a computer. The socket is also used
to connect to the Peterson website for updating the firmware or uploading custom settings or configurations for
the StroboPlus and for uploading Tempo Maps.
Thru/Output Jack ¼”
The Input Jack’s signal will be routed to this jack for output to an amplifier or other sound equipment.
Volume Control
This control adjusts the volume of the audio including metronome clicks.
Input Jack ¼”
To tune, plug the instrument output cable, external microphone, or a Peterson “TP” vibration tuning pickup into
this input jack.
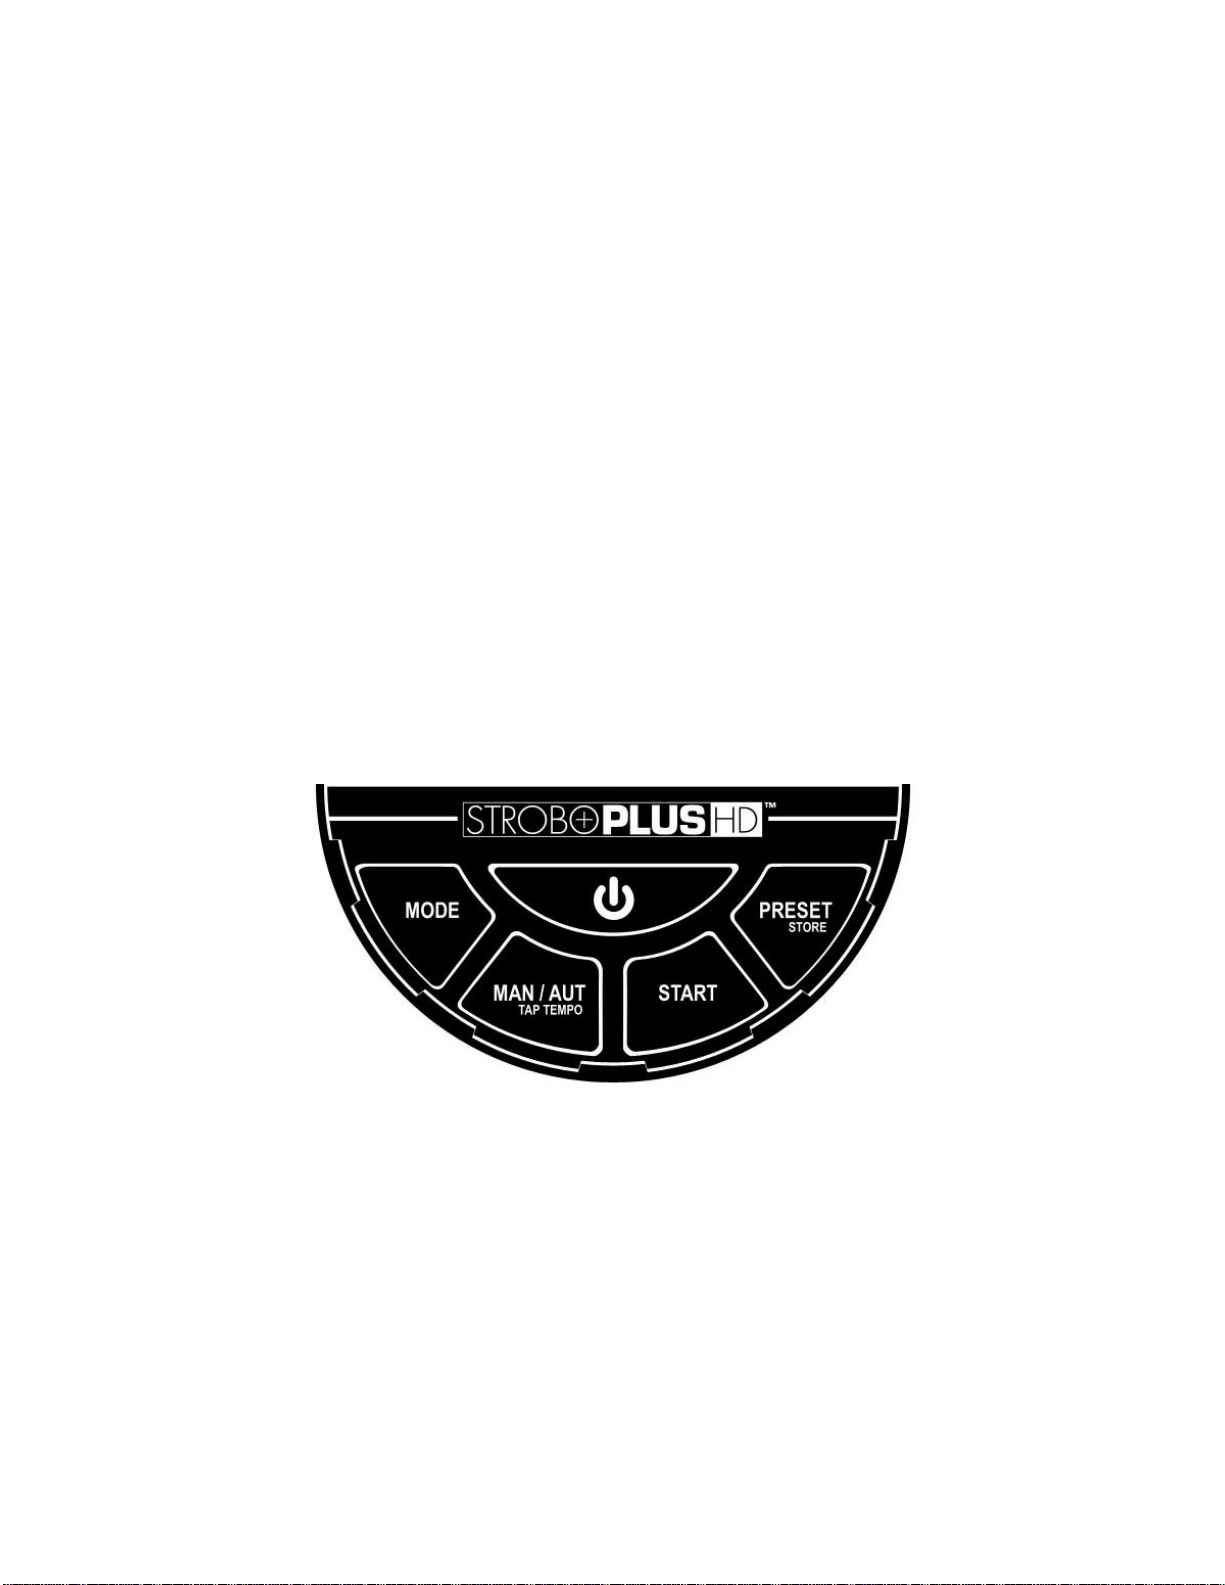
USER INTERFACE
How to Turn StroboPlus™ On
Press and hold the Power Button until your StroboPlus powers on. If the battery is drained, StroboPlus will
require a few minutes of charge time before it can be powered on.
How to Turn StroboPlus Off
Press and hold the Power Button for two seconds.
Mode Select
The Mode Button selects what mode the StroboPlus™ is currently operating in. Three modes are possible:
Strobe Tuner, Audio Tuner, or Metronome.
Page 4

How to Edit Parameters via the User Interface
The StroboPlus has a very intuitive user interface that makes it easy to quickly change any parameter that you
desire. A single Select Knob is used first to determine which parameter will be adjusted, and then to actually
adjust the value of that parameter through this two-step process:
Select the Parameter
Rotating the Select Knob sequences through the available parameters. The current parameter is indicated by its
value blinking. Pressing the Select Knob enables the Edit Menu for the parameter you have chosen.
Edit the Parameter
The parameter value to be edited will blink. Rotating the Select Knob changes the value of the blinking
parameter. Pressing the Select Knob now will exit the Edit Menu and return the screen to normal operation. In
the metronome mode, Tempo is the default/normal setting that the StroboPlus returns to after a few seconds
with no adjustments by the user.
From the normal screen (with nothing blinking), pressing the Select Knob will activate the Edit Menu for
Tempo (or the most recently selected parameter).
Advanced User Controls
Locking the Active Edit Menu
To prevent the automatic timeout and closing of a parameter’s Edit Menu, first activate the Edit Menu. Then
press & hold the Select Knob for 2 seconds. The screen will return to normal but the selected parameter will
continue to blink and the Select Knob will continue to edit that parameter indefinitely. The automatic menu time
out will be disabled. To exit the locked Edit Menu, press the Select Knob until the screen returns to normal.
Note: Locking a parameter in the Edit Menu can be handy when you desire to edit that parameter over a
period of time.
Selectable Parameters
This manual only covers the metronome functions. You received a printed tuner manual with the StroboPlus
and you can also view one online at http://www.petersontuners.com/media/pdf/StroboPlus_OM.pdf .
Page 5

StroboPlus BodyBeat Metronome Functions
Tempo Select
Tempo select is the default parameter that is adjusted by the Select Knob in metronome mode. Rotating the
Select Knob clockwise increments the value while counter-clockwise decrements the value.
Note: Tempo is always set in quarter notes per minute. Be sure to calculate the correct tempo for meters
in which the quarter note does not represent one beat.
Tap Tempo
Tempo can also be set by “tapping” the beat on the Tap Tempo Button (also used as the MAN/ AUTO note
select for tuner modes). When entering a tempo by using the Tap Tempo feature, each tap is assumed as 1 beat
of the current meter setting unless an Accent Pattern is selected, in which case you may enter the tempo by
tapping the accented beats only. For example - in 7/8 with a 2-2-3 accent pattern you can set the tempo by
tapping quarter note, quarter note, dotted quarter note a few times in succession.
Meter Select
Rotate the Select Knob to adjust first the Beats Per Measure setting (numerator) and then the Beat Value setting
(denominator). For each of these parameters, press the Select Knob and the active component will flash. Once
the parameter is flashing, the Select Knob will increment or decrement the active component.
The Beats Per Measure parameter can be adjusted from 1 to 12. Adjusting the Beats Per Measure parameter will
clear any active Accent Pattern, as the list of available Accent Patterns is dependent on Beats Per Measure.
The Beat Value parameter has a list of possible values consisting of 2,4,8,16. Adjusting the Beat Value
parameter will reset any Subdivision setting, as the list of available Subdivisions is dependent on the Beat
Value.
Subdivision Select
Turn the Select Knob until the Subdivisions icon is flashing, then press the Select Knob. Turning the Select
Knob will now increment or decrement through the list of available subdivisions.
Note: The list of available subdivisions is dependent on the Beat Value chosen within the Meter setting.
For a complete list of available subdivisions relative to the Meter setting, see Appendix A. - Subdivisions
Accent Pattern Select
Turn the Select Knob until the Accent icon is flashing, then press the Select Knob. Turning the Select Knob
will now increment or decrement through the list of available Accent Patterns. Accent Patterns help in counting
complex Meters by dividing the total Beats Per Measure into different combinations of 2 and 3 counts.
Note: The list of available Accent Patterns is dependent on the Beats Per Measure Value chosen within
the Meter setting. Since the list of available Accent Patterns consists of every possible combination of 2
and 3 that will add up to the current Beats Per Measure, there are no Accent Patterns available for
Meters with a Beats Per Measure setting of 1-3. For a complete list of available Accent Patterns relative
to the Meter setting, see Appendix B. - Accent Patterns
Selecting a Metronome Voice
The StroboPlus has four available voices, or sets of sounds for metronome playback when using the StroboPlus
as an audible metronome. Each voice or sound set has three distinct parts, which play different roles within the
rhythmic pattern. The available metronome voices are 1.) Rimshot, 2.) Clave, 3.) Wood Block and 4.) Beep. To
select a different voice, turn the Select Knob until the Voice icon flashes. Press the Select Knob once, then turn
the Select Knob to display the desired voice number. Press the knob one more time or wait for the Edit Menu to
time out.
Page 6

Note: When using the StroboPlus with the Vibe Clip as a tactile, pulsating metronome, the voice parts
are instead felt as levels of intensity. High, medium and low intensity vibrations correspond to the high,
medium and low pitches within the voices.
Using the StroboPlus with the Vibe Clip
The StroboPlus can be used as a tactile, pulsating metronome with the help of the optional Vibe Clip. The builtin speaker and headphone output will automatically be silenced when a Vibe Clip is plugged into its designated
jack. The Vibe Clip allows the rhythm to be transmitted from the StroboPlus to the user invisibly and silently
via vibration. The Vibe Clip can be purchased from the Peterson Online Store.
https://www.petersontuners.com/index.cfm?category=135&action=itemView&itemID=40
Apply the Vibe Clip to one of the following areas:
1. Waist area along the belt-line.
2. Hip area near the pelvic bone
3. Nape of the neck
4. Shoe top or ankle area
5. Sleeve or pocket
Note: Be sure that the correct (capsule) side of the Vibe Clip is facing the body. If the vibration is
too intense, turn the capsule away from the body.
Presets
Creating a New Preset
When your StroboPlus displays a combination of settings that you wish to save as a preset, press and hold the
Preset/Store button until the word “Preset”, a number, and the word ADD or SAV (“save”) appear. If other
presets have already been saved and you wish to create an additional one, turn the encoder knob until the word
“ADD” instead of “SAV” is shown. This will also display a preset number that has not already been used. Press
the Preset/ Store button again momentarily to confirm. The display will briefly show a circular animation to
indicate that your StroboPlus is saving your preset. If "ADD" does not show, you have entered the maximum
number of presets.
Overwriting an Existing Preset
To store the displayed combination of settings by overwriting the values already assigned to a particular preset
number, press and hold the Preset/Store button for two seconds. Rotate the Select Knob until the preset number
you wish to edit is displayed, along with the abbreviated word “SAV”. Press the Preset/ Store button
momentarily. A circular animation indicates that your values are saved to that preset number.
Deleting an Existing Preset
To delete a preset that was previously created, momentarily press the Preset/ Store button. Rotate the Select
Knob to display the preset number that you wish to delete, then press and hold the Select Knob for a few
seconds. The abbreviated word “DEL” will appear for a few seconds; continue to press the knob until you see a
circular animation. The "DEL" will then disappear which will indicate that the preset was deleted. All highernumbered preset combinations will have now shifted to a lower preset number accordingly.
Recalling a Preset for Use
To use a combination of settings that was previously saved as a preset on your StroboPlus, momentarily press
the Preset/ Store button. Turn the Select Knob to display the preset number you wish to recall. A moment after
you stop turning the Select Knob, the display will change from the preset number to the values associated with
that preset. To begin using those values, simply wait a few seconds without turning or pressing the Select Knob,
or to immediately accept the displayed values momentarily press the Power Button once.
Page 7

Tempo Maps
The StroboPlus is capable of storing nine MIDI Tempo Maps in its local memory. A MIDI Tempo Map is a
MIDI file that has been imported into the StroboPlus via the USB software. Once imported, only the number of
bars, meter changes, and tempo changes are stored in the StroboPlus memory. All instrument, track and pitch
information is ignored. It is then referred to as a MIDI Tempo Map. Up to 999 bars can be stored in each of nine
memory locations.
MIDI Tempo Maps can also be created from scratch
using a free Peterson online tool. To download the
latest version of the USB software and obtain further
instruction on how to import MIDI files as MIDI
Tempo Maps, or to design your own Tempo Maps, visit
http://www.bodybeat.net/
Connect your StroboPlus to a computer using the
provided USB cable. After the computer recognizes and
installs the device automatically, open the BodyBeat
USB software. (In Windows XP only, select USB
Audio Device as both the MIDI In and MIDI Out
Devices). For each of the 9 memory slots, you may now
browse to the location in which you saved a MIDI
Tempo Map and select the .MID file.
Count In: Set a number of bars to count in for each
Tempo Map by using the up and down arrows or simply
typing in the number. The StroboPlus will count the
specified number of bars in the same meter and tempo as the current bar when Play is pressed. The count-in
bars will be shown as negative numbers. You may set count-in from 0-8 bars ( 0 for no count in ).
Loop: Checking this box will continuously loop your Tempo Map until it is manually stopped. This makes it
easy to rehearse short multi-bar patterns that contain meter and/or tempo changes.
Once you have finished selecting Tempo Maps, press the button labeled “Sync” to transfer Tempo Map data to
your StroboPlus. You may archive and recall an entire bank (all 9 slots ) of Tempo Maps into one “backup” file
using the “Load File” and “Save File” buttons. Pressing “Clear All” will remove all Tempo Map files from all 9
locations.
Selecting a Tempo Map
Once you have imported a Tempo Map into at least one memory slot of the StroboPlus, select the parameter
with the “M- -“ icon and press the Select Knob. (the -- will show the Tempo Map number if there are any
stored Tempo Maps). Use the Select Knob to select the Tempo Map you wish to play.
Press the Start Button to play and pause your Tempo Map. The Bar Display will show the current bar of the
Tempo Map. The Select Knob can be used to navigate through the bars of the Tempo Map when stopped.
To exit the Tempo Map function set the M selection to -- .
Note: Currently, the StroboPlus will not play transitional tempo changes that occur gradually over
multiple bars. The tempo change will happen only at the downbeat of each bar.
Page 8

Configuration Menu
This menu is used to reset your StroboPlus to factory default settings and find out what firmware and hardware
version the device has.
To enter the Configuration Menu, press the Power Button and the Mode Button at the same time.
The first setting to show will be C indicating the type of configuration currently loaded, either FDR= Factory
Default Reset or USR= User Configured. USR indicates that there has been a user configuration created on the
PetersonConnect™ site and loaded into the device. While the “C” is flashing, to return to the factory default
configuration, press the Select Knob once, select FDR by turning the Select Knob, and then press the Select
Knob once again. If only -- -- -- is shown, there is no user configuration in this device.
Rotating the Selector Knob while C is flashing will next show F and the firmware that is currently installed in
your tuner. There will be three numbers which indicate the installed firmware version.
When you rotate the Select Knob again, the “H” screen will indicate the hardware version of this device.
To exit the Configuration Menu, press the Mode Button.
© 2013Peterson Electro-Musical Products, Inc.
11601 S. Mayfield Avenue, Alsip IL 60803-2476 USA 1-708-388-3311
www.petersontuners.com
Page 9

Appendix A - Subdivisions
The available list of subdivisions varies depending upon the Beat Value parameter of the Meter setting.
Subdivisions will always be notated correctly as one whole beat of the selected meter. The following chart
shows the available subdivisions in relation to meter. The Beats Per Measure parameter does not affect
subdivisions and is shown in grey.
Appendix B - Accent Patterns
The available list of accent patterns varies depending upon the Beats Per Measure parameter of the Meter
setting. Accent Patterns will always be notated as a combination of 2 and 3 counts that add up to the Beats Per
Measure parameter of the selected meter. The last accent pattern in each list is shown as and signifies no accent
pattern AND no accented downbeat. All accent patterns are available both “as written” and with only the
accented beats sounding (or vibrating when the optional Vibe Clip is used).
© 2013Peterson Electro-Musical Products, Inc.
11601 S. Mayfield Avenue, Alsip IL 60803-2476 USA 1-708-388-3311
www.petersontuners.com
 Loading...