

Page 1

peterson
Strobe Center™ 5000 II
Strobe Tuner
Instruction Manual
Revised 4-00 for Software Revision 1.05
© 1996, 2000 Peterson Electro-Musical Products, Inc.
11601 S. Mayfield Avenue, Alsip IL 60803-2476
Phone: 1-708-388-3311 FAX: 1-708-388-3341
Info@PetersonTuners.com
http://www.PetersonTuners.com
Page 2

TABLE OF CONTENTS
INTRODUCTION ........................................................................... Page 1
EASY TO USE GUIDE FOR BASIC EQUAL TEMPERAMENT TUNING ............................. Page 1
SUMMARY OF FEATURES AND FRONT PANEL CONTROLS .................................... Page 2
STEP-BY-STEP INSTRUCTIONS FOR USING THE Strobe Center 5000 ............................... Page 4
1. EQUAL TEMPERAMENT TUNING ..................................................... Page 4
2. ENHANCING THE VISIBILITY OF THE STROBE PATTERNS .............................. Page 4
3. TUNING TO A PITCH STANDARD OTHER THAN A=440 .................................. Page 7
4. TUNING INSTRUMENTS THAT PLAY IN OTHER THAN THE KEY OF “C” .................. Page 8
5. CUSTOMIZING THE START-UP MEMORY SETTINGS .................................... Page 8
6. CHECKING INTONATION WITH THE SC-5000 .......................................... Page 9
7. ENHANCED RESOLUTION OF INTONATION MEASUREMENTS ........................... Page 10
8. ON-STAGE TUNING USING THE SC-5000 DURING A PERFORMANCE .................... Page 11
9. TUNING FOR NON-EQUAL TEMPERAMENTS .......................................... Page 11
10. SETTING AND USING CUSTOM NON-EQUAL TEMPERAMENTS ......................... Page 15
11. COPYING AND MODIFYING (OR DELETING) AN EXISTING TEMPERAMENT FILE ......... Page 19
12. STRETCH SCALE TUNINGS FOR PIANOS AND SLIGHTLY INHARMONIC INSTRUMENTS . . . Page 22
13. CREATING CUSTOM STRETCH TUNINGS ............................................. Page 26
14. COPYING AND MODIFYING (OR DELETING) AN EXISTING STRETCH FILE ............... Page 32
APPENDIX A: TEMPERAMENT FILL-IN FORM................................................ Page 36
APPENDIX B: STRETCH FILL-IN FORM ...................................................... Page 37
APPENDIX C: STRETCH FILE DATA AND CHARTS ............................................ Page 38
INDEX ................................................................................... Page 46
Page 3
INTRODUCTION
peterson
The
microprocessor digital and motor control technologies have been combined with the 12 individual strobe-wheel tuning
method to provide a versatile tuner with unsurpassed accuracy and features. The SC-5000 II is designed to be easier to read
and even simpler in operation than its predecessor, the SC-5000. It is designed to be used by music educators, musicians,
manufacturers, and for any tuning application where an accurate and versatile tuner is required. Musical instrument
maintenance professionals will appreciate the easy, intuitive procedures included for "stretch" tuning and simple methods
of storage and recall of any desired stretch or unequal temperament tuning ratio.
Strobe Center™ 5000 II is the most advanced tuning device ever developed. Precision
PREPARATION FOR USE
IMPORTANT PRECAUTION: The Model SC-5000 is designed to be used on either 100-130 or 200-260 Volt, 50/60 Hertz
AC power sources. IT IS VERY IMPORTANT FOR THE VOLTAGE SELECTOR SWITCH LOCATED ON THE BACK
OF THE TUNER TO BE SET FOR THE PROPER VOLTAGE BEFORE PLUGGING IN THE LINE CORD...........
FAILURE TO DO SO MAY RESULT IN SEVERE DAMAGE TO THE INSTRUMENT!
Check the setting of the voltage selector switch located on the back of the tuner. If it must be changed, use a small blade
screwdriver and rotate it so the white dot above "110" or "220" (depending upon which voltage you require) lines up with
the pointer. You may now plug the tuner line cord into the power outlet.
EASY TO USE GUIDE FOR BASIC EQUAL TEMPERAMENT TUNING
We will first give a summary of how to use the SC-5000 for basic tuning using the equal-tempered scale and A=440 Hz as
the pitch reference. We follow later in the instructions with the details of how to use the other features available on the tuner.
After you have checked the back of the Strobe Center 5000 as detailed above to verify that the voltage selector switch is set
to the correct position of 110 Volts AC or 220 Volts AC, connect the line cord to the AC outlet receptacle and follow these
easy steps to use the tuner.
Press the power switch located on the back panel of the tuner to ON (up position). The SC-5000 will take approximately
5 seconds to perform a self-check during the power-up cycle. During this self-diagnostic interval, the display panel will
indicate:
PETERSON
MODEL SC 5000 TUNER
REV # XXXX
SERIAL # XXXXXXXXXXX
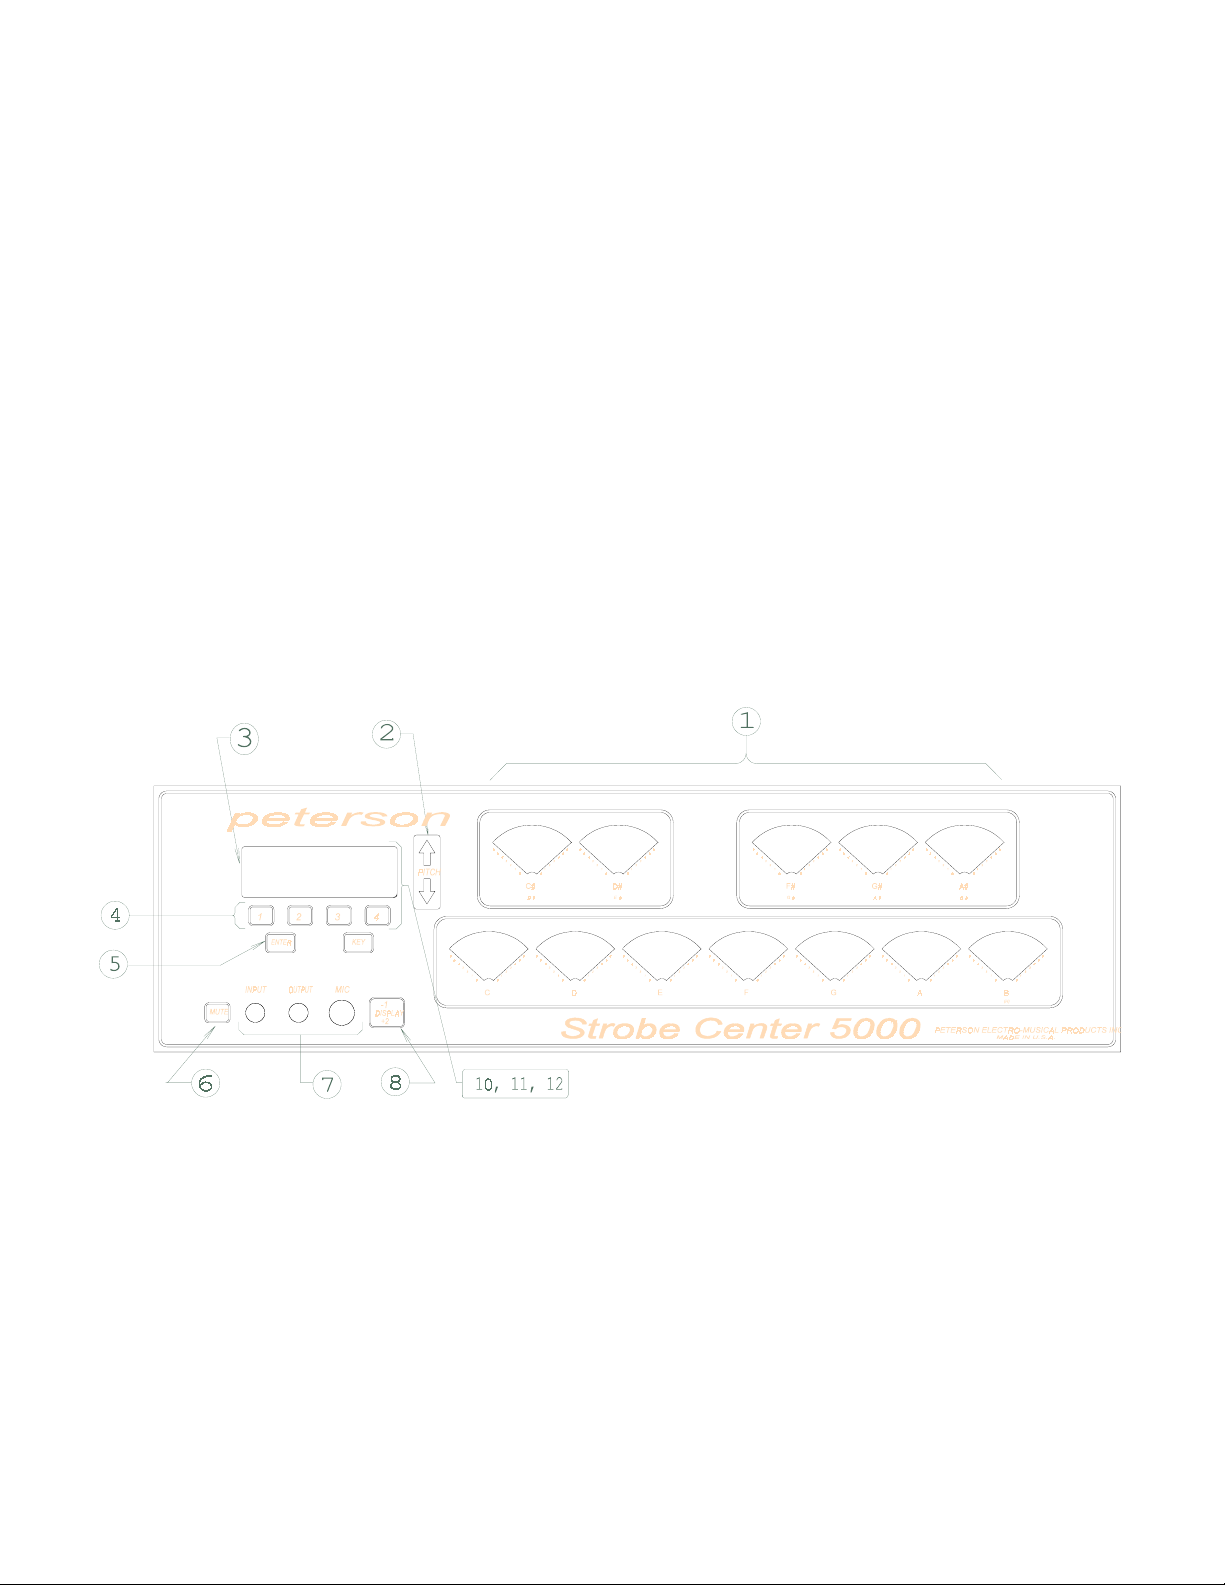
At the conclusion of the power-up tests, all twelve tuning wheels will begin rotating and will flicker slightly due to random
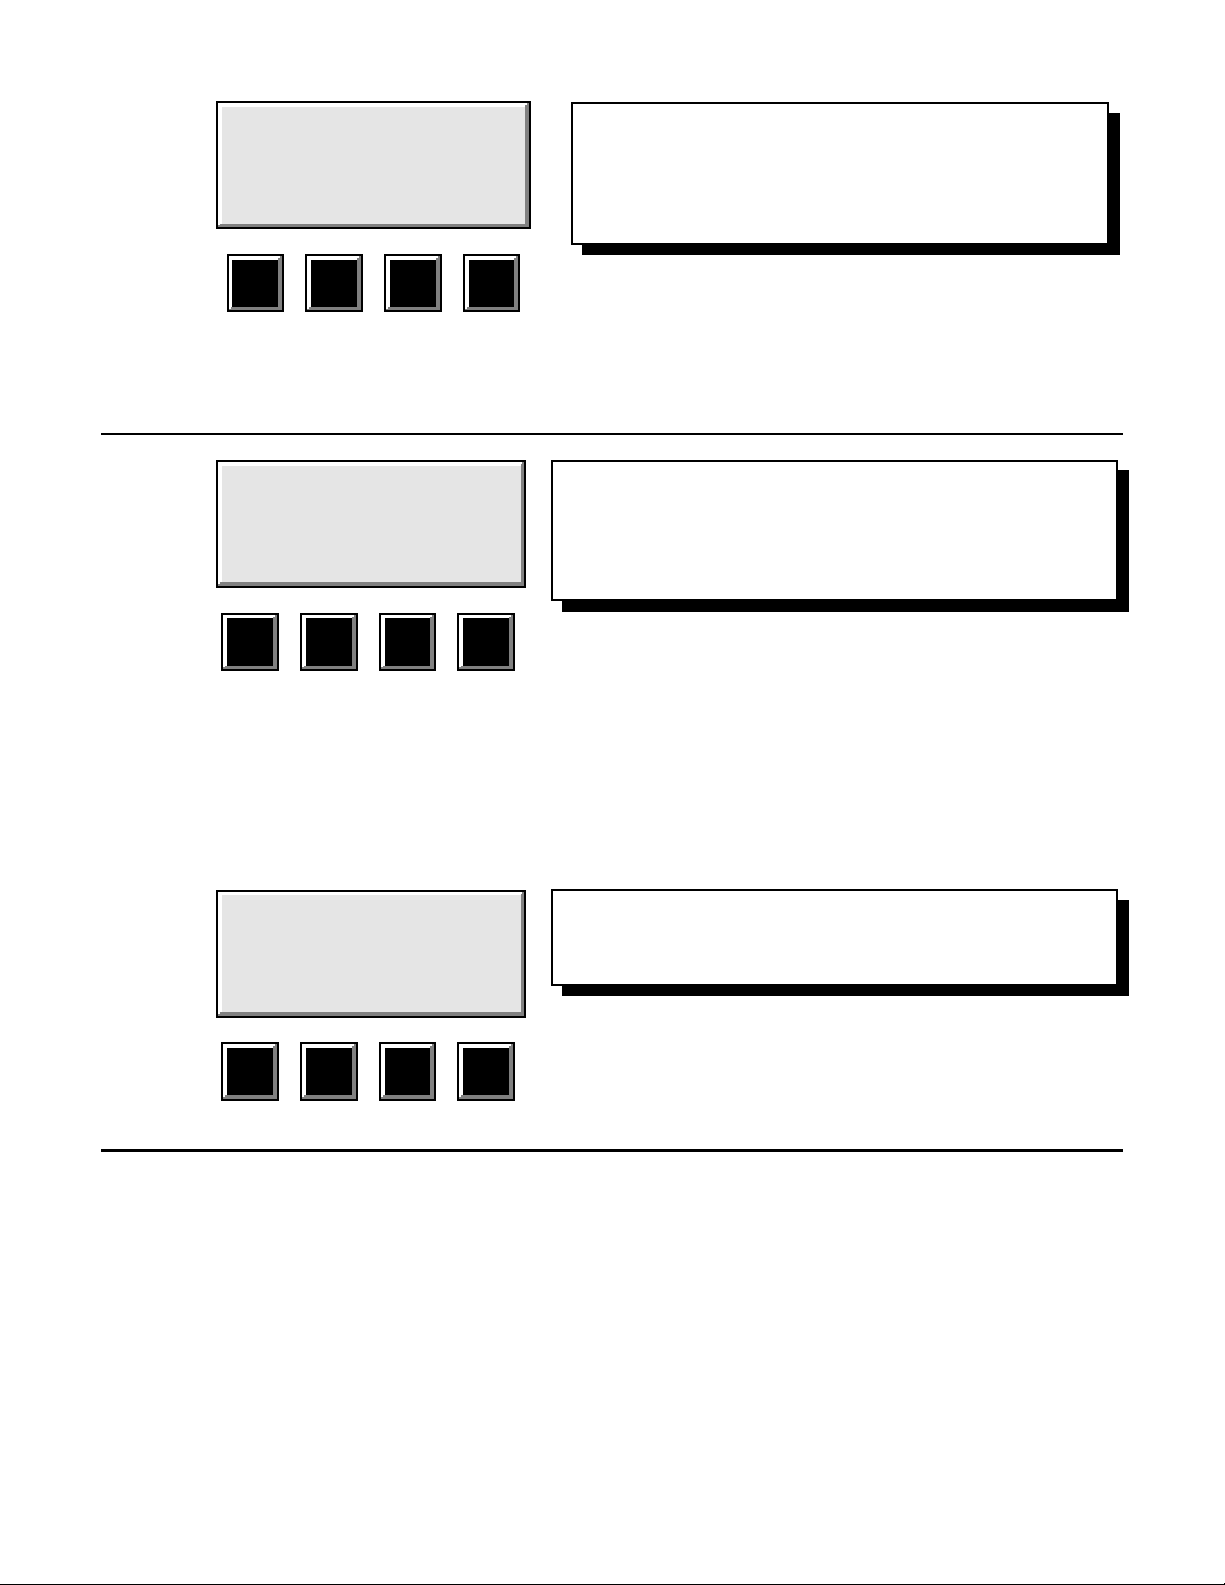
noise in the room. The display panel will then
change to the normal Run Mode indication as
shown below:
KEY = C
A = 440 00 ¢
HI
SETUP IMAG
The initial screen during the power up phase is depicted here.
Line three shows the software revision number and line four the
serial number of the particular tuner.
The first line indicates that the tuner is set for instruments that
operate in the Key of C. Line two indicates that the standard for
Concert A is currently set to 440 Hz (Hertz) and that the global
pitch offset is set at “0" cents deviation. Line three shows the
current Image Clarifier setting. The items on line four always
indicate the current function of the menu-driven Function buttons
(1 through 4) below the LCD display and will be explained later in
the text.
Page 1
Page 4
The built-in microphone will pick up an instrument from across a relatively quiet room. However, if you are working in a
noisy environment it may be helpful to use an external microphone to be more selective and point the microphone directly
at the instrument you wish to tune. At this point you simply play the note you wish to tune.
Each of the 12 tuning wheels is marked with a note corresponding to the chromatic scale. The tuning wheel that matches the
note sounded will glow brightly, and a dark pattern will appear on the wheel. When this pattern appears to be stationary,
the note is perfectly in tune with the equal-tempered scale derived from middle A at 440 Hertz (cycles per second). When
the pattern appears to rotate to the right, the note being played is sharp. Conversely, if the note is flat the pattern will appear
to rotate to the left. The faster the pattern appears to be moving, the farther out of tune the note is. Observe that the pattern
will appear to move more slowly as your instrument is brought more closely into tune, and that it will appear to stop moving
when the sounded note is exactly in tune.
SUMMARY OF FEATURES AND FRONT PANEL CONTROLS
We'll begin with a brief description of the basic features plus the front panel controls and indicators of the
Strobe Center 5000. This will provide you with a quick reference guide to the front panel of the tuner. Detailed information
about each control is explained later in the section titled “Step-by-Step Instructions”.
FRONT PANEL
1. IMPROVED ACCURACY AND STABILITY WITH QUIET OPERATION, 12 SEPARATE MOTORS - An
internal quartz crystal reference provides absolute stability to the tuning accuracy. No warm up period is required unless
the tuner has been subjected to extreme temperatures, either hot or cold. In this instance allow the tuner to sit at room
temperature for about ten minutes before starting. The tuner is accurate to within 1/10 of 1 cent throughout the entire
range of the instrument. Each of the twelve strobe tuning discs is driven by an individual, electronically-controlled
motor. All twelve motor controllers receive their commands from the microprocessor or "brains" of the tuning center.
Gear box noises previously experienced with 12-wheel tuners are entirely eliminated. Separate motors also allow the
versatility of both multiple temperaments and stretch tuning with the Strobe Center 5000.
Page 2
Page 5

2. PITCH UP / PITCH DOWN arrows - Precision digital Vernier Control permits you to sharpen or flatten the pitch of
the SC-5000 to measure the correctness of your own intonation with an accuracy of 1/1000 of a semitone. You can
adjust the tuner sharp or flat over a range of one half semitone (50 cents) each way, with selectable resolution of 1/10,
1/2 or 1 cent increments (1 cent equals 1/100 semitone). If you use this feature to stop a strobe pattern, after the tuner
wheel is stationary, the display indicates how many cents sharp or flat the tuner has been adjusted, giving you an exact
reading of the difference from correct intonation for each note observed. (These buttons are also used as select buttons
under some of the Temperament and Stretch Menu screens.)
3. EIGHTY-CHARACTER LCD MENU SCREEN - Simplicity and ease of operation are enhanced by the intuitive and
user-friendly menu screen displays which address all the functional features of the tuner.
4. FOUR MENU-DRIVEN FUNCTION KEY BUTTONS - These four keys are each defined by the specific menuscreen information for each of the various operational modes of the tuner. They permit great flexibility and simple user
interaction with the Strobe Center 5000.
5. ENTER - This push button is used to select specific values of Pitch Up or Pitch Down deviations when editing
customized temperament and/or stretch tuning files used in specialized tuning applications. It is also used for some of
the user selections in the programming menu of the tuner.
6. MUTE - The Strobe Center 5000 may be used on-stage during a performance with the external Input patched through
to the Output. The Mute Mode disconnects the internal patch through path to permit silent on-stage tuning. The Mute
is a toggle function. Press the key once to engage the Mute Mode ("M" will be indicated on the display panel when this
feature is activated). Press the key again to restore normal patch through operation.
7. SELF-CONTAINED MICROPHONE & EXTERNAL PATCH THROUGH INPUT- The Strobe Center 5000 is
equipped with a built-in condenser microphone as a complete self-contained tuning center. The intonation of notes
sounded into this microphone will immediately be visible on the corresponding tuning disc. The front panel also includes
connectors for an external Input and patch through to Output. The internal microphone is automatically disconnected
whenever the external Input is used for an outboard microphone or other electrical input.
8. DISPLAY +2 / -1 - Improved pattern clarity is achieved for the hard to see lower and upper octaves by pressing this
key once or twice. The +2 Mode lifts the bass notes up by two octaves into the middle of the strobe discs for easier
readability. Similarly, the -1 Mode drops the treble notes down one octave on the strobe wheels. Combining this feature
with both Advanced Image Clarifier filtering and automated contrast adjustment makes the Strobe Center 5000 very easy
to use.
9. KEY - Selectable key signature is used to change the Strobe Center 5000 to the key in which your instrument is tuned.
You no longer have to transpose your note to the key of C. Press this button once, twice, or three times to adjust the tuner
between the keys of C, B=, F, and E=. Sound your note and the tuner will show your intonation on the tuning disc
corresponding to the note you are playing.
10. USER SELECTABLE PITCH - The International Standard Pitch of A=440 Hertz (cycles per second) can be raised
or lowered to any tuning frequency you desire. The adjustment range for Middle A (A4) is from A=350 Hz to
A=550 Hz. This modified standard pitch can be memorized in the Strobe Center 5000 so that the tuner starts up
calibrated for the selected pitch of your preference. The pitch currently selected for "A" is displayed by the LCD
indicator screen.
11. SELECTABLE TEMPERAMENTS - The microprocessor circuitry allows you to choose the equal tempered scale
or one from a list of seven preprogrammed non-equally tempered tunings. You may program and save personal custom
temperaments by entering the tempered values for each of the twelve notes in the chromatic scale in 1/10 of 1 cent
increments. The current temperament in use is shown in the LCD display panel whenever it is different from the equal
tempered scale.
12. STRETCH TUNING FROM STANDARD OR CUSTOM TABLES - The Strobe Center 5000 has 8 built-in stretch
Page 3
Page 6
tables for tuning pianos or other slightly inharmonic instruments. You may also enter your own preferred stretch
configuration. You may then save this information into memory. The chosen stretch configuration in use is displayed
on the LCD display screen whenever Stretch Mode is engaged.
STEP-BY-STEP INSTRUCTIONS FOR USING THE Strobe Center 5000
1. EQUAL TEMPERAMENT TUNING
a. Check the back of the Strobe Center 5000 to verify that the AC Input Switch is set to the correct position of 110
Volts AC or 220 Volts AC. Connect the line cord to the AC input receptacle.
b. After confirming the setting of the AC Input Switch and attaching the Line Cord to your AC power source, move
the power switch located on the back of the tuner to the ON (up) position. The Strobe Center 5000 will take
approximately 5 seconds to perform a self-check during the power-up cycle. During this self-diagnostic interval,
the display panel will indicate:
PETERSON
MODEL SC 5000 TUNER
REV #XXXX
SERIAL #XXXXXXXXXX
c. At the conclusion of the power-up tests, all twelve tuning wheels will begin rotating and will flicker slightly in
response to random sounds in the room. The display panel will change to the normal Run Mode screen:
KEY=C
A=440 00 ¢
HI
SETUP IMAG
When the power is first turned on, the Strobe Center 5000 defaults to the equally tempered chromatic scale based on middle
A at 440 Hertz (cycles per second). Each of the 12 wheels is computer controlled to indicate whether a note played into the
microphone is sharp or flat from the correct pitch by means of dark markings which create a pattern which appears to move
either in a clockwise or counterclockwise direction. Counterclockwise movement of the pattern indicates that the note is
flat, while clockwise movement indicates that the note is sharp. The pattern appears to moves more slowly as the note is
brought closer into tune and it appears to be stationary when the note is in tune.
d. Use the built-in microphone on the front of the Strobe Center 5000, or you may connect an external microphone or
other direct input to the external Input connector on the front panel. The internal microphone is disconnected
whenever the external Input is used.
e. Each of the 12 tuning wheels is identified with its corresponding note in the chromatic scale. In a relatively quiet
room, play the note to be tuned, and it will be picked up by the internal microphone. When using an external
microphone, it may be placed as close as a few inches from the musical instrument in order to pick up the maximum
volume of the tone being produced.
2. ENHANCING THE VISIBILITY OF THE STROBE PATTERNS
At times when playing in the lower or upper musical registers, you may want to make the strobe patterns more distinct. The
Strobe Center 5000 is equipped with an adjustment to enhance the visibility of the strobe patterns. The Image Clarifier is
Page 4
Page 7
always active and is set to either Low or High, corresponding to the lower or upper musical registers. Although the
SC-5000 II contains imaging improvements which yield good results even for low frequency sounds when in the factorydefault “HI” setting, the strobe patterns for very low notes can be further clarified by changing to the “LOW” setting. This
is now a one button function.
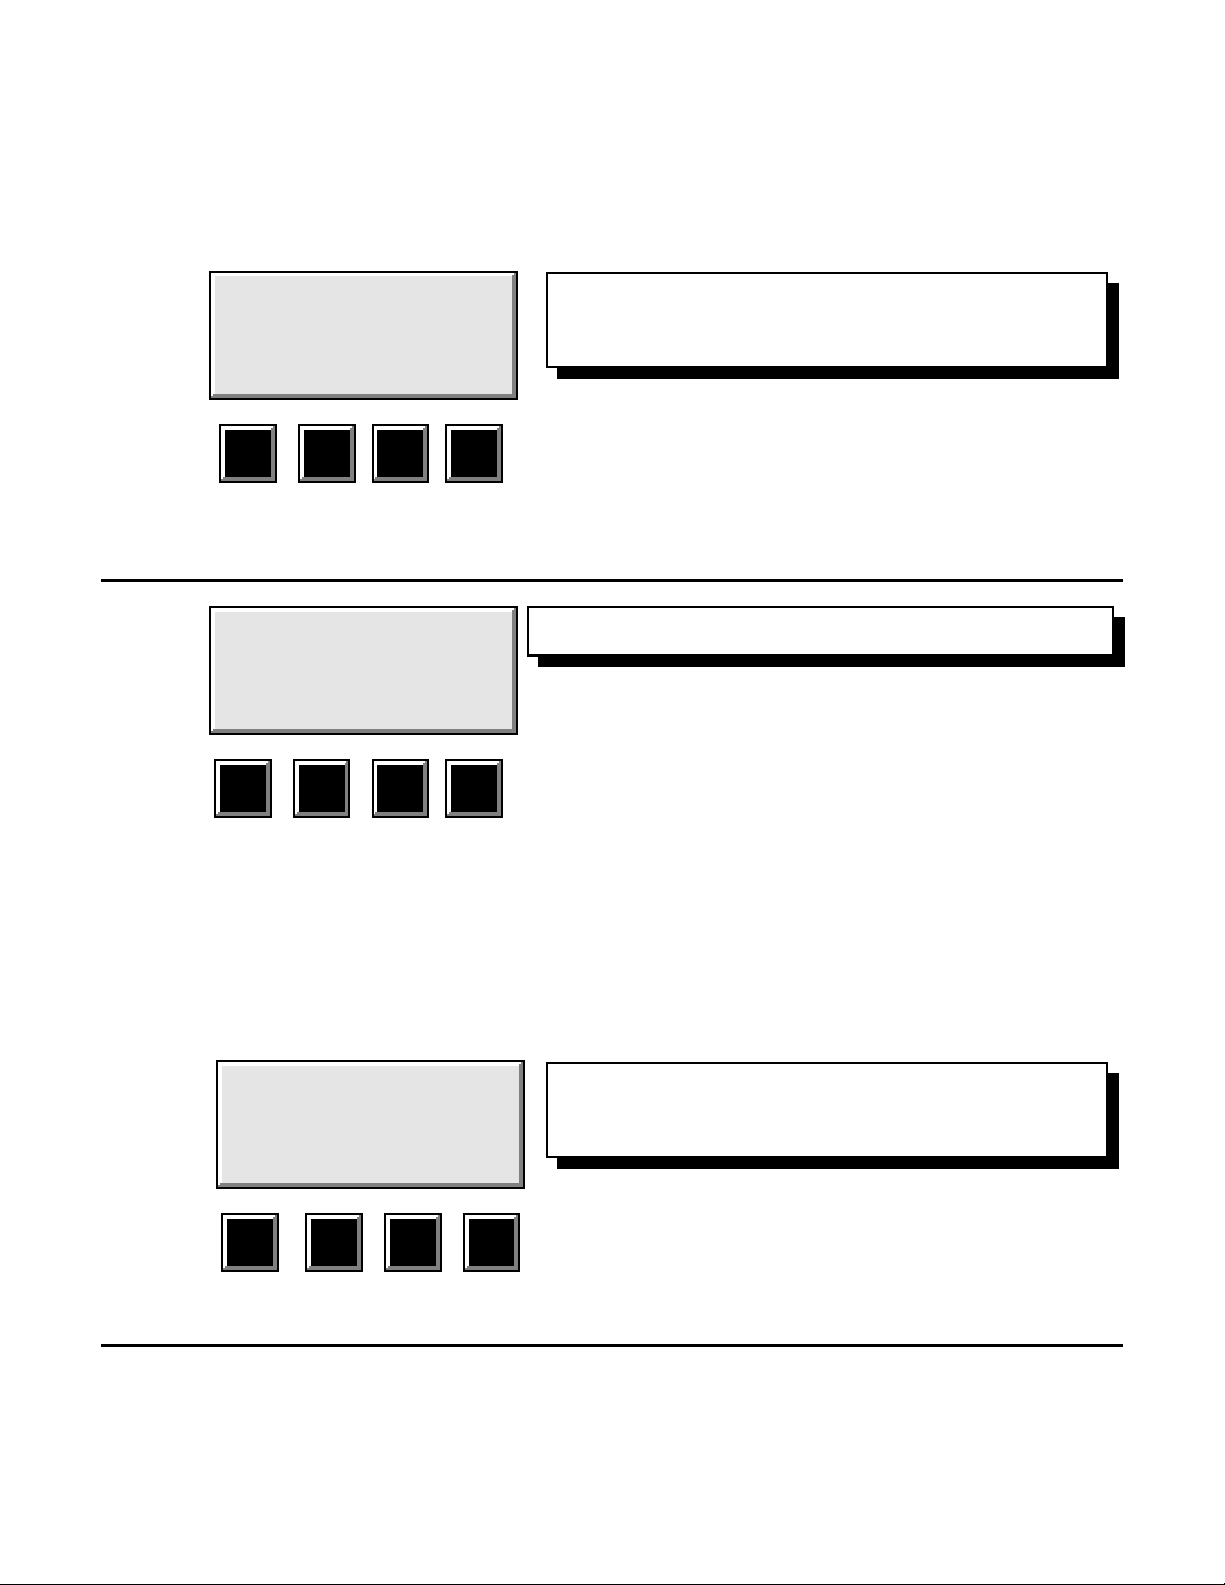
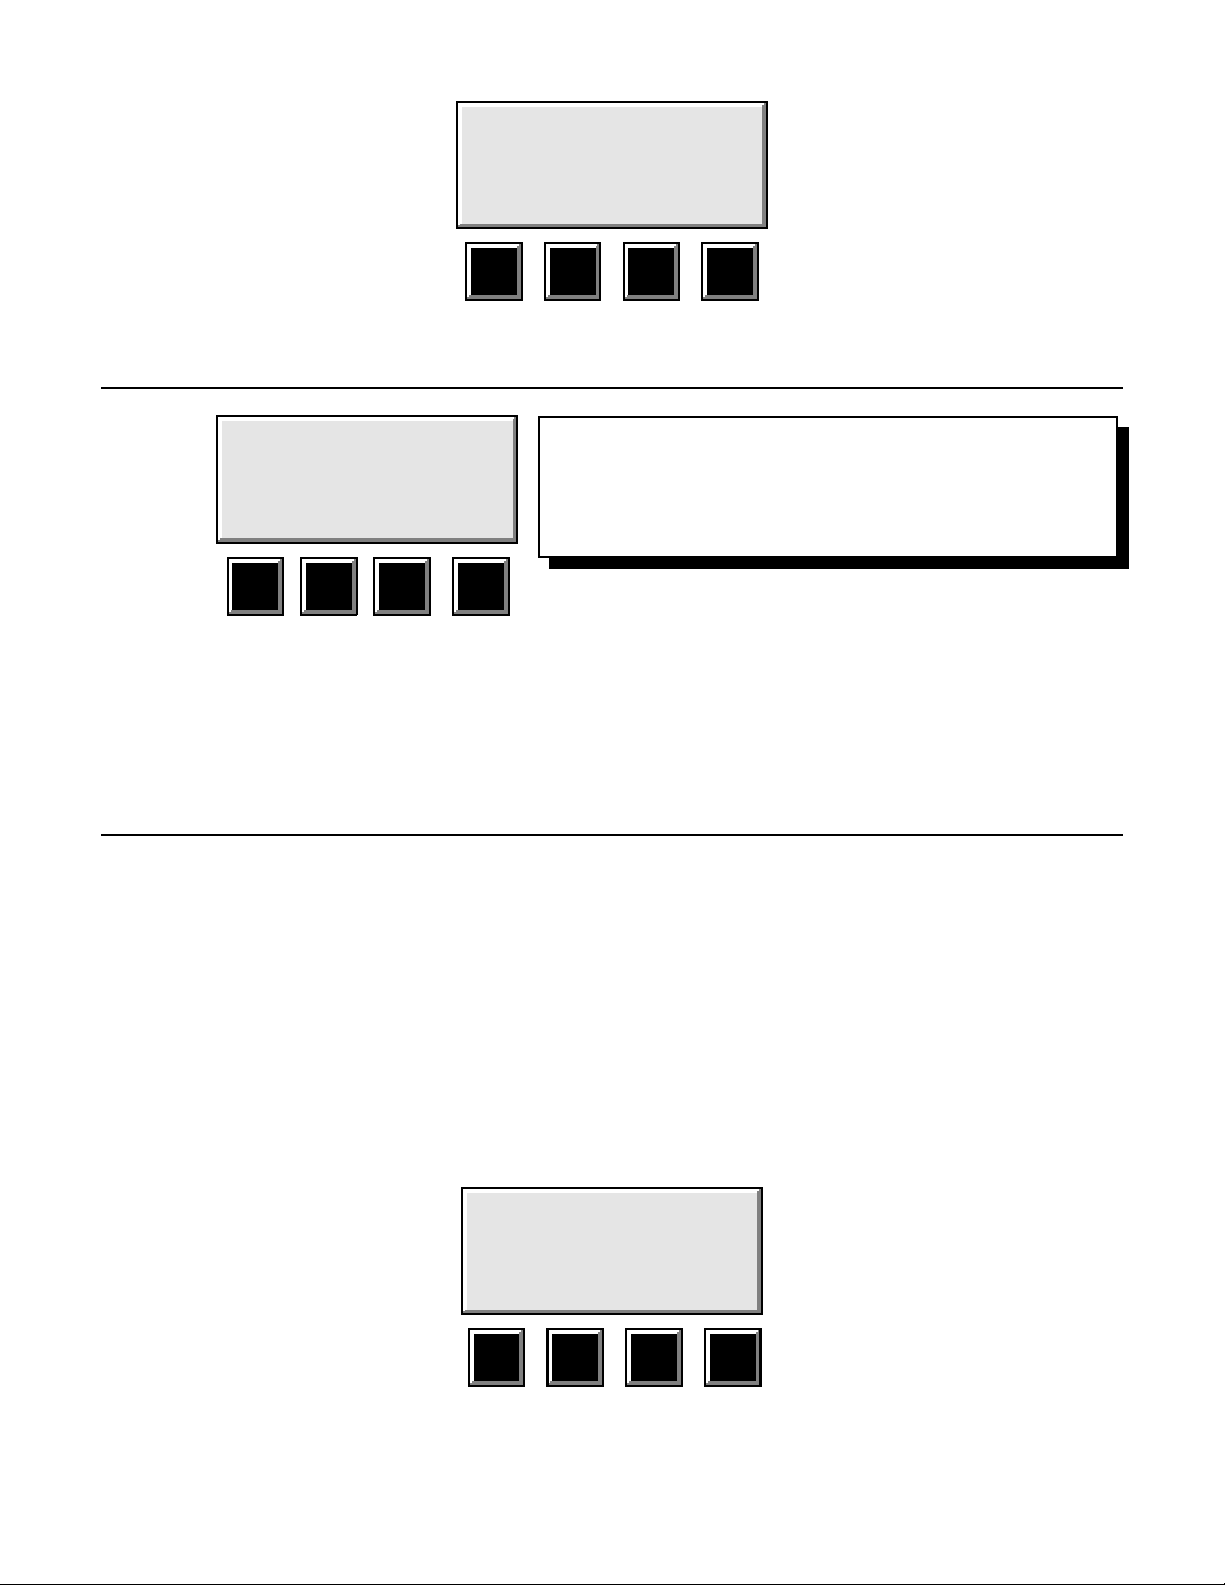
a. ADJUSTING THE IMAGE CLARIFIER
KEY=C
A=440 00 ¢
HI
SETUP IMAG
Key #1 calls up the Setup Menu.
Key #2 toggles the current Image Clarifier setting shown
on the third line of the LCD screen.
1 2 3 4
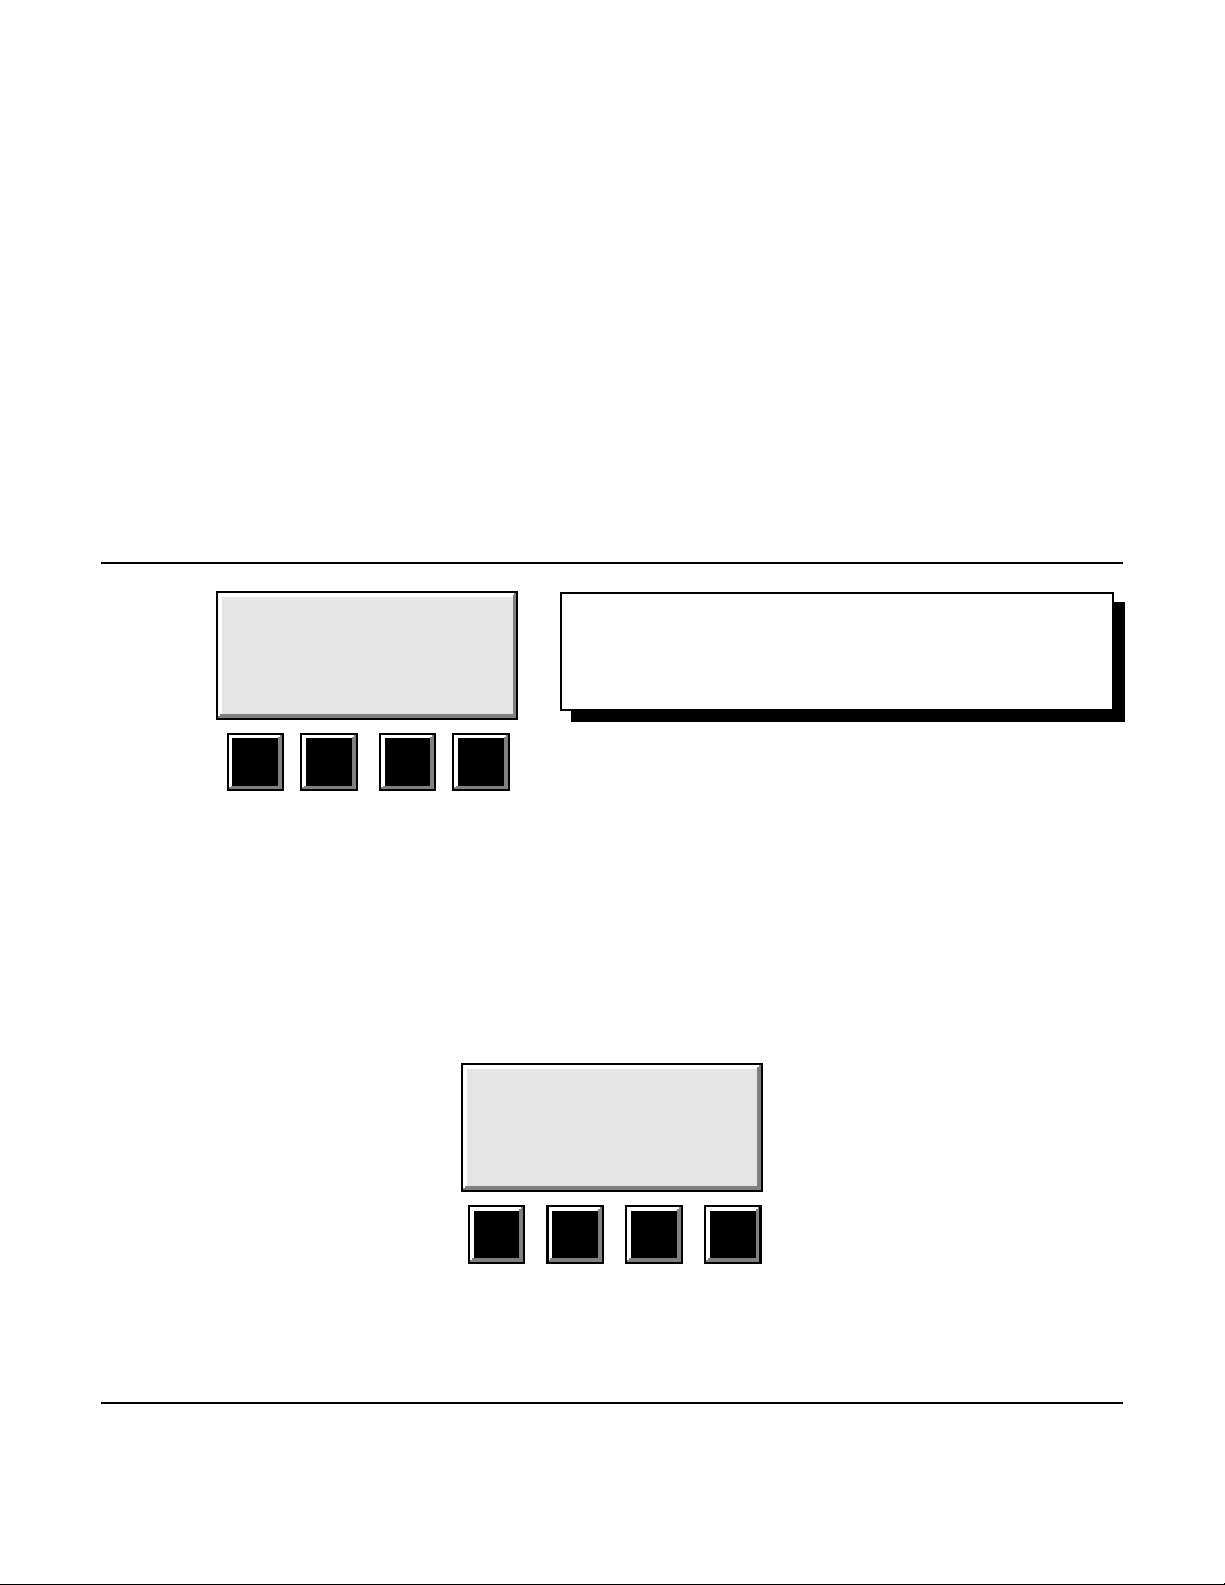
Pressing Key #2 “IMAG” will toggle the current clarifier setting which is always shown on the third line of the LCD
screen immediately above the “IMAG” label on the RUN screen:
KEY=C
A=440 00 ¢
LOW
SETUP IMAG
Function Key #2 will toggle the Image Clarifier setting.
1 2 3 4
The tuner will continue to operate normally while you are making adjustments to these image enhancements thus
enabling you to view the effect of the changes you are making. Pressing Key #2 again will toggle the current IMAG
status back to “HI” once again. This can be repeated indefinitely. NOTE: The adjustments you make from this screen
will only stay in this particular setting while you are using the tuner until you turn off the tuner’s power switch. To
change the Image Clarifier default setting (the way it will be set on power-up), use the following method.
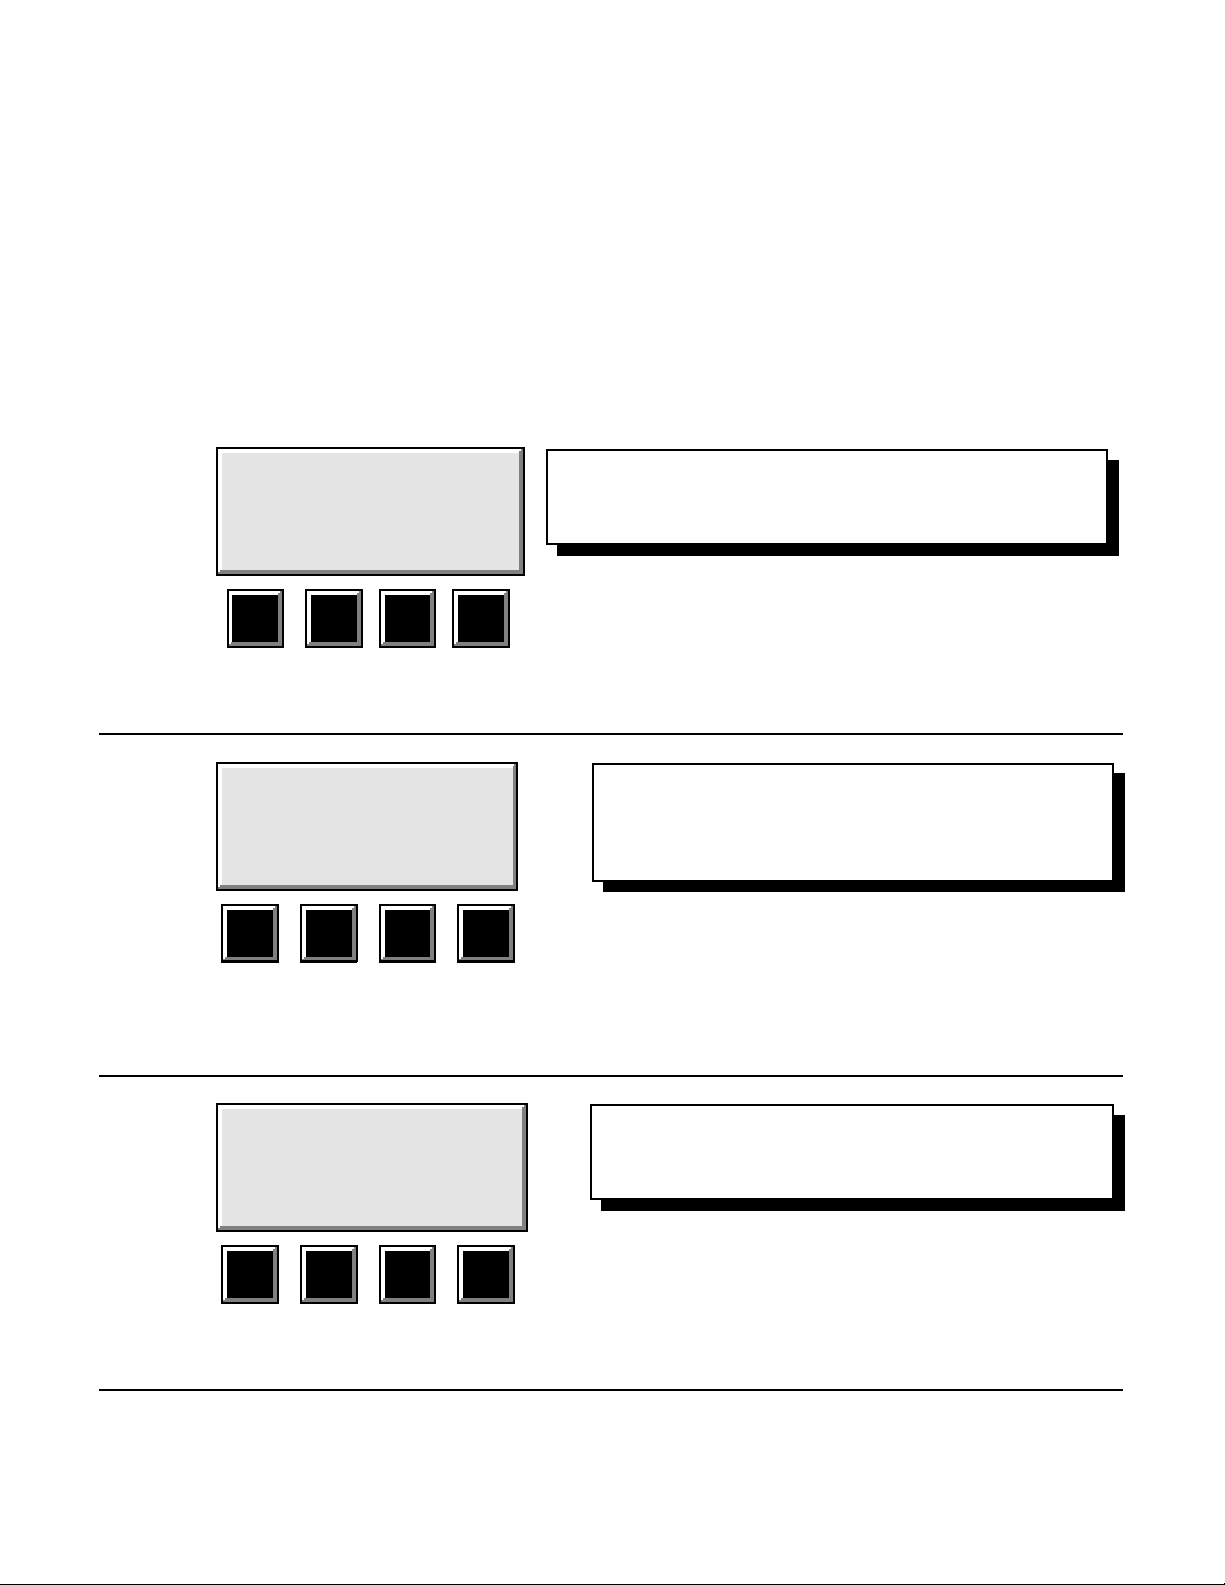
b. SETTING THE DEFAULT (POWER-UP) ADJUSTMENTS OF THE IMAGE CLARIFIER
KEY = C
A = 440 00 ¢
HI
SETUP IMAG
Key #1 calls up the Setup Menu.
Key #2 toggles the current Image Clarifier setting shown on
the third line of the LCD screen.
1 2 3 4
i. From the Run Mode screen press Key #1 to bring up the Setup Menu.
Page 5
Page 8
SETUP MENU
PLEASE SELECT MODE
OPTN FILE RUN DIAG
Key #1 will call up additional option menus.
Key #2 will bring you to the temperament and stretch file
choice menu.
Key #3 will return the tuner to the Run Mode
Key #4 will call up factory diagnostics.
1 2 3 4
ii. Press the #1 key which is labeled OPTN (meaning Options) and you will first see a screen for recalibrating the
tuner to a different pitch standard. From this new screen press the #1 key again (labeled NEXT) to bring up
the menu for adjusting the Image Clarifier:
SET IMAGE CLARIFIER
LOW / HI? (NOW - XXX )
NEXT RUN LOW HI
Key #1 brings up the next choice of Image setting.
Key #2 returns tuner to Run Mode.
Key #3 when pressed will set Image Clarifier to Low.
Key #4 when pressed will set Image Clarifier to High.
The present setting is shown in (NOW - XXX).
1 2 3 4
Press the #3 function key to set the Image Clarifier to Low or key #4 to set it to High. After you have chosen the
desired Low or High register, your choice will show in the "NOW - XXX" portion of the window. The tuner again
continues to operate in the normal Run Mode when you are setting the Image Clarifier so that you may observe the
difference in the clarity of the pattern while you make these adjustments. Pressing the #1 key will advance to the next
screen which allows you to store the last selected Concert A, Image Clarifier, +2/-1 Display,and Key settings into the
power-up memory:
STORE VALUES IN
MEMORY?
NO YES RUN
Key #1 returns to SETUP menu without storing defaults.
Key #2 stores new defaults and returns to SETUP menu.
Key #3 returns to Run screen without storing defaults.
1 2 3 4
c. USING DISPLAY +2 / -1 FOR ENHANCED VISIBILITY
The Display +2 Mode is used when tuning extremely low bass notes. Press the Display button once and all strobe
patterns are shifted up exactly two octave bands on the strobe disc. With the tuner in the Display +2 Mode, all
twelve tuning discs are now slowed down exactly two octaves, so that the strobe patterns on the tuning wheels are
correspondingly shifted upward exactly two bands on each wheel into the easier to read middle bands or registers
on the strobe discs.
Similarly for extremely high treble notes, Display -1 mode shifts all strobe patterns down exactly one octave. The
Page 6
Page 9

rotational speed of each strobe disc is doubled beyond the normal tuning speed. The dark tuning indications are
then shifted downward by one octave into the middle region of the tuning wheels. When in the Display +2 mode,
press the Display key one more time and the tuner wheels are shifted to the -1 mode.
Press the Display key one more time to return the Strobe Center 5000 back to the normal speed tuning mode. The
Display modes will follow this sequence as the Display button is pressed repeatedly: Normal display mode, Display
+2 mode, Display -1 mode, Normal display mode, etc. When in Display +2 or Display -1 modes, the indicator
panel will show the Display status:
KEY = C
A = 440 00 ¢
HI +2
SETUP IMAG
KEY = C
A = 440 00 ¢
HI -1
SETUP IMAG
Display for +2 Mode Display for -1 Mode
NOTE - The Display +2 / -1 button is only active in the Run Mode, with the Run Mode screen showing as above.
3. TUNING TO A PITCH STANDARD OTHER THAN A=440
The International Standard pitch of A=440 Hertz (cycles per second) can be raised or lowered to any tuning frequency you
desire within a broad range. This range of adjustment for middle A (A4) is from A = 350 Hz to A = 550 Hz. This modified
standard pitch can be memorized in the Strobe Center 5000 so that the tuner powers-up calibrated for the selected pitch. The
currently selected pitch for "A" is displayed by the LCD indicator screen.
a. To change the pitch standard of the tuner use the following procedure. After the tuner has gone through the
power-up self-check it will then display the Run Mode screen with the standards you have previously chosen. New
from the factory the tuner is set to power-up on equal temperament at A=440Hz. This is shown on the second line
of the screen below as A=440:
OR
KEY = C
A = 440 00 ¢
HI
SETUP IMAG
1 2 3 4
b. From the Run Mode menu above, press key #1 (SETUP) to call up the Setup Menu shown next.
Page 7
Page 10
SETUP MENU
PLEASE SELECT MODE
OPTN FILE RUN DIAG
1 2 3 4
c. Press key #1 OPTN (Option) once, and the tuner will display the screen for pitch recalibration:
RECALIBRATE TUNER?
NOW A = 440
NEXT RUN DOWN UP
Line two indicates current pitch of A.
Key #1 brings up the next screen menu.
Key #2 updates selected values and returns to Run Mode.
Key #3 lowers the pitch of A by 1 Hertz each time it is pressed.
Key #4 raises the pitch of A by 1 Hertz each time it is pressed.
1 2 3 4
d. Press key #3 to lower the pitch by 1 Hertz. Key #4 will raise the pitch in increments of 1 Hertz. You can press and
hold either button and the tuner will automatically step down to A=350 or up to A=550. Once the pitch is at the
desired frequency, press key #2 labeled RUN to return the tuner to the normal Run Mode screen. If you choose
the #1 function key labeled NEXT, you can proceed through the Image Clarifier and Store Memory screens before
returning to the Run Mode menu screen. Once you have returned to the Run Mode screen, notice that the display
will be changed to show the new pitch standard you have entered.
4. TUNING INSTRUMENTS THAT PLAY IN OTHER THAN THE KEY OF “C”
The Strobe Center 5000 solves one of the biggest difficulties of wind players, and other non-"C" instrument musicians when
using a precision tuner. Mental transposition of your note into the key of "C" is no longer required. The tuner can be easily
shifted to show the correct note being played for all instruments in C, B=, F, and E=.
When the Strobe Center 5000 is displaying the normal Run Mode screen, simply press the front panel button labeled “KEY”.
Press this button once, twice, or three times to cycle the tuner between the musical instrument tuning keys of C, B=, F, and
E=. The pitch of the twelve tuning motors will change as the speed of each tuning disc is internally transposed to the new
tuning key. Sound your note and the tuning will show up on the corresponding tuning wheel. The key signature selected
will be shown in the upper left hand corner of the Run Mode screen.
KEY = xx
A = 440 00 ¢
HI
SETUP IMAG
1 2 3 4
Page 8
Page 11
5. CUSTOMIZING THE START-UP MEMORY SETTINGS
If you desire the Strobe Center 5000 to always start-up in a different pitch standard than A=440, to a key other than "C"
(band directors may desire B=, for example), or with different settings of the Image Clarifier and +2/-1 DISPLAY controls,
it is easy to do.
a. In the Run Mode menu, make the adjustment to the key you desire by pressing the KEY button as just described.
Choose the display mode you desire of NORMAL, +2, or -1 by pressing the DISPLAY +2 / -1 button as described
previously.
b. Press the #1 function key to call up the Setup menu. Then press the #1 function key three more times (sequencing
through the #1 function key labels of OPTN {OPTION}, NEXT, and NEXT) to go through the screens of
RECALIBRATE TUNER?, and SET IMAGE CLARIFIER. As you proceed through each of these menus, check
that the settings are those you desire for the start-up memory values. You may adjust these values as needed until
you reach the menu screen:
STORE VALUES IN
MEMORY?
NO YES RUN
Key #1 returns to the Setup menu.
Key #2 saves new values and returns to the Setup menu.
Key #3 returns to Run Mode and uses new values.
(new value are not put into startup memory with #3)
1 2 3 4
c. You are now asked if you want to permanently store the choices you have just made into the "STANDARDS" or
power-up memory of the tuner. The power-up memory includes the user selection of the pitch frequency chosen
for middle A (A4), LOW or HIGH register for the Image Clarifier, the Display Mode (+2, -1, or NORMAL), and
the KEY in which your instrument is tuned (C, B=, F, or E=). The #2 key button (YES) will rewrite the power-up
memory of the tuner and return you to the Setup menu; key #1 (NO) will simply return you to the Setup menu
allowing you to re-sequence through the steps of the Setup menu to verify and/or reset your selections before
proceeding with the tuning process. Pressing the #3 key (RUN) will enter the new values you have selected and
return you directly to the Run mode; however, these new values will not be entered into the power-up memory.
KEY = xx
A = xxx 00 ¢
xxx xx
SETUP IMAG
1 2 3 4
d. At the Setup menu press key #3 labeled RUN to return to the normal running mode of the tuner. You are now ready
to begin tuning with the new parameters you have set.
Page 9
Page 12

6. CHECKING INTONATION WITH THE SC-5000
When you desire to check your playing intonation, the tuner can assist in a very simple manner. You will need a partner
to adjust the pitch of the tuner to match the intonation of the note(s) you are checking.
When checking and adjusting your own intonation, it is useful to use an external microphone. Turn your back to the
tuner while playing your note so you don't see the indications on the tuning discs while your partner is making the
adjustments. That way you will be less likely to slowly change your intonation at the same time your partner is
adjusting the tuner.
a. Connect an external microphone to the Input connector of the tuner. Set this microphone on a stand so that you
can face away from the tuner.
b. Adjust the tuner to the tuning key of your instrument as detailed in Section 4 above. If necessary, raise or lower
the standard tuning pitch of the tuner by following Section 3.
c. You are now ready to begin. For the remainder of this section we will assume that your instrument is tuned in "C"
with a Concert A reference pitch of A = 440 Hertz. The normal Run Mode screen of the tuner will be displayed:
KEY = C
A = 440 xx ¢
HI
SETUP IMAG
1 2 3 4
d. Play your note into the microphone, while your partner watches the strobe windows. While you are sounding your
note, your partner will press the PITCH UP and/or PITCH DOWN buttons until the dark markings on the tuning
wheel corresponding to your note appear to be stationary. When these markings are stationary the tuner is in-tune
with the note you are playing.
e. The display will show the correctness of your intonation by indicating how many cents sharp or flat your partner
adjusted the tuner to match the note as you actually played it. This is presented in the "+" (sharp) or "-" (flat)
"XX.X" "¢" (cents) location of the display screen.
f. Musical tuning is measured by units called cents, representing a 1/100 division of a semitone. There are 1200 cents
in each octave, and exactly 100 cents between each half-step note in equal temperament tuning. The SC-5000 is
adjustable in a range of 1/2 semitone (+50.0 cents sharp to -50.0 cents flat) from being perfectly in tune
(00.0 cents) with the selected temperament and pitch.
7. ENHANCED RESOLUTION OF INTONATION MEASUREMENTS
As you continue to practice your intonation with the SC-5000, you will find that your pitch accuracy continually improves.
As you find yourself playing more and more closely to perfect intonation, you may desire that your partner adjust the tuner
more closely to your pitch. The SC-5000 has tuning accuracy to within 0.1 cent. The tuner may be adjusted to your note
within that same accuracy. The tuner always starts with a displayed resolution of 1 cent. This is shown as "00 ¢". When
operating in the Run Mode, the tuner can be set for enhanced resolution of either 0.5 cents or 0.1 cents. Press and hold the
ENTER key, then press either PITCH UP or PITCH DOWN and the resolution will be changed to 0.5 cents. To further
Page 10
Page 13

enhance the resolution to 0.1 cent increments, first release the ENTER key, then press and hold it again while you press either
PITCH UP or PITCH DOWN. The display screen always presents enhanced resolution of 0.5 cents and 0.1 cents by showing
a decimal point and place: "xx.x ¢".
When the tuner is set for enhanced resolution, the PITCH UP/DOWN buttons increment the tuning adjustments of the tuner
in steps of 0.5 cents or 0.1 cents. This permits intonation measurements with an accuracy of 1/1000 semitone.
The resolution of the tuner may be returned to 1 cent resolution by again using the shifted key buttons for PITCH UP/DOWN
(press and hold the ENTER KEY while you press either PITCH UP or PITCH DOWN). The tuner resolution cycles through
a selection sequence of 1 cent, 0.5 cent, 0.1 cent, 1 cent, etc. Note that the tuner requires you to release the ENTER key
between each step of this resolution selection cycle. Then press and hold it again to go to the next step selection.
Other possible uses of the enhanced resolution of 0.5 cent, or 0.1 cent could be for exact measurements of precise partial tone
frequencies during the manufacture of percussive musical instruments (for example - bells, chimes, gongs, etc.), or for
specific scientific research into the timbrel structure of complex sounds and vibrations in the musical and audible frequency
spectrum.
8. ON-STAGE TUNING USING THE SC-5000 DURING A PERFORMANCE
You can measure your intonation during an on-stage performance by connecting a direct input to the external Input of the
tuner. This direct input can be another microphone, a clip-on pick-up, a direct feed from a mixing console, etc. Your
intonation precision and that of other performing partners can be visible to you and your performing ensemble as you observe
the SC-5000 during the performance. This same external Input may be patched through to the output connector and returned
to a mixing console as an extra signal source to the audience reinforcement. The internal microphone is automatically
bypassed whenever the external Input is connected to a signal source.
When using the external Input in the patch through mode to the Output connector, you and/or your performing partners may
want to tune-up your instruments while the audience is present. The Mute button permits you to execute a silent tuning
without disturbing your audience.
The Mute is a toggle function. Press the Mute button once, and the Input to Output patch through signal path connection
is interrupted. Press this same Mute button again, and the patch through connection is restored. The activated state for the
Mute Mode is indicated by the letter "M" on the regular Run Mode screen below the A = XXX indication as shown here:
KEY = C
A = xxx +00 ¢
M HI
SETUP IMAG
9. TUNING FOR NON-EQUAL TEMPERAMENTS
Equal temperament divides a musical octave into 12 equal semitones. The distance in pitch between any two neighboring
notes is exactly 100 cents (1200 cents making one musical octave). Since approximately 1850, Equal Temperament has been
commonly accepted as the standard musical tuning temperament - because any and all musical keys sound "equally" the same
and are completely enharmonic. All keys can be "equally" used - thus the name "Equal Temperament".
Page 11
Page 14
Because the (twelfth root of two) mathematical ratios of equal temperament are not exactly in tune (in both the scientific and
historic sense of whole number ratios between all the twelve musical intervals in the chromatic scale - and particularly for
major thirds, fourths and fifths), many performers of fixed tuned instruments, such as harpsichords and organs, prefer to have
the instrument tuned so that certain keys and intervals sound more perfectly in tune and "sweeter" to their ears and those of
the audience.
Many musical history scholars claim that music composed prior to 1850 should be performed with historically specific
non-equal temperaments so that contemporary performances of this music will sound more exact to the audible intentions
of the composers. Tuning an instrument so that a particular key, or certain keys, sound in distinctly good tune while other
keys sound somewhat more roughly in tune (or have one or more completely unacceptable "wolf" keys) is known as tuning
in non-equal temperament. Use the following steps to select a non-equal temperament from the preprogrammed tables in
the Strobe Center 5000:
KEY=C
A=440 00 ¢
HI
SETUP IMAG
Key #1 calls up the Setup Menu.
Key #2 toggles the current Image Clarifier setting shown
on the third line of the LCD screen.
1 2 3 4
a. Press the #1 Function key to access the Setup Menu.
SETUP MENU
PLEASE SELECT MODE
OPTN FILE RUN DIAG
Key #1 calls up the additional option menus.
Key #2 proceeds to the File Menu screen
Key #3 returns the tuner to the Run Mode.
Key #4 is for running factory diagnostics.
1 2 3 4
b. From the Setup Menu, press the #2 Function Key named FILE. You will now see the display screen for the File
Menu:
FILE MENU
PLEASE SELECT MODE
TMPR STRCH SETUP
1 2 3 4
c. Press the #1 Function Key to see the Temperament Menu:
Page 12
Key #1 calls up the Temperament Menu.
Key #2 calls up the Stretch Menu
Key #4 returns to the Setup Menu.
Page 15
TEMPERAMENT MENU
PLEASE SELECT MODE
START COPY
–EDIT –DEL RUN STOP
Key #1 is used to Start a TMPR file; also to use and/or
edit a new or existing TMPR file.
Key #2 Copies or Deletes a Custom TMPR file.
Key #3 returns the tuner to the Run Mode.
Key #4 Stops an active TMPR or STRCH File.
1 2 3 4
d. Press the #1 key labeled START-EDIT to call up the listing of all preprogrammed temperaments, and any custom
temperaments you have saved in the memory. The display screen will first show the 8 temperaments
preprogrammed into the Strobe Center 5000: The cursor is an underline beneath the first character of any file
name. In this first screen it shows as"E
QUA", with an underline under the "E" character.
SELECT TMPR =
QUA PYTH JUMA MEAN
E
WRK3 KRN3 YONG KLNR
NEW (EDIT) CNCL START
1 2 3 4
Key #1 begins the process of naming and editing a
new temperament file.
Key #2 is visible only from custom user files, and
goes to the Edit sequence for the file name at the
cursor.
Key #3 returns to the TEMPERAMENT MENU.
Key #4 activates the selected temperament and
returns to RUN Mode.
e. Use the Pitch Down and Pitch Up Keys (Down
Arrow - cursor forward and down; and Up Arrow - cursor up and back) to scroll the cursor through the
preprogrammed temperaments. When the cursor is on the eighth Name on any page of stored temperaments (in
this case YONG), press the Down Arrow key again and the tuner will display the first memory page of your custom
temperaments. Similarly, when the cursor is on the first Name of any custom temperaments screen, pressing the
Up Arrow key for the Back Cursor will show the previous page of custom or preprogrammed temperaments.
When the cursor is on the temperament memory file you desire, press the #4 function key to load this temperament
into the operation buffer of the tuner. The display will then return to the Run Mode screen and indicate the chosen
temperament file.
The temperaments listed on the screen above are the eight preprogrammed temperaments shipped with the Strobe
Center 5000. These eight temperaments are stored in a non-alterable, non-erasable memory of the tuner.
Remembering that there is always a perfect 2/1 frequency ratio (and 1200 Cents) between all octaves, each of the
eight Preprogrammed Temperaments are briefly described below:
EQUA - EQUAL TEMPERAMENT is the standard tuning scale in which the tuner powers up. There are exactly 100 Cents
between each note in the chromatic scale and 1200 Cents in each octave. Equal Temperament has been the standard musical
tuning used throughout the world since about 1850.
PYTH - PYTHAGOREAN TUNING is the most ancient method of tuning musical instruments in our recorded history of
Western music. This tuning was the musical standard for more than 1000 years, until the fourteenth century. It is based on
the exact, whole number frequency ratios of 2/1 for octaves, 3/2 for Perfect fifths, and 4/3 for Perfect fourths. The tuning
was started with the note E= and proceeded in an ascending circle of Perfect fifths (and descending octaves), ending on the
note G<. The interval E= - G< is much too wide to be usable and is known as a "wolf" tone. Major thirds are very wide,
and minor thirds are very narrow compared to the Equal Temperament to which we are accustomed. Thus, triads will sound
Page 13
Page 16

very different. This may be the reason why music from that era was based mostly on octaves, fifths, and fourths and for
which this tuning is said to sound extremely good.
JUMA - JUST INTONATION (MAJOR PITCH) was created after musicians discovered the sweet richness of the
perfectly aligned harmonic partial tones in the major third whole-number frequency-ratio of 5/4. The tuning uses as many
whole number ratio perfect fifths, perfect major thirds, and perfect minor thirds as possible. It sets a scale with 6 perfect
major triads and 6 perfect minor triads, while the other 12 musical keys are essentially unusable "wolves". "White" note
major keys, with more key signature sharps than flats, and their relative minors are more favored by Just Intonation in Major
Pitch.
MEAN - (1/4 COMMA) MEAN-TONE is a temperament used to increase the number of usable keys beyond the twelve
permissible with either just intonation tuning described above, while retaining the purity of the 5/4 whole-number ratios for
the major thirds as much as possible. This temperament creates eight perfect major thirds, with sixteen favorable good keys
and eight "wolves". The fifths are all tempered slightly more narrow than in equal temperament.
WRK3 - WERCKMEISTER III is classified under the category of a "well temperament". Tunings in a "well
temperament" allow performance of music in any key. Although some keys sound more favorably close to pure whole
number ratio tuning and some keys are more roughly in tune, there are no completely unacceptable "wolf" keys in a "well
temperament" tuning. There is a sense of key "color" because the keys with a more favorable tuning are described by some
scholars as having a peaceful, restful quality; while those more roughly in tune are characterized as being more active and
brilliant in their timbre. Werckmeister III sets most of the major thirds slightly wide, and is a useful method for "well
temperament" tuning. It should be used with the warning that one major third (A= - C) is much too wide and sounds very
out of tune. Keys with few sharps or flats are favored, with C major and A minor being the best. Those keys with many
sharps or flats produce a rougher tonality.
KRN3 - KIRNBERGER III is another "well temperament" which uses five tempered (narrowed) fifths, the perfect major
third of C - E, and a sequence of seven perfect fifths. All keys are usable, yet due to the basis on tempered and perfect fifths,
there are only a few good intervals of major or minor thirds. Kirnberger III sounds much different than the equal
temperament to which our ears are accustomed. It is probably best for music from the late eighteenth century.
YONG - THOMAS YOUNG's temperament is a "well temperament" identical to one discovered by Francescantonio
Vallotti. The scale tempers six fifths by narrowing them, while six fifths retain the pure ratio of 3/2. Young started the
tuning with the note C, while Vallotti began with the note F. The favorable and less favorable keys get shifted slightly when
one modulates from C to F. Of the seven preprogrammed non-equal temperaments available in the tuner, the Young
temperament is the closest to Equal Temperament, with some differentiation of color in the various musical keys. Young's
choice of starting on C seems to slightly favor some of the more commonly encountered historic keys over starting on F.
KLNR - KELLNER is another “well-tempered” scale believed to be that employed by J. S. Bach for “The Well-Tempered
Clavier”. It is built on the concept of producing equal beat rates in the major third and fifth intervals built on the C key root.
It has become an extremely popular temperament because of its excellent balance of tone color among a wide range of keys
with minimal “wolf” intervals (only three Pythagorean thirds at Ab, F#, and C#).
f. Returning to our previous section about selecting a preprogrammed temperament, you have made your choice by
moving the cursor to the desired temperament and then pressing the #4 function key (SLCT) to select the
temperament. The tuner has modified the operating parameters buffer to the new Temperament values and returned
you to the Run Mode screen. The display indicates the temperament you have chosen, and also shows Enhanced
Resolution of the tuner:
Page 14
Page 17

KEY=C TMPR=
xxxx
A=440 00.0¢
HI
SETUP IMAG
The selected temperament is shown by “xxxx”.
Resolution is Enhanced to 0.1 Cent Steps.
1 2 3 4
The resolution may later be changed back to 1 cent, or 0.5 cent increments. Internal accuracy of the Temperament
is always maintained to the precise 0.1 Cent values which have been stored in the memory file. When exiting the
Temperament Menu, the tuner indicates the Enhanced Resolution to denote the accuracy with which the
temperament values are being used by the tuning motor controllers.
NOTE : The SC-5000 tuner powers-up in equal temperament. During the power-up sequence the EQUA file (with the values
for equal temperament) is input to the operating parameters of the tuner with the full precision of 0.1 Cent Resolution.
Accuracy of the strobe discs is always correct to 0.1 Cents, even when the displayed resolution shows Pitch Up/Down
increments of 1 Cent, or 0.5 Cent. The tuner always powers-up with resolution set to 1 Cent increments.
10. SETTING AND USING CUSTOM NON-EQUAL TEMPERAMENTS
a. To make and save a new Custom Temperament, it is first necessary to assign a new name to the tempered scale
values you plan to enter. You may also copy an existing TMPR file to a new name and modify it from there. From
the Run mode screen, press the #1 SETUP, #2 FILE, and #1 TMPR (Temperament) function key buttons to call
up the Temperament Menu:
TEMPERAMENT MENU
PLEASE SELECT MODE
START COPY
–EDIT –
DEL RUN STOP
1 2 3 4
b. Press the Start/Edit (#1) function key to see the list of preprogrammed TMPR files, then press the NEW (#1)
Function key to open and save a new custom temperament file. The following Pick Name screen will be displayed:
Page 15
Page 18

PICK NAME – ABCDEFGH
IJKLMNOPQRSTUVWXYZ0
1 23456789
TMPR=____
<–– ––> BKSP
CNCL
Key #1 shifts the cursor Left by one space.
Key #2 shifts the cursor Right by one space.
Key #3 backspaces and deletes one character in the
name.
Key #4 cancels the New file name and returns to the
Temperament Menu.
1 2 3 4
c. Scroll through the letters and numbers using the #1 and #2 function keys as the Left Cursor and Right Cursor
respectively. Move the cursor to the corresponding letter, space (directly following digit "9"), or number in the
4-character NAME of your new Custom Temperament. Press the Enter key to select the desired character at the
cursor location. Press the #3 BKSP (Backspace) function key to delete the previous character you have just
entered. The #4 function key is used to cancel the newly opened file and returns you to the Temperament Menu.
Once the fourth letter or number of the name has been selected, the display screen will permit you to confirm the
file name you have chosen:
THE NAME CHOSEN FOR
TMPR IS: XXXX
REDO OK CNCL
Key #1returns to the previous screen.
Key #2 advances to the next screen.
Key #3 cancels the New file name and returns to the
Temperament Menu.
1 2 3 4
d. If the characters were entered incorrectly, you can press the #1 function button and re-enter the name of the custom
temperament. You may choose to Cancel the entry of a new temperament and to return to the Temperament Menu.
To Cancel, press the function key #3. Any existing temperament or stretch files will be stopped as the tuner returns
to the normal RUN Mode screen.
Press the #2 function key to edit the scale values for the temperament file name you have selected. The tuner will
first check its memory to see if the name you have selected has already been used. A warning screen will appear
if the name has been previously stored in the custom user memory:
TMPR = XXXX
ALREADY EXISTS
NO
EDIT DEL RUN CHNG
Key #1 proceeds to the Editing sequence.
Key #2 permits DELetion of old TMPR file.
Key #3 returns the tuner to the Run Mode, using no
TMPR or STRCH files.
Key #4 returns to the Temperament Menu screen.
1 2 3 4
e. Use the #3 function button to return the tuner to the Run Mode using no temperament or stretch files. When you
choose to go back and enter a different name for the custom temperament, press the #4 Function key to return to
Page 16
Page 19

the Temperament Menu. You can again press START-EDIT (Function Key #1) in the Temperament Menu and
then NEW (Function Key #1) under the SELECT screen to enter a different designator for your custom scale
values. You may also choose a different option from the Temperament Menu.
Use the #2 function key when you want to delete the existing custom TMPR file from your custom temperament
memory locations.
NOTE: Due to a program oversight in this version of software, the DELete choice will always return to the Temperament
Menu screen without deleting the named file (normal if the name corresponds to a factory pre-programmed file) even if the
named file does not conflict with a factory file. However, you may still delete the appropriate previously-programmed user
file under COPY-DEL (Function Key #2) of the Temperament Menu.
f. To Edit the temperament which already exists (on screen: TMPR= XXXX ALREADY EXISTS), use the #1
function key. The tuner will advance to the Edit TMPR sequence. In the Edit TMPR sequence, the offsets for each
note are updated and/or rewritten into the tuner memory as each note value is entered. The existing temperament
value for each note is overwritten as you enter each new value! Use the Copy procedure to make a duplicate of
a useful existing temperament with a different name, and then edit the newly-made copy of the TMPR file.
g. Similarly, if you have confirmed that the selected name (on the screen - THE NAME CHOSEN FOR TMPR IS:
XXXX) is OK, by pressing the #2 Function button and the memory check determines that the selected name does
not already exist, the tuner immediately opens a new TMPR file with the name you have selected. The screen
advances to the Edit TMPR sequence.
In the unlikely event that the memory of the tuner is full, you will see an error message of “MEMORY IS FULL
- PLEASE DELETE A TMPR OR STRCH FILE”. The tuner memory capacity is 255 custom TMPR files, or 31
custom STRCH files, or a mixture of both custom TMPR and custom STRCH files. If you see this message
display, it will be necessary to delete one or more custom TMPR or STRCH files in order to enter your new file.
Before deleting one of these useful files, you will probably want to write down the specific values for every
tempered and/or stretched note in the file. In Appendix A and Appendix B of this instruction manual, you will find
blank tables for your hard copy entry of custom temperament files and custom stretch files (with permission to
photocopy these pages). Use the Edit TMPR or Edit STRCH sequence to examine the specific values for each note
in the TMPR of STRCH file you plan to delete. Do not alter any value as you transfer this information to your hard
copy paper record. After you have documented the details of your file it is then safe to delete it and make room
for more custom files.
h. In the Edit TMPR sequence, the temperament value for each note (in Cents deviation from the Equal Tempered
Scale) is input using the Pitch Up and Pitch Down buttons on the tuner front panel. Entering the selection for each
note overwrites that value into the memory location for that specific note in the TMPR file. The tuner starts with
C and proceeds in an increasing sequence through all twelve notes of the chromatic scale, ending on B. The first
screen display is:
Page 17
Page 20

TMPR = XXXX KEY = C
NOTE = C +XX.X
DONE NEXT
1 2 3 4
Use the Pitch Up and/or the Pitch Down control to adjust the number of Cents deviation from the Equal Temperament
tuning for the note C. You may enter this value with a precision of 1/10 of 1 Cent. Press the ENTER button on the
tuner front panel or Function Key #4 (NEXT) when the displayed temperament value for the note C is correct. The
display will increment the note to C#:
TMPR = XXXX KEY = C
NOTE = C< +XX.X
DONE NEXT
1 2 3 4
Use the Pitch Up and/or the Pitch Down control to adjust the number of Cents deviation from the Equal Temperament
tuning for the note C#. You may enter this value with a precision of 1/10 of 1 Cent. Press the ENTER button on the
tuner front panel or Function Key #4 (NEXT) when the displayed temperament value for the note C# is correct. The
display will increment the note to D:
TMPR = XXXX KEY = C
NOTE = D +XX.X
DONE NEXT
1 2 3 4
Use the Pitch Up and/or the Pitch Down control to adjust the number of Cents deviation from the Equal Temperament
tuning for the note D. You may enter this value with a precision of 1/10 of 1 Cent. Press the ENTER button on the
tuner front panel or Function Key #4 (NEXT) when the displayed temperament value for the note D is correct. The
display will increment the note to D#.
The same procedure will be continued sequentially through the notes E, F, F<, G, G<, A, and A<, until the screen
increments to the note B:
Page 18
Page 21

TMPR = XXXX KEY = C
NOTE = B +XX.X
DONE NEXT
1 2 3 4
Use the Pitch Up and/or the Pitch Down control to adjust the number of Cents deviation from the Equal Temperament
tuning for the note B. You may enter this value with a precision of 1/10 of 1 Cent. Press either the ENTER button on
the tuner front panel or Function Key #3 (DONE) or Function Key #4 (NEXT) when the displayed temperament value
for the note B is correct. The display screen will now change to:
TMPR = XXXX
SETTINGS
COMPLETE – PRESS
ENTER TO CONTINUE
1 2 3 4
i. Press the Enter button on the tuner front panel. All custom temperament note values are now saved to the "XXXX"
TMPR file. The tuner returns to the normal RUN screen with the edited temperament file now active:
KEY=C TMPR=
xxxx
A=440 00.0¢
HI
SETUP IMAG
The selected temperament is shown by “xxxx”.
Resolution is Enhanced to 0.1 Cent Steps.
1 2 3 4
11. COPYING AND MODIFYING (OR DELETING) AN EXISTING TEMPERAMENT FILE
Although this is a subset of the material above, proper explanation of the COPY/DELETE procedures calls for an
independent description. Sometimes it is easier and faster to copy and modify an existing TMPR file than to create a whole
new one. Particularly with Custom Non-Equal Temperaments, there may just be two or three sharps which, for example,
get raised to the pitch level of their non-enharmonic flats (this is the sole difference between the Minor Mode of Just
Intonation and the Major Mode tuning preprogrammed into the non-volatile memory).
a. Use the #2 Function Key in the Temperament Menu to call up the Copy/Delete Menu:
Page 19
Page 22

COPY/DEL MENU
COPY DEL RUN BACK
Key #1 copies a custom TMPR file to a new name.
Key #2 deletes a custom TMPR file from memory.
Key #3 returns the tuner to the Run Mode using standard
EQUAL-TEMPERED tuning values.
Key #4 returns the tuner to the TEMPERAMENT Menu.
1 2 3 4
Use the #3 function key to exit the temperament menu sequence. The tuner will return to the Run Mode using standard
equal-tempered tuning.
Use the #4 function key to return to the Temperament Menu screen when you desire to follow a procedure different from
the COPY/DELETE menu. The Temperament Menu will again appear and allow you to reselect your desired option.
b. Deleting a custom temperament file
If you have received a MEMORY IS FULL... error message, and you have already documented some presently unused
custom TMPR files, you can Delete them by first pressing the #2 function key. After you press the DELete key, the tuner
will display a listing of all the custom TMPR files:
SELECT TMPR =
XXXX XXXX XXXX XXXX
XXXX XXXX XXXX XXXX
CNCL SLCT
Key #3 returns to the Temperament Menu with no
changes.
Key #4 selects TMPR file to delete from memory.
1 2 3 4
Use the Pitch Down and Pitch Up Keys (Down Arrow - cursor forward and down; and Up Arrow - cursor up and back) to
scroll the cursor through the user-programmed temperaments. When the cursor is on the eighth name on any page of stored
temperaments, press the Down Arrow key again and the tuner will display the next memory page of your custom
temperaments. Similarly, when the cursor is on the first Name of any custom temperaments screen, pressing the Up Arrow
key will show the previous page of custom (or preprogrammed) temperaments.
When the cursor is on the temperament memory file you desire to delete, press the #4 function key (SLCT). The tuner will
always ask for confirmation of file deletion before executing your request:
DELETE TMPR = XXXX
ARE YOU SURE?
Key #1 deletes file and returns to TMPR Menu.
Key #2 returns to the Temperament Menu.
Page 20
YES NO
1 2 3 4
Page 23

Choose the #2 function key to return directly to the Temperament Menu without deleting the selected custom TMPR file.
Use the #1 function key to Delete the selected custom TMPR file. After deleting the file, the tuner returns to the
Temperament Menu.
c. COPYING AN EXISTING CUSTOM TEMPERAMENT FILE TO A NEW NAME
COPY/DEL MENU
COPY DEL RUN BACK
Key #1 copies a custom TMPR file to a new name.
Key #2 deletes a custom TMPR file from memory.
Key #3 returns the tuner to the Run Mode using standard
EQUAL-TEMPERED tuning values.
Key #4 returns the tuner to the TEMPERAMENT Menu.
1 2 3 4
Use the #1 function key to Copy an existing TMPR file to a new custom TMPR file with a new name. When the Copy
function key is pressed, the screen first asks for a new name to which the existing TMPR file will be copied:
PICK NAME – ABCDEFGH
IJKLMNOPQRSTUVWXYZ0
1 23456789
TMPR=____
<–– ––> BKSP
CNCL
Key #1 shifts the cursor Left by one space.
Key #2 shifts the cursor Right by one space.
Key #3 backspaces and deletes one character in the
name.
Key #4 cancels the New file name and returns to the
Temperament Menu.
1 2 3 4
Scroll through the letters and numbers using the #1 and #2 Function keys as the Left Arrow and Right Arrow respectively.
Press the #3 function key to reenter the previous letter or number in the 4-space name of your new custom temperament.
Press the #4 function key to return to the COPY/DEL menu screen.
When the fourth letter or number of the name has been selected, the tuner will first check its memory to see if the name you
have selected has already been used. A warning screen will appear if the name has been previously used by another custom
TMPR file:
TMPR = XXXX
ALREADY EXISTS
RE-
NAME DEL RUN
Key #1 returns to the PICK NAME sequence.
Key #2 permits DELetion of old TMPR file.
Key #3 returns the tuner to the Run Mode, using standard
EQUAL-TEMPERED tuning values.
1 2 3 4
Use the #3 function key to return the tuner to the Run Mode using standard equal-tempered tuning. The #1 function button
returns you to the Name Selection screen, permitting you to make a different choice. Use the #2 function key when you want
Page 21
Page 24

to DELete the previously used TMPR file name from your custom temperament memory locations. Whenever you choose
to Delete a custom TMPR file, the tuner will request confirmation of the file deletion before performing the erasure:
DELETE TMPR = XXXX
ARE YOU SURE?
YES NO
Key #1 deletes file and returns to TMPR Menu.
Key #2 returns to the Temperament Menu.
1 2 3 4
Choose the #2 function key to return directly to the Temperament Menu without deleting the selected TMPR file or copying
a file. Use the #1 function key to Delete the selected custom TMPR file. After deleting the file, the tuner returns to the
Temperament Menu.
If, instead, a valid name for the new temperament file had been created, the display screen will change to:
COPY THIS TMPR =
XXXX XXXX XXXX XXXX
XXXX XXXX XXXX XXXX
CNCL SLCT
Key #3 returns to the Temperament Menu with no
changes.
Key #4 selects TMPR file in memory to copy from.
1 2 3 4
Use the #3 function key to return the tuner to the Temperament Menu screen with no copy file created.
Use the Pitch Down and Pitch Up Keys (Down Arrow - cursor forward and down; and Up Arrow - cursor up and back) to
scroll the cursor through the programmed temperaments. When the cursor is on the eighth Name on any page of stored
temperaments, press the Down Arrow key again and the tuner will display the next memory page of your custom
temperaments. Similarly, when the cursor is on the first Name of any custom temperaments screen, pressing the Up Arrow
key will show the previous page of custom or preprogrammed temperaments.
When the cursor is on the temperament memory file you desire, press the #4 function key to select that temperament into the
operation buffer of the tuner. The display will then proceed to a confirmation screen:
COPY XXXX TO YYYY
ARE YOU SURE?
YES NO
Key #1 copies file and proceeds to the EDIT screen.
Key #2 returns to the Temperament Menu.
1 2 3 4
Page 22
Page 25

Use function key #2 to return to the Temperament Menu without creating a copy of the existing temperament file. Choose
the #1 function key to copy the existing TMPR file to the newly named file and store it in memory. You will then be
transferred to the EDIT screen so as to immediately alter the newly-made copy file or, if you choose, exit with no changes
to the note offsets of the file and return to the RUN screen with the newly-made file now activated.
12. STRETCH SCALE TUNINGS FOR PIANOS AND SLIGHTLY INHARMONIC INSTRUMENTS
“Stretch” refers to specific adjustments in the frequencies (pitches) of notes—both within octaves and over multiple
octaves—to enhance the overall quality of tuning within an instrument. While such adjustments have traditionally been
applied only to the acoustic piano, it has become increasingly popular to exploit this tuning consideration in allied
instruments such as the harp, bass, and guitar as well as in percussive instruments such as the xylophone, vibraphone, and
steel pan. The need for stretch adjustments arises from the “non-ideal” vibrational mechanisms that are inherent to such
instruments. This is not to say that they are inferior in some way; on the contrary, it is the non-ideal vibrational modes of
these instruments that lend unique interest to their tones. Rather, “non-ideal” refers to the fact that these sound vibrations
do not precisely follow simple mathematical models that create frequencies of sound at integer ratios to one another. In short,
with no stretch tuning in these types of instruments, the overtone frequencies produced when striking lower-pitched notes
do not match the fundamental frequencies of notes in higher octaves. This results in a subjective impression of discord even
when the fundamental pitches of these notes are completely harmonious with one another!
In order to minimize this disparity, the pitches of notes in lower octaves must generally be made increasingly flat and the
pitches of notes in upper octaves made increasingly sharp—hence, the term “stretch”. However, the proper degree of
stretching depends on many factors. In a piano, for example, the thickness, tension, and type of construction of the strings
as well as the “scale” of the piano all play a role in determining how much stretch should be employed. In reality, no two
pianos would ever be properly tuned to the exact same note frequencies throughout.
Moreover, stretch tuning is a highly subjective adjustment which is necessarily a compromise between minimizing overtone
beats and maintaining the “cohesiveness” of fundamental pitch. In fact, no two critical listeners (or even one listener at two
distinct times or locations) would ever truly agree on the “ultimate” tuning of any given piano! Thus, customizing a stretch
for a piano based on the vibrations of three or four strings—as at least one tuner manufacturer does—is, in some ways,
providing a false sense of security. Even if your piano matches another perfectly at such points (yielding identical stretch
curves under such a method), does your piano “break” into wound strings at the same note as the another? Have each of your
strings really aged uniformly and in the exact same way as those on another piano? Seems unlikely, doesn’t it?!
Is there no hope! Are we destined to mire in a sea of cacophony!! Not really. True, there is no possibility of mathematical
perfection in the tuning of a piano, but, after all, this is not why pianos exist. A piano is a wonderful tool for creating sounds
that please the human ear and soul. The piano technician’s goal then is to maximize the playing and listening pleasure of
his clients. A reasonable compromise (or at least a good starting point) for tuning pianos and related instruments is to employ
stretch tuning to match those factors which have the greatest impact on the perception of pleasing pitch and harmony. For
pianos, these factors are, overwhelmingly, the type (upright or grand) and scale (string lengths) of a given instrument. The
SC-5000 II addresses this need by supplying a number of preset stretch profiles which correspond to the range of instruments
most piano technicians will likely ever encounter.
The FILE (temperament or stretch) menus are accessed under the SETUP screen. Thus, the first step when starting from the
normal RUN screen is to press the “1” button to enter SETUP:
To access the Stretch Tuning functions on the Strobe Center 5000, we begin from the Run Mode screen:
Page 23
Page 26

KEY = xx
A = 440 00 ¢
HI
SETUP IMAG
Key #1 calls up the Setup Menu.
Key #2 toggles the current Image Clarifier setting shown
on the third line of the LCD screen.
1 2 3 4
a. Press the #1 Function key to access the SETUP MENU.
SETUP MENU
PLEASE SELECT MODE
OPTN FILE RUN DIAG
Key #1 will call up additional options menu.
Key #2 will bring you to the temperament and stretch file
choice menu.
Key #3 will return the tuner to the Run Mode
Key #4 will call up factory diagnostics.
1 2 3 4
b. Press the #2 Function key (FILE on the screen) to bring up the FILE screen under the SETUP MENU.
FILE MENU
PLEASE SELECT MODE
TMPR STRCH SETUP
1
2
3 4
Function Key #1 calls up the TEMPERAMENT
MENU
Function Key #2 calls up the STRETCH MENU
Function Key #4 returns to the Main SETUP MENU
c. Press the #2 Function Button to bring up the STRETCH MENU.
STRETCH MENU
PLEASE SELECT MODE
START COPY
–EDIT –DEL RUN STOP
Key #1 is used to Start a stretch file; also to use and/or
edit a new or existing stretch file.
Key #2 Copies or Deletes a Custom stretch file.
Key #3 returns the tuner to the Run Mode.
Key #4 Stops an active temperament or stretch file.
1 2 3 4
d. Press the #1 key labeled START-EDIT to call up the listing of all preprogrammed Stretch files, and any custom
Stretch files you have saved in the memory. The display screen will first show the 8 Stretch files preprogrammed
into the SC-5000 II.
Page 24
Page 27

SELECT STRETCH=
STGD AVRG SMGD
CNGD
UPRT VERT CNSL SPNT
NEW (EDIT) CNCL START
1 2 3 4
Key #1 begins the process of naming and editing a
new stretch file.
Key #2 is visible only from custom user files, and
goes to the Edit sequence for the File name at the
cursor.
Key #3 returns to the STRETCH MENU.
Key #4 activates the selected stretch and returns to
RUN Mode.
e. The screen shown above would be the first
“page” of the list of preprogrammed stretch charts and custom stretch charts. Use the PITCH UP arrow and PITCH
DOWN arrow buttons to the right of the screen to scroll the cursor through the preprogrammed stretch files. When
the cursor is on the eighth name (right side of second row) on any page of stored stretch files, press the PITCH
DOWN arrow button again and the tuner will display the next page of custom stretch files (if any). Similarly, when
the cursor is on the first name (left side of first row) on any screen of custom stretch files, pressing the PITCH UP
arrow button will show the previous page of custom or preprogrammed stretch files.
When the cursor is on the stretch memory file you desire, press the #4 Function key to select this stretch file. The
tuner will then return to the RUN Mode screen and will be updated to operate using the stretch you have selected.
KEY=C STRCH= xxxx
A=440 00.0¢
HI OCT= 4
SETUP IMAG OCT- OCT+
The stretch file selected is shown in the upper right
hand corner of the screen as STRCH = xxxx.
Resolution is shown on the second line as 00.0 ¢.
This indicates it is enhanced to be in 0.1 cent steps.
1 2 3 4
f. The tuner activates the new stretch file and returns you to the RUN Mode screen. The display indicates the stretch
file you have selected, and also shows enhanced resolution of the tuner. The resolution may later be changed back
to 1 cent, or 0.5 cent increments. Internal accuracy of the stretch file is always maintained to the precise 0.1 cent
values which have been stored in the memory file. When exiting the Stretch Menu, the tuner indicates the
enhanced resolution to denote the accuracy with which the stretch file values are being used by the tuning motor
controllers.
NOTE: The SC-5000 Tuner powers-up in Equal Temperament and with no stretch. During the power-up sequence the
EQUA TMPR file (with the values for Equal Temperament) is input to the operating parameters of the tuner. All deviation
values are set to 00.0 cents (no stretch) - with the full precision of 0.1 cent resolution. Accuracy of the strobe discs is always
correct to 0.1 cents, even when the global cent offset is displayed in increments of 1 cent, or 0.5 cent. The power-up memory
is set to start the tuner with the global cent offset in increments of 1 cent because this is the most easily used mode of the
tuner.
Whenever a stretch file is active under the RUN screen, an indication of the current octave (OCT) of scale note settings that
the unit is referencing from that stretch file is displayed on the third line of the LCD display. The current octave is
never automatically sensed but is chosen at the discretion of the user by pressing buttons "3" or "4" beneath the display.
Specifically, button "3" (OCT-) will decrement the octave setting (octave 7 through octave 0). If held continuously, it
will continue to decrement the setting shown on screen line 3, wrapping back around from OCT=0 to OCT=7. Conversely,
button "4" will increment the octave setting, eventually wrapping from OCT=7 to OCT=0.
Page 25
Page 28

STANDARD STRETCH TUNING FILES
The SC-5000 II comes with 8 non-erasable, unmodifiable stretch profiles. These “piano” stretches vary steadily in order from
very minimal (CNGD—Concert Grand) to extreme (SPNT—Spinet).
SELECT STRETCH=
STGD AVRG SMGD
CNGD
UPRT VERT CNSL SPNT
NEW (EDIT) CNCL START
A table describing all included stretches is presented below. The piano scale length numbers are given as a rough guide for
selecting appropriate tables and refer to the dimensions normally associated with this measurement. Specifically, the vertical
pianos are measured from the floor to the highest point on the piano. The grand pianos are measured from the keyslip (the
piece of wood in front of the keys) to the furthest point back on the piano.
SC-5000
FULL NAME DESCRIPTION
NAME
CNGD CONCERT GRAND Useful for all concert style grand pianos of approximately 8 feet in
length or greater. This minimal stretch profile may also be of use on
smaller pianos strung with thin piano wire or in situations where the
user wishes a greater coherence of fundamental pitch throughout the
instrument.
STGD STUDIO GRAND Optimal for a 6’ to 7’11” range of grand piano.
AVRG AVERAGE (all classes) Taken from optimal settings for vertical and grand pianos of many
makes and sizes, this profile will produce a reasonable tuning for
non-critical applications. It also provides a good starting point for
creating your own stretch profiles.
SMGD SMALL GRAND Useful for grand pianos that are 5’10” or smaller in scale.
UPRT UPRIGHT Suitable for vertical pianos equal or exceeding 51”.
VERT VERTICAL Taken from optimal settings for many makes and sizes of vertical
pianos, this profile will produce good results for any vertical-style
piano in typical playing environments for such pianos.
CNSL CONSOLE Designed for vertical pianos in 39” to 51” range.
SPNT SPINET Designed for vertical pianos smaller than 39”, this profile is the most
extreme (farthest bass and treble note stretching) of these piano
preset stretches.
Although they cannot be edited directly, one may copy any of these permanent stretches into a custom stretch file which can
then be viewed or edited further on a note-by-note basis. The SC-5000 II permits up to 31 user-programmable stretches
which can be created in this way or “from scratch”.
The actual note offset values for each of the piano presets is presented in Appendix C at the back of this document.
Page 26
Page 29

13. CREATING CUSTOM STRETCH TUNINGS
Under stretch tuning, different octave and note frequency relationships may be set to any value desired up to ±50 cents offset
(½ semitone). These custom stretch tuning ratios may be named and saved for future use by the simple touch of a few
buttons. Refer to the following procedures which describe Naming, Saving, Editing, Copying, Deleting and Using custom
stretch tuning files.
a. To make and save a new custom stretch file, it is first necessary to assign a new name to the stretched scale values
you plan to enter. (You may also copy an existing stretch file to a new name and modify it from there.) From the
RUN Mode screen, press the #1 SETUP, #2 FILE, and #2 STRCH function keys to call up the Stretch Menu:
STRETCH MENU
PLEASE SELECT MODE
START COPY
–EDIT –DEL RUN STOP
1 2 3 4
b. Press the START-EDIT (#1) Function key to "name and save" a new custom stretch file. The following will show
up in the display:
Key #1 is used to Start a stretch file; also to use and/or
edit a new or existing stretch file.
Key #2 Copies or Deletes a Custom stretch file.
Key #3 returns the tuner to the Run Mode.
Key #4 Stops an active temperament or stretch file.
PICK NAME – ABCDEFGH
IJKLMNOPQRSTUVWXYZ0
1 23456789 STRCH
=____
<–– ––> BKSP
CNCL
Key #1 shifts the cursor Left by one space.
Key #2 shifts the cursor Right by one space.
Key #3 backspace and deletes one character in the name.
Key #4 cancels the New file name and returns to the
Stretch Menu.
1 2 3 4
c. Scroll through the letters and numbers using the #1 and #2 function keys as the Left Cursor and Right Cursor
respectively. Move the cursor to the corresponding letter, space (directly following digit "9"), or number in the
4-character NAME of your new Custom Stretch. Press the Enter key to select the desired character at the cursor
location. Press the #3 BKSP (Backspace) function key to delete the previous character you have just entered. The
#4 function key is used to cancel the newly opened file and returns you to the Stretch Menu. Once the fourth letter
or number of the name has been selected, the display screen will permit you to confirm the file name you have
chosen:
Page 27
Page 30

THE NAME CHOSEN FOR
STRCH IS: XXXX
REDO OK CNCL
Key #1returns to the previous screen.
Key #2 advances to the next screen.
Key #3 cancels the New file name and returns to the
Stretch Menu.
1 2 3 4
d. If the characters were entered incorrectly, you can press the #1 function button and re-enter the name of the custom
stretch file. You may choose to Cancel the entry of a new stretch and to return to the Stretch Menu. To Cancel,
press the function key #3. Any existing temperament or stretch files will be stopped as the tuner returns to the
normal RUN Mode screen.
Press the #2 function key to edit the scale values for the stretch file name you have selected. The tuner will first
check its memory to see if the name you have selected has already been used. A warning screen will appear if the
name has been previously stored in the custom user memory:
STRCH = XXXX
ALREADY EXISTS
NO
EDIT DEL RUN CHNG
Key #1 proceeds to the Editing sequence.
Key #2 permits DELetion of old STRCH file.
Key #3 returns the tuner to the Run Mode, using no
TMPR or STRCH files.
Key #4 returns to the Stretch Menu screen.
1 2 3 4
e. Use the #3 function button to return the tuner to the Run Mode using no temperament or stretch files. When you
choose to go back and enter a different name for the custom stretch, press the #4 Function key to return to the
Stretch Menu. You can again press START-EDIT (Function Key #1) in the Stretch Menu and then NEW (Function
Key #1) under the SELECT screen to enter a different designator for your custom scale values. You may also
choose a different option from the Stretch Menu.
Use the #2 function key when you want to delete the existing custom STRCH file from your custom stretch memory
locations.
NOTE: Due to a program oversight in this version of software, the DELete choice will always return to the Stretch Menu
screen without deleting the named file (normal if the name corresponds to a factory pre-programmed file) even if the named
file does not conflict with a factory file. However, you may still delete the appropriate previously-programmed user file
under COPY-DEL (Function Key #2) of the Stretch Menu.
f. To Edit the stretch which already exists (on screen: STRCH= XXXX ALREADY EXISTS), use the #1 function
key. The tuner will advance to the Edit STRCH sequence. In the Edit STRCH sequence, the offsets for each note
are updated and/or rewritten into the tuner memory as each note value is entered. The existing stretch value for
each note is overwritten as you enter each new value! Use the Copy procedure to make a duplicate of a useful
existing stretch with a different name, and then edit the newly-made copy of the STRCH file.
g. Similarly, if you have confirmed that the selected name (on the screen - THE NAME CHOSEN FOR STRCH IS:
XXXX) is OK, by pressing the #2 Function button and the memory check determines that the selected name does
Page 28
Page 31

not already exist, the tuner immediately opens a new STRCH file with the name you have selected. The screen
advances to the Edit STRCH sequence.
In the unlikely event that the memory of the tuner is full, you will see an error message of “MEMORY IS FULL
- PLEASE DELETE A TMPR OR STRCH FILE”. The tuner memory capacity is 255 custom TMPR files, or 31
custom STRCH files, or a mixture of both custom TMPR and custom STRCH files. If you see this message
display, it will be necessary to delete one or more custom TMPR or STRCH files in order to enter your new file.
Before deleting one of these useful files, you will probably want to write down the specific values for every
tempered and/or stretched note in the file. In Appendix A and Appendix B of this instruction manual, you will find
blank tables for your hard copy entry of custom temperament files and custom stretch files (with permission to
photocopy these pages). Use the Edit TMPR or Edit STRCH sequence to examine the specific values for each note
in the TMPR of STRCH file you plan to delete. Do not alter any value as you transfer this information to your hard
copy paper record. After you have documented the details of your file it is then safe to delete it and make room
for more custom files.
h. In the Edit STRCH sequence, the stretch value for each note (in Cents deviation from the Equal-Tempered Scale)
is input using the Pitch Up and Pitch Down buttons on the tuner front panel. Entering the selection for each note
overwrites that value into the memory location for that specific note in the STRCH file. The tuner starts with note
C in Octave 4 and proceeds in an increasing sequence through all twelve notes of the chromatic scale in Octave
4, ending on B. Then, following a typical piano tuning order, the sequence proceeds through alternating octaves
above and below Octave 4, gradually widening to the highest (7) and lowest (0) octaves. The first screen display
is:
STRCH = XXXX KEY = C
NOTE = C +XX.X
OCTV= 4
DONE NEXT
Key #3 holds values entered - advances screen to save
current STRCH tuning values.
Key #4 enters and holds value - goes to next note.
1 2 3 4
Use the PITCH UP and/or the PITCH DOWN Control to adjust the number of cents deviation from standard, Equal
Temperament tuning for the note C in Octave 4. You may enter this value with a precision of 1/10 of 1 cent. Whenever
you have modified as many Octaves and Note values as you require for your Custom STRCH file, you may exit the
Stretch Edit sequence by using the #3 Function key (DONE) and then the ENTER button. The values you have entered
will be saved and the tuner will return to the RUN Mode, using the programmed STRCH tuning values. Alternatively,
press the #4 Function key when the displayed Stretch file value for Octave 4, Note C is correct. The display will
increment the note to C#.
Page 29
Page 32

STRCH = XXXX KEY = C
NOTE = C# +XX.X
OCTV= 4
DONE NEXT
Key #3 holds values entered - advances screen to save
current STRCH tuning values.
Key #4 enters and holds value - goes to next note.
1 2 3 4
Use the PITCH UP and/or the PITCH DOWN Control to adjust the number of cents deviation from standard, Equal
Temperament tuning for the note C# in Octave 4. You may enter this value with a precision of 1/10 of 1 cent.
Whenever you have modified as many Octaves and Note values as you require for your Custom STRCH file, you may
exit the Stretch Edit sequence by using the #3 Function key (DONE) and then the ENTER button. The values you have
entered will be saved and the tuner will return to the RUN Mode, using the programmed STRCH tuning values.
Alternatively, press the #4 Function key when the displayed Stretch file value for Octave 4, Note C# is correct. The
display will increment the note to D.
STRCH = XXXX KEY = C
NOTE = D +XX.X
OCTV= 4
DONE NEXT
Key #3 holds values entered - advances screen to save
current STRCH tuning values.
Key #4 enters and holds value - goes to next note.
1 2 3 4
Use the PITCH UP and/or the PITCH DOWN Control to adjust the number of cents deviation from standard, Equal
Temperament tuning for the note D in Octave 4. You may enter this value with a precision of 1/10 of 1 cent. Whenever
you have modified as many Octaves and Note values as you require for your Custom STRCH file, you may exit the
Stretch Edit sequence by using the #3 Function key (DONE) and then the ENTER button. The values you have entered
will be saved and the tuner will return to the RUN Mode, using the programmed STRCH tuning values. Alternatively,
press the #4 Function key when the displayed Stretch file value for Octave 4, Note D is correct. The display will
increment the note to D#.
The same procedure will be continued sequentially through the notes E, F, F<, G, G<, A, and A<, until the screen
increments to the note B:
STRCH = XXXX KEY = C
NOTE = B +XX.X
OCTV= 4
DONE NEXT
Key #3 holds values entered - advances screen to save
current STRCH tuning values.
Key #4 enters and holds value - goes to next note.
1 2 3 4
Use the PITCH UP and/or the PITCH DOWN Control to adjust the number of cents deviation from standard, Equal
Temperament tuning for the note B in Octave 4. You may enter this value with a precision of 1/10 of 1 cent. Whenever
you have modified as many Octaves and Note values as you require for your Custom STRCH file, you may exit the
Stretch Edit sequence by using the #3 Function key (DONE) and then the ENTER button. The values you have entered
Page 30
Page 33

will be saved and the tuner will return to the RUN Mode, using the programmed STRCH tuning values. Alternatively,
press the #4 Function key when the displayed Stretch file value for Octave 4, Note B is correct. With Octave 4 now
completed, the display will jump to Octave 3, Note B:
STRCH = XXXX KEY = C
NOTE = B +XX.X
OCTV= 3
DONE NEXT
Key #3 holds values entered - advances screen to save
current STRCH tuning values.
Key #4 enters and holds value - goes to next note.
1 2 3 4
Use the PITCH UP and/or the PITCH DOWN Control to adjust the number of cents deviation from standard, Equal
Temperament tuning for the note B in Octave 3. You may enter this value with a precision of 1/10 of 1 cent. Whenever
you have modified as many Octaves and Note values as you require for your Custom STRCH file, you may exit the
Stretch Edit sequence by using the #3 Function key (DONE) and then the ENTER button. The values you have entered
will be saved and the tuner will return to the RUN Mode, using the programmed STRCH tuning values. Alternatively,
press the #4 Function key when the displayed Stretch file value for Octave 3, Note B is correct. The display will now
decrement the note to Octave 3, Note A#. This process continues through Octave 3 through notes A, G#, G, F#, F, E,
D#, D, C#, and C. With Octave 3 now completed, the display will jump to Octave 5, Note C:
STRCH = XXXX KEY = C
NOTE = C +XX.X
OCTV= 5
DONE NEXT
Key #3 holds values entered - advances screen to save
current STRCH tuning values.
Key #4 enters and holds value - goes to next note.
1 2 3 4
Use the PITCH UP and/or the PITCH DOWN Control to adjust the number of cents deviation from standard, Equal
Temperament tuning for the note C in Octave 5. You may enter this value with a precision of 1/10 of 1 cent. Whenever
you have modified as many Octaves and Note values as you require for your Custom STRCH file, you may exit the
Stretch Edit sequence by using the #3 Function key (DONE) and then the ENTER button. The values you have entered
will be saved and the tuner will return to the RUN Mode, using the programmed STRCH tuning values. Alternatively,
press the #4 Function key when the displayed Stretch file value for Octave 5, Note C is correct. The display will now
increment the note to Octave 5, Note C#. This process continues through Octave 5 through notes D, D#, E, F, F#, G,
G#, A, A#, and B. With Octave 5 now completed, the display will jump to Octave 2, Note B. This pattern
proceeds—decrementing through lower octaves and incrementing through upper octaves— through Octaves 2, 6, 1,
7, and finally Octave 0, Note C:
Page 31
Page 34

STRCH = XXXX KEY = C
NOTE = C +XX.X
OCTV= 0
DONE NEXT
Key #3 holds values entered - advances screen to save
current STRCH tuning values.
Key #4 enters and holds value - advances screen.
1 2 3 4
Use the PITCH UP and/or the PITCH DOWN Control to adjust the number of cents deviation from standard, Equal
Temperament tuning for the note C in Octave 0. You may enter this value with a precision of 1/10 of 1 cent. Having
reached the final note in the editing sequence, pressing either the #3 Function key (DONE) or the #4 Function key when
the displayed Stretch file value for Octave 0, Note C is correct will exit this procedure. The screen that follows requests
one final button input to actually save all settings for this STRCH File in permanent memory:
STRCH = XXXX
SETTINGS
COMPLETE – PRESS
ENTER TO CONTINUE
1 2 3 4
i. Press the Enter button on the tuner front panel. All custom stretch note values are now saved to the "XXXX"
STRCH file. The tuner returns to the normal RUN screen with the edited stretch file now active:
KEY=C STRCH= xxxx
A=440 00.0¢
HI OCT= 4
SETUP IMAG OCT- OCT+
The stretch file selected is shown in the upper right
hand corner of the screen as STRCH = xxxx.
Resolution is shown on the second line as 00.0 ¢.
This indicates it is enhanced to be in 0.1 cent steps.
1 2 3 4
Whenever a stretch file is active under the RUN screen, an indication of the current octave (OCT) of scale note settings that
the unit is referencing from that stretch file is displayed on the third line of the LCD display. The current octave is
never automatically sensed but is chosen at the discretion of the user by pressing buttons "3" or "4" beneath the display.
Specifically, button "3" (OCT-) will decrement the octave setting (octave 7 through octave 0). If held continuously, it
will continue to decrement the setting shown on screen line 3, wrapping back around from OCT=0 to OCT=7. Conversely,
button "4" will increment the octave setting, eventually wrapping from OCT=7 to OCT=0.
14. COPYING AND MODIFYING (OR DELETING) AN EXISTING STRETCH FILE
Although this is a subset of the material above, proper explanation of the COPY/DELETE procedures calls for an
independent description. Sometimes it is easier and faster to copy and modify an existing stretch file than to create a whole
Page 32
Page 35

new one. Particularly with Custom Stretch files, there may just be one or two Octaves which get slightly modified in the
revised Custom STRCH file.
a. Use the #2 Function Key in the Stretch Menu to call up the Copy/Delete Menu:
COPY/DEL MENU
COPY DEL RUN BACK
Key #1 copies a custom STRCH file to a new name.
Key #2 deletes a custom STRCH file from memory.
Key #3 returns the tuner to the Run Mode using standard
unstretched tuning values.
Key #4 returns the tuner to the STRETCH Menu.
1 2 3 4
Use the #3 function key to exit the stretch menu sequence. The tuner will return to the Run Mode using standard unstretched
tuning.
Use the #4 function key to return to the Stretch Menu screen when you desire to follow a procedure different from the
COPY/DELETE menu. The Stretch Menu will again appear and allow you to reselect your desired option.
b. Deleting a custom stretch file
If you have received a MEMORY IS FULL... error message, and you have already documented some presently unused
custom STRCH files, you can delete them by first pressing the #2 function key. After you press the DELete key, the tuner
will display a listing of all the custom STRCH files:
SELECT STRCH =
XXXX XXXX XXXX XXXX
XXXX XXXX XXXX XXXX
CNCL SLCT
Key #3 returns to the Stretch Menu with no changes.
Key #4 selects STRCH file to delete from memory.
1 2 3 4
Use the Pitch Down and Pitch Up Keys (Down Arrow - cursor forward and down; and Up Arrow - cursor up and back) to
scroll the cursor through the user-programmed stretches. When the cursor is on the eighth name on any page of stored
stretches, press the Down Arrow key again and the tuner will display the next memory page of your custom stretches.
Similarly, when the cursor is on the first Name of any custom stretch screen, pressing the Up Arrow key will show the
previous page of custom (or preprogrammed) stretches.
When the cursor is on the stretch memory file you desire to delete, press the #4 function key (SLCT). The tuner will always
ask for confirmation of file deletion before executing your request:
Page 33
Page 36

DELETE STRCH = XXXX
ARE YOU SURE?
YES NO
Key #1 deletes file and returns to STRETCH Menu.
Key #2 returns to the STRETCH Menu.
1 2 3 4
Choose the #2 function key to return directly to the Stretch Menu without deleting the selected custom STRCH file. Use
the #1 function key to delete the selected custom STRCH file. After deleting the file, the tuner returns to the Stretch Menu.
c. COPYING AN EXISTING CUSTOM STRETCH FILE TO A NEW NAME
COPY/DEL MENU
COPY DEL RUN BACK
Key #1 copies a custom STRCH file to a new name.
Key #2 deletes a custom STRCH file from memory.
Key #3 returns the tuner to the Run Mode using standard
unstretched tuning values.
Key #4 returns the tuner to the STRETCH Menu.
1 2 3 4
Use the #1 function key to Copy an existing STRCH file to a new custom STRCH file with a new name. When the Copy
function key is pressed, the screen first asks for a new name to which the existing STRCH file will be copied:
PICK NAME – ABCDEFGH
IJKLMNOPQRSTUVWXYZ0
1 23456789
STRCH=____
<–– ––> BKSP
CNCL
Key #1 shifts the cursor Left by one space.
Key #2 shifts the cursor Right by one space.
Key #3 backspaces and deletes one character in the
name.
Key #4 cancels the New file name and returns to the
Stretch Menu.
1 2 3 4
Scroll through the letters and numbers using the #1 and #2 Function keys as the Left Arrow and Right Arrow respectively.
Press the #3 function key to reenter the previous letter or number in the 4-space name of your new custom stretch. Press
the #4 function key to return to the COPY/DEL menu screen.
When the fourth letter or number of the name has been selected, the tuner will first check its memory to see if the name you
have selected has already been used. A warning screen will appear if the name has been previously used by another custom
STRCH file:
Page 34
Page 37

STRCH = XXXX
ALREADY EXISTS
RE-
NAME DEL RUN
Key #1 returns to the PICK NAME sequence.
Key #2 permits DELetion of old STRCH file.
Key #3 returns the tuner to the Run Mode, using standard
unstretched tuning values.
1 2 3 4
Use the #3 function key to return the tuner to the Run Mode using standard unstretched tuning. The #1 function button returns
you to the Name Selection screen, permitting you to make a different choice. Use the #2 function key when you want to
DELete the previously used STRCH file name from your custom stretch memory locations. Whenever you choose to Delete
a custom STRCH file, the tuner will request confirmation of the file deletion before performing the erasure:
DELETE STRCH = XXXX
ARE YOU SURE?
YES NO
Key #1 deletes file and returns to STRCH Menu.
Key #2 returns to the Stretch Menu.
1 2 3 4
Choose the #2 function key to return directly to the Stretch Menu without deleting the selected STRCH file or copying a file.
Use the #1 function key to Delete the selected custom STRCH file. After deleting the file, the tuner returns to the Stretch
Menu.
If, instead, a valid name for the new stretch file had been created, the display screen will change to:
COPY THIS STRCH =
XXXX XXXX XXXX XXXX
XXXX XXXX XXXX XXXX
CNCL SLCT
Key #3 returns to the Stretch Menu with no changes.
Key #4 selects STRCH file in memory to copy from.
1 2 3 4
Use the #3 function key to return the tuner to the Stretch Menu screen with no copy file created.
Use the Pitch Down and Pitch Up Keys (Down Arrow - cursor forward and down; and Up Arrow - cursor up and back) to
scroll the cursor through the programmed stretches. When the cursor is on the eighth Name on any page of stored stretches,
press the Down Arrow key again and the tuner will display the next memory page of your custom stretches. Similarly, when
the cursor is on the first Name of any custom stretch screen, pressing the Up Arrow key will show the previous page of
custom or preprogrammed stretches.
When the cursor is on the stretch memory file you desire, press the #4 function key to select that stretch into the operation
buffer of the tuner. The display will then proceed to a confirmation screen:
Page 35
Page 38

COPY XXXX TO YYYY
ARE YOU SURE?
YES NO
Key #1 copies file and proceeds to the EDIT screen.
Key #2 returns to the Stretch Menu.
1 2 3 4
Use function key #2 to return to the Stretch Menu without creating a copy of the existing stretch file. Choose the #1 function
key to copy the existing STRCH file to the newly named file and store it in memory. You will then be transferred to the
EDIT screen so as to immediately alter the newly-made copy file or, if you choose, exit with no changes to the note offsets
of the file and return to the RUN screen with the newly-made file now activated.
Page 36
Page 39

APPENDIX A: TEMPERAMENT FILL-IN FORM
Temperament Name = ___________
C C# D D# E F F# G G# A A# B
Temperament Name = ___________
C C# D D# E F F# G G# A A# B
Temperament Name = ___________
C C# D D# E F F# G G# A A# B
Temperament Name = ___________
C C# D D# E F F# G G# A A# B
Temperament Name = ___________
C C# D D# E F F# G G# A A# B
Temperament Name = ___________
C C# D D# E F F# G G# A A# B
Temperament Name = ___________
C C# D D# E F F# G G# A A# B
Temperament Name = ___________
C C# D D# E F F# G G# A A# B
Page 37
Page 40

APPENDIX B: STRETCH FILL-IN FORM
Stretch Name = ________
OCTV C C# D D# E F F# G G# A A# B
0
1
2
3
4
5
6
7
Stretch Name = ________
OCTV C C# D D# E F F# G G# A A# B
0
1
2
3
4
5
6
7
Page 38
Page 41

N
APPENDIX C: STRETCH FILE DATA AND CHARTS
FILE: CNGD
Note Note Cents Note Note Cents Note Note Cents Note Note Cents
No. Name Deviation No. Name Deviation No. Name Deviation No. Name Deviation
1 C-0 -12.8 25 C-2 -1.2 49 C-4 0.0 73 C-6 0.1
2 C#-0 -11.8 26 C#-2 -1.0 50 C#-4 0.0 74 C#-6 0.2
3 D-0 -10.9 27 D-2 -0.8 51 D-4 0.0 75 D-6 0.3
4 D#-0 -10.1 28 D#-2 -0.6 52 D#-4 0.0 76 D#-6 0.5
5 E-0 -9.4 29 E-2 -0.4 53 E-4 0.0 77 E-6 0.7
6 F-0 -8.8 30 F-2 -0.3 54 F-4 0.0 78 F-6 0.9
7 F#-0 -8.2 31 F#-2 -0.2 55 F#-4 0.0 79 F#-6 1.2
8 G-0 -7.6 32 G-2 -0.1 56 G-4 0.0 80 G-6 1.5
9 G#-0 -7.0 33 G#-2 0.0 57 G#-4 0.0 81 G#-6 1.8
10 A-0 -6.5 34 A-2 0.0 58 A-4 0.0 82 A-6 2.2
11 A#-0 -6.0 35 A#-2 0.0 59 A#-4 0.0 83 A#-6 2.6
12 B-0 -5.5 36 B-2 0.0 60 B-4 0.0 84 B-6 3.0
13 C-1 -5.0 37 C-3 0.0 61 C-5 0.0 85 C-7 3.5
14 C#-1 -4.6 38 C#-3 0.0 62 C#-5 0.0 86 C#-7 4.0
15 D-1 -4.2 39 D-3 0.0 63 D-5 0.0 87 D-7 4.5
16 D#-1 -3.8 40 D#-3 0.0 64 D#-5 0.0 88 D#-7 5.1
17 E-1 -3.4 41 E-3 0.0 65 E-5 0.0 89 E-7 5.7
18 F-1 -3.1 42 F-3 0.0 66 F-5 0.0 90 F-7 6.3
19 F#-1 -2.8 43 F#-3 0.0 67 F#-5 0.0 91 F#-7 7.0
20 G-1 -2.5 44 G-3 0.0 68 G-5 0.0 92 G-7 7.7
21 G#-1 -2.2 45 G#-3 0.0 69 G#-5 0.0 93 G#-7 8.4
22 A-1 -1.9 46 A-3 0.0 70 A-5 0.0 94 A-7 9.2
23 A#-1 -1.6 47 A#-3 0.0 71 A#-5 0.0 95 A#-7 10.0
24 B-1 -1.4 48 B-3 0.0 72 B-5 0.0 96 B-7 10.9
CONCERT GRAND STRETCH CHART
50.0
40.0
30.0
20.0
10.0
0.0
C- 0 C- 1 C- 2 C- 3 C- 4 C- 5 C- 6 C- 7 C- 8
-10.0
-20.0
CENTS DEVIATIO
-30.0
-40.0
-50.0
NOT E
Page 39
Page 42

N
FILE: STGD
Note Note Cents Note Note Cents Note Note Cents Note Note Cents
No. Name Deviation No. Name Deviation No. Name Deviation No. Name Deviation
1 C-0 -28.3 25 C-2 -2.8 49 C-4 0.0 73 C-6 0.8
2 C#-0 -26.3 26 C#-2 -2.4 50 C#-4 0.0 74 C#-6 1.1
3 D-0 -24.3 27 D-2 -2.0 51 D-4 0.0 75 D-6 1.4
4 D#-0 -22.4 28 D#-2 -1.6 52 D#-4 0.0 76 D#-6 1.7
5 E-0 -20.6 29 E-2 -1.4 53 E-4 0.0 77 E-6 2.0
6 F-0 -18.9 30 F-2 -1.1 54 F-4 0.0 78 F-6 2.4
7 F#-0 -17.3 31 F#-2 -0.8 55 F#-4 0.0 79 F#-6 2.8
8 G-0 -15.8 32 G-2 -0.6 56 G-4 0.0 80 G-6 3.2
9 G#-0 -14.4 33 G#-2 -0.4 57 G#-4 0.0 81 G#-6 3.6
10 A-0 -13.1 34 A-2 -0.3 58 A-4 0.0 82 A-6 4.1
11 A#-0 -11.9 35 A#-2 -0.2 59 A#-4 0.0 83 A#-6 4.6
12 B-0 -10.8 36 B-2 -0.1 60 B-4 0.0 84 B-6 5.1
13 C-1 -9.8 37 C-3 0.0 61 C-5 0.0 85 C-7 5.6
14 C#-1 -8.9 38 C#-3 0.0 62 C#-5 0.0 86 C#-7 6.1
15 D-1 -8.1 39 D-3 0.0 63 D-5 0.0 87 D-7 6.7
16 D#-1 -7.4 40 D#-3 0.0 64 D#-5 0.0 88 D#-7 7.3
17 E-1 -6.8 41 E-3 0.0 65 E-5 0.0 89 E-7 8.1
18 F-1 -6.2 42 F-3 0.0 66 F-5 0.0 90 F-7 8.9
19 F#-1 -5.6 43 F#-3 0.0 67 F#-5 0.0 91 F#-7 9.9
20 G-1 -5.1 44 G-3 0.0 68 G-5 0.1 92 G-7 11.0
21 G#-1 -4.6 45 G#-3 0.0 69 G#-5 0.2 93 G#-7 12.2
22 A-1 -4.1 46 A-3 0.0 70 A-5 0.3 94 A-7 13.5
23 A#-1 -3.6 47 A#-3 0.0 71 A#-5 0.4 95 A#-7 14.9
24 B-1 -3.2 48 B-3 0.0 72 B-5 0.6 96 B-7 16.5
STUDIO GRAND STRETCH CHART
50
40
30
20
10
0
C- 0 C- 1 C- 2 C- 3 C-4 C-5 C-6 C-7 C-8
-10
CENTS DEVIATIO
-20
-30
-40
-50
NOT E
Page 40
Page 43

N
FILE: AVRG
Note Note Cents Note Note Cents Note Note Cents Note Note Cents
No. Name Deviation No. Name Deviation No. Name Deviation No. Name Deviation
1 C-0 -31.3 25 C-2 -6.4 49 C-4 -2.0 73 C-6 2.6
2 C#-0 -30.1 26 C#-2 -5.9 50 C#-4 -1.8 74 C#-6 2.8
3 D-0 -28.9 27 D-2 -5.5 51 D-4 -1.6 75 D-6 3.1
4 D#-0 -27.7 28 D#-2 -5.1 52 D#-4 -1.4 76 D#-6 3.4
5 E-0 -26.5 29 E-2 -4.8 53 E-4 -1.2 77 E-6 3.8
6 F-0 -25.3 30 F-2 -4.5 54 F-4 -1.0 78 F-6 4.2
7 F#-0 -24.1 31 F#-2 -4.3 55 F#-4 -0.8 79 F#-6 4.7
8 G-0 -22.9 32 G-2 -4.1 56 G-4 -0.6 80 G-6 5.2
9 G#-0 -21.7 33 G#-2 -3.9 57 G#-4 -0.4 81 G#-6 5.8
10 A-0 -20.5 34 A-2 -3.8 58 A-4 -0.2 82 A-6 6.4
11 A#-0 -19.3 35 A#-2 -3.7 59 A#-4 0.0 83 A#-6 7.1
12 B-0 -18.1 36 B-2 -3.6 60 B-4 0.0 84 B-6 7.8
13 C-1 -16.9 37 C-3 -3.5 61 C-5 0.2 85 C-7 8.6
14 C#-1 -15.7 38 C#-3 -3.5 62 C#-5 0.4 86 C#-7 9.5
15 D-1 -14.5 39 D-3 -3.5 63 D-5 0.6 87 D-7 10.5
16 D#-1 -13.3 40 D#-3 -3.4 64 D#-5 0.8 88 D#-7 11.6
17 E-1 -12.2 41 E-3 -3.3 65 E-5 1.0 89 E-7 12.8
18 F-1 -11.2 42 F-3 -3.2 66 F-5 1.2 90 F-7 14.2
19 F#-1 -10.3 43 F#-3 -3.1 67 F#-5 1.4 91 F#-7 15.8
20 G-1 -9.5 44 G-3 -3.0 68 G-5 1.6 92 G-7 17.6
21 G#-1 -8.8 45 G#-3 -2.8 69 G#-5 1.8 93 G#-7 19.6
22 A-1 -8.1 46 A-3 -2.6 70 A-5 2.0 94 A-7 21.9
23 A#-1 -7.5 47 A#-3 -2.4 71 A#-5 2.2 95 A#-7 24.5
24 B-1 -6.9 48 B-3 -2.2 72 B-5 2.4 96 B-7 27.2
AVERAGE PIANO STRETCH CHART
50
40
30
20
10
0
C- 0 C- 1 C- 2 C- 3 C- 4 C-5 C-6 C-7 C-8
-10
CENTS DEVIATIO
-20
-30
-40
-50
NOT E
Page 41
Page 44

N
FILE: SMGD
Note Note Cents Note Note Cents Note Note Cents Note Note Cents
No. Name Deviation No. Name Deviation No. Name Deviation No. Name Deviation
1 C-0 -33.1 25 C-2 -6.0 49 C-4 0.0 73 C-6 2.5
2 C#-0 -31.6 26 C#-2 -5.4 50 C#-4 0.0 74 C#-6 3.0
3 D-0 -30.1 27 D-2 -4.8 51 D-4 0.0 75 D-6 3.6
4 D#-0 -28.6 28 D#-2 -4.3 52 D#-4 0.0 76 D#-6 4.2
5 E-0 -27.1 29 E-2 -3.8 53 E-4 0.0 77 E-6 4.9
6 F-0 -25.6 30 F-2 -3.3 54 F-4 0.0 78 F-6 5.6
7 F#-0 -24.1 31 F#-2 -2.9 55 F#-4 0.0 79 F#-6 6.4
8 G-0 -22.7 32 G-2 -2.5 56 G-4 0.0 80 G-6 7.2
9 G#-0 -21.3 33 G#-2 -2.1 57 G#-4 0.0 81 G#-6 8.1
10 A-0 -20.0 34 A-2 -1.8 58 A-4 0.0 82 A-6 9.0
11 A#-0 -18.7 35 A#-2 -1.5 59 A#-4 0.0 83 A#-6 10.0
12 B-0 -17.5 36 B-2 -1.2 60 B-4 0.0 84 B-6 11.0
13 C-1 -16.3 37 C-3 -1.0 61 C-5 0.0 85 C-7 12.1
14 C#-1 -15.2 38 C#-3 -0.8 62 C#-5 0.0 86 C#-7 13.2
15 D-1 -14.1 39 D-3 -0.6 63 D-5 0.0 87 D-7 14.4
16 D#-1 -13.1 40 D#-3 -0.4 64 D#-5 0.0 88 D#-7 15.6
17 E-1 -12.1 41 E-3 -0.2 65 E-5 0.1 89 E-7 16.9
18 F-1 -11.2 42 F-3 -0.1 66 F-5 0.2 90 F-7 18.2
19 F#-1 -10.3 43 F#-3 0.0 67 F#-5 0.4 91 F#-7 19.6
20 G-1 -9.5 44 G-3 0.0 68 G-5 0.6 92 G-7 21.0
21 G#-1 -8.7 45 G#-3 0.0 69 G#-5 0.8 93 G#-7 22.5
22 A-1 -8.0 46 A-3 0.0 70 A-5 1.1 94 A-7 24.0
23 A#-1 -7.3 47 A#-3 0.0 71 A#-5 1.5 95 A#-7 25.6
24 B-1 -6.6 48 B-3 0.0 72 B-5 2.0 96 B-7 27.2
SMALL GRAND STRETCH CHART
50
40
30
20
10
0
C- 0 C- 1 C- 2 C- 3 C- 4 C- 5 C- 6 C- 7 C- 8
-10
CENTS DEVIATIO
-20
-30
-40
-50
NOT E
Page 42
Page 45

N
FILE: UPRT
Note Note Cents Note Note Cents Note Note Cents Note Note Cents
No. Name Deviation No. Name Deviation No. Name Deviation No. Name Deviation
1 C-0 -42.1 25 C-2 -7.2 49 C-4 0.0 73 C-6 7.2
2 C#-0 -40.1 26 C#-2 -6.6 50 C#-4 0.0 74 C#-6 7.8
3 D-0 -38.1 27 D-2 -6.0 51 D-4 0.0 75 D-6 8.4
4 D#-0 -36.1 28 D#-2 -5.5 52 D#-4 0.0 76 D#-6 9.0
5 E-0 -34.1 29 E-2 -5.0 53 E-4 0.0 77 E-6 9.7
6 F-0 -32.1 30 F-2 -4.6 54 F-4 0.0 78 F-6 10.4
7 F#-0 -30.1 31 F#-2 -4.2 55 F#-4 0.2 79 F#-6 11.1
8 G-0 -28.1 32 G-2 -3.8 56 G-4 0.4 80 G-6 11.8
9 G#-0 -26.1 33 G#-2 -3.5 57 G#-4 0.6 81 G#-6 12.6
10 A-0 -24.1 34 A-2 -3.5 58 A-4 0.9 82 A-6 13.4
11 A#-0 -22.2 35 A#-2 -3.2 59 A#-4 1.2 83 A#-6 14.2
12 B-0 -20.5 36 B-2 -2.9 60 B-4 1.5 84 B-6 15.0
13 C-1 -19.0 37 C-3 -2.6 61 C-5 1.8 85 C-7 15.9
14 C#-1 -17.6 38 C#-3 -2.3 62 C#-5 2.1 86 C#-7 16.8
15 D-1 -16.3 39 D-3 -2.0 63 D-5 2.4 87 D-7 17.7
16 D#-1 -15.1 40 D#-3 -1.8 64 D#-5 2.8 88 D#-7 18.7
17 E-1 -14.0 41 E-3 -1.6 65 E-5 3.2 89 E-7 19.7
18 F-1 -13.0 42 F-3 -1.4 66 F-5 3.6 90 F-7 20.8
19 F#-1 -12.0 43 F#-3 -1.2 67 F#-5 4.0 91 F#-7 22.0
20 G-1 -11.1 44 G-3 -1.0 68 G-5 4.5 92 G-7 23.3
21 G#-1 -10.2 45 G#-3 -0.8 69 G#-5 5.0 93 G#-7 24.7
22 A-1 -9.4 46 A-3 -0.6 70 A-5 5.5 94 A-7 26.2
23 A#-1 -8.6 47 A#-3 -0.4 71 A#-5 6.0 95 A#-7 27.8
24 B-1 -7.9 48 B-3 -0.2 72 B-5 6.6 96 B-7 29.5
UPRI GHT PIANO STRETCH CHART
50
40
30
20
10
0
C- 0 C- 1 C- 2 C- 3 C- 4 C- 5 C- 6 C- 7 C- 8
-10
CENTS DEVIATIO
-20
-30
-40
-50
NOT E
Page 43
Page 46

N
FILE: VERT
Note Note Cents Note Note Cents Note Note Cents Note Note Cents
No. Name Deviation No. Name Deviation No. Name Deviation No. Name Deviation
1 C-0 -46.5 25 C-2 -4.3 49 C-4 0.0 73 C-6 5.2
2 C#-0 -44.0 26 C#-2 -3.8 50 C#-4 0.0 74 C#-6 5.5
3 D-0 -41.5 27 D-2 -3.3 51 D-4 0.1 75 D-6 5.8
4 D#-0 -39.0 28 D#-2 -2.9 52 D#-4 0.2 76 D#-6 6.2
5 E-0 -36.5 29 E-2 -2.5 53 E-4 0.4 77 E-6 6.6
6 F-0 -34.0 30 F-2 -2.2 54 F-4 0.6 78 F-6 7.0
7 F#-0 -31.5 31 F#-2 -1.9 55 F#-4 0.8 79 F#-6 7.5
8 G-0 -29.0 32 G-2 -1.6 56 G-4 1.0 80 G-6 8.0
9 G#-0 -26.5 33 G#-2 -1.4 57 G#-4 1.2 81 G#-6 8.5
10 A-0 -24.0 34 A-2 -1.2 58 A-4 1.4 82 A-6 9.1
11 A#-0 -21.5 35 A#-2 -1.0 59 A#-4 1.6 83 A#-6 9.7
12 B-0 -19.3 36 B-2 -0.9 60 B-4 1.8 84 B-6 10.4
13 C-1 -17.3 37 C-3 -0.8 61 C-5 2.0 85 C-7 11.2
14 C#-1 -15.5 38 C#-3 -0.7 62 C#-5 2.2 86 C#-7 12.1
15 D-1 -13.9 39 D-3 -0.6 63 D-5 2.4 87 D-7 13.1
16 D#-1 -12.5 40 D#-3 -0.5 64 D#-5 2.6 88 D#-7 14.3
17 E-1 -11.2 41 E-3 -0.4 65 E-5 2.8 89 E-7 15.6
18 F-1 -10.0 42 F-3 -0.3 66 F-5 3.1 90 F-7 17.0
19 F#-1 -8.9 43 F#-3 -0.2 67 F#-5 3.4 91 F#-7 18.5
20 G-1 -7.9 44 G-3 -0.1 68 G-5 3.7 92 G-7 20.1
21 G#-1 -7.0 45 G#-3 0.0 69 G#-5 4.0 93 G#-7 21.8
22 A-1 -6.2 46 A-3 0.0 70 A-5 4.3 94 A-7 23.6
23 A#-1 -5.5 47 A#-3 0.0 71 A#-5 4.6 95 A#-7 25.5
24 B-1 -4.9 48 B-3 0.0 72 B-5 4.9 96 B-7 27.6
GENERIC VERTICAL P IANO STRETCH CHART
50
40
30
20
10
0
C- 0 C- 1 C- 2 C- 3 C- 4 C- 5 C- 6 C- 7 C- 8
-10
CENTS DEVIATIO
-20
-30
-40
-50
NOT E
Page 44
Page 47

N
FILE: CNSL
Note Note Cents Note Note Cents Note Note Cents Note Note Cents
No. Name Deviation No. Name Deviation No. Name Deviation No. Name Deviation
1 C-0 -49.2 25 C-2 -10.1 49 C-4 0.0 73 C-6 8.2
2 C#-0 -47.0 26 C#-2 -9.3 50 C#-4 0.0 74 C#-6 8.9
3 D-0 -44.8 27 D-2 -8.5 51 D-4 0.0 75 D-6 9.6
4 D#-0 -42.6 28 D#-2 -7.8 52 D#-4 0.1 76 D#-6 10.4
5 E-0 -40.4 29 E-2 -7.1 53 E-4 0.2 77 E-6 11.2
6 F-0 -38.2 30 F-2 -6.4 54 F-4 0.3 78 F-6 12.0
7 F#-0 -36.0 31 F#-2 -5.8 55 F#-4 0.4 79 F#-6 12.8
8 G-0 -33.8 32 G-2 -5.2 56 G-4 0.6 80 G-6 13.7
9 G#-0 -31.7 33 G#-2 -4.6 57 G#-4 0.8 81 G#-6 14.6
10 A-0 -29.7 34 A-2 -4.1 58 A-4 1.1 82 A-6 15.5
11 A#-0 -27.8 35 A#-2 -3.6 59 A#-4 1.4 83 A#-6 16.4
12 B-0 -26.0 36 B-2 -3.1 60 B-4 1.7 84 B-6 17.3
13 C-1 -24.3 37 C-3 -2.7 61 C-5 2.0 85 C-7 18.2
14 C#-1 -22.7 38 C#-3 -2.3 62 C#-5 2.4 86 C#-7 19.2
15 D-1 -21.2 39 D-3 -1.9 63 D-5 2.8 87 D-7 20.2
16 D#-1 -19.8 40 D#-3 -1.6 64 D#-5 3.2 88 D#-7 21.3
17 E-1 -18.5 41 E-3 -1.3 65 E-5 3.6 89 E-7 22.4
18 F-1 -17.3 42 F-3 -1.0 66 F-5 4.1 90 F-7 23.6
19 F#-1 -16.1 43 F#-3 -0.8 67 F#-5 4.6 91 F#-7 24.9
20 G-1 -15.0 44 G-3 -0.6 68 G-5 5.1 92 G-7 26.3
21 G#-1 -13.9 45 G#-3 -0.4 69 G#-5 5.6 93 G#-7 27.8
22 A-1 -12.9 46 A-3 -0.3 70 A-5 6.2 94 A-7 29.4
23 A#-1 -11.9 47 A#-3 -0.2 71 A#-5 6.8 95 A#-7 31.1
24 B-1 -11.0 48 B-3 -0.1 72 B-5 7.5 96 B-7 32.9
CONSOLE PIANO STRETCH CHART
50
40
30
20
10
0
C-0 C-1 C-2 C- 3 C- 4 C- 5 C- 6 C- 7 C- 8
-10
CENTS DEVIATIO
-20
-30
-40
-50
NOT E
Page 45
Page 48

N
FILE: SPNT
Note Note Cents Note Note Cents Note Note Cents Note Note Cents
No. Name Deviation No. Name Deviation No. Name Deviation No. Name Deviation
1 C-0 -50.0 25 C-2 -14.8 49 C-4 0.0 73 C-6 11.5
2 C#-0 -50.0 26 C#-2 -13.8 50 C#-4 0.0 74 C#-6 12.0
3 D-0 -50.0 27 D-2 -12.9 51 D-4 0.5 75 D-6 12.6
4 D#-0 -50.0 28 D#-2 -12.0 52 D#-4 1.0 76 D#-6 13.2
5 E-0 -50.0 29 E-2 -11.2 53 E-4 1.5 77 E-6 13.8
6 F-0 -50.0 30 F-2 -10.4 54 F-4 2.0 78 F-6 14.4
7 F#-0 -50.0 31 F#-2 -9.7 55 F#-4 2.5 79 F#-6 15.1
8 G-0 -50.0 32 G-2 -9.0 56 G-4 3.0 80 G-6 15.8
9 G#-0 -48.0 33 G#-2 -8.4 57 G#-4 3.5 81 G#-6 16.5
10 A-0 -44.7 34 A-2 -7.8 58 A-4 4.0 82 A-6 17.3
11 A#-0 -41.5 35 A#-2 -7.2 59 A#-4 4.5 83 A#-6 18.1
12 B-0 -38.6 36 B-2 -6.6 60 B-4 5.0 84 B-6 19.0
13 C-1 -35.9 37 C-3 -6.0 61 C-5 5.5 85 C-7 19.9
14 C#-1 -33.4 38 C#-3 -5.5 62 C#-5 6.0 86 C#-7 20.9
15 D-1 -31.1 39 D-3 -5.0 63 D-5 6.5 87 D-7 22.0
16 D#-1 -28.9 40 D#-3 -4.5 64 D#-5 7.0 88 D#-7 23.2
17 E-1 -26.9 41 E-3 -4.0 65 E-5 7.5 89 E-7 24.5
18 F-1 -25.0 42 F-3 -3.5 66 F-5 8.0 90 F-7 25.9
19 F#-1 -23.2 43 F#-3 -3.0 67 F#-5 8.5 91 F#-7 27.4
20 G-1 -21.5 44 G-3 -2.5 68 G-5 9.0 92 G-7 29.0
21 G#-1 -19.9 45 G#-3 -2.0 69 G#-5 9.5 93 G#-7 30.7
22 A-1 -18.4 46 A-3 -1.5 70 A-5 10.0 94 A-7 32.5
23 A#-1 -17.1 47 A#-3 -1.0 71 A#-5 10.5 95 A#-7 34.4
24 B-1 -15.9 48 B-3 -0.5 72 B-5 11.0 96 B-7 36.5
SPINET PIANO S TRETCH CHART
50.0
40.0
30.0
20.0
10.0
0.0
C-0 C-1 C-2 C-3 C- 4 C- 5 C- 6 C- 7 C-8
-10.0
CENTS DEVIATIO
-20.0
-30.0
-40.0
-50.0
NOT E
Page 46
Page 49

INDEX
+2/-1 DISPLAY ............................................................................. Page 6
power-up setting ........................................................................ Page 8
A440
adjustment ............................................................................. Page 7
power-up setting ........................................................................ Page 8
cents
definition ............................................................................. Page 11
fine control ............................................................................ Page 2
defaults
changing .............................................................................. Page 6
factory defaults.............................................................................. Page 8
changing .............................................................................. Page 6
file menu
temperaments.......................................................................... Page 12
front panel ................................................................................. Page 2
image
hi/low band shifting ...................................................................... Page 6
image clarifier
adjustment ............................................................................. Page 4
power-up setting .................................................................. Page 5, Page 8
image visibility .............................................................................. Page 4
input voltage ................................................................................ Page 1
intonation
training method ......................................................................... Page 9
key signature
changing .............................................................................. Page 8
power-up setting ........................................................................ Page 8
line voltage................................................................................. Page 1
menu
stretch ............................................................................... Page 23
mute ..................................................................................... Page 11
pitch
fine control ............................................................................ Page 2
up/down ........................................................................Page 2, Page 10
pitch standard
change ................................................................................ Page 7
resolution
cents................................................................................. Page 10
enhanced ............................................................................. Page 10
stretch
instruments ........................................................................... Page 22
Page 47
Page 50

stretch tuning .............................................................................. Page 22
access ................................................................................ Page 23
blank form ............................................................................ Page 37
charts ................................................................................ Page 38
copying .............................................................................. Page 33
creating .............................................................................. Page 26
deleting ....................................................................... Page 28, Page 32
naming ............................................................................... Page 27
preprogrammed ................................................................. Page 24, Page 25
temperaments
blank form ............................................................................ Page 36
changing ............................................................................. Page 12
copying .......................................................................Page 19, Page 20
creating .............................................................................. Page 15
deleting ....................................................................... Page 16, Page 19
naming ............................................................................... Page 15
preprogrammed ................................................................. Page 12, Page 13
resolution ............................................................................. Page 15
un-equal .............................................................................. Page 11
unequal ....................................................................... Page 37, Page 38
tuning
silent ................................................................................ Page 11
All contents © Copyright 1996-1999 by Peterson Electro-Musical Products, Inc. No part or parts may be copied or
reproduced without the expressed written consent of Peterson Electro-Musical Products, Inc.
Page 48
 Loading...