

Page 1
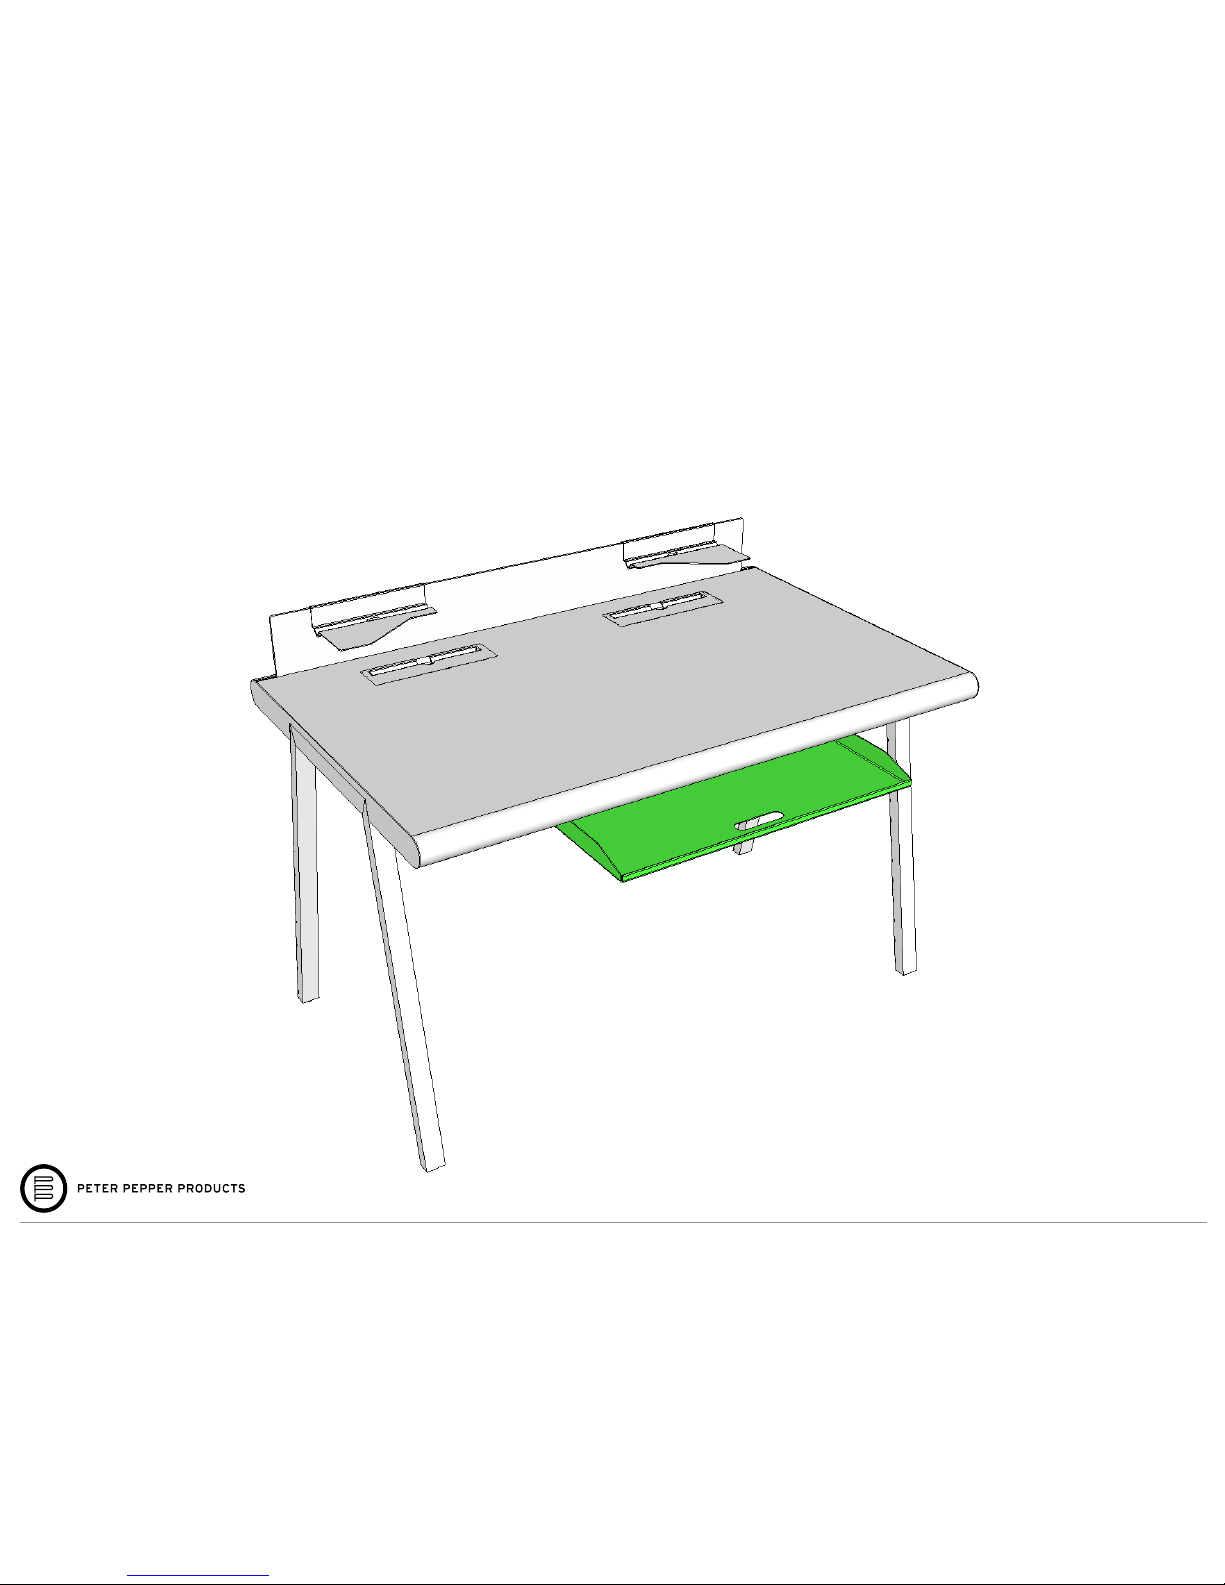
NIK Desk / Magic Drawer Installation Guide page 1
NIK Desk / Magic Drawer Installation Guide
Page 2
NIK desk / drawer installation guide! page 2!
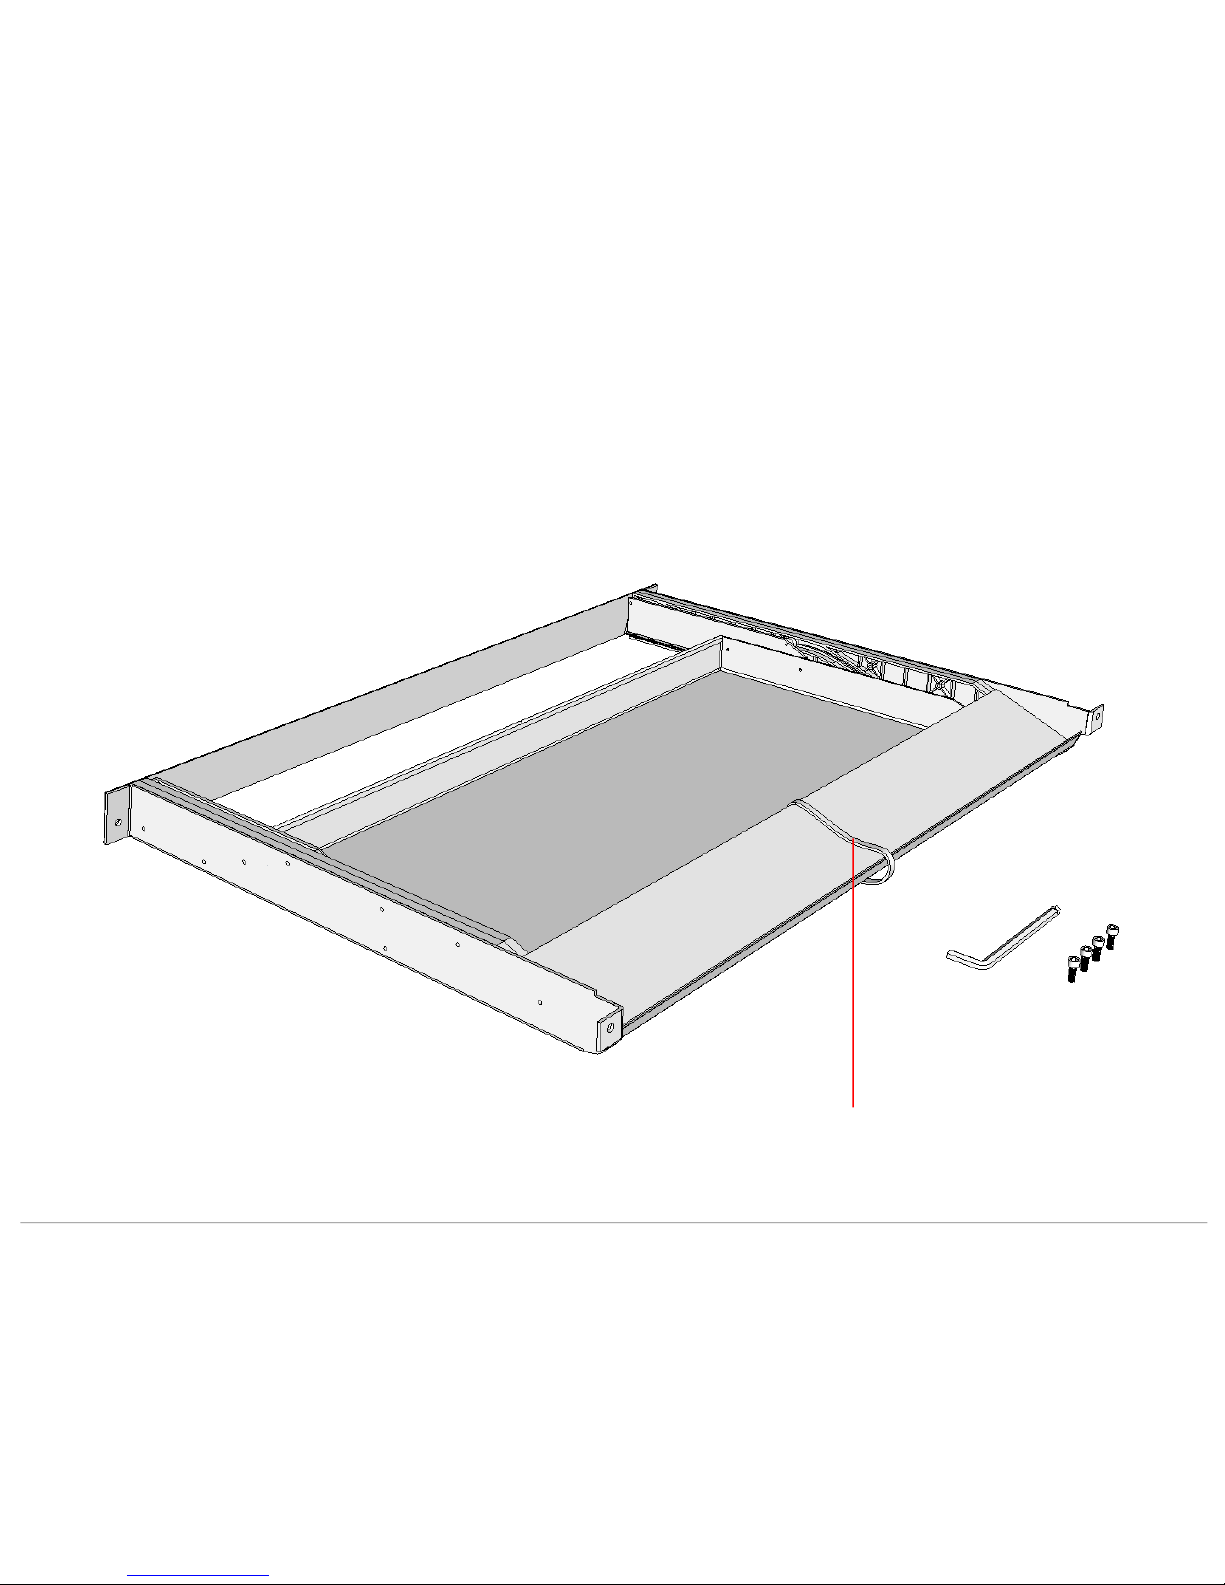
After removing the items from the cardboard box, the content
consist of a fully assembled drawer (secure with a zip tie), one Allen
wrench and 4 socket screws.
What’s in the box
Zip tie
It is recommended to leave this
on until installation is completed.
Allen wrench, 4 sockets
screws
Page 3
NIK desk / drawer installation guide! page 3!
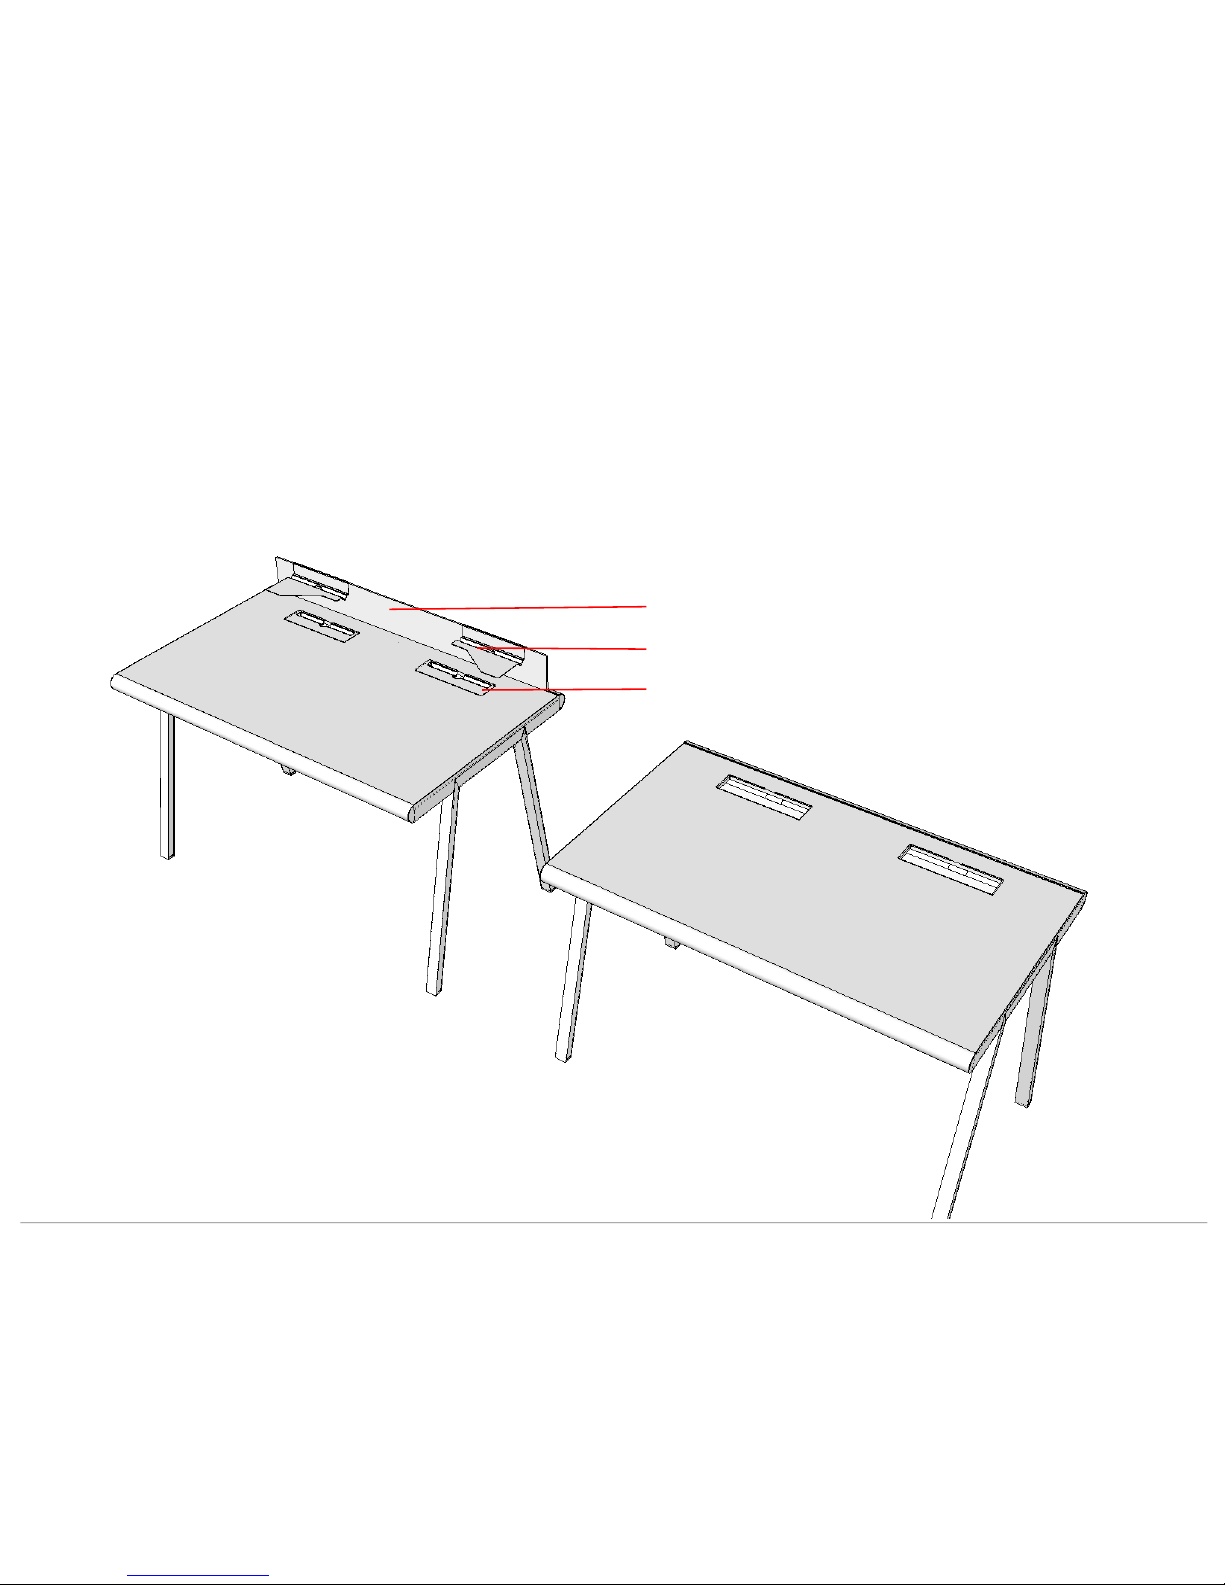
Remove both dock shelves, both dock plates and the glass.
Important: if you installed the thumb screws to secure the glass you will have to
remove those under the desk before being able to remove the glass.
Step 1
Glass
Dock shelf
Dock plate
Page 4
NIK desk / drawer installation guide! page 4!
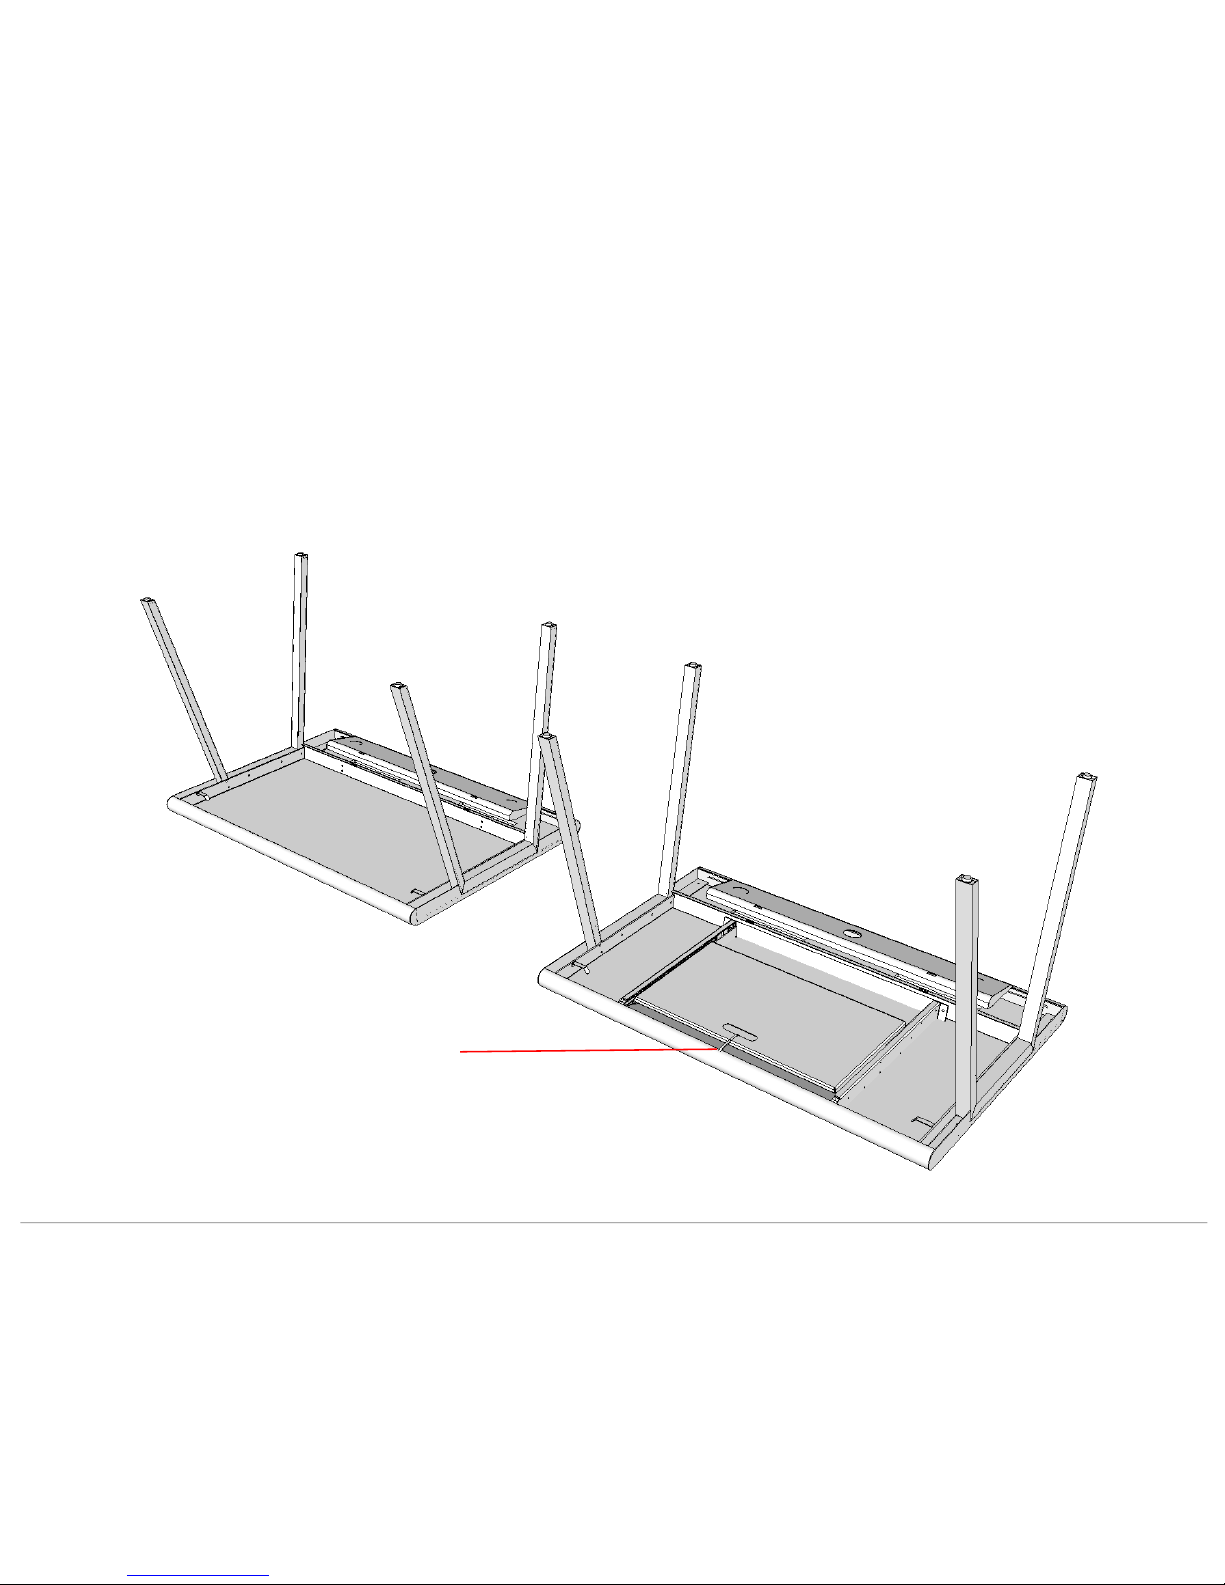
Turn the table upside down.
Important: You should place it on a soft surface (e.g. a carpet) to avoid scratches on the table top.
Place the drawer with the closed surface facing up on the inside of the desk and the zip-tied cutout handle towards the front of the desk.
Step 2
It is helpful to leave the zip-tie
on the drawer until the
installation is completed
Desk without the drawer
Desk with the drawer
Page 5
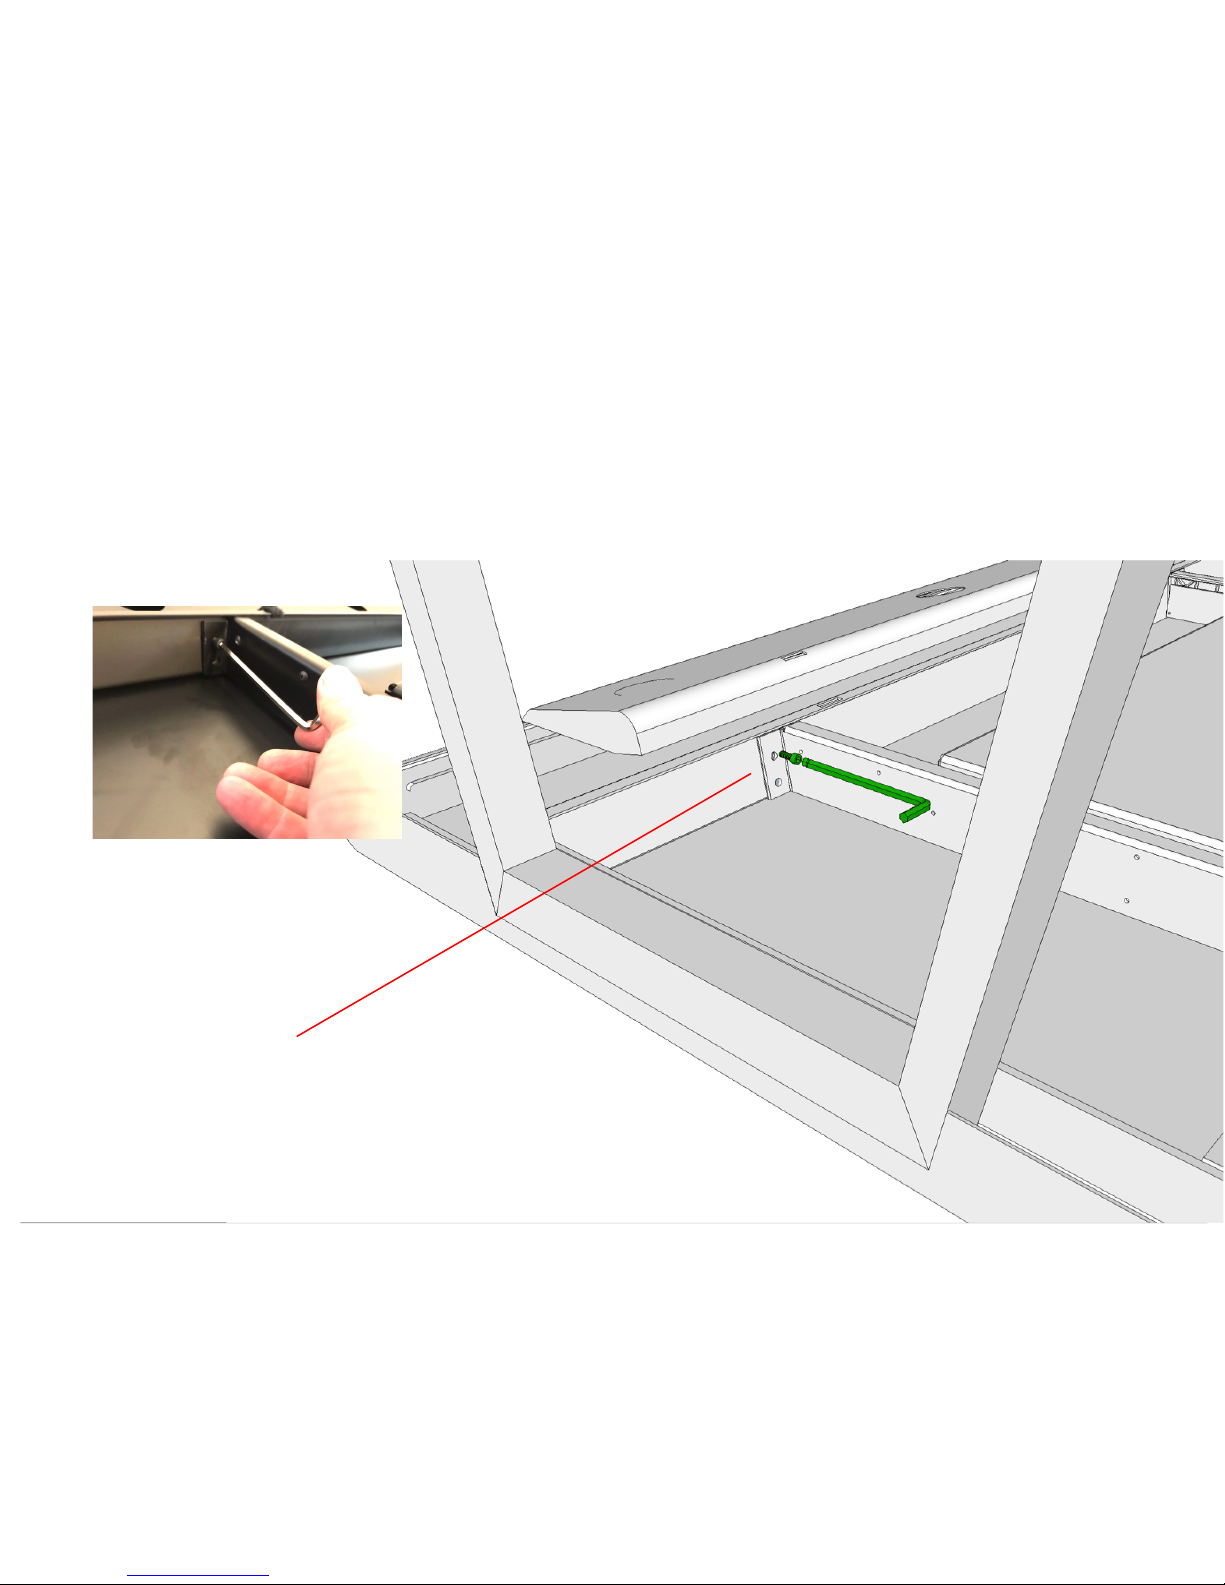
NIK desk / drawer installation guide! page 5!
Use the provided socket screws and Allen wrench to secure the drawer in the back on both sides.
Important: The desk and the drawer have 2 holes in each side. In the back make sure to use the
upper hole (i.e. furthest from the table top) for the attachment.
Step 3
In the back use the
upper hole for the
attachment
Page 6
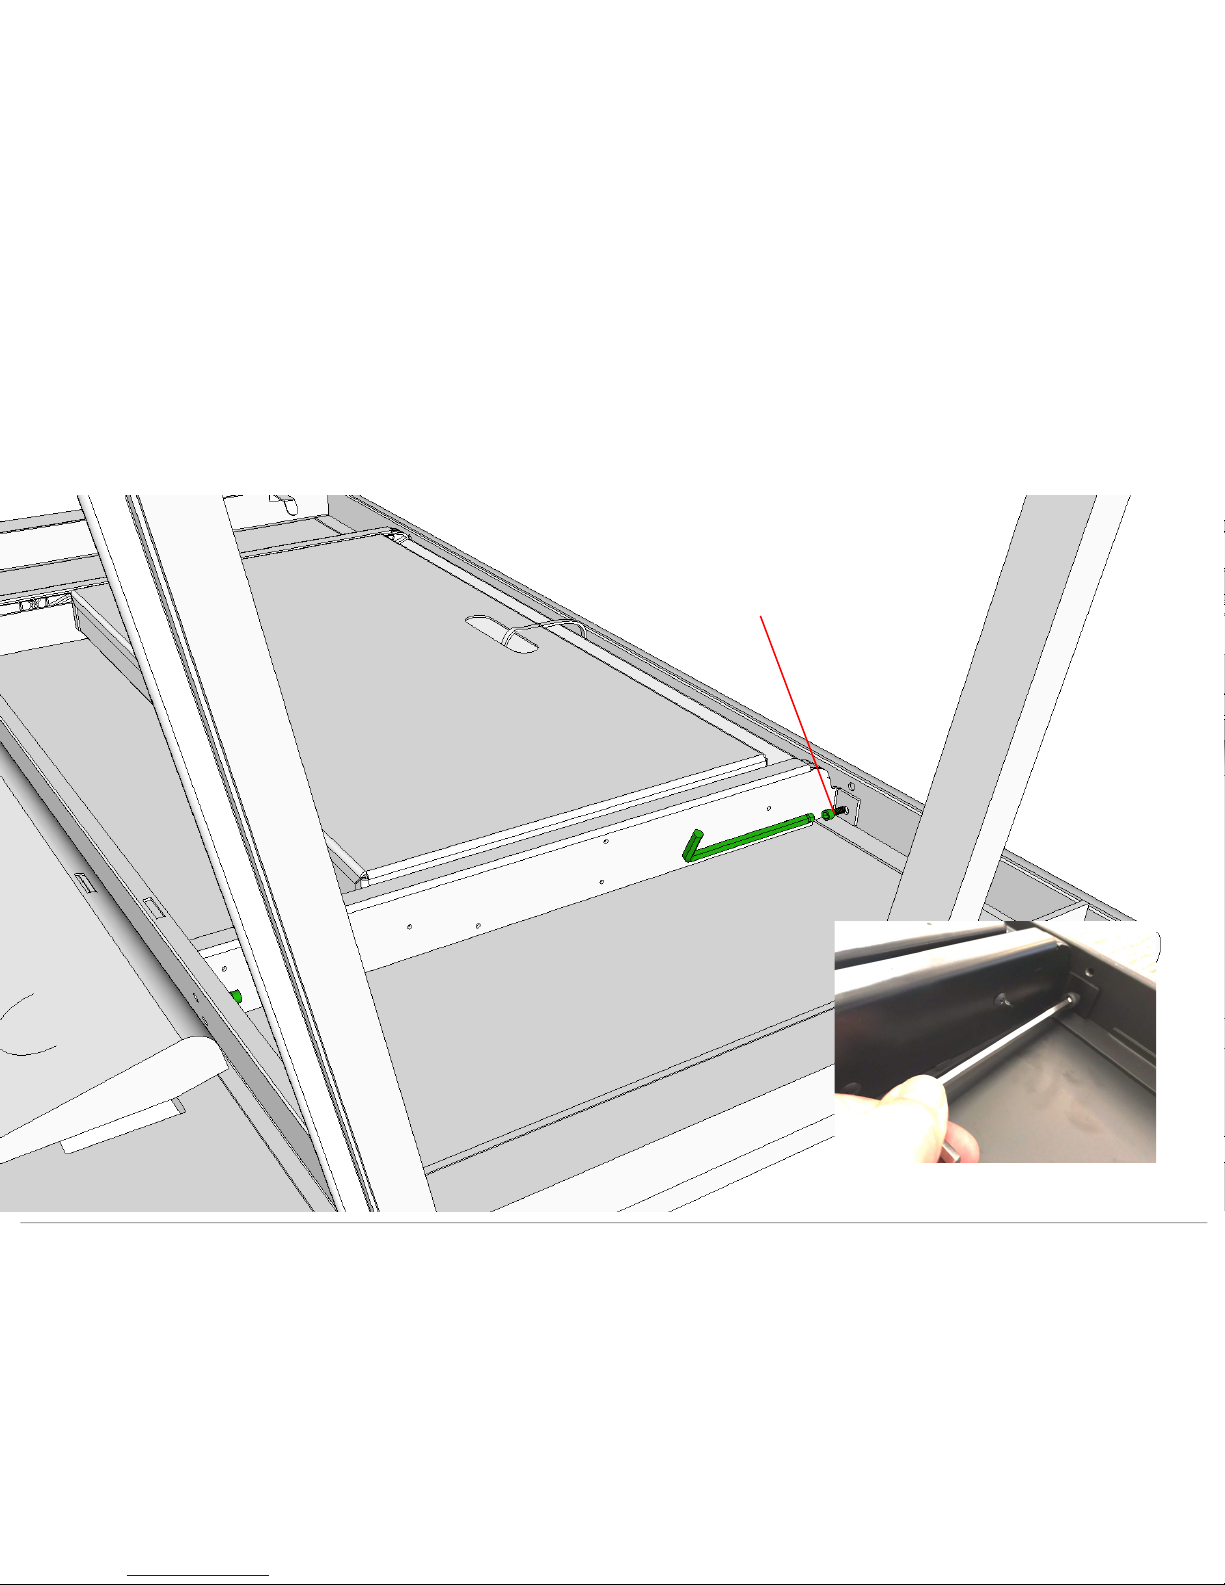
NIK desk / drawer installation guide! page 6!
Use the provided socket screws and Allen wrench to secure the drawer in the front on both sides.
Important: The desk has 2 holes, but the drawer only one. In the front make sure to use the lower
hole for the attachment (i.e. closest to the table top).
Step 4
In the back use the
lower hole for the
attachment
Page 7

NIK desk / drawer installation guide! page 7!
Step 5
After all 4 socket screws are secure and tightened, flip the desk to its normal upright position
Important: if you have removed the zip tie already, be careful when flipping the desk as the drawer
might slide out during this operation
Step 4
Cut the zip tie with scissors, pliers or a knife, put the glass, dock plates and dock
shelves back on and you are ready to go.
If you need further assistance please contact us at
 Loading...