

Page 1
INSTALLATION INSTRUCTIONS
** Installation recommendation: JBA recommends in most case that the vehicle be taken to a reputable exhaust shop for installation.
40-3113 & 40-3114
2010 Chevrolet Camaro SS 6.2L - 3 inch system
Recommended Tools:
15mm deep socket
9/16 deep socket
13mm deep socket
Small at head screwdriver
Pliers
Pry bar
WD-40 or equivalent
Start:
1. Remove and inventory new JBA
exhaust system.
2. Disconnect negative battery
cable and allow vehicle to cool.
3. With the vehicle raised and
properly supported, unbolt the factory cross member that runs under
the drive shaft and swing it out of
the way.
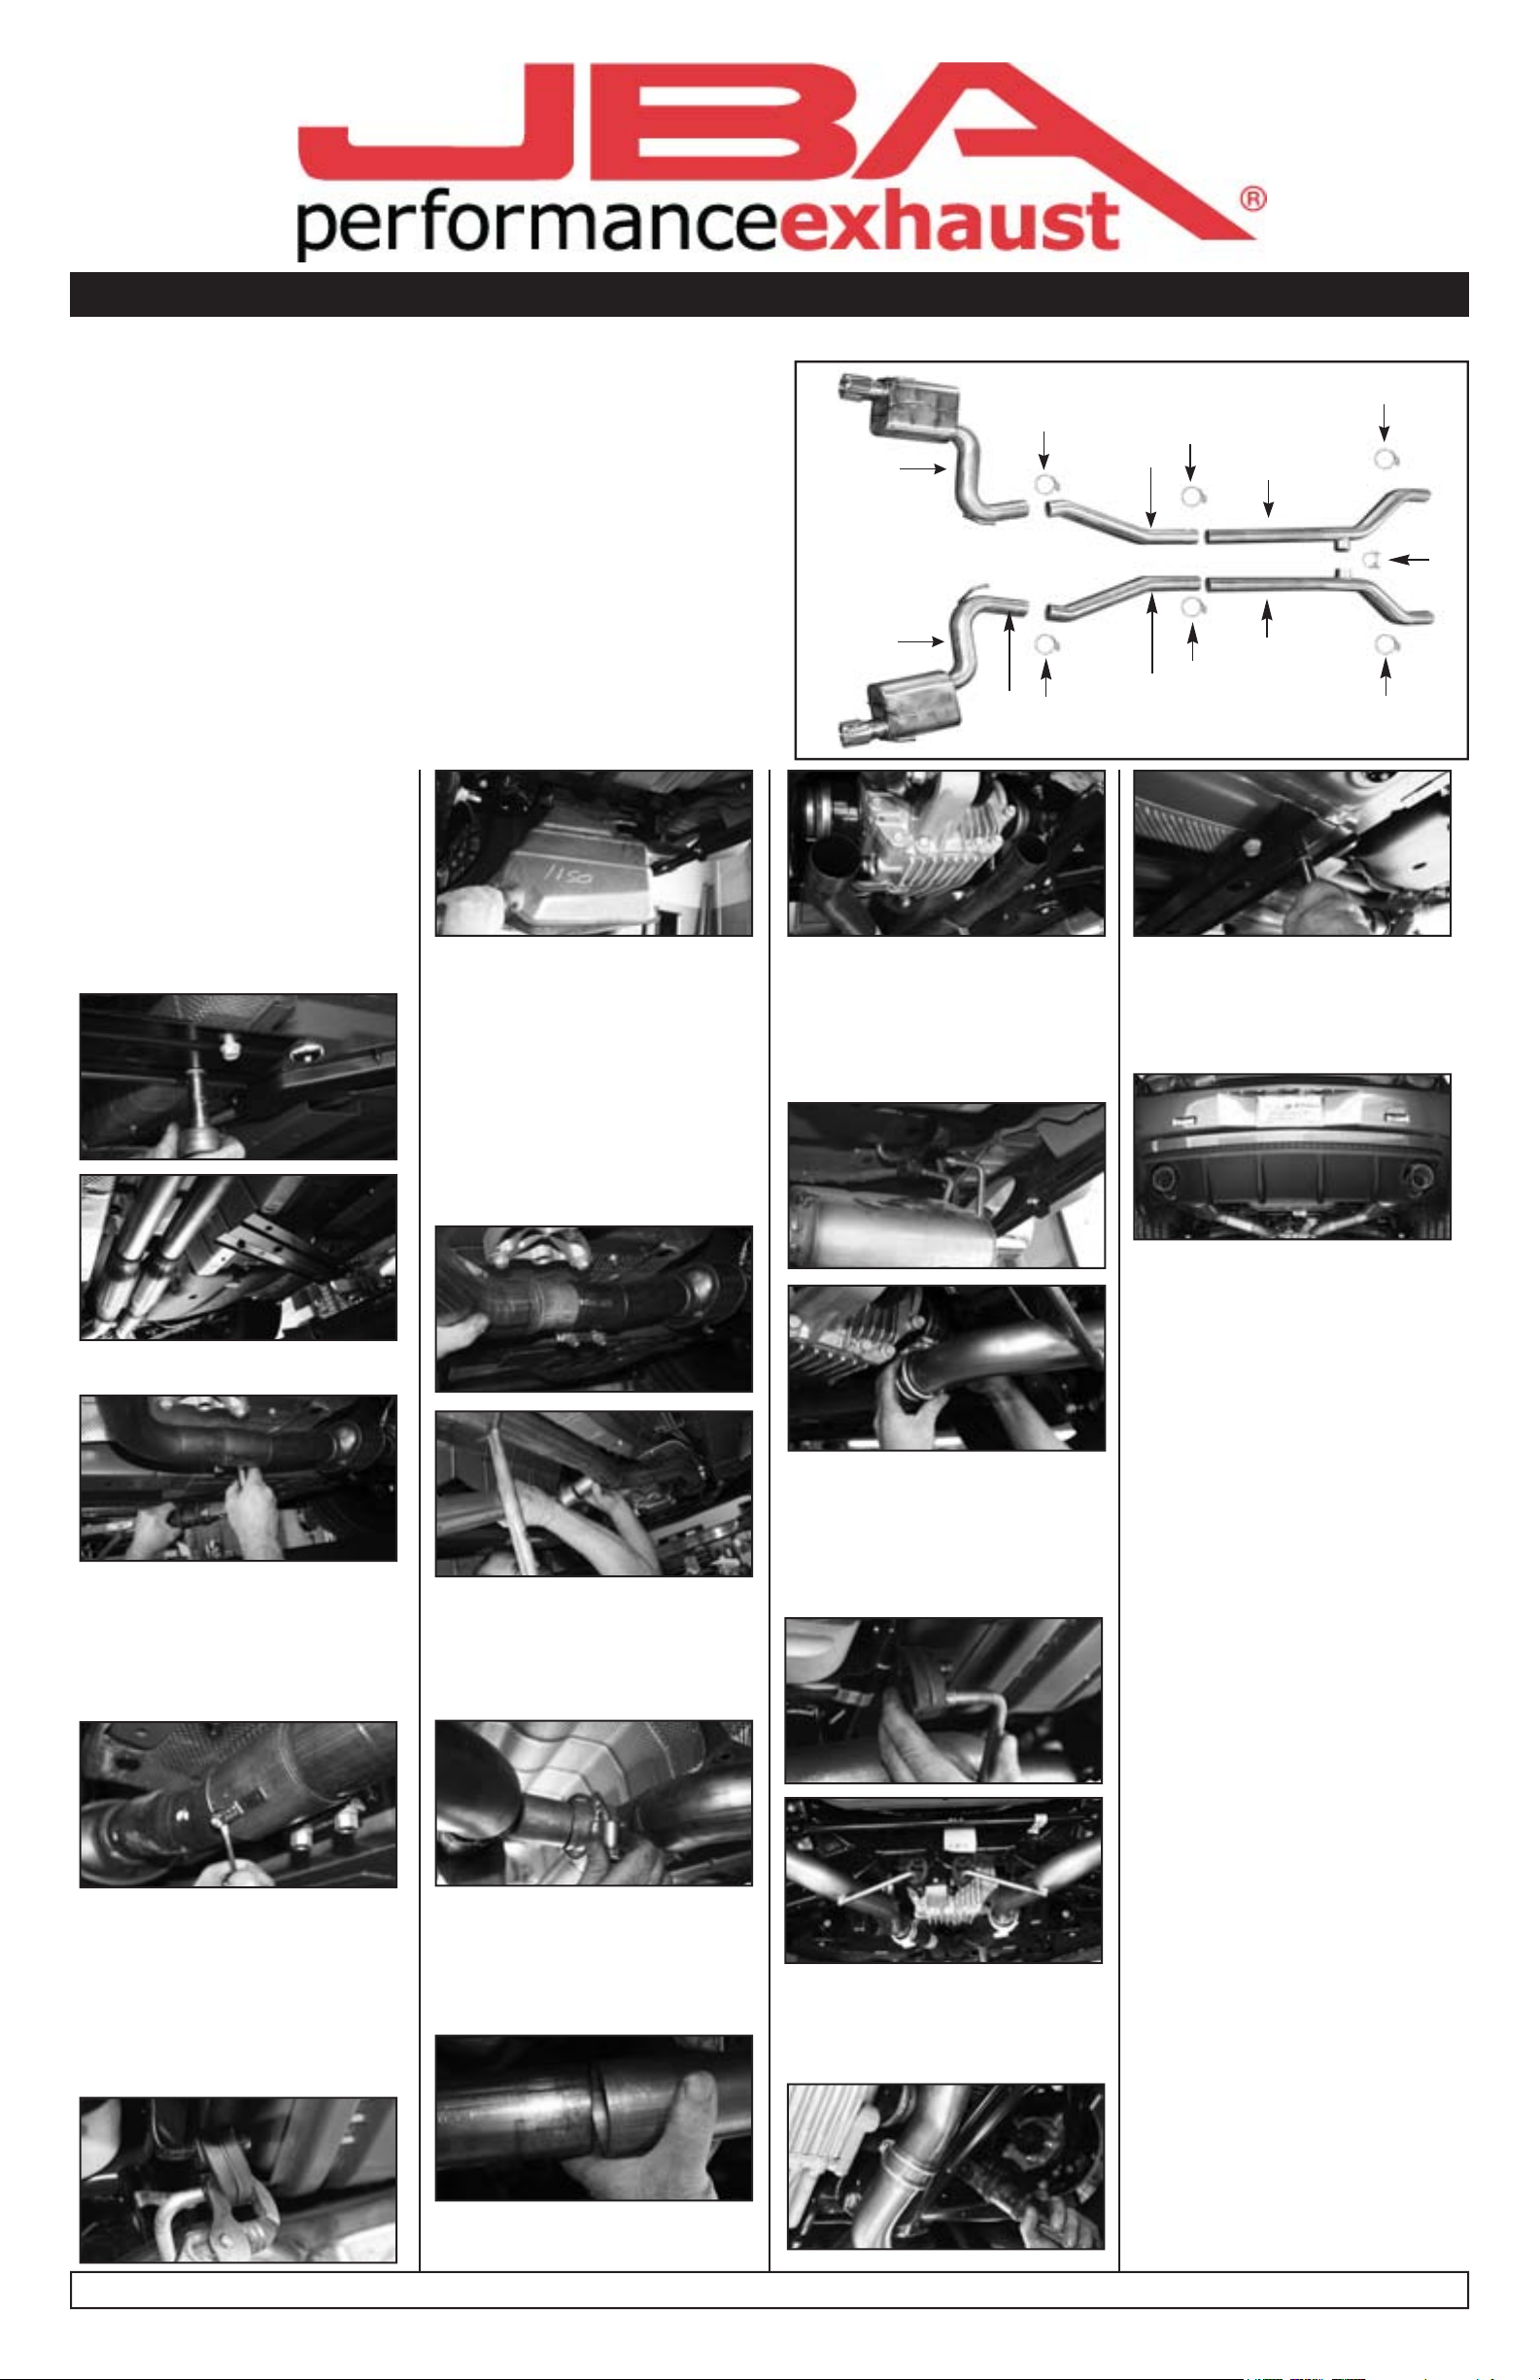
Parts List Qty.
A. H Pipe Assembly Driver side 1
B. H Pipe Assembly Passenger side 1
C. Driver side Intermediate Pipe 1
D. Passenger side Intermediate Pipe 1
E. Driver side Mufer Assembly 1
F. Passenger side Mufer Assembly 1
G. Sure Seal™ clamp 4
H. U-bolt clamp 1
I. Sure Seal™ clamp (40-3113 Only) 2
7. With the system free from all
mounting points it can be completely removed from the vehicle in
one piece.
8. Slide the H-Pipe assemblies
into position. (Note: The 40-3114
reduces to 2.5” and will re-use the
factory band clamp. The 40-3113
must be used with JBA PN 6813SD
or 6813SDC and will use 2 supplied
Sure Seal™ clamps.)
G
E
F
G
11. With the intermediate pipes in
place you are ready to hang the
mufer assemblies.
12. Hang the mufer assemblies
through the rear valence using the
factory rubber isolators.
G
I
G
C
A
H
B
G
D
I
15. With the system tightened and
installed to satisfaction, re-install
factory cross member.
16. Using a soft cloth, remove all
prints from exhaust tip.
4. Loosen the bolts on both factory
band clamps.
5. Locate the keyways on the
band clamps attaching the factory
exhaust system to the cat pipe
assembly. Using a small at head
screw driver pry the tabs back to
release the factory exhaust system.
9. Slip the U-bolt clamp (H) over the
end of the H-pipe Align the H-pipe
assembly so that it is at and even
on both sides. Then tighten the U-
bolt clamp over the connection.
13. Slip the Sure Seal™ clamps
(G) over the end of the mufer as-
semblies and nish hanging them
using the factory rubber isolators at
the center of the vehicle behind the
rear end.
17. Check all clamps and connections for proper t and align-
ment. Double check all clamps are
tightened and that all hangers are
secure in rubber grommets. It is
recommended that after installation
of the exhaust system you have all
slip connections tack welded by a
mufer shop.
NOTES:
1. All exhaust systems expand
about 1” rearward when exhaust
temperature rises.
3. Use anti-seize on threads of
clamps.
Other JBA 2010 Camaro Parts!
Emissions compatible shorty’s
Part No. Application
1812S 2010 6.2L stainless
1812SJS 2010 6.2L silver ceramic
1812SJT 2010 6.2L titanium ceramic
The Compete JBA 2010 Camaro
Competition system!
6. Your factory exhaust is a one
piece system and it is highly recommended that a second individual
be employed to assist in removal.
While bracing the factory system,
use pliers remove all exhaust
hangers from the factory rubber
isolators.
10. Install the intermediate pipes
(C & D) by slipping the ends into
the H-Pipe assembly. Make sure to
position all Sure Seal™ clamps (G)
as you build the system.
14. Making sure that the tips are
centered and positioned well
through the rear valence, tighten
all clamps.
JBA Long Tube Headers
Part No. Application
6812S 2010 6.2L 1 3/4 stainless
6813S 2010 6.2L 1 7/8 stainless
JBA High Flow Mid-Pipes
Part No. Application
1812SY w/o Cats for 1812S
1812SYC w Cats for 1812S
6812SD
6812SDC
6813SD
6813SDC
w/o Cats for 6812S
w/ Cats for 6812S
w/o Cats for 6813S
w/ Cats for 6813S
JBA recommends taking the vehicle to a mufer shop and having all slip connections tack welded. 12.09
 Loading...