

Page 1
INSTALLATION INSTRUCTIONS
2001 Ford F-150 Super Crew
4.6L, 5.4L 2/4 WD
TOOLS RECOMMENDED:
TO ST ART :
ratchet
9/16 deep socket
15mm deep socket
channel lock pliers
8mm wrench
rubber mallet
spray lubricant or penetrating oil
pry bar
reciprocating saw or hack saw
anti-seize
2. Disconnect negative battery cable and
allow vehicle exhaust to cool.
3. With vehicle raised and properly
supported, using a reciprocating saw
or hack saw, cut the tail pipe approx.
3î behind muffler. See notes #1
4. Spray lube on rear tail pipe hanger rod
and remove from lower hole in rubber
grommet using channel lock pliers.
5. Remove tail pipe assembly from
rear of vehicle.
15. Install tail pipe (C) from rear of vehicle and slip into rear of muffler (B).
NOTE: Make sure that the end of the
tail pipe with the hanger rod is at the
rear of vehicle.
1. Remove and inventory new Evol
exhaust.
6. With muffler supported, spray lubricant
on rear muffler hanger rods and remove
from lower holes in rubber grommets
using channel lock pliers.
7. Spray lubricant on front muffler clamp
and remove using a 15mm socket
20. Retighten all clamps and tack weld all
slip joints.
21. Lower vehicle and reattach the
negative battery cable.
NOTES:
1. If vehicle is raised with proper vehicle
lift, step #3 can be eliminated and stock
exhaust can be removed in one piece
2. If anti seize is not used on threads of
clamps before tightening, the nut's will
gall, and clamp rod will break.
11. Install muffler (B) with JBA logo
towards rear of vehicle.
12. Slip muffler hanger (G) over end of
muffler (B)) and hand tighten only at
this time.
13. Install 2-1/2" clamp (E) over front slip
joint on head pipe (A). Position so clamp
is on rear side of locating pen as close as
possible and tighten completely using a
9/16" deep wall socket. NOTE: Use antiseize on threads of clamp. See note #2
8. Using some form of heat and force,
remove muffler assembly taking care not
to damage front head pipe.
9. Install head pipe (A), aligning notch
with locating pin. You may have to tap it
on using a rubber mallet.
10. Install rear 3" muffler clamp/hanger
(G) through lower holes in rubber grommets with longer rod towards driverís side.
10. Install rear 3" muffler clamp/hanger
(G) through lower holes in rubber grommets with longer rod towards driverís side.
10. Install rear 3" muffler clamp/hanger
(G) through lower holes in rubber grommets with longer rod towards driverís side.
10. Install rear 3" muffler clamp/hanger
(G) through lower holes in rubber grommets with longer rod towards driverís side.
14. Install 3" clamp (F) over front muffler
slip joint and position 1/4" from lip.
Tighten completely with 9/16" deep
socket. NOTE: Use anti-seize on
threads of clamp. See note #2.
14. Install 3" clamp (F) over front muffler
slip joint and position 1/4" from lip.
Tighten completely with 9/16" deep
socket. NOTE: Use anti-seize on
threads of clamp. See note #2.
14. Install 3" clamp (F) over front muffler
slip joint and position 1/4" from lip.
Tighten completely with 9/16" deep
socket. NOTE: Use anti-seize on
threads of clamp. See note #2.
14. Install 3" clamp (F) over front muffler
slip joint and position 1/4" from lip.
Tighten completely with 9/16" deep
socket. NOTE: Use anti-seize on
threads of clamp. See note #2.
16. Install rear tail pipe hanger into lower
hole of rubber grommet. Rotate tail pipe
(C) to align rear hanger rod.
17. With tail pipe properly aligned, tighten
rear muffler clamp/hanger (G) completely
with 9/16" deep wall socket. NOTE: Use
anti-seize on all threads of clamp. See
note #2.
16. Install rear tail pipe hanger into lower
hole of rubber grommet. Rotate tail pipe
(C) to align rear hanger rod.
17. With tail pipe properly aligned, tighten
rear muffler clamp/hanger (G) completely
with 9/16" deep wall socket. NOTE: Use
anti-seize on all threads of clamp. See
note #2.
16. Install rear tail pipe hanger into lower
hole of rubber grommet. Rotate tail pipe
(C) to align rear hanger rod.
17. With tail pipe properly aligned, tighten
rear muffler clamp/hanger (G) completely
with 9/16" deep wall socket. NOTE: Use
anti-seize on all threads of clamp. See
note #2.
16. Install rear tail pipe hanger into lower
hole of rubber grommet. Rotate tail pipe
(C) to align rear hanger rod.
17. With tail pipe properly aligned, tighten
rear muffler clamp/hanger (G) completely
with 9/16" deep wall socket. NOTE: Use
anti-seize on all threads of clamp. See
note #2.
18. Install turn out (D) over end of tail pipe
(C) and rotate to desired position leaving
clearance from body.
19. Install 3" clamp (H) over turn out slip
joint and position 1/4î from lip. Tighten
completely using 9/16" deep socket.
NOTE: Use anti-seize on all threads of
clamp. See note #2
18. Install turn out (D) over end of tail pipe
(C) and rotate to desired position leaving
clearance from body.
19. Install 3" clamp (H) over turn out slip
joint and position 1/4î from lip. Tighten
completely using 9/16" deep socket.
NOTE: Use anti-seize on all threads of
clamp. See note #2
18. Install turn out (D) over end of tail pipe
(C) and rotate to desired position leaving
clearance from body.
19. Install 3" clamp (H) over turn out slip
joint and position 1/4î from lip. Tighten
completely using 9/16" deep socket.
NOTE: Use anti-seize on all threads of
clamp. See note #2
18. Install turn out (D) over end of tail pipe
(C) and rotate to desired position leaving
clearance from body.
19. Install 3" clamp (H) over turn out slip
joint and position 1/4î from lip. Tighten
completely using 9/16" deep socket.
NOTE: Use anti-seize on all threads of
clamp. See note #2
W e recommend taking the truck to a muffler shop and having all slip connections tack welded.
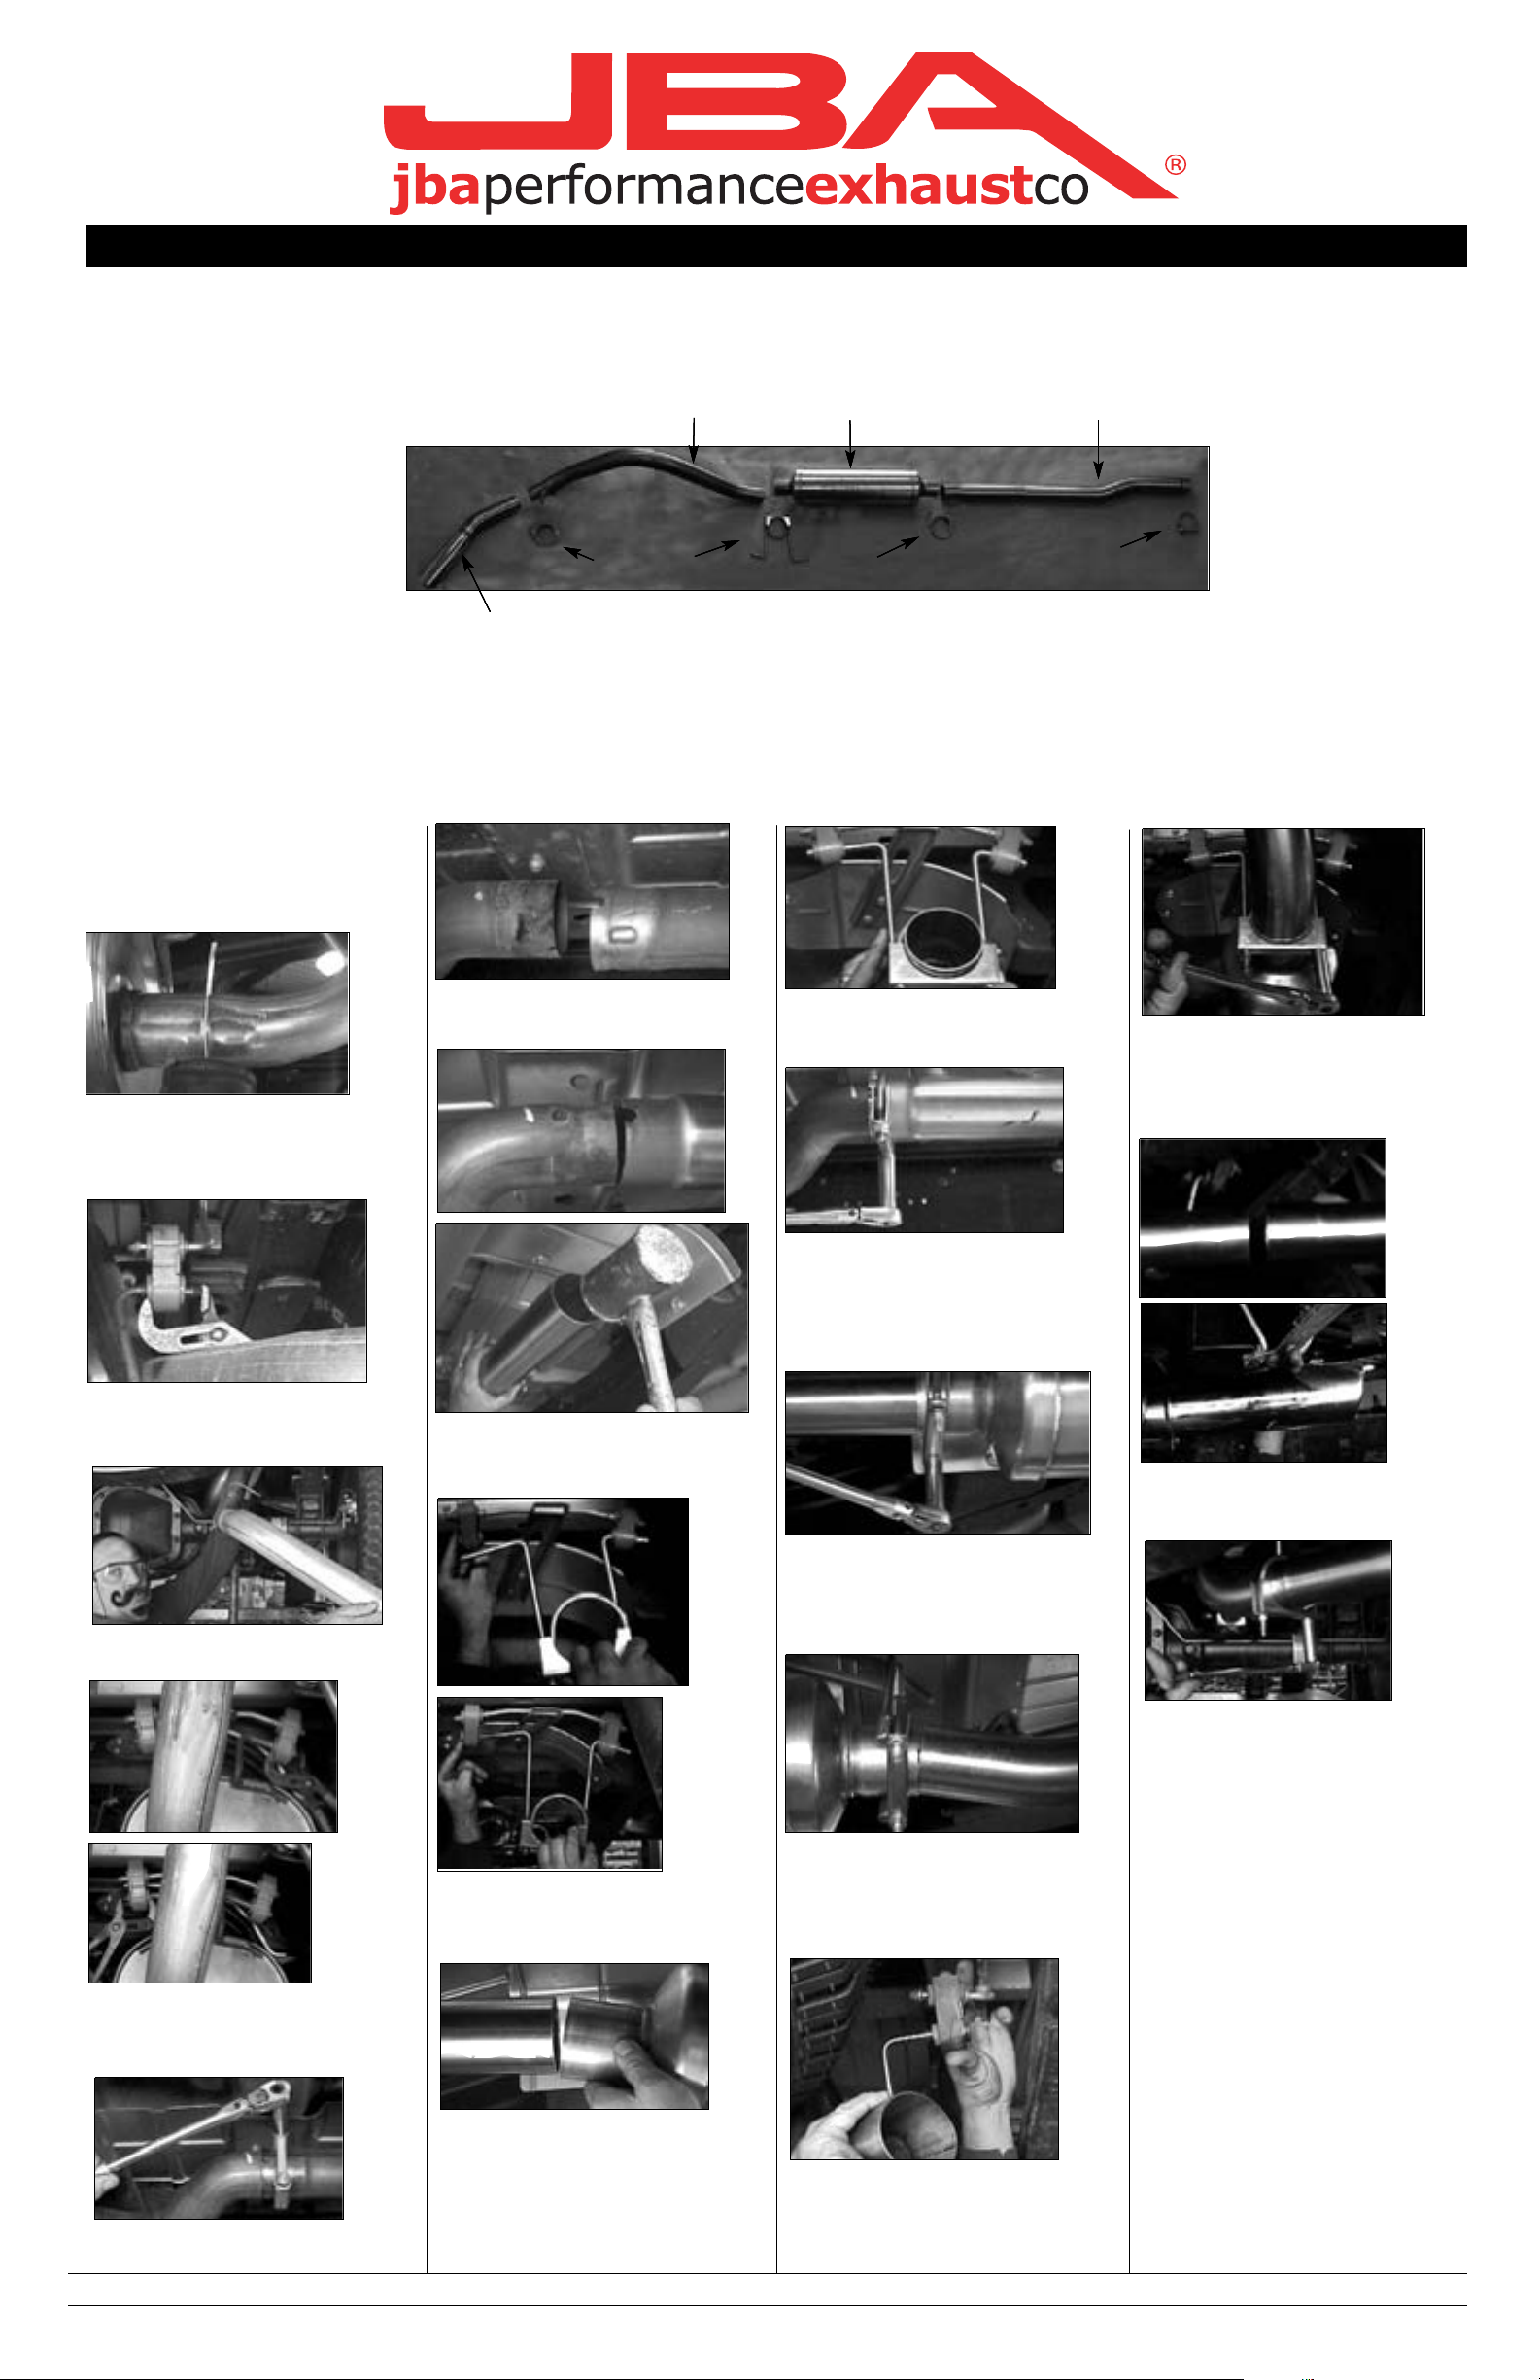
A. Head pipe 1
B. Muffler 1
C. Tail pipe 1
D. Turn out 1
E. 2-1/2" clamp 1
F. 3" clamp 1
G. 3" clamp/hanger 1
H. 3" clamp 1
**Installation recommendation:
JBA recommends in most cases that the vehicle be taken to a reputable
W e recommend taking the truck to a muffler shop and having all slip connections tack welded.
A. Head pipe 1
B. Muffler 1
C. Tail pipe 1
D. Turn out 1
E. 2-1/2" clamp 1
F. 3" clamp 1
G. 3" clamp/hanger 1
H. 3" clamp 1
**Installation recommendation:
JBA recommends in most cases that the vehicle be taken to a reputable
B
A
D
E
C
F
G
H
Part s List
B
A
D
E
C
F
G
H
Part s List
B
A
D
E
C
F
G
H
Part s List
B
A
D
E
C
F
G
H
Part s List
40-2520
 Loading...